Transcripts
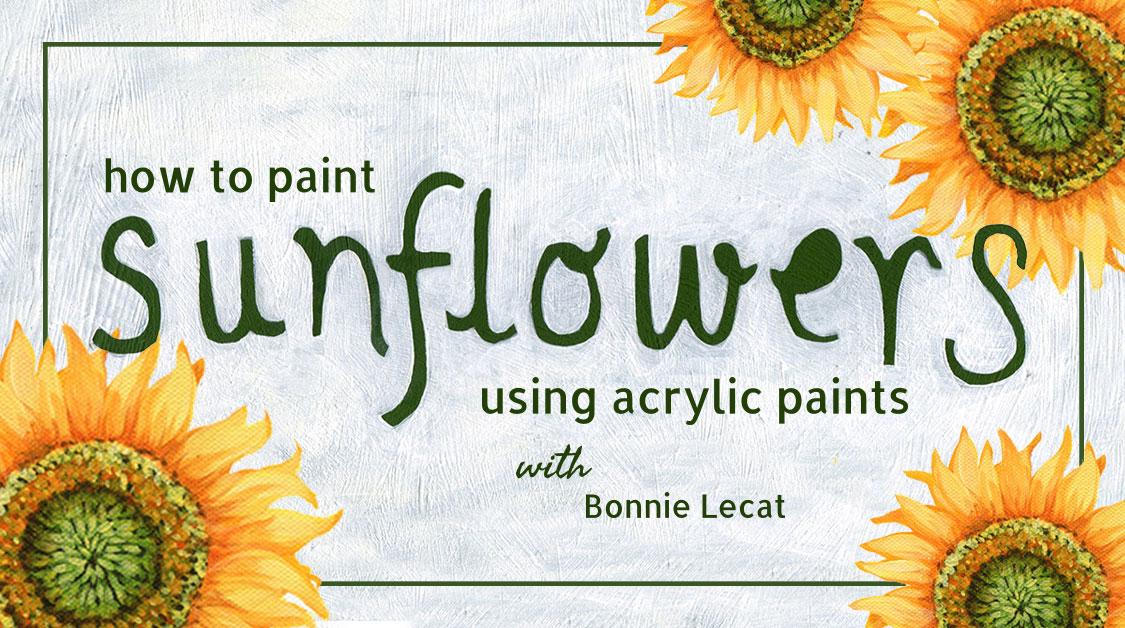
1. INTRODUCTION: So I created this course for two reasons. One. I love flowers with my very favorite things to paint and to love using acrylic paints because they are very versatile, they're easy to use, and I would love to teach you some basic information so that you feel comfortable and confident using acrylic paints in your own art craft projects. I'm buying. Look at I'm an artist and designer. I designed to create artwork in courses which I sell online via my website and on etc. I find most of my inspiration in nature. I love to paint birds and flowers and really anything that makes life a little bit more cheerful. This is how to paint sunflowers using acrylic paints. This class is for anyone who's interested in learning some basic information about acrylic paints, the type of brushes that work best with acrylic paints and how to use them and anyone who just loves flowers and wants to learn some simple techniques for painting them successfully and easily. The classes geared for beginners, and we'll give you all the information that you need to paint this beautiful sunflower again and again, all on your own. After completing the class, you're gonna feel so great about paying sunflowers that you're gonna want to paint them everywhere. So your projects going to be to come up with a project of your own where you lies, your new sunflower painting skills, for instance, you might decide to paint a canvas or wood panel. Makesem New Wall Art You might decide to make some jewelry like a necklace. Here. You could paint some furniture like a chair frame or a desk or even a wall. There are so many things you could Dio once you've learned this new skill and I can't wait to see what you come up with, so let's get started.
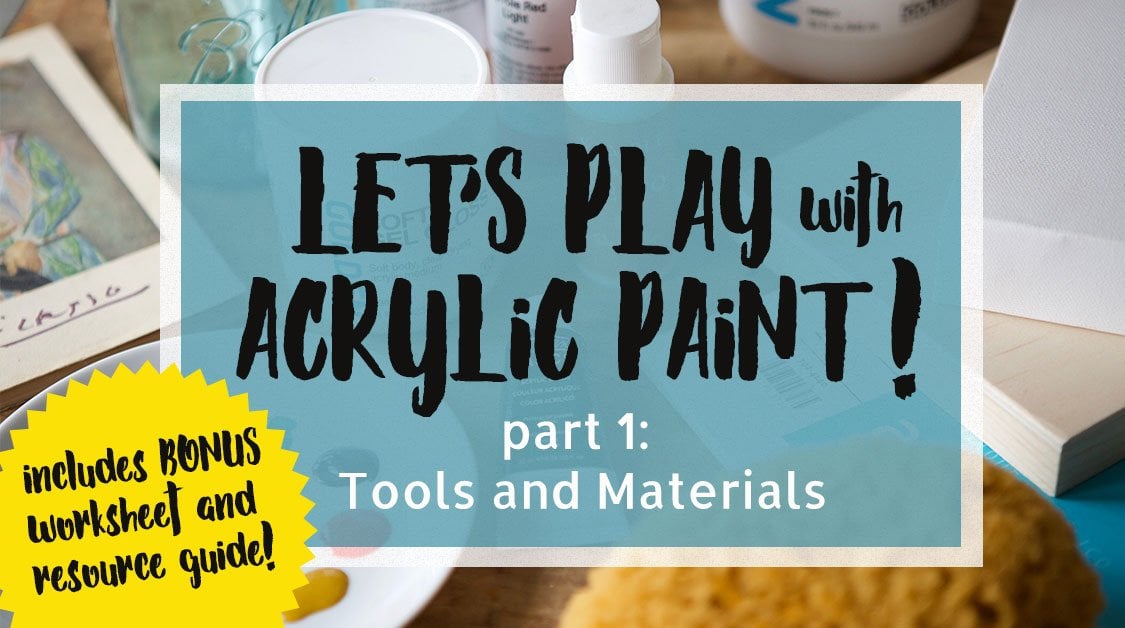
2. SUPPLIES YOU WILL NEED : Here's what you'll need to complete the class and paint your sunflower acrylic paints in the following colors. Cadmium, yellow, medium titanium, white parole, red light, Indian yellow hue, raw number and chromium oxide green. You're going to need a painter's palette. You can use just a phone Plato or a ceramic plate. If that's what you have. Some clean water in a rag for rinsing and drying your brushes, you're going to need round synthetic paint brushes in sizes 26 and 10. Ah prepared canvas panel and the reference material provided with the class, which you can download in print. You can find that in the class notes where you'll also find a link to Amazon, where I've created a supply list with all of the supplies that I've mentioned here. Ah krilic Paint is a fast drying paint made of pigment suspended in acrylic polymer emotion . Basically, it's liquid plastic. Acrylic paint dries very quickly, making it a convenient choice for many projects. This can also be viewed as a disadvantage if you use too much paint on your palate because it will dry up and be unusable. So be sure to Onley poor what you will use onto your palate or to save it. You can mist it with water and cover it up between uses. Acrylics clean up with soap and water. They're also very flexible and adhere to many different surfaces. Acrylic paints are versatile. They could be thin and apply like watercolor. Or they could be applied very thickly, like oil paints. And that's it. That's some basic information about acrylic paints. So gather your supplies and let's get started. I'll see in the next video.
3. BRUSHES AND BRUSHSTROKES: E. Before we get started painting, I want to tell you a little bit about paintbrushes. Synthetic brushes are usually used for acrylics, and I'd like to use soft, round brushes that come to a point, and that's where I've used in this project. Select a size and a shape that relates to your painting size to make your painting easier whenever you're selecting your brushes. And here's a couple more quick things about brushes. Most any type of brush will work with acrylics, but synthetic, which is nylon brushes, work well and are much more affordable. You can use watercolor brushes for smoother, more fluid applications and stiffer brushes for heavier or dry brush applications. We'll be using two types of brushstrokes to create our sunflower. The first stroke will be doing is to make the pedals. So to make your pedals, you'll load up your brush, and I'm using a number 10 round acrylic synthetic paintbrush. Any number 10 round brush for acrylics will work, so I'm gonna take the point of my brush. And by using pressure by pushing down and pulling up, I'm going to create thes petal shapes and what you're gonna want to dio is twist and turn your pedals all the way around your flower like this. So what I want you all to Dio is to take a few moments to practice your brush work. Because if you can manage this and master this, your flower will be so much easier. So that is the breaststroke we use for the pedals. The other stroke we're going to be using to paint our sunflower is just a simple dot and dash and will be using this stroke to paint the details. Let me demonstrate you're gonna load your smallest brush, which I've got a number two round acrylic brush here and you're just going to get comfortable with how much pain you have on the brush. I like to twist it in my paint on the side to get just the right amount and just practice making little dots and dashes like so So that's it. Practice those and meet me back in the next video to get started. Painting are sunflower
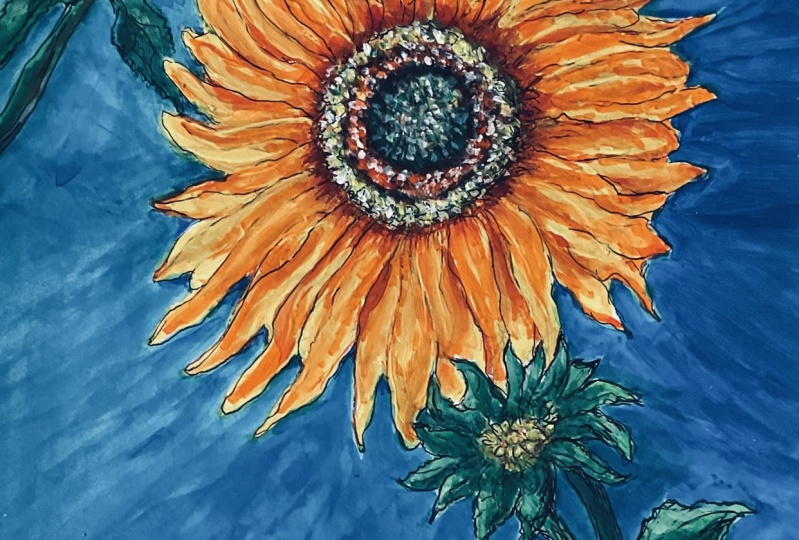
4. PAINTING THE SUNFLOWER - LAYER 1: fresh clean canvas panel ready to paint on. I've got my paints, some fresh water, my clean brushes, and I've got some reference material of a finished sunflower that I'm going to refer to as I paint. You can print yours out from the class notes provided with the class. So the first thing I'm going to do is to sketch light, very lightly sketch out a rough circle That certainly doesn't have to be perfect. This is just going to be used as a guide when I'm doing my sunflower. Now, I want you to take your pencil and do a larger circle around the edge. This is also does not have to be perfect. Make it very, very light cause will be erasing this at the end. But this is just a guide. So I know how far out to make my pedals We're gonna take our largest brush to begin wedded to make it pliable Dry it off so it's not drippy wet and we're gonna take raw number and paint the center of the flower twist and turn your brush to make more of an organic irregular shape Not a perfect circle. This will help your sunflower look more realistic. Move your wrist as needed to use the tip of the brush. To make this irregular shape, fill in the centre, making sure to cover all of the white spaces. And once that's done, we're gonna let it dry before we move on to the pedals. If once it's dry, you find that it's not fully covered. You can repeat a second raw number layer. Okay, Once your center is dry, it's time to move on to the pedals. So once again, you're gonna wet and wipe off your brush, making shirts clean and doesn't have any brown on it. And I'm gonna go to my yellow, gonna load up my brush, twisting off any excess. And I'm going to start using the brushwork that we practiced in the previous video going to start out at the edge and I'm gonna press down, twist my brush and then pull up when I get towards the center. And what you're gonna want to dio is make sure that every pedal is a little bit different, goes a little bit in a different direction. You can overlap as you see here. They're all none of them are exactly the same. And that's what's going to keep your flower looking more organic and more natural and more realistic. So that's it. Just repeat this brush stroke twisting, turning overlapping around the rest of your flower. As you can see, I'm using the pencil marks that I made is a guide so that I keep a somewhat consistent circular shape for the whole entire flower filling in these little white spaces as I go. And don't worry that it's all one big shape because we'll be adding dimension definition. Teoh each pedal and our next All right, that's it. Flair one is done to see in the next video.
5. PAINTING THE SUNFLOWER - LAYER 2: Once the pedals air dry, it's time to start adding details to the center of flour. So to do this, I'm gonna take my smallest brush, which is a number two round brush. And I am going Teoh loaded off with my green mixed with a little bit of yellow to make it a little bit lighter and brighter and a touch of white. So I'm just gonna mix up enough so that I don't have to keep mixing it, but again and again, and I'm gonna use that same technique of kind of rolling my brush to load it up. What I'm gonna do is start in the very center of my sunflower, and I'm gonna make the little dot and dash pattern that we practiced in the previous video . And I'm gonna start working my way out from the center in little dots and dashes, and that's really all there is to it. So you're gonna want to do this same pattern, same brush stroke, leaving some of the brown showing through till you get about half way out of the circle. Once you get half way out, you're gonna want the green to get a little bit darker. So we're gonna go into the grain that doesn't have the yellow and white in it. And we're gonna make a couple more passes around the circle. Once you're done with a green, you're gonna want to rinse off your brush, dry it off, and we're gonna move on to the next color, which is more of an orange color. More oven orangy gold. So I'm going to take my gold paint, and I'm gonna mix a tiny bit of parole red light into it till I'm happy with the color this space from where the green stopped to where the pedals start. I'm gonna fill up half of that using our same brush work. And just repeat that same brush stroke that dot and dash pattern, leaving a little bit of brown, depending on what type of paint you use. Some acrylic panes are a little more transparent than others. This one's pretty transparent, so if you have a more transparent paint, you're just gonna need more layers. And that's one of the great things about acrylic paints. You can layer things up. You can paint things out. You can paint over and start over if you If for instance, if I were to mess this up for didn't like it, I could go right over the top with the raw number and start again. I wouldn't have to get a fresh canvas like in watercolor. When you when you mess up your kind of done in acrylics, they're much more forgiving. And you could just start things again and again. And if you get kind of a glass of paint like that, no worries just dry and clean off your brush and go in And you could just pull up that paint. Or if you, some people like the effect of the thicker paint it's called in Pasto. If you like that, leave it. It's your it's your piece of art. Okay? So once you've gotten all the way around the edge, we're gonna make our final pass for the center, which is a much more yellow circle in the same pattern and to make my yellow paint. And I'm gonna mix a little bit of white in it because I want this yellow to be lighter. So I'm gonna mix it up, and I'm gonna make a final pass around this outer edge with the same exact brushstroke. Super easy, right. And you can see that our flower is starting to take shape. I mean, it already is definitely looking like a sunflower thes air. Just details. I hope you're already starting to think about all the things that you could use this sunflower for once you've acquired this skill, you can use it in all of your art and craft projects. And so many things would look great with a sunflower. So I can't wait to see what you all come up with. Once you've mastered painting sunflowers, so just continue this the rest of the way around the flower. The only other thing we are going to do in the center is to add a little more detail by adding some value some lighter values to the center to bring the center of the flower forward. You can see in your reference. So to do that, I'm gonna go when I'm gonna take my lighter cream that I was already using. And I'm gonna add a little more yellow this time and a little more white to make it even lighter and brighter. Make sure you don't have just too much white because I think the yellow keeps it nice and bright and fresh. We're gonna repeat the same brush stroke. We're just gonna layer over the top. We're gonna go back to the center, and you don't want it to be a huge difference in value. But just the subtle difference in value will make it seem realistic. It will bring the center of the flower as if the center of the flowers kind of mounded visually forward. So we're only going to do these toward the center. It's going to fade as we get closer to the Orange Circle, so just continue those not all the way out about like that. All right, now we're gonna do that exact same procedure, um, adding a slightly lighter value around the orange circle. So to do that, I'm gonna take my gold, and I'm gonna have a little bit of yellow this time to my gold in a little bit of white. The white also will make your colors more opaque if you have a particular color or shade. Um, that is more transparent. So we're gonna do this same thing I wanted a little more orangey, so I'm gonna have a little more parole. Red light. Here we go. Repeating the same brush stroke. Don't worry if your colors aren't exactly the same as mine. This is more about the technique than about learning the actual colors. I encourage you to practice. It makes a few different times almost done with the center. Now, I want to do the exact same thing over the yellow. And to do that again, I'm gonna take my yellow paint, and I'm gonna add a little bit of white toe, lighten and brighten it and make the value a little lighter. And I'm gonna go around the edges one more time. So we really are using just to brush strokes throughout this entire painting. All right, that's it for the center. We will add maybe some finishing touches at the very end. But for now, we're gonna let that dry, and I will meet you in the next video to finish up the pedals
6. PAINTING THE SUNFLOWER - LAYER 3: So we're gonna go back to our larger brush and I am going to get my yellow and I'm gonna mix it with some white same principle we've been doing on the inside by We're adding detail by changing the value of the color that we're using to call these flowers forward in space and to separate the shapes into individual petals. I'm going to use the same brush stroke once again that we used on her practice when we were practicing the pedals. So I'm gonna go to the edge and I'm going Teoh push down and pull up. And I like the difference in value. It's enough to separate the pedal without being completely like starkly like light and white. So I'm happy with that. So I'm gonna continue this over around over and around the rest of the flower like we did the first round. Overlapping, but not but leaving some of the yellow showing through. And that is what is going to give dimension and shape and definition teach pedal. So continue this brushwork, not covering the entire thing and not going all the way to the to the center. If you need, you need to adjust your colors along the way. Maybe add a little more white or a little more yellow. That's fine, too. We didn't follow the reference exactly pedal for pedal. But we did follow it to kind of get an idea of how you want to be painting. So feel free to look at your reference now we're not finished yet, But compare is you go. If you're having any struggles, check out your reference and compare and see if you can figure out what it is you need to do next. Now I'm gonna add just a touch more white and I'm gonna go back. Each of these shapes I just made I'm gonna add a little bit of lighter to some of them to pull those even more forward. But not everyone, because I don't want it to be exactly the same all the way around the flower, some floor. Some pedals will be closer to you in space than others, and some will be behind other pedals and wouldn't be is light. So the next step is going to be to add a little bit of a darker hue where the paddles meet the center of the flower right here to do that. I'm gonna take my medium round brush, which is a number six. So I'm gonna get my gold, and I'm gonna come in, use the point of the brush toward the center of the shape, and I'm just gonna pull out a little bit. Sort of a combination of the two brushstrokes we've used already. If there's any areas that you want to be a little bit darker once you've gone all the way around, you can just add a second layer once it dries. I'm just adding a little bit more definition teach pedal. Okay. Our floor is just about done. The last thing we need to do is just to look at the flowers, see if there's any finishing touches to erase around the edges and we are finished. So I am going to look at my reference. I'm gonna see what I want to dio. I could make it a little bit darker, this prince a little bit dark, so bear that in mind when you are doing your painting. And also it's your painting so you can make it is dark is light as loose as tight and as you want it to be. So I am going to just darken around the edges a little bit. And to do that, I'm gonna take my gold again. But this time I'm gonna add a tiny, tiny bit a parole red and a tiny, tiny bit of number. So I'm just making it a shade just to touch. And I'm gonna tested up to make sure that's the color I want. And I'm gonna go in some of the areas that I just did and just repeating You can see it's just pulling, adding a little more definition, pulling that center forward and pushing the pedals back visually in space a tiny bit and separating the center of the flower from the pedals there. I think that's just enough. Okay. The only other thing I am going to dio just because I want to make it a little bit more decorative, I'm gonna add some little lighter areas in the centre, adding a couple little dots around the yellow around the orange layer and then the yellow layer. If you look at your reference, you'll see that I did that. There is well, if you're happy with your sunflower, you don't even have to do this layer. Were this touch? If you don't want to. Okay, That's it. I am happy with my sunflower, and I certainly hope you are too.
7. CLASS PROJECT: So here's a quick review of the class project, so it's your turn to complete of sunflower painting in the project of your choice that utilizes your new sunflower painting skills and posted in the class projects. If you haven't thought of an idea already here, some inspiration you could paint a sunflower on a piece of wood and hanging on the wall is wall art. You could paint a sunflower, Weinglass or maybe a pair of jeans or handbag or in a prin. There's so many things that you can dio. I'm sure you're going to come up with something great and I can't wait to see it.
8. FINAL THOUGHTS: Congratulations. You did it. I hope you enjoy the class. And I hope you learned a lot. If you enjoy the class, please leave me a thumbs up in a review. Please follow my channel. If you'd like to see more classes like this And thanks again for your time and your efforts . And I hope to see you again here on skill share.
 Bonnie Lecat, illustrator, designer, teacher