Transcripts
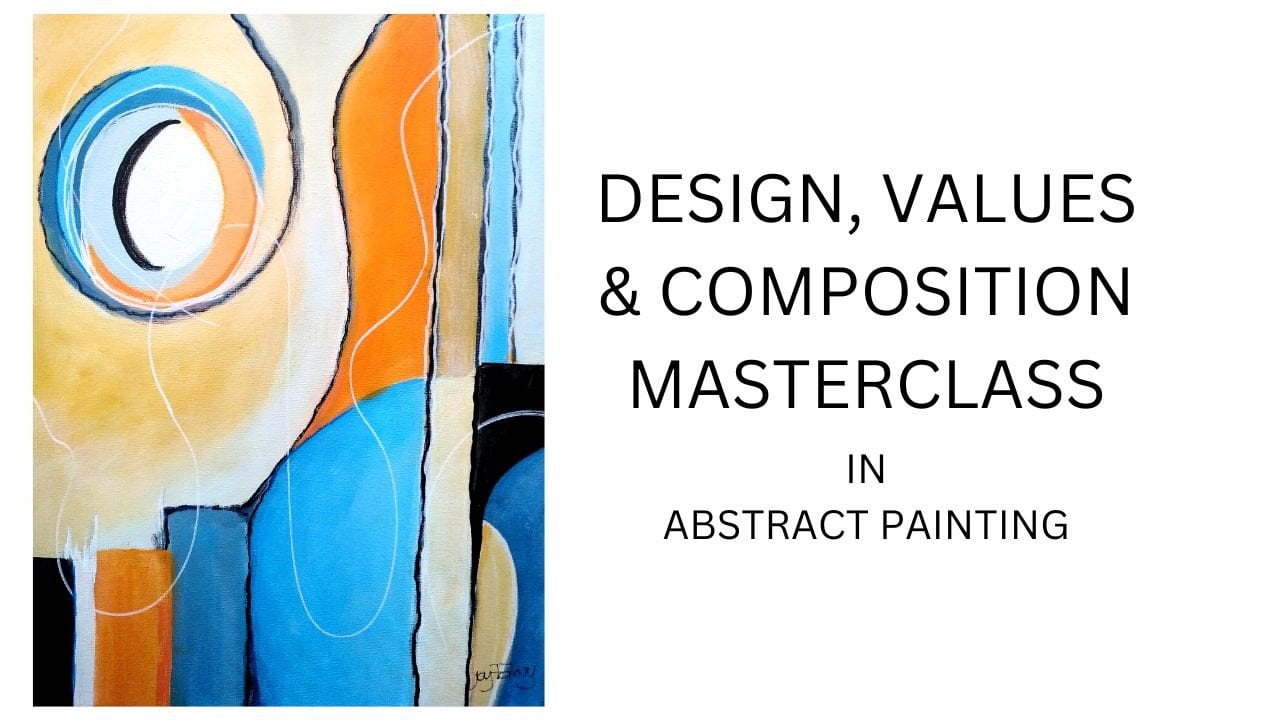
1. Introduction to How to Draw & Paint Abstracts: Hi, I'm excited to be sharing this class with you. Abstract painting and drawing from start to finish. And looking forward to showing you how you can paint Great and unique abstract paintings. I'm Joy. Hey, I'm, I'm an artist and teacher and I've been teaching for many years. And one of the things that I have noticed over the years is that many students are a bit scared of an abstract painting. Consider, really know where to start and what to do. So I've put this class together to help you give you the nuts and bolts and the confidence to paint very expressive, unique abstract paintings. I'm going to go through all the materials that we need. And then I'm going to show you different techniques on a color value, on contrast, on composition. Everything really that you need to know to develop your confidence and really paint super paintings. This is really designed for anybody you know whether you've painted before or not. It doesn't matter because the processes so interesting, even if you've had quite a lot of experience, I know that this will inspire you and give you some new ideas. So without further ado, let's get started and I'm looking forward to sharing this class with you.
2. Materials You'll Need : So now I'm going to show you what we're going to be using throughout the class and are listed below. So you can check that basically helped us white paper. And this is just printing paper, which you can use also, you can also use some cartridge paper. This is a mental sketchpad. And if you want something bigger and you can use a free countries Plaka, which is fine but any kind of paper and say, Okay, and then you're going to need maybe a canvas if you want or brought hammers. Any size that suits you. You can have a smaller one hour, a big one, you know, dependent on what size you feel you would like to do you're painting on. And now I'm going to go through all the actual tools that you're going to need to really experiment with. So we're going to be using acrylics, but if you've got other paints, watercolors, feel free. You know, it's up to you, but I like using acrylics for this. And I've got some basic colors here. And, and you can obviously add your own colors. And then I've got using some different tools and brushes and scrapers, some sponge, those are really quite essential. And a pallet knife hopefully, and you can use different materials. So it's really up to you, but these are kind of things that we all used to start with. And then I've got some different colored pens here, a marker pens, colored ones, black ones, and some chalk and charcoal. And then extras release or oil pastels, which I find a lovely, but you can use wax crayons or kinds of things. So this is just a variety of possibilities and not all essential, but you will find for yourself interesting things that you can make marks with to make your painting interesting. But this gives you an overview of some basic tools that we will be using to create our paintings and have fun with HIV, which I'm now looking forward to sharing with you.
3. Introduction to Creative Drawing: So before we begin the class today, I'm just going to show you what we're going to use. We could use a pencil if you have one. I have a Chinese mark here. It's just a really a black crayon or a actual marker pen. So any of those you want to use, feel free. But before we actually start, I just want to talk to you a little bit more about the actual concept of drawing. You know, when we were children, we just used to freely draw. We didn't use to think about it. We just played and had fun and saw what happened. Sadly, as we grow up, the tendency is to then move from that, you know, just being free and creative to having to learn to draw. And in that process, we basically move from the right side of the brain, which is our creative side, to left side of the brain, which is our linear side. And the tendency then is to move our creativity over to the skill side. And then perhaps get frustrated because we have an idea in our mind about what we want to draw, but we don't know how to do it. And that can carry on with us all our life. So the idea here of what I'm going to show you is how to tap back into playful, creative side of our brain, which allows us then to really move forward into wonderful expressive drawings and paintings. So that's what we're going to go through now with a few of these little exercises, if you like, they're warming up exercise is if you go to the gym, you Walmart before you actually start. Well, this is kind of warming our brain up, if you like. And, and seeing the shift from the left side, the thinking side, to the right side, the creative side, to allow ourselves then to get into the zone and into the flow of drawing. Now for me, I always think it's important to just focus on now on the present, what I, where I am, where I'm, where I'm up to. And I take a deep breath and relax. I'm going to be creating. So I want to be in the right space in my mind to create. So just before we start the drawing, take a nice deep breath. Relax. Focus your energy on what you are going to discover about your drawing and moving that forward.
4. Start Your Creative Drawing: Okay, so what we're going to imagine, our pencil is an extension of our own. So we're not going to be very tight using our risks. We're going to use a whole drawing. So I just want you to just kind of dancing around the paper. You can sort of move your body if you like. Just see what happens. If you just allow the pencil to move on the paper. Very, very cynical. As simple as that. And you feel nice and relaxed. And you'll notice that you'll get some very interesting things that are going on in that drawing. What we're going to come back to that in a minute. So the next one we're going to do is actually think about the structure of a toy. And basically we have three basic shapes, which are the square, the circle, and the triangle. So from those three shapes comes everything else. There'll derivative the case of the cylinders, rectangles cause this is really the structure of any drawing of the squares, circles and triangles. And then when you think about the line, the line really is just a series of dots. So when we, when we think about this, we just hurriedly really bring it down to basics. And it's very interesting how this will start to play out. Now then, if we then take with your next drawing, just the idea that we're going to draw everything on a square. So we're not going to have any circles or curves in this drawing. So again, very simple, using the whole arm. What that does is really help us to connect to the right side, the creative side of operating. So I'm desperately to do everything in Scratch now these can be big, they can be small. They can be whatever you want them to be. But again, it's just relaxed. And you're just going to allow your pen to move in lines and squares. And you'll come up again with some very interesting, interesting shapes. So you can probably feel when you're doing that, how you're concentrating, but you're concentrating in a creative way, which sees the key to all of it. So now the next one is looking to do everything in circles. So again, keep on reading news is if you're really moving your whole body into it. And we're just going to do circles and again, small, long, big lungs. Like to just move around the paper. However it goes. And to me, I'm I'm into my circle. But it's a lovely feeling. I just want you to probably get hold of that feeling of just relaxing into it. As simple as that. And again, an interesting things can develop from that, again, come to it later. So the next one now is four triangles. So just again allow it to happen. See what's going to happen with the triangles. And you'll chase. That may be your brain is telling you to move. Do a circle. Just want you to concentrate on the triangle. Okay? So we've now got some very interesting is like abstract drawings that we can play with later. So finally, what we're going to do on the next one is again, come back to all three drawing, but with those shapes in mind. So you are not just random, you're going to let yourself move and have some of these shapes and majority. So it could be anything. But you know, that you can actually put some squares in it if you want to do. And you'll, again, you'll come up with something quite interesting. When I look at this, I see some very nice shapes that I could do something ways. If I turn it around to the camera that way you can see something is developing here, which is very interesting. So those are our first exercise is to start with, and you can play with that. Play with this, the free drawing, play with the squares. Play with the triangles. Circles occurs with you. And I'm going to type that in the next stage in the next video.
5. Creative Drawing Demonstration 1: So now we're gonna do something with the drawings that we've done and maybe you've done some more. So you can really go to town on this in an experiment. Basically, you have a fun begins. Let me just show you a couple of examples of things that I've done to show you what kind of thing you can do his one from a free drawing. And what I'm going to use some charcoal, a marker pen. These are all in black and obviously my Chinese marker, black crayon. So that's what I've used for these. And you can see, you can get some really interesting abstract pictures that you can then use as inspiration for paintings. So organic and I'm going to show you all different ways of doing this. But, you know, the drawing is a very important start. In the early days, all the masters they used to take at least two year drawing practice before they actually started painting, but we're not going to take that long. Probably going to take about five minutes on this one. But what I'm saying is the more you practice this freeing up and using these three drawings, the more confident you'll feel and it'll start developing your own style. So I'm going to start this and show you, and then I'll speed it up to the end. But just to give you an idea how you can begin to look at your painting, your, your joins and find interesting things out. If I just turn this around to you, I've got kind of like beautiful birds had going on here. I might do something with that. There's sort of like the body coming down here. So there's interesting things that might develop, but I don't really have a preconceived idea. I'm just kind of again, staying in the flow of it. So I'm just going to start with the charcoal. I like this line here. So I'm just going to follow through with this shape and just allowing it to, to really unfold itself and see what's going to happen. And obviously, yours is going to be very different from mine. And that's the point I don't want you to copy. I want this to inspire you to find your own, your own way in it. And the more you play and play is the operative word because that keeps us in the right side of our brain soon as we get into judgment. And oh, what's this about? I'm not sure what I'm doing, et cetera. Then you fall into the wrong trap. So we want to kinda keep it as creative as possible and just stay loose and breeds and enjoy seeing what the process will offer you. So I'm just going to keep drawing this and just see what's happening. And then as I'm, as I'm varying, once I've brought my, my mark sound that I really like, what are the enhanced? And I might swap to my black pen. Now this is again totally up to you. How you feel, what takes you, what gives you the feeling to go in a direction. So you can see, I can just enhance areas that I'm enjoying looking at.
6. Creative Drawing Demonstration 2: So I'm using the charcoal and in many different ways. And as you can see, I'm rubbing different areas with my finger. And this gives you lots of different possibilities from going from very dark to very light. Which obviously then gives you very interesting tone value in your drawing that you can turn it into just a simple line drawing, into a really fascinating abstract drawing. And this is what I love about doing these kind of things because it's always very unexpected. You know, you never know what's going to actually appear on the, on the paper. It's not thought out. I'm going to do this, I'm going to do that. You really, you really go with the flow of where the painting or the drawing wants to take. Q. So it's also very meditators. You get so absorbed in it. And that's the wonder of creativity. In my opinion. It's so different from doing anything like landscape for the trees or flowers, you know, still life. You know what you're going to be representing with this. It's representing something inside yourself which you're exploring and discovering so you can make it fascinating. Now here I'm just going over with some of the lines with the black marker. Again, you've got the distinction between the very dark and the going through the tones to the lighter terms. And, you know, again, you can get so many fascinating effects to turn a simple line drawing into really quite a magical abstract drawing. And you really discover something about yourself. And it's wasted the hero to me, it's always very, very exciting because we just don't know where it's going to, where it's going to finish and what's going to occur in the drawing. So you can go on doing this for, for, you know, as long as you like. But you know, you will find a time when it comes to its conclusion. Now what I've done here is I've sealed it. You can use a Fixer. I've actually use hair lacA, which is good. So you can give that to spray. And then you can carry on, on top of it to as many layers as you like. So here's my finished picture. And you can see I've got lots of different layers on this and interesting textures because of also gone back and used the China marker in it as well. You can see here, so fascinating things can happen.
7. Emotions in Drawing: So I hope you're enjoying doing your drawings. And I also hope that you maybe did something with your squares and your circles. I started something on this one. And I've storage is something more Causes. Well, so you might be wondering where all this is going. And I would like to actually help you validate this by showing you some paintings that will show you which direction we're going in. And then I'm going to follow that with giving you some interesting exercises on expressing your emotions in your painting. First of all, we're going to have a look at poor clay. You might recognize this picture. We're looking really here at the shapes and what we've been covering in the shapes. And here we go again with our squares, circles and triangles. It validates everything that we're doing and seeing how this can be put into painting his, another one of his very simple, interesting shapes but an impact on, you know, on a, on a painting. And here's another one with the squares. It's fascinating and not one of my favorites. Kandinsky again, looking at the shapes and the passion and the color in it. But basically it's made up of those shapes that we're talking about. Here's another one, very dynamic picture of Kandinsky free. Now moving on to Picasso. And you know, when you look at the shapes in his work, and if you think about our free drawing, we're not far away from getting to this kind of energy of free drawing. His very famous painting, Guernica. And there's so much passion in here. And again, it's black and white to know tone values that we've been covering. This is one from Willem de Kooning, who I love his work very, very dynamic. Again, very strong. Shapes. Another one, a little bit more crazy. But it's giving you the idea. And I hope give you some inspiration. I always loved looking at wonderful paintings, you know, to get the feel of how the artist has put it together. And my suggestion to you is to really have a look at some of the paintings that you like and see what it is that you like about them. What moves you, what resonates with those paintings with you? So our next lesson is going to be on how to express ourselves through our drawing before we move on to the painting. So let's get started on that now.
8. Drawing Your Emotions: Just before we begin this class to, on drawing our emotions to help you with there. So I've actually put in the resources a very long list of things that I probably can't see it so well. Many, many different kinds of emotions and feelings to help you. There are some that will jump out at you and some that weren't. But it will just help you focus your energy. What we're going to concentrate on for the class, it's just basically six and opposites which are going to show you now. So what I've done is I'm on a paper. I've just divided it into thirds, just to make it a little bit easier. And I've written out six for me. Happiness, sadness, peaceful, frustrated, interests, mid, or anger. You, you would have your own but you use if you like. So the idea here is to, as we've taught me for, you know, take a breath, is you're feeling happy. What kind of movement would that give you? Fine. Just feeding that. I'm just feeling happy, gentle, soft slurry flowing. Okay. Nine, if I go to sadness, how would I express that? If I'm feeling sad, it's going to be very different from how I feel when I'm feeling. They feel about sadness. How is that small, tiny, bit stronger, and very kind of different from the happy feeling. Very interesting when you focus on that. How sadness would draw itself out. So I could carry on doing that. But you can see logic a difference. Now if I go to peaceful, how do I feel I would like to draw peaceful. Well, I feel sorry wavy to me. You know, we're all going to have our different feelings and different models for each emotion. But it's peaceful, is very kind of wavy and gentle. We see various different energy to happiness. There's a subtle difference, but you can see the difference, can't you know, I factored into frustrated. The opposite of feeling peaceful. How my, when I feel frustrated, well, it's kind of very, very powerful, very strong frustration. Okay, so you can see exactly what's happening here. Now let's go to interest rate. If I'm interested in something, what, how do I, how do I approach rat? While i'm, I'm interested in kind of quiet high-energy feeling to me. How energetic. That is. Again, very different to peaceful and different to happiness. Obviously different to our sadness and frustration. And if we go to anger, how would under be different from frustration? Well, let me feel how I'm, the fields are aligned. I'm going like this and I'm very angry about something and it's really getting it out there. Right? So now you can see how different effects you're joining has dependent on what you're focusing on and how you're feeling. And this is the most interesting thing. And here is a picture that I would like you to see that you've probably already seen before, but it does express what I'm saying here, which is a painting by Edvard Munch. Cool the screen. So if we have a look at this picture, you can see all the emotion, you can feel, the frustration, you can see the anxiety in it. And it really expresses that emotion. And that's why it's such a popular painting. Because people can resonate with it so readily. For, you know, we've all had that pent up, frustrated, angry feeling. And that painting really sort of says it all off multiple. So if you now have a practice and maybe go to the less that are giving you. And take some of the emotions out of here that resonate and see what different drawings you make from those different nations. And you'll find that very helpful then when we come to actually put that together, maybe in another drawing, but obviously in our painting.
9. Using Your Sketchbook: Well, I hope you found the emotional drawings interesting. One of my suggestions would be, would be now to have a sketchbook so you can be drawing in your sketch book hopefully regularly. But your different emotions from day to day. Now, here's mine here. And I have a lot of different drawings. Look at this scribble. A feeling at the time. And it's in a funny kind of way. It's a little bit like a journal because you're making a record of how you're feeling. Here's another one. She can't see, but I'll put some of these in the resources for you to have a look at. But it's kind of, it's a very interesting process because it really helps you with developing your passion in your painting. And we're going to join that together with color later. But by doing these drawings, you can see some of them behind me here. By doing some of these joints. Here's another one. And again, he comparably see it so well, but this one was called all in a day. So if you imagine ebbs and flows in the day of our mood swings, you know, it can wake up, we can feel one thing and something happens, we feel another. And so it goes. And actually tracking that in our drawing kind of gives us a new perspective on many different areas of our life. And also one of the interesting things is it helps us change our focus points. So for example, if you happen to be feeling anxious or angry or frustrated or whatever, and then you start drawing that and then you move to the opposite. Well, actually I'm going to draw out, feel like when I'm happy were none contented when I'm feeling at peace with myself. You can exactly move the focus. And if we have that in our painting, in our drawing, then we can have that in our life. So we don't have to be attached to justice if we're feeling upset about something, we're drawing you tau, we can move the focus then to feeling okay again, that's a very interesting process. This whole we're holds if you lie, when we start exploring it in that way, because it gives us so many new ideas and new approaches. So I would suggest strongly to have a sketchbook can be drawing all kinds of things in there. Some of them then you might be able to use in your painting when you want to express your feelings. And we're moving into that, into the next video. But just to kind of round off this idea of different ways of creative drawing. Because this puts ourselves into our drawing, in our painting. One of the things that I would really help that want to help you do throughout this course is find your own technique. Find your own way of expressing yourself without copying anybody else. Some things might be similar, which is absolutely fine. But we want to kinda get to how you feel, how you draw, how you paint, which is unique and special to you. So let's now on the next video, start with the painting. But see, you know, get your sketchbook and start doing all kinds of interesting drawing.
10. Paint Selection: So now we're going to get onto the painting. And I've got an array here of things I'm going to show you that I'm going to use to get started now, as I mentioned before, I'm just using basic colors to begin with. But you oversee can use the colors that you like. But you know, we really always want to start with red, blue, and yellow, which are our basic colors, which basically mix everything together with black and also with white. So I've got some white here. I've got two different reds, like a magenta red and cadmium red. So you get different kinds of pinks and hues and purples when you're mixing that with blue. And obviously you can mix your greens together. You can mix your purples together. So you've got a whole range of colors to mix. And I'm going to include in the resources a very simple color wheel, which you can use as reference. And I would suggest in your spare time to actually paint out your own color wheel because it really helps you. So how you can mix paints are not going to go into all of that now, um, but suffice it to say, I've got the red, blue, and yellow. I've also added a lovely orange because I love using orange. And my favorite color, which is a teal, turquoise, blue. So these are the colors that we're going to work with to begin with, and we can obviously add to them later. So what I've done here, I've actually, I've got a palette here for you. If you, you want to use palette, you can use anything that you want to mix your paints on. I actually for quickness. And have a lovely little thing here where I've put all my paint colors in here. I can use it easily. I don't have to be mixing up the colors all the time, so it doesn't interrupt the class. You can, this is like a little box that I got from the DIY that you could put buttons in all things, org, screws or whatever. But I find it really interesting to use and it saves me a lot of time from putting out color all the time. I've also got now a nice mixture of brushes. Again, use the brushes that you have. There's no particular whatever you feel comfortable with. I like using these nice flat brushes. Sometimes ones with a little curve on which is quite nice for the diagonal. You can see that I've got a couple of palette knives here, and another shaped one here. Also. I've got my scraper, which is here. But if you haven't got that, it doesn't matter because you could use an old credit card which works very well or a piece of very stiff card. You know, the thing about this is you don't need a huge amount of materials, but you can be inventive with what you begin with. And then as you get more and more into it, you can add things to it. But those are the things that I would suggest starting with and to give you some options and have them at hand. So if you know the mood takes you, I might do something with that. I might experiment with this. You've got them there. So this is our kind of starter kit, if you like. Also some paper towels. I use lots and lots and lots of those. So those are good to have handy. And the other thing I have handy on cotton wool, few tips. Just sometimes it's nice to scribble with those. And so I have those at hand as well. Okay, so let's begin.
11. Beginning to Paint: So now we're prepared and what I want to do this before we begin is just show you some of our loosening up exercises again, similar to what we did with the join, but now we're going to do that with the painting. And here are some of the time that's going to show you to begin with. Because they're quite dynamic in their own way. Here's one that I've done, obviously just in two colors. But again, looking at the shapes and the energy behind it, it kind of frees you up, loosens you up. They take two seconds to do, but it gets you in the zone and unlatched the point. So that was the first one. And then the second one. I started doing a lot of different colors on here again, experimenting, just seeing the colors and scraping in which I'm going to show you. And I'm going to draw on top of that and do more with it. But these are just really good starting off exercises to build your confidence, feel and relaxed with it, enjoy it to experiment. Now remember, we're staying in the play time mode. We want to keep in the right-hand side of the brain as much as possible. We're not here producing great, great works of art, although we might do. The idea here is to just explore the possibilities. So I loved playing around with these and seeing what happens. And of course with the acrylic, you can keep going over it and over it and over it. And interesting things always uncover, uncovered there. It's incredible. So this is some fun things that we're going to do. And then the end of palette. Now what do I mean by that? When you kind of think you've finished this and you've got a bit of painting paint left on your palette. I like to do stuff with that. So this is an end of pilot picture, which I actually really love. It's got so much energy. And so, you know, just sort of doing these fun things to begin with, really help you kinda start understanding the paint that color combinations, the energy. You know, we've talked about those, all the different emotions that we can have in a painting. And this kind of helps you let go and really enjoy it and have some fun with it. So that's where we're going to start now. So I've got to work with few sheets of paper here. And I'm just going to see what happens if I just begin. I've got my brush a little bit of water. I'm taking a water, putting it on, just getting the excess off. And I'm first going to just go into my black. And this, let's see, again using the arm, Let's see what happens if I'm just playing with black. So interesting, what might happen? And you, again, you can use what color you want, but just play with it. See what happens when you do. Nice. I like that. I'm going to change brushes, but I don't want to mix the color up. So now I'm going to go with, I think I'm going to go with some yellow. And let's see what's going to happen with that. If I just put some yellow end, again, energy, It's deaths are nice. Energy working. I might go to my bit of orange, sorry bit of red here. So let's see what happens. I've got no preconceived idea. I'm just experimenting to see what might happen. So you have a little play with doing those kind of things to start with. And you will surprise yourself what you produce. And, you know, you can imagine that on a large scale it would look very, very dynamic. So that's my first one. Now, the second one I'm going to do something a bit different. I'm going to do here on the second one is perhaps do a bit more of some blocked color. So what do I mean by that? I'm going to say take my orange and I'm just going to do some blocks of color. And again, keep it nice and three. And then I might just move over to putting a little bit of red with that. We're just again, seeing how we feel and keeping it nice and loose. Breeze, enjoy. And let's see what might happen. I'm using some different reds here, nice warm colors. And again, we're just experimenting, seeing what might happen. I'm going to go back into some orange and some nice patterns are occurring. I might just put a bit of white into here, see what might happen with that. And it's interesting when you put the YTM because he get obviously different tone values. From just kind of having fun playing, seeing what might happen. I might turn it round now. And I might go back into doing something with black. So again, just blocking in a bit of color, experimenting a bit of white in. And I'm literally playing. I'm not. What any preconceived idea about this. Just playing. Let's see what happens. And this is what I want you to just feel confident in letting go, really allowing the thing to occur without any preconceived ideas. I always find it fascinating because, you know, we're naturally creative. We actually don't have to think about. Being creative, we are, we are all creative beings. So when you start doing stuff like this, you really can tap into that lovely, creative part of you that is hidden from us for a vast amount of time. So enjoy just playing, seeing what happens. We're not, we haven't got a preconceived idea. We're just looking what might work, what might not. Turning it around, getting a feel. Scope back into some orange over here. And something inside you. We'll tell you where you're going and what to do and how it's working. So I might just leave that for now, let it dry and then I'm going to come back to it. So let's then go on to our next one here, one over here. And then again, free up, see what happens. And I got paint on my brushes. So I'm going to play, I'm going to see what might happen. Just playing with some of the colors that I've got left. And it's interesting because again, you've got no preconceived idea. You'd like to get some textures in here. And just using our shapes, using our arms. Having a bit of fun, then I might put a little bit of paint, not too much. Just again to explore what might happen. And let's now go with a little bit. I'm going to put a little bit of my favorite color in teal. See what effect that might have. Now, once I've got this fear, I might then get my scraper with the rigid pavements still wet and see what I might do with that. I might draw in to see what might happen. Again, just playing, exploring. Not sure where it's going, but that doesn't matter. I'm going to put some yellow in here. Again, I've gone a bit thicker with that yellow. And again, we're going to explore what might happen. I'm going to mix it with some of the red and see what happens. Go back to my scraper. Can you see how I'm just exploring possibilities and seeing what effects happen? And, you know, sometimes they really, really, really surprise you, which is great fun. And something occurs. You can see an interesting colors happening. I'm going to put a bit of blue in here. I'm going to put some glue on my scraper and see where that might take. You know, I could do lots of different things that this scraper. I can do some lines, I can pull it, I can scribble with it and I can see what might happen her now going to go back. I'm going to go back and put some orange and I think some orange. See how that goes. So you can see how you can start discovering some very interesting abstract paintings completely creatively without preconceived idea. And as you go, you really do get into the zone on that beat. You have to trust me. Even if you think, What on earth are you doing? Once you get started, something else takes over. And it presents you with something really exciting, interesting, unexpected, and fascinating. So you can see here something is really developing, some just scribbling to start with. So I want you to play around with this, do as many as you can, and then you can go back to them and I'm going to show you what you could do with them once they've dried and you've you've had a really good play on them. What else she might do with it? So that's the beginning of our free creative drawing and painting to enjoy. So you don't have it three differences. And I'm going to come back to these very different for all exploring with our primary colors. We've done our free fun drawing, painting with just a few colors. And then blocking in color. And then playing with our after palette and then adding to it. So some great things to begin with to get you in the zone.
12. Discovering Your Creativity: Okay, So now everything's dry. I want to talk to you now about what we've done and how we can then enhance it in balance sheet and see what we can do with it because this is where really the abstract painting comes into its own. So if you remember, I'm just working on the two that we did, which was the blocking in one which I have here. Was that on and also the one that we did at the end of the palate and that was this one. So what I've done, just to give you some direction with this, Let's start with this one. What do I do? It, it's actually I scan this in. And actually just before that, before I finished, I had some of the teal paint on my scraper. I might actually just to add it to here, which really brought it to life. I thought, Wow, that's interesting. What I did then was I scanned this in and then I thought had paint on top of it and show you the difference between the original blocking in painting and what you'd like us to do with it, which I got to show you here. So I've enhanced the colors and made them a bit deeper and emphasize the shapes a little bit more. And I've drawn into it a little here. And I've added a little bit of blue paint so you could have an experiment like this yourself if you want to. But through now in the, in the class I shall show you going over this one, how we can do that. So this is an interesting way for you to have the original, print, the other one off and play with it. And the thing is then you've got no barriers. If it makes a mess, it doesn't matter. What I want you to feel like is that the whole thing is pure experiment and investigation and exploration. So you can discover things. You know, for me, this one, I really like it that on a big canvas would look very stunning. And what's so fascinating is when you do these kind of paintings, they tend to have natural composition. And I'm going to talk to you about competition more in the next, in the next class. But this kind of flows together really nicely. So then the other one, I did the same thing. Yes. Which the original colorful what's going on and kind of Difficult to work it out. So what I've done with this one, and I suggest you, you can do this for yourself. I cut out a lot of different kinds of frames. So I can go round the picture and have a look if there are areas that kind of stand alone that with the frame round, it really works. I've got many different sizes of those. I'll just show you because I brought them here. But what small ones, big ones you can see all different kinds of sizes just cut out of paper to help me when I'm doing this kind of thing too. And find little areas that might be interesting pictures. So I strongly recommend that you make yourself a few of these in different sizes. So that's what I've done with this one. So I took actually a big one here. First of all, I scan the tin. So here's the scanned one. And I took the area here. And I'm really kind of liked that. And if you can see now, it's turned into sort of, I get the feeling. It's turned into like a seascape with nice shadow on it here into the water. But it's a very dynamic picture now. Now who would have thought that out if you're just playing around and if palette adding some paper, doing some scraping, the absolutely at the end of the day, you can come up with a really fantastic, actually abstract painting. All intuitive non of it. Preconceived. Not sort of stiff and hard. And actually in here, again, we've got an interesting color balance, interesting composition come to, but a very good fun painting. So don't dismiss these play things fees because you'd be really amazed what can happen when you start actually looking at it with a fine tooth comb and deciding, you know, water areas might write really work for you. You know, I could go really small one, a monopsony, interesting or not, that looks a little bit lighter. Shadow on it. So I could learn through different areas and see what might work as little pictures. And then you can frame them. You can make them into cards. You can do, you know, have a nice little series, three or four of them dependent on the size that you do. So you've got the makings here of some very interesting, fascinating dynamic paintings. So not to be dismissed. So let me just show you then the process of this. So let's start with this one. Let's start with this one here. So I'm Turning it in different ways to see what actually is standing out to me. What I'm enjoying, what I feel is interesting and again, using that little frame to decide. So then with my paints, I'm just going to again play and see what happens. Very, very simple. And this is the thing that I want you to really get to grips with is the simplicity of it and not over complicated or overthink it when you actually come to, to painting. So I'm going to start with this brush here. There's a little bit of a chisel edge on it, but I like it. And I'm just going to have a look at this area, the tie, the type earmarked, so I get my heels together. So I'm I more or less about here, right? So I'm going to kind of work within this area that you can see here. So I'm just going to see where I'm going to go with it. So I've got my paints ready. And I'm, I'm going to just mix a few of those colors together. I've got a little bit of pink here and see what, what happens. What some white and some oranges. I'm going to put that on here on my, on my palette. And I'm going to play around with these. I'm also going to get some white. Let's put some white on my palette so I'm there. And so let's have a look where we're up to. So my feeling is when I'm looking at this with these bits, I can, I can do little different things with and just adding paint here and there. Which is why I can make it really quite thick and it quite impasto. So i'm, I'm going with what I've already got that embellishing it if you like, just adding some other colors, It's got another brush. I like, I like the yellow that's going on. Some of the yellow and white. And you can see how it can start to come alive. And this is what I want you to be thinking of. When your are going back into your painting, you know, you might paint all over it and that's absolutely fine. But you might just actually take some areas that you like and see what else. Now this one might turn out differently to the one that I failed to properly. But if in case it doesn't matter, I'll have two similar paintings which I'll be very happy with it. I'm just kind of playing around seeing what might happen. I might also use my scraper again and scrape into some of this. I might add a bit of color on the scraper so I can add the tolerance as well. If I want to. I mean, any option is elephant to me. I'm going with what I feel and how the painting is talking to me, what I'm getting from it, what it's saying. Well, I could do this and I could do that. And this might be interesting. Pink down in here. So you understand what I'm saying? I'm not going to do all of this because, you know, you've got your own and I've shown you the possibilities. But you can enjoy just exploring the possibilities in your, in your painting. It might be that you just say, oh, you know what? I'm just going to paint over this. I don't like it at all. But then in doing that, you might then get scraper and scrape it. And then some interesting things that are going on underneath. Because you've got a layer. And that's also makes it very interesting. The other thing that you might also consider, which I have done a little bit on there. I did it in some white, I wanted us to do it on the dry paint. You might actually also draw some shapes into it. That might be something that you feel could happen in your picture. And then if you don't like that, you can just take your view paint again maybe and just paint over it. But you're going to constantly build, building up the layers, which gives the painting a lot of depth. And you know, rather than just have one layer and it looks quite flat. You, in doing this, you're building up the layers. So then if you do scrape into it, you've got something else going on underneath. So for example, with Hitler here, if I was to put a bit of red on here, I could scrape into that and get the yellow back, but leave a bit of the red behind. So, so many possibilities that you can really explore and experiment with. And it's exciting, guys. I love doing this, you know, and it gives us confidence. It takes away the fear of playing and exploring the possibilities. It's not having to be x, y and said, it can be what it is. And you'll discover that you can make some fantastic painting so that, that covers that one with the With the scraping that we did. Now, if we go into locking collar, and here's the one that I did. And actually even though this is just some ordinary paper, because now I've got so many layers of paint on it. I can really fairly on painting so I could cover all of this over and do something else. In fact, when I'm looking at this now, I've got some of this pink on my brush. I feel like going back over there with some of that pink and I might add a little bit of orange on that to be here. So I can now, because I've got so much paint on here, I've got layers. I can carry on doing it. And that's also exciting. So when you actually come to do your blocking in this one and I, I've used the frame, but I'm not going to do that now. And, you know, we can just see what happens if we start to go over the painting that we've done and we can continually add layers to it until we get it how we really want it. And add a bit of orange and a bit of white I can make sat onto the paper and build a tough, I can blend it. So I really would love you to experiment with your blocking in and see what happens. And go with the flow. Just stay in the zone. Go with the flow. And you will really surprise yourself with what you can achieve. Now, let me just show you some other examples of again, looking at new original. This was the original scraping in one that I did. Hello, I enjoy doing that. Then I actually photocopy of that. And I've painted a little bit on top of this one again to show you that as soon as I put the frame rounded, I can set different ideas, different things that I can, I can use. An anomic only becomes really kind of exciting and interesting. If I've got a smaller one here. So I can look at this. I can look at the SRR like that. And to me it looks like two people talking with a child here in the middle. And I've got a lovely little picture there. And then maybe another one down here. So you can have a look to see areas that work as paintings. So I have looked forward to seeing your projects if you put them in the class and we can have a look at them and see how you get on with that. And then the next lesson, I'm going to talk a little bit about composition and about color, and about color balance. And we'll go from there. So I hope you've enjoyed seeing what the possibilities are with what you have already achieved with your play paintings. And we will carry on play painting, but with a few more techniques in the next class.
13. Colours and Colour Wheel: So before we move on, I just want to talk to you a little bit about color. Now It's a huge, big subject. There's many books and Leptis that you can listen to on color theory. And I'm recommending a couple of books which I'll put in the resources if you want to go into this subject more. But our desk give you a brief summary. So it gives you an idea how you can put to your paintings together with your color palette. So obviously our primary colors are red, yellow, and blue are secondary colors, which are orange, purple, and green, which are opposites to the primary. And then we have the intermediate colors which are in-between those two. So you will be mixing, for example, your red and your yellow together to get orange. And if you mixed your orange with more yellow, you're going to get a lighter hue in between. If you mix your orange with more red, you're going to get a darker hue and sell it goes around the circle, as you will see on your color wheel. So it's very kind of interesting when we start looking at this because it's also to do with our composition, how we're using colors, and how we're putting our palette together. So it's important before you actually start a painting to think about your color palette. Are you going to be moving between warm colors? Are you going to be moving between cool colors are black in here. Because obviously, black mixed with any of them are going to make them darker. I'll come to that in a minute. Now the rule of thumb, you don't have to stay with this, but it gives you a guideline. And what I've done here, and again, I've put this in resource, in the resources is to give you a little bit like a diamond shape. You can put in the middle of your color wheel. So the top one, say for example, would be our dominating color. So say that's yellow, are opposite to the yellow is this deep violet, purple, right? Our intermediary colors of this blue and this red. So if we were to say that are dominating color is mainly yellow. Now that could be a few different yellows together, not just maybe one color, but different tones of that yellow. Focal point. Then is, I'm going to show you with the composition where we put our focal point to take ourselves around a painting and our intermediate colors give it sparkle. And the rule of thumb is 80% is your, is your main color, dominating color. 10% is your focal cover, and 5% for your intermediate colors. So when you're putting your palette together, if you want to go with, let's go with red, yellow, and blue. Those are our summary colors, nice feeling colors. So how we enhance that? Do we make it more? We could turn this around and say, our dominant color is the dog Quan and Vocalpoint is yellow, that's going to change it. We could move all the way around and say, well, the blue here is our dominant color and are orange and purply violet colors are our secondary colors, and red is our focal point. So it gives us a way of putting our paintings together in a very subtle way. Now, let me just talk to you about these colors here. Excuse me. These colors are our primary colors and secondary colors mixed together with white. And we get all these very subtle shades. And they're great for background because you're using the same color as your palate. So if you choose to use red, yellow, and blue, and you want some subtle colors behind it. And you can mix, you can mix them together with the white, and you will get a nice subtle color behind it. So my suggestion is to experiment what happens when you mix complementary colors with white? If you just mix them together, they'll be kind of a gray surgery. Gray, which we call him painting a muddy color. But if you add the white to it, you're going to get some very interesting, nice, subtle colors that have the color that you're using in the main part of the painting. But we'll, we'll help to enhance your main colors. So all the inflammation is in the resources. And I suggest you just have a play with the different kind of palettes that you can use for your painting. So that gives you a brief overview of our colors.
14. Emotions in Painting: So now we're beginning to get an understanding of color using our color wheel. Now we're going to take it again, another step forward and explore our own likes and dislikes of color and our emotions and color. So I'm going to go through with you now a process which is fascinating. Actually, I love doing these myself because it always reveal something very interesting to me. So I'm going to show you how you can really kind of focus your energy, discovering your color preferences and what you're leaning towards. And I think you'll find this really helpful. And actually from it, you might get some really pretty or impactful pictures. So let's have a look. So I've divided the paper up into sections again, like we did with the drawing. And I've given you a different subjects here that you can explore. The first one is the PET, the colors that you like. The second one, colors you dislike, and then onto summer colors. Talk underneath autumn, fall colors, and winter, and then spring. So here are the colors that I like. Obviously yours will be different. And these are the colors I really don't like. And so you'll have yours obviously, these are my summer colors, sorry, brightens sunny. And these are my four colors or autumn colors, lots of yellows and golds and reds. And this is much colder winter, my winter colors and then onto spring colors. So when we have a look at all of these, they're all very different. They're interesting and you will obviously come up with your own colors for each subject. And it makes it fascinating. Now we're going to actually move on to looking at our emotions with color, which is very interesting again. So again, in for six of them are the top ones are love, joy, and tranquility. And the bottom one. So jealousy, sadness, and anger are very different from the last ones. And you'll use the colors that you feel are relevant to those emotions for you and you can choose your own. This is my one on love. And it's just my one on joy. It's very happy, nice colors I like. This one is tranquility for me. And the next one is jealousy her off very red and strong and energetic. Or don't like this one. This one is sadness, very dark and deep colors. And then this one surprise me as anger, very powerful again. So there we have 12 different interesting paintings that you can see, the colors that naturally come to you. And you'll find it, I'm sure, extremely helpful and interesting. And you will amaze yourself, I think.
15. Let's Start Painting on Your Canvas: So now we're ready to paint. And to start this off, I'd like you to just get in the right space in your mind. Take a nice deep breath, relax, you're going to be created. And I'm going to start this with my China marker. And then I'm going to go on to some pain tough already done a few scribbles on here to get me in the mode. But you know, everything that we are going to do initially, obviously we'll pain Toba will leave a few things, but mainly we'll be painting over it. So just relax and enjoy moving around. Point your own. You could use charcoal or you could use a pencil, whatever you feel, you know, using the shapes and enjoying it. Really very much as simple as fat then. Now I'm kind of, you know, got the juices flowing. I'm not going to do a little bit with the with my black paint because then we can stop feeling we're really into it. Now again, just relax to see what happens. You know, it might do anything that comes into our mind. Just finance or you can see I'm using my whole arm. I'm not getting it tight. I'm just going to enjoy the process. Let's see what happens. And some of this we might use, some of it we wrote. So we will see what, what occurs with it's building up the layers and enjoying the process. I might even just get my water spray. Just see where that takes us then to use around the page bit. Again, just relax and enjoy. Find your shapes. I'm really, it's a simple post that when we first started, just want you to like go and see what happened is I am enjoy it. Because and come back to this. Once this is dry, we can start painting on top of it. Yeah, there might be some, as we saw in the drawing, some of the shapes that we really like, which we might just outline just because we want to. And there we go. That's our beginning. Lovely place. So I'm going to let that dry and then we're going to come back to it and stop putting some color on.
16. Painting Process: Okay, so now this is dry. I'm going to just start painting into it. Now. I'm not going to talk yet about composition or contrast. Not yet. Because what I want you to do is just to get into the feel of relaxing and painting and not worrying. You know, we're still in play mode. As we start refining, we're going to talk then about your contrast and about your composition. But until that time I don't want to cloud your mind. That moves you into the left side of the brains that are the right. So we're just going to use the colors that you like that you feel that you want to express. These might be covered over as we go. But don't worry about that. The whole process we're layering and we're going to just see what actually unfolds. So relax, let go, use the colors that you want and have fun. That is simply said, let's get started. So I'm just using a fairly big, medium-size flat brush. And just kinda going with the, you know, that these nice warm colors of the oranges and yellows and reds, and just being free with adding the color. And this is the point, the point that I want to really try and relate to you is just the fact that you can literally let go and just enjoy putting the color on no particular order, just adding the colors that you like, feeling your way through it. I'm sort of doing different brushstrokes, scrubbing in painting, using my water spray desk to help the paint flow. But the challenge that a lot of people tend to have is to think that something, you've got to produce something straight away. And this just isn't the case. This is a process and you're just laying down some foundations, like building a house. You have to put the foundations down first before you can start building. And this is very much the case with what, what we're doing here and what you do with your painting. Don't have any judgement about it. Yes, It's not the prettiest thing on the face of the earth at the moment. But wait and see, because what will unfold will be really quite magical and you will surprise yourself. But you need to go through this process, laying the foundations and enjoying it. That's the point to get rid of any fear of what it is or what it isn't, or if it looks nice or if it doesn't. At this stage, none of that matters. What matters is just to enjoy the process of applying the paint, enjoying the experience of, of painting, and the colors that you're using. You know, you discover things when you add all those different colors, what's going on? And it's fun. And you'll have you'll have a good time doing it, but don't have the judgment. That's the main point. Okay. I've now got the first layer on. You can see I'm just playing very warm colors. What routes I want underneath? And some of that will come through as we as we go. So I'm going to let that dry and I'm going to have a look at some different ways. And one of the ways that you can do also is okay, we've painted it that way. But sometimes, you know, it's interesting at all stages. As you can see that you can turn it up different ways and have a look at it. See what jumps out at you. Okay? And how you feel about it looks very different that way round. Then it did the way we paint with it. So as you're letting your dry, just play and see how you feel about where it's going, Mr. Scott, lots of energy units at the moment, sorry, dynamic with those colors. And we can change it around. Have another look, what's happening. And then you decide on how it's resonating with you. That's, that's the main thing, is how you are feeling with it. So I'm going to let this dry and come back and we'll carry on.
17. 16 Painting the Layers: So now I'm just going to carry on in the same feel of just exploring what's going to happen with the painting. And I don't want you to kind of start thinking about it too much, just allowing it to actually find itself. That's how I feel about it. What is it saying? And obviously your picture is going to be different from mine. But the idea is, you know, sometimes when you look at it at this stage and it looks bit of a mass and you wonder what's going on. You just have to kind of stay with the flow. It could completely change. And that's absolutely fine. And if I look at some of my work and then you can see drastically how it can change. It can go from one thing right through to another. And that's the exciting thing about it. So just kinda carry on and let it take you rather than you kind of interfere with it. It'll come as you go, you have to kinda get over that factor of what is it. We don't really know what it is until it's actually there. And we'll find out what is there by going through the process. So I'm just going to go through the process. And the same with yours. And you will find that it then gets to a stage where you feel as if something is really coming together. So allow it to happen. Keep breathing, relax, keeping the right side of the brain. So you are not interfering with it, but allowing it to happen. But really you want feel about is the colors that you want to use. Now I'm going to start with some other colors and see what happens. And then I will find, it will tell me. So let's go forward from here. So I'm just applying now some white paint and just feeling my way. It's such an incredible process. You get so involved in it. It I've mentioned before the painting kind of speaks to you. If you allow it. It's, you know, you can't really verbalize it as exactly what goes on because you're, you're working in your creative center. You know, we've talked a lot about being in the right side of the brain. And that's what, what's happening is. You're just seeing what might happen. And it's very childlike really, you know, when children are painting, they, they just do it. They don't think about it. And you know, as we grow older, we tend not to be in that space very often. We can just be intuitive and allow ourselves to be. And this is what's so wonderful. Really about abstract painting is that you just get totally absorbed with it and allow it to just take you over. And that's why it's so exciting and interesting and gives you so much pleasure. And I don't know, I guess I find it really incredibly therapeutic because I'm I'm just my mind is is in a completely different space than it would normally be released. Probably quite a good thing I would think, or a lot of people would say. So you can see here, I'm just feeling my way to the colors. I'm mixing a lot of the colors with the whites and seeing where they might go, using some of the shapes at the moment as a guideline. But that doesn't mean to say that they will be there at the end. And you can see that for yourself on your own painting. Obviously, this one is not one that you would be copying because you're doing your own thing. And that's the whole point really off this whole course is to help you the confidence to let go. Be creative and discover something about yourself in your painting. And, you know, we've talked a lot about discovering your own style. And this is the way to do it, is to see what you actually come up with without thinking it through. And this really kinda puts you in your own unique, wonderful space. You know, what you have to offer. It's irrelevant. What anybody else is doing. It's similar to someone else. That's absolutely fine. But you are discovering something about yourself. And as you progress and you do more of these, you get more and more confident about doing more and pushing the boundaries. What might happen if, and that's very much this process. What might happen if I allow myself to do this or I allow myself to do that. And you know, it doesn't matter because if it works, it's great. If it doesn't, then you just go back over it. Do something else. You don't get attached to a certain thing. You, you, you know, you can always paint over the whole thing, which I've done on many, many occasions there. So I don't like any of this going on or the mood that I did it in at the time wasn't the mood I came back to with it, so I changed it all. And you will see as we go through this process and you're watching me go through this process, how that actually manifests itself and what occurs. So it's brilliant really when you think about it like that. So now I am defining some of the shapes and going with some of the original drawing that was underneath. These might not necessarily stay later. But I'm just staying with how I'm feeling at the moment during the painting. Starting to add some nice complimentary colors into give it another dimension. And you know, when you're doing your painting, you can then go back to your color. We'll have a look at what your complimentary colors are. And then you can do them in different tones. You can see here that the smaller one is a little bit brighter than the other one. And then again the same with the yellows. Some can be a little bit lighter with white. Sum can be a little bit darker. You can mix a little bit of orange with it. So you have a variety of the same color as we talked about when we were doing our little things on the color wheel. You can vary your, your yellows, your oranges, all of them. By adding other little color, sometimes you make mistakes and then you rub it out and go over. It. Has to feel right. That's the most important thing. When you're in that zone, you can feel if it's going in the right direction. If you feel that it's not, then does take a break. You know, that's important because you don't want to force the issue. You want to keep in that creative space. So allowing the painting to flow and to come together. And you want to feel good about it. That's, that's really why we're here, is to feel good about our painting and to feel excited about it. And, you know, sometimes it doesn't come together immediately. Take some time just to look at it. Take some time. This feeling about where it wants to go if you're not happy with it painted out. And this is what I do. I take my time. I know I'm doing this all in one for the course, but in actual fact, this has taken me, I don't know, over three days. So I come back to it, have a look at it, feel how it, how it's going, what needs to be added. And you do the same with your painting. You know, you're not forcing the issue, you just allowing it to, to unfold and you're discovering it, really, if you like, seeing what, what next might happen. And I'm sure this isn't going to stay like this. I can feel that as I'm working, I can feel that there's, you know, there's more to come which is exciting and interesting. And you will discover something new every time. So the same will apply to what you're doing with your painting.
18. Painting Courage: So now we're at the halfway stage. And we've got an interesting painting here, but it's not really where I want to go to yet. So I'm going to dive in and have courage and go for it. And this is what creativity is all about. It's kind of, you know, jumping in there, taking a risk and feeling where the next stage is going to go. So I think you're going to be surprised at what's going to happen now with this, with this painting and what's going to unfold. And, you know, you might say why on earth are my painting over it? Well, I don't feel that. I feel that when you get to a stage with a painting like this one and hopefully like yours. Then, as I said earlier on, we need to push the boundaries, take a risk, and discover more about what might happen. Now, one of the tricks that you can use for doing this is taking a photograph of the picture and I've been talking about taking pictures of it quite a lot. But if you take a photograph and then maybe make two or three copies and play with those copies of what might happen. If. So, you're not going straight in to painting over your whole picture. Straight away. You can have a play with your copies and see different aspects of it that you might change. So you've got some different alternatives. And I think this is a really interesting way to help you have the courage, if you like, to push the boundaries and play with the copies and see what might happen if you do certain things over it. And then when you come back to actually doing the painting, you've got a whole different approach to it, a different perspective. And it ceases to become scary. You know, what's that wonderful saying? Feel the fear and do it anyway. Uh, you know, the original picture was an interesting picture. I had some, you know, telling me various things it looked like to me, like somebody facing one way and two other people facing the other. It's sort of like a conversation or the end of a conversation. But I wanted more from it than that. I wanted to consolidate it rarely. And actually, when you do that little trick, it helps you to really build your confidence and see different things. Painting. So that's a suggestion that will, I think, really help you jump to the next stage and see what might happen. Now. Sometimes if you have a look at the masters, I'm thinking of Van Golf here. Particularly. How many times did he paint his beautiful sunflowers? He did them, I don't know, I can't remember, but many different times. He he painted the same picture and did different things with it. And in a way, this is what we're doing with this. If you've got your photocopies, you do it on, on good paper, then it's very easy to paint over them and develop the painting in that way without actually going into the actual painting itself until you feel ready. So you now have a try with that, because I think you'll, you'll find that it becomes much easier and what's more fun, because you can see all different things that you could do with one thing today. So you can see here now the time really going to town with the colors and seeing where the colors might go. Looking at balancing the colors up and still using some of the drawing or painting underneath as a guideline. But embellishing it and doing more, taking it to the next level. And the more you practice this, the more confidently you will become, and the more you'll be able to really start developing your own style. This is my style, and I'm not expecting you to copy what I'm doing because you have your style. And doing these little exercises. We'll help you find your color balance. Find how you want to interpret it. Find your own level of how you feel you want to paint. And this is the whole exciting part of abstract painting. We're allowed to do anything, but we really are. And, you know, when you have a look at many of the exhibitions, if you go on YouTube and see some of the different exhibition tours of the different galleries to murmur or the Tate Gallery in London or wherever. If you go and have a look at some of the paintings, sometimes really horrified me because I think how can someone have done map? But, you know, that's me. But for mental and I don't want to be that. But what it does do is give you the feeling that anything that you do is validated because it comes from you. And when you look at some of the great modern art, modern artists and the work that they do. Anything goes and you don't have to judge it. Just explore it and see your tears and adventure and take a risk. See what happens. And it's fascinating what, what really does develop. I'm, I mean, I'm always astounded sometimes with what happened, with what occurs. Where did that come from? Obviously something inside me that I didn't know. And the same thing will happen with you. It'll be something that you can discover about yourself through your painting, through your language of art that gives you a whole new wonderful perspective of yourself, of your life, of your creativity. And really, this is what this course is all about, is to help you really discover something fantastic and magical about yourself. And being able to express yourself in your painting. And what could be better than that? He lived for me. It's just marvelous that I can have painting as an expression of how I feel and what's going on in me and in my life. And here we are. Here's, here's a painting that's quite exciting to me. I'm really enjoying doing it. So I hope you're enjoying doing yours and follow it through.
19. Finishing the Painting: Sudo, mating, making progress with this painting. One of the interesting things to do is to leave it for a while and then come back and have a look again. So you can have a different perspective on it. And I like to do that. I leave it over night maybe as it is, and then come back and have a look. The other thing that is also interesting to do is to take photograph of it. And then what I do with the photograph which I was talking to you about before when we're going to talk about composition and contrast. So we know from our drawings that we, we have to find that balance of contrast values. And if you take photographs of the picture and then put it into black and white, you'll get a feel of the turn value. So you'll see the very dark areas. You'll see the midtone areas, and you'll see the lighter areas. So I've done that with this. And there are few things that are jumping out at me that I'm not happy with. And I'll come to that. But first of all, let's have a look at the composition. So if we think about composition as our eye, naturally going around the painting, if everything is all in one space, then it just goes to that space. So in composition, you need to have quiet spaces and then interesting places, spaces. So for example, with this painting, I could look at it in two ways. The one of the things that you might have heard of is dividing the painting up into thirds. The rule of the, well, that's fine, but it's very simplified. The other way of looking at it is what is what's called dynamic symmetry. And that's about following the rules of logic. Can geometry to where the eyes go when they're looking at a picture now normally they start down in the left-hand side of the painting and work themselves up and then round. So we want to have interest that takes us around the painting. So there are lines maybe that pushes, pushes BI and also the color. So we were talking about earlier about finding our complementary color of focal point. So if we're having a look at this picture at the moment because I feel that this thing was that need to change. Those don't feel it's quite right yet. But you've got focal points of these strong rates here. And some lines that are taking as round the painting. There's interesting spaces where our eyes construct, but those families. Busy areas where it's intriguing. So that's why I like about this picture. But I feel that it's very divided into several. What I feel I'm going to do is to bring this blue over to here, which would help the picture move around. Now, when we're looking at tone values, if you see all the different tones of blue that are going on. And then the dark blues, the lighter blue. So there's lots of tones of blue, which is interesting. And then you've got these neutral areas and we've talked about neutral for me, we're doing our exercises. So there's an interesting combination of both the strong color, the strong colors that pop out, and then the neutral colors that come down. So when you're looking at your painting, if you think about the geometry of it, where is your eye going? See if you can just have a look and get a feel, and then put areas in the painting on various spots to take Q round. Okay, Then the last thing I want to talk about is contrast. So where have we got contrast? To me? I've got two, really probably improve the contrast here. Contrast between light and dark. So where we've got light, we've got dark was an interesting contrast here again. So throughout the painting there are interesting contrasts. And then this calm areas where it's all the same value. So as an abstract painting, this is quite in your face as far as the color is concerned, but it's an interesting, it's an interesting piece. And if you think where it came from and what it's transformed into, then, you know, it's fascinating processes before. So have a look at your painting and see where your color values are, where your contrast are, and where your focal points are. And you don't want the focal point dead center necessarily mean you want to have interests. It takes you around the painting. For me, this one is sticking out too much. I want to soften that down. And I'm going to bring this blue across and see what happens when I do that. So I shouldn't have playing with that now. And I can always paint it out. Which obviously what we've talked about before is if we don't like something, we can we can take it out. So let's just see what happens if I bring this across. It might be interesting to see. I think just looking at it there, it's bringing the painting together and little bit more than it was. And I'm going to kind of blend it into the turquoise teal color and just see how that works. To me, that works a bit better. So it's kind of bringing that around to here. That's not what absolutes space one to the other. So I quite like that idea. And when you're doing your painting, just had a look at where your eyes stopping. Where are you focusing on and is pleasing? Is it stopping you or is it taking you carrying on the journey of the painting? So have a look at your contrast. Take a photograph of it in black and white and just have a look and C way your dark colors are where your light colors are and where your midtones are. Excuse me. And then have a look at your focal point. Where your focal point, where is it popping out? And then your colors. You know, we've talked about this a lot before. And what your, you know, your dominating color is one obviously this one is blue, but I've got a lot of the other little colored started, but mainly it's coming through with the blue, which I'm, I'm pleased about and I think it's an interesting painting. So I'm going to computate on it's a little bit more. And then maybe just do a little bit more on it before we close. And you do the same, see how you feel and then come back to it after a little time. Even turn it upside down like we did before. Have a look at the composition there, whereas you're going, what are you seeing? But obviously this painting, it's got quite a lot of energy. We know that there's a lot going on. I did. So I find it really interesting myself as a, as a piece of art. So I'll see you very shortly once we've had a look again at your painting, come back and then we'll finish.
20. Critique and Finished Painting: So here we are. The final painting finished, and I'll just go through it with you a little more just to show you a few different hints about when you're looking at your painting to see how the contrasts are, how the colors are, how your composition is. And this painting seems to have come together quite well with all that. And I've just had a few finishing touches from when when I left you before. I've just outlined a few little areas. But if you have a look at it overall, you can see in the corners here how much darker they are. And when you do that with your painting, it brings it together. It holds the painting together. It frames it if he likes, it, pushes you in to have your journey around it. And if you have a look at the color balance, if you see the dark color here, the dark color here, and the dark up here, how that balances itself up. And then you've got your obvious focal points which are taking you through the painting. And it's interesting how that works. So when you're looking at your painting, See if you can see how you're moving around it. And again, how would suggest they can photograph or hurt because you see it in a different perspective if you like. And you know, now, now we've finished his eyes. We've gone through so many different things from the drawing through to doing our little emotion. Pictures are colors that we like. You know, those are all wonderful warm up super exercises to do to get you in the zone, to move into the creative side of your, your mind, to let yourself flow into it and allow yourself to express yourself in your painting and find your style because that's where it is. When you experiment with this kind of thing, it always is a surprise what happens? So, I hope you've enjoyed doing the class. I've really had a good time myself doing it. And I hope to be joining you again with some more classes, but thank you so much and I really, really look forward to seeing your paintings that you've done in the projects. And I'd really love to see them. So don't forget, put them in there. And I hope to see you again soon. Happy painting, Bye for now.
 Joy Fahey, Joy of Art