Transcripts
1. Introduction: Hi and welcome to my world. My name is Chris Yellen hammer. I'm a decorative artist,
living in London. As a decorative artist, what I do is I'm painting
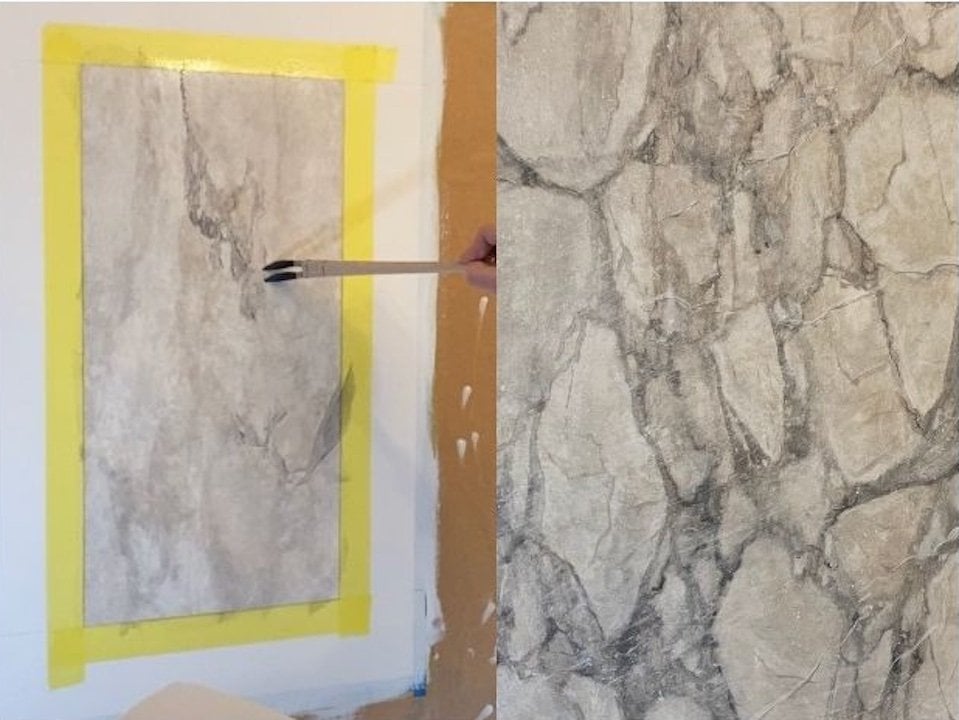
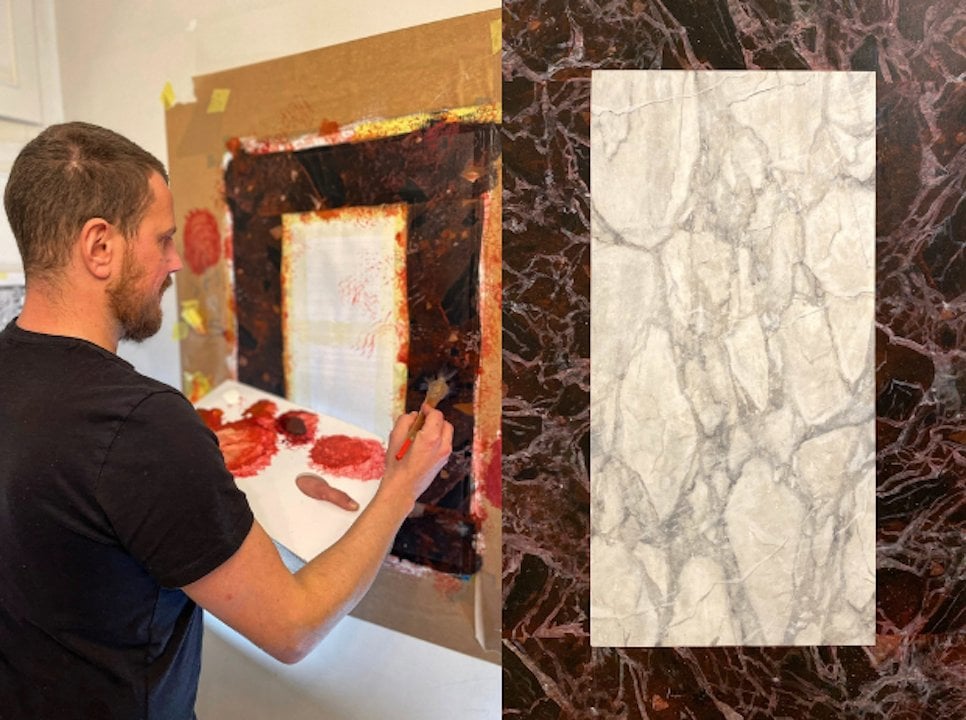
stuff look like a material. It might be an M there, skirting or obese board that needs to match
the marble floor. So I painted in a marble technique to make
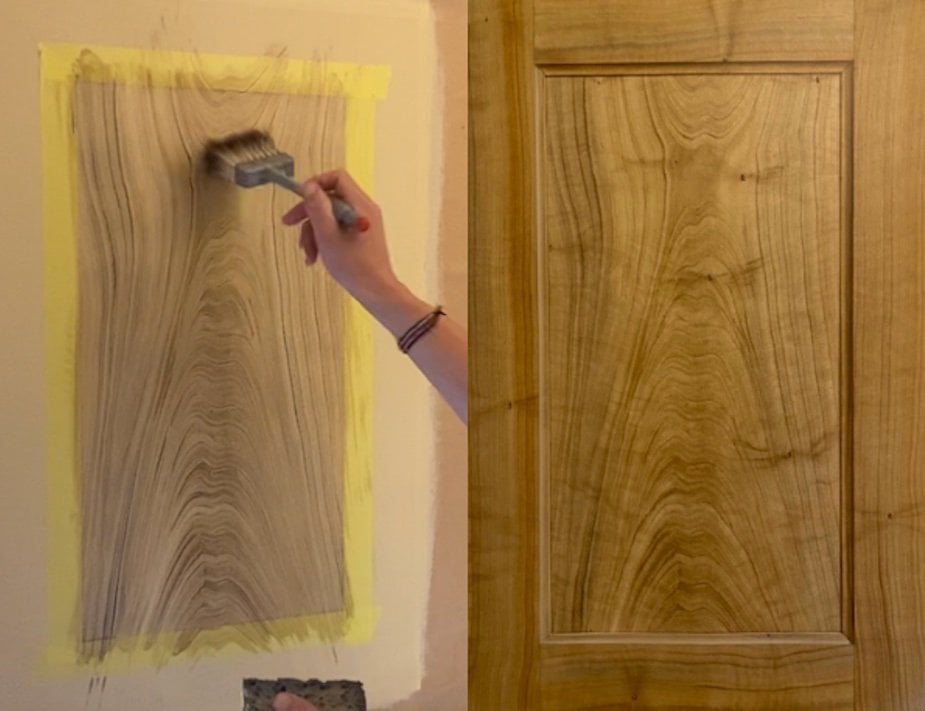
it look like the real stone. Nothing. I can do the other
way around as well so I can wood grain something to
look like it's proper wood, even though it might just
be a cheaper material. Like like I said, the MBA for the knee or
something like that. So what I'm gonna do now
is I'm going to teach you guys how to adapt some
of my techniques into, into your own way of starting
to fall bits and pieces. Maybe you want to paint something
or for a family member, or you wanna do
something in your house. Or you might even
thinking about taking up this trade and
go out and start making money of painting people's doors leading into the house or the
garage doors are huge. I mean, the possibilities
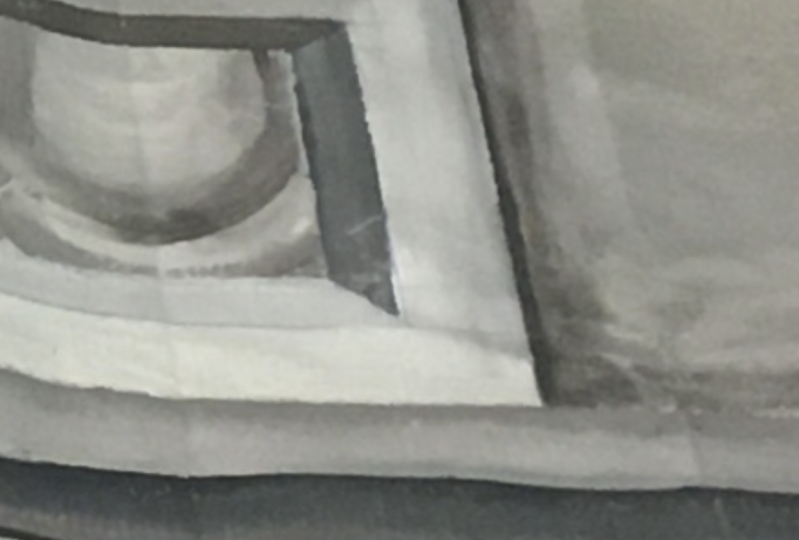
are endless. In this class. Now,
we're going to focus on, on Trump Floyd, like
the trunk blow molding, like you can see on this
panel here that I've done. So all of this, this is completely flat. So we are going to
paint this molding here just to give our panel
a little bit of debt. It's brilliant technique
that works very nice for, for wanes coding and the paneling in the room where the walls are
completely flush. If you want to add that little extra to your room
to create like a dado. And then you can just come
down with little bit of paneling and you can even
do a big walls as well or, or a flat door. You might just turn flat door into something that
looked like a panel door. We're going to start
off with one of them or more simply, styles of employee. And then later on, we are going to create some more intricate
moldings as well. So stay tuned. Thank you so much
for joining me. And let's get going. Yeah. Shall we?
2. Introduction to Trompe l'œil: So we're getting into the exciting part where we are going to start to create
the Trungpa remolding. Trump Floyd. French means
to deceive the eye, to fool the eye. So what that means
is that where we're painting an optical
illusion in a, in a three-dimensional way on a, on a two-dimensional panel. In this in this case, this technique can be
adapted to onsite work, can wherever you want to
create the feeling of the architectural elements that isn't there can always be
painted in to look like it. Important thing to think
about when painting the trunk ploy is that
there is no default. There's no default that the light is going to
come from the top-left. Can come from top-right. When you're in a room, you need to think about the when when will
this room be used? Is it daytime? Nighttime? Does the
room have big windows? Smaller windows? Does it have a big
chandelier in the center? Does it have applied
from the floor? So your light source can be pretty much
anywhere in the room. Think of all these components, because it's quite important
to make sure that you follow your light source to make
your Illusion look realistic. And also when talking
about colors of the trunk, It's quite important
to think about if it's a warm light or a cool light coming
into the room as well. So sometime the sun is
very yellowish in color. And sometimes you can have a halogen light which is
quite blue and quite strong. So think about that as
well when doing this. So one room, but
I tend to follow, is that if my shadow
feels cold than my light will be warm and
the other way around round. So if my shadow
is a warm shadow, my light tends to
be a bit cooler. Quite easy rule to remember. There's a couple of
sketches that I've done to make this a little
bit easier for you to understand what we
are supposed to do. And they will be here on
my on my right-hand side, your left hand side. And they will use to explain
where to put the shadow, the drop shadow,
the cast shadow. Drop shadow, cast shadow. Same thing. Where to put your, your highlights, the
fade, and so on. All of this I'm
going to go through, I'm going to paint it on this
panel that is drying out. And this takes a
bit of practice. We're going to freehand
it with a mall stick. Or you can use a ruler or whatever you've
got in hand sometimes just a straight kind of like a yardstick or
something like that. It's helpful. You can
of course take this. I find it a bit more natural
with a hand painted line, then you're using
tape all the time. So this is definitely something you can practice and you're all going to
have a great time with it. Maybe paint a couple of
lines on the side of your panel just to get
the feeling into it. But all of this is
going to fall in place. I'm going to explain it for
you and let's crack going. So I'm just going
to move my camera over to the other side
because I'm right-handed. I just want to make sure that you guys get the
most out of this. And I definitely want you to see what's going
on because this is an important step and
don't want to miss out. Okay, So tools for this, we're going to start by just
using a striping brush. I've got a couple of
different ones here, which are slightly
slanted, as you can tell. These two squirrel and this
one is a synthetic one. They hold a lot of
paint and also they will help you to give a slight
fade to what you're doing. If you use it on
the side like that, you'll get a slight fade. And also, I got to doomed
artists brushes here. Which I'm going to use to help my faith along the way as
well to make it a bit softer. This one square L. And this one is a synthetic. So I'm going to try and see which one works
best for this one. Also, if you prefer, you can use a striping
edge or a mall stick. I've extra padded mine
because I wanted it to give me a bit more
distance from the wall, but you can use it
as it is as well. So talking about moles sticks, there is another one as well, which we call a
telescopic mall stick. This is perfect for painting ornaments or
lettering and stuff. And it's like, it
looks like this. This is no good for the kinda trump polar
we're doing now. Because your brush is going
to lean against this. And because it's getting
narrower and narrower, it will skit, it will skip
on each and all of these. So perfect for ornamentation, not good for moldings. I prepared my shading and my highlight colors and a good way of doing it to
get your shading color right in the room is to
put your hand towards the panel and look
at the color that the real shade from
the light is creating. In this case, I'm going
to exaggerate it a little bit just to make
sure that we can see throughout the camera. And we're going to
pretend in this case that the light source comes from
the top right-hand corner. And also I prepare them the
highlight color as well. And for wood, this
is only for word. I prefer to use a color that is as close to the base
coat color as possible. So in this case, we were starting on a really
light yellowish beige color. So I've mixed up my highlight color as close
as possible to that color. I tested it on a panel
and it looks really good. I tend to never use black or pure white for my
shading and highlights. It will never look natural unless you're on a,
on a black marble. You might use your
black for your shading. On a white marble, you
will have to use pure white to get your highlights
right and make it pop. But other than that, I tried to stay away
of black and white. So the shading color
I mixed up is a glaze again with row number and the letter dash
of ultra marine blue, just to cool it down slightly. And for my highlight color, I used the titanium white, raw sienna, a dash or Rwanda
and burnt umber as well. You have to warm it
up just a little bit, give it a bit more body to it. So saying that we're off. Okay, so first of
all, let me say this, that if you're super
happy with your panel, you don't want to
make a mistake or, or you don't feel
confident used to tape. I mean, there's nothing wrong. Like I'm using tape as well, especially when I do
intricate moldings. When you've got a
lot of shadings and a lot of straight lines and you don't want them
to blend together, turn much, then the tape
is perfect for that. So don't be afraid or ashamed
of using tape. I do it. It's a perfect way of doing it. But in this case,
I'm not going to use tape because I want
this as an exercise. And it's quite nice thing
when you get the feeling for the striping and get it right. It takes some practice, but eventually we'll get there. So first of all, I'm
going to tape off my corners on a 45-degree angle. I'm saying I'm not using tape, but I will be seeing
some tape just to make sure I get my corners sharp. And also that will help
me to determine where my highlight and my shading is going to be on the
following slides as well. Because of the we've done the shading and the
highlight on the rails, we will have to let that
dry and then come back and do our styles of the so yeah, let's just Start try it. And also the style of the Trump DOI molding
we're going to do is called k-vector. Don't know what it means, but I will find out for you
and I'll put it on there, on the slide on the side. Maybe.
3. Trompe l'œil Moulding on Rails: I'm going to use the mall
stick because I think for me, that is how I was taught
initially and it's quite sturdy. And also it let me actually
see through what I'm doing a little bit more than
than the striping edge. It to me, it feels like the striping edge is
hiding a lot of my work. So don't get me wrong. I am using it, but I'm not
going to use it today. So let's start by establishing where
the light comes from. So in this case, I've decided that the light will come from the top, right. So I'm just going
to put a couple of arrows, arrows like this. Just for myself to remember. This is one of the, the easier one of them or more easier Trump
point moldings to do. So really, I don't
really need that, but when you're getting into
do more intricate from ploy, It's really good to have those arrows because
it will help you to determine or should it
be shaved, should be light. Helpful. Okay. So we've done that. Now. I'm just going
to load up my brush, makes sure that the, the glaze is quite fluid. It should come off
the brush quite easy. And this is gonna be a
little bit messy, messy now. So I'm just going to use top of the paper to make sure it's almost gonna
be like my palate now. I'm just gonna make sure I got enough material in the brush. Put in my mouth, stick up. I am following my top line now because I know that
that is going to be my darkest part of the shading and
then it's going to fade down into nothing. So let's use, line this up. And I'm going to use this more
like a pencil on Mars now. I'm just going to uploaded
on the side of my tape. Make sure it follows through. And we'll painting. And make sure that goes all the way through
to the next tape. That is now a quite harsh line. So what I'll do,
I'll slightly angled my brush and I'll go
through it again. So what it will look
like right now, It's like that you can see
it a harsh line up there, but you're all getting
material down here as well. So we just going
to continue to go through that. Even that out. A little bit. Like this. It might be a bit
tricky sometimes because it's on the canvas. So it might have a
couple of bubbles. So take your time with this, practices a little bit. Put that brush and down
now and as you can see, it's a bit smaller on that side and a bit
bigger on that side. So what we'll do now
is going to take the dual brush that
we got, which is dry. Important because you don't want to add water to depend on. With this brush. I'm going to start shaping it and fading it by
dragging it back and forth. Established just
drag it through and just pushed darker to the top and just drag
the access down. Little bit like that. To me, it feels a little bit
harsh on this side here. What you can do you
stipulate as well. And by stippling it, you will soften it as well. Depending on how, how dark
you want your shadow. You can go through it
a couple of times. You can leave it as it is at
this point because that will read this when I have a look
and go for it once more. So I'm gonna go through it once more just to make it look
a bit more detailed, little bit more deepened
on that top crisp line. Now for the highlights, it's important to think
a little bit in reverse. So what we've done up
here is that we've established that the dog
part will be the top part. Down here. You lightest. Light is going to be
on the opposite side. So it will still be on the line that is furthest
out from your panel. We're going to do the
exact same thing, but we're just going
to reverse it. And I always pull
through my first one quite light like that. Then I start to build it up. After you establish
that first one. It's a bit easier to to follow
through with your brush. A bit more material. And I hope you can see that, but this is already
starting to blend and fade. Just doing that with this brush going through
it a couple of times. Exactly the same way. But just for the sake of it, I will follow through
with this one. And you just gently,
gently soften it. Clean the brush a little bit. This is a little bit too
harsh on this side here, so I'm just using my
mouse take as a guide. And I'm just gently
stippling it. Yes, give it that light shading. Also, what we're
going to do now in this step is to add a bit
of a harder highlight, not harder but a harsher. So it's just gonna
be a single line. But it's super helpful and
it's really going to help you establish the shape
of this this molding. And this is going to go
on the inner part of the line we create that is the closest to the center panel. So it needs to be on the molding side of the line
and not the panel side. So what I've done on the sketch that I show
you about the highlights. It's in the red. It's
just a really thin line. And that's what we're
going to do now with the striping brush. So this is not
going to be faded. This is just going to
stay as a single line. So if you want to
make sure you've got enough material and just
pull through slowly. Like that. We're gonna do it again. Because I wanted
to be a little bit thicker so that you can see it. That will just show you the sharpest side of your molding where
the light hits it. And it's going to
look super nice. And also this is now when
it's going to show up. If you don't have
your 90 degree angles perfectly lined up. Because you're starting
to do you try employ and it doesn't add up in
one of the corners, all of a sudden your
entire panel will be, I wouldn't say messed up, but it's gonna be tricky to try to fix it to
make it look right. So always work on
your measurements. Like I said in the first part, when we talked about
the measurement and double-check all of that. Coming back to it, we're going to add a little
bit more dark up here. They will be a cast
shadow as well. Where our styles
and Rails will cast a small slight shadow onto the panel that
we got in the center. But to do that, I will have to remove
my tape and reverse it. So yeah, I'm just going to let this dry and we'll continue. Important thing up now. When we're going to
add a little bit of extra shadow to shadow that. Always think about that. There's a one-third rule. So we've established how far
we want to shatter together. Now, when we're going
to make it deeper, you need to keep it almost to a third of what you've
been working before. So in this case, that means that we are going to
stay really close to to the top line because we don't want
this to grow any bigger. So I'm just going
to create a small, small, small darker
line up here. Just shade it. And that will be it really
for the shadow on this. To me, it just feels like we removed a little bit
too much on that side. So I'm just going to come
back in with my lining brush. Add a little bit more
color on that side. And we're going to
do the same thing that we've done up there, down here. Put a highlight. We just want to sharpen
it up just a little bit. And by saying that is that if we add light
to this part here, we have to add light to the
sharp highlight as well. But let's just start by doing it to shaded. One thing to keep in
mind is that if you, if you mix your color, even though if it looks like you got a lot of color in your mix, it might look very
white on your panel. Don't be afraid of add more colors because that's just going to help it
to look more natural. You don't want your, you don't want your light to
live or to read to white. You want that light
to look like it. Like it sits right on your panel on the material
that you're painting. If you light looks too
harsh to blue to white, then it's not, it's not right. And people will see that random make your colors softer than too strong. It's easier to go over
it a couple of times. Then trying to redo it. Okay, So we've
done both for ALT, let that dry, reversed my tape, And we're gonna do this.
4. Trompe l'œil Moulding on Stiles: Also important thing is that now when you
remove your tape, saved the tape because
that's gonna be your guide to doing
your, your, your styles. So I've kept my tape
on the side here. And like we said, we establish the light coming
from the top right, which means that this
part will take light. And this part here, we'll take the shadow. So I'm just going to
align my tapes up with where I put my
highlights earlier and do the same thing
with the shadow, the shadow tape here. So I have a tendency to always start with my, with my shadow. And yes, so that I can gauge the color on
my light as well. Also thinking about the light, it kinda depends on the varnish
or lackey You're going to put on top of this panel
when it's finished as well. So if you go in
with a high gloss, your highlight will
probably be a bit whiter than it would be if
it's on a matte surface. So keep that in mind as well. After you varnished your panel. If it feels like could've
done with a bit more light, you can always come back in with some more light and just
relaunched the section or, or mix up the paint in
the varnish and just do a quick stripe when you are a
bit more competent with it. This time. The shadow is going to take on the outer line that we created. So what I'm doing, I'm just setting up my mouth, stick like that again. And now I'm just
going to start by establishing where that line is. So what I do is I can almost make what I
call an air airplane. So I use lifted up, let it fed it down. And then I'll do the same thing. When I start again. Just put my mouth stick earlier. This good clean. What I'm doing now I keep
I'm holding my brush by the far end that I can get a bit further
away from my panel. So if you go over your line, you can always come back
in with a damp cloth. I have a tendency to put
it in my mouth, mouth. I'm not gonna do that now. But you can use, again
to shape up your line. If you need to. You can use
this as a guide as well. Put that and you can just
follow it through with your thumbnail and just sharpen that line and put the highlight. We're doing the same thing
as we've done before. Putting the highlights on the furthest line,
weight from the panel. Just to make sure
it matches up with your with your right rail. Highlight. Smooth as possible
in this first step. Then again, with this,
this is going to come in. You can see I'm keep cleaning my brush because I want
a smooth transition. We got that sharp
highlight today as well. Put my mouse click
on that side now In Part of that line. And then very important
part is to push, positioning yourself,
right as well. Steady legs. Try not to bend your knees. Tried to tried to
lock yourself in position because you
want your lines to be sharp and crisp as possible. Perfect. So again, dry this, go over it once more. And then we're
getting ready to do the cast shadow,
Vanessa corners. And have a general look over on the panel and make sure we're happy
with everything. Translucency is key. Keep that in mind
because you don't want to paint over what you've done with it
with a lovely week. Grainy. Don't want all
your Ukraine to disappear. You still want it to shine
through your employer. So keep that in mind. Always make sure you go through
your tape lines as well. So now he is quickly removed the tape to make sure we're
happy with what's going on. And you don't need
these files anymore. So the next day, if you
wanted to get rid of them, you can save them for a little bit
just in case if I want to change something. Again, quickly clean up like that. Stepping back, have a look, make sure we're happy
with everything. If not, this is a time to
touch up smaller sections. Like down here on that corner. I'm not perfectly happy with
where where my highlights neat little bit of
something down their lands on this side as well. Make it a little bit stronger. And now you should
definitely be able to feel that your panel
is getting there. Getting something extra
doesn't just look like a plane canvas anymore. It actually gets life to it. So again, I'm just quickly
going to let this dry. I'm going to hairdryer it again. And then we're going to
create a little bit of a cast shadow onto
that center panel. And after that, it should
be where they belong.
5. Finilising the Trompe l'œil Moulding: Now pretty much all
we've got left with a true employ is to
add the cast shadow. So by doing that, it means that we
will have to take off a line here and
a line here because the shadow will go
all the way down to the highlight of that
molding on both sides. So good and create
that line here and that fine hair at
the same time now. So I'm just going to put a
small piece of tape there. Know where i'm I'm stopping. I'll do the same thing
on this side here. Just to make sure I don't go through the neutron
point we just created and wakes it up again because it might not be fully cured since I just put a
quick hairdryer on it. And the same down here. I can feel it's not
completely cured because the tape doesn't
really want to stick. No big shakes. So we're not really going
to fade this line. It's going to be a quite, it's not going to be harsh line, but it's going to
be distinctive. And also this is now when you need to decide how wide
you want it to be. How much do you want this molding to be
raised from your panel? So I'm going to keep it to just a couple of male is to give me a little
bit of depth. But I'm not going to be I'm not going to do a
cast shadow that is often in shore or
1.2 cm or whatever. I'm just gonna I'm gonna keep it really tight and nice for us. So I'm going to use
a bit of a smaller, it's still a slanted brush. Just to make sure I can get a
really nice and sharp line. So I'm using the same color that we used earlier or the same same glaze
for the front. I'm just going to test
this and make sure that we're happy with a width. If you're finding
it hard to decide, you can always test it
on your, on your panel. As long as everything
is dry around it. Predict creative arch. Most of the work is happening back almost
where the cameras. So I'm just going to
step back, have a look. That looks quite good. I like that. I might just want
to make it a little bit bigger on the
left-hand side. Another important
thing to remember is that the cast shadow, because it's such
a sharp shadow, it does tend to be a little bit darker then shaded shadow. So you might want to go
through it maybe two, maybe three times sometimes
depending on the depth of it. Or of course, you can mix it up. You can mix a color that
is slightly darker. But I'm a bit lazy. I'm just quickly hairdryers. So as you can see now, I'm holding the brush
that we started off with because that will give
me a really narrow, really tight, nice
stroke as well. So we're going to keep to the one-third rule that
I talked about earlier. So in this case, we just want to deepen that intersection of that
line is to keep it crisp, is to keep it a bit darker. We want it to look
a bit darker than what we got on the
shadings around it. So yeah, let's see how it goes. By removing these tapes, you can see if you've
got any wet bleeds, anything that doesn't
look natural. But a little bit
dumb. Taking care of a little bit up there. Don't want it to be on top
of your lovely triploid. And now I'm just going to add
a little bit of an extra. You don't have to do this, but it just makes it look. Just helps the
illusion a little bit. What I'll do here,
I'm just going to likeliest shape that
on the end there. And do the same thing down here. Because in reality, you shadow would drop onto
here as well. What else? Can I make a little
bit by mixing the shade color with,
with the highlight? Linear, sharpen up
your lines little bit. Sharpen up this
one a little bit. Well, once already done. And what you can
do if you want to, you can just put a little
dot down here to make, make it look a little
bit more realistic. That to me looks very, very nice, very realistic. And also if you want to, you can just highlight some of these notes just a little bit to give them a little
bit of a more pop. It's up to you. You don't have to.
I used to feel like this one ended up writing it from ploy so you can have
disappeared a little bit. So what I would like to do with my highlight color can give it a little bit of
a might not show a little bit of
light on one side. Other than that, I would say
we're pretty much there. We just need to varnish
this lacquer it or whatever finished you want to do on top of it
just to protect it. And then it's gonna
be over to you. And I am so excited to see what you guys can
do with my techniques. So please don't hesitate to send me pictures, photos,
step-by-step. Anything you do,
sketches, whatever. Don't be scared. Yes, go for it. Enjoy your time. Play. That's the most
important thing, yes. Have fun with all
of this, please.
6. Conclusion: Right? So we've come to the
end of this class. And I would say the conclusion
of this off the web, lacking it varnished, it, got all the small touching done, is start off by planning in your head or
you put your arrows down. What, where's your light source? Where will your light
hit in this case, you remember we did
a 45-degree angle from the top wide coming down. Which means that
all of these parts here will end up in the shadow. In this part here will
end up with highlights. So super-important,
keep practicing. Think about all this
because it's super helpful. And mistakes happen so easily. I still today always keep with
me to put down my arrows. And even now, I'll
do some sketches. If I got more intricate
moldings to do, I sketch it out before
I actually painted on on a door or a wall
or paneling, whatever. Please feel free to
upload as many pictures, as many questions as you go. Don't hesitate. I'm
always here for you. And I hope that my
techniques will help you to do a good soft. And then also that you can adapt your own
techniques into this. Super excited to see what
you can do with all of this and keep on painting
and enjoy it. And like I said, just upload as much as you want on on Skillshare and I'll comment and get
back to you soon. So again, thank you
so much for watching and please feel free
to ask any questions. And I can't wait to
create the next class.
 Kristoffer Gyllenhammar, Decorative artist