Transcripts
1. Welcome!: Hi, guys. Welcome to my class. My name is Kate Lawrence,
but you can call me Kate. I'm a self taught digital Illustrator based
on Long Island. This class is all
about utilizing Procreate Symmetry
Tool in radio. I found through my
experience with it that the possibilities
are truly endless. For me, creating Mandalas
is a meditative practice. It's a time where I can be
present and in the moment. I hope that you enjoy
this class project while learning how to operate
Procreate Symmetry Tool. I love this tool so
much that I even used it to create and self
publish an adult coloring.
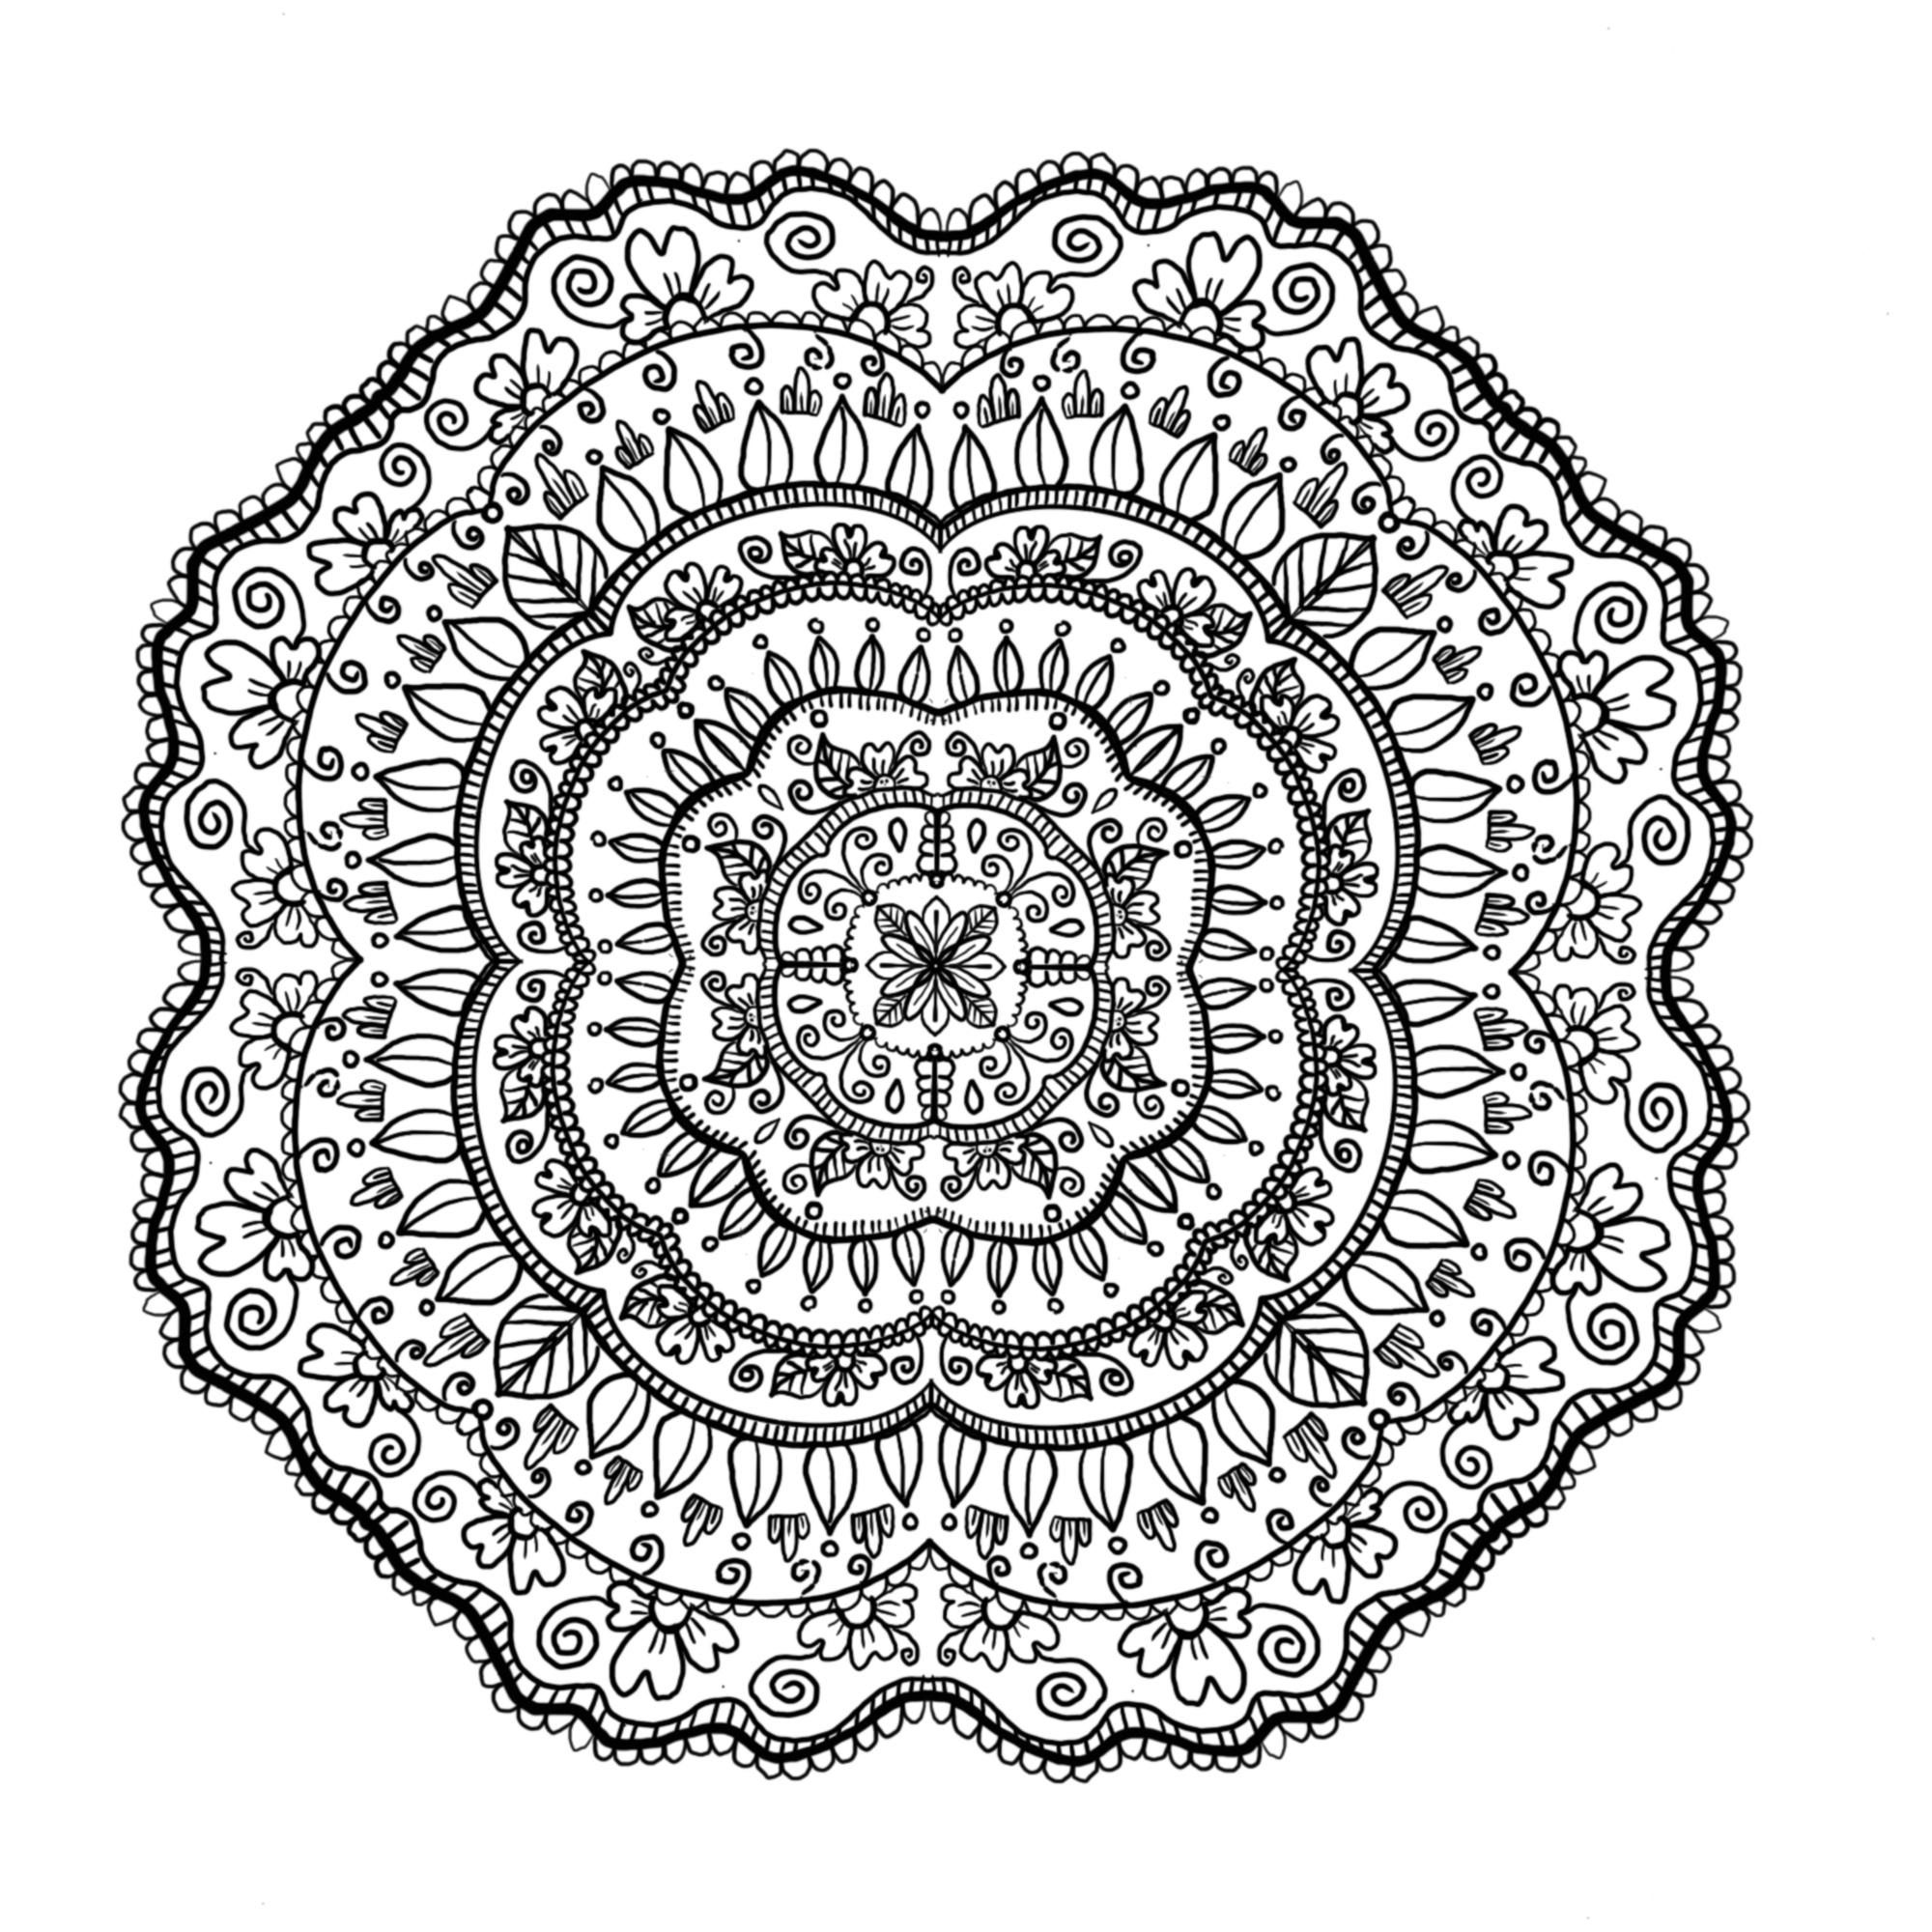
2. Class Project: Do you want to create a complex perfectly
symmetrical design? Do you not know where to start? In this class, we learn my personal technique
for creating mandalas. I've broken down
this project into seven small lessons so
it's easy to follow along. We begin at the center and
work our way through creation. I teach step by step
how to create mandalas while utilizing the
symmetry tool in Procreate. For our project resources, I have attached the elements
of Mandala worksheet, so you can practice drawing
before even jumping in. Together, we will be
creating this mandalla. Body
3. Elements Worksheet: To get started, we are going to practice drawing the different elements
used in this mandala. We will be using
our technical pen by Procreate found under inking. To start, we're
going to practice drawing our first element,
which are leaves. You can see here that
I do it in one stroke. I just do the shape of leaf and then a little vein
running down the middle. For our second element, we're going to be doing scalloping. Kind of just like little
bumps all connected together. Now, the rounder you do them, I feel the better it looks. For the third one,
we're just going to be doing little short
lines close together. This is going to add detail and fill in blank spaces
in our mandola. Number four, we're gonna
be drawing little flowers. I tried to pick out
elements that are earthly, so this is what
what we're doing. The flower is simple, so
don't let it intimidate you. It's just four little bumps and then the little
lines on each petal. If you'd like, you can
add leaves as well. Sometimes I like to do dots in the center just to give
it a little detail. For our fifth element, we're
gonna be doing like waves. It's just squiggly lines. Now, I love using
this technical pen, and that's why we're
gonna be using it during this class
because it gives you precision and it's not
pixelated. It's beautiful. And it's very smooth
to work with. For number six, we're
gonna be doing swirls. It's just kind of like a long
curved line or a short one, however you think
they should look. Number seven, we're going to be doing these
just little circles. And they're great accents. I feel. I love using
them in my work. If you want to make
a perfect circle, you can hold down after
you make the circle, and the ellipse tool will come out to make it perfectly round. Number eight, I don't
know what this is. It's like a little
cactus of sorts. So I just do three bumps, connect the line at the bottom, and then three little
lines in the middle. And again, you can do either or. And those are our
elements of Ar mandala.
4. Setup: Let's set up our Canvas. To start, hit the plus sign on the top right hand corner and
then hit the little folder. Now we're gonna make a canvas
of 2000 by 2000 pixels. When you're done, hit Create on the top
right hand corner. Okay. Next step is we're going to go to our wrench tool
and then under Canvas, you're going to go
to Drawing Guide. Hit Edit Drawing Guide. Go to symmetry on
the bottom right. Options and then radial. Now, you'll see the
color bar up top. You can change the
color of the lines. I'm going to leave it because
I want them to be black.
5. Center: Alright, so to get started, the first thing you're
gonna notice is that your canvas looks
like a pizza pie. There are sections everywhere. We are going to be
working on one slice or one portion of this pie. So let's zoom in super close and make your
brush size to about 5%, and we're going to be using
the technical pen again, for this entire process. So it's just one brush. We're going to be
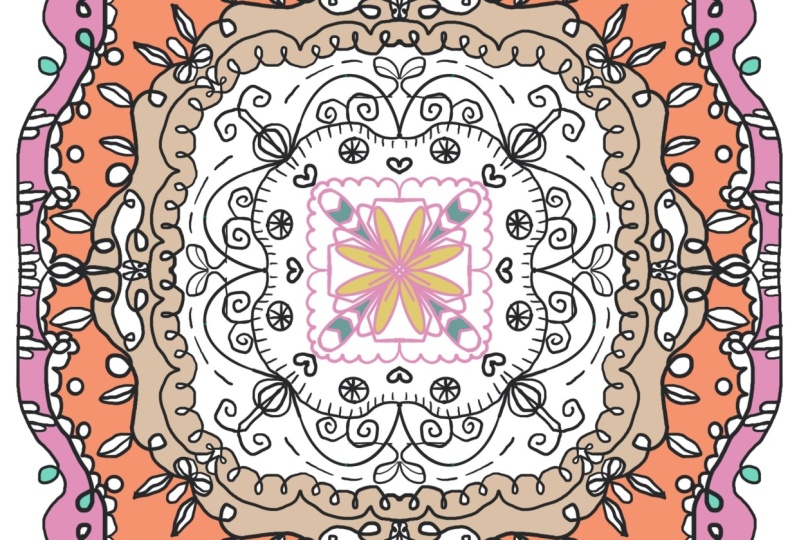
using the color black. You can use whatever
color you like. If you want it to be bright
and hot pink, go for it. Alright, once you're set
up in the one portion, we're just going to make like
a tear drop and then hold down and wait for the ellipse tool to come out
to make it perfectly round. How cool is that? Next, we're just going to darken up those lines by tracing over them
just a little bit. And then in between the petals, we're going to add
another petal, just to make it look a
little more round and full. Now draw a line down
the middle of each petal and then draw an additional little
leaf with some veins. All right. Once you're done with
that, we're going to draw little circles on the tips of each leaf or petal to
give it, like, a round look. Then we're going to use
the scalloping from one circle to another to create this fun little
border around our center. Now we're going
to do some swirls coming out of the circles. I think I'm going
to do two here. It's always good to draw
and then zoom out and take a look and decide if
you want to go further. I'm pretty satisfied with that, so I think I'm just going to make a little line from one
piece of slice to another. And now we have, like, a little border around what we just did. Is going to be
these little lines. So we're just going to do them continuously until they
reach one another. And what I love about the radio
tool is you don't have to do that much work because it's
copying what you're doing. On the other sides. So I just went ahead and outlined the little
lines that we made. And when you're ready, we are going to continue
by adding little, like half moons, if you will. On top of what we just did. And this is going to be
the center for a flower. I kind of just like
a curve little line. Do the middle, and then
the last leaf or petal. And then I like to
do two little lines on each petal just to give it some extra detail and two or
three dots in the center. You can finish off
the flour by adding a leaf and I'm going to do some veins
down the middle as well. Let's do them out
to check it out. I like how it's looking so far. Let's do some more circles on the tips of the leaves
that we just created and some little swirls coming out of the flower. There
we go. That's it.
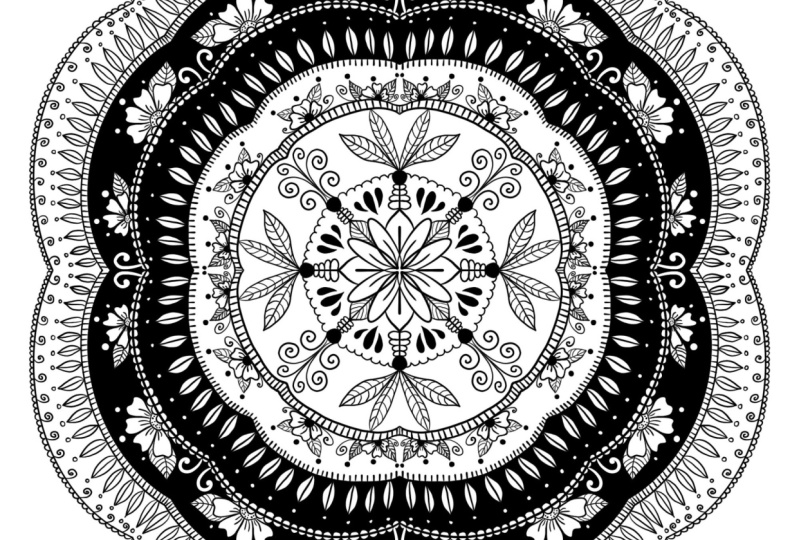
6. Middle: Okay, so we have our center complete and it's
looking pretty good. Let's zoom in so we
can get a better look. We're going to be working
on the middle section of mandala, and again, only in one quadrant or
one slice of this pie. So from line to line, I'm just drawing one
swooping motion, like a bump around
what we drew before, and now we have a nice outline. Let's zoom in a little bit. And we're going to
draw the little lines again on the bottom side. And this is going to fill in
the gaps and just give it a little bit more of
a complex look to it. Zoom out. Alright. I think next we're going
to do some leaves. Now, when I do the leaves, I like to make sure that
the top has a point to it. I just feel like it gives it a little bit of an edgy look, but it's totally preference. So draw your leaves
how you like them. And then just one in the center
here a little bit larger. Okay, now draw the middle
vein on each leaf. Excellent. Now, I think what we should do is we should
do some little dots. So we're gonna draw
some circles on the top of each leaf
that we just draw. It looks pretty cool. Gonna
zoom in a little bit, rotate. We're gonna draw a line from line to line again
in the same quadrant. And now we have a nice border. Zoom in a little further
and do some scalloping. I love to switch it up between the little lines
and the scalloping. It almost looks
like lace. Alright. Once you're done
with the scalloping, we're gonna move on to our
next element. So scalloping. More scalloping. So you're just going to do it on
the top of the line. And again, it doesn't
have to be perfect. Just as long as
you're having fun. I think the double
scalloping looks pretty cool here, actually. All right. We're gonna draw some swirls. And also, like, a
half circle for the flower with three petals. I'm gonna add on a little leaf, do the center, and
then the veins. And add on the little
swirls, as well. I just to give it a whimsy feel. Now we're gonna make
another flower. Draw the three
petals and a leaf. Et's zoom out and check it out. Alright. Once you're satisfied, we can move on to the next step. So let's zoom back in, and let's fill in any gaps
that we may have. So I think I'm going to add a swirl and it's replicating it on the
other side, which I love. I wouldn't Now I think we should draw a
border around these flowers. I'm going to turn it
trying to get a good angle here for demonstration purposes. So from line to line, I'm just drawing a little bump
around the flower and then just dragging it down by
holding down my pencil. We're almost complete
with the middle section. We're going to do
some little lines on top of what we just drew. And again, just take
your time with us. No need to rush. Turn it so you get again. And now from line to line, I'm going to draw another bump on top of what we just did. I think that gives
it a nice effect leaves then we can
keep adding onto it. You just basically
work out in layers. We're gonna draw some
more leaves with those pointy edges, pointy tops. And a bigger one, if you have to fill up the gap a little
bit, that's totally fine. It still looks cohesive.
7. Outer Edges: Okay, so you made it to the
outer portion of the mandala, and we're going to
start by adding lines to the leaves that we just drew. Give it a little detail. And I kind of like to
make them curve to give the illusion that the
leaves are slightly bent. Then once you're done with the
lines for the middle vein, we are going to add circles
on top of each leaf. Pretty small, not too big. Okay. Now, the next element
we're going to add is this weird little
cacti that I drew. So we're going to
start with that. So it's a straight line across and then like a small bump, a middle one, and then
another small bump. I don't know, it just kind
of reminds me of a cactus. And we're just doing
those individually in between each leaf. If you would like
to do something different, you could do a star. You could do a bigger circle. You could do a small flower, whatever you think would elevate your drawing
is what you should do. If you are doing the cacti, I like to add a little
line in between each bump. So that's what I'm doing here. And I'm going to zoom
out to check it out. And it's starting to look full, you'll notice that each
element that we add, it starts to add
more personality to it and a little
bit of the story, which is what I love
about Mandalas. Alright. Now, from the round line, we're just going to draw, like, a bump around what we just drew, and that's going to
be like a border, again, and then
we're going to add scalloping on top of that. I'm making them slightly bigger just because I want them to be a little
bit more prominent. Okay. Now, I'm gonna add some swirls just
beneath the scalloping. And I'm kind of
doing it in between, like, the little cacti. So And again, that's just
going to fill it in, add a little razzle
dazzle to it. Next thing we're going to do is we're going to
make some flowers. So draw some half circles. Fairly spaced apart. You leave enough
room for the petals. And again, I like to do
them in groups of three. So I feel like that
gives a nice effect. I'm darkening the center and adding little
lines on each petal. Do you give it a
little bit of detail. And then some swirls
coming out of the flowers. I'd like to do one on each one.
8. Filling in gaps: Okay, so for this section, we are going to be
filling in the gaps, and we are also
going to be touching up just little spots
here and there that maybe you've gotten marks through the creation process that we're just going to erase. So Zoom in, and
we're going to make a straight line in the
center just like so. And then we're going to draw half circles around the line. Kind of like a little snowman. I'm just realizing that I made a little line, and
I'm trying to get rid of it. There we go. This is a
good point to just kind of check and see if you've made any little mistakes here or there that you
can just clean up. Alright, so once
we're done with that, we're going to make teardrop
shapes in the middle. And then in the
section above it, we're going to draw one. And I think that gives
it a nice full feel. You can do as many or
as few as you'd like. I found another little spot,
so I'm cleaning that up. It's my eraser tool. Now we're just going to zoom in on the center a little bit, and we're going to
thicken the line right above the flowers. Just by tracing over
it, we're not even adjusting the brush size. And I feel like that makes
the center pop a little bit, just by giving it some
contrast of a thicker line. Next, you're going to go to
your edges and create like a wave from line to line, just like we've done before, and that gives it a nice border. Next, we're going to make
our little lines on top of the wave going across
the entire thing. Once you're done,
you're going to make an additional
wave on top of the little lines,
sandwiching them together. Like so. Now, don't worry if some
little lines are sticking out, we're going to take
our eraser tool, and on a little brush, we're just going to sweep
one swooping motion, get rid of that excess. Make it nice and smooth. Just clear up clean up the
edges a little bit. And that's
9. Finishing Touches : Alright, so to
finish our mandala, we're going to do a
couple more things. First thing that we're going to do is we to zoom
in a little bit. And we're just going to darken the edges of
one of the borders. You can do the one
that I'm doing, which is the second leaf
pattern. It's right below it. But it just adds an extra
element of dimension, which I think is really fun. The next thing that I'm doing is I'm just doing
some light veining on one of the leaves that I
drew before, right above it. I just think it
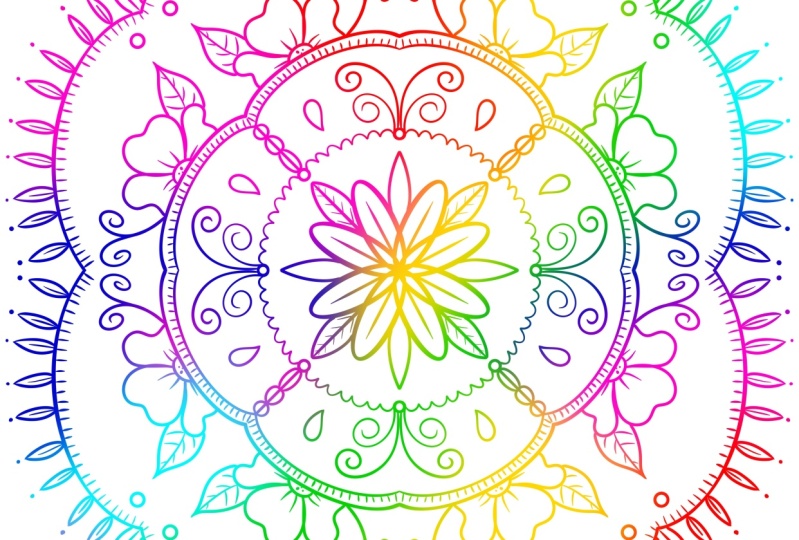
adds a little fun. This is a section where you can really make your piece your own. You can play around
with this radial tool by making all sorts
of different shapes. And if you're working in color, I can't wait to see
what that looks like. Next, I'm just adding some
swirls here and there, just filling in the
gaps a little bit more. I think I'm going to add some
definition to the flower, so I am defining the circle, the center of the flower, and then also just like the
little divots on the petals. And I'm doing that to each one. I think that's one of
the most relaxing things about Mandalas and creating them is that you get to do
repetitious work over and over, and it kind of becomes
like autopilot. Super relaxing. Alright. I'm going to add some swirls to the top layer of flowers,
some little ones. And I'm zooming out a lot
right now because I'm just trying to figure out
what needs to be done. What else we have to do. I'm going to thicken the outer
edge pretty significantly. And that just kind of
makes the whole thing pop. And now we're gonna do some large scalloping on top of that. And this just adds that
little dainty feel to it. And we are complete.
10. Thank You! : Congratulations. You
finished the class. I hope you enjoyed
creating and learning. I can't wait to see
what you all make. Make sure to upload your finish mandalas to the Project Gallery. Here, I can provide encouragement,
feedback, and support. Thank you so much
for taking my class, and I hope to see
you again soon. Bye.
 Caitlin Lawrence, Illustrator