Transcripts
1. How to Make Storyboards in Procreate Dreams: Learning to draw
your own stories is a powerful creative skill. And in this class, I'm going
to show you how to use Procreate Dreams to turn any
idea into a visual story. The art of storyboarding allows you to bring
your ideas to life, to create mini movies, without ever having to animate. It shows people immediately
what your creative vision. Name's Shavon, and I'm a top
teacher here on Skillshare. I've worked for over 15 years in the animation industry in studios in Dublin,
and in Vancouver. Today, I focus on
teaching the skills and sharing the knowledge that I learned from working
in the industry. Storyboards are the
foundation of any movie, whether it's animated
or live action. It's a secret skill set
that allows you to uniquely translate any idea into
something very close to a movie. I'm going to show you exactly how to do that,
Procreate Dreams. This app is literally an entire production
studio in your hands. Not only can you draw
individual frames and panels, but you can also time them
out and get them to flow exactly how they would in a
fully finished animation. So I'll show you the updated features of
Procreate Dreams. I'll walk you through
how to use the app. So even if you've never
opened it up before, you're going to get to
know it inside and out. You'll first learn all about the principles of
visual storytelling. These are the camera angles and shots that are used
in every movie. I'll also teach you how
to compose your shots, how to draw each panel, and what shots are best
to use for your ideas. And then we're going to
use that knowledge to bring a really simple
concept to life. I'm going to use one image
to create an entire story, and I'm going to show
you how to thumbnail your ideas and to storyboard
exactly like this. So at the end of this class, you'll have a professional
storyboard with camera moves, keyframes, one that reads just like the final
animation will. Plus, you'll have a brand
new skill set that you can use for your own
animation projects, or you can show
this storyboard to prospective clients
if you want to start working as a
storyboard artist. But more than that, by
the end of this class, you'll have leveled up your
Procreate Dreams skills. You'll know how to
use this app like a full production suite
because with this app, there's no limit to the
stories that you can create. So if you're ready to start
storyboarding, let's tie in.
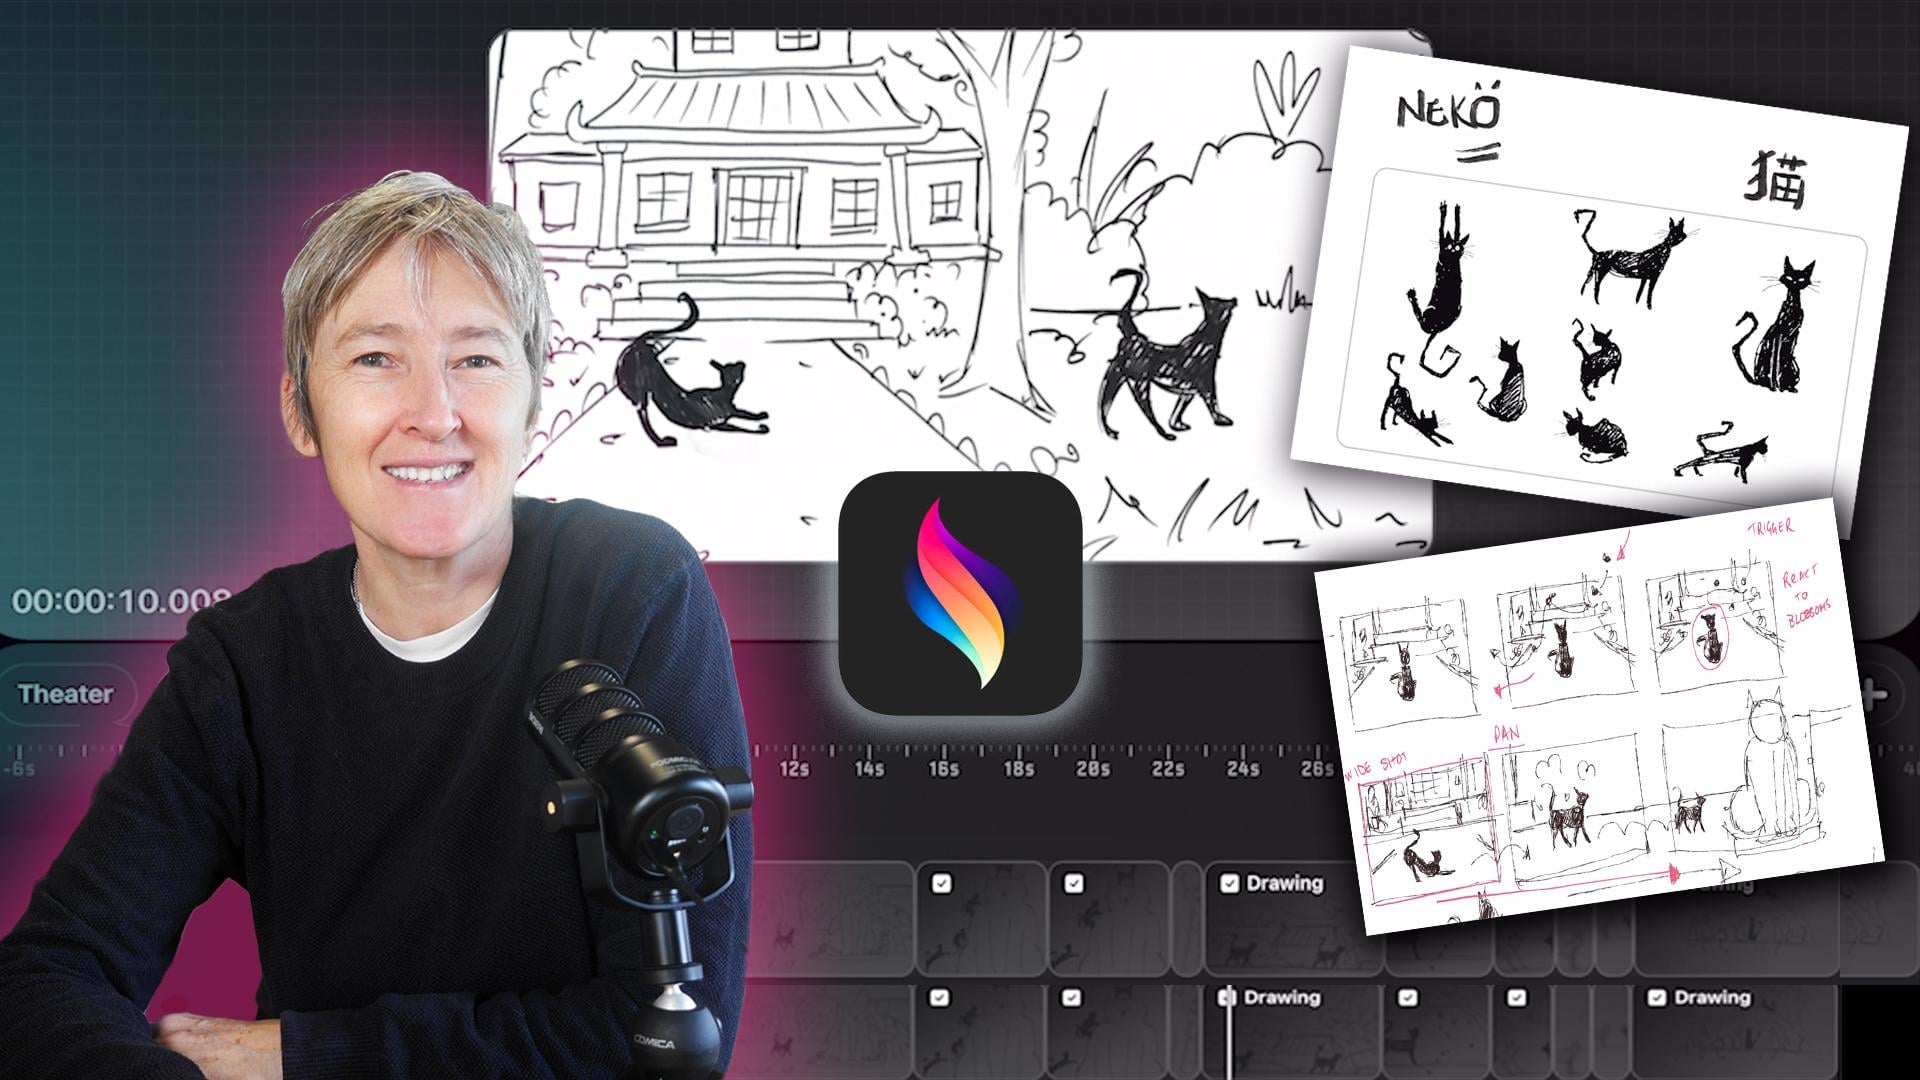
2. Your Class Project: So in this lesson,
I want to go over your class project and what
you need for this class. For your class project, I
want you to come up with one simple idea,
and from that idea, I'm going to show you
how to thumbnail it, how to clean up the panels, and how to tie them out
and even add basic motion. So, for example, you know, my idea started
with a photo that a friend of mine shared with
me that she took in Japan, and it's a photo of a cat
sitting in front of a temple. From there, the whole character and story started to
come to life for me. I started to conceptualize
the character of the cat. I started to do sketches. I love the name Nico, so
I call my character Nico. And I tried to imagine, you know, what was she doing
in front of that temple. So, I visualized her being drawn towards some beautiful
cherry blossoms that were floating
through the sky, and that led her on a journey of discovery where she
arrives at a magical tree, and eventually she's joined
by a lot more cat friends, and they all watch
the sunset together. So it's a very simple idea. But I wanted to show you how
one really simple idea can be used to create a very compelling and
interesting story. Now, a quick side note. If you'd like to see
me actually animating this character
against the backdrop that I created for this story, then check out my
Scotia originals class where I animated Niko
walking along the wall. I used this idea for that class, and I included the
background, as well. So it might be an
interesting class for you to check
out after this one. But for this class, I want you to focus on
the art of storyboarding, because even if you don't have any experience in
animation at all, but you know that you have
a love of storytelling, then storyboarding
is the way to go. You don't need to be
very skilled at drawing. In fact, the more rough and loose you
can draw, the better. You just need to
have a vision of your idea and to be able to
imagine that idea as a movie. So up next, I'm going to walk
you through the features of Procreate Dreams in case you're not really
familiar with them, and I'll show you
the exact tools and processes that I'm going to be using throughout this class. So when you're ready, meet
me in the next lesson.
3. Overview of Procreate Dreams: In this lesson, I'm going
to walk you through Procreate Dreams and point
out all of the main features, the main tools and the processes that I'll be using throughout the
rest of this class. If you've never opened up
Procreate Dreams before, then you're going to get to know everything that there is
to know about this app. And if you have used
Procreate Dreams before, you might want to
watch this video just to make sure that you know exactly how I'm using the tools in this
particular project. And so it might be a lot to take in if you've never used
Procreate Dreams before, but you can bookmark
this lesson and come back to it if
anything is unclear. But what I will say
at the outset is that once you start actually using the tools and the
functions of this app, it becomes very, very
intuitive very quickly. When you first open
up Procreate Dreams, what happens is you land on this screen, which
is the theater? This is where all of your
files and projects live. And if you select, tap Select, you can choose
each of these files. You can put them
into a new folder. You can delete them, or you
can make duplicates of them. And if you tap this
plus button right here, then that allows you to create a brand new file
project or movie. On this menu, there are
a couple of options. To start any document, you can either choose flipbook
or you can choose empty, and I'll show you what that
looks like in a minute. But I just wanted
to point out that these three dots
here is where you can actually change the frames per second of your
document or the duration. Also do that later
on in your process, but I just wanted you
to know that that's where that is at the outset. And then you'll see
these dots here on the side indicating
other screens. If you scroll
through, you can see the different presets
that are available. I usually go for
widescreen because for me, it fits the movie that
I see in my head. So I'm going to stick
with widescreen, but I'm going to start my
project by clicking on Empty. So now, when an empty document
appears on your screen, I want you to take note
of a couple of things. Firstly, it's split up into
two distinct sections. This section along the
top here is the stage. So this is where you're going
to do all of your drawing. This is where you
can animate things, where you can, you know, create new frame,
new flip books. You can even import
media into this area. And down below that stage is this area called
the timeline, and this is where you set
the time for your animation. You can set keyframes. You can do all your editing and compositing
down in this area. So if you look at
the bottom here, you'll see there are
three options or three modes that you
can be working in. You can be working in compose. You can be in perform, which I'll show you
later is literally just dragging objects on the screen around
to animate them. Or you can be in keyframe mode, which is going to allow
you to add keyframes to content that exists
within your timeline. Over here on the left, I just
want to point out theater obviously brings you back out into where we were a minute ago. And this button
here for settings, if you tap on that,
you can change, again, things like the
frames per second, the duration of your document. You can change the resolution. And there are several
other parameters that you can change
according to the stage, the timeline down here, your share options
and your preferences. So we don't really
need to worry about too many of these
settings for now. As long as your settings
are matching up with mine, I'm not even going to
come back in and change any of these except
for the duration. So I'll show you very
quickly how to change the duration because it's an important one. You
simply tap on it. At the moment, it's
set to 5 seconds. If I put it in for 10 seconds. You'll see that my
timeline has now changed from 5 seconds to 10
seconds in length. So that means I've got 10
seconds in my timeline. Now, if you go over to the right here and click
on this Plus button, this is where you can add
a new flipbook, a drawing, text, new tracks, and you
can also import photos, videos, and other
files like audio. We're not going to
be working with flipbook too much until
the very very end. So what I do want you to get familiar with
is the drawing. So if you tap on drawing, you'll see that the
timeline disappears, and essentially the
stage has increased. So we're now inside the stage. This box here represents kind of the bounding
box of the stage, but you can actually use all of this area around the
stage to draw on. It just won't show
up if I double tap on drawing again to go
back out to my timeline. You see it doesn't show
up on the main stage. That's because it is
outside of that area. And why is this important? Well, simply because this
outside area is very useful to animate objects
on screen or off screen, so you can use that
as much as you like. But what I use this
outside area for, you'll see in my
thumbnailing process is just to be able to draw
on a bigger canvas. When you do create a drawing, I've essentially created a piece of content on the timeline, and it has extended
it out to the end, you know, all the
way to 10 seconds. So let me go back into drawing
mode and have a look at the tools that we will be
using the most in this class. Obviously, the most important tool
we're going to be using is the brush because we'll
be drawing our storyboard. So I'm using the basic
animation brushes that ship with Procreate Dreams. I haven't imported
any other brush set, so you can follow along with me. I think I'm using double
man for the most part. Over here on the left, this
button here or this slider. This is where you can increase
the size of your brush, and this one down here is where you increase or
decrease the opacity. That can be useful sometimes. I don't really use
the opacity much. I just use the brush and
I can change the size. The other tool then
obviously is the color tool, but again, because
we're storyboarding, we're just thumbnailing
and sketching our ideas, I tend to stick with
the basic color. But over here on this icon
here, this is your layers. And I want to point this out
to you right now because it is actually a very
useful function. Let's say you've
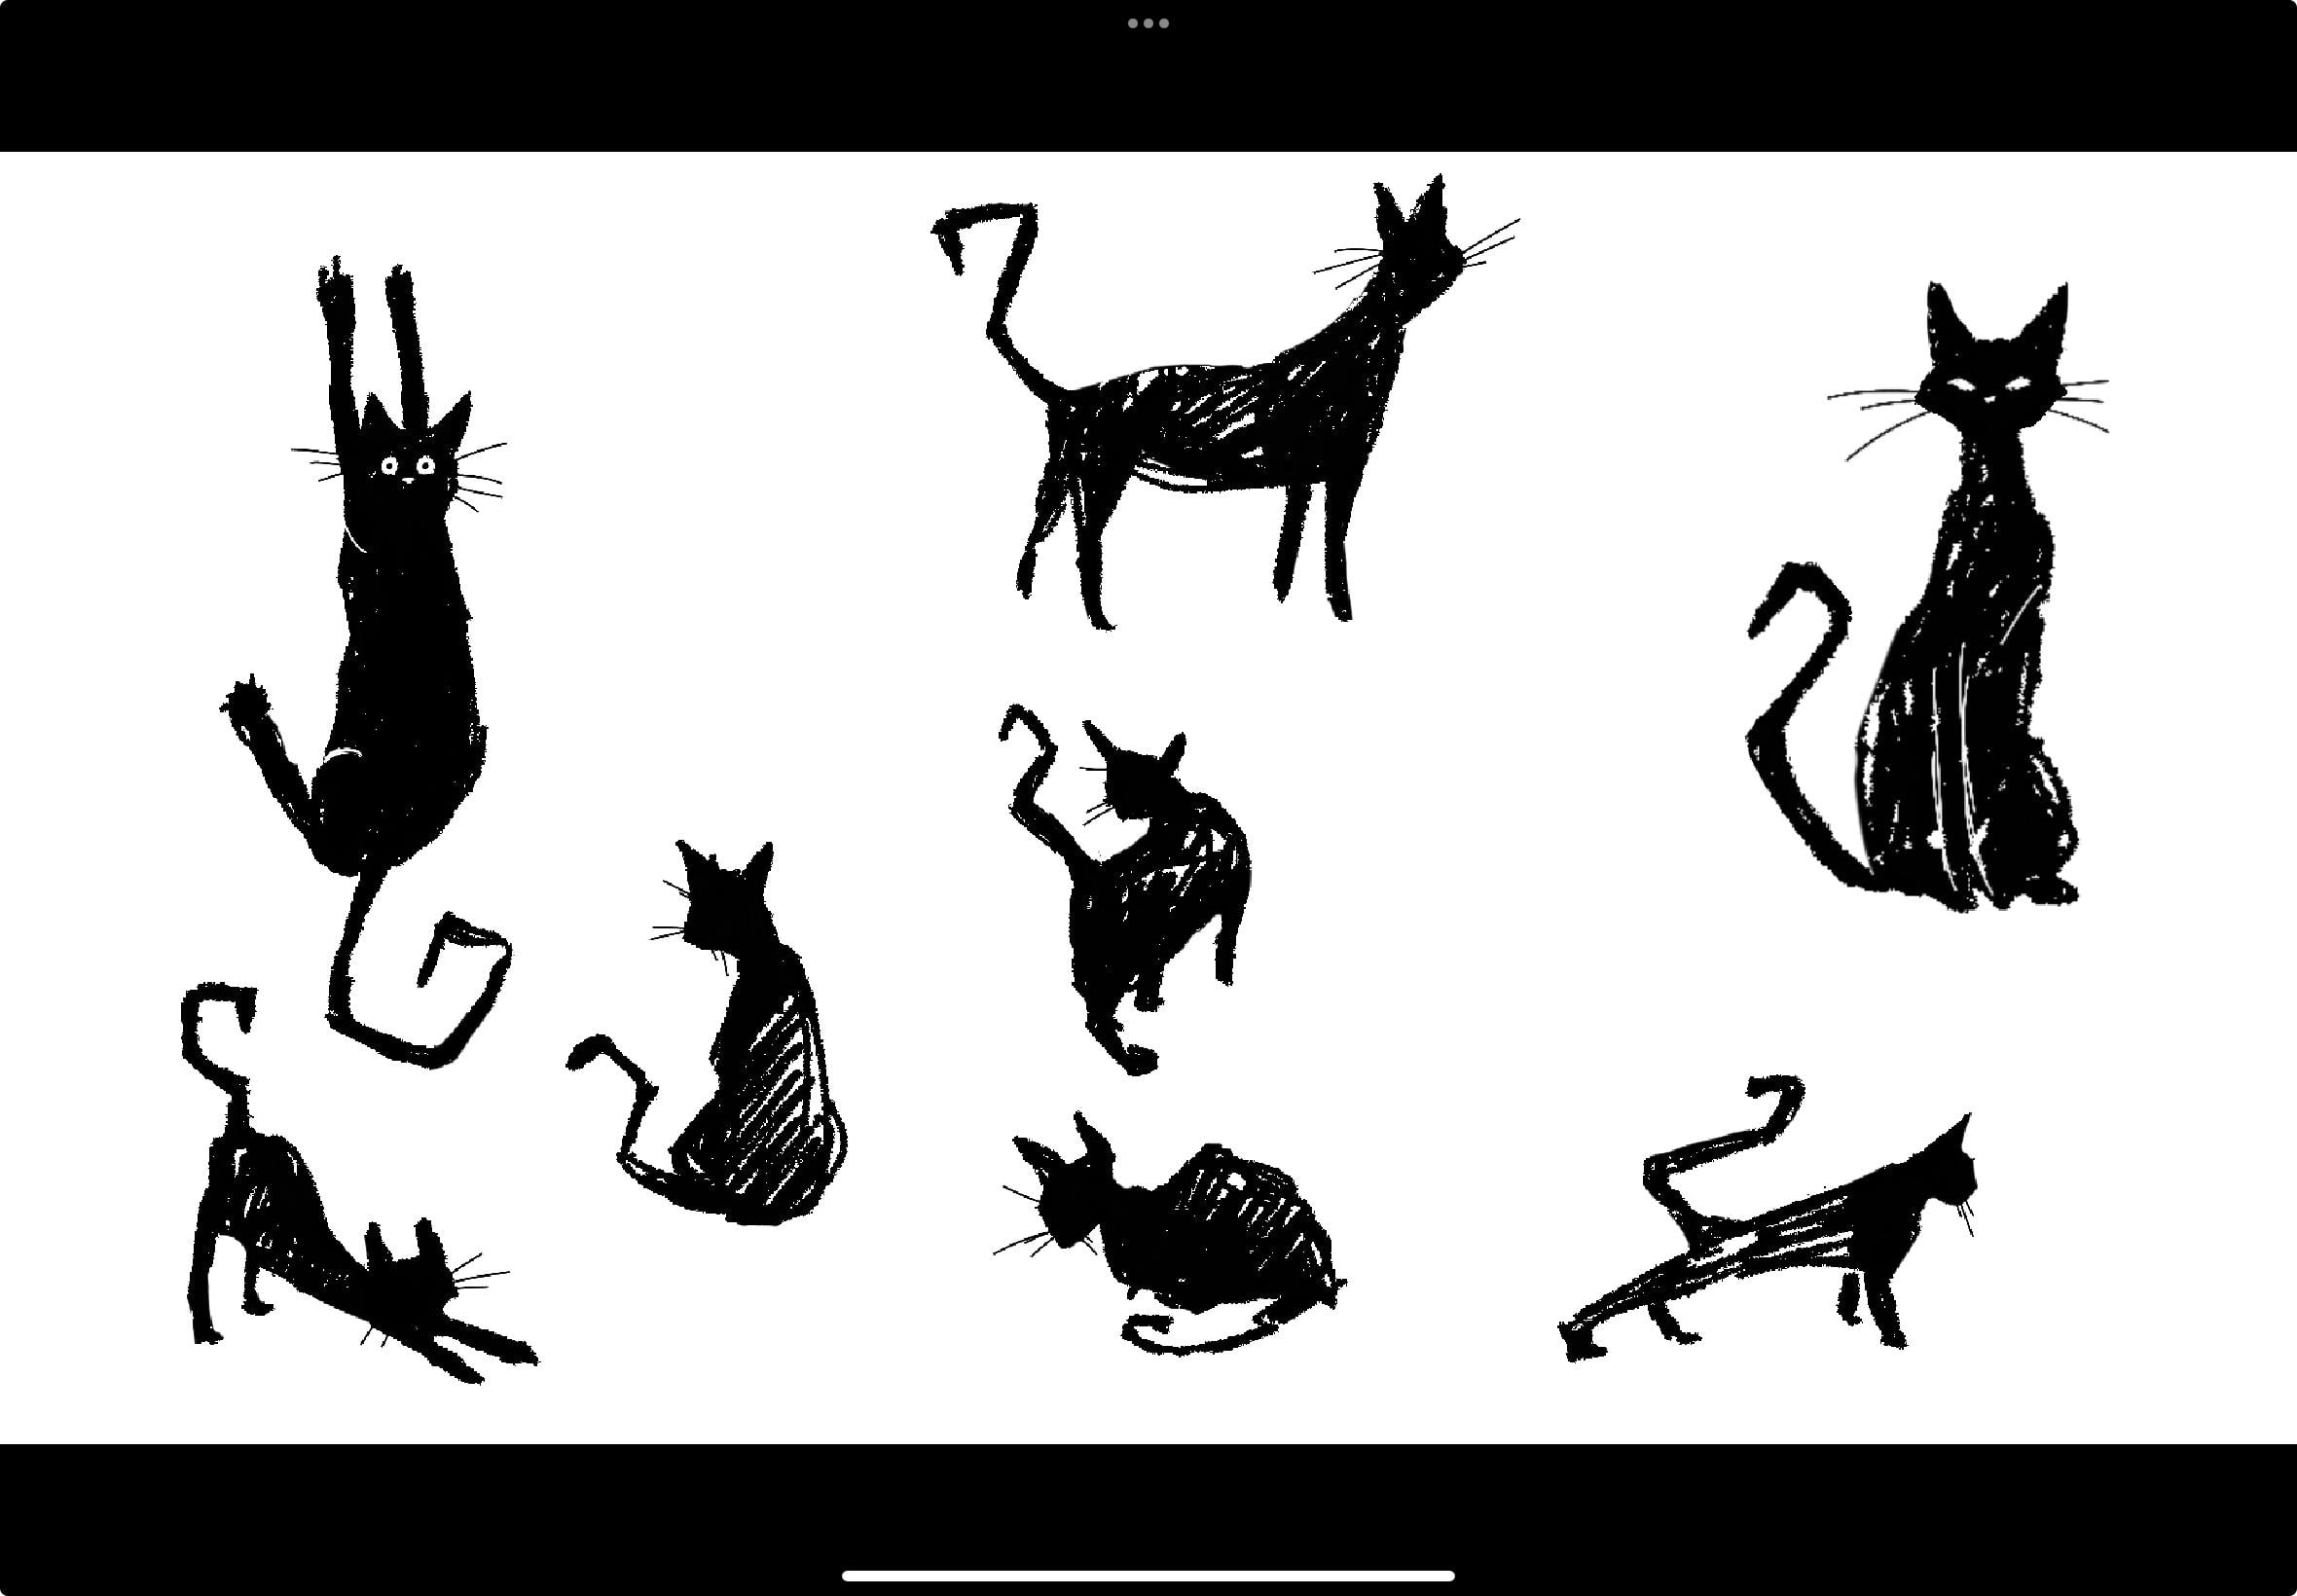
made a drawing like this lovely set of
scribbles here. If you add another layer, that allows you to really be
creative in how you build up your composition or add some background, it
does come in handy. And I know when I'm
thumbnailing my ideas, I tend to use layers rather than creating
new drawings in the timeline every time. This icon is obviously the
eraser, the eraser tool. What I like to do, and
I'll just point this out, it's a little trick. You
might not know about it. If you're in brush mode
and you're drawing away, if you tap hold on
the brush icon, it will erase with the same. It'll make sure that
the eraser switches to the exact same as the drawing tool that
you were just using. So it's handy because you
can do kind of you can erase out using the same shape and style of the brush
you were drawing with. But obviously, you
don't have to do that. If you tap on the eraser, you can choose any other
brush style that you like. Now, the only other
thing that I want to point out at this
stage is, you know, what I do a lot when I'm
storyboarding is I will copy and paste elements of
my work rather than having to redraw everything
each and every time. So that's an important function to know and to get used to. All you have to do is
go over to select. And when you tap
on that, you know, a couple of options
appear at the bottom. Make sure that
you're in free hand. And then what you can do is drag around the area
you want to say, copy, make sure that
you've selected it all. Yeah, when it's all selected,
it will look like that, and then you can come down
again and just hit copy paste. So just note that when
you do copy and paste, that thing that you've
just pasted will arrive onto the stage
as a new layer. The other important tool to
note is the transform tool. So if you tap on
that, a similar menu appears at the bottom
of the screen, and I like to have
uniform selected so that when I grab one of the
corners and drag it up, it's going to scale
that object uniformly. And that's really
all you need to know for your drawing mode. Double tap on drawing and
come back to the timeline. You'll see there's my content
in the timeline below. Now, when it comes
to storyboarding, another key feature that I use a lot is splitting
content in the timeline. And to do that,
all you need to do is make sure that
your playhead is at the exact time that you
want to make a new drawing, and then tap hold on it, and then you can choose
the option split content. And now you've got
one drawing there, and you're ready to
make another drawing. If I wanted to drag a
piece of content out, you can just tap on the
end on the end of that. And you'll see that
these arrows appear, and then you can just
drag your content all the way out. That's
what you want to do. Now, to add keyframes, let's have a quick look at that. So let's say at 2 seconds in, I want this to move
off screen altogether. I'll just tap on keyframe mode. And now my cursor is changed
to this clapperboard icon. If you tap on that and
tap and select move, you can add a move
and scale keyframe. That indicates the
start of the motion. If I bring my playhead to some other the six second
mark and tap it again, now I've created two keyframes. So there's no movement yet, but if I make sure
that I'm on the end keyframe and I drag
my drawing away, that's where the motion happens. Okay, so I'll explain more
about keyframes and how you can work with them in storyboarding later
on in the class, but I just wanted to point out those two functions for
you there. All right. So the very last
thing that I want to point out are some
of the gestures. I think that the gestures and Procreate Dreams are very
intuitive, actually, and I think that you'll get
used to them really quickly if you've never used
Procreate Dreams before. It might take a little
bit of getting used to if you haven't ever
used the gestures, and you might find that
you're moving things around and kind of unsure about
how to go about it. So essentially, the most
basic gesture or yeah, the most basic gesture
in Procreate Dreams is to use three fingers
in the timeline to scroll your content up so that you can get a good view of it in the timeline or three fingers dragging down to minimize it. And you would do
that if you've got a lot of tracks
in your timeline, lots of layers of content. Three fingers sliding to the left will help you to
zoom out of your timeline. And if you want to zoom in, you can use three fingers
scrolling to the right. And then on the stage
to pinch and zoom, you can pinch Zoom in and out. Similarly in the timeline, you can pinch Zoom
in and out as well. You can also use one finger to slide through the timeline. And if you want to look
at your artwork or your animation in a full screen, you just use four fingers
to tap on the stage, and that brings you into
full screen mode like that. And then you can
use four fingers to tap on the screen again, and it brings you back
into your timeline. Okay. Well, that is
a basic overview. That's really all you need
to know for this class. And I promise you, once
you start using all of the tools and processes
within Procreate Dreams, it very, very quickly becomes a very natural and
intuitive way of working. And obviously, of
course, we'll be getting to know a lot
of these features very well throughout
the exercises and the project in this class. So when you're ready, meet
me in the next lesson.
4. How Storyboards fit into Animation of Film Production: So in this lesson, I want to explain where
storyboarding fits into the whole animation process and why it's such a critical
part of any project. Without a storyboard, an animation project is like a building or a house
without a foundation. You literally wouldn't
be able to build a house if you didn't
have a solid foundation, and it's the same
with animation. You need a storyboard, and you need one for
two important reasons. The first reason is to simply work out the action to see
if it's going to work, to see if your choices in camera angles are
actually going to work. And the second reason is to time out the action so that later on, when you get to animate
each of the scenes, it's already set in place. Now, essentially, the
storyboard is your vision of the final animated movie
on paper or on the iPad. Your storyboard could
even replace a script. For example, the very
successful TV show Samurai Jack was created from storyboards, not from scripts at all
in the initial phase. The show's director
GendeTrtikovski, and his story artists
all worked out their ideas in a storyboard before they even
wrote the episodes. So every animated show or movie
starts with a storyboard. The story artist
draws out each scene, and the director then
adds the timing, which means that each scene
is timed out exactly. Then what happens is, each
of those scenes gets handed off to the animators and
to the background artists. So they work on everything
scene by scene. At the end of production, each of those animated
scenes along with the painted backgrounds
are fed back to the editor along with
that original storyboard. The editor or compositor then matches the scenes and
backgrounds to the original storyboard and makes sure that every
scene is accounted for and that each one fits the exact timing that was
locked in at the beginning. So as you can see,
storyboarding is not only a fantastic tool to explain
your idea visually, it's actually a really
important component of any animation production.
5. The 6 Basic Camera Shots in Filmmaking: In this lesson, I'm going to explain six of the
basic shots that are used in any movie or
TV show or animation. But first, I want to
explain that, you know, the story of any
movie or film is actually shown or it's told
twice in two different ways. So you can think of it this way. There are basically two layers. The one layer is
the actual story. That's the script that
was written or, you know, the story that you can describe to somebody else in words. If someone was to ask you, you know, what is
this movie about? And the second way that
a story is told or the second layer is
through the visuals. So these visuals are not
just showing the action. They actually provide
a narrative in and of themselves that supports
the written story. This is called visual language. So the visual language of any
movie or show or, you know, animated feature is
something that we read, but we do so almost
subconsciously. Visual language is basically
the camera angles, the shots, and the way that
those shots are composed. In order to understand
this language, I'm going to take a look at some of the really basic
building blocks. You can think of
this as the letters of the visual language. At first, this might seem really overly simplistic when you
break it down like this. But when you start to
use them creatively, splice them together,
then they can make extremely emotional
or dramatic sequences. Also, I should
note that once you start to spot these
camera angles, these shots or these ways
of composing images, once you start to spot
them in movies and films, you won't ever be able to
watch a film passively again. The very first basic
film shot is called the establishing shot or
the extreme wide shot. So it's a view of the
entire scene or let's say, the entire location
where we show the viewer where the movie or
the action is taking place. So you, the viewer or the
audience is at a distance, but they're able to see the
entire place as a whole. The best way to think
about this shot is like, those establishing shots at the beginning of a movie or at the beginning
of a sequence, like, you know, sweeping
landscape at the start of a film that shows
you where you are. You could think of,
like, you know, say, I don't know if it's the
exact opening shot of Dune, but let's say you're
watching Dune, and it shows you the
desert, you know, from a very wide angle or a science fiction movie that shows you, like, outer space. So the establishing
shot literally establishes where the
action takes place. The next type of shot moves a little bit closer in
from that wide angle, and it's simply
called a wide shot. And this is very
common to sort of re establish the audience
if you've had a bit of, you know, close ups
or a bit of action and you want to re
establish the location. You can start to feel like you're sort of entering
the space a little bit. There are more details of
the particular location, but it's still far
enough back and wide enough to show you that
sort of general context. Then the third basic shot
is called a long shot. Now, I'm doing these in order of sort of stepping
in closer each time. You might notice that, and it's quite intentional, as well. Each of these shots that
I'm going to list gets progressively closer and
closer into a scene, particularly into
maybe a character. So in a long shot, if it's a character
in the scene, you're going to see the entire character
from head to toe. After that, the next shot that's very common is
called a medium shot. So with a medium shot, you're really close
up to the character. It shows a character from the waist, all the
way up to the head. Now, this is an
important shot because now we're very close
to the character. We can start to see details and emotion on the
character's face, but we're still
able to see if the characters using their hands
or something like that. So it's good for any scene
where a character's moving around and doing stuff not
just for straight up dialogue. Then after the medium
is the close up. And this is maybe the most
important storytelling shot. It could be the most important
shot really in any movie. The close up is
important because it's used to show the emotional
content within the scene, particularly on the
character's face. So you want to use a shot
when you want the audience to understand what's
happening with the character or identify
with the character. You want to be able to
show the emotion on their face and really show what's happening
with the person. Finally, the last of the six basic shots is
the extreme close up. So this is a shot
that's used for really, really dramatic tension, like, huge emotional impact
and intensity. So it's not overly used as say, the close up because it
carries that emotional weight, it's a really powerful shot to underscore what a
character is feeling. And an extreme close up, you know, as the title implies, it's like, really, we just see maybe the eyes
of the character or, you know, the eyes
and the mouth. So, believe it or not, these are the only shots in film language, and any other shot that you'll likely hear about
or see, you know, something like an over the shoulder shot or a
point of view shot, any other shot like
that is really just a variation on one
of these six basic shots. So for example, an over the shoulder shot
is actually a close up, or a point of view
shot is a close up. Okay? And I'll explain more
of that a little bit later. But I want you to really become familiar with these
six basic shots first. Once you start to combine
these shots together, that's when storytelling becomes really interesting
and compelling.
6. The 3 Main Camera Moves: In this lesson, I'm
going to explain camera moves because these are important for storyboarding, and also it's something that's really easy to do in
Procreate Dreams. And I'm going to be showing
you exactly how you can animate some of your panels, your storyboard panels
to simply effect or to replicate camera moves
within your storyboard. So the first most
common camera move is a zoom in or a truck in, and it's basically
a slow camera move that moves into the subject, whether that's a
character or a scene or, you know, a location
or even an object. If you think about it
in real life terms, if you had a camera
that was filming someone on a tripod
or if you had a camera on a tripod
filming someone and you moved it in or you
zoomed in on that character, that's the exact camera move
that we're talking about. Now, it's used in storyboarding to basically draw
the viewer into the story to heighten the emotional intensity
of a scene or really to, like, direct the
viewer's attention. To indicate it on a storyboard, you essentially just
use arrows to show that the shot will go from
point A to point B like this, you know, the start and the
endpoint of the camera move. That's all you need to do. You don't need to
do anything more to indicate that camera move. But like I said, when we
get later into the class, when we look at animating
our storyboard, I'm going to show
you how you can create that motion
within Procreate Dreams. So the next common
camera move is a tilt when the camera moves up or
down in a straight line. And in this instance, you draw your panels vertically
one above the other, and then you add arrows to indicate the direction that
the shot needs to move. So again, this is a very
common camera move. It's really used to reveal something to show the viewer in a very intentional way
by directing the gaze from moving and giving
the information visually. Lastly, the third very common camera move that I want
to show you is a pen. So this is when the camera moves laterally or horizontally from, say, left to right
or right to left. Now, it's very simple,
it's very straightforward, and it's probably one of
the most common shots or most common camera moves. Again, the way you indicate that on your
storyboard is to use your arrows indicating where the starting point is
and the ending point, and we will animate that
later in Procreate Dreams. Now, I want to say you can get completely crazy and
creative with camera moves. But one thing that
I need to point out and just mention is that you should always use camera moves to underscore
what's happening. You know, you don't use them
just for the sake of it. It has to any camera move has to underscore the
action or the story. Like, if you had a crazy crane shot with a swinging camera
move and then a crash Zoom, and basically the action was just that two characters
are talking to each other, it would make really no sense. It would be an awful
scene to watch and nobody would really kind
of get what was going on. So just be mindful about the visual story that
you're trying to tell. This is where you really have to understand your script
or your idea or your story in order to be
able to choose camera moves, you know, intentionally
and cleverly. So if you're telling a
crazy action story that does need those kinds
of over the top moves, you know, if you're
telling, like, a crazy, let's say, into the Spider verse, sort of, you know,
superhero story, it's likely that you will have learned
all about how to do that simply from working first with these very
basic camera moves. So that's why I'm a great
advocate of learning how to apply very simple
camera moves first, and then you'll easily know how and where to apply
those crazy camera moves.
7. Shots versus Angles: In this lesson, I'm going to explain the difference between camera angles and camera shots because it can get a
little bit confusing, and it does actually make a slight difference if
you know the correct, you know, what each
term is referring to. So I want you to have
an understanding of each of these and how to use different I also want
to explain how you can use different angles
in your storyboard. So think of every scene that you draw as being viewed through
the lens of a camera. If there was a camera here, then you're capturing
the character or the scene like this. So this is the view that
you see through the camera. Now, that's called a shot. If I move the camera
up and point it down, so it's the exact
same, you know, shot or it's the
exact same scene, but we're now looking at it from high above, looking down, we're pointing it down, then that's essentially the same
shot with a different angle. In this case, it's
called a high angle. And similarly, if I place the camera down
here and, you know, we're looking up
at the character, again, it's the same shot, but it's a different
camera angle. This one is called
a low angle shot. If you think of it
in those terms, you know, those are again, like the basic camera moves or the six basic camera shots
that we talked about. Those two angles, high angle
or low angle are really powerful storytelling shots
or storytelling devices. And if you get used
to using them, you can get very creative
in your storyboard. Last angle that I want to show you is if you've got
the same character, the exact same shot, but the horizon line is tilted
a little bit like this. This is called a Dutch angle. So it's not as common as a
high angle or low angle, but you'll start to see it in movies or shows where the
director wants to make the character feel a little
bit unsteady or unstable or the emotional intensity
of that scene to be, you know, very kind
of disorienting. A high angle and
a low angle have quite powerful impacts in
terms of visual storytelling. A high angle is going to imply
that the character within that shot is in a very low
position psychologically. They're, you know, going to feel intimidated or almost
in a weak position. Whereas, if the
angle is low down, looking up at the character, that places the character
in a powerful position relative to other people in the scene or even to the viewer. So start to notice those two angles when you're looking at a movie or a show and see if that's underscoring the storyline of that
particular film. So we've covered the
basic camera angles, the basic camera moves, and the basic camera shots, and that's all that you need in visual storytelling to
understand the language of film. Before we get into
storyboarding, our own idea or
our own narrative, I want to cover one
more important concept for storyboarding,
and that is staging. So when you're ready, let's jump into the next essen. Let's go over how to set up a shot in terms
of composition, and then we'll get into
storyboarding our idea.
8. Staging and Composition: So the last thing that
I want to talk about before we start drawing our
own storyboard is staging. This is the last main sort of visual language principle or concept that I want you to know about because it's really important to be
aware of this one, and it's going to really
help you a lot in your drawing and in
your storyboarding. Aging means essentially how you set up a shot with respect
to the characters that are in it or the scene
that you're trying to show and how you arrange
elements within that scene. So essentially, it means that if there are elements
within the shot, let's say, like trees or background
elements or props or furniture, they are all going to be read in a visual sense
by the audience, whether you're sort of
conscious of them or not. So, in other words,
where you place any of the elements
within your shot is going to be really important to how that shot is read or understood. And where you place the
character within that is really going to impact how the scene is viewed
by the audience. For example, most
common staging trick that people use is
the rule of Thirds. It's not a trick by any means, but it's simply a very, very common way to
compose a shot. If you place your character on any one of these three thirds, that's going to make a
pleasing composition. Everybody composes their shots using a rule of
Thirds like this. It's just a dynamic, visually interesting way
to set up something. If you put your
character dead set in the middle of the camera
view or the shot, it's going to make that shot or that scene look kind
of very standard, very boring, very undynamic. And sometimes that's actually what you do want to achieve. Again, think about the story
that you're trying to tell. Maybe you want to really
show this character in the middle of the shot
because it's, you know, super important to
establish stability, stable kind of ethos
around the character. But nearly 90% of the time, people will choose to use a rule of thirds to set
up their composition. The reason is that breaking down something into
three is a bit more dynamic than just simply breaking things down
into two equal halves. So placing a character on one of these thirds
is going to make that dynamic composition feel very structured,
very intentional. Now, the other common
consideration for staging for your composition is framing. And framing refers to how you
arrange the elements within scene so that they literally
frame the focal point. They're going to
draw attention to the exact point within
the shot that you want the viewer's
eye to be looking. Let's say you had a character
in the center of the scene, you could make sure that
there was, you know, a bit of, like, maybe a
tree in the foreground, that the buildings in
the background were on either side and didn't
overlap that character, or you could add some other
element into the foreground that kind of points the viewer's
eye towards the middle. So that's framing. The third very important
staging principle is depth, and it's especially important in storyboarding where we're
drawing out our shots or our scenes because
we always want to give the impression of distance
or depth within a scene. And the way this is achieved is through
implying perspective. So you can create
the impression of perspective by making sure that the elements that you draw
within a panel or within a storyboard get smaller and smaller going into the distance. That's using that idea of scale, particularly comparative
scale as well. If you've got one element that is repeated
throughout the scene, like a telegraph pole or trees, make sure that they get smaller and smaller as they move away. Another really clever way to establish depth or to give
the impression of depth in a shot is to use overlapping
elements because that will naturally lead the
viewer's eye to thinking that there's space
in between those elements, so that just sort of very, very easily creates
a sense of depth. Okay, so now we've
covered all of the main important principles of storyboarding and
visual language, in fact, the most basic, most common building blocks of visual language in
all of filmmaking. In the next lesson,
we're going to dive into storyboarding our own idea
and our own narrative. So when you're ready, meet
me in the next lesson.
9. Drawing Thumbnails for a Storyboard: No matter what you're
storyboarding, whether it's just a simple idea, a concept, or a full feature
length animated movie where you're working
from a script. The very first step is always just to jot down
some thumbnails. A thumbnail means a
really small drawing of your ultimate goal or
your ultimate vision. So you want to make sure that your drawings are
rough, they're small, and you can easily, just scratch them out
if they don't work and can add to them
or move them around. So the whole idea
with thumbnailing, especially as a process
for storyboarding, is to be rough and loose and
just let your ideas flow. And that's how I
approach it myself. I'm not even going to be
working from a script at all. I'm just simply going to
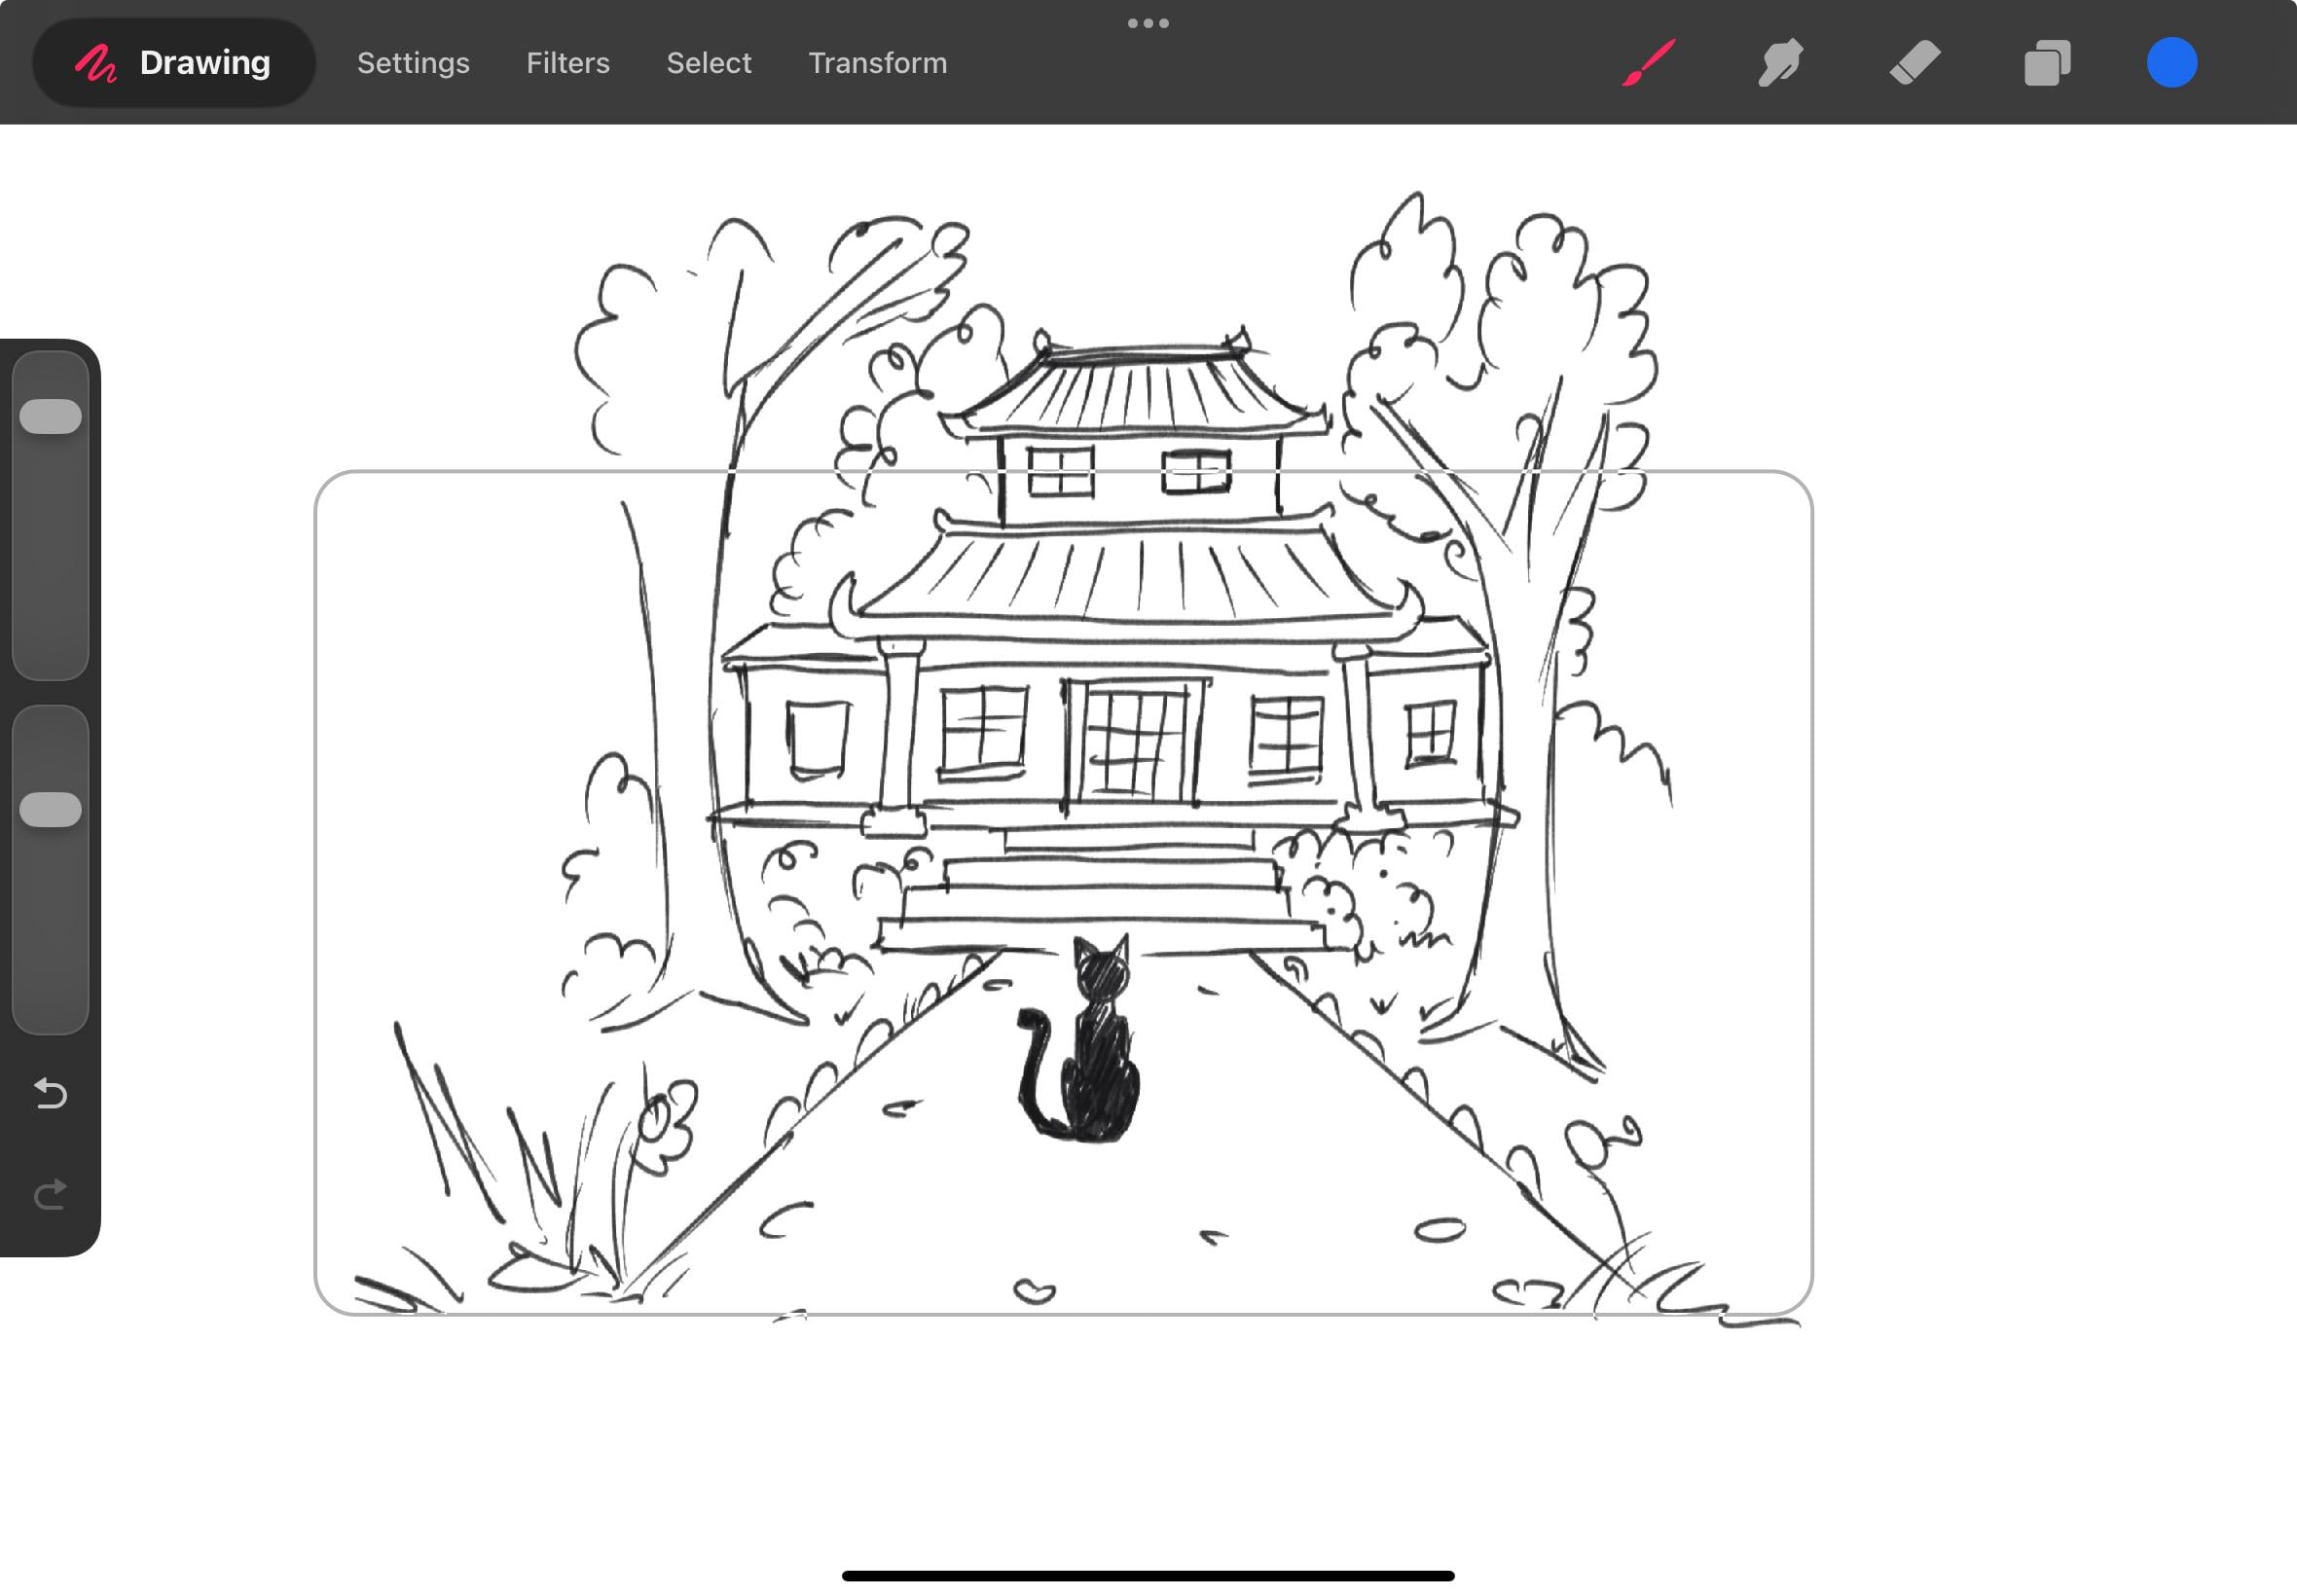
jot down visual ideas. Now, I talked about my idea at the very beginning being based on a cat in
front of a temple. So first sort of order of
business is just to get that one visual idea down onto the page and very roughly
sketch it out like this. I'm basing this off of a photo that a friend of
mine shared with me that she took in Japan where she saw a cat sitting in front of a temple
exactly like this. And I just thought it was such a compelling, such
interesting moment, a beautiful scene
that from there, it sparked this idea that I
wanted to get to know more about this cat and why was
this cat in front of a temple. So that's my very first idea. And that's my first drawing. That's my very first thumbnail. And my idea here is that the
camera's going to pan down. So we'll start at the top
of this temple pan down, and we'll reveal Nico sitting in front of
the temple like this. So if I just quickly
sketch out what that final shot would look like after the camera moves down, what we're going to do is end up seeing Nico staring
at the temple. So this is where the camera move is eventually going to end up. So I'm just jotting that down here very quickly,
very, very roughly. Okay, so that's my opening
sequence, basically, my establishing shot and then my next sort of medium
or medium close up. I'm going to copy this exact
shot using the select tool, I'm going to copy and paste
it and drag it over to here for this next shot
that I want to happen. So basically, while this
cat is sitting here, we're going to see these cherry
blossoms float into view. So that'll be my next image, my next storyboard panel. So they'll move through
the shot like this, and the cat's going to
react the cat will look up. She'll see these
cherry blossoms and that'll kind of effectively
start our story for us. Okay, next up, I'm going
to then go into close up. I want to see the
reaction of Nico looking up at these cherry blossoms
as they float past her. So the next shot is going to be a different pose of our cat. So I'm going to redraw it in this new pose where she's
looking upwards like this. Okay. So that's my initial sequence
nicely coming together. It's a very nice simple
scene, very nice setup. After that close up, I'm
going to pull back to that original wide shot from the establishing from the
opening shot that I used. And I'm going to
indicate or draw out that Nico is going to
get up and do a stretch. So Niko gets up and
does a big stretch, and then she's going to walk
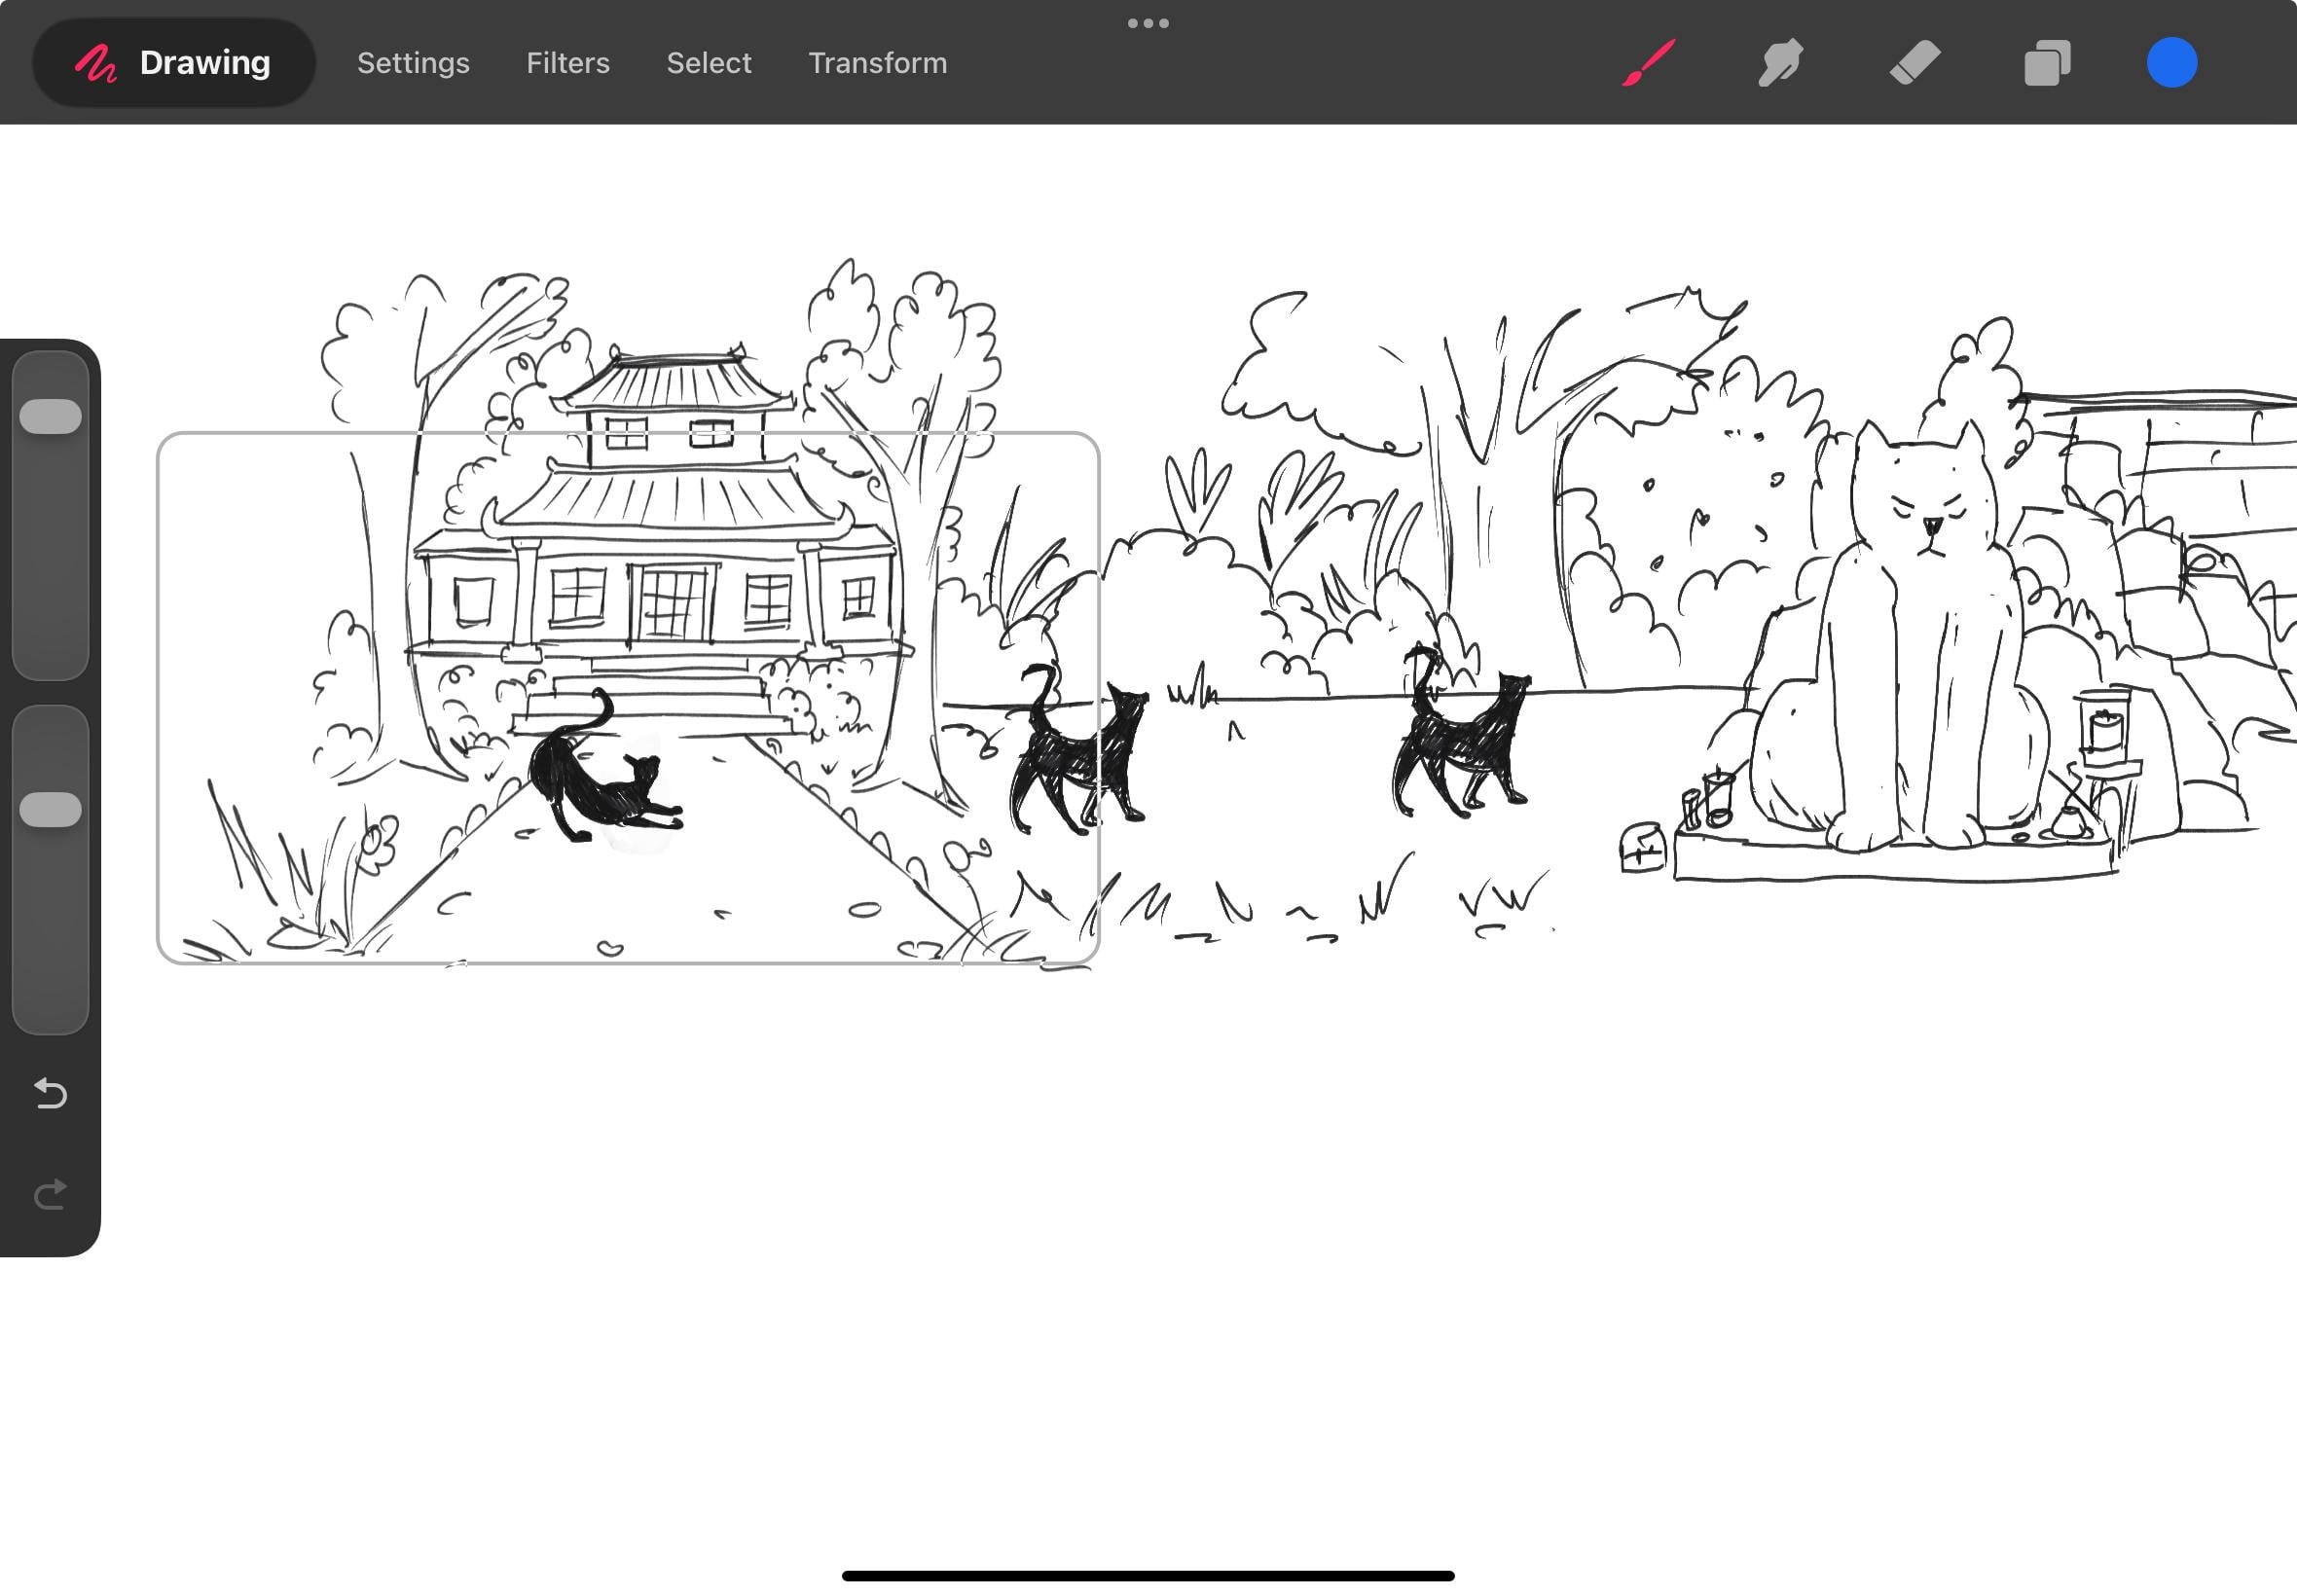
off to the right like this. So I'll draw Niko like this, walking Alright, so Niko then walks this way
to, you know, to the right. And I want the camera to
pan with her as she walks. I'm just going to indicate
that with an arrow. And she's essentially gonna walk over here to where there's a huge statue stone
statue of a cat. What I can do here
is just simply copy this exact pose a couple of times because I want
to indicate that the camera will move with
Nico as she walks by, so I'm going to
select that pose, copy it and paste it. And then from there,
Nico is going to jump up onto the statue. So I just basically
need to draw that as one pose for any action that you're doing when
you're storyboarding, especially in the
thumbnail phase, you just need to
draw one pose that indicates or explains
that action. So in this case,
one pose to show Nico jumping onto the statue and then another pose to show Nico jumping up to the
head of the statue. Okay? So it just needed
two poses really, and that describes perfectly
that entire action. And then we're going to end
up at the top of the statue. I'll just draw Nico in
a standing pose here. Like, she's already landed. She's standing on top of the statue and having a
look around and trying to figure out where
did those flowers that were floating in the air? Where did they come from?
So once she's taken, like, a moment, we can
have like maybe a beat where we just stay in that spot. I think what I'll do in this scene or in this
shot is keep the camera on Nico and have the cherry blossoms
come into view again. So maybe at this point, another few flowers float past. And what that'll do
is just reiterate or remind the audience
of, you know, why we're chasing or why we're
going in this direction. So now from here, I
think, let me see. So now the next thing
that I want to happen in this little story is
that she jumps from the stone statue onto a wall, and she's going to walk along the wall to the
cherry blossom tree. So I think for that reason,
I'm cutting back to a wide angle here so that
we can see, you know, re establish the scene again, show the statue within the
context of the environment. And that'll make a lot
more sense visually when Nico jumps off the statue and then starts to
walk along the wall. For that, I'm going
to use a pan again. So I'm going to kind of have a long tracking pan going
from left to right, following Niko walking
on this wall, and, you know, exploring the area, trying to find out where these
flowers are coming from. Just to note, when you do
copy and paste elements of your storyboard
inside Procreate Dreams, it often lands in the
middle of the canvas. So you might have to go looking for it and
then come back. So if I select Nico
copy and paste, you know, it lands back up there in the middle
of that canvas. You'll notice I'm drawing
way outside of the canvas, and that's fine for now. But
that's what you should do. If you want to copy
and paste anything is just drag it back down
to where you're drawing. Okay. So I've drawn three
poses here of Niko walking. I think that's enough to indicate kind of the
progression of that pan. And you'll notice I didn't
even change the pose. I used the exact same pose
and just duplicated it out. And that's perfectly
fine for storyboarding. Again, any action that you're trying to describe
in a storyboard, make sure you've got,
like, one or two poses that exemplify
that action. So if I have a camera
panning as Nika walks along, she's going to end up at this cherry blossom
tree over here. And from here, this is, like, now the end
of the sequence. You know, I think I'd
like her to maybe sit down under this cherry
blossom tree and just enjoy the sunset over the city and have these beautiful cherry blossoms
float in the air. Okay. Now, at this point, I did start to think of a
couple of other things. As I got to the end of
my idea or my story, I thought, Nico's all alone
is sitting on this wall, watching a beautiful sunset. Wouldn't it be nice
if maybe a couple of other cats jumped in and
not only joined her, but I think made the story feel a little
bit more resolved. So what I did was
I moved that away, and this is part of the
thumbnailing process, you know, as soon as
ideas come to you, you just try to jot them
down as quickly as possible. So even though I drew
that final shot, I then changed my mind. I'm going to have Nico in this last couple of shots
arriving at the tree because these cherry I want to give the idea that
the cherry blossoms were actually guiding her to
something better, let's say. So, you know, at the
start of the story, she's sitting in
front of the temple. Alone, really, essentially. And the cherry blossoms
were a sign a sign from the universe that she needed to be somewhere else
where she could meet friends, and other cats and hopefully
that's not too corny, but I really loved that idea that she would arrive
at this magical tree. The sun is setting, the cherry blossoms are
floating through the air, and then she meets
all these other cats. So in the last shot, I'm going to just
have a couple of other cats jump
down and join her. And I think that's really sweet. And yeah, it's
probably very cheesy, but I guess I'm a little bit cheesy anyway. So, that's fine. But that's how I thumbnail any idea or
any concept that I have. And as I said at the beginning, it does not matter if it's a basic idea,
like what I have here. I started with
basically a photograph that a friend gave me, and it doesn't matter
if it's a basic idea or if it's like a full length, you know, written
script for a movie. Always start with this very
rough thumbnail process where you just you get your
ideas out of your head and onto the page or onto your iPad as quickly as possible without second
guessing yourself, without sort of, you know, thinking too hard
about it because your initial ideas are what is going to be so
interesting for the audience. You can always
refine them later. So in the next lesson, I just want to talk
through and analyze some of the shots that I
ended up creating here, without even thinking about it. When you're ready, I'll see
you in the next lesson.
10. Analyzing Your Thumbnails: So, as I said in the last esson, you'll notice that in my
rough thumbnail process, I didn't plan out the types
of camera angles or shots. I didn't make any of those
decisions beforehand. I just drew what I
was imagining in my mind straightaway
and just let it flow. So I was literally
sort of jotting down the actual movie that I was
seeing or feeling myself. And that's what I want to
emphasize here for you. I think it's a really good way just to get your ideas out. Something isn't working,
that's when you're going to find out if a certain shot
will work or not work, but you won't have
put too much time or energy into drawing
something very complicated. Now, in this lesson, though, I want to walk through that
thumbnail process that I did, and I want to point out
the exact camera angles and shots that I
ended up choosing, even subconsciously, and I want to talk about
why they're working. Okay, so the first shot is, as I said, the
establishing shot. It's going to show us exactly where the actions taking place. We start at the
top of the temple, and we're going to pan down. So I would probably, you know, draw a frame around
the beginning or the starting point like this, and then I would draw
another frame around the end point where the
pan is going to end up. Love this shot because
it does two things. It gives us, like, a wide view or an overview, but that pan down
to the character reveals that character, and it also gives us a let's call it a wide
shot or a long shot. So we go from that
establishing shot into into a long shot you know, kind of very seamlessly. If I move over to this
next panel, like, the setup is already
kind of established. The cat is in the center here, and the next shot is
going to reveal or show these cherry blossoms
flowing into view and flowing through
the shot like this. They're going to come
in from the right and go out to the left here. Then this next shot, it's important to notice
that Nico reacts. And this is almost
like what is going to kick start the action or
it's kind of like that. What do they call
it in film terms, the motivating moment, you know, where the whole action to the movie or the whole
action to the story begins. It triggers Nico to kind of get interested
in her surroundings, to understand that
there's something outside of this temple, something happening
somewhere else because these
cherry blossoms are indicating this very mysterious
or interesting thing that could be happening
from somewhere else. So the next shot is a close up. I really wanted to underscore that interest or that kind of engagement in the character. So close up is obviously
the way to go. Whenever you have a
reaction like that, you want to cut close and
see the character's emotion. From there, I cut
back to a wide shot. I wanted to re establish that initial location
or initial scene. So cut back to a wide
where we can still see enough of our character
to do a stretch, and then she walks
over to the right, and that's where we
have the camera pan. The cameras now going to move with Nico as
she walks along. And I love that idea that her action is triggering or is motivating the
camera, in a way. So we are going with Nico. We're not sort of left behind
watching her walk away. Uh, we're not sort
of ahead of her, looking at her
coming towards us, we're walking with her
through the story. And we discover this statue of the cat at the same
time that she does. So as she walks into frame or as she walks
across, rather, the statue comes into
frame very naturally, very organically, and we see the statue for the
first time with her. Alright. At this point, she's going to jump up
onto the statue. And again, I'm going
to cut closer. I'm going to go into that
scene a little bit closer, so I'd use a close
up or a medium shot here to show her jumping up
onto the statue like this. And I should mention at
this point before we go on, just in terms of
analyzing this sequence, there are a few cuts here, so I'm just going
to indicate them. A cut means where the camera shot changes
from one shot to another. So if it changes
from a close up to a wide shot or if
it changes from a wide shot to a close up, that's essentially a cut. It's an editing term, meaning that the
footage has changed. The footage has been cut, and there's a new shot
that is now introduced. So now we're on the
top of the statue. And again, this is
where we restate our initial triggering sort of narrative thing that we used with the cherry
blossoms coming in. I want to reintroduce them here. I want to remind the
audience, you know, what is motivating Nico
to go on this journey. And it's these magical, amazing ethereal flowers that are flowing through the evening. So once she's on
top of the statue, you know, she's
probably thinking, What am I doing here again? Let's introduce the
cherry blossoms floating by and that kind of, yes, you know, kind of
reignites her exploration. So we could cut back to a wide shot here and show Nico
jumping off the statue and continuing her search or
continuing her journey and starts to walk across
walk along this wall. And again, as I
explained earlier, I'm using a panning shot
here at this stage. So I like to just indicate
those pans by drawing in a frame around the beginning of the pan and a
frame around the end. You don't have to do that,
but that's the way I like to kind of annotate
it for myself. When we get into the animation
part of the storyboarding, we're actually going
to do this inside appropriate dreams
using keyframes, so we won't need necessarily to draw these arrows on
our final storyboard, but it's a good idea on your
thumbnails to indicate them. And here she's like,
she's found the tree. We definitely want to
see her interacting or reacting to the source of
these cherry blossoms. And then I did change up the last sequence or the last couple of frames
of my thumbnail process. I'll show you now. What
I did was I introduced, you know, a few more
other cats joining Nico. Here. I drew Nico
turning around and, you know, a few more
cats jumping in. This is the exact same
shot as previously, but I think in the next one, it's a little bit wider. It cuts a bit wider
just to show the view a little bit better and to give space for other characters
to enter the shot. Again, just as a side note, that's kind of an important
thing to bear in mind. If you want other characters to enter into any scene or shot, make sure that the shot that you've chosen
has enough space. So a medium or a
close up wouldn't be wide enough for us to see other characters
joining into the scene. At this stage,
there are a lot of cats joining Nico
in the final frame. But I love it. I
think it works great. It's really gorgeous,
and that's my story. Anyway, that's how I imagined this character's
journey unfolding. Okay, so meet me
in the next esson. I'll show you how to
clean up your thumbnails, how to add shots and panels
into procreate dreams, and how to add simple
keyframe animation to make your camera
pans and camera moves.
11. Cleaning Up Your Storyboard and Building the Timeline: So in this lesson, what I'm going to do is walk you through the clean up process. Now, essentially, what the cleanup process means in animation
or storyboarding, it is when you take your rough drawings
and you redraw them, but with a very clean line. So this is an opportunity
to refine your drawings, to make any changes
that you sort of decide that you want to add or take out from your
rough drawings. And in particular, inside
of Procreate Dreams, the beauty of doing it
in this app is that we can now start to
build out a timeline. So each panel is going to be essentially a new frame on my timeline, inside
Procreate Dreams. And I'll walk you through
exactly how to do that. So as you can see, my
thumbnails are all on one page, and I want to
separate out each of these panels into
separate frames on my timeline so that I can add duration of
time to each one. So I'm going to double tap
and come out of drawing mode, and now I'm on my timeline. And you can see that the
drawing is here and it extends to the full length
of the timeline down below. So I'm just going to
scale down my page of rough thumbnails
and drag the first one over to the
center of my stage. Okay? Once I've got that drawing more or less centered
on my stage, I am then going to tap on
the drawing in the timeline. I'm going to drag the opacity of this drawing
down to about 50%. Then go over to the plus button and add a new drawing on top. And that brings you
back into drawing mode, and this is where you
get to trace over your rough drawing and make those lines nice and
crisp and clean. So the process is a little
bit time consuming. It might take a little bit
of time, but, you know, you could throw on
some music and just get into the zone because you're not really struggling
at this point to try and get your
vision onto the page. It's already there. You're just redrawing it with a
cleaner, simpler line. So take your time,
make sure that, you know, you are getting down everything
that you want to. As I said, this is also
an opportunity to take out anything that you think isn't working or
to make changes. Again, your rough drawings are just your sort of thoughts. So you're allowed to change your mind in this process
and make any changes. That's pretty much
my first drawing, my first panel done. And remember, at the beginning, I said that this first
establishing shot is going to be a pan down. So I want the camera move
to start at the top and pan down and reveal Nico sitting
in front of the temple. For now, I'm going to
actually just leave it on the end of
that camera move. I'm going to leave the frame exactly there where it is and then drag the drawing
back in my timeline. I don't want this
drawing to extend out because I'm going to add a new drawing for every new panel. And then I'm going to tap on the rough drawing underneath
and choose split content. And that way, I can now grab the rest of the thumbnails and drag the new
drawing into position. If I click on it, you'll see
I've got the bounding box. I can just drag the next
couple of panels over. So what I'm going to do
is copy this first frame, duplicate it, and paste it again into the timeline because
this is my second panel. And then I'm going to if I
turn off the rough thumbnails, you'll see there it is. I don't have to redraw it. I just copy and paste it. And this is where I want
the cherry blossoms to float into frame. So what I'm going to do is actually just add another layer. I'm going to go up
here and tap on the plus icon, add
another layer, and just over top of
this original drawing, just add in a drawing of the cherry blossoms
floating through. And then I'll tap on the layers again and go back
to the base layer, and I'm going to erase out the pose of Nico here and
just draw her looking up. Great. Okay. So that is my first and second
panels actually done. The next panel over
is a close up. It's where, you know, we see Nico reacting to the flowers. So I'm going to drag that rough thumbnail into
the center of my stage, add a new drawing
in the timeline, and then go in again
and redraw it. So just note that I'm keeping every new drawing that I'm
doing, essentially each panel. I'm keeping them fairly
short in the timeline, but it could happen
that you don't have enough seconds in your
timeline, just like me. So go over to movie settings
and just click on duration. And here you can change the
duration of the timeline. So I'm going to change it
to about 20 seconds for now and just come back out, and you'll see that the
timeline has extended, so that gives me a
lot more room to add new panels as I go. And that is the process. So I'm going to go through
my entire thumbnail page, and I'm going to follow the exact same process for
every shot or every panel. I'm just going to split them up in the timeline and make sure that each panel is when I
redraw it is its own frame. And like I said, just
take your time with it and work through it sort
of very systematically, and it will all come
together very well. For this long pan the camera move where the camera's following Nico as
she walks along, I did that as one drawing
and it'll be one frame in my timeline because I'm going to keyframe that pan going
from left to right. For this section where Nico
jumps up onto the statue, I actually made three
separate drawings, three separate frames
in the timeline. I decided, I'm not going to do a camera
move for that one. And then the last section of
the storyboard is basically, again, fairly simple
and straightforward. Nico is going to
jump off the statue, and we've got
another camera pan. So again, on this section, I'm drawing the entire
panel as one long panel, and it will be one long frame in the timeline that I'm just going to add keyframes
to create motion. The very last section is
cutting back to a wide shot, and this is where the rest of the cats are going
to jump into frame. So that means that is that is
a separate shot altogether, so I'm just drawing
that separately. Okay, so that's the end
of the cleanup phase. What I've got now in my
timeline is a whole series of frames for each and every
panel in the storyboard. So it's very nice. It's very good to have
it organized like that. Instead of the entire
storyboard on one page, now each panel has its own
frame in the timeline, and that means that I can now add some motion and
some key frames. So when you're ready, meet
me in the next lesson, and we'll add our camera moves. O.
12. Keyframing the Camera Moves in Procreate Dreams: In this lesson,
I'm going to show you how to create
camera moves in your storyboard and
also how to time out each of the panels so
that when you play it back, it feels like the natural rhythm that the finished
animation might play at. The first thing that I'm
going to do is I don't need the rough drawings
underneath anymore, so I'm going to select all of them using
the selection tool, drag through, and then just
tap hold and delete them. And then I'll come into
my first panel here. This panel is the
establishing shot. It's the pan down, and it's
going to end at this frame. So what I'm going to
do is go to the end, make sure that you're
in keyframe mode. Tap on the icon and
choose moving scale, and now you've created
your first keyframe. Then I'll go to the
beginning of that clip, and I'm going to create
another keyframe and drag the drawing down so that we start with the
top of the building. And it pans down. So,
yeah, that's great. Now, when you create keyframes on any piece of
content like this, there's a couple
of things to note. You'll see that
underneath the content, there is now another track. This is your keyframe track. If you tap hold
anywhere on that, the first thing is that
I want to make sure that the easing is even between
these two keyframes. What that means really is that there's a steady even pace. So you can select
set all easings and then set all easings to linear. Okay, so that'll make
sure that there's no slow in or slow out, that the motion is completely evenly paced
between each key frame. Once we've pound down, this is where Nico is going to notice these cherry
blossoms floating through. At this stage, this is
another camera move. So this is where the
camera pans left or right, and we end up over
at the statue. So again, I'm going
to use my cursor, go to the beginning
of the panel, select moving scale, and then I'll go to
the end of the clip, set another keyframe by
tapping on it there. And now I'm dragging the drawing across so that it lands
up at this point. So yeah, there we go. There's the camera move
going from left to right. And then I'll set all
easings to linear. Now, there is
another camera move here where Nico jumps up
onto the stone statue. I had originally
thought it would be three separate shots, but I'm seeing now that it actually works as a camera move, so I'm going to add one in here. But before I do that, I am
going to make some adjustments to the drawings
because I feel like the poses are too big, especially if I look
at the last pose where Niko stands on top
of the statue. I want everything to
be in proportion. So I'm just scaling things down. And then because I'm someone who likes to
tweak things a lot, I decided to add
in another pose. So over here, I just added another simple pose of Nico
jumping onto the statue. I felt like they needed
to be a pose that actually kind of demarcated that action a little bit better. So I'll just do that. And I might move that other drawing back and scale
it down a little bit. Okay. So now if I go
over to this clip, I can set my camera move
exactly the same way. This time it's sort
of going upwards in a diagonal motion and just make sure that all
the easings are even. And then what happens
is we end up at the top of the statue,
and that's perfect. Now, let me move across to the last shot or the
last camera move, which is on this panel. And again, it's very simple. It's just a matter of setting my starting point,
hitting moving scale, going to the end and
putting another keyframe there and making sure it's
all even, and that's it. And that's pretty much it. There's no other camera
moves towards the end. It's nice and simple. And I think that that is working fine. If I play it back, though,
I just want to point out, you know, it's quite choppy
or the rhythm is not great. It's a little bit choppy, and it's a little
bit fast, as well. So what I'm going to do in the next lesson is show
you how to time out those camera moves and those panels so that
when you play it back, it feels much more even, much more natural, and
it's easier to read. You can easily imagine
it as an animated clip. So when you're ready, meet
me in the next esson.
13. Creating the Timing for each Panel: So in this very last
phase of our project, we're going to time out some of the panels here
because this is one of the most powerful features
of Procreate Dreams in that it allows you to create
timing for your storyboard, which will essentially create a foundation layer for any animation that you
want to do on top of it. Timing out the panels
is crucial if you want your storyboard to actually flow like an animated clip
or an animated movie. Alright, so it's
very, very simple. If you think about
it, we already have everything in a timeline. So it's just really a matter
of adjusting the length or duration of each piece of
content within the timeline. And that is simply a
matter of dragging the end of each
piece of content. But just bear in mind,
if there's key frames within or keyframes
attached to that one clip, you'll have to
drag them as well. I think I'll make it
a little bit longer, so I'm going to drag it
out again, play it back. And I really like that. I think that slow pan down
works very nicely. If you get to the
stage where you want to stretch a piece
of content out, but, you know, you've got all of your content filling
the entire timeline, what I would suggest
is a couple of things. Firstly, we're going to extend the duration of our
timeline out slightly. So I'm going to extend it from 20 seconds to 30 seconds just to give myself extra
room in the timeline. And then I'm going to use
the selection tool and grab all the pieces of content in front of the
clip I want to adjust, pull them to the side, and then zoom in and adjust the length of that
one particular shot. So let's see. I want
this shot to have, you know, a bit of a pause, a bit of a beat because
this is all about, like, that moment where Nico sees these flowers
floating in the air. So then I will drag
this clip back. But again, it starts for
me, it starts too quick. So I'm going to drag the
first keyframe forwards, and that means that at the
beginning of that clip, there's just that
little bit of a beat. Which if we were to
animate this would give us enough time to set up the prose or set up the action for Nico to
do that big stretch. Let me just give that
a bit more timing. I'm drag the clip all
the way over and move my keyframes I think I think
it needs to be a bit longer. Let's see. I'll pay it back. Yeah. I think that's good. So Nico stretches and
then starts to walk. We really need to
have that pause there to show the action of
Nico stretching out. So we go from that close up, we cut back to the
wide, Nico stretches, and then starts to walk. Camera pans with her. And again, I'm going to
make that I'm going to make this clip go a little
bit differently, I think. I think what I want to do on
this clip is make the pan actually stop just slightly so that each of the poses read. Now, in order to do that, it's just a matter of, let me delete these frames
together and start over here. I'm going to add
another keyframe. At the beginning, and I will add another keyframe,
a few frames in, and another one
directly after it, and then move my drawing
up and do the same. So I'm essentially
what I'm doing is I'm placing a hold on the movement. So at each place, it's
held for a little bit. So the actual pan just occurs between those two keyframes,
and it's quite fast. It's quite a fast movement
just to follow Nico as she jumps because I want to give the impression that
the jump is fast, and then she lands and takes
a beat. That works great. And then we're at
the top. So I'm actually going to extend my timeline again go give
myself a bit more room, stretch it out to
about 40 seconds. I'm going to select all
this content, drag it out, and just let this frame or this moment last a little
bit longer on screen. Timing is all about playing things back and seeing
if it feels right. That's something
you do get used to, but you'll know
instinctively whether or not something is too fast
or it doesn't make sense. For example, this
pan is way too fast. It doesn't feel right.
And so I'm going to make it drag it out so that it's
a lot longer in duration. So the importance of timing,
you know, you might think, why are we timing
things, you know, especially if we're going to get animation done on
top of the storyboard. What's the point of timing
out any of these shots? Surely, that's the job of the
animator to figure it out. And actually, it's
incredibly important to do your timing at this
stage of any project. If you've got a storyboard, before you even move
into animation, you need to decide and
lock down exactly how long each scene or each shot in your storyboard is
actually going to be. Because once it
goes to animation, it's going to be critical that
the animator knows, Okay, I need to animate 2 seconds or I need to animate
three or 4 seconds. So everything in animation is always decided and as I said, lockdown in this phase of
any animation project. Okay, so everything I
think is timed out. Let's play it back, see
what that feels like. That's a nice slow pan down. Nice close up, and then
pull back to the wide shot, and then Nika walks over
towards the statue. And springs up and springs up. And then we see the
cherry blossoms again, jumps onto the wall and
strolls along as the sun is setting and finds
this magical tree where all the cherry
blossoms are falling. And then suddenly is
joined by loads of cats, and they watch the sunset.
I think that's great. The timing feels spot on. I think it feels perfect for me. And, yeah, that's it. So meet me in the
next sesson and I'll wrap it up with
my final thoughts.
14. Review and Wrap Up: Okay, so by now, you have a clear understanding of how to take a simple idea, how to sketch it out,
and even create a moving storyboard with camera
pans, cuts, and timing. I don't want you to underestimate the
power of this skill, even though we worked
with a really simple, quick and easy idea here. The applications of what
you've learned are enormous. This is a skill set that
very few people have. And with practice, you could
build out your own projects, you could streamline
existing projects, and you could even take on clients who need a
storyboard artist. Now as final advice for you, I want to emphasize
just a couple of things that you
learned today. Firstly, always just
imagine your story. Give yourself time
to conceptualize it. Before you do anything else, just, you know, sketch
out your concept, allow the idea to
formulate in your mind, and literally sort of watch the movie in your mind
that you wanted to create. Then, secondly, when it
comes to thumbnailing, as I mentioned many, many times, sketch
your ideas quickly. Do small rough sketches. There's a reason for this. It's because you
don't want to lose any of your ideas
that you might have. So don't start making, you know, very intricate and detailed perfect drawings straightaway. Give yourself time to really jot down your ideas in the
most rudimentary way. And then, thirdly, after
you've redrawn your panels with a clean line
and tidied things up and added more detail, when you watch them back
in Procreate Dreams, try to feel the timing. Now, this might sound
a bit crazy at first, but it's definitely
something that you can do. As you watch your
panels in the timeline, you will instinctively have a feeling for how long
a shot should be or, you know, if the flow of cuts or the flow of
shots feels right. Animators always
talk about this, you know, how an action feels, rather than how
it looks or even, you know, how it sort of
breaks down technically. So try to develop
that in yourself. Like, how does an action feel? How does the flow of shots feel? To close out the class, I just want to mention
that not only are you set up now to bring your own ideas and your
own visions to life, but you can also
use this skill to help others in their
creative projects. I can't wait to see the amazing stories
that you come up with. Thank you so much for watching. Don't forget to, you know, work on your own idea, and I will see you in
the project section.