Transcripts
1. Introduction: Learning to animate gives you a powerful creative freedom, and with Procreate Dreams, that power is entirely
in your own hands. With this app, you can
bring drawings to life, create stories that people will love and set your
imagination free. My name is Siobhan, and I'm a top teacher
here on Skillshare. I've worked for over 15 years in animation studios in
Dublin and Vancouver. Today, I focus on teaching the skills that I
learned from working in the industry so that anyone
who has a love of drawing and animation can feel confident in following
their dreams. I learned animation the hard way through a lot
of trial and error. Now I'm here to show
you the easy way. Luckily, with Procreate Dreams, animating your ideas has just
gotten unbelievably easier. In this class, I'll show you
all of the updated features, and I'll walk you through
how to use the app. So even if you've never
opened it up before, you'll get to know
it inside and out. We will start out
exploring the app with a very simple project that is a refresher on the
fundamentals of animation. Then we'll apply
those fundamentals to a slightly more
complex animation. We will animate a four
legged walk cycle and create a beautiful
cinematic scene. At the end of this class, you'll have a portfolio
ready piece of animation that you
can proudly show to prospective clients or to studios if you want to
land an animation job. More than that, by the
end of this class, you'll have leveled up
your animation like a pro, and you'll have mastered a powerful animation
tool, Procreate Dreams. With this app, there's no limit to the animations
that you can create. So if you're ready to start
animating, let's dive in.
2. Explore Procreate Dreams: In this lesson, let's dive
into Procreate Dreams. I'm going to take
a few minutes to show you around the interface and to explain all of the features and tools
that you'll need. If you've never used
Procreate Dreams before, you'll become very
familiar with this app, and if you have used it before, then this lesson
will explain all of the updates and the new features that you
need to know about. So when you open up
Procreate Dreams, the first thing you'll
see is the theater. This is the place where
all of your projects live. If you tap the" Select"
button up at the top, you can select
multiple projects, and you can either put
them into a new folder, you can delete them or
you can duplicate them. Procreate Dreams saves
your project continuously, and it also has deep history if you need to undo
actions that you've done. But I'll often duplicate
my projects just in case I want to quickly
access a previous version. It's a really handy
way to do that. Let's tap on the "Plus"
icon though to start. When you do that,
what you'll see is a few different
options depending on whatever parameters you want your project to be set
up at the beginning. Let's go with
widescreen for now. You can also tap these
three dots here, and that'll give you
options to either change the frames per second or the
duration of your project. These are settings
that you can change at any time within your project
during your workflow. So it's not essential to
do that at the outset, but certainly just to note
that I tend to work in 24 frames per second on all
of my animation projects, so do set your project to
the same frame rate as me. So then you can either
tap Flipbook to go straight into a new flipbook or Empty to open up
an empty document. I'm going to open up an
empty document so I can show you exactly the interface
and how it works. So this top half of the screen
is essentially the stage. This is where you'll do
all of your drawing, all of your hand
drawn animations, and where you move
objects around in space in order to create motion. Down here on the lower
half is the timeline, and that's where you
set the duration for any motion or action
that you are creating. So I really love this
design, this layout. I think the interface
is so clever. These two sections
perfectly match, and they're in
perfect synergy with the two most important
principles of animation, timing and spacing, which literally define and
control animation. But we'll get into that
later in this class. Let's look down at
the timeline first. The timeline is, as I said, defines the length of
time of any animation, but it's also the area
where you can add tracks. You can add multiple
pieces of content, such as photo, video, text. You can even add audio files, and, of course, you can
add flipbook animations. Then these three
buttons determine which mode of working
that you're in. You want to be in
composed mode when you're moving content around within your tracks, setting
their placement. Perform allows you
to literally add animation to an object on
stage by simply moving it. Keyframe is the
feature where you set keyframes to any piece of
content within your timeline. Over here on the right
is a Plus button. Now, when you tap on that, it gives you a lot of
different options. Obviously, there's
flipbook, there's drawing. It enables you to add
text or new tracks, photo, video or files. Let's tap into Drawing first
and take a look at this. If you're familiar
with Procreate at all, this is almost the exact same. You've got your color
picker here, brushes, eraser, all of the
normal features that you would be
used to when you're creating artwork in Procreate. The brushes are set
out here in libraries. You can have your classic
library of brushes, and there are plenty there
to choose from or the new and updated brush library
in Procreate Dreams, which is the animation brushes, and there are some
amazing brushes in here that are really suited to creating beautiful
hand drawn animations. Let's just create
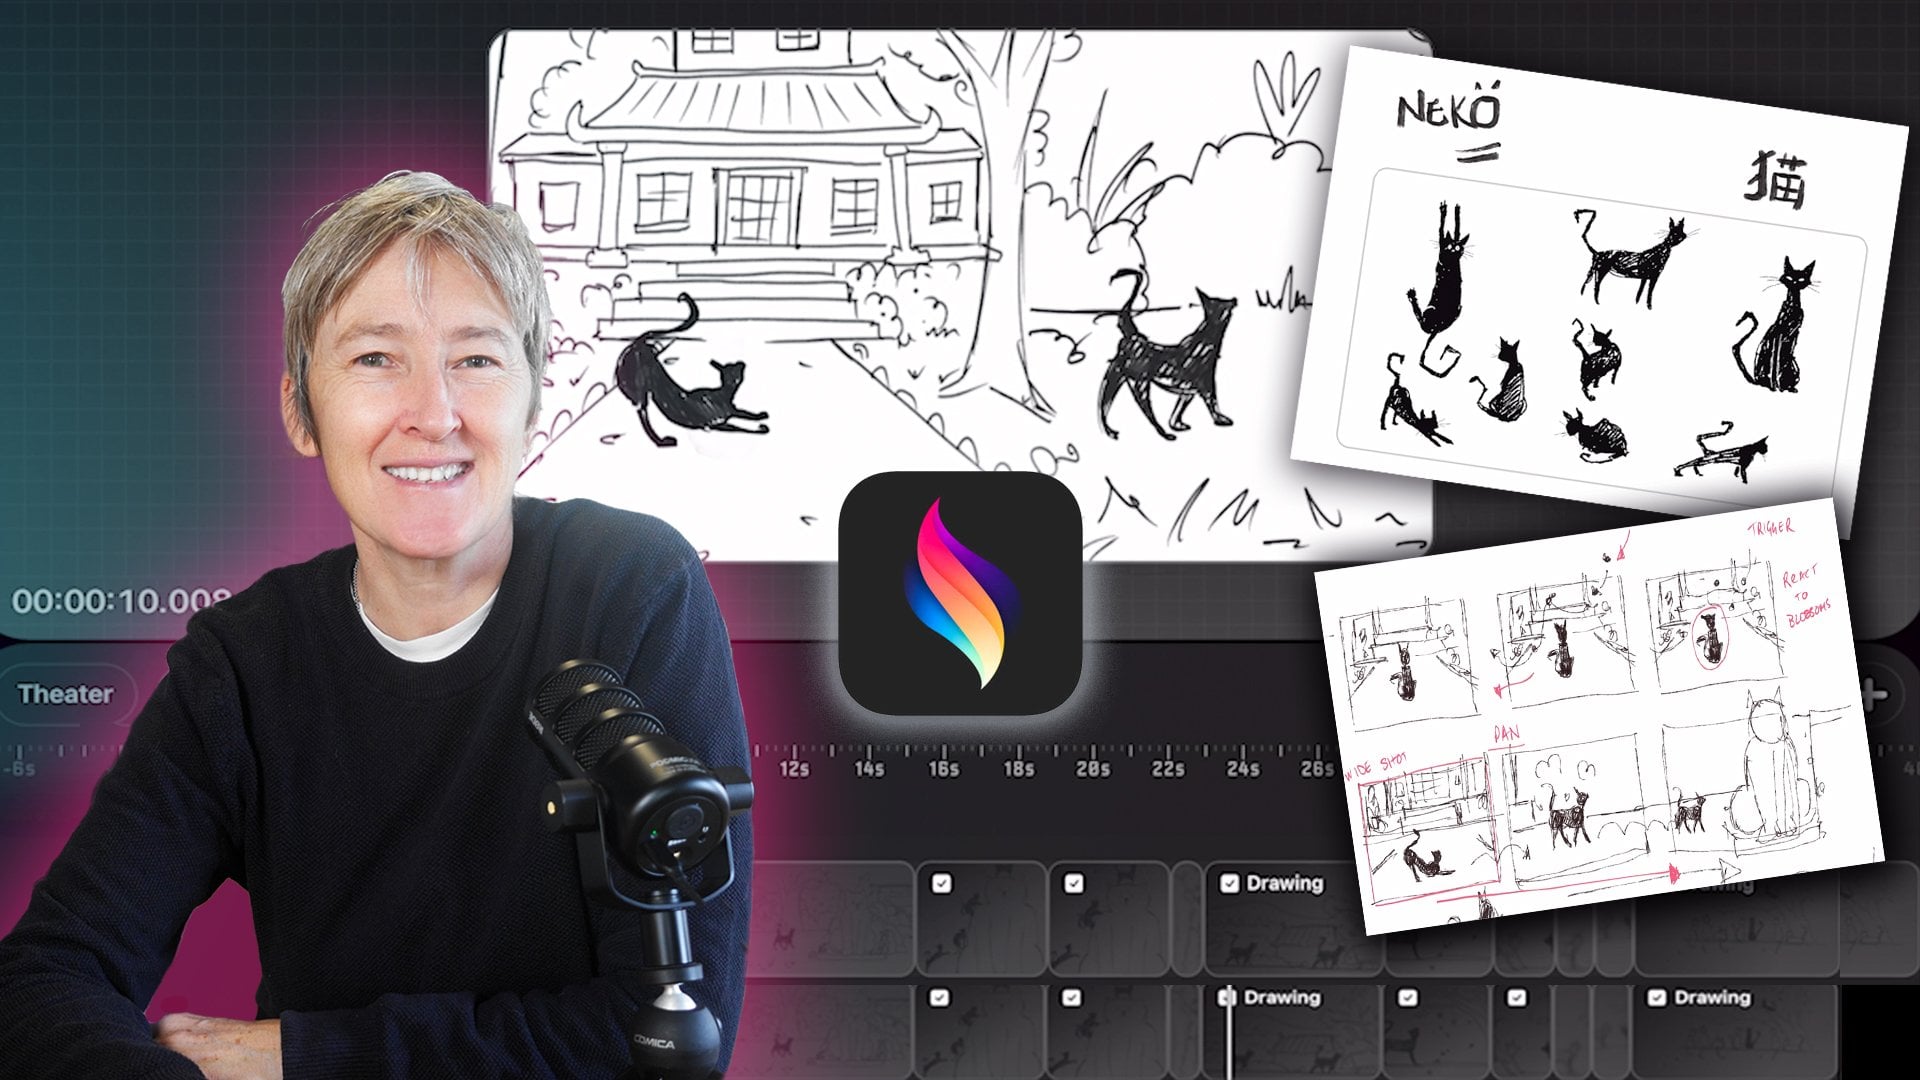
a little drawing. Let's say this is our cat. Since we're going to be doing
a little cat animation. Once you've got a
drawing on your stage, you can also select it with this new updated
Select feature. By using the free hand select
tool, you can draw around. You can also select with the
rectangle or the ellipse, and then hit Transform and you
can scale your drawing up. You can use the Uniform scale, which allows you
to scale things in proportion or free form, if you want to use squash
and stretch animation, you can also distort and
warp, which is interesting. We'll be using the Select
and Transform tools a lot during our cat
animation project. Let's look at Settings
for a second. Right here, you can add a photos directly in to the
drawing if you wanted to. You can change the
settings for your canvas. You can crop and resize your canvas if you
wanted it to be bigger. This is a feature that
we'll look at when we get into flipbook because it
pertains very much to flipbook. But the one preference that I wanted to point
out just so that you know because I do this
is under preferences, where it says, "Enable
painting with finger". That might be
toggled on for you. You might want to toggle it
off, which is what I do, simply because I know
when I'm drawing that I will often leave
my hand onto the screen, and I don't really want
that to create a mark. If you do want to toggle
that off, remember, it's under Settings preferences, Enable painting with finger,
and it's very handy. Let's double tap on
Drawing to come out, and you can see that
I've now created a piece of content in my timeline
that is five seconds long. There's no animation, obviously, but this is where you start. You start with a drawing
or a thing on your stage, and then you can start
to add movement. Like I said, you
can do that with the Perform feature or
the Keyframe feature, which we will definitely be
doing later on in the class. Let's go back up to
the Plus button, and let's take a look at Flipbook just so that we
get familiar with that. Before I do that, I'm
going to just turn off my drawing so
it doesn't confuse. Let's tap the Plus button
and then tap into Flipbook, and this is the really
power feature, I think, of Procreate Dreams is
the updated Flipbook. It's an incredibly
intuitive and easy to use feature that allows you to do hand drawn frame
by frame animation. It's essentially exactly
like the drawing mode. You've got all of the same
tools and features that you would have in drawing
mode or in Procreate. Except at the bottom, you've got an
additional timeline. This is what's so amazing
because down here, you can set really
precise animations. You can also add tracks into your animation so you can have multiple tracks, and by default, it's set to 24 frames, but you can extend that
out and make that longer, and I'll show you
how to do that. Become familiar with Flipbook, and you can experiment
with maybe drawing a few frames and just
seeing what you can create. I'm just tapping in one frame, drawing and that is
a little animation, a little sprite, jumping from
one section to the other. That's how quick
and easy it is to create smooth
motion in Flipbook. This icon here is the
Multi select tool, and if you tap on that, you can select all of the
frames in your timeline. You can tap Hold, flip them, delete them if you
want to duplicate them if you want to loop again. You can also tap on
the frame so you can see these handles
and you can drag out your animation to
two or three frames and see if that
affects the speed. Then to come back
out of the Flipbook, just double tap and you're
back into the main timeline. You also have the Multi
select tool here, which allows you to grab multiple pieces of content
in your timeline., and if you tap Hold, you can group them. You have different
options there as well. Duplicate copy and paste
and adjust the blend mode. Lastly, over here, this button will bring
you to settings. You can adjust settings
for the project. Like I said, you can change
the frames per second. You can adjust settings for the stage if you wanted to
change the background color, or if you even wanted it to be transparent so that you could export your animation to overlay
on top of another video. On timeline, I have it set to one shot or you
can set it to loop, and it will just
play back in a loop. This is where you can
export your work and where you can adjust some of the
preferences like the gestures. Let's take a quick look at the gestures in case you're
not familiar with it. The gestures in
Procreate Dreams, again, are a very
powerful feature. One gesture is simply
just to pinch to zoom in and out of your timeline or to zoom in and out
of your stage. You can also use three
fingers to scroll up to expand the tracks
in your timeline or three fingers scrolling
down to compress them. Three fingers moving to
the left or right will zoom in or out to a specific
area in your timeline. The gestures are
actually very intuitive. You probably will be using
them without even thinking, and it just makes your
whole workflow feel very seamless and
very intuitive. That's a really brief
overview of the stage, the timeline, and
all the features and tools in Procreate Dreams. We're going to get to
know all of this really well as we work through the
projects in this class. But up next, in the next lesson, I thought we'd take a
look at one of the most fundamental and most basic
of all animation projects. It's a really fun, really
easy animation to do. It's the bouncing ball. If you've taken any of my other Procreate
Dreams classes before, you'll be very familiar
with this project, but I think it's always
good to review it. I also think it's
going to give us an opportunity to not only dial deeper into the features of Procreate Dreams a
little bit further, but also to talk about those two really
important aspects of animation that I mentioned,
timing and spacing. So when you're ready, meet me in the next lesson.
3. Practice Animating Timing and Spacing: This lesson, let's
review a project that's in every animation
class or curriculum, and that's the bouncing ball. It's a great project because
it teaches you all of the fundamentals of animation like creating
key-poses, in betweens. But for our purposes
in this class, I want to use this
project as a way to review or to show you two of the most
important principles of animation timing and spacing. Plus, this is a great
opportunity for us to explore some of
the Procreate dreams features before we dive into our main animation project in
this class. Let's dive in. I've created a brand
new empty project, and I've set the framework
to 24 frames per second. What is timing and spacing? Timing relates to
the amount of time that any action or
animation or motion, the amount of time
that any action takes, and spacing relates to how that action moves on
screen or on your stage. Let's look at the Bouncing
Ball project because that immediately shows
you exactly what these two principles mean. One of the first things
that I always do whenever I'm going to
animate anything at all is I create a guide layer or a bit of a rough thumbnail
as a plan for my animation. To do that, I'm going to
tap on this plus button, and then I've got a few options
here of what I can add, and I'm going to add a drawing. I'm going to tap on drawing, and that brings me
into my drawing mode. For the bouncing
ball, essentially, my idea is that it's going
to come from off-screen. It's going to
bounce once, twice, maybe three times,
and roll off screen. What I do is I draw out
just a rough guide my idea. As I said, this is
the ground plan, and then my imaginary ball. My ball is going to
come in from offscreen, bounce once, maybe bounce twice, three times, and then
roll off like dash. Now I'm going to double-tap to get out
of the drawing mode, and you can see, there's
the content in my timeline. Let me tap hold on that, and then I'm going to drag this opacity down just to
fade it out a little bit. I don't want it to
be too overpowering. I'm going to come back over to the plus icon and
add a flip-book. Just for the sake of simplicity, I am going to create a round circle using
the ellipse tool. I'm going to select
and then make sure that ellipse is active, and just drag out
anywhere on the stage. If you place another
finger onto the stage, that'll ensure that you
get a perfect circles. Let's say about that much. That's good enough, and drag the color into there. Let's drag it into place there. That will be my starting point. That's Frame 1. Let me copy this. Further down the timeline, let's say, take at Frame 8, I'm going to paste it
and move that all down. Now, you can see that ghosted
image is the previous one. If you don't see the previous, come up to your settings. Here under Onions, you can adjust your
onion skin visibility. You can turn it
off or turn it on. I like to have the
previous frame. I like just to see one, but you can keep it
at four for now. The forwards frame is at four, and I'm going to change
my onion skin color from yellow to blue. Now I'm going to go
ahead in the timeline. I'm going to copy that position in drawing and maybe go to Frame 14 or 15 and
paste it there. Grab that and move it around, and then do one more
copy that drawing, copy. Let's go to Frame 19, paste, go to transform. That'll be the last bounce. Then at the end
of the animation, it will roll off screen. Copy and paste at the
end there, move it out. Now, essentially, to play it back is a bit weird. Nothing will happen because
there are no in betweens, but I've worked
out my key poses. This is what timing
and spacing is all about tiiming means
how long it takes for that drawing to go from that moment in time to
that moment in time. Spacing means where are you going to put
your in betweens. There are six drawings
in between here. If you were to put them all up squished up in this corner, or if you were to put them
all up squished up here, it would affect the
speed of the animation. I'm going to show
you exactly that. I'm going to copy Frame 1, copy and then paste it. Transform and using the onion
skin feature, I can see. I'm going to move it very
slightly, keep it there. Copy this drawing, or you could even just
for now duplicate. Let's duplicate, transform, drag it out a little bit
incrementally further. Duplicate, transform. Let's not do too big of a jump. Duplicate there. Duplicate once more, transform, look at there. Then I'm actually just going to grab this
one and drag it in. Let's go to Frame 1. If I scrub back, you can get
a feeling for that timing. It's very slow, and then it
shoots fast to the ground. That's one bounce done. I'm now going to animate between this frame and this frame
to do another bounce. Let's quickly go ahead, duplicate that.
Following the guide. Then I think I'm going
to drag this frame back. Let's look at that now. Scrubbing through.
That's pretty good. You can now start to easily see that when drawings are
spaced close together, it slows the movement or
the motion down slightly. Let's do the final
bounce quickly. Let's go back to this
drawing, duplicate it. There, and then
from here on out, it can just roll out. Maybe it does do a little
bit of a shoot out there, and then from here, it's just
going to really slow down. Then I'm going to bring this
last frame back into this. The bouncing ball is done, and you can see as
you scrub through the timeline that it
is actually working. It looks like something's
moving on screen. Now, I want to show you this
next very important thing. This is one of the
things that I want you to start to look
at as an animator. What does this feel like to you? To me, it feels like
a ping pong ball, just like really springy, really bouncy way too fast. I'm going to actually
slow this down. What I've done essentially
here by putting all of these drawings on one frame is that I have animated on ones, meaning that each
frame has a drawing. I actually want to
slow this down, and what's called
animate on twos. To do that, let me
quickly come out of flip-book and drag
my flip-book out, so I've got more frames to
work with. I'll go back in. Now you can see I've
got at the end, all these empty frames. What I'm going to do is use
the multi-select tool here, tap on that and just
select everything. Now with everything selected, what I can do is tap
on Frame number 1 and drag one of these handles
out to Frame number 2. What that has done
is it has given every drawing another frame. This is what's called
animating on twos. It just means that I've
now doubled my animation. I've made it slower. Let's play it back and see. Now, that looks a lot more
natural, not more realistic. I'm seeing a little
bit of issue there. There's too many frames there. Let me go back to
one for a second. What happened there?
Come back to this here. In here, even with
the onion skin, I can see it's a bit
too many frames, so I'm going to remove
frame, this one. Tap hold on that
and delete frame. The timeline has
just deleted it. That's there, there. I don't need this drawing, so I'm going to delete frame. Now let's play it back and
have a look. We're on ones. Let's come back to select
everything, like that. Come back to the first frame. I always like to do it at the
first frame just to ensure that everything shifts properly. Play, much better. There's a lot more that
you can do to make this project or make this animation a bit
more sophisticated. You can add squash and stretch. In the fast sections
of the animation, like here, for example, this drawing can be stretched just to give
a sense of speed. It's a really nice thing to do, to make your bouncing
ball look more cartoony, look more animated. I would even maybe bring this down so that it's in contact. Wait, hang on a bit, like that. Let's move this one there. Then the stretched pose, those are your stretched poses, your squashed pose
is for impact. Whenever something impacts
or has that a heavy impact, you can do a squashed pose. What that does is it just basically gives it a
bit more of a spring, a bit more life to it. You can do it on the
other side as well. You could maybe stretch out this drawing if you wanted
to really emphasize that. Then I would do it on
the other side as well. Even though, I think that maybe this drawing
is slowing down, or the velocity of the bouncing ball is
definitely slowing down, but maybe just
slightly like that. Have a look at that. It just
feels a bit more cartoony, a bit more personality-driven. Some people like to also
play around with the timing. Maybe on the fast poses, you can give them
just one frame each and then see if that affects us. Let's have a look. Maybe if you drag some of these middle frames
out for three frames, maybe that changes the speed or the character of the bounce. I think there it looks
a bit more [inaudible]. [inaudible], by the way, it's a very technical animation term. That's a quick
refresher course on timing and spacing and animation using the perennial
bouncing ball. Super fun project,
super easy to do, and there's a big payoff. It's very satisfying
to be able to do that. In the next lesson, what I'm going to
do is break down the mechanics of a
walk cycle and explain exactly what poses we're
going to be working with when we move ahead to animate
our four legged walk cycle. When you're ready, meet
me in the next lesson.
4. Learn the Mechanics of a Walk Cycle: In this lesson, let's talk about the mechanics of a basic walk. By that, I mean a simple, two legged human walk. It's from this basic walk that
we'll be able to build out our more complex four legged walk cycle in
the class project. On the surface of it, a human
walk looks really simple. It's 1 ft goes in
front of the other. But what I want to show you in this lesson is that there are a few very slight
movements that you might not pick up on when you look
at a regular person walking. But if you don't have them in your animation as key poses, then the walk cycle might
look a little bit odd. Got a very basic stick figure in a walk cycle here that I
just wanted to keep things as simple as
possible to show you the main parts of this animation that you
need to know about. As I said, you might
think that taking a step is literally just 1 ft going in
front of the other. But when you break that
motion or that action down, there are actually a couple of subtle movements that
are present in it. I'm going to explain
exactly what they are and how to achieve
them in this lesson. But first, let me just point
out that I've separated out this character's left leg
and arm and their right leg. Right arm in order to also show you that when a
person is walking, their arms will oppose the legs. In other words, if this is
our character's right leg, then their right arm swings forward when that leg
is swinging back. Similarly if that's the
character's left leg, then their left arm will
be opposing that leg. This is called a contact
position or a contact pose, and it's always the first pose in a walk cycle when
you're animating. From there, a character
will then go into a slightly squashed
pose or it's called a down position because the knee will bend foot goes
flat on the floor, and that causes the whole body to slightly shift downwards. After that, what
happens is the figure, the character will propel
themselves up into what's called an up position or a
passing pose and from there, before they topple
over altogether, the leg swings forwards and catches them in the
next contact pose. You always start with
a contact pose and end with a contact pose in one step. You'll notice that
I've actually got two steps in this animation. I've got the first step, which we've just
gone through, and then I've got another step, which doesn't quite end
on the contact pose, and that's because I'm creating
what's called a cycle. A cycle will always loop back on itself in order
to play seamlessly. I've animated from
this contact pose, I've animated the
exact same poses, but I've kept that last
contact position out of the equation because
the animation loops back there at
the very beginning. If you're still with me, great. Let me just What
I'm going to do is turn on my notes here
so it's very clear. Let's just review what
I've went through. You'll always start
with a contact pose. The next pose or position is called a
down pose from there. The third pose that
you want to have in a walk cycle is the up pose. This is where the
character starts to push themselves up in order to
propel themselves forward. Passing pose is almost the highest in the cycle and you'll note that the
characters almost on their toes and they're
really moving forwards. Then there's what's
called an in between, and it's simply a pose
or a drawing that is in between this high passing pose
and the next contact pose. Just reviewing that,
you've got contact down, up passing in between, back into contact
and then you repeat those poses for the
next leg swing. Character will move down,
go into an up pose. Passing pose in between and then arrive
into that contact. I'm going to turn off my notes, and let's just grab all of
these frames and come down. I'm just going to extend
out the animation, maybe for two frames
or three frames, slow it down and you'll
see it's quite a fluid, seamless walk and
everything's moving, and it looks natural. Those subtle movements up
and down are what give walk an animated walk cycle its fluid and natural feeling. If you didn't have that,
it would look a little bit unrealistic or a
little bit stilted. Those are the key pointers to be aware of for any
walk cycle and what we're going to do is apply this to our four legged animal
walk cycle for our cat. When you're ready, meet
me in the next lesson, and we'll start animating
our cat walk cycle.
5. Plan Your Animation: In the next section
of this class, you and I together are going
to create a really lovely, really gentle walk
cycle for a cat. Now, in this lesson, I'm
going to show you our plan of action for this project because planning out your work is
really a crucial step, and every animator will
always spend time, first of all, planning out what they're going to do for
the entire process. I think for beginners,
this one step, this planning step
is so important, it's usually the step that can actually make or
break your animation. In general, the process
for any animation project, whether it's a simple scene, a one shot action, or even a full story or a
movie, it's as follows. Step 1 is research and
design and development. It's really crucial
to take some time to observe the thing that you want to animate. In this case, a cat. Don't take my word for how a cat walks or how a cat moves. Go out and research or watch clips of
live action animals. Step 2 is to break your
animation up into phases. In our case, we're
going to split up our animation into
two main cycles, essentially a cycle for the back legs and a cycle
for the front legs. Then we'll add the body and
then we'll add the tail. Now, there are a couple of reasons why I'm
doing it this way, but it will be come clear
when we work through it. But mostly it has
to do with staying organized because once
you start animating, especially hand drawn
frame by frame animation, it can get quite complex, and you won't to be able to keep everything manageable
and organized. The other reason why I'm doing the front legs and the back legs separately is because there's a specific quirk to an
animal's walk cycle, which we will dive into
when we get there, but the back legs need to be offset by a couple of frames. But I'll explain all of
that when we get into it. Then the third phase is to
draw all of the rough poses. Now, we're going to draw our
poses really rough at first, and we're going
to make sure that the animation feels right. Once that's in
place, then we know everything will be working
from there on out. The fourth phase is the
cleanup and color phase, and then the final phase
is adding the background. You can keep this checklist
handy if you like, just to make sure that
you stay on track. To be able to monitor
your progress. You can also use
this checklist as a template for any other animation project
that you want to do. If you're ready to
start animating, meet me in the next lesson.
6. Animate the Back Legs: In this lesson,
we're going to start the animation for the back legs. Now, we're keeping our work
very rough at the start. This phase is really just
about trying to figure out what poses we need and what
poses are going to work. To do that, I'm actually going to start with a
really rough drawing an under drawing of the cat
in the main contact pose. In a blank document,
tap on drawing, and then you'll get into
the drawing interface, and this is going to be
my very rough key pose. I'm just using
black to draw with, and my brush that I'm using for this is
called Double Man. I'm going to start out with
two circles like this for the back legs and
the front legs. Then work up the pose, just like this, keeping
it very simple, circle for the head. Don't be too worried
about getting anything exact or anything super
neat at this stage. Take your time because
this will really be the foundation for the entire character
throughout the animation. I like to do this at the very beginning just to set myself up so that I've got something that I can
always refer back to. In animation terms, that's
called staying on model. If you've got a rough drawing underneath your
animation like this, you can always just
check that you're keeping the size of your
animation consistent, as well as volume and
things like that. Once I've got my very
rough-looking little cat, the next thing that
I want to do to set myself up before I even
start animating is just add in a ground
plane for the cat to walk on because
it's very important that the feet stay
on the exact on the same line and that
they don't move around. In order to do that, I'm
going to make a new layer. I'm just going to use
the rectangle tool, so I'll click on Select, make sure rectangle is active, and then click and drag out. From there, you can add a
color in any color you like; it doesn't matter and make sure that it matches
up to the feet. Then double-tap and come
back out to the timeline, and that's your as I said, I call this the
foundation, really. You've got a grand plane, and you've got a
really rough drawing of the contact position. I'm going to tap and
hold on the drawing, and I'm actually going to
lower the opacity down to about 50% and then come over to the plus button and add my
flip-book on top of that. Now, when I go into flip-book, you can see that
that under-drawing is visible because I've
lowered the opacity down. It's not too overpowering. This is really useful to
always refer back to and make sure that everything stays in the same size, the same volume. I'm going to go in,
and on frame Number 1, I'm going to copy this pose. I'm still drawing it rough. Don't worry about
being precise yet. Then once I've done that, I'm then going to tap
hold on that frame, copy it, and I'm going to
come down the timeline about, down to frame Number 6, and I'm going to paste
that exact frame there, and that's going to be the other contact
position for these legs. Basically, when one
leg has swung forward, and the other leg swung back, it will arrive into the
new contact position. Here, I'm just going to
switch those legs around. Perfect. Before I
do anything else, I'm going to add a new track, and I'm just going
to label all of these poses or positions
for the animation. This is the contact position. It's one of the most important positions
in the walk cycle. This next pose that
I need to do after the contact is always
a down position. Then, following that, there's always the up position. After the up position, there is the passing. Then, between the passing
position and the next contact, there's always an in between. I'm just going to write
in between there. Now I know that I've
got a very clear guide, a very clear formula
for my animation. I know all I have to
do is do literally four more drawings for this
part of the walk cycle. Firstly, I'm just going to
copy this circle exactly, and then hit the
transform button and slightly, slightly
nudge it down. You don't want to make too
big of a movement here. I know the temptation is to really make big
movements if you think, this is a down position or
this is the up position. But actually, you just
want it to be very subtle. Just nudge it down
ever so slightly. From there, start to
drawing that pose. On the dam position, that leg that was
forwards is sliding back. Since this is a cycle, the cat's walking on the spot. We want that leg to come back, and this leg that's
back there will be very slightly
moving forwards. Now I'll go ahead to frame Number 3 and draw
in the up position. My first thing that I
do is draw the circle again, grab the transform. Then nudge it up very slightly. Now, drawing that leg that
has been moving back, it's in the middle
for the up position. Now we're doing
the passing pose. Again, I'm going to
trace my circle, and the passing pose is actually the highest pose in the cycle. I'm going to nudge
that up very slightly. For the in-between drawing, what you're going to do is
simply make the circle again, nudge it down slightly, make sure that the
legs then are in a position that's
between what you see as the pink or purple
previous frame and the blue subsequent frame. That's what your in
between will look like. That is one half of
the walk cycle done. In order to complete the walk
cycle for these back legs, we need to make
sure that there's one more leg swing so that we arrive back at that
first frame here. It's the exact same process
and the exact same drawings, but just the legs are switched. I'm going to copy my first
frame, my first contact. I'm going to go ahead to frame Number 11 in the timeline, and paste it there
in order that I can reference where I'm
going to end up at, by the end of that leg swing. Then, repeat the process, do the down pose, drawing the up pose, drawing the posing and
drawing the in between. Now, if I play it back, that's actually
working very well. If I hit the multi-select
button, select everything, and I can drag them
out to frame Number 2, and that essentially
means that every frame in the timeline is two frames long. Now, if I play it back,
it's a lot slower. You can notice at the very end, there's a slight glitch
or a slight hold, and there is that glitch is because that first
frame, remember, I copied it over into Frame 11 in order
just to reference it. I don't need it because the animation loops back
on itself into Frame 1, so I'm going to go ahead and
delete that out. That's it. That's a perfectly good
animated walk cycle for the back legs. We got that done very quickly. In the next lesson, we'll
move ahead and animate in the same way the frames and
the poses for the front legs. When you're ready, meet
me in the next lesson.
7. Animate the Front Legs: Amazing. We've got the
back legs working. They're animating great, and now we're going to animate the cycle for the front legs. It's the exact same process. It's the same poses,
the same drawings. The only thing to keep in
mind is that, obviously, the front legs are a slightly different
shape to the back legs. We'll just be mindful of
that as we draw our poses, but still keeping it very
rough and loose at this stage. I have made a new track above the track where I drew in all the poses
for the back legs, because I want to keep both of these sets of animation
on different tracks. On this first frame
in my new track, I'm just proceeding
exactly as before. I'm drawing in the
first contact position. Now I can go back
out to the timeline and turn off that base drawing, that underlying drawing,
and I can continue to work now that I've got
my first frame locked in. I'll copy that, and I'll paste it again over on Frame Number 6 and switch the legs around so that this is now my
second contact position. Then, as before, I'm just going to
work methodically from one contact
position to the next, doing the down position first. It's the exact same procedure, simply tracing that circle
as my guide initially. I'm always tracing the
purple or pink onion skin, which represents
the previous frame. I trace that, and then
using the transform tool, I just nudge it down into position and then
draw in the legs. What this round circle does, you might wonder, why are
we doing it this way? It's really handy to make sure that every
drawing on each frame is going to be in the correct place or
is going to match up at the end when the animation is finished and
when the legs are moving, you don't want the
legs to be slightly off center or not
in the right space, and working with a
circle like this as the place where
the legs move from will ensure that
they're always be exactly on the right spot
when they are moving. When it gets to
the cleanup phase, we'll be totally erasing
these circles, but for now, it's just an incredibly
useful tool or a useful guide to have as you're working out the
poses for each of the legs. As you can see, every
pose that I'm doing, I'm able to scrub back and
forth in the timeline and make sure that I'm keeping
an eye on the movement. It's one thing to
reference the onion skin, but it's also important to scrub your animation
back and forth like this and just make
sure that to your eye, visually, things are moving naturally and there's
nothing jumping out. As long as you maintain a consistent in-between drawing approach in the
sense that you're consistently making sure that your drawings are in between the purple on onion skin
and the blue onion skin, your drawings will
not be out of sync, or they won't jump out
during the animation. That's one side done. That's my first half of my
walk cycle for the front legs. I'm going to come to
Frame 1, copy that, and just like we did before, I'm going to move ahead
in the timeline to Frame Number 11 and
paste that there. Now I have something
that I can reference. It can seem a little bit tedious and a bit of a heavy workload to make all of these drawings, but in actual fact, it
doesn't take long at all. And once you've got
these frames drawn, your animation is nearly done. There's a few extra
things we do have to do, but it's amazing how this is the absolute foundation of
the four-legged walk cycle, and once you have it in place, then you're pretty
much almost halfway there to completing the
entire cat animation. Now I'm going to delete
that last frame. I don't need it anymore. Check back, and that's great. Let me select everything, drag all of the animation out. That looks great. That
looks really good. I'm going to drag it
out to three frames. Just to slow it down, that
slows it down slightly, and I think that
actually looks better. Let me bring it back to ones and look at both
of the legs together. Now, there's one thing I want
you to note at this stage, and that is that if I play
the animation back with both legs walking
together, it looks good. It's absolutely working. However, one thing I want you I want to note
at this stage, I want you to be
aware of is that, in reality, a
four-legged walk cycle doesn't actually work like that. In reality, an animal,
when it's walking, the back legs and the front legs are not on the same timing. Our animation has the
exact same timing. If I play it back,
you'll see that the back legs and the front legs are moving at the
exact same time. They step down onto the contact position
at the same time, so we don't really want that. What I'm going to do
is I'm going to use the back legs as my lead, and then I'm going to select
the first two frames, drag them to the end, and then select everything on that track and drag it
back to the beginning, and now the back legs
start on the up position. I'm going to drag that track to the
top just so that I can reference my markers. For my markers, I'm going
to select all of them, and I'm going to drag
them so that they match the correct position
of the back legs. If I turn off the front
legs so it's not confusing, you can see we've
got contact down, up passing in between, and back to our contact again. This then would be the down. This would be the up position, starting at Frame 1, then the passing and then
the in between again. I'm going to use those markers simply for the
back legs for now, working as we work forwards. If I play it back
now, you'll see it looks much, much more realistic. That's a really tiny, but quite a complex and
important tweak to make to your animation to make sure that for a four-legged
walk cycle, you have offset the back legs from the front legs
by those two frames. Having that offset
will really make your four-legged walk
cycle look realistic. Now, in the next lesson, we'll start to build out the cat and add the body on top
of the leg animation.
8. Add the Body of the Cat: Believe it or not,
you've got most of the animation done for this
project at this stage. By animating the legs, even roughly, you've achieved a huge amount of work already. The really hard work of this animation is
actually complete. Now, I know it's rough, and we will be
cleaning it up later, but I just wanted
to point out that once you've locked
down these main poses, the rest of the
work is very easy. What we'll do in
this lesson is we'll add the body of the
cat onto the legs. Now, I've kept it as
a separate phase or a separate section because there will be some
very slight movement. But what I really want to do is make sure that this part of the cat is quite
precise in terms of the linework and that it
matches up to the legs. I'll show you
exactly what I mean. Just to review where
we are, firstly, we've got our front legs animated and the
back legs animated, and everything is
working perfectly. Scrubbing through the timeline, I can see there's no issues.
Nothing's jumping out. What I'm going to do now is move ahead and add the body
and the head to the legs. We have a full character. What I'll do is I'll go back
out and turn on my drawing again and then come back into my flipbook
and just see the cat, cat drawing so that I
can start to trace it. I'll make a new track as usual. That's the amazing thing about the updated flip book is the
ability to make new tracks. I'm going to lower the opacity of both
of the leg animation. What I want to do in this pass
is basically draw as close as I can to the reference underneath and try
and draw it with, as few lines as possible. Now, the reason I
want to do this is because I'm going
to keep instead of redrawing the body of
the cat on every frame, like we did with the legs, I'm going to copy and paste this one drawing
into each frame. It's a lot less drawing involved in this section
of the animation. But because I'm copying and
pasting the same drawing, I want to be able to make sure
that it's going to match. I will get an
opportunity to make a really clean line when we
move into the cleanup phase. But like I said, I
want to be able to match my animation up to the legs as closely
as I possibly can and you'll notice that
on the back legs of the cat, for example, there's
quite a close match with the line of the body of the cat at that
point and that's why I'm taking a little bit of
extra care on this drawing. I'm going to copy this frame, I'm going to go over to
the contact position and paste it down, and then using the
transform tool, I'm just going to slightly nudge the drawing
so that it matches up to the back legs exactly. I'm using the back
legs as the marker. I would suggest
choose one section of your drawing that you
always want to match up. Then I'm going to copy that and paste it to the other
contact position. Remember, when I'm talking about the contact position or
the up or down position, I'm referencing the back legs. My markers on the top track are relating to the animation
of the back legs. What I'm doing is basically moving forward through
each of the poses, copying the drawing
of the cache, and matching it up
to the back legs, depending on whether or
not it needs to be nudged slightly up or slightly
down depending on the pose. This is the up position. I'm tweaking it, so it's
very slightly moving up. Again, as I said before, you don't want to
make huge movements. Just some very subtle
movements will make a big difference to the animation and
that's all you need. You just need those
very micro movements for it to read like a
natural cat walk cycle. Then the last pose is the
in-between and again, you can see the
lines there clearly, I'm going to just nudge it down, so it's in between
the purple onion skin of the previous frame and the blue onion skin of
the subsequent frame. Now I can scrub through and
see what that looks like. It seems to be quite a
nice, smooth animation. There's a little
slight movement, and I think that's all I
really want in order to have that very natural fluid
movement of the cat walking. I'm going to bring the opacity back up on
the leg animations. I'm going to select
everything in my timeline, and I'm going to drag
the frames out to about three frames each
and then let's see. I'm going to come out
of flipbook, actually, and drag my flipbook out because sometimes the
frames get cut off. If I go back into flipbook now, that should be fine and let's have a look.
That's brilliant. That's a very nice
little walk cycle, and it looks very natural. The legs are moving well. The head and the body of the cat have got a
nice motion going on. It feels like it's a
natural little walk. Brilliant. In the next lesson, let's add the tail.
9. Animate the Tail: This next step is just simply adding the tail onto
the existing animation, and it's very straightforward. There's only going to be a very slight subtle
movement in the tail, and just as I did before, I'm going to create that on a separate track
inside flip-book. What I'm going to do is
use my multi select tool, select everything
in my timeline, both the leg animations
and the body and head, and just making sure
everything is selected, I'm going to go back
to the first frame, tap and hold there and
drag everything back so that everything in my
timeline is on one frame. It's just a lot easier to work
when everything is on one. I'll make a new track. Start in the contact position. I always like to start
at that starting pose, and then I'll just
grab my regular brush, and start my rough idea of how I want the tail to look like. My inspiration for
this cat animation is the cats in Nagasaki and
Japan, called Omagari cats, who are well known
and quite famous for having bent tails little
kinks in their tails, sometimes called
question mark tails. I think I'm going to
draw my tail like that. I think that's fine. That's fine for the rough pass. The cat's tail
moves a little bit like this as he steps forward, and then we'll obviously move back into that starting
position again. That's how I'm going
to animate the tail. Again, very subtle movement. I don't want to have
huge big movements here. It'll be very straightforward. Again, just like the body
and head of the cat, we only need to copy and
paste our one drawing and to make sure that it matches up to the animation that
we've already created. I'll just copy this frame, go to the next or to the
other contact position and paste it so that it's
in the same pose. Then I'm going to just put a frame roughly in the middle
at the passing position, and I'm going to slightly
rotate the tail. The motion of the
cat's body is going to make the tail move
very slightly. Then once I've got
that established, I can do the in
betweens a lot easier. I can go back to this
frame and I can rotate the tail so that it fits in
between those two drawings. Again, for this frame here, I'll do the exact same. With that selected, I'll use the transform tool and rotate
that backwards as well. Then the last one is
just this drawing here. I will copy it over,
use the transform tool, and just nudge it very slightly to be
completely in between. Now if I scrub through, there's slight
movement. That's great. It looks like the
body or the hips of the cat are affecting the
movement of the tail, and that's what we want. For the last few frames, I'm just going to copy and paste the existing drawings
that I've made. Since I've already moved
them into position, I don't need to do
anything else there. Now let's select everything
again or four tracks. Let's pull the animation out
so that it's three frames, make it nice and slow, and playing it back,
that's working great. We've got a slight
movement in the tail, slight movement in the
head and the body, and the legs are working.
That is pretty good. We've got a working animation finally of four-legged
walk cycle. In the next lesson, let's
clean up our animation and add color and really make this look
polished and finished.
10. Clean up the Animation: We've worked through
this animation really efficiently
and very quickly. If you've gotten this far
with me, then that's amazing. What you've achieved so far is a really sophisticated and
very complex animation project and I don't think you should
underestimate this at all. You could literally show this rough version to
a client or a studio, and it would stand out from any other animation submissions that don't have four
licked walk cycle. Even though this is super rough, it's model, it's
working perfectly, and it demonstrates a lot of really deep animation principles and your ability to animate. But we want to take this
to a professional level. In this lesson, let's do
the final work of cleanup. I'm back in flipbook and
everything's working. I'm just going to
add a new track by tapping on the
New Track icon, and then I'm going to lower the opacity of all of the animation that
I've done so far. I'm going to just lower
it down to about 50% so that I can still see it
when I'm tracing over it. But all of these tracks just tap hold on each of them
and lower the opacity. Then I'm going to zoom in
and literally on Frame 1, start to trace out each
pose of this animation. Luckily, there's not
a lot of poses to do, but it'll just take a
little bit of time. Once you get through it all of your animation
will be on one track. I am choosing to not do
the tale at this stage, I'm going to do the tale
next on a separate track just to control that movement
even more precisely. But for now, what I'm doing is literally going to go
through each frame by frame and trace over all of the animation
into one drawing. Now, I suggest that you do try to keep the line
as simple as possible. There's always an
opportunity to go back and clean the line even further
or to make adjustments. But I'm trying in this
pass as much as I can, to get my line work into one smooth clean
and precise line. That way, it won't jump out a lot when we play
the animation back. The beauty of this
style of animation, hand drawn to 2D animation is, I think, that you do see the hand drawn quality
of the animation. I think that makes it
really interesting, and it's one of the
charms of 2D animation. If there is a little
bit of movement in the linework as the animation
plays in the final result, that adds to the quality
of it in some way, but you simply don't want
to have lines that jump out and create a disturbance
within the animation. Slight movement,
slight variation in line work really adds
character and nuance and that unmistakable quality of a hand drawn animation that really gives
it that richness. That's what I'm going
for in this process. There's also an opportunity in this process to make
any small adjustments. At times I'll use the
onion skin feature just to look at where
the in between that I'm currently drawing
is in relation to the previous frame and
the subsequent frame. If I see that there should
be changes to the line work, I can make those subtle
changes at the stage. Very often the line
is not exactly in the middle of the two
frames on either side, and so when I'm cleaning up, I might do that slide
adjustment at the stage. But if the onion
skin feature creates too much confusion with which drawing you're
trying to trace, then I suggest turning
off onion skin and just simply tracing the underlying
animation as one drawing. That's it. I've completed the entire animation
traced into one track. I'll just scrub back through
the timeline and check, and I think it is
actually working fine , that looks great. Let me select everything
that I've just done, all the work I've done, and
I'll drag out the frames. If you happen to see this where the flipbook is not long enough, then all you need to
do is double tap, come out of flipbook, go
back into the main timeline, and drag your
flipbook out so that it reveals all of the other
frames that are in there. I'm going to drag
it out a little bit further just to capture
all of my frames, so that's we're done with
the animation nearly. In the next lesson,
we'll add color, we'll fix up the tale and then we're going to import
our background, make this very simple
looking animation into a really stunning
cinematic scene.
11. Add Color: [MUSIC] Now we get to add color
to our animation, and this is something
that you could easily do during
the cleanup phase. It's part of cleanup, but I've separated it out into its own lesson because
there are a couple of different ways that you can add color to your animation
in Procreate dreams. It's a very
straightforward process. There's just a couple of things I want you
to be aware of. One is that it is possible to drag color out from
your color picker. Let's say we decide to
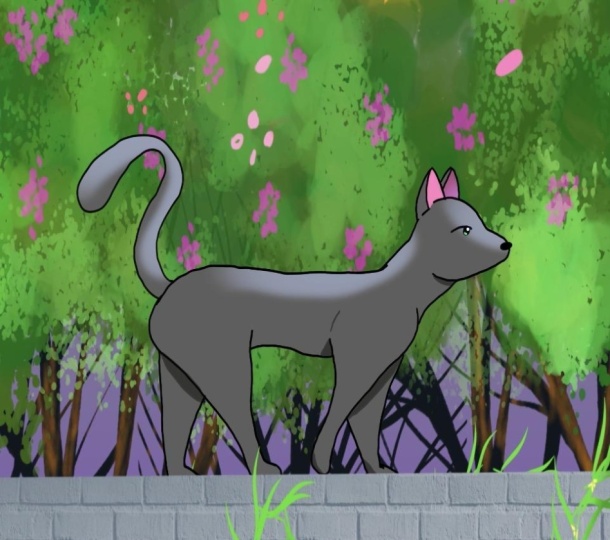
go with the gray color. Then to just drop it
into the drawing, you can see how easy that is. That's very very
simple and quick. However, doing it that way, you'll just need to know that
if I zoom in very close, the color effects the line
work slightly because I'm working with a brush that has a very slight texture on it, that texture will also pick up on the color drop when
you do it that way. To avoid doing that, what I do is I simply duplicate this entire track so that
I've got two layers of linework and I can
drop the color into the underneath track keeps the linework in the
top track intact. Then the other thing that is
pretty amazing, actually, for this process is once you drag color into your
drawing and drop it in, you then have the option
up here that says, continue filling, and
once you tap that, you can basically
tap into all of the empty areas of your drawing and fill it automatically. You can do that frame by frame throughout
the whole animation. You don't have to
keep going back and on each frame starting
the process again. I literally sets it up
from the beginning. Now, one thing that's
very important for this entire process is to make sure that your
linework is closed. That's why during
the cleanup phase, we took a lot of time and care to make sure
that the linework joins up all the way around that there are no
gaps in the linework. Then I'm going to go
back and do the tail. The same thing with the tail, I need to just duplicate
that track so that the linework stays intact. I'm actually going to
draw, use the paint brush, and the color fill
to color the tail. On each frame for the tail, I'm closing off the line
work with a brush and then filling with the color
drop. That's it. At the end of the process,
I've got four tracks. I've got one track that has
my linework for the cat, and then one track
that has the color, and then two tracks
again for the tail. If I come out to
the main timeline, it's a nice, slow, gentle, lovely cat walk [LAUGHTER]
Cat walk cycle. Perfect. Now [MUSIC] In the next lesson, we're going
to import our artwork for our background and give this animation some context
and create a scene.
12. Import and Animate a Background: Now you've got a fantastic, very polished and very
professional piece of animation. I'm very proud of you if
you've gotten this far. It's not an easy process, but it's straightforward
if you follow your plan and if you literally
take it step by step. Like I said, this
piece of animation is very impressive if it's
included in a portfolio. But to give it that little
bit extra flare or polish, I'm going to show you how you
can bring in artwork from Procreate into
Procreate Dreams to create a stunning cinematic
background and how you can add animation to that background to give it some
movement and some life. Let's take a look first at our
file of our cat animation. I'm going to come
to the very end of where I see that the
animation stops, double tap to get down to
the first single frame, and then I'm going to tap hold Split content and delete
the part that's empty. Then I'm going to come
over and tap on Settings. I'm going to change the
duration of this project to, let's say, 10 seconds. That's all I need to do to prep the file in order to
import my artwork. Now I'm going to
open up Procreate, and I'll show you
this background that I've made for the animation. I've left this for
you to use as well, but you're certainly
more than welcome to use your own background for your own animation,
if that suits. I just wanted to show
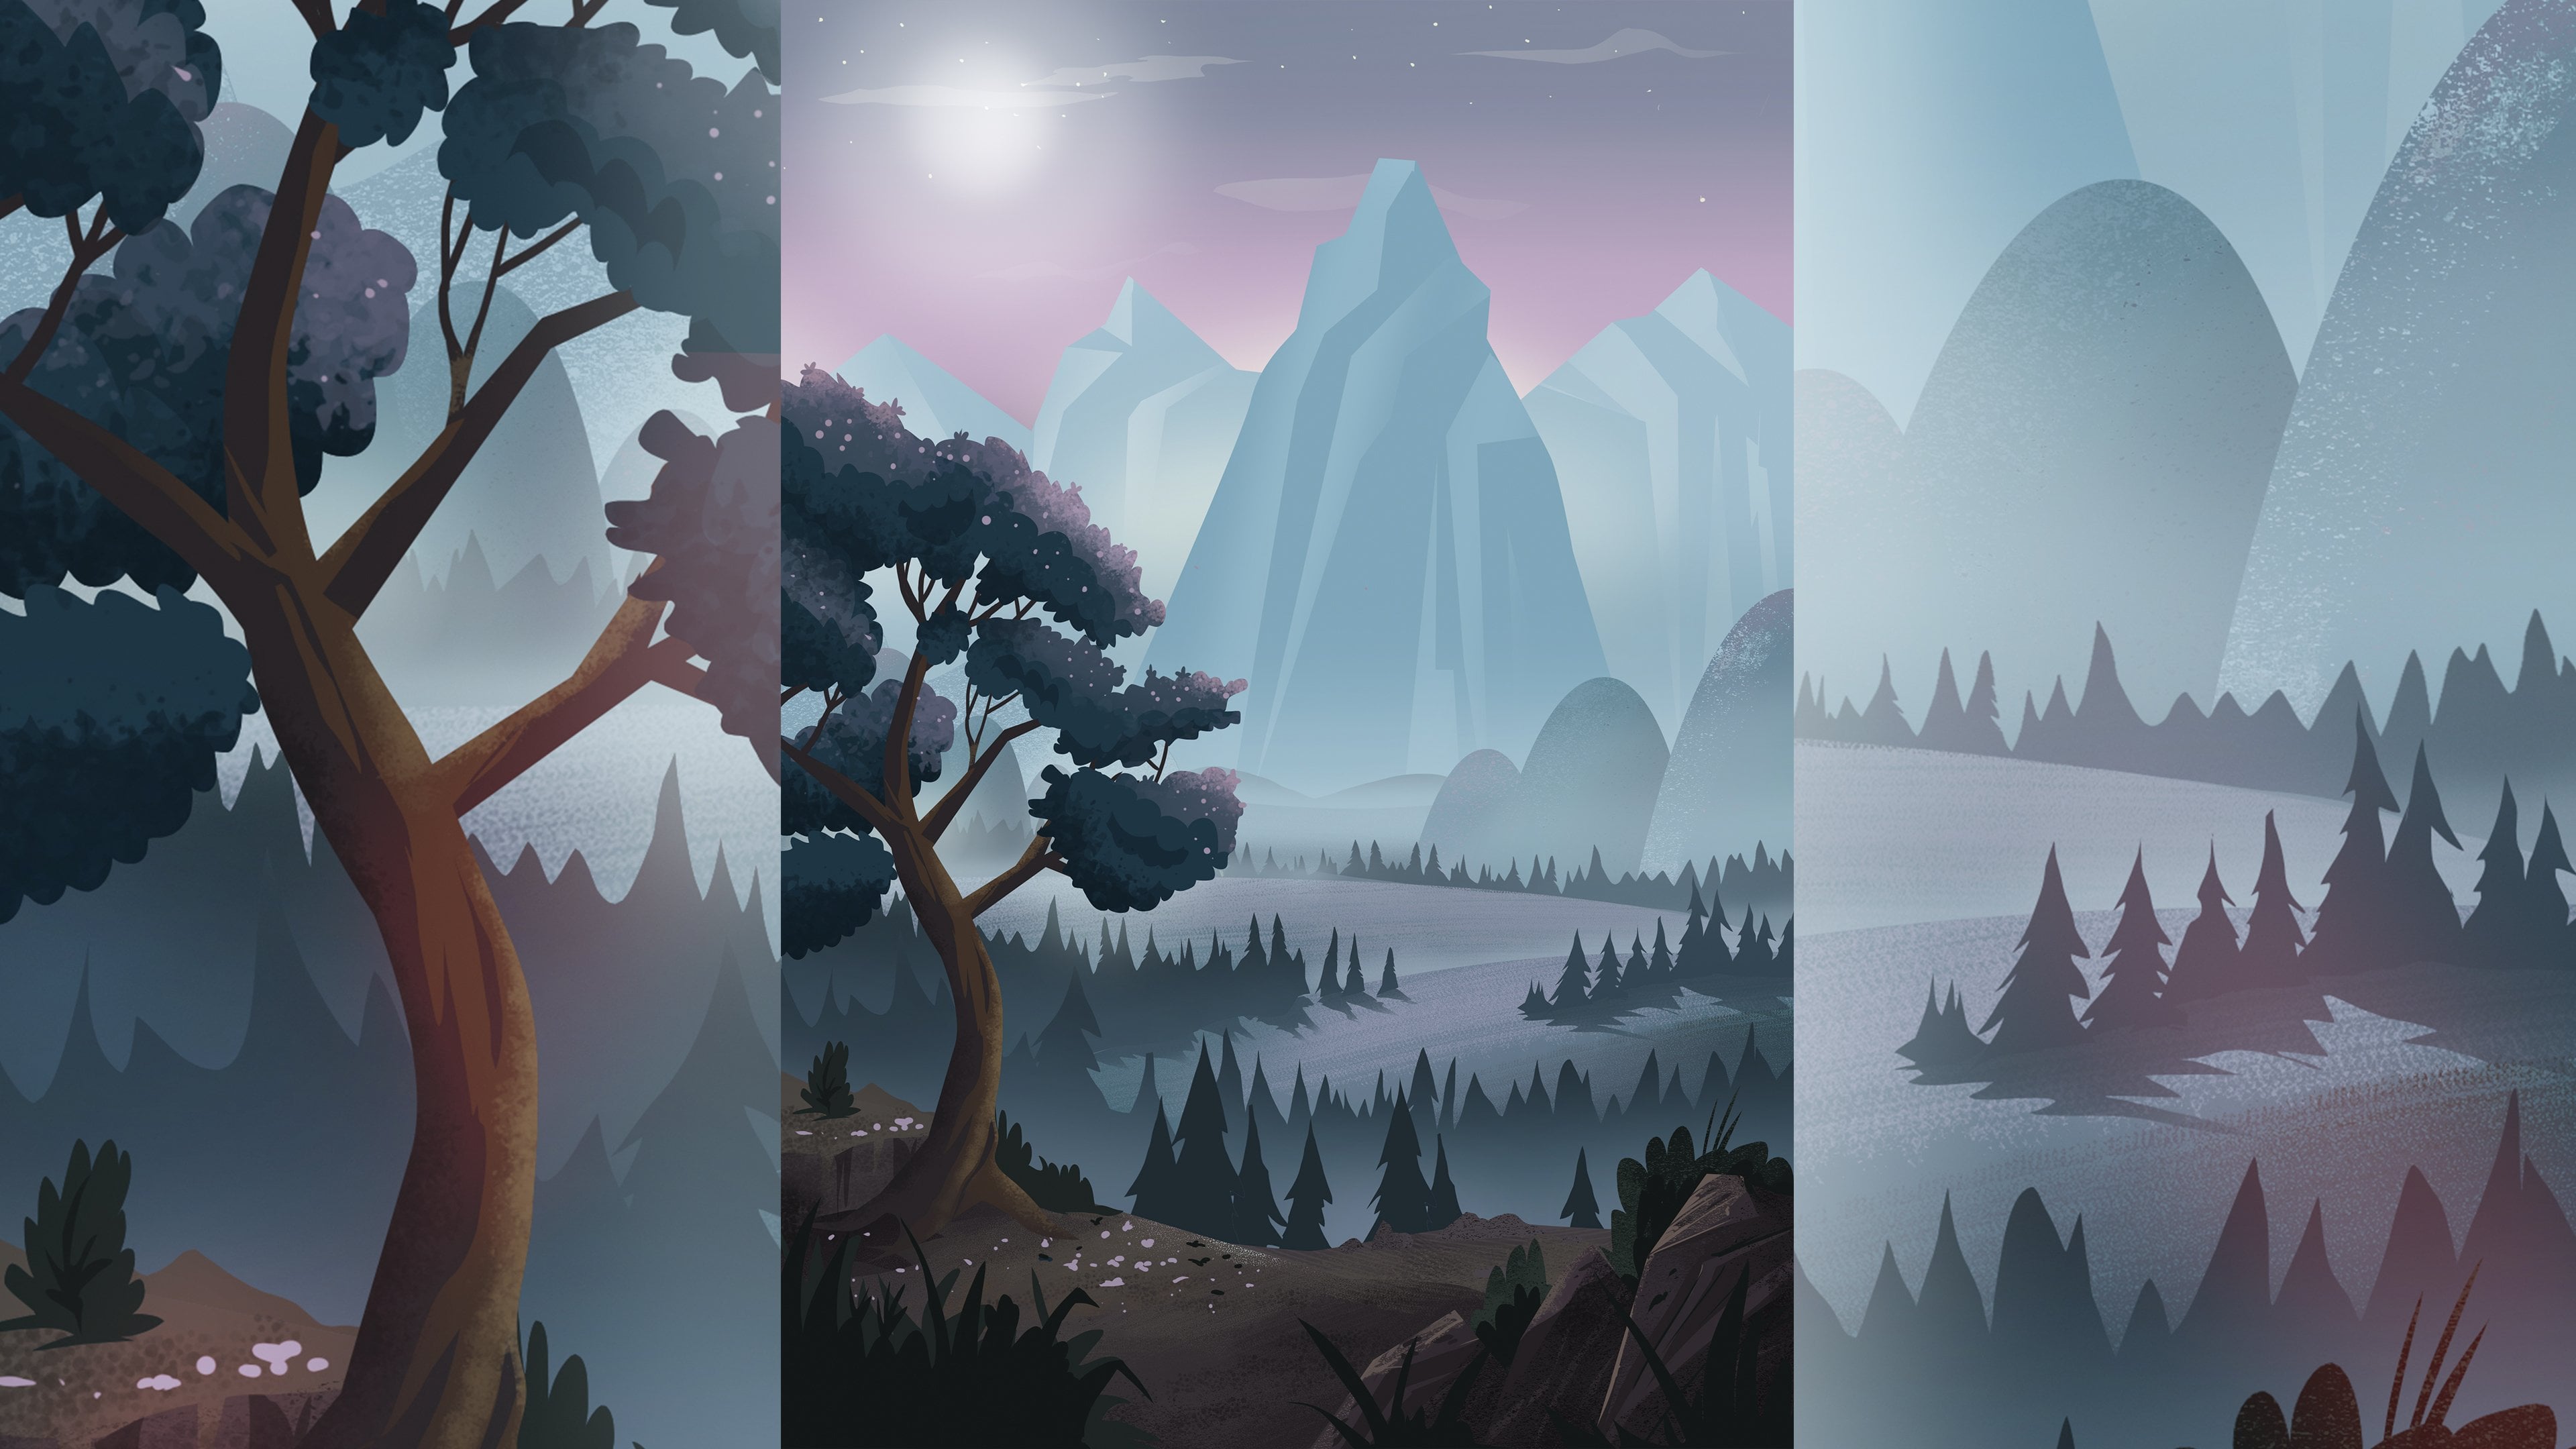
you that the way I've set it up is in a few layers. I've got foreground background, and then I've got
mountains and sky. The mountain and sky can
actually be one layer, so what I'll do
is merge those by pinching them together so
that they become one layer. It's important to have an
organized layer system in your artwork because when you do bring it into
Procreate Dreams, you'll be able to put each of these layers onto tracks
within Procreate dreams. That's why I'm
mindful at this point of keeping this as
simple as possible. Then I'll go back out into the Gallery
section of Procreate. Then tap on these three dots at the top and choose Split View. Then open up Procreate
Dreams and literally drag the artwork over across
into Procreate Dreams. Now I'll slide this off screen, so I just am in my animation. Then I can drag the background
over and as you can see, it comes in as one image, one piece of artwork
or one drawing. Let me just shift it
into place first. I'm going to drag it
over to the right, so it starts there. But you can tap hold anywhere on your drawing and choose Convert
Drawing layers to tracks. Now what that does is
it basically separates all of the layers that
you had in Procreate into separate tracks right
here in Procreate Dreams. This is very
powerful. This means that each of these
tracks can be animated individually using the
keyframing component of the timeline. But don't forget to drag the artwork all the way to
the end of the timeline, make sure that every
piece of content in your group fits the entire
track that it's on. Then go to the very
beginning of the timeline, make sure that you're
in Keyframe mode, tap on the little
clapperboard icon, and set a Move and Scale
keyframe right there. Then go all the way to
the end of the track, keyframe it there by just simply tapping on
the icon again, and then come up
to the stage and drag your background
over to the left. That will create a pan, essentially, that
will create movement. Now at this stage, I
always do two things. I want to ensure that if I'm
doing a straight right to left pan that I'm not moving
my background up and down. Come back down to your timeline. You'll see your keyframe
track directly underneath your content anywhere
between those two keyframes, just tap hold on that keyframe track and
select Expand Move and Scale. Now what I do is
the Y-coordinates are the coordinates that control the up and
down movement. So I'm going to go to
the very beginning and tap hold on that Y and choose Copy because
that is not going to move at all during the pan, during the camera move
that I'm creating. Then I come back
over to the end, tap hold on that
Y-coordinate and simply paste that keyframe down. You might see it just
jumped there. That's great. So that's locked in that
up and down movement while the background itself
moves left or right. The other thing that I
do. The second thing is on that keyframe
track, for a pan, for a camera move,
I will tap hold, and I will choose
Set all easings, and I'll choose Linear. That basically means
that there's no easing. It's one even linear movement
going from left to right. There's no speeding
up or slowing down. Then tap on Compose and come
back to the beginning again. We're going to create
a similar movement for that skyline or
cityscape in the background, and then a similar movement
for the mountains and sky. Here's the reason why I chose to bring everything
in on different tracks. I'm going to make sure that
the city or skyline in the background moves at a slightly slower pace than
the foreground elements, and then the sky
and the mountains are going to move at
an even slower pace. This is a phenomenon that you will notice whenever you're, say, in a moving vehicle or
on a train or something, look out the window, you'll notice that elements of this scene or countryside
that you're looking at, anything that's close
to you is moving fast, and anything in the
midground is moving slower and anything in the
background moves even slower. That's called parallax
motion in animation. It's when things within your
background are moving at slightly different speeds in
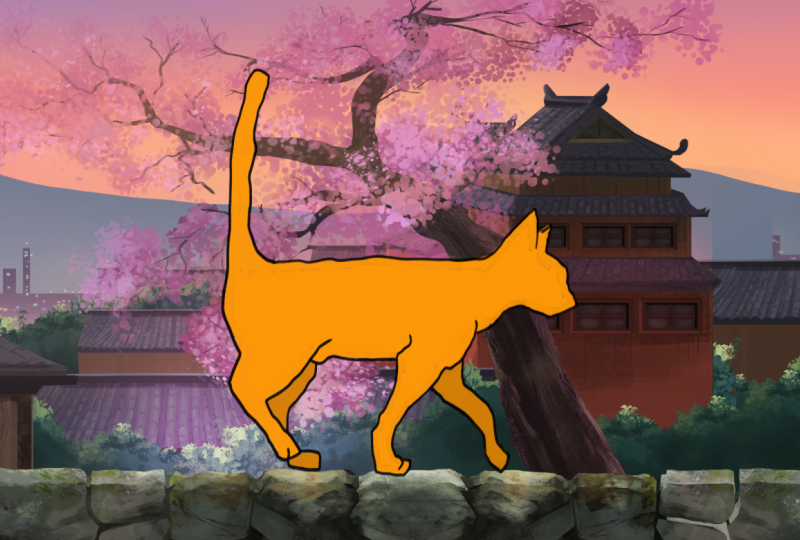
order to give that effect. [MUSIC] Let's close up the group, and let's go back to Compose. I'll start at the beginning
and that looks great. There's definitely a difference between the far background
and the foreground, which is exactly what I want, and it's moving very smoothly. So I'm very happy with that. Now is the moment of truth. We're going to see
if our animation can match up seamlessly
to the background. Come up to the flipbook, tap on your flipbook, and then tap hold on the flipbook and then
choose Duplicate after. Then just select both of those pieces of
content again and do the same process and continue selecting and duplicating until the animation has filled
out the entire track. There we have it. That
looks really great. That looks really, really good. The pacing is perfect. The pan of the background matches the pacing of the
animation exactly right. Now it's a little bit difficult to see the cat against the background. I
anticipated that. Since this is a very
atmospheric cinematic scene, I wanted to take the
opportunity to show you another feature in Procreate
Dreams that is really, really powerful,
and that is masking out your animation or using a clipping mask
on your animation. I'm going to create
a little bit of a light falling onto the cat. To do that, I'm going to create a new track and
create a new drawing. Then choose a light color, something that
matches the color of the background with
a very soft brush. It can be completely rough. It doesn't have to
match the outline of the cat just somewhere
along the edge. Then double tap
on the drawing to come back to the
timeline and make sure, of course, that this drawing
is above your animation. What you're going to
do then is tap hold and choose a blend
mode for this track. I'm going to choose
something that's going to give a bit of a glow to
the underlying animation. Then tap hold again
on that track. Come up to Mask and
choose Clipping mask. You'll see that
immediately it clips to the drawing of the
cat underneath or the entire track,
actually, underneath. That's a really cool feature that you can play around
with and experiment with. I think that looks grayish. It's enough for me so that the cat stands out
against the background, and it adds to the movement. Play around with that,
see what works for you and when you're ready, meet me in the next lesson. We're going to use the
Perform feature to add the last final
touch to the scene.
13. Animate with the Perform Feature: Now we get to add our final
flourish to our animation. I want to show you how to use the Perform feature
in Procreate Dreams. When I was working
in the industry, we used to often joke about
how we would love if there was a button you
could just press to animate something.
Now there is. It's the Perform feature. We'll just add some
atmospheric elements like the cherry blossoms falling off the tree
as the cat walks by, and I'll use the Perform
feature to show you how to do that on a new track
above my animation, I'm going to just
add a drawing or at least open up the
drawing interface. I want to be able to create
some tiny petals here. It's really a very simple, very basic shape that
I'm good to paint. Then I'll double tap to get
back out onto my timeline, and then I'll just
move it offstage. Switch on Perform mode. When I do that, you'll see in the top left hand corner here, there's an active Record button. That just indicates that
Procreate Dreams is ready for you to perform whatever animation
it is that you want. What you'll do is just
move this petal or leaf, whatever you're going to do. Move it through the
screen and through the scene in the way
that you want to. While you do that, the timeline is going to play along as well. Sometimes it'll take
a bit of practice just to get used to
the coordination, but it's definitely a lot
of fun to try this out. I'm going to go ahead, move through the scene just like that as if it's
floating on the wind. Now, you'll notice
that as soon as I lift my pen off the screen, the Perform feature
stops right there. If I expand my timeline, under that little
piece of content, you can see all of the key-frames
that have been created. I'm just going to trim
my piece of content down so I can check
this out more closely. I'll actually drag
this to the top of my tracks altogether. Then on top of that, I think I'm just going
to do it again. I'm going to go back
into Drawing mode, create another little
petal or leaf, maybe a different shade
this time. Come back out. It's already off stage. I drew it over there, so it hit Perform and slowly move
it in much the same way. I'm trying to make a little bit of
variation as I do this, but you'll see it's so easy, it's so quick, and
it's very effective. I'm going to keep going. I'm going to repeat this
process, maybe one more time, so I can have maybe
three or four petals and just change up the color slightly so there's a
little bit of variation. Now I've got a few
tracks in my timeline, all of lovely little simple
animated leaves flying. What I'm going to do now is
group all of these tracks, all of these pieces
of content together. Then I'm going to duplicate
that group entirely. When I duplicate
them, it's fine, but it's the same exact
motion as the group below. You can play around
with offsetting the timing of each of
these tracks or each of these pieces of content
within your tracks or drag them around so that it's just a little bit
different and you're not mirroring the action or the animation of the previous
group that you created. I might just continue
with this a little bit more and see if maybe even adjusting the size
creates a little bit of difference and a
little bit of depth. That's it.I think I'm
going to leave it there. I don't want to
overdo it too much. But I really love this effect. I think it's working
really nice. It's really subtle,
and it just gives that extra little bit of interest to the scene and
a little bit of life. Go ahead and experiment with the Perform
feature yourself. Maybe there's other elements of this background that
you'd like to animate, maybe you could animate
some plumes of smoke in the background or some lights coming on as the cat walks by. I will leave it up to
you and I'll look out for what you do in
the Project section when you post your animation. Up next in the next lesson, I'll show you how to
export your final work.
14. Export Your Final Project: But when it comes to exporting your movie from
Procreate Dreams, so if you want to share
it with the world, there are a few
options that you have, and in this lesson, I'm just going to walk
you through those. Before we do our final export, I just want to mention
that what you can do is, in terms of just
consolidating your layers and making everything neat and
tidy in your timeline. It's a good practice to
always group things together, and this will come in especially
handy if you start to work on projects where you're
collaborating with others. Try to always keep your timeline as
organized as possible. As you can see, I've already got the background art in
one group, that's good. But I might just group these layers together
for the animation, or at least group the cat and the clipping mask
together into one group. I'm going to go ahead
and just do that. Group everything. Everything is grouped and
then group. That's there. Let's go ahead and rename and do put up the keyboard,
call this animation. Call this background. Then I've just selected
everything in my timeline, and I've put it into one group. It's up to you if
you want to do that. Now what we'll do to export is come over to this settings icon, and here's where you can export your work under
the Share button. If you tap on Share, you'll
see that there's video. You can animate, sorry, export it as an animated
Gift video frames. You can even export
one current frame. If you want to export it still, you could export it as a
Procreate Dreams document, but we are going
to go with video. Tap on that, and it'll export it. It'll take a few
seconds, really, even just to export it and then it'll pop up
with this option of where do you want to save the video that
has been exported? I will just do save video
into my photo library. I'm going to click
tap that and then if I pop over to my photos
and open up photos, you'll see there is
my file right there. It is as simple as that. That's how you will
export your movie if you want to share it with
me in the project section.
15. Final Thoughts: Well, congratulations for getting to the
end of the class, for working through the
projects in this class with me. I think it's amazing, if
you've gotten this far. You've achieved
something that is really complex and
really sophisticated, in terms of animation projects. You've gotten to know exactly how to use timing and spacing. You know how to set keyframes and how to draw in-betweens. You know how to add
a little bit of nuance and subtle movement to create something
really lifelike. You've also been able to do
that in a complex way by animating multiple
parts of a character, as well as adding
secondary action. All in all, this is a very advanced project that
you've completed. Not only that, but
you've been able to take that animation
and add it to a really beautiful
cinematic scene that has movement and
life in it as well. You can build on this animation
now going forward with so much confidence
because you know exactly how to proceed through any animation
that you want to do. You've now got a skill set that is very unique
in the world. It's also a doorway to
your own creativity and to the stories that you can tell through your artwork and
through your animation. I really hope that you now share your animation
with the world. Start by posting your project into the project
section of this class. I want to see it, review it, and
give you feedback. I'm here to encourage you and
support you going forward. Make sure that you
leave any questions or comments that you have as well
in the discussion section. I just wanted to
say thank you so much for being here and
taking this class with me. I find all of your
projects so inspiring. It really helps me in my work. Thank you so much for
choosing this class. I can't wait to see
you in the next one.
 Siobhan Twomey, Artist, Illustrator, Instructor