Transcripts
1. Introduction: Hello and welcome. My name is Lisa Celeb eaters. I'm a commodity certified consultant, organizing enthusiast and lover off all things to sign minimalism and creating aesthetically pleasing environments. I spent most of my time supporting people organizing and decluttering their homes according to the contrary, My fit. I truly believe that having a home in which you're only surrounded by items you love can be life changing in many, many ways. I'm deeply passionate about helping people create a home and lifestyle that truly sparks joy for them, creating an orderly home ghost beyond just aesthetics. In my opinion, I created this course in order to introduce you to the combined method and show you how to tidy your clothes. I will start by introducing you to Mari Condo, the inventor off the combine method, and I'll go over the six core principles off the method. Next, I will break down how to get started with the actual tiding process and what it means to Troy. Check your clothes. You learn about clothing organizing fundamentals and then I'll show you step by step, how to fold 24 different clothing items. Plus I discuss what items to hang up in how to organize them as a class project. I will ask you to declutter an organized your clothes from start to finish and submit before and after photos. If you ready to get started, stay put and watch the next videos.
2. Marie Kondo: Marie Condo is a former Japanese organizing consultant and star off the Netflix show Tiding Up with Marie Condo condo device. The Camara Method, a decluttering in organizing approach that has evolved into a movement, and people all over the world have had success becoming and staying tidy for good. She's probably best known as the author off The New York Times bestseller The Life Changing Magic of Tiding Up.
3. The 6 KonMari Principles: The combined method is guided by six core principles. Number born. Envision your ideal lifestyle before you start hiding. It's important to visualize your ideal home and lifestyle. Really think about why you want to tidy and what your ideal home in life should look and feel like. This will help you push through, especially when it gets difficult along the way. Commit yourself to tiding up completely. Complete your tiding undertaking in one shot, or at least within a reasonable timeframe. This way you can actually see the progress you're making an hour. Motivated To keep things going, you're more likely to finish quickly and not experience relapse. Too clever to state again. The first step is discarding, and the second step is organizing. Finish discarding first before you start storing the items you decide to keep. This is a very important principle because you can only assess the available storage space and where to best put your things once you're done with decluttering. Thus, keep in mind to complete Step one before moving on to step number two. Tidy by category and not by location. It's key to tidy by category rather than by location or room. The main reason behind this is that you can only grasp what you have and how much of it. If you gather all the items off one category in one spot on Lee, then you're able to make informed decisions about whether to keep or discard something. Adhere to the correct category. Order. Your belongings are divided into five main categories. Clothes, books, papers, kimono, which is miscellaneous items and Mementos, which is sentimental items. The idea is that you progress from generally easier items clothing to more difficult ones. Mementos. Doing it this way helps you to not get stuck right at the beginning. You learn how to make discarding decisions and get comfortable with the whole process. As you progress towards more difficult items, only keep items that spark joy. The combined method puts the focus on choosing what you want to keep rather than what you want to part with. The ultimate goal is to only keep items that spark joy and support you in your ideal lifestyle. In this class, I'll show you how to tidy clothing. The first off the five Kumari categories
4. Gather Clothing: gather clothing. Start by gathering every single item you own in one spot on the floor, your bed or any other location in your home. That seems conducive. Make sure to retrieve everything from all the different locations you might store your clothing. Do this swifty. Make sure to check every nook and cranny off your home for clothes. Get out your offseason clothes that you might store in a section off your home That's out of sight. Gather every single piece as you want to be able to assess everything at once and make an informed decision whether you want to keep an item or not. In order to do that, you need every piece of clothing in one place. I can't stress this enough. Only gather clothing items such as thes shorts, thes tops, long sleeve tops, tank tops, sweaters and sweatshirts, pants, shorts, dresses, skirts, outerwear, sleepwear and launch where active where. Swimwear, socks and underwear. If you feel like you have two small off a space to lay out all of your clothes at once, or you think that you might not be able to get through everything in the time you allocated for your first session. Take a partial approach. It is only lay out a few sub categories you're comfortable tackling at once. For example, start with all your outta wear dresses, jumpsuits, pants and shorts, and then to the rest of her clothes. Later, once you've Choi checked and organized the first round of clothes that said, it's preferable that you tackle all your clothes at once, if you can. The reason for that is that you get to assess all the storage space you have available for your clothes with a fresh eye and put things back in a potentially better way right from the beginning.
5. Joy Check: Choi chick Now what does it mean? If a clothing item spark joy in general, it's something you love to wear. It creates an uplifting feeling. When you look at it and touch it, it makes you smile and you feel good when you put it on. You also would buy it again if you came across it in a store. Once you've laid out all if you close, move on to Choi checking them. Make sure to Choi check each item individually. Take every item in your hand and ask yourself if it sparks joy. If it does, keep it. If it doesn't think the item for the purpose it has fulfilled and place it in the back with the items you want to donate or sell. Thinking the item serves is a ritual in a transition to let it go. Every item has a purpose. You acknowledge that by expressing gratitude towards it, thank it for the purpose it has fulfilled in your life. Giving things also makes it easier to let it go. For the items that spite joy, you completes them down in a separate spot, use boxes or posted labels to pre sort them into categories like pants, shorts, dresses, T shirts, sweaters and so on. Do not downgrade items to loungewear or something like that. Look at the items intended purpose. If you down great something, it likely has fulfilled its purpose and doesn't spark joy for you any longer. If you come across items you truly can decide on the spot, create a maybe pile and move on. You also might come across items you would like to try on before deciding if they truly spark joy. It's totally fine if you want to try on clothes for now. Also put them on the maybe pile so that you're not stopped in your flow. Then at the very end, revisit the maybe pile. Try on the things you need to try on and finish Troy checking.
6. Organizing Fundamentals: organizing fundamentals. I used someone who stores Offseason close in a different location and makes a switch when the seasons change. If you can do not do this going forward, try to store all your clothes visibly in one place. First of all, you often need and where items, regardless off the season. You might have some cold summer days when you need a sweater or even a jacket at night. Or you might be traveling toe a tropical area at a time where it's winter in your home country. Let's not forget about the time is safe by keeping all your clothes in one easy to reach spot all year about. You also won't forget that you stored offseason clothes somewhere else. It regularly happens from what I've seen. When it comes to organizing and storing your clothes, make sure to put them in one define place. If possible, keep some easy sub categories that don't overlap. Fold everything that can be folded. Make sure that's everything. It's visible at a glance as much as possible. In the end, remove shopping tax and dry clean wrapping. If this is new to you, make it a habit going forward. If you take off the shopping tax, you make the new item your You also more likely toe. Wear it saying with clothing from the dry cleaner, remove the wrapping and put the items on one of your own hangers. Tip. Check with your dry cleaner. If you can drop off your items with your own hangers. This not only creates less work for you but also reduces waste.
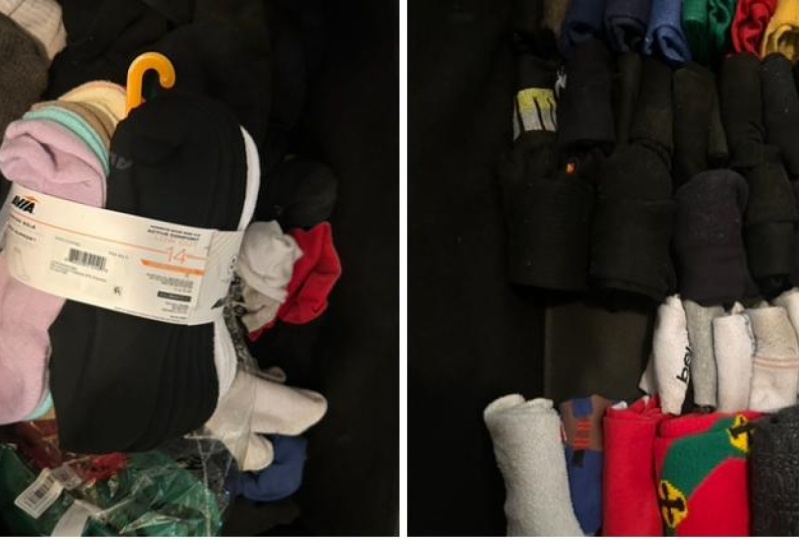
7. Folding Clothes: folding clothes. Folding is the preferred method for storing clothes. This is for two reasons. Number one. You maximize space in your closet. Number two. You have to deal with each item with your hands and thus are able to examine if an item still sparks joy going forward. When folding, use a flat, firm surface and smooth out the wrinkles off the garment you're folding. In general, you should fold items into rectangles that stand up. You've accomplished the Kumari folding method to 90% if you're able to make a rectangle by folding the left and right sides towards the centre off the garment. After that, you can fold the rectangle in half lengthwise, leaving a little gap at the end. The last step is to fold the item in half or inserts. Adjust the number of folds to achieve the height that best suits your drawer. Also, the height and width of each item in a drawer should be equal so that your drawer contents look cohesive. Pack your drawers like a bento box. That means keep them about 90% full. By following this rule, you can be certain that your drawers are not stuffed and not to empty, preventing folded clothing items from coming undone. Also, make sure not to use too many dividers as they crowd up your drawers, leaving you with less space than you actually have available. Keep in mind that there are always exceptions to the rules. For example, items that don't stand upright on their own, such as very thick cardigans or sweaters, can be laid down. You can stack three or four sweaters on top of each other. Items that are made out of very thin or flimsy material would not stand up after folding them, either. Rather, you can roll them up after folding them in half lengthwise. Also, the other folded clothing items in your drawer were Give them support to stand up as world's, create color gradation with lighter colors in the front and darker colors in the back off your drawers. This not only makes finding items easy, but also is pleasing to the eye. If you don't have drawers available but open shelves, you comm. Place your folded items in boxes or bins and put those on the shelves. In the following will show you how to fold thes 24 different clothing items short, safe top long sleeve top tank top. Bulky sweater hoodie, art shape. Top bodysuit jumpsuit. Regular pans, wide leg pants, regular shorts, wide leg shorts. Dress skirt bra bra. Let foodies regular socks, long socks, pantyhose, Panies trunks, swimsuit and bikini T shirt or short sleeves. Top. Put it on a flat surface and smooth out the wrinkles, old in the left side and then the right side, always smoothing out the wrinkles in between. Then fold in half, and in this case, we have folding into thirds long sleeve top. Smooth out the wrinkles, fold in the left side and then fold the long sleeve back and down. You want to make sure that you create a perfect rectangle so that nothing is sticking out. Now fold in half, always leaving a little gap at the bottom and then fold in half or in thirds until it stands up in a package. The tank top. You fold in the upper part and then you fold in the left side and the right side you fold in half, leaving a little gap and fold in half again. Now bulky sweater. You start 40 folding like a long sleeve. Top left and right side inside, and then you fold it in half. You can stack heavy sweaters, not more than three or four Ah hoody fold in the left side, full back the sleeve and down, same of as a long sleeve top. And after that stun, you fold in the hoody, making sure that nothing is sticking out. And then I folded in thirds. So that's it's a firm package, and it it's standing up. This is an odd shaped top, so the key is here that you just create this many fools until you arrive at a rectangle so smooth out the wrinkles. Fold in the pieces as much as you have to until you arrive at a rectangle so you can see I'm folding. I'm making as many folds. It's necessary until I was arrived at a rectangle, and then I fold in half and in thirds bodysuit. You want to create a long safe top here by folding in the the part of the down part, and then you proceed as you would by folding a long, safe top. This is a jumpsuit, so we want to create essentially a pant shape by folding in the upper part and then fold in one leg on the other. You fold in the seat so it becomes a rectangle, and then you fold it in half, leaving a little gap and fold in thirds. He's a regular pants. Fold one leg on top of the other. You fold in the seat, fold in half and fold in thirds until it stands up. These are wide leg pants. You start off by putting one leg on the other and then you fold in the whole part. Bets over but sticking out. You fold in half and in thirds regular shorts. Samos pants just one fold in half until you arrive at a package. Why Nick shorts? I like to fold in one side and then the other and then folding them. Insert in 2/3 in this case address. Same here. You want to fold in left side, full back the sleeve and the other side. Same thing. Always make sure to smooth out the wrinkles. After every fault. Fold in half and then thirds and a skirt very similar. You fold in the sights, you fold in any sticking out pieces, and then you fall in half and in thirds until you arrive at a package for bras. You want to store them like royalty, so close thumb. Put the straps within the cup, and then you store them in a box or in a drawers so you can see them just nesting lightly on each other. Obr elect. You want to fold in the straps and then you fold in the sights and you folded in half and wola foodies. You wanna place one on top of each other and then fold in thirds regular socks, put them on top of each other and then folding thirds very similar long socks. You just have to make more folds. Pantyhose essentially is being folded like a pant. Fold one leg on each other and then to his many folds. It's necessary Panies. Place them down, fold up the bottom and folding the sights and fold in thirds drunks, folding the left side and the right side and create a little package swimsuit, folding the top straps and the bottom. Fold in left and right and roll up. And then you have two options you can store laying down, or you can store upright with the swirl on top a bikini, so you want to fold in the straps into the cup, and then you fold the bottom part as you would a pani. Place it in one cup and full the other cup on top so it's enclosed and then do one full down. So it's a little package all in one, and then you can store it in a box or in a drawer, necid in with other things.
8. Hanging Clothes: hanging clothes. Clothes that need to be hung are generally coats, jackets, suits, dresses, skirts, dress pants, tops that are silky flimsy or have a lot of embellishments or the like. In general, you should hang items that appear happier to be home. I trust you will know or find out which ones are those. Keep items off the same subcategory together that is, create a code category, jacket category and so on. Hang these categories in the described order, from left to right from coats to tops within those sub categories, arranged the items according to their heaviness, color and length. That means that you should hang heavier, darker and longer. Items on the left, rising up to the right towards lighter, brighter in short items arranged them as best as possible following those principles and how it makes the most sense for you. One more little tip. Use the same type matching hangars. If you have, um, available, it makes the end result look especially meat
9. Take Action: take action. Now it's time to start tidying your clothes. Follow the process I outlined in the previous videos. Actual steps. First, gather all of your clothing. Second choice. Check each item individually after that and you're left with clothing you want to keep. Fold those clothes and organize them and hang up the ones that need to be hung. Make sure to take before and after pictures off your closet and drawers and submit them under the projects and resource is tap. If you want to tidy their entire home and not just clothing category, make sure to grab my free Camara category checklist through this link, which is also linked in my bio.
 Lisa Tselebidis, Organizing expert & KonMari consultant