Transcripts
1. Introduction: Hi there and welcome to this Skillshare class. My name is Lucas and I'm a videographer and video editor. Today I want to walk you through how to make a really great tiktok video. How to make the video pop, makes sure the video does well, understanding the pace of the video and putting it together in a fun and interesting way that will do well on the platform and you make your channel set seed. So the majority of the work that I do is social media base or work with a lot of creators and brands. I helped them either shoe and that had their videos. And today I'm going to walk you through one of the address that I'm doing. It's very straight forward at it, but it's going to really help you understand what I look for in an adult, what I definitely take it out and how do I pace into make sure to video feels fun and interesting and the best that it can be. So this class is going to be very straightforward. I'm going to tell you a little bit about the software that I use. I'm going to show you some of the footage. I'm going to show you the editing itself and how to get the most and make sure you're avoiding mistakes. There's a lot of really great work out there, but not a lot of them stand out. For this video in particular, I shot the video and a cannon R6, which is what I'm shooting indoors right now. And I'm meditating on phenocopy Pro 10, which is my editing software of choice. This can be done in any other software. The principle is the same, dislocation mobility different. So if you have a software They are already familiar with completely fine. You can still follow along and just kinda understand what the pace is like and how we go about it. If you don't have any cytokines are great options, are straightforward and beginner friendly. I'm going to show you some of the things we're going to use throughout. Already going to walk you too much through the software because there's a lot to it. I'm just going to show you where you need to make a really great tiktok video.
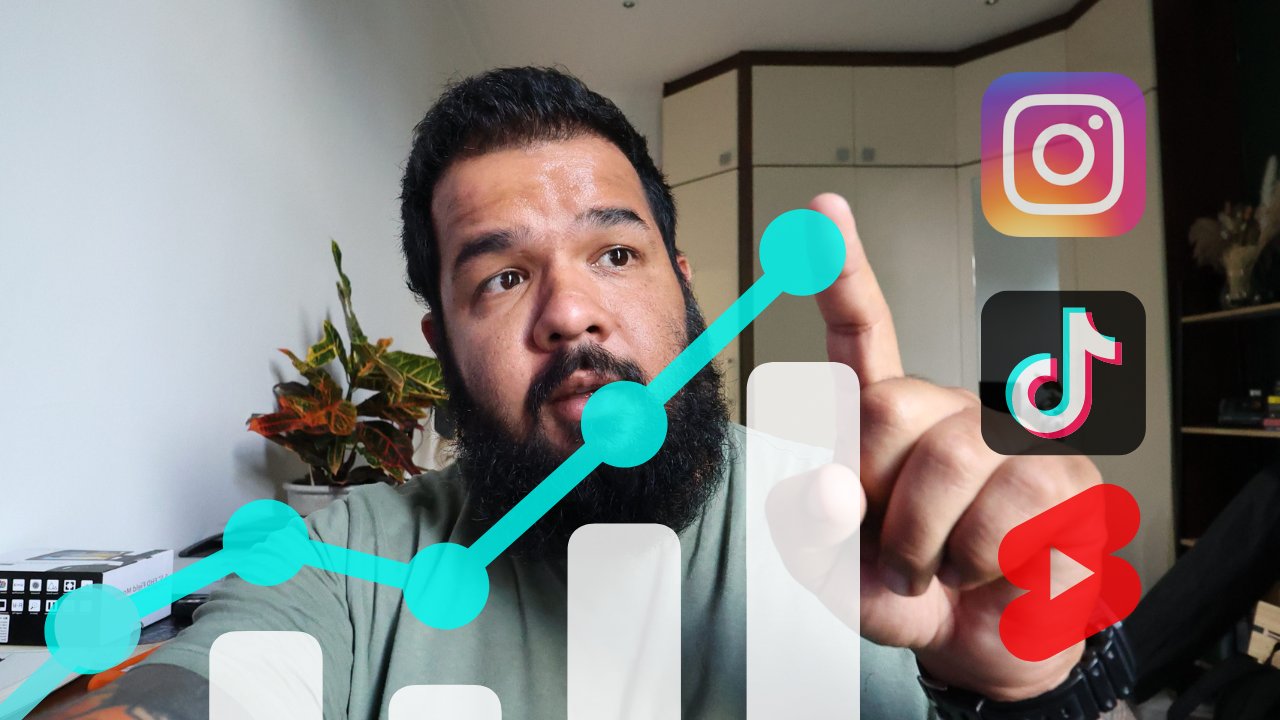
2. Reason Why: Reason why I use a camera and a software to edit put together this video is because is one of the methods that are used to make sure the video stands out. I think a lot of the content on tiktok is greater than a phone and kinda edit on dApp, sold loves videos, kinda fill and look the same. So it's very easy if people are scrolling for them to just kinda go pass your video because it just blends in with everything else. So when you show a video on a camera and you edit on the software, immediately making a video different has a different deaf filled, it has a different image quality, has a different color and different everything. So that way, you're ready standing out, you're ready calling yourself attention. And thus what the social medias are all about. They're about distinguishing yourself from the crown. And I think this is a really great way, even if you shoot your videos on a phone, being able to edit them on the computer will definitely make them feel different. I do shoot videos on phone once in a while. And being able to edit them on the computer will help me increase and better the color is and make them feel a little bit different and all of that. Eventually the video turn out better, shouldn't, and a camera's great, otherwise your phone is still great. Editing on that proper editing software will help you create a video. There's a little more precise and a little more intention of the fund can be a little clunky and hard to put together. But the software itself is going to be great. Because you can go in there and really choose those frames and make sure things are working properly. So let's get into this lesson.
3. Set Up: So first thing, organization, incredibly crucial and incredibly important to have an organization system. Because right now you might be working on in one video, but soon enough as you grow and he started doing this more often, you're going to be a working multiple videos of the same time. So I haven't organization system is going to help you keep those things organized, keep yourself accountable, and make sure that if we're passing this on to an editor or if you're trying to reach a video that you made it a little while ago. You know how things are working. You can explain to yourself and explain to someone else if you need how your system is. And as an instance, because it's averse reform video, I'm not doing too many sub-folders. It's created a folder with all four assets that I have here. So these are two video acids into audio acids. For it is fitting particular we recorders sound externally. So max, which is our protagonist today, the person and camera. He was worrying. Lavalier mic, which is a mike just like this one that I'm wiring. And the sound was being recorded on the self and I was recording him from a distance. So one of the things that I need to do for this video is sink the video with this sound, which I think is really great because sound is so, so important that if you're watching a video would bet sounds really hard to get around it. Wave the sound is nice and clear. It's so much better to deal with bad image. So even if you go, go around and maybe, maybe get yourself a little microphone, just improve sound quality. I'll totally recommend it. If you can have connected straight to the camera, you can just skip this step. But if you're recording a separate, this might be useful for you to put it together. Okay, so I'm going to click in here and get this started. Would usually open like this and asks you for an open library we're going to counsel for now because I want to show you how to create a library from scratch. So in here we're going to go File New Library. This is the folder where my files are, so I'm happy to just drop the librarian here, tick tock, video, you name it however you like, and click Save. Great. When you create a library, ie immediately creates a event. Event is just a way for you to organize your footage and your files. If you're working on a bigger project, you might want to create different events and have them separate like that, but is very much optional. To pour footage. You can just click down here or you can come and file import, media or Command I on as well. This will open your computer so you can search through your hard drives or whatever it is. This is already the folder where my footage is. So you can double-check them here. Squared grade. I knows oh, these four files. So I'm going to double-check on the side here. So in this instance, I want to I wanted to Federica to leave the fall where it is because I already organized, so I don't need to find a cut to try and make a copy of it to be safe. I know where to file is, lever where it is, keywords, things like that. I'm not too fussy. Balanced scholar. This is frantically trying to help you, but I'm happy to do these things myself, so I'll keep them unchecked. Transcode, create optimized medium. I'm not a fan of creating optimized media because basically just duplicating your footage. I do like to create a proxy. Proxy is a smaller version of the file itself. So if the file is being a little difficult to work with, creating a proxy will make it easier to work with. Yeah, so I just screw progress proxy if 50 percent. If you have a rebuttal computer, a really old computer, you might want to go even lower. That'll make your computer even faster and easier to edit. Scroll down here. Honestly, most of these options, I don't really care much Mao assign. I don't need that either. Import, right? Close this import tab and our files are over here.
4. Sync Audio & Image: This next step is just to sink the footage together because they recorded audio and video separately. I wanted to make sure they combine and come together so that I can then edit. Much easier if you don't need this or if your footage already has the sound you're going to use, you can skip this lesson and move on to the next one. Otherwise, move forward. Okay, so in here, they're very straightforward and know that the first clip is the first sound, second sound is the second clip. So I'm going to select the Finish by clicking on it. Hold Command and click on the sound. Now they're both selected. I'm going to right-click, click multi-camera clip. A new multi-camera clip. I can just write. Clip one in here is just going to create into the event US out to make sure this is clicked, then use the audio for synchronizing. This means is going to look at the sound of the clip and try and synchronize it that way. So it's going to synchronize the sound from the camera and the sound from the microphone and bring it to gather. Automatic automatic version. I did shoot the video for a k by accident, someone's going to leave the multichannel like that, but it doesn't matter. Okay? Okay, okay. You're good. See super-fast and is in here. We can do here. Now if you double-click, you can see this is the audio file, this is the video file. You can see him here. The little audio is in here and delete it with videos in here. So you already recognizes that this is one audio file in one video file. So you probably already knows what I'm trying to do. So I can hear. Okay. I can see that the video succinct, so that's all I needed. I can then move on. You can press Command Shift seven and then DES to live tiles are going to show up. You can see over here, the first one, house me sound and video together to whatever clip. The second one just image that dirt ON, just sound. So you wanna make sure sound is on the sound clip and video is on the video clip. That way you're gonna be, you're gonna be just fine. Command Shift seven makes Staff tab disappear, gives you neither.
5. Creating a Project: Okay, next step is one that is very, very important and where I say a lot of people making mistakes and a lot of things can go wrong if you'd get this next stage wrong. So we're going to create the project itself. So we're going to create that timeline where you're going to do all the work. And what can go wrong here is that I should do the wrong frame. Or if you do the wrong dimensions, you're going to be editing in a different format. And if you try and correct that later, the video may not adapt as well. And you might have done a lot of work for net. So we want to make sure we're doing the best work we can from the beginning. Make sure we're setting up everything we need to do beforehand so that everything would do will translate immediately into a video format that works perfectly well with Tech Talk and any social media is that we decide to use. So in here we're going to go File. Make sure we're on our Event file, new project. Click on that. This little tab will show up project name and it's going to call it tiktok video. You can call it whatever you like. In event. Again, this is just a way of keeping organized. If you're doing a lot of Tiktok videos, you might want to have Your an event just for a dose projects. Again, I'm doing a very fast quick video in here, so I don't mind them being o and missing files to have a luck to look for. So I don't mind format. This is crucial. A lot of videos usually are in 1080. What we want is vertical. And find aka just gives you vertical if you're using it. If you're using a different software where you have to write the dimensions, this is dimensions you want to write. You want to write 1080 by 1920. These are the size of the format. So 720 is a smaller video. 1080 is equivalent to HD, and 2160 is for k. Because obviously we're shooting content does going to be displayed on a phone. I feel like for our kids and little bit of overkill and again, to be a little bit of a trouble if you're trying to send it back and forward to your phone. It's going to take a lot of storage, is going to take a lot of time to upload to social media as well. But if you want to go that way, myo means the process is the same. I do think HD is more than enough. So that's what I'm going to go with. The next thing is very important to frame rate. There's might have n's where you live. Personally, I live in the case. So the type of frame rate that we use here's 25 frames per second. And I do that throughout all my works or is always consistent. So if I'm ever using something elsewhere, I know always match. I know that sound will match and other video match, so that's what I use consistently. So even for these vertical videos, That's what I dealt with within the US, is very common to use 23 in that EA. But I also 24 is a very common known one, so to speak, the one that you prefer. You can also check the file they shop. C will frame rate. That is if you want to just go with whatever camera you used, S, but this is very important to just make sure you're consistent, metro your files over the same so you never going to have problems of soundless sinking or video feeling a little slower, a little snappier than supposed to be near apple progress for 22. Stand erect. Seven O nine. Happy mood. This very happy. We're happy. Okay, amazing. Well done. Now you have your project, now you have your workspace, your, you have your editing space. Now we can finally, finally craft to your video. And that's what we'll do in the next lesson.
6. Editing (part 1): Okay, so in here now we're going to start working with our timeline. So first thing you wanna do is bring your footage down to the timeline. There's a few ways you can do this. You can select the furnish itself, drag it down, or you can select the footage, press E for that. You can just grab the fetish you want. Personally, I'm using multi-camera because I had to sink my videos. You can select multiple files as well. Can come in a and select everything. If you want to select a few select ones, you can press Command and just click on the ones you want. And here, and 0, 1, these two files. Okay, We're ready to go. I'm going to quickly show you a couple of things tools that might be helpful. So for example, over here, these are your Mao's tool. So things are your mouse can become, you can have a look through them and try them out. The one thing that I want you to keep in mind is that a sharp cuts in here? If there is a tool in here that you likely you want to try and use. Knowing the key word for it will help your editing the easier way. Finally, reason you forget or isn't sure, can just click it in there and, and selected TO. The tools that I use the most is obviously select which is a, which is just lets me move things around without changing anything position. But does a little bit more advanced when I'm already going to use that here, but it can be used for some times, MB for Blade, which help us cut footage whenever necessary. I'm going to show you a different way of cutting things around which I prefer. It's really great if you want to split fundamental bubblegum estate would a song's going to click away from it. Great. So I have two files. I know. If you press Command minus, it will shrink your timeline. To press Command Plus to zoom into your timeline. I find that easier. Again, I know that this is the file that I want to use first I won this part of the video and then this one over here. So first thing I'm gonna do, I'm gonna drag this clip to the left, which immediately moves down to clip to the right, I drop it. Now this is the order of the clip because it created a multi clip and the sound is longer than a video itself. You get a lot of black here where nothing is really happening or kind of getting things ready. But I in here is really good if you zoom in. And to be a little more precise, I know the video. Suppose the star Center, he starts pour into Coca-Cola, right? So if you look, if you look in here as this starts, is our video starts. So I want this to be my first frame. What I'm gonna do, I'm gonna impress 0, 0, this is end selection. So as you see here, I press O and you select everything from that point backwards. And the opposite of it, if you want to create an initial point selection, you press I. So if I click off of it, it goes away. But if our pressed eye over here, so that's everything from there forward. Or if I select from here for a breast, 0 selects from that point backwards. This is what I usually like to use for ageing. Instead of cutting things and then choosing them as the leading. I just used the points to select to delete things away. So I know that it is going to start over here. So what I'm gonna do, I'm gonna come to this point, press O and then Backspace. Now, now everything from that point backwards is deleted. Okay. And then it quickly have a look through. And then no interior her breast. I you see the video. This file ends over here. So if I press I over here, it only goes to that point. So not touching the other colors. Yeah, I'm just deleting the access from this file, so I'll press backspace as well. This is perfect. Same thing over here. This one, because it's a multi clip saw on Perfect. Okay, the interaction starts here. This one I actually have to have a look through and be able to listen. So I'm going to cut a little bit before the fire actually starts press backspace, clear that out. This is one that interaction. And I'm going to press, I backspace, delete. Now what I did there is what we'd like to call a first draft, which is run through the video and just cleaning the SS. You know, you don't want to spend time watching that waiting. So you want to have a look through the first Asian anything is to shake anything, you know, it's clearly an eye, even an options, a black frame or something out of focus is something that is not tangible and it's not going to be part of the story. Cut that out. You want to have a nice clean timeline would somewhere useful footage. It doesn't mean you're going to keep it all definitely want would definitely going to be cutting these things in parts. But you have enough that will allow us to get working and get moving with the story. Not going to spend any time is watching any black frames. I only have things that can possibly be in the video, but would definitely have to look through them and make those decisions as we go.
7. Editing (part 2): So here, commanding plus to zoom in, I want to make sure I can see the sound waves. Especially for Tech Talk. There's not a lot of space for breeding, bleeding sickly. The videos are usually very impactful versus stronger, faster. Then again, to the point before someone realizes that the My want to scroll away, you want to captivate and grabbing people's attention. First thing in the video, this video, for example, it's a little bit of a social experiment, but we'll do an introduction. So with that introduction has to be delivered quite well and cut together in a way that amplifies hook. The videos, a hook, deliver, hook and delivered. This is what a good Tiktok should look like. You want to capture someone's attention and then delivering what you captivated them. Look over my dog did and then you deliver showing what a dog bed, it's a setup pay off. This is how a good Tiktok videos should be. Okay, so in here, we're going to have alert built confidence that would use big directly. Ask them what their favorites or directly with the way you again, amazing Max is really going to delivering. So in this instance, we only have this one day because we knew it worked out. It looked great. Is centigrade. Don't have any complaints. But if you notice here, it takes him a few frames to start talking. We have this idea of starting the video and important to Coke. But I don't want, I don't want to split second in that video where we're not captivating it. And I know it may feel silly because you're looking at these macro like this frames would end the image. And this is the difference between using a software and editing and tick tock, tick tock whenever gate you. That precise. But is this precision that makes the video filled buffering? So this is why I would prefer to edit on this. And this is what I hope that you kinda get from this lesson is to pay attention to those details going further and being able to the side and make it the videos work is what makes these videos very successful. Okay, so in here I want to start straight from when he's speaking. So we're actually leading a frames, thus a third of a second. So same thing here, press O backspace, thus deleted. Now, so soon as that video happen, the idea is like you might be swallowing the words a little bit. My fill that overwhelming to get into a video and there's things already speaking. But what this does is once the person has captivated, they watched the video, they might start watching the video again because they might, I'm not quite recognize what he was said in the beginning and what that does is increase your duration time, which is really good for your algebra Adam, and really good for your exposure. It's technically, it tells the platform that people are watching the video twice. So they're spending a lot of time with your videos, so the platform will wind up sharing a video of him further. Directly. Ask them what neighborhoods are. Amazing. Okay, So here's the under his point, we are expressed. I deleted a little bit of that tail end. Now. Now what's really great about this video in particular is that we're telling you, here's a practice for you to become a more comfortable and secure person. And we're showing you, so it goes, act a setup. Here's what you can do to be a more secure, confident person act to be that being put into practice. So we are telling you and showing you set up pay off.
8. Editing (part 3): Problem that we had here is that I wasn't quite ready. One, max started talking to the waiter. I had just got to my place and the waiter came around. So if you see the beginning of the video, it takes a little bit for me to kinda like Gan to focus and be ready to go. So we're going to have to find a little bit of a way around this and make sure we we still get a good video out of this. Because I don't have this first this purse few frames. I'm going to cut that down. So we're not going to pay him saying Hi, I'm just going to start from can we just talk can you talk me through the menu? Now we were shattered knee out the video, making them more appealing to social media. So anything that is not as useful or beneficial to the video itself, we're cutting it out. So here, o backspace. Just had a little bit of a problem with focusing here because the camera is on now to focus, I had a little bit of a problem here. Some of these does runner came past to image, defocus, pulled into him and left max. So we have this little bit of a chunk here. Where is out of focus? I don't know how much NO be there to do with this, but I want to be able to kind of replace that a little bit if I can. And just kind of mascot al little bit of the under, a little bit of data from. So there's this moment here where the waiter will gain front of max. So I can't actually see them talking. You can still get the interaction. So what I might do is I'm going to replace this whole bit with the waiter in front of max. So what I'm doing here is I'm pressing be to create a blade. You can see they becomes a blade. You see at that point over there, that's where I want to cut it. So I'm going to cut it here. And I'm going to try and do something a little bit different. We're going to grab the file, grab the clip, drag it down. What does does is that the clip in front of it will snap back. Now, this clip is underneath, the clip above. So Wiki here, both of them at the same time. Which is not gray. But what we can do here as because I want to be able to hear Max talking. So I'm going to detach out to you. Now what this did, is it made out here from the clip separate. You see that now these are two different things, right? I can drag this one forward. And in now, in here we can only hear. Now here we can hear Max talking, but is not actually an Amora, he's talking. But the goal is to make the video flow. Well, I'm not too bothered about creating an image that looks right. I'm a focus on creating a good video that presents itself. Well. So let's see how this plays out. We get the great thing here is because the way they're speaks in a little quietly and a little slow, which is not ideal for TikTok. We can speed his pH a little bit. Added last sound, so sound a little, little more fuller. So with the blade, I'm creating two little points over here. Press a back to Select, click that clip in the middle, Backspace deletes. And seeing. Okay, after he say squid. And I want to make the video too long, I want to keep a nice insurance drift forward. The goal here is just to prove a point to what it was said before. So I don't need the full interaction that they're having. I can actually cut down this, which is a seconds, which in social media, time is quite long. So I cut that down. So the waiter answers which were his favorite, and the max goes on to ask them about domains. So let's see how this sounds. Okay, again, doing analytics, touching on the sound. Okay. So a little bit of time has been through, been there a couple of cuts now I'm going to show you how to put together the video so far. So the beginning here is still the same. And it's just him introduce here, sorry, here we have a little bit at the beginning because you can see Max talking. You've moves on to him stepping it out. You here. It's a little choppy. Lighter options. Okay, Awesome. I'll get the chicken legato playing your favorite squid as a startup and a Coke. With Lebanon. I used the audio, I cut out the pieces that we're good at it together, canal to clip here. So that is a little more engaging. What I'm going to do. It fills a little further out. So in this one, because I wanted to cut, to feel a little more interesting, I'm going to click, select a clip, click on the little film strip up here. And I go and should transformations. And then on scale, I want to just grab this and boring it up a little bit. In this case, they can do quite a bit. Actually, I like this. I'm gonna do a little bit of this with the other ones as well. So click on the clip hold command and then I can select the other ones as well. I'm going to do it a little bit on these Mao one through 50.
9. Colour Grade: One little extra step that I want to do is grading a, filling this out a little bit blunt, especially if you're shooting on your phone, you want to do a little bit of color grading just to help the image pop a little bit. So we're going to click on this second little tab over here. And this is going to show up. This is your exposure, so your shadows, your mid tones, and your bright tones. That's all you need to know. Obviously, this depends according to your footage. You don't want to do too much of this. You want to do just a little bit just to help us bring the attention to the details because you see he's wearing black here, but the black is not very clear. So I'm going to grab this shadow and I'm going to Marina down a little bit. You see down here 13 percent happy with that. Social media really incentivize bright image. So you want to make sure your image is not too dark. So I'm about to overexpose either. So we want to bring this up just a little bit, like nine midtones. I'm happy, you know, here, minus five. Click on saturation. Saturation. You want to come on this one over here. This is your global, this is moving the whole thing. So you're not making any particular part more saturated. You making the whole image saturated. And a grab this and bring it up a lot of them, maybe 20 percent. And if you click, you see this little tick button here. Click in. And now you can see the difference that I made is nothing drastic. We still wanted the video to look very natural, very authentic, but we do on damage to call attention to itself a little bit. Depending on what you're doing, you may want to do more or less. Are you going to dive deeper, Temperature and all those things? Because I'm pretty happy with how the video was shot. I want to keep a very natural, so I'm just literally pumping up the image a little bit more. But if you see we only did that to this last one. The other ones are still a little a little bland. So what I'm gonna do is I'm going to Command C, which is to copy. I can use the select button and then just drag it over all the other ones like this. Press Command, Shift V. This little images are going to pop up. I'm going to untick these. Only wonder the color to go past the other ones. So I'm happy that Paste. Now these other ones, I also have the color grading. This first image. Let's try this out Command Shift V, See what this will look like, and then we can always adjust afterwards. And take this. I want only the grading, only the color bridge paste. You see this, it looks too dark, too dark. So even though it was the same camera, the same lens, same everything, the exposure is a little different. So when I just do this, when I click here back in exposure and I get the black. And we're going to bring this up until we have the detail on his shirt back, especially with the mid tones. So this one ends up being a little more natural and more close to what it was. But again, if you click in and now especially on his skin tone, you can see a little bit of saturation helping and look a little more natural. I'm pretty happy with how this is. Okay. So this is very straightforward. This is kinda getting into video done to a point where I'm pretty happy with a few steps further they might wanna do. And i'm, I end up doing this on a future for this video as a different video is doing subtitles. And that can be done quite easily by using texts. So if you want to just type it out, we can do that. There are services like rev.com that you can upload the video there and they'll send you trust scripture of your video and then he can use that to that to your video. If you want. I can do a video and subtitles. If it's something you're interested in Lebanon, and then I'll do that is very straightforward. There's not a lot of complications, but it can be helpful if you want to further increase. But I believe some platforms have Alto, Alto transcriptions. And so if you prefer, you can do that, but is quite straight forward. Okay, pretty happy while the video is, we want to click up here and go master file where currently exporting the clip when I make sure we're exporting and properly. So information tiktok video is about. So this is something the software does by itself. There's no need to really changed down unless you want to change the name format and make sure it has video and audio. If you haven't. They have different versions in here. And depending on, on your computer, might be as similar as you want H 264. Because if you try a different format, your phone is not going to be able to read the file. And again, you have to upload to your phone and then upload to the app, to upload to your phone, and then upload to the social media. So making sure you having that there is good. We don't need this action. Happy with how this is. Click Next. You have to choose where it's going to be delivered to. Homes are going to go into the same folder we were before pleat, going to create a complete folder and save. Over here you can see him. You can see the process of thing went through. Was this is a 100 percent new videos completed. I put it into a folder, particularly because this is a video that I'm making for someone else. So I'm going to send it over. They're going to have a look at Davin, your opinions are any changes? What I'll do, I'll come here and do a change within our exploring to a version. Two, always want to keep the previous versions in case we get a little bit off track you and I happy with how the video is. I can always go back to a previous version and go on from there if I want to. Videos exported currently 41st seconds, which is really great for Tiktok. It shows up here. You can just press Show and he will show you where it is, finder. Otherwise, you can just go to where, uh, you know, the video is. Because I have an iPhone, I'm just going to right-click share. Airdrop. Personally, I think AirDrop is the best option here. But obviously if you have an Android phone, just however you would transfer files from your computer to phone. Thus how you do it. You can also upload to Google Drive or Dropbox and then download on your phone. There is multiple, multiple ways of how to do this. This is for me just the most straightforward way. I clicked on my phone and then I get the video file in here. You can see that it looks at for an already feels different. And I think that's where you're going for.
10. Summary: So you made it, you put together something that looks incredible. Hopefully you get better. A video that you make. Take further, try things out. There's a lot of effects and things that you can do in a fine AKA that came improve the quality of your video. If you've tried this out, love to see it. If you put in the workshop down below or just send it to me on any social media, love to have a look. And this is a process. This is something that every time you do it, you'll get better. You can not quite happy with a video. You can always step back into font Aka, and do those adjustments that you like. Bananas for you to watch it on your phone as well, especially because you're being delivered on a phone. So watching how that looks in a phone, make sure the compression and the size fits quite well. And I hope this class was useful to you. I hope it was beneficial in an interesting, I'll love to hear some feedback from you and loved to see where you guys make. Thank you for your time. I'll see you next time.
 Lucas Pelizaro, Filmmaker