Transcripts
1. Introduction: It's Clayton in this class, you're going to learn how
to draw the human eye from the front side and
three-quarter views, as well as the top-down and
bottom-up perspectives. Again, Let's get
straight into it.
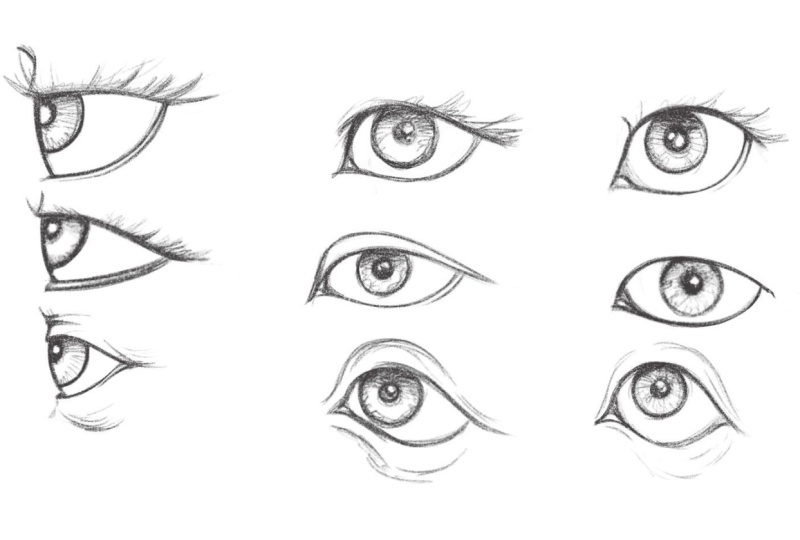
2. Standard Eye Views: We'll start by drawing the
front view of the eye. Since that's one of
the most common things that everybody wants to learn how to draw when
they first pick up a pencil, there's probably one of
the first things I ever drew was an eye from
the front view. So let's just go
ahead and do that. Now let me explain how
I like to think about the shape of the eye from
this particular view. If you take it just a
basic block like this. So you could call it a
rectangular prism if you like. It's not the most perfect rectangular prism
I've ever drawn. But you take that and then
all you do is you push it on its side in order to
create this shape. Now the name of this
shape and it does have an actual name
escapes me right now. But that's basically what
we're working with as far as the standard
shape for the eye goes. And so when you can think
about it in that way, it's not so hard to
then go ahead and make a few tweaks and a
few adjustments to that shape in order to capture. Finished I. Okay, so this
is the opening of the eye. Of course, there's some anatomy you can add in around that. There's the pupil and
the iris and of course, the eyebrows on top of that. But in terms of keeping it as simple as we possibly
can to start out with. This is really the
way in which I interpret the shape
of the eye itself. So with that said, what you can do when it
comes to practicing the eye is you can start out just
practicing this shape. Get a feel for it, get used to it. Try to become as comfortable
as you possibly can with it. And then once you've
got an idea as to what this shape consists of, going ahead and
start to actually sculpted out a little bit
and create a finished, a more finished representation of how the eye actually looks. Now as far as the
construction method goes, we're finished front view
representation of the eye. Here are the steps that I take. I usually start out with
the top of the eye. And the top of the eye can be laid in on any
number of angles. Let's just say that
we started off with a somewhat of
a downward slant. It's very, very subtle. It's not just necessarily
straight at chlorous. You'll notice that there is a very slight bend to this line. It's not, again, it's
not completely straight. And really you don't
want to keep any of your lines completely straight
throughout the human face. You is when I have a little
bit of character to them. But I started out with
the top of the eye. And then from there, I'll draw out the NRI. And this inner thigh
is going to lead in the tear duct. Okay. So I hook it off
there at the bottom. Once I've done that, I take my attention to the
outside of the eye. And I bring the contour down to about the level
with the tear duct. And then I'll change the
trajectory of the contour, dipping it further down. Ever so slightly. And I'm not I mean, you can, depending on what the
facial expression is going to be of
your character, you could certainly
widen the eye, you could narrow the eyes. This is probably what we're
drawing here is a resting I. Is there a default idol I
that's not expressing anything. And then that also is going
to lead into the tear duct. Okay. So you can see that I've
added a little bit of shape here to the
bottom of the eye. Now sometimes I'll be
looking at the eye I've drawn and I'll go,
Well, you know what? I think that the back of the eye here could come in a little bit further and I'll give it more
of a slanted appearance. I'll increase the angle
that I've drawn it on in order to capture the right shape
that I'm looking for. So when you're watching the
re-recording of this lesson, go ahead and pay
attention to each one of those steps and practice
it over and over again. Toroidal, the top of the
eye, the inner thigh, the back of the
eye, and then lead that round to the
bottom of the eye. Once we've done that. We can then go ahead
and start to add in the surrounding elements that will bring the eye
through to completion. But this is really
the main part. So let's now lay
in the eyelashes. So with the eyelashes, I like to keep them as
a very basic shapes. So if we go up here
to the first example, usually I'll, I'll draw them
in something like this. I'll draw an eyelash in
around the top of the eye, an eyelash in around
the back of the eye, and then another one around
the bottom of the eye. And depending on whether
or not I'm drawing a male character or
a female character, or a character
that she's wearing makeup or not wearing makeup. In the end, that'll
determine how much you give the eyelashes of the eyes that you're drawing. So here we're not going
to get too crazy. I'm going to just draw
in some water eyelashes. Just to show you the example. So I establish the
overall shape first. We want to try to capture
a nice clean shape for our eyelashes to start with. And then I'll add in the
first set around the top, the second set around
the sides of the eye. And you can see that this
is before they may have sharp corners at the
edges of these eyelashes. Have a bend to them. Then once I've added in the eyelashes around
the side of the eye, I'll take my attention
to the bottom and add in the final set
around the base, leading that up
into the tear duct. Once I've done that, you
might be asking yourself, well, what about the NRI? Do we add any any thickness at least to the line
there and yes, we do. And are usually I'll go ahead
and I'll add just a little. You could think of
it as a line weight. And then once we've done that, we can go ahead
and actually start filling in that eyelash shape. Increase the size
of my brush here. In order to do that
a little faster, we just want to carefully fill in that shape that
we've outlined. In order to complete
the eyelashes. I'll do that around the top. We'll do it around the
back of the eye as well. While the outer i depends on what you
want to label it as. Then finally, we'll fill
in the bottom eyelash. Now if you want, you can
just shade that in quickly. If you're working
with a sharp pencil. Once again, you're going to
have characters that have either thicker or very
little eyelashes. But really this extravagance. So just keep that in mind. You can tweak these different
assets that you apply to the facial features in a
multitude of varying directions. All of this is customizable, which is what's really
great about it. You just thicken up that
initial shape if you want to get thicker eyelashes
and if you don't, then you'll, you'll
make it thinner. But shape is really
everything when it comes to drawing
not only the head, but also the facial
features on the head. Now, this is looking maybe
a little bit too graphic. And so what we can do in
order to introduce some more, more of a natural visual appeal
to these eyelashes is we can actually go ahead and split some off from the main shape. What this will do as an effect is made them
look a little brush here, like they're actually
made of hair. Rather than just a flat shape that's surrounding the
opening of the eye. And usually the points at
which I add in these offshoots of eyelash around the top
of the eye, in-between the Top eyelash shape and
the side eyelash shape. And then in-between the side
one and also the bottom one. You can see that that's all
that's really required. Now what you don't want to do is start adding in eyelashes
that a single lines. That's probably
not going to work out very well and it just won't look good when haven't finished professional quality to it. So always define your
eyelashes with a shape first. Once we've gone ahead and
placed in the eyelashes, what we can start doing is establishing the surrounding
anatomy of the eye. Usually what that's
going to consist of is the crease in the
upper region of the eye, where the top eyelid folds in
underneath the eye socket. And in order to depict that, what I'll usually do is
lay in a line right here, where the inner eye meets the the brow as it
leads into the nose. Then I'll place an another line that intersects that at the top. And then runs back in toward the back of the eye or
the outer, IF YOU will. You can add line
weights to the contours that you're drawing
your eye with. Defining your eye in order to once again get
that professional, that professional
finished quality, a professional look to it, makes it look really polished. I'm just going to
move this i example down because we're going to add some iron browsing on top. Once we've drawn out
this top eyelid region, we can also go ahead and add in some very subtle
render lines there just to thicken up the form. We can also add in an indication of the bottom edge
of the eye socket. And usually I'll just add
in a few lines there, like so in order to indicate that it could
be a single line, it could be multiple lines
like I've just placed in. Just something to indicate the form the anatomy
around that area. Now of course, this eye is missing a vital
component right now. It's missing the two
vital components is missing the pupil and it's
missing the iris as well. So let's go ahead
and draw that in. Top eyelid actually risks
over the iris and the pupil. Which means usually, rather than drawing it
right in the middle, you're going to be
drawing the iris somewhat sitting underneath
the top of the eye. So I'll usually scan chat, circular shape for the iris. And you'll notice that it's
not completely circular. Again, anything I'm drawing, I want to try to add
some character to it. So I'll mess around with
the shape somewhat. Sometimes I'll squash it, sometimes I'll straighten up the lines at certain points
and our rounded object, or a rounded elements
such as the iris here. And that just adds
additional visual interests to what it is you're drawing. Next up, we'll lay in the pupil. Now remember that the
pupil can dilate. And so there's gonna be times where it's a
little pinpoint. There's going to be
occasions where it actually widens when the character
is scared or break down. Keep that in mind. That once again, this is
another customizable element, the pupil that can allow you to produce certain
emotions or omit certain emotions
within your character and show them what they're
feeling to the audience. Cool. So now that we've gone ahead and place down the
pupil and the iris, Let's actually lay
in the eyebrow. Now, just like with the eye, the eyebrow can be simplified down into
a very basic shape. And this is the shape that
I usually like to use. It, it only has
four sides as well. So let's go up the top here
and do an example of that. The eyebrow consists
of a bottom edge, an inner edge,
just like the eye, top edge, and then
an outer edge. So it's, again, it's
not unlike the eye. Now what I will do
is I'll go ahead and I actually
tweak that shaped, somewhat old-fashioned
of sculpted out a little bit to something that
looks more like this. So I'll add a downward
bend to that shape. And I'll curve out the
inner eyebrow somewhat. Then add an additional point
to the base of the eyebrow. Right in the middle
of its lower edge. Then I'll scoop
the contour backup into the outer edge
of the eye, eyebrow. And then folded back down. Looking at around the underlying
form that it sits upon. Once I've got that
shape established, which is really the key to capturing a vivid
looking cool eyebrow. You'll then want to do is fill
it in with some rendering. So I'm going to just demonstrate that real
quickly for you here. What that'll look
like is very thin, very subtle lines that flow through the eyebrow shape in the direction that the
hair should be moving in, that the hair is combed in. And what you'll notice is that I'm grouping some of these. You could think of them as eyebrow strands or
eyebrow clumps together. While others, I'm
spreading apart, giving a lot of
distance between. The reason for that is, here's what you want to avoid. You do not want to draw these
eyebrows strands like this, because otherwise
that's going to lead to a very patently
look which you want to avoid when it comes to more natural or organic
looking subject matter, such as hair or eyebrow for. So that's the same deal here. Once again, what we can
do if we want to practice our eyebrows is we can start
out with that basic shape. And then slowly but
surely construct a more refined look
for the eyebrow. And what this rendering
does is it just, it makes it look less like
the eyebrow has just been painted or stuck onto
your character's face. You can also go ahead
sometimes if you want to, and you can split off eyebrows strand and
in the inner eyebrow. Again, just to give it
that hair-like appearance, similar to what we did
with the eyelashes. So now let's apply
an actual eyebrow to our example that
we've done up here. Right now. The eyebrow, depending on whether
or not you're drawing a male or female character, feminine or masculine character. Usually male characters
will tend to have brushy, a thicker, lower
suiting eyebrows. So keep that in mind. Now, it seems as
though we're drawing up more of a feminine I here, which they're really great for demonstrating eyelashes
and that kind of thing. And so we'll keep our eyebrow
more feminine as well. And for them, what you want to keep in mind is that
they're going to sit a little higher above the eye and they'll
typically be thinner, less brushy at lists
heavy looking. So I'm going to go ahead and very lightly draw
out the eyebrow shape. To begin with, starting
with the bottom edge. Once I've got the
base established, I'll draw in the
inner eyebrow wall at a curve to the top of it. And then lay in
the outer eyebrow. And you can see how very lightly I've drawn that it might even be difficult for you to see there. But the reason that I
keep it so light is just in case I mess
up along the way. I like to trial test
what I'm drawing first before I go ahead and do exactly
what I'm about to do. Set it in stone with
a heavier outline. I would highly recommend
that you do the same thing. Start out very light. And then once you're happy with what you're seeing on the page, go over the top of it, lay in that final contour. Place down the line weights. Line weights, by the way, if you're wondering it
just varying levels of thickness within the line that you're placing down
onto the page. So you can see here that well, we can see what will happen with this eyebrow is
I'll give the outer shape a much darker outline then I will the
interior rendering. That would be an example of
how to use line weights. You could also go
ahead and thicken up your lines at the corners where they meet. Other edges. Okay, so I'm very
happy with that shape. And once again, I can't
emphasize this enough. Focus on capturing a solid, good-looking shape for
whatever it is you're drawing. Alright, next up, let's place in the eyebrow for rendering. You can see I'm adding a bit of a curve to each one of
these lines as well. Once again, that'll give
us a more natural look. I am somewhat clumping these
eyebrows strands together. Sometimes I'm doubling them up, sometimes I'm leaving
them as a single line. Once again, you want to create some randomization within the rendering
of hair especially. And it's quite
difficult to do for us. It's surprisingly
difficult because as human beings we habitually try to look for patterns
and also produce them. So you want to be consciously avoiding that
when you're laying in eyebrow hair or anything
else that you want to have look more natural
because nature is, even though there's some order
to it, it's fairly random. At least it can seem
random on the surface. Okay? Once again, you'll notice that the
direction of these lines as I draw them into the eyebrow
shape or being combed back to establish a sense of flow within the movement of
these eyebrow hairs. So think of that. Think about combing
back the hair in the direction that you want
those eyebrows to flow. Alright, once we've done that, there's also some
additional little points of rendering that we can use to define some of the surrounding anatomy
of the brow itself. Usually what you'll find is that the upper brow bone will lead down into the top of the nose. And so in order to
indicate that transition, what I like to do is just lay in a very subtle
line to indicate it. We can also add in some
additional doubled up line rendering around
the NRI there. Then another line to describe the fold of
the bottom eyelid. And other than that, this is what you
could certainly call a finished representation
of the human eye. Step-by-step. So let's go ahead
and move straight on to the side of the eye. The eye also starts out
with a very basic shape. So it's more, less
of a rectangle and more of a triangle that has
been pushed onto its side. You could also think of
it like a piece of pie. So it's got a top
edge and bottom edge. And then the front of the eye. And it really doesn't have to be any more
complicated than that. Of course, when it
comes to drawing some eyelashes onto the eye. Well, we're going
to notice that they actually fan out
toward the front. So we get a good sense of the direction of
these eyelash planes. And the same thing will
occur on the bottom as well. Notice that the eyelashes
actually push forward. And the idea is that the reason that nature is designed
them in this way is so that if it's raining or if there's sand blowing
around these eyelashes, we'll catch that and stop it
from going into our eyes. Same with the actual eyebrow. That's what it's designed for. Can't tell you how many
times I've bumped my head, hit my brow instead of
my eye, thankfully. Alright, cool. So let's go ahead and draw a finished representation
of the eyes side view. I'll start out. With just that
really basic shape, beginning with the top edge
and then the bottom edge. And you'll notice that
there's more of an angle applied to the bottom edge
of the eye. In this view. The reason for that is because the top of the eye is somewhat
flattens out a little bit. Usually, again, at
risks over the top of the eye that could be due
to gravity, I'm not sure. But ultimately the bottom eyelid will always sit lower
than the top eyelid. Okay, cool. Once we got that basic
shape established, we can then go ahead
and we'll just resize that a little bigger
so we can see it. We can then go ahead and
lay in the eyelashes. So just as before, we're going to start by defining the shape
of the eyelashes. Burning them out at the front. And the back will also
do the same thing. Well, So fan them
out a little bit, but just not as much. And we'll do the same thing
around the bottom of the eye, bending them out front
and pulling them back in. Once we've done that, we can in our eyelashes. And you'll notice that
what happens when you apply eyelashes to the eyes of your characters is that its eyes
look much bigger. This is the same effect
that occurs in real life. When you wear mascara or your
wire, thicker eyelashes, more attention is
drawn to them at essentially frames
the opening of the eye and draws more attention to that
area of your face. And that's a good thing because a lot of expression
comes through the eyes. You can tell a lot
about a person. Oftentimes how they're
thinking, what they're feeling. Just by looking at some of the, the cues that their
eyes are giving off. So it makes poker
players so dangerous, they're very good at being
able to read what, you know, what people are, what
emotional state people are in, just by looking at the
expressions on their face. But micro-expressions, but i
is give off a lot of them. Because when you think about it, there's that big ring of muscle
that sits around the eye. It's capable of a wide
range of movement, both subtle and also
quite prominent. Once we filled in our eyelashes, we can then go ahead
and we can place in some off-shoots of eyelash hair in order to make them look like they're
actually made of here, rather than just a solid shape. You can experiment with different shapes
for your eyelashes. By all means you can experiment
with different shapes. Be your eyes as well. Next up, what we're
going to do is draw in the iris and the pupil. The iris and the pupil
from the side view. This is actually
very interesting. So we'll start off by
laying in the iris. It's going to sit a little bit underneath the top
eyelid just as before. The pupil is really where
we see a major difference. Now, most people think
just intuitively that the pupil is going to sit right at
the front of the eye, but that's actually
not the case. The pupil actually sits
back inside the iris. The iris, He's actually a cup. Now, we're not necessarily going to draw it in depicted here, but there's also a
membrane that sits over the top of the iris and protects it on through drawn in
the iris and the pupil. Let's now start to lay in some of the
surrounding anatomy. Now we can draw a contour
upward from the top of the eye and into
the upper region, where we'll fold the top
eyelid up underneath. The upper edge of
the eye socket. It's going to look a
little bit like that. Just kinda tweak the
shape of my iris here for a moment. The people up. There we go. Oh, you can also go
ahead and add in our reflection to
your iris as well. If you'd like to make the
eye look a little more wet, a little more shiny. Because certainly, if you've
ever had dry eye as before, It's not a pleasant feelings, so they I certainly do. It's a great way to describe
the material of the eyes, almost how light
reflects off of them. Can add that to
both of your eyes. I usually just draw
out a little bit of a a shape that reflection. And then I erase or
I fill in on top of that the iris just to get rid of that
contour underneath it. Okay, wonderful. Once we've got the side of
the I figured out, Let's talk about the
eyebrow and how that looks to us when presented
in the profile view. You can also use a very
simple shape for it as well. And the way in which I interpret it on a basic level is
something that looks like this. We've got a front for the
eyebrow, we've got the top, we've got the bottom and then it hooks background. Once again. Following the shape of the underlying anatomy,
the underlying skull. Okay, so that's the kind of
shape that we'll be going for here when we
draw in our eyebrow. And in fact, if you wanted to, you could indicate
where the front of the brow is and where
it joins onto the nose. So I'll lightly lay
that in because it'll it'll give us a bit of an indication as to
where to place that eyebrow. Okay, great. So we'll start
at the front of the brow, laying in the inner
edge of our eyebrow. And then we'll pull it back, defining the lower edge. And I am trying to think about the way in which
the eyebrow will conform to the general geometry of this area of the face because that's
exactly what it does. Well, then go ahead and placing the top edge
of the eyebrow. Again, I'm very lightly
drawing this out. Then I'll hook it
back around. Like so. In fact, probably haven't
taken back far enough here, so I'm going to do exactly that. So I'll pull it back
even further here. Probably drawn this side view of the eye a little larger than
our front view actually. So I'm going to
shrink it down a bit, giving us more room on the page. Okay, so now let's
try that again. Hook the back of
the eyebrow around. I think that's looking great. I'm just going to make
a few tweaks here. So you can see that
I'm simply drawing in another line to thicken up the
inner edge of the eyebrow. And I'll erase the lighter
one that I drew in before. I think that looks pretty good. So now I'll go over the
top of that eyebrow shape, define it with
some more clarity. Thicker outline. Making it nice and vivid before we start to add
in that rendering. And each step of the process
that I'm going through here, you can execute repeatedly in order to really get
a handle on it. And try to perfect every step. If you have trouble
drawing eyes. Repetition is the key. If you have trouble
drawing anything, repeat each one of
those steps separately until you really get
it. Okay, awesome. So now we'll lay in those
eyebrow strands now going to be flowing in somewhat of a different direction
this time around. So instead of curving
back toward the eye, there are toward the
outer edge of the eye. They're going to be flowing inward toward the
front of the eyebrow. Pretty much in the
opposite direction. Now this might not be
entirely accurate, but it does look good when you draw it
down onto the page. That's where one of the everlasting
clashes comic artists have to face starts
to come into play. Or any artists really that wants to go for
a more stylized, stylized approach with
their arm weighing up the decision that you make
between what looks good on the page and what is actually
true digital reality. And there's a lot of decisions
that you may have to make later on down the track that
wouldn't work in real life. But we're look really
cool on the page. So always go for coolness. Always go for the visual
experience of the audience over realism because sometimes real is just kinda
boring to look at. It's bland at people engage with movies and comic books and video games because they
want to escape from reality. So it's good to give them
that kind of experience. Alright, so that's our
side view representation of the eye completed. Move that up here.
And now let's tackle the three-quarter
view of the eyes. The three-quarter view is, well, we're going to be drawing
up two different eyes here. And so what we need to consider is the
foreshortening That's going to be applied
to them as we represent the eyes in 3D, essentially in the
three-quarter view. This is what happens. We take this basic shape that we learned
about to begin with. And now we're going to be
applying perspective to it. So over to the right here, what I'll do is I'll
draw around a line that represents the level at which our eyes see
it on the face. Normally if we're looking
at the head straight on, we would see the eyes having an equal width of
space between them. And they would also be
of equal widths as well. However, when we turn
the head to observe it, the three-quarter view, what we end up with is a skewed representation
of those measurements. So the distance between the eyes will be smaller than the width of the eye
that is closest to us. And the fire, I will be
smaller than both of those. Alright, so I'm going to lay in the basic shape of the eye
is first up over here. So that'll be the eye
that's closest to us. The distance between
that ion, the fluoride. Then we've got the far right, which is of course going to have a less width now that it's
slightly turned away from us. And what you'll also notice is due to the foreshortening
of this basic shape. What we end up getting is a somewhat some distortion
that happens within it. We see that in fact there's a larger amount of space
on the inner thigh. When we're looking at
the far side of the eye. And a larger amount of space on the add array when
we're looking at one, the one that is closest to us. Okay, so it's important to keep that in mind
when it comes to drawing the eyes on the
three-quarter view, right? They're going to
change both of them. So we'll start out with the
eye that is closest to us. And I'm going to run
through these examples a little bit faster now that we've had an
introduction into the front and side
views of the eye. You'll be fairly familiar with
the process at this point. We're going to start out
with the top of the eye. Again, lightly
sketching it in there. The inner array that
is going to run down from the top
of that upper edge. Then the back of the eye, which will flow down into
the base of the eye. I'm going to add a greater angle to the back of the eye there. Erase it away. I'm going to focus on first up is just the shapes that we
want to be looking at. When we're observing
the eye on this angle. Are both the eyes on this angle. Now the eye that's
closest to us, it really doesn't
change too much. There's a slight amount
of distortion that's applied to it, but
not a whole lot. However, when we're
looking at the eye that is further away, that's where we do see quite a significant
change ends up occurring. Alright, so again, we want
roughly just short of an idea, since between the two, we're going to see a
slight outline here. Where the nose leads
into the brow. Then when we got the eye
that's further away. I, that's further away isn't
simply not going to have as much width applied to it as the eye that
is closest to us. It's going to be smaller
but not in terms of height, just in terms of width. And depending on how far away the head is
rotated from us, these effects will
be pushed further. Okay, So the far right will
get narrower and narrower and narrower as will the eye that's closest to
us for that matter. And in fact, it is
somewhat narrow woman, when we're looking at it in
the three-quarter view as opposed to front view where
we see it's full width. So that's the basic shapes
that we're dealing with when it comes to drawing the
three-quarter view of the eye. And you can see that it's
pretty much the same shape. It's just that now
it's been tweaked, It's been morphed a little bit. Next up, what I'm going
to do is draw in some of the surrounding anatomy even before we start to lay
in the eyelashes here. At this point, we know pretty
much what that consists of. Over here. We've we've mostly already
done that for the far right. We've got the
outline of the nose. Once we've gone ahead and drawn
out eyes are eye-opening. We can then go in and
add those eyelashes. And as you'll see, we're, we're pretty much executing the exact same steps over and over and over again for
each of these examples. That gives us extra practice, of course, which is wonderful. But at the same time, it also makes the whole
process so much easier for us. When you can go through
the same series of steps over and over
and over again. It means that you don't have to really guess your way
through it anymore. You've got your technique down, you've got your method. Now we have to focus on is actually getting
it to look good. The more brown brain power
that you can dedicate to that particular
task, the better. So now we'll fill
in our eyelashes. On this side of the face. What do the same thing around the bottom eyelashes
and around the top. And you can be clean
cut with this. You can be a little
rougher if that's the kind of style that
you'd like to go for, that's completely fine too. Again, this is just a way
in which I approach it. And sometimes I do get a
little bit rough because I want a more natural look and less of a clean
cut appearance. Yourself might even
have multiple styles. I know I certainly do. I've got my more dark fantasy, really detailed look for my art. But then I've also got this
is more clean cut appearance. Their ideas, maybe for a
sci-fi comic or illustration. So different stars
are going to work for different genres are better than others. Okay, great. So we've got our
eyelashes now drawn in. We'll do the exact same
thing on the other eye. Outlining them first. And you'll see that they're
fanning out just a little bit more on the far
side of the face. So really try to practice
that eyelash shape. Once again, we've got
very sharp corners, but the edges in-between
them have a curve to them. And so what you
get is this nice, smooth flowing
sharpness to the shape. Keep your corners up, but keep your edges soft. Alright, we'll fill those into. We're really giving
our attention, our full attention to the eye
as at this point in time. And we'll do the same thing for all the facial features so that we can get a real
proper handle on them. As I've said before, if you really want to get good at drawing eyes or any facial feature
for that matter. Spend a good few days doing
these exercises repeatedly. Don't just draw the eyes from
a three-quarter view once. Jordan, from the
three-quarter view over and over and over again, fill up an entire page just
with three-quarter view eyes. And you'll get really,
really good at it at drawing them
from that angle. The other angles of
the eye, of course, which we'll go over
and after this, a little bit more difficult. But now that we've
got an understanding of what the basic shape
of the eye consists of. It should be much
easier to understand. That's why figuring out how to draw the standard
views of anything, the eyes, the nose,
the entire head. It can really help
us out when it comes to those more
dynamic points of view. So to complete our eyelashes on our three-quarter view eyes, I'm going to add in you
offshoots of eyelash hair. Thicken up the inner eye line. Just a little to indicate
that maybe there is some mascara following
around the shape of the eye. Then I'll do the
exact same thing on the opposite
side of the face. Mirroring all the steps
that I'm taking here. In reality, of
course it doesn't, it's not necessarily
going to take you this long to actually
draw it out. And I initially maybe, but as I said, we're taking our time to
go through each step here. And the idea is that you
take your time at first, then as you get more
comfortable you, and you'll inevitably
get faster at this. And it won't be so taxing. You find it easier and
there'll be a total breeze. Eventually with enough practice. Okay, cool. So once we've got the
eyes drawn in there, while the eye-opening and the
eyelashes surrounding them. Let's place in the
iris and the pupil. I'm roughly going to outline
the IRS to begin with. You'll notice that
I actually don't link the iris up at the base. I leave it completely open. The colorist will do their
thing if they decide to color it and fill it in. But broken lines can be quite handy when it
comes to capturing, once again, that polished professional looking
presentation at the end. This is why I say,
leave the contours. The outline for your lips open. Once in awhile, break them up. You don't necessarily always have to make it a
complete outline. And it just adds
so much more of a stylized finished to your work. So we've got the
reflection drawn in there. Do the same thing
on the opposite eye and notice what happens here. What you'll see is
that the width of the iris is also going
to become a little bit squashed because of
the additional level of foreshortening that's
been applied to it here. Okay. So not only is it the shape of the eye itself that ends up
becoming discord distorted? It's actually the interior shapes that we place
within it for the iris and the pupil that also have that same effect
applied to them. We'll go ahead and we'll lay in the
reflection of the eye. This one as well. Okay, Great. And usually what I'll also do is to really polish this up, is I'll thicken up the top of the outline that I've established for the iris. So okay, Great. So that's our three-quarter view IS pretty much completed. Let's go ahead and give
them some eyebrows. And what we're going to see is some similar effects
actually take place here. We're going to be foreshortening
the eyebrows themselves. Alright, now in order to find the placement of the eyebrows
and the three-quarter view, I know that there's
this underside plane of the brow that I
need to consider. And so what I'll
typically do is I'll draw a diagonal line upward through where I would
like the eyebrows to sit. And that'll allow me to find where the front
of the eyebrows begin. Figured that out. Of course I can go ahead
and just erase that line, but it's a handy
little trick if you're ever finding that the
three-quarter views of your head simply seem to have eyebrows that aren't
positioned quiet right? Now just as before, I'm
going to start out by outlining the shape that I want to go with
all the eyebrows, drawing it this larger scale, by the way, individual
facial feature. I don't know if it's just
me, but you might also find it just that little
bit more challenging. Because you don't get
that overall look at exactly how everything
is coming together. So we will hook the back of
the eyebrow around the eye. What you'll notice is this back section of the eyebrow is going to
be more stretched out.
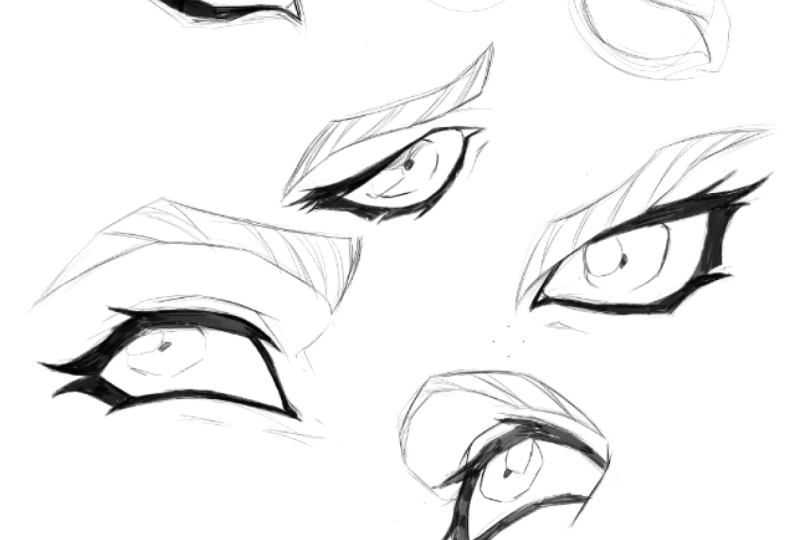
3. Dynamic Eye Views: Now let's jump into the more
dynamic views of the eye. This is where
things are going to get a little bit
more interesting, but we've got our
basic shape down. Let me show you how
I would actually go about using this or this. I shade them in drawing it in the way that I
would actually draw it. Because I'm actually,
I'm a little bit looser when it comes to my artwork. And this is how I would start. So let's say that
we're drawing the eye from the top down view. So I actually keep it
very, very scribbly. And the reason that
I do that is I'm, I'm sculpting as I go. And these lines here, they did directional
lines that I'm laying in. But the basically
providing the pathway for me to follow to
actually draw the eye out. Now, this is going to be an I, which is sitting on the side
of the face which is further away from us if we're drawing it in the
top-down position. So go ahead and just so you could even take the same
approach if you wanted to, you could keep it very
loose in the beginning. As long as at the end
you're able to lay in a more defined and refined
outline for your eye. Once you've finished
taking this approach. I'll even do the same
thing with the eyelashes. I'll keep it very, very loose, very scribbly in the beginning, until I like what I'm
seeing on the page. So this is all about, you know, trial and error. To begin with. It doesn't always
have to be neat. I like to keep it
fairly clean when we're going over the main views, especially just so
that you've got a solid idea of what we're working with because
this can be, it can be a little
bit hard to see in a little bit hard to
tell what's going on. But what I want to
describe here is the top-down view of the eye and arthro drawn it out for you. I'm actually going to
explain what's going on, skipped over that step. But it has this shape to it. Essentially just as before, it's made up of a top
edge and inner edge, and a bottom edge as
well that somewhat connects onto curves
onto the outside edge. But you can see that
once we've scribble this down is basic shape. We can go ahead and
go over the top of it and refine what
we've got there. So it really depends on what approach you like to
take most used someone who enjoys working rough in
the beginning and then hones everything in two more
finished illustration. At the end. I tend to be that
particular artist. However, some people,
they like to go ahead and take a very
calculative approach, keep everything extremely clean. And that works just as well. It ultimately
depends what kind of experience you enjoy the most is if you don't enjoy the
method that you're undertaking that you're executing
every time you draw it. Well, you're probably
not going to stick with drawing for
a very long time. So that's the basic shape for the fast side eye, the
top-down position. And what you'll notice
is that the eye, the eye lids are somewhat following the shape
of the eyeball. So here's what's happening. I'm going to draw out a little
example down below here. We look at the eyeball. Say this is our eyeball that's
sitting inside the skull. By sitting inside the
skull, I mean, it's, it's actually sitting
inside the eye socket. So I'll draw the eye socket
in around this eyeball. Alright? So the eyeball sits
inside the eye socket. Then I'll get out my red pen
here so it's easier to see. What's going to happen is
our eye-opening is going to follow the curve of the eyeball because
the eyelids actually wrap around it. Okay. So that's why we get this
curve happening here at the base of the eye that's
wrapping around the eyeball. And if we're looking
at the eye from above, same kind of deal. I'll do another example
where we're looking at the eye from that, sorry, we were looking
at the eye from below. Alright, another eyeball here. So if we're looking up at the I, I still going to be
sitting in the eye socket. Little windows at
the high peaks out of and the eyelids
that sit around it. Once again going to wrap
around that eyeball shape. And of course we're still using the basic shape that
we learned about. When we were drawing
the eye from the front and the side views, three-quarter view as well. But now that shape is being wrapped around the spherical
form of the eyeball. So this is a good way
to understand it. Always try to capture
this curve here. Because that will make
your eyes look more 3D. It'll indicate that indeed, the eye lids are wrapping
around that ball, which is, which is
what's happening, right? So hopefully that
makes more sense. Now, the other thing
to keep in mind as well is that the eyeballs, they sit in alignment with one another when you're looking
at the main perspective. So let's take the bottom-up
view. Once again. We draw a line between each of our eyeballs sitting
at the same level. Okay. So don't curve them around the face or
anything like that. Make sure that they're
sitting at the same height. Then when you go to
lay in the eyelids, make sure that those eyelids are wrapping around the eyeball. And you'll notice
that once again, depending on whether
or not you're drawing a far side of the eye, the eye that's
closest to it to you, it's going to have
a different shape. Or the shape will morph
in different ways rather, even though it's the same. Okay, So we'll continue on with our top-down
representation of the eye. This going to go
ahead and rather than Philly getting
completely with black, I'm going to actually that'll probably be the
fastest approach. So let's go ahead and do that. Try to keep inside the, the beautifully defined shape for the eyelashes
that you've laid in as you fill them in. And if you go outside the
lines just a little bit, then go back over the top and
just smooth it out a bit. It really tried to
polish up that line. There we go. We want a sharp shape. This should be smooth, right? There should be a
very smooth contour. So no worldliness, right? Keep it very sharp and clean. If you find that you
are traveling outside the lines a little bit too
much, a little bit too often. Then go ahead and just shrink the size of your brush
like I have here because the reason I did it is
I was traveling outside the lines too often in
that top top eyelash. So I've gone ahead and I've
recalibrated my brush size. I was never very good
at coloring in books. And go. Alright, we'll do the same thing with
the bottom eyelash. Filling it in it by bit. Increase the size of my
brush slightly more here so that I can do that faster. There we have it. Now we can add in
our offshoots of eyelash and really take your
time to nail this shape. I want to emphasize that again. Important thing. Again, you'll notice how rounded
this transition is. There's a slight, there's
a slight edge there. Then it rounds out into
the bottom portion of the eye to really pay
attention to that. In order to capture the shape that we're looking for here. With the eye. Once we've done that, go
around the inner edge of the eye and it's outlined. Bring it through to
completion sermon. We started out with very, very rough with
this eye and then we've really gone ahead
and cleaned it up. Next up. Let's place in the
pupil and the iris. Lay in another eyelash. Shoot here. So we're looking
down at the eye. It'll appear as though
especially the eyes still looking at but us, that the IRS is sitting
further underneath the top eyelid and see that I'm not making my iris
completely round here. I'm actually squashing
the shape a little, distorting it in order
to get something that looks more
interesting and dynamic. This is with the
previous examples. N, because we're looking
down at the eye, we're going to see the pupil
moved back into the iris. So it'll actually be
sitting at about here. Then I'll lay in a little bit of a reflection to give that
wet look to the eye. Now if I'm looking at
the eye and I think that this could be a
little more diagonal. I'll go ahead and
I'll make that tweak. The same thing with the
eyelashes up there. I think that's
looking pretty good. Next up, I'll place
in some anatomy, some surrounding
anatomy for the eye, as well as the eyebrow, which is going to be sitting
fairly close to the top of the eye in the
top-down representation. So this is width the eye. I'm actually going to
draw that out pretty fast and I'm going to keep
it rough along the way. If you are going to go
for that Ralph approach, makes sure that you keep
your lines very, very light. That's important because
you're going to want to either go over the top of them with a darker outline
or erase them completely. So I'm having the back of the eyebrow here
hook around the eye. At the top. Again, I'm really
going to focus on capturing a solid
shape for the eyebrow. And I'm keeping my lines a
little bit too rough there, so I'm going to be more careful and try to polish
them up as much as possible. Alright, great. Now let's go ahead and place
in those render lines. You can see that I've added
a clump of rendering there. Now I'm going to
separate it further apart is I'm leaving a decent amount of space
between them here. I'm only going to add
two here and then I'll move on to another section. Add in a few more. Now some people, they
didn't bother adding any rendering to their eyebrows. And that's still
works quite well. They just fill it in with
some color and it's great. So it's really the
decision that you can either make or not make depending on the
look that you're after. Okay, cool. So that's a top-down representation
of the eye. We could also add in the fold, the top eyelid as it sits
underneath the eye socket there. It's looking pretty good. Great. That's the top-down view of the eye that is sitting further away from us and
the far side of the head. Now let's take a look
at how that would look if we were observing the eye that is closest to us. And it probably
wouldn't look that much different, to be honest. Really depends on how far away the head is
turning from us. We can see how the
top of the eye, it actually starts to
curve around that eyeball. And the bottom eyelid has an
even greater curve as well. I'm going to sit the eyebrow
right on top of that. I because we're looking
down on it from above. So what's going to
happen in effect is we will see the form
slowly transition, the form of the brow slowly transition over the
top of the eye. We've scribbled in our shape there will lay in some anatomy
as well surrounding it. We could even say, well, we'll go ahead first and why actually lay in the eyelashes? Now, we're almost
looking at the eye from an even higher
vantage point here. So what I'm going to do is actually start to flip
those eyelashes around. Because now we would
be seeing them actually overlap on
top of the eye here. Start seeing them
fan out like so. So at a certain
point the eyelashes won't be sitting
above the top eyelid. Actually be overlapping
the eye itself. That's when you have
really high up. Or when the eye
is almost closed, you'll see those eyelashes flipped down over
the top of the eye. But in terms of the
eyelash shape, I mean, you can describe it in any
way as long as you're making it look as though these
eyelashes are clumped together. Again, don't, don't separate them into individual strands. That simply won't give us
the appeal that we're after. Okay, So now we'll
outline eyelashes, clean up those very rough
lines that we've laid down. You can see that
I'm sculpting out the shape of the eye more
and more at this point. I'm deviating away from that
initial trapezoid shape. We would talking about before that we were learning
about initially. But this is certainly
still derive from it. Again, simplify it out. We're really dealing with is something that looks a
little bit like this. Now it's wrapping
around the eyeball. So let's go for a
different approach. We'll just we'll just fill in
these eyelashes once again, is to keep things consistent. Staying inside the lines, making sure we're maintaining that outside shape
as much as possible. Sometimes it's not just
learning the process. The process is actually quite
easy to get a handle of. It's also just being
able to recognize how these different
facial features looking from these
varying angles. Okay, how does the
eye look from above? It's very difficult to
know until you see it. Even though you might
know how to describe. The shape of the eye. And you might know the
basic way in which you establish the shape of the
eyelashes and the eyebrow. Actually knowing
what the eyelashes, the eyebrow and the
eye itself look like from above or from below, is near impossible until
you actually do it, until you actually see it. Because those reference points aren't just floating
around inside your mind. You've actually gotta be able to see them in the first place, to be able to replicate
them on the page. These examples that
I'm doing up for you, even when no, We're
going through the process of drawing them in. It seems a little
bit repetitive. No doubt. You'll notice that all of them at
different points of view that you can
draw the eye from. That they all have
their own challenges associated with them. Go ahead and draw in the iris
and the pupil once again. The iris is going to be a little bit more
ovular this time. Sitting right up against
the top of the eye. Going to set it back as well. Because once again, the pupil is going to
sit back inside the eye. We've got the
reflection drawn in. You could add rendering to
the IRS If you wanted to. Sometimes I do,
sometimes I don't. Because the top of the eye
is going to cost somewhat of a shadow over the
iris and the pupil. You see might add in
something like that. I'm keeping it
fairly cleaned for most of these examples. However. Then of course we've
got the eyebrow, which we would describe this notice define
the shape of first. Once we've got it sketched in their experiment a little
bit bigger out if, if working refer is
going to help you out, help you get to the finished
result you're looking for. Faster and easier than if you're keeping every single
step precise and clean. I find that I don't do my
best work with that approach. Usually I've gotta be very, very loose and I got
to keep it rough in order to arrive at
the ideal outcome. Just because I need
room to explore, I need to, I need
room to mess up. If I don't feel that
way as I'm drawing. It, just it makes me
less imaginative, less willing to experiment. And you may have
actually found the same within your own art. My antidote to that is, no, keep it messy from
the beginning, then you don't have to
be afraid of keeping MSE of or messing up. You can always refine
things and change them up later. Okay. Next we can go ahead and see in that crease between the underside of the
brow and the top eyelid? At in a little bit of a
fold underneath the eye. And that just about
does that example. Move these eyes off
to the side here? What I'd like to do
now is an example of an eye that's turned even
further away from us. Okay, So another Far Side, AI, but one that is a
little bit narrower, that we're also going
to be looking down upon k. So these are the
views of the eye from above. Alright, so I'll keep this fairly rough
to start out with. The grip on my stylus is also
very loose at this point. If you're wanting to get those really light looking lines that are loose and not heavy. And I highly suggest you relax your hand
around your ears, your pencil or stylus that
you're using to draw with. So this is a very
similar shape to the shape we went with for
the initial IOE drew out. Except now it's much
narrower and also you'll notice that the
brow is obscuring. More of the eye here. It's sitting almost
over the top of it. Well, it is sitting
over the top of it, essentially, especially
the front of it. So especially from the
top-down position, this particular
eye, the far-right, can look very angry. And of all the facial features, the eyes are probably the
hardest to get right. Funnily enough because the fact that they're placed under so much scrutiny when
people look at them. As I said before, they one of the most observed
facial features and so people know what
they look like. They're very, very
familiar with them. And if those eyes
look off in any way, it'll be easy to pick up, even for people who
don't, aren't artists. Right now we're going to
draw in these eyelashes. And once again, because we're
looking down on the I here, they're going to be folding over the top of the
actual eye-opening. Draw these eyelashes
around the eye. Once again, most of these are
very feminine looking eyes. Just because I want
to, I want to push the eyelashes and how you would shape them
in these examples. And feminine eyes are the perfect opportunity to be able to show you
how to do that. If you were drawing male eyes, you would simply you'd
either just give them a heavier outline
around the opening of the eye or you would make, would still give them eyelashes, but you would make
them somewhat smaller. You'd make them a lot smaller. In fact, these eyelashes can
be cut to varying lengths. Even the eyelashes on this
particular I are actually possibly larger
than the eyelashes are drawn on the previous eyes. Okay, so I'm going to fill these in as we've done with
the previous examples. Making sure we stay
inside the lines and maintain that
sharp looking shape. If you're doing
this traditional, you may be using a
texture at this point. To do this. Find tip, tip texter
that allow you to fill it in in a much faster
than a very fine tip pen. Usually unless you're
drawing eyes this big, it won't take you so much time
to fill in the eyelashes. It'll actually be a
very quick process. You think about how large eyes usually are in
a comic book panel, especially you, you're never going to draw them
to this scale. But in these exercises, what it does is it
allows you to be able to see what's going on
in a higher resolution. So it's quite useful to begin large and then shrink
things down later on. You'll only be able to ever draw so much detail within your
facial features anyway. Depending on the amount of distance that you've
got to work with. A cool stop. Let's draw in the
pupil and the iris. Be sitting up
underneath the eye. Quite a lot here.
Actually, probably even more so than what
I've drawn it in there. So we'll give that another shot and see that I'm really
squashing that iris shape. They seem the pupil up nice and high back inside the iris. Then laying in that reflection. Next we'll attend to the
eyebrow, same as before. And hopefully each
of these examples are giving you an
opportunity to be able to practice the different shapes
that we use to construct the eyebrow with multiple times so that it can become
familiar with it. Once that's done, we
can start to lay in those INR eyebrow strands
for the rendering. Giving the basic
shape we've done up a hair-like appearance. I would encourage you to
experiment with these elements, just see how you can tweak them, what you might be
able to come up with. It's even different to
what I'm showing you here. Look at your
artistic references, your artistic inspirations,
and ask yourself, well, hey, how do they
describe eyebrows? Do they just use
just a flat shape? What do they render it out? And then they do render it out. How do they render it out? What does that look like? We try to observe it and then
imitated in your own art. Mix-and-match, of course,
without serratus so that your work doesn't
look exactly like this. That's the way you come up
with your own unique style, your own unique take. Okay, cool. So we've got the
top-down representations of the AI taking care of here. Now let's go ahead and draw up some examples of
the eye where we're looking at it from below. Move this one over here. Okay, So thinking about
little diagram from before where we
were looking up at the eye and we've
seen a wrapping around the spherical
form of the eyeball. We're gonna be keeping that
in mind as we establish the shape for the eye-opening
in the bottom-up position. So again, we'll start out rough. Keeping your hand nice
and loose as we work. And I'm giving the
top eyelid this time a much greater arch. There's a lot more curvature
being applied to it. As opposed to the
top-down view of the eye, where we seen almost the
opposite effect happening. The bottom of the eye in the
bottom-up position is going to flatten out
quite considerably. Once I've got the
eye-opening drawn in, we can go ahead and get you in the eyelashes
surrounding it. And from this point of view, what you'll notice is
that the top set of eyelashes are actually going to extend it outward
quiet a lot more, but there's still going
to be wrapping around that arched trajectory
of the top AI contour. So we'll add in some
eyelashes around the side of the eye and around
the base of the eye. But what's going
to happen here in this example is
that bottom set of eyelashes are really
going to flatten out due to the perspective we're
now observing the ion. Just going to tweak the shape of the eyelashes a
little bit here. Finally, capture
pleasing representation for them on this angle. So I'm sculpting. I sculpt the face today by sculpt the shape of the
facial features as well. And I do so until it
all looking right. That's the way I
want it to look. And see. I got a few offshoots
of eyelashes. I'm going to take a few of them out because I don't want the
eyelashes still to brushy. Just enough to
describe them as hair. Okay, I think that'll
probably work quite well. Next up, we're going to
draw in the eyebrows. Well, sketch them in loosely. We're going to want a
little bit more room between the eyeball and the eyebrow in this
instance because we've got that plane that
sits above the, I. Start sketching out the
shape of the eyebrow. Or we're sitting at much, much higher above the
eye in this example. So again, the opposite
effect to what we've seen in the top-down
representation of the eye. Right? And you'll
notice that a lot of the changes that you'll see in the bottom-up
view as opposed to the top-down view or just
the opposite of what you would see in the former. So we've got our basic
shape sketched out for the eye and also the eyebrow. Next up what I'm going
to do is actually sketch in some of the anatomy, the surrounding
anatomy of the eye. Because here in this viewpoint, what we end up seeing
is a better look at the top eyelid folding in
underneath that eye socket. We really want to make sure
that that's drawn in there. We can also go
ahead and lay down a line that indicates the edge of the bottom
of the eye socket to. Once we've got that all established in our
underlying sketch, we can then go ahead and start to actually fill in
those eyelashes. And what I'm going to do after I filled in the eyelashes
is I'm going to go around the outside
of them if needed, and refine the
surrounding contour, the surrounding silhouette. Just to make sure that shape
is nice and sharp and vivid. So I'll go around all
of the eyelashes, placing in that nice
thick black value. And another thing that
eyelashes and sick, equally laid on I'm
makeup gives you is additional contrast around
the eyes, which inevitably, inevitably draw more attention
to the face in that area, but also on top of it,
add additional appeal. Contrast on the face
seems to be appealing. It makes it more
readable for people. So they can, they
can understand it, makes it easier to look at
the sand what they're seeing. It breaks up the
face a little bit. And you could add
contrast to anything. You'll get the same effect. By contrast, I just
mean varying levels of tone and value
that you might add in the face or other
areas of the body. The hair is also
another great place that you can add contrast. Usually you'll notice
that the appeal of your heads actually increased dramatically just by
adding in some hair, either black hair or red
hair or blonde hair, or whatever color you like. It's going to be different
from the values of the face, least in a large part. Great, So we've filled
in the eyelashes. Now let's go ahead and send some off-shoots
of eyelash hair to add some texture
to the eyelashes. We can see that
I've tried to keep that shape is sharp as possible. Next up, we'll place in
the pupils and the iris. Now, I think we'll have
the eye looking in the upward direction
here, away from us. So we'll place the
iris at the top. It can be a little bit
intimidating actually to draw the iris looking directly
down at the viewer, especially if the camera
is placed below the face. Just because it's a very
dominating point of view. Right? Anything that
you're looking up at, it. On some level, it tells you
that you're smaller than it. If you've got to look up at it. Could be a tall building, could be a character. But depending on the effect you're trying to achieve within your comic book and how you want the vibe of that
character to come across. It's a nifty technique to use. Okay, great. So we've got our iris and we've
got our people placed in. Next up. Let's thicken
up at the outline of our eyebrow shape
and render it out. Okay, So you can think of the initial stages
when we're just loosely sketching in our
drawing as the drafting stage. And now this stage would
be the refinement stage. We're retracing our steps, going over the top of
everything and just really trying to nail it, polish it up. We're thinking
about the neatness of our lines at any point, it would be at this point. We might even get out or eraser and get rid of some of the
under drawing if needed. Comic artist, David
finch tends to do this. He will actually go over the top of his
under drawing with a kneaded eraser and
get rid of most of it, leaving just enough information there for him to be able to see what the existing underlying
sketch consisted of so that he can go
over the top of it with a more finished outline. Okay, Cool. So next up. And he, go ahead here and please see in those eyebrows strands
you can see I'm using a very thin or very
small brush size here in order to keep
those lines nice and thin. And once again, trying
to keep these eyebrow, eyebrow render lines as
non-uniform as possible. Eyebrow render lines. It's a good tongue
twister, at least for me. Right? There we go.
Again, we can do that single offshoot of eyebrow for at the end of the eye there. And then finally, I'm
simply going to darken up some of the surrounding contours that I've added into
indicate the anatomy. The most part, we can simply leave this as a single outline. We can add in an
additional second line, That's dinner to
the main outline, which will just add
that additional depths. Then that completes
our first example of the bottom up
representation of the eye. Let's do a final one now. This time we will turn
the eye more on its side, maybe looking at the
far side of the face. Okay. So this is actually a point of view for the I that I'm just realizing
I'm quite unfamiliar with. So we'll see how I go here. Can't remember the last time I drew the far side
of the eye from below it again, for me, really thinking about how the eye opening wraps around the eyeball helps me out a lot, even when I'm feeling unsure. And that's the great thing, is remembering these
basic concepts. Even if you're a little non practiced in a
certain point of view. For facial feature or
even the head itself. It, it really just helps
you to be able to go in and take a decent shot at it anyway and probably get it
fairly correct looking. Alright, once I've got the
eye shape drawn in there, you can see I've got
a very large arch to the top of the eye. This point of view. And we'll draw out the
eyelashes and they're going to be fanning out a little bit here in this point of view. The sides. So this would be
the edge of the head here. The same as with the eyebrows. You really want to
make sure that if you are going to be doing
these eyelash offshoots, you're keeping the distance between them
somewhat randomized, so don't make it an eat them
at equal distance apart. If he can help it. That'll cause them to make
that'll cause them to appear artificial or not quite natural, which is certainly not the
look you want for eyelashes. Even though some of the time
they may be glued on right? Now, sometimes. What will happen in
this point of view is you'll actually
get the bridges and noise obscuring a
portion of the eye. So just to really hit
home this example, that's exactly what
I'm going to do. I'm going to place
the bridges and noise over the eye just
a little bit here. To show you that yes, the form of the noise can
actually hide part of the eye. And indeed what will
then happen is we'll see the eyebrow around the
top from that point. So really I'm starting to test my lucky I'm
pushing and I'm pulling this eyebrow shape and all different sorts of
directions as I work. And I'm, I'm bending
it to my will. Especially with this example, you can see a curve that Ryan
in around the eye there. So that's what I mean. When I'm, when I'm
drawing out these shapes, I know they look solid, like they can't be bent, bent in any way. But I certainly don't
treat them like that. Bend these shapes to my will in order to
get what I'm after. And I encourage you to
do the exact same thing. And that can pertain to
the shape of the face. It can pertain to the shape of each of the facial features, the shape of your
character's body. If you're getting into that. Once we got the under
drawing completed, let's go through the
exact same process again. At this point, you'll be fairly
familiar with the drill. Going around the eye-opening
with a darker outline. And then we'll increase the size of our brush just a little bit and start filling in those
beautiful eyelashes. We'll make our way
around the entire area, building it in bit by bit until the whole
thing is nice and dark. And again, you can see
the effect that eyelashes add to the eye creates a nice, beautiful frame that
just pulls you in. Eyes are important. They're
the windows into the source. So of course we want to draw
people's attention to them. And I would argue
that if you mess up the eyes on your face, it doesn't matter how well
you draw on the nose. It doesn't matter how well
you draw in the mouth. If you mess up those eyes, everything kinda gets
thrown out the window. There. The first impression
that people are going to have over your head overall. So if you get good at drawing
any one facial feature, makes sure it's the eyes. Really practice those the most. I used to draw
almond-shaped eyes, which certainly
wasn't appealing. Probably the way in which
I learned how to draw eyes is by looking at the work
of Mark Soviet history. And that's where I got
that trapezoid shape from. And that was my own analysis, my own way of interpreting it. So who knows how
he thought about it as he was drawing
them in there, but I really helped
me out a lot. And I tried to analyze your
references in the same way, try to create associations
with what you're seeing. That'll allow you to be able
to execute how you draw the same facial features and to remember how
to draw them as well. Okay, So same deal here. We'll go ahead and we'll draw
in the iris and the pupil. And remember that the membrane of the iris is actually going to push the top eyelid upward
when the eye is looking up. And of course we're not going to place our pupil out here. We're going to
place it back side the iris drawn out a
little reflection. That completes the eye-opening. Now let's attend to our
eyebrow defining its shape, keeping the line claim. Always remember that
make it a priority. When it comes to drawing the
final outline of your art. Keep those lines smooth, iron out any blurriness
within them. I think that was probably
the hardest part about learning how to
draw digitally for me is just trying to get my Don
outlines to be smooth. I tried everything to
I tried automatically. I tried the pen tool and almost synthetically putting
my line in so that it was completely 100% neat,
but then it was too neat. You can have a line that
looks way too neat. Be careful with that. If you're working digitally, what I'd encourage
you to do is mess around with the
stabilization of your brush. I've got very high level
of stabilization applied to my inking brush when I
go to ink my comic books. And the reason for
that is because what stabilization does is it gives you the ability to draw a very long lines that are
extremely smooth and straight. Don't want to ramp
it all the way up. Otherwise, again, you'll get that weird artificial appearance TO work where it just
looks to dance moves. So use it in a reserved manner. It depends. Some hands, some people have hands that
a steadier than others. So you've got to
calibrate all of this stuff with your
own way of working. Some people have a
tighter grip than others. And so they've got to use a smaller brush size because they just tend
to press heavier. And if they were using a
larger brush size than those lines will become
an out way too thick. Some people have a
very light amount of pressure that they apply
to the drawing board. And in that case you maybe
you want to thicken up the size up your brush a bit. Okay, once you've
drawn out the eyebrow, let's go ahead and
Goring the top eyelid about holding up against the upper ridge of
the eye socket. Okay. That completes the
dynamic views of the eye when we're
observing it from above, and when we're observing
it from below.
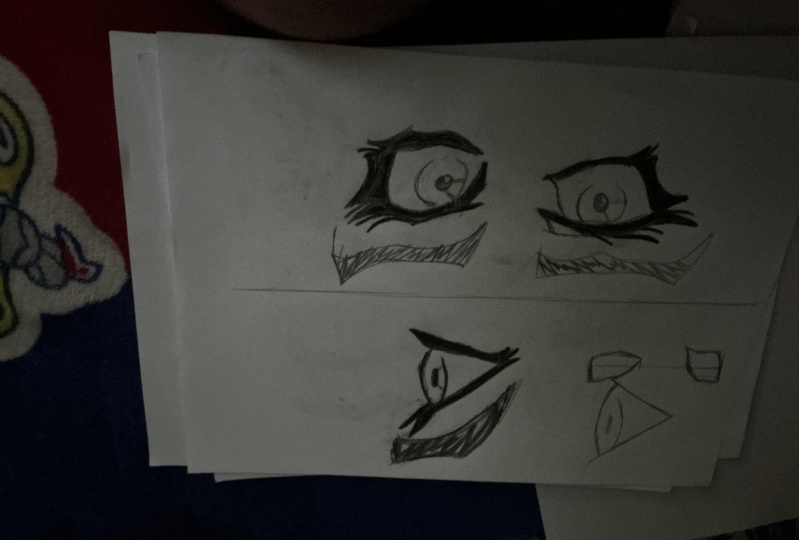
4. Assignment: Hey, thanks for watching.
I hope that you got a ton of value out
of this class. And ideally, what you've got drawn up in front
of you right now, after going through the lessons, is a whole bunch of eyes drawn from different points of view. But it's going to take practice to get
really good at this. So that's exactly what I'd like you to do for
this assignment, is goes through and drop the human eye
from the front side, three-quarter,
top-down and bottom-up perspectives a few times more. So that you can get to know
this process off by heart. Build your confidence up
so that it doesn't matter what viewpoint you're
drawing the human eye on. You can do so without
even thinking about it. You know it off by heart. Good luck with the
assignment and until next time, keep drawing.
 Clayton Barton, Harness the Power of Dynamic Drawing