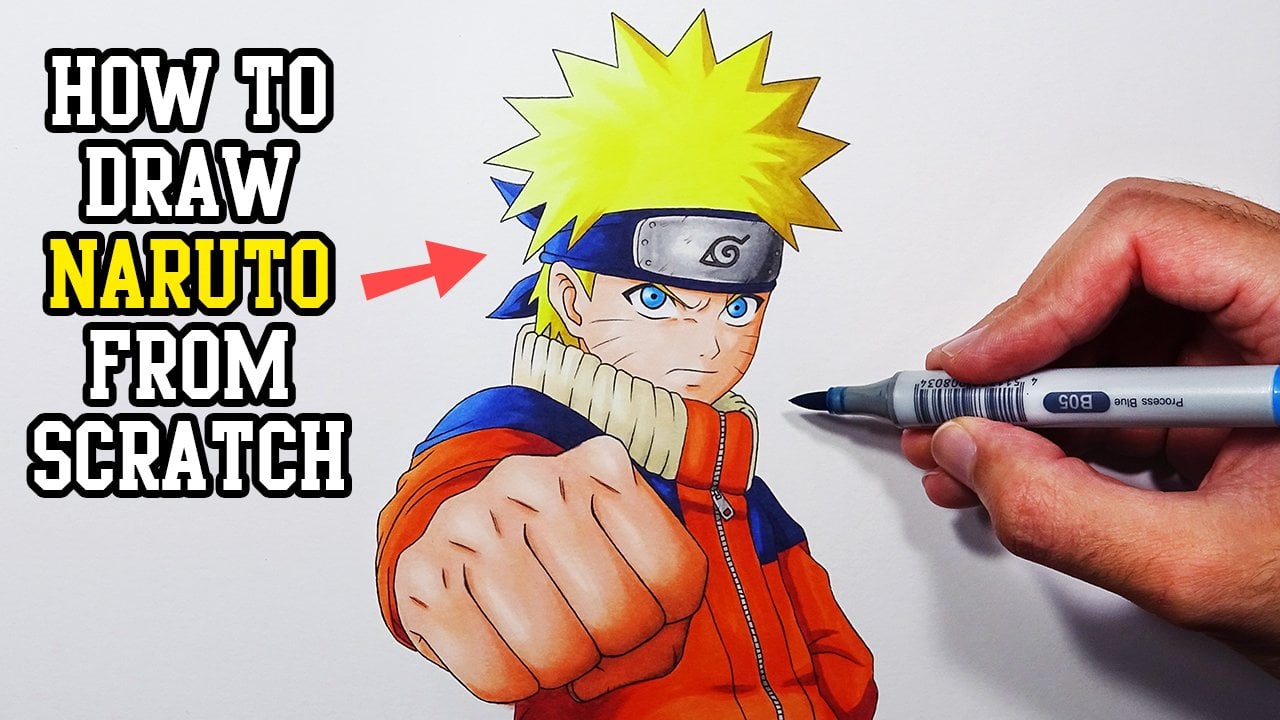
Transcripts
1. Class Intro: What's up, everybody,
My name is, I'm a professional artist
for more than ten years, specializing in traditional
art as well as digital. You can see some of
my favorite words. Doing deals. I managed to gain more than 900
thousand subscribers. Social media, when which I teach and showcase
some of my best works. But enough about debt. In this tutorial, I'm going
to teach you how to draw your favorite character
with three steps. First, we've got the
sketching process in which we learn how to draw the face and body using geometrical
shapes and guidelines. In the second part of the teach you how to ink your drawing. And finally, in the third stage, we're going to color the join using Copic markers
or colored pencils. So without further ado, your pencils down to business.
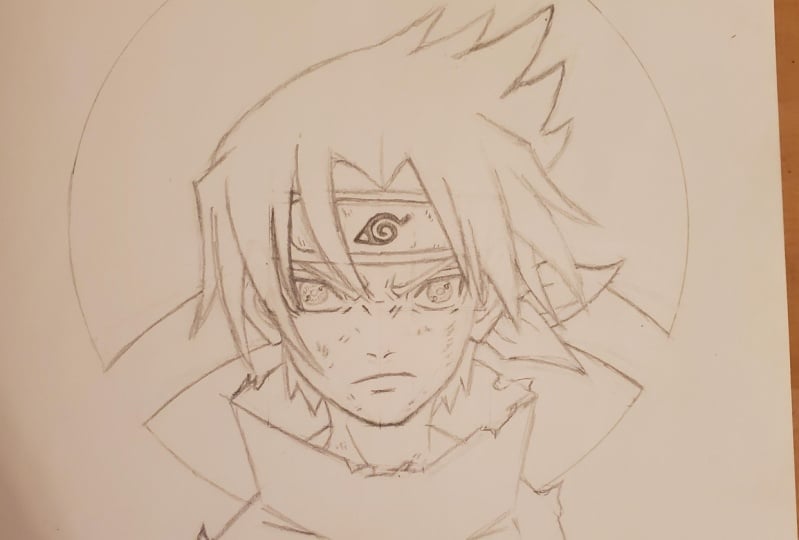
2. Sketching & Inking Sasuke: Okay, So today
we're going to draw Saskia from the
animate narrow tube. It will check the
description box. You can see all the materials
I'm going to use for this tutorial with
Amazon product links. This is gonna be a frontal pose. As you can see, I draw
a perfect square. Each side is six centimeters, but you can draw it in any size. You want to just make sure
to keep the size relation. Okay, So we're going
to start by drawing the shape of his face just
by drawing five lines. Next, we're going to
draw some guidelines to help us keep the right
proportions of the eyes. Now I'm going to
draw the eyes by using four curved lines. As you can see, it's in the
shape of a parallelogram. Next we'll draw the eyelashes simply by adding
some more thickness. Then we follow up by
drawing the eyebrow. And as you can see, it gets thinner
towards the edge. Next we'll add some
wrinkles around the eye. And we'll add the upper eyelid. Now to draw the iris, you can either use this circle template or just
draw yourself like this. We'll add the pupil at
the center and then draw the showing gun just
by adding two tomos. Next, we'll add
some lines between them in the shape of a circle. And now we're going to do the exact same process
for the left side. And again, you want to use
the guidelines and follow the exact same steps we
did for the right eye. Awesome. Next we'll
draw the nose simply by drawing two commas. I'm going to fix his chin, just going to make it a
little bit more wide. Daniel Joy, his mouth. I'm going to draw the
nose a little bit lower. And we'll add some
more wrinkles. Awesome. Next we are
going to draw the head bend just by drawing a curve. When I refine his face, again, just kinda make it a
little bit more curved. Will indicate the top
of his head band. And now we'll continue
by drawing the ears. So first, what we want to
do is draw the shape of the ears and only then
will add all the details. Awesome, Ed, now we
can focus on the hair. So we want is HER2
blowing the wind a bit just to create
a cool effect. As you can see, I'm drawing the hair by using curves again. And for this joint the wind
will come from the left side. Awesome. Now we'll draw the
rest of the hair locks. And we'll add five
more locks on top. Again, pointing to
the right side. Awesome. Next to lose two
curves to create the neck. We'll draw the trip muscles
again by using two curves. And then we'll add the rest
of the hair from the back, just adding some spikes. Next, we'll add the
edges of the bandana. With some creases, of course. Now we'll focus on the torso. So first we start by drawing
the color of his shirt. And the next we'll
draw the shoulders. We'll add some
creases, of course. Next we'll add some bruises to his face simply by
drawing some lines, some tiny lines right
next to each other. And we want to add
some terrorists for the show just to create
more genetic effect. Like he was in a very big fight. Awesome. Next we'll
focus on the headband, will add the metal plate. Then we'll draw the
leaf village symbol. By following these steps. Will add some thickness to the plate and add
some cuts as well. Awesome. Next, we want to draw this symbol of his
Glendale, which here Glenn. And we'll draw it right
behind SaaS. Care for that. I'm going to use a pot lid and then cross it to create
the shape of the land. As you can see, I'm using the oil to keep the
right proportions. And lastly, we'll add
the neck muscles. Awesome. So we are done
with the sketching part. And now we can move on
to the inking process. For that, we'll use black pens. The tip size of the pen
will be 0.1 or 0.2. What you want to
do is hold the pen closer to the tip
with a very firm grip and just go all over the lines by pushing lines
are pulling lines. And of course, make sure
to do that by rotating the page so you can have
your natural and movement.
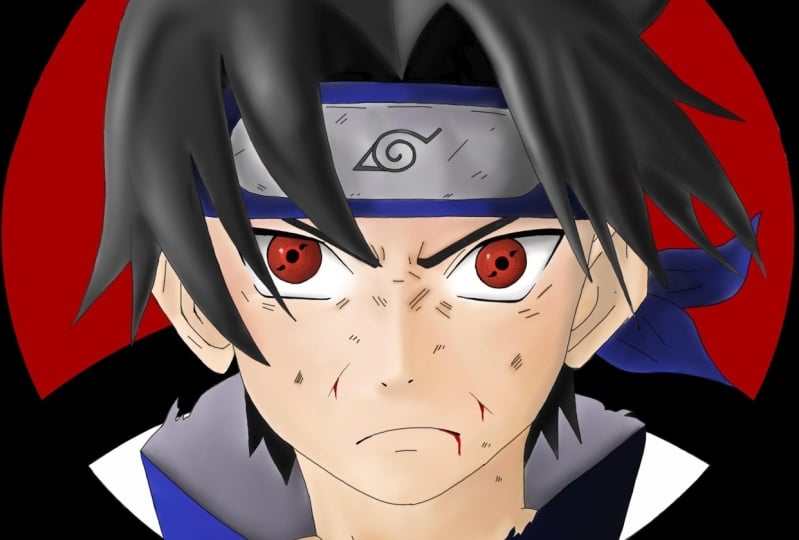
3. How To Color Sasuke: Awesome. Once you're done, make sure to clean
the lead very well, because we don't want
to smell the lead later on when we use
the Copic markers. Now for this tutorial, I'm
gonna use Copic markers. However, you don't have
to use Copic markers. You can use either
colored pencils or use your HB or B pencils and
just do some shading. Now, if you'll look at your
top left of the screen, you can see the exact number of copies of using
for this tutorial, we are going to start
by coloring his shirt. As you can see, I'm
coloring by using first brush strokes in the
direction of the shape. And I'm starting with
the lightest tone. For this tutorial,
the main light source will come from the left side, which means of course
that the right side will appear darker because
it gets less light. Next step we'll be
using a darker tone. That's gonna be our mid tone. And again, as you can see, I'm coloring in the
direction of the shape. After that, we'll use
an even darker tone. That's gonna be
our darkest tone. And it will color
the darkest areas again in the direction
of the shape. Awesome. Now we're going to
do some blending. So we'll use the midtone to blend the darkest tone
with the midtone. And we'll use the
brightest stone to blend it with the midterm. And as you can see, we'll do some adjustments along the way, adding more layers to
create more contrast, to create more blend. Awesome. Next we'll color
the inside of his shirt, will use some purple
gray tones for that. And we'll do the same technique, starting with the lightest tone, then moving to the mid
tone, adding some shade. Then we use the brighter tone
again to do some blending. And we'll use the
midtone again to add some layers in order
to get more contrast, to get more shaded. Awesome. And now we can move
on to the skin tones. So this time I'm going to use more than three tones
for the skin tones. But if you want to get a
slightly more detailed look, you can use five by
following the next steps. So first, we'll start
with the brightest stone. Then we'll use a darker tone. After that, we use
an even darker tone coloring the most shaded areas. We'll do some blending
with the midtone. And now I want to use an even darker tone
just for the edges. Will do some blending. And then I'm going to
use a pale purple. And we'll do some blending
just like we did before. Just to get that nice
gradient effect. Awesome. So we're going to do this same process for the face. But you are going to
leave some light at the areas that sticks out more, for example, the
cheeks, the bottom lip. And of course, the areas that
are closer to the light, which means the left side. And just like before,
we'll do it gradually, we start with the
brightest stone. And as we move forward, we'll use a darker tone until
we use the darkest tone. Awesome. And now we
can focus on the eyes. Sought for that, we
use three tones. Again, I'm going to start with the brightest dawn coloring in the direction of the shape, which means in circles. But we're going to leave a blank area to create
a very nice highlight. On the far left side. Next, we'll use the mid-tone
color in around the pupil. And then we'll use
the darkest tone on the far left side and
below the eyelashes. And of course we'll do some
blending just like before. Lastly, what we
want to do to get a very nice transition is take the colorless blender and basically soak some of the
ink around the blank area. And by debt, we get a very
nice-looking gradients. Awesome. Next to add some shade below the eyes by
using some gray tones, we start with the brightest one. Then use a darker tone. And of course, do some
blending just like before. Awesome. And we are going to use the same gray tones
for the metal plate. And as you can see, I'm leaving some blank areas again to
get a very nice highlight. We want to get the
shine of that metal. Next we'll add the midtone. After that, we'll blend the colors again with
the brightest stone. And then we'll add
the darker stone. Just like before. We'll
blend it as well. Now, I'm going to
use one more tone That's a lavender color. I guess it's very, very bright purple tone. And I'll just add one
more layer on the plate. So you don't necessarily
have to do that. That's just a nice addition. Next, we'll color the
leaf village symbol with some darker grays and will
blend them, of course. And as you can see, I'm doing some more adjustments
to the metal plate. What you can do as well is
use the colorless blender, just like we did before, and soak some of that ink to
get a very nice highlight. Awesome. So next, we'll use the same blue tones we use for
the shirt on the headband. Start with the mid-tone, then adding the darkest tone. And of course,
blending the colors. And we'll do the same for
the edges of the bandana. Awesome. So now we can
focus on the hair. So we're going to start with
the mid tone this time. As you can see,
I'm coloring from side-to-side in the direction of the shape, just like before. And I'm leaving some blank areas again to create a highlight. Next, we're going to
use the darkest tone, that's C7, adding some shade, mainly on the right side. Next we'll use the
brightest tone, C3. And we'll do some blending. And then we'll do some
adjustments with all the colors. Awesome, So this is the
result we want to get. Now we're going to color
the rest of the hair. We're going to start by using
the brightest stone and C3. Then we'll use the
Midtones, adding one layer. And after that, we'll
use the darkest tone. Just like before, we'll
do some blending. Now I want to get a darker tone. So we'll use a black color. In the, of course, will blend it with C7, the darkest gray. And we are done with the hair. So now we are going to color
the wheelchair symbol. First, we want to
take the black marker and go over the borders
with one more layer just to make sure that you won't accidentally color on top
of the hair or the body. For that, we'll
use a red marker. Now here's a trick I
learned from Dan can offer out to be done if
you have copycat fears. What you want to do is
take some cotton wool, will drop some ink into
their cotton wool. And then we'll spread
it all over this area. That way we can save some time. After that, we'll use
the marker in color, all the blank areas. Awesome. And to finish up, what we basically
want to do is color this entire background in black. So again, we can use
the same method, will take a black coffee refill, dropping some ink into a cotton wool and smear
the ink just like that. And then just use
the Copic marker filling the remaining
blank areas. If you want to get an
even more cool effect, we'll use the chisel
tip of the marker and we'll color around the
symbol just like that. And we are done. Everybody. This is how you draw. Susskind will cheer
from the antenna. Now auto, I hope you guys
and girls enjoy this. Congratulations if
you made it this far, please let me know how you
did in the comment section. That's it. Thanks a
lot for watching. Keep being awesome as always, stay home, stay safe. And I'll see you on
the next video. Peace.
 Yair Sasson, Artist