Transcripts
1. Class Introduction: What up, everybody. This is Yi. Welcome to another
step by step tutorial. And today, we are going
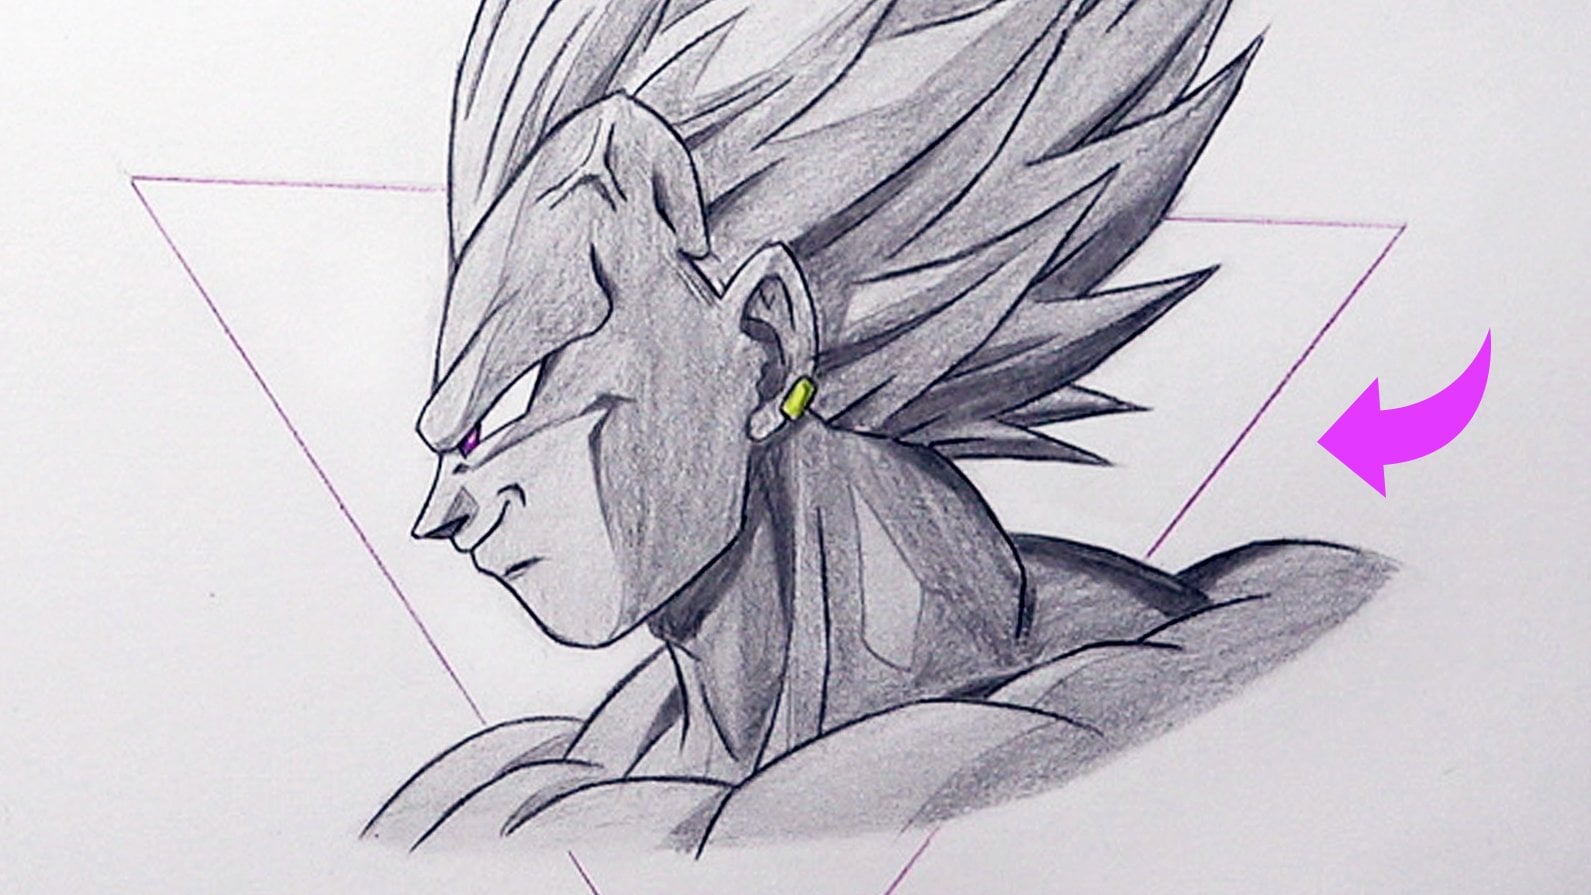
to learn how to draw vejio super St. Good from
the anime dragonbl super. We are going to
start by sketching Vagio then moving on to inking and finally coloring
with alcohol based markers. And if you don't have markers, you can also use
colored pencils. So without further ado, let's get started and by
the end of this class, make sure to submit your join so I can give you my feedback.
2. Step 1: Drawing and Inking : Okay, so today, we are
going to learn how to draw supers good vegito. If you'll check the
description box, you can see all the materials I'm using for this tutorial. So first, we're going to start by drawing a perfect square. Each side is 5 centimeters, but you can draw it in any size. You want to just make sure to
use a suitable paper size. So this is going to be
a three quarters pose. We're going to start by
drawing the shape of his face. Then I'm going to mark the
center of his face using this guideline and add the
wriinkles between the eyes. Next, we're going to
draw the eyebrow. As you can see, it gets
thicker towards the edge. Gonna add bump above the eye, and we'll use three
lines to create the eye. Next, add the check marks, and we'll place the
iris at the center slightly to the left and
draw the pupil, of course. We're going to do the same
for the left side, although, of course, his right eye will be bigger because
of the perspective. Next, we are going
to draw the nose, and we'll use five lines. We'll give him a nice smirk. And as you can see,
the gap between the nose and mouth is
really, really tiny. We'll draw the bottom lip, and then we'll move
on to draw the ear. So first, I'm going to start
by drawing the shape of the ear and then we'll
add all the details. The next step is
drawing the hairline. As you can see, it also connects to the center of his face, the previous guideline we used. And now we are going to
draw his portara earring. And we also add one circle here. Awesome. So now we
can draw the hair. I'm going to start with
two spikes on the front. So as you can see, I'm
going up and then go down. I'm going to cover
his eye a little bit. So as you can see, one
line up and then two down. And we'll add some
lines right there. We're going to do the same
process to white spike. And now we can draw the
rest of the spikes. But first, I'm going
to draw his neck. And as you can see, because
of the super same got state, his neck is going to
be a bit thinner. Now we'll draw one
spike on each side. And then I'm going to use
this guideline to help me keep the right
proportions of the hair. And now all you
have to do is just add the rest of the spikes. And again, as you can see, I'm mainly using fre
lines to create them. Of course, make sure to
jam with a nice curve. Awesome, next, what we
are going to do is draw some random lines from side to side in the direction
of the spike. And now we can move
on to the torso. So first, we're going to add
some details to the neck like the neck muscles
and the trichia. Next, we are going to
draw the trapeze muscles and we'll draw his upper chest. I'm gonna do some adjustments to the neck muscles because
they need to align well. Also, next, we are going
to draw a bottom shirt, and then the shirt on top. Now, as you can see,
because of the perspective, his left side will appear
smaller than the right. Now what we are
going to do is just add the details,
add the creases. So we're going to start
with the shirt on top and then draw the sleeve of the bottom shirt and also draw his
shoulder muscles. We're going to add the rest of the crises and his left
shoulder, as well. Awesome. So we are done
with the sketching part, and now we're going to
use the inking pens. So what we're going to do
is use some black pens, and we're going to go
all over the lines. Now, I like to use 0.1
for the entire body. That's the size of
the inking pen. But for the facial features, I like to use 0.05 just because it allows me
to be much more accurate. Also, once we are done
with the inking process, we are going to get
rid of all the lead. I'm using the notorious charcoal
eraser, and after that, I'm going to use
the eraser stick and make sure to clean it
very well because later on, we don't want to smear the lead when we
use the pi markers.
3. Step 2: Coloring!: Awesome. So once it's clean, we can start the
coloring process. I'm going to use copic markers. Those are alcohol based markers, which means they can
blend very well. If you don't have
any copic markers, you can use color
pencils or just shade the drawing using
your HB two pencil. Now, if you check your
top left of the screen, you can see the exact number
of copic I'll be using. I'm going to start
with his bottom shirt. For that, we are going
to use orange tones. I'm going to start
with the brightest one and just feel this entire area. And as you can see, I'm coloring in the
direction of the shape. That's very important. You want to color in the
direction of the shape. Next, I'm going to use
a slightly darker tone that's going to be mid tone, and we'll add the shaded area. For example, the shade he
gets from the shirt on top. Next, we are going to
use the darkest tone, and we'll color the most shaded
areas, the darkest areas. And now you don't have to, but I usually like to
blend some of the colors. So to blend them, what I'll do? I'm going to use the mid tone to blend the darkest tone
with the mid tone, and I'm going to use
the brightest tone to blend the brightest
tone with the mid tone. And I actually did it before. That's why you don't
see it right now. But if you move a couple
seconds back, you can see. Awesome and this is the
result we are going after. Now I'm going to proceed
by coloring the shirt on top for that we are
going to use blue tones. I'm going to start by
coloring the brightest areas. And as you can see,
the light source for this drawing will be
mainly from the left side, meaning that the right side
will be, of course, darker. Next, I'm going to
use the mine again, coloring in the
direction of the shape. I'm going to do some blending
with the brightest stone. And then I'm going to use the darkest tone for
the most shaded areas. I'm going to do some blending. Now, you don't have
to, but if you want, you can use another blue tone just to add a nice
blue tint, as well. Okay, so now I'm going to color the rest of the shirts
with the same method. I just explained. I'm
going to repeat it again. I'm going to start with
the brightest stone, filling all the area, coloring in the direction of the shape. Next, I'm going to use the meton adding all the shaded areas. Once I'm done with
that, I'm going to use the darkest stone for
the darkest areas, and then I'm going to
do some blending and adjustments until I'm satisfied. Awesome. So once we are done
with the shirts, we can focus on the skin tone. But first, make sure
to color this area, for some reason, forgot. And as you can see, I'm also using a darker tone. But again, you don't
really have to. It was just important to me
to make it a bit darker. Okay, so back to the skin tones, we're going to use three
different tones as well. Just like before I'm going to start with the brightest one. Then I'm going to add some
shade with the mid tone. As you can see, the
shoulder muscles split into three
different parts, and then I'm going to add the darkest tone and
obviously blend. Awesome. We're going to do
the same process for the chest and
the neck muscles. However, if you pay attention, when I cut of the
chest, for example, I'm going to leave a
tiny blank area at the middle just
because I want to get that nice gradient and that also makes the chest pop out more. God. Awesome. So now, we're going to
color the earrings. You're going to use some yellow, orange, goldish tones for that. And for the earring holder, I guess, you can use
some gray tones. Awesome, so now we
can color the face. Again, we're going to
use the same skin tones. I'm gonna fill all this area, but I'm going to leave some
blank areas on the bumps above his eye and on
the bottom lip as well. Again, because
those areas sticks out more and they'll
get more light. Next, I'm going to
use the mi tone, and I'm going to color
all the shaded areas. For example, the shade
he gets from his hair, the shade below the eyes, and, of course, on
his right side of the face because of
the light source. We are going to use the darkest
stone with a minimal use, but as you can see, it
adds a lot to the drawing. And now we are going
to colour the ice. So for that, we're
going to use some red, and I'm colouring
with the same method, trying to get a
nice gradient look. But if you want to
add more highlights, you can use the
colorless blender. And what you'll do is soak
the ink out of this area. And by that, you make
it look brighter. Awesome, and now we are
ready to color the hair. So we're going to start
with the eyebrows. Now we're going to use different red tones to separate the eye color
from the hair color. I'm going to start
with the mid tone and just fill in all the areas. As you can see, I'm using
the same tone to add shade just by
adding more layers. Awesome. So next, I'm going to demonstrate how to color
one spike of hair. First, I'm going to use
the brightest tone. As you can see, I'm coloring in the direction of the shape, and I'm repeating
myself again and again, but that's important,
so pay attention. Next, I'm going to use the
mi tone, as you can see, I'm adding it to the right side again because of the light. Next, I'm going to do some blending with the
brightest tone. Then I'm going to
use the darkest tone with a minimal amount. And then to add more highlight, I'm going to use the
colorless blender to soak some of that ink. And this is the result
we are going after. So I'm going to do
the same process for the entire hair and we'll
continue once I'm done. Awesome. So the last thing
we are going to do is take a graton and add some
shade below the eyebrows. And now, please lower
the volume a bit. We're going to do
the ceremonial, and we are done, everybody. We D. Everybody. So this is how you draw
Super St. Good vegeto. I hope you guys
enjoyed this tutorial. Please let me know how you
did in the comment section. And if you want
to see MTutorios, you can check out my
tutorials playlist. That's it for today.
Thanks a lot for watching. Keep being awesome, and I'll see you on the next video. Peace.
 Yair Sasson, Artist