Transcripts
1. Introduction and Supplies You Will Need: Oh Hi, friends. How are you? I hope you're having
a great day today. I'd like to introduce
you to this project. This is a drawing and
watercolor painting project that I designed,
especially for kids. You do not need to have any drawing or
painting experience at all to be successful
with this project. I will take you step by step through all the steps
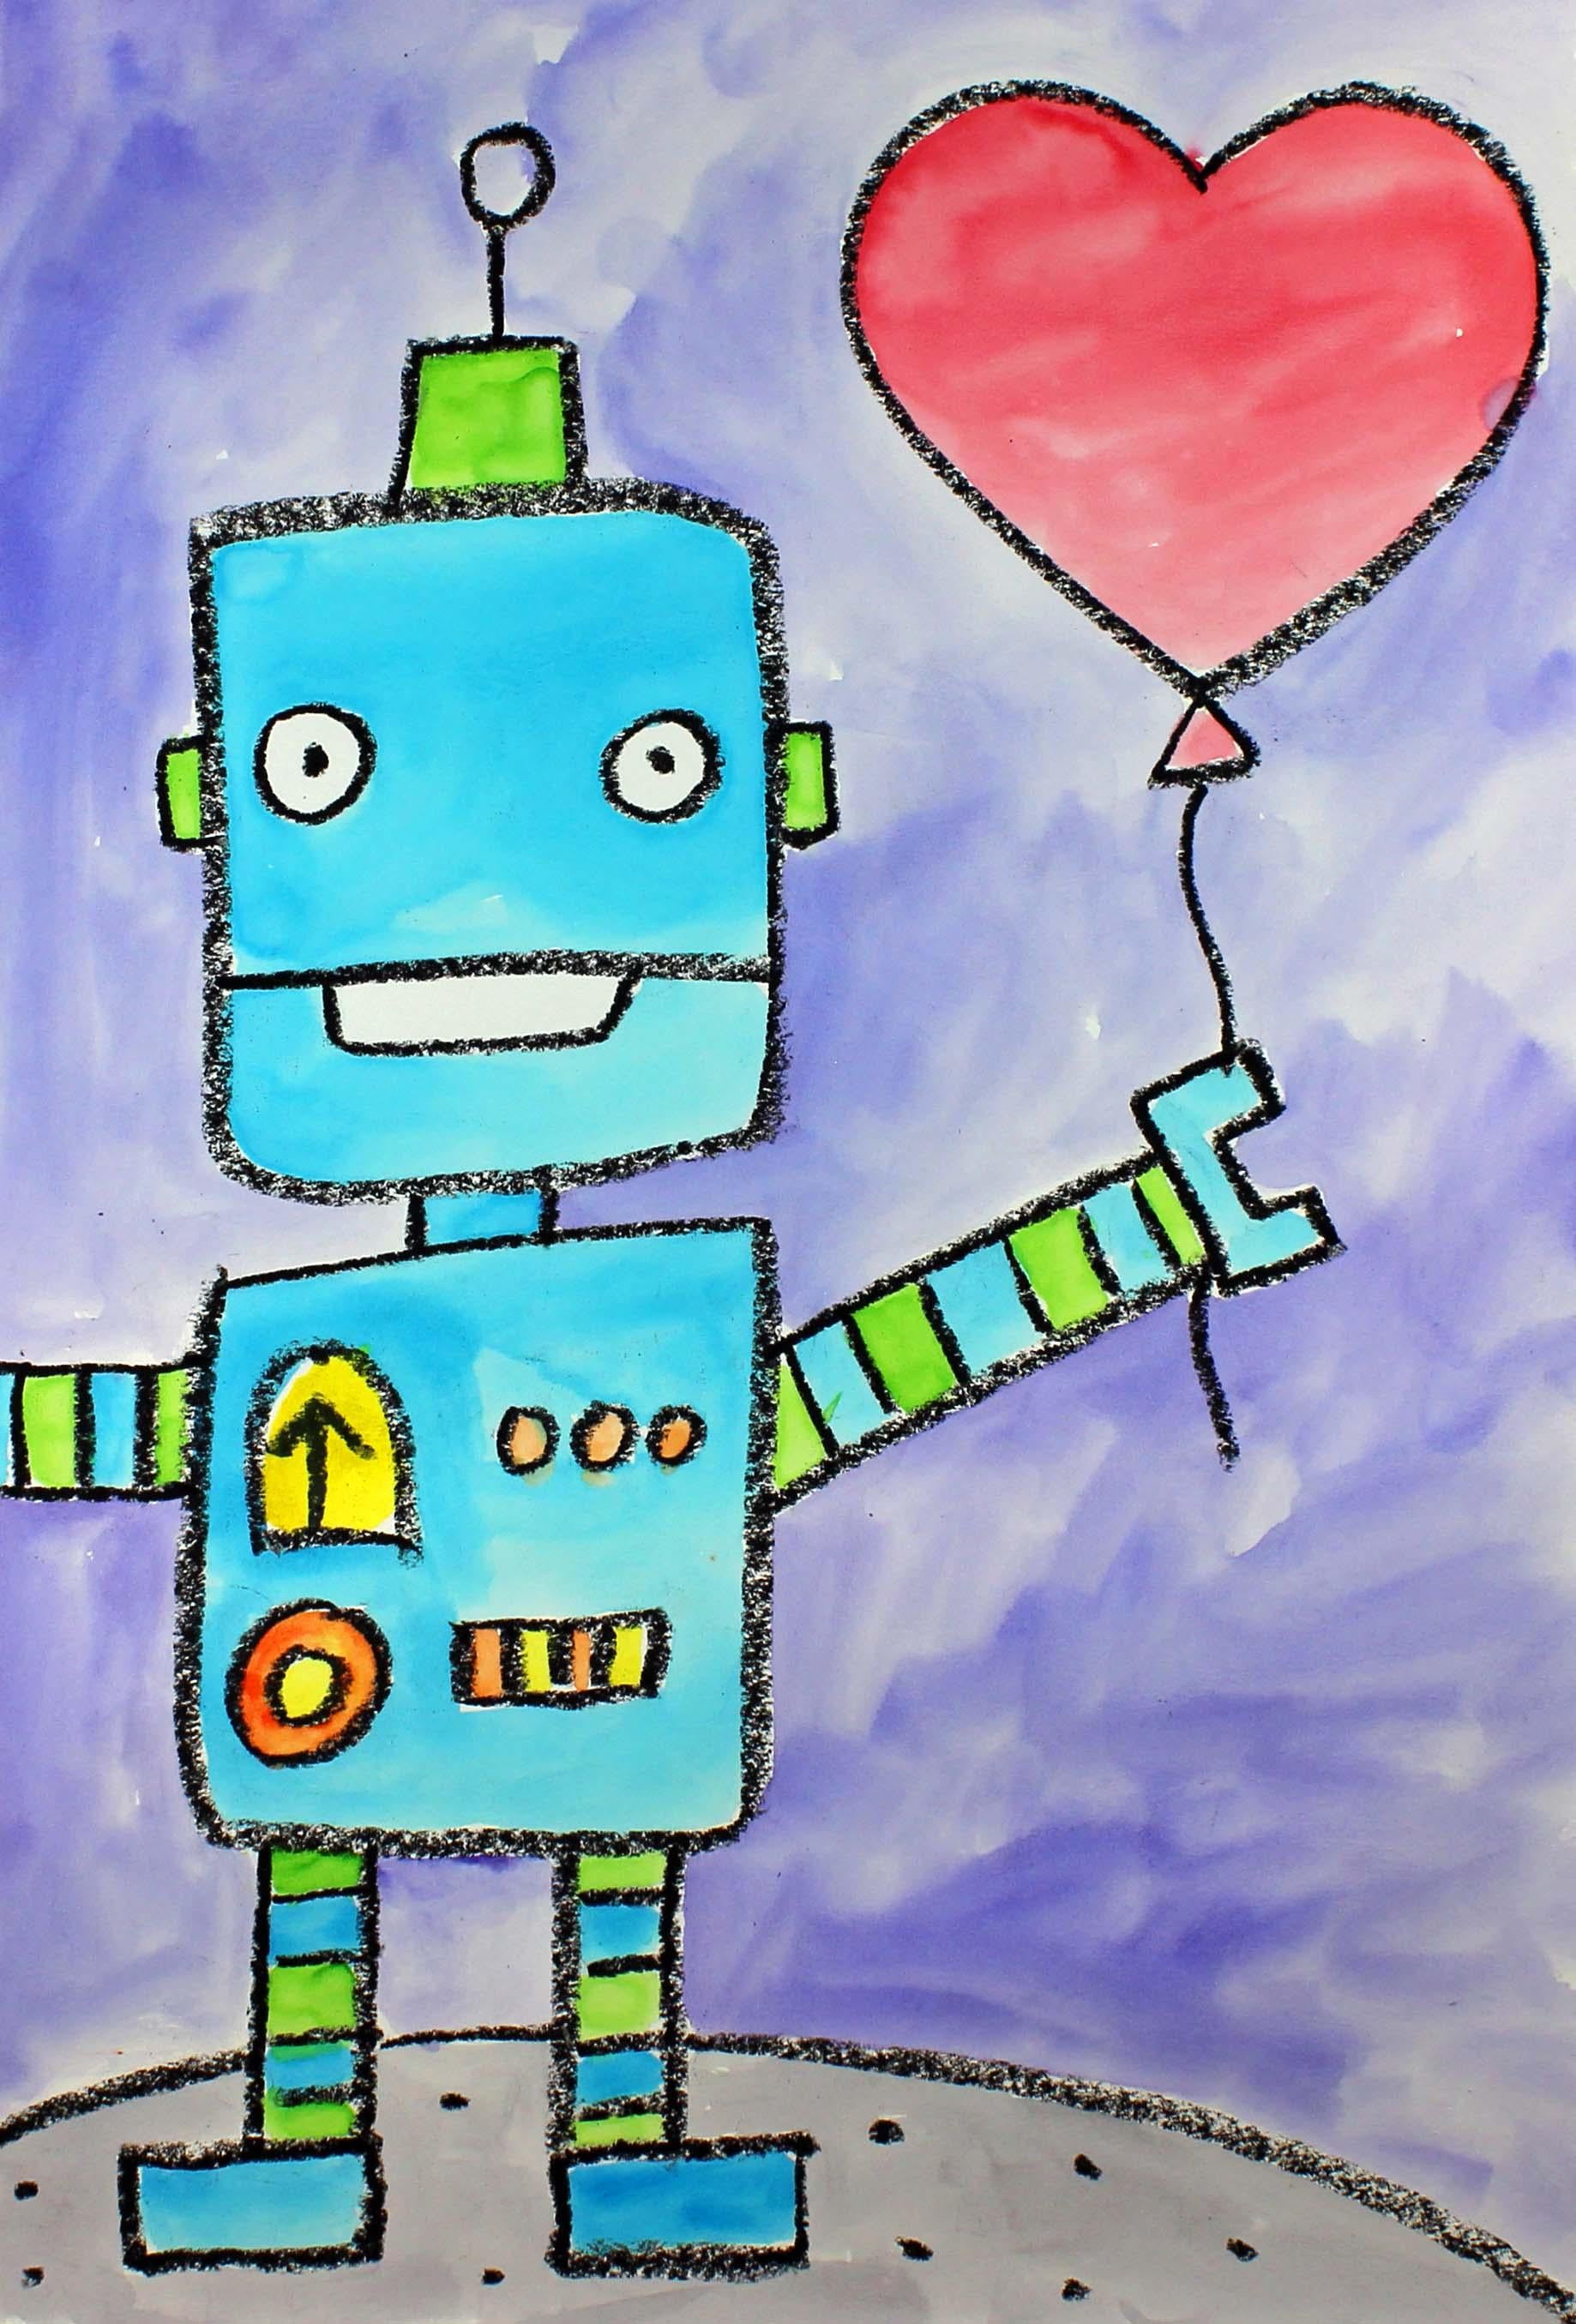
that you need to take. Today, we will be creating this robot who is
holding a balloon. Let's talk about
the supplies and the materials that you will
need for this project. The first thing
that you'll need is a piece of watercolor paper. You will need a set
of watercolor paints. You will need a paperbush. You will also need a
bowl or a cup with clean water and a black oil
pastel or a black crayon. And you will also
need a paper towel. So go ahead and collect all of those supplies
and materials, and I'll see you back
here in the next video.
2. Step 1: Draw a Robot Design: In this step, we are
going to draw our robots. So let's get started. Go ahead and pick up your black oil pastel
or your black crown. And what we're going to
do is we're going to find the middle of
our piece of paper, and we're going to
move up a little bit on the left hand side. On the right hand side,
we are going to be creating a balloon
up here at the top, so we need to leave a little
bit of space for that. So we're going to
find the middle. We're going to go up a
little bit from the middle. And we're going to create a
shape that looks like this. So it's going to be a square. And if you'd like to make
the angles of the square, these areas a little bit softer, so they're not very sharp. You can go ahead and do that, or you can just make
a regular square. This is going to be
the head of our robot. Now what we're going to do is we're going to come down just a little bit with
two straight lines. They're not going
to be that long. And we're going to
create a body down here underneath those lines. So I'm going to
make another line. I'm going to come down.
I'm going to come over, and I'm going to close up. There we go. If it's not a
perfect square, that's okay. That'll just give
it more character. Now what we're going to
do is we're going to create some legs down
here at the bottom. So two straight lines,
two straight lines. And then you can make some
feet however you'd like to. I'm just going to make
some rectangles like this. Now let's come back up
here to the arm area, and I think I'll
start with this arm, and I'm going to go
off the piece of paper with this arm because
I ran out of space. I'm just making two
lines coming from the body off my piece of paper. And on this arm,
I think what I'll do is I'll come up
just a little bit. Then what I'll do is
I will make a hand, one of those pincher hands. I have a line, a straight line that touches these two lines and
another line coming up, and then I'm going to close that up so did you see what I did? So it's almost like
a squared off. So down, down, over. And then across over, up and over and up again. Now, if you have enough
room on this side, you can make a similar
hand to this one. But if not, you can just have your hand go off of the
piece of paper like I did. Alright, so that's the
basic shape of our robot. And what we're going
to do is we're going to now start adding
some details. This is where you can have a
lot of fun with your robot. I'm going to go ahead and
give you some examples and show you some
things that you can choose to do if you'd like. So let's make a mouth first. So what I'm going to
do is make a line going from this line right here, the side of his
face to this side, and then I'm going
to make a mouth. And then I'm going
to make some eyes, and those are just
going to be some circles with dots inside. And remember, if you'd like to make a different type of a face, you can go ahead and do that. My face is going to
just be pretty simple. For his ears, I'm just going to have them
come out the side, some lines that are closed
up into a rectangular shape. And then on the top of his head, I think what I'll do is I'll put another rectangular
or square shape, and maybe I'll even put a line
with a circle at the top. There we go. Cool. Now what I'm going to
do is on my limbs, those are my arms and my legs. I'm just going to
make some stripes to add a little bit of
detail and interest. And I'm going to
do the same thing for the legs down
here at the bottom. And then for the
inside of his body, you can get creative with different circuits and
dials and buttons. I think what I'm going to do
is make a dial right here. So an upside down U
that's closed up. And then I'll make an arrow. And then right here, maybe
I'll make three buttons. And then here, maybe I'll
make a couple of lines. I'm just kind of
making it up as I go. And then right here,
maybe I'll make a giant button. Like that. Okay, I'm really
happy with my robot. If there's anything
else that you'd like to add to yours, go
ahead and do that. So now we're going to have our
robot stand on the ground, so we'll make a little
bit of a curve line, jump over that leg, another curve line, and
then another curve line. So we have a curve line,
jump over the leg, another slightly curve line, jump over the leg, and then we're going to
finish up that line. So as you can see, it looks like he's
standing on something. We can even put a little
bit of detail here. Maybe I'll put some
small dots here, almost like he's
standing on a planet. Now what we're going
to do is we are going to create a balloon right here because this robot is going to be holding
a heart balloon. So what I'm going to do
here is I'm going to make a really big heart And then
at the bottom of the heart, I'm going to make
a little triangle. And then a string is going to
come out from the bottom of this triangle and then
come out the bottom. So it looks like he's holding the balloon with his hand
with his robot hand. Okay. All right. If there's anything else that you'd like to add
to the background, now's the time to do it. I think what I might do, gosh, he looks so cute the
way that he is now. I think that I'm good. I was going to add
some hearts around, but I think I'm going to leave this as is because I
think he looks great. If there's anything else
that you'd like to add around the background
of your robot, you can go ahead and do that. And when we come back,
we will start painting. I'll see you back here
in the next video.
3. Step 2: Paint the Design : In this step, we
are going to add some watercolor
paints to our design. So let's get started. The first thing that we're
going to do is add a drop or two of paint into
our paint palette. And what this will do is it will soften up our paints just a little bit so that they
are easier for us to use. It will dissolve the
paint just a little bit. While our paints
are softening up, let's turn our
attention to our robot. So what I'm going to do might be different from
what you're going to do. You can certainly paint your robot any color
that you'd like, and you can paint the heart any color that you'd like
and the background. What I'm going to do is I'm
going to paint my heart red, and I'm going to paint my robot blue and maybe
add a little bit of green, and the background
may be purple. And then the planet down here, I think I'm going to create
a gray color out of black. So let's get started. So I'm going to start with
the painting of my robot, and I'm going to use
this blue color. Yes. I think I made the
right decision on that. And I'm going to leave some
parts of my robot white. For example, I'm going to leave my eyes white and maybe
my smile down here. I'll leave that white as well because I really want those
two things to stand out, the eyes and the mouth. So I'm not going to
put paint on those. But the rest of the robot, I am going to paint. Alright, friends, I'm
finished painting my robot. When we come back, we will
start painting the heart, the planet, and the background.
4. Step 3: Paint the Background: In this step, we are going
to paint the background, so let's get started. The first thing that
I'm going to do is I'm going to paint my heart, and I'm going to choose the
color red to paint my heart. It's not going to be
a really dark red. It's going to be a lighter red, so I'm adding a little
bit more water to it, more water than paint. So there is my heart balloon. Now I'm going to start
painting my background, and I think I'm going
to paint it purple. Don't want it to be
a super dark purple. But more of a light purple. So when you want a light color, what you'll want to
do is you'll want to add more water than paint. If you want a darker color, then you add more
paint than water. All righty friends. So I'm finished painting
the background, the sky and the red heart, and now I'm going to paint
the planet down here, and I wanted to show you how
I'm going to create a gray. So what you're going to
do is you're going to put some water inside one of your wells if you
choose to make gray, then a tiny bit of black. You're going to add, and that
will create a gray color. I want mine to be pretty light, so I added more
water than paint. As I said before, if you want a lighter color, you'll add more water. If you'd like a darker color, then you add more paint. It's completely up to you. I just wanted to show
you how I make that really light gray from water and my black
paint. There we go. Oh, I'm really, really
happy with this project. I think he looks really cool. I hope that you
had a lot of fun, and I will see you next time.
 Em Winn, Teacher, Art Instructor, Artist