How to Draw and Color a Realistic Balloon with Alcohol Markers – Gradients & Blending Techniques | Anna Ostapenko | Skillshare

Playback Speed


1.0x


  • 0.5x
  • 0.75x
  • 1x (Normal)
  • 1.25x
  • 1.5x
  • 1.75x
  • 2x

How to Draw and Color a Realistic Balloon with Alcohol Markers – Gradients & Blending Techniques

teacher avatar Anna Ostapenko, Watercolor & Marker artist

Watch this class and thousands more

Get unlimited access to every class
Taught by industry leaders & working professionals
Topics include illustration, design, photography, and more

Watch this class and thousands more

Get unlimited access to every class
Taught by industry leaders & working professionals
Topics include illustration, design, photography, and more

Lessons in This Class

    • 1.

      Welcome to the Class!

      1:17

    • 2.

      Materials

      1:42

    • 3.

      Gradients Practice

      6:55

    • 4.

      Sketching the Balloon

      1:55

    • 5.

      Balloon: Coloring & Blending

      7:15

    • 6.

      Final Word

      0:33

  • --
  • Beginner level
  • Intermediate level
  • Advanced level
  • All levels

Community Generated

The level is determined by a majority opinion of students who have reviewed this class. The teacher's recommendation is shown until at least 5 student responses are collected.

112

Students

9

Projects

About This Class

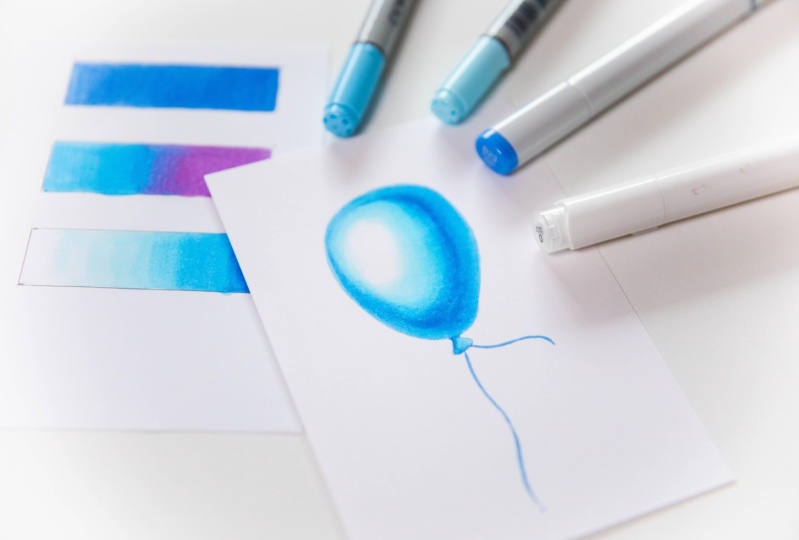
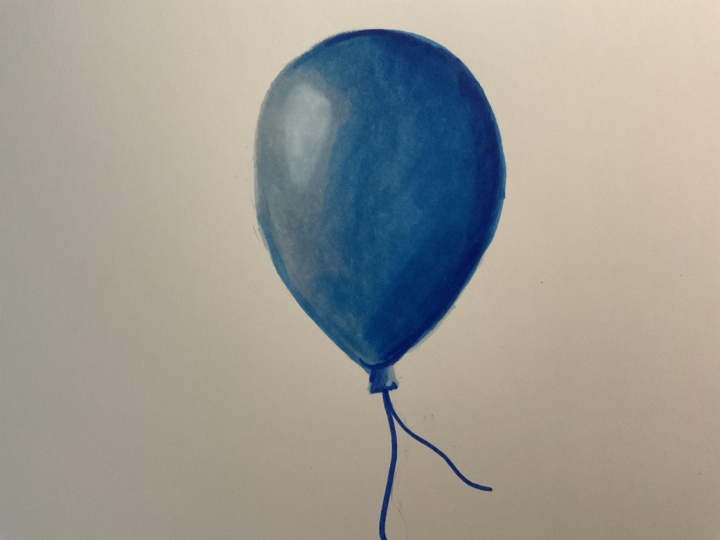
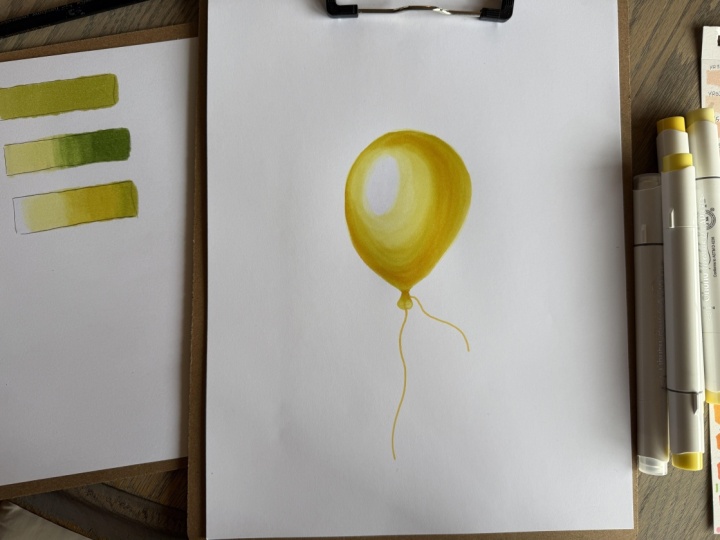
This is the first class in my Marker Basics series — and in it, we’ll focus on one of the most essential skills for alcohol marker art: blending and gradients. In this easy and completely beginner-friendly class, we’ll explore how to work with alcohol markers and create a bright, realistic illustration of a shiny blue balloon.

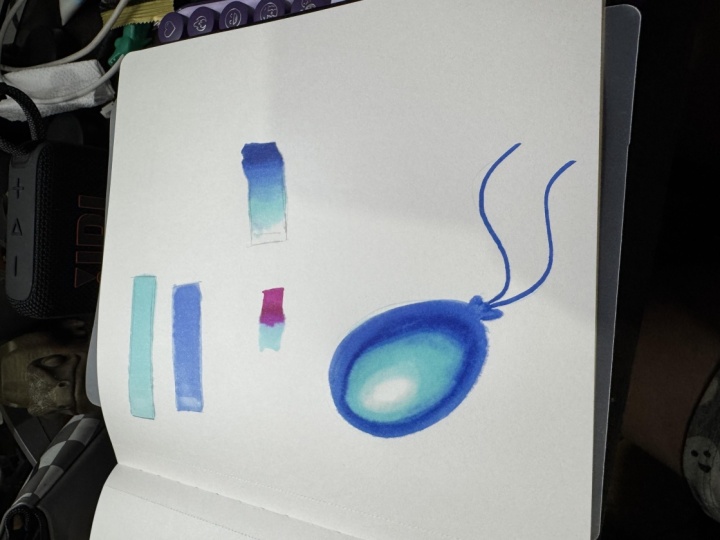
You’ll learn how to sketch the balloon step by step, create smooth gradients using wet-on-wet blending techniques, and understand how to place highlights, shadows, and reflected light to give your balloon a three-dimensional look. We’ll also practice a simple one-color gradient, a two-color gradient, and a multiple-color gradient exercise to help you master smooth transitions before starting the main project.

This class is broken down into clear, easy-to-follow lessons — from gathering materials and sketching to coloring and blending — making it perfect for anyone new to markers or looking to improve their blending skills.

Whether you’re just starting your marker journey or want to add more fun, playful illustrations to your sketchbook, this class will help you gain confidence and create smooth, vibrant marker art.

Note: I’ll be using Bristol paper, but you can absolutely use any marker-friendly paper you prefer.

Want to explore more? Check out my other marker classes:

Meet Your Teacher

Teacher Profile Image

Anna Ostapenko

Watercolor & Marker artist

Teacher

Hello everyone! My name is Anna Ostapenko, and I'm a Ukrainian artist traveling the world. My adventures and the places I visit inspire my art--I've explored over 40 countries so far!

Through my watercolors, I show the beauty of nature--tender flowers, amazing, breathtaking landscapes, and peaceful seascapes. Each painting is a way to share the places that inspire me and the feelings they leave behind.

I also enjoy working with markers, especially when creating bright, playful illustrations like candies and desserts--it's a fun way to explore color and texture in a completely different style.

Here on Skillshare, I'm excited to share everything I've learned along the way--from watercolor techniques and color mixing to marker basics, composition, and finding your own ... See full profile

Level: Beginner

Class Ratings

Expectations Met?
    Exceeded!
  • 0%
  • Yes
  • 0%
  • Somewhat
  • 0%
  • Not really
  • 0%

Why Join Skillshare?

Take award-winning Skillshare Original Classes

Each class has short lessons, hands-on projects

Your membership supports Skillshare teachers

Learn From Anywhere

Take classes on the go with the Skillshare app. Stream or download to watch on the plane, the subway, or wherever you learn best.

Transcripts

1. Welcome to the Class!: M if you struggle with blending alcohol markers or creating beautiful transitions whether with one color or multiple colors, this class is perfect for you. Hi, I'm Anna Sapnka, a watercolor and market artist, and I'm excited to welcome you to the first class of my market basic series where we will explore all about alcohol markers through fun, easy, and fast sketches. In this class, we will focus on one of the most important skills for working with alcohol markers, blending and gradients. We'll start with practice exercises. Smooth, one color, two color and multiple colors gradients you comfortable with transitions and blending techniques, then we'll bring it all together in a shiny blue balloon illustration from a simple pencil sketch to building the volume of the balloon, wrapping up all the knowledge from our gradient exercises into a vibrant final piece all in just 10 minutes. This class is completely beginner friendly, no previous experience needed. You can follow along exactly or have fun experimenting with your own colors and balloon shape. So grab your markers, and let's get started. 2. Materials: Now let's talk about the materials you'll need. First of all, paper. I will be using Bristol paper by the brand Lana. But there are many other brands that offer this type of paper as well, so don't worry about using the exact same one. In my opinion, the most important thing is to choose Bristol paper. It gives really beautiful gradients and smooth transitions. If you don't have Bristol paper, any market friendly paper will work just fine. Next, we will need a regular graphite pencil for sketching and an erasum. I will be using a needed erasm, but a regular one is also perfectly fine. For coloring the balloon, we will only need four markers. A colorless blender, that is a transparent marker and three shades of blue. Light blue, medium blue, and a darker blue. You can absolutely experiment with other colors instead. It doesn't have to be blue. The main thing is that the colors are clearly different in tone, so the gradient effect works well. And for one of the exercises where we will create a two color gradient, I will be using this purple marker. This is just to practice blending different non blue colors. Feel free to replace it with any color you like. That's it for materials. Now let's move on to our gradient exercises. 3. Gradients Practice: So to start, let's practice together and see what types of gradients we can create with other markers. The first gradient is one using only a single marker. Here, it's important to work quickly while the ink is still wet. I'm using a blue shade B 23. It shouldn't be too light so that we can achieve a nice tunnel transition. I begin filling in the area like this, layering the color over itself as I go. I fill a section, then return to the area I already filled adding more layers. This way, we build up a smooth gradient. I go back again over the same area to intensify that blue even more. With just one marker, we can achieve multiple tones because alcohol based in nature builds up with each layer. As you can see, the gradient gradually forms going from the lightest shade to the darkest. And here at the end, I'm adding even more color to get the deepest shade possible. This way, we can create a smooth gradient using just one marker, from a light tone to a very dark tone. You can really see how many different shades one color alone can give us. Now let's create a gradient using two colors. I'm taking my lightest blue 00 and filling in a little more than half of the area. M. While it is still wet, I immediately add my second color. This can be any color you have. It really doesn't matter. I'm using purple V 15, but you could use red, yellow, green, brown, anything at all. Working wet on wet, I blend the second color into the blue, filling the rest of the area to the end. Now, I go back to the blue marker and blend the transition where the purple and blue make. Then I return to the purple and blend from the other side. And once more, I go back to the blue to soften that edge again. This way, we are gradually building a smooth transition between the two colors. And here's the final result, a beautiful two color gradient. And finally, let's create a gradient using multiple colors. The same type of gradient we'll use later in our balloon sketch. I'm taking all my blue shades and a colorless blender. This gradient will start from white, so I first use the blender, the transparent marker to fill about one third of the area. This will give us a soft base for the next color. Now, while it is still wet, I take my lightest blue, B zero, zero, and leave in a little space, fill in the next section. I overlap slightly onto the area filled with the blender and continue filling. Leaving the space for the medium blue. Next, I take the medium blue in my case, bid 12, and again, overlapping slightly with the previous color, fill in the next section, continuing all the way towards the end. I go back to the light blue to soften the transition between the two shades. Now I take the darkest blue bit 23, and add it right at the end. This will be the deepest tone of our gradient. And Then I return to the medium blue to soften the transition between the two blues here. This way, we are creating a seamless smooth transition. We can also go back to the lightest blue, B zero, zero, one more time to blend and soften the transition at this end. And let's deepen the very end of the gradient once more with the darkest blue. And here is the final gradient, starting from white, the light blue, medium blue, and finishing with the darkest blue. I would love to see your gradients and give you feedback. So make sure to applaud the finished gradients to the project section of this class, and I will see you in the next lesson, we will start sketching our balloon. 4. Sketching the Balloon: Mm hmm. Alright, let's move on to our pencil sketch. I won't be using any reference here. I will just draw a balloon from my imagination. You can play around with the shape and don't have to copy me exactly. First, I'm drawing the basic overall shape like this. Now I'm going to lighten the sketch with a needed eraser. And then we draw the lines more clearly. I'm intentionally making the sides slightly uneven, so the balloon looks more interesting. Next, let's draw the little section where the balloon is tied. And we'll also add two strings hanging from it. And that's it. Our pencil sketch is ready. Before we start working with markers, I'm lightening the drawing once again so the pencil lines don't smudge. Now we are ready to move on to the markers. 5. Balloon: Coloring & Blending: For our balloon, you only need four markers, a colorless blender to soften the highlight into white, and three blue shades, light blue, medium blue, and dark blue. Alright, let's get started. This area will be where the highlight goes, but I won't mark it with a pencil since it's going to be the lightest part and the pencil might show through. So instead, I will likely mark that spot with a blender. I'm even feeling a bit more than just the highlight area. While it is still wet, I take my lightest blue and begin coloring around the highlight, leaving that section white. As you can see, because you started with the blender, the blue now blends more softly without hard edges. Now, I go back in with the blender to smooth out the highlight even more and create a softer transition. I continue working with the lightest blue and fill in most of the balloon. I'm not going all the way to the edge since those parts will be darker. Next, I take the medium blue and slightly overlapping the light blue while still leaving it visible. I continue building the form of the balloon. I switch to the brush tip, or you can use the ballet tip to add a bit more detail here. I shade the lower part of the balloon and where the strings will attach. Then I go back to the late plue to blend this transition and create a smooth gradient. Now, I pick up the darkest blue and add the shadow area of the balloon, thinking about how light and shadow would fall on a sphere. With the darkest blue, I'm not going all the way to the edge of the balloon because that edge will have a lighter spot. That's called the reflected light. Then I go back to the medium blue and soften those harsh transitions. I layer over the area to blend the colors more smoothly and refine the balloon's shape. Now, again, with the lightest blue, I soften the transition in this area, blending into the medium blue. Let's go back to the medium blue once more and smooth out this part too. Refining the shape as we go. Yes. One last time with the lightest blue to blend here. And then I will use the blender again to soften things out even more. Now let's add a shadow near the tight section using the darkest blue. Then I will soften it with a medium blue. And then again with the lightest. Now I'm going back to the darkest blue to define the edge. And let's use the same color to draw the balloon strings. And once more, I will return to the medium blue to adjust the shape of the balloon just a bit. And that's it. Our balloon is finished. 6. Final Word: And that's it. You have just completed your first Marte Basics project. I hope you enjoyed practicing your gradients and shiny balloon. Don't forget to plot your work to the projects and resources section. I would love to see both your balloons and your gradients, so I can leave you a personal feedback. If you like this class, be sure to follow me here on Skillshare so you don't miss the next lessons in this series. Thanks for watching, and I will see you in the next class.