Transcripts
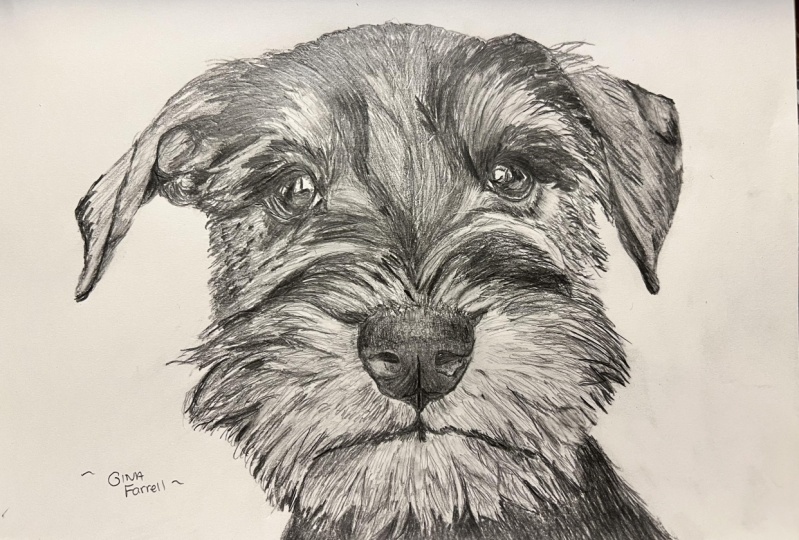
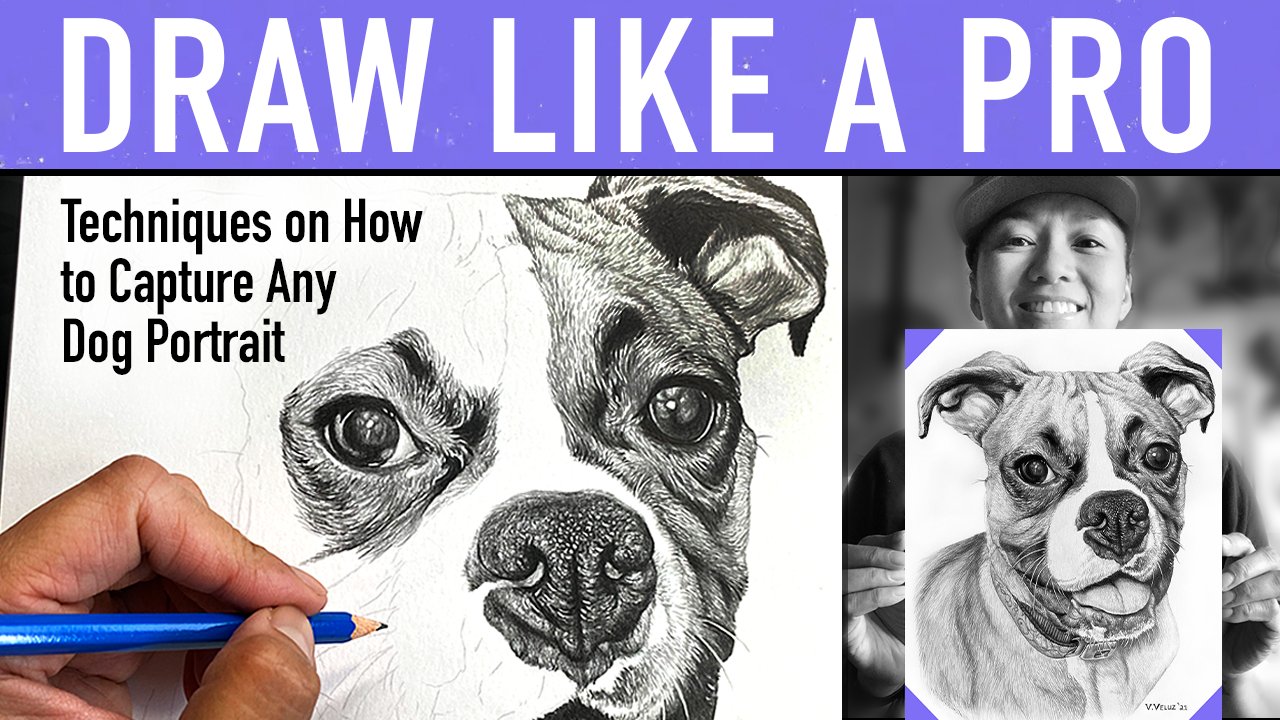
1. Introduction, Materials, and Project Files: Hello, my name's Victoria Veluz, and I've been a full-time artist for the past five years, specializing in drawing pet portraits. Today I will be teaching you how to capture an adorable. Schnauzer dog, Gianni. I will walk you through my whole process in real-time, step-by-step. I show you my techniques that's allowed me to serve clients all over the world with Forever Portraits. And now I'm hoping to show you the way as well. I've provided an outline for you to trace your initial drawing so you can get started right away. All of my materials and tools are located in the projects tabs. So please go there first for all the resources, I look forward to seeing your work and your progress. We have lots to cover, So let's dive right in.
2. Adding the First Layer of Tones: Ears & Eyes: Let's get started. The first thing we do is capture the darkest shadows on the model. And I'm starting with my red mechanical 0.5 pencil. Looking at my reference. I'm rendering fur one stroke at a time and also shading the darkest parts going back and forth. Now you don't have to use a mechanical pencil. I just like using this technique because it saves me time with sharpening and it also creates very consistent pencil strokes. Now let's capture this dark area on the edge of the ear. Make sure your pencil strokes don't have the same length each time. Also, if you want to make an area darker add another layer of strokes, I'm going to render this dark edge now. Again, individual fur strokes. Capture that realism of fur. Looking at this reference photo, I think I'm going to switch to my 7B pencil to capture more of those darks. With this darker pencil, wooden pencil, make sure it's sharpened to create these individual fur strokes. Also leave some room for highlights, individual hair highlights. I want to make sure I capture that white eyebrow area with dark edges. So I'm going to fill those in right now. Please make sure you're looking at your reference photo. You should be looking at it as much as you're looking at your drawing to make sure you're on the right path. I'm jumping around because as I look at my reference photo, I see more dark areas that I want to render and capture. Okay, that's looking good. Let's zoom in and do the eyes, beautiful windows to the soul. Again, let's fill in the darkest areas first. And it's usually on the top lid. Where it has the deepest darkest shadows. Let's carefully go around the eye now and, capture this corner part. Take your time. Make sure you capture the shape of the eye as close as you can to the reference photo. Because that really establishes the personality and essence of your subject matter. Now I'm going to fill in the dark shadows around this highlights. Please make sure you preserve that highlight. It actually creates dimension in the eyes. Now let’s render the corner tear duct here very carefully. There's also a slight highlight there. Now I'm going to fill in this bottom eyelid with individual fur strokes and transition it from that dark area to the highlighted portion of the eyebrow. I'm also making sure that I'm following the direction of the fur around the contour of the eye. It's very important. Looking at my reference photo, just drawing what I see. Now let's capture the shadows underneath this bottom eyelid. Very slowly. One fur stroke at a time. You can do it, guys. You can do this. Take deep breaths and also stay hydrated when you're drawing. I'm going to jump around and make sure I'm establishing these individual fur strokes and shadows around the eyes, randomizing it here and there to make it look more natural. I don't want it to seem like this was drawn by a robot. Okay, That's looking pretty good. Let's move to a new area of darks.
3. Rendering More Dark Tones: Forehead, Ears, & Eyes: Let's capture. Gianni is cute little forehead. Carefully establishing that edge there. Now I'm changing the direction of the fur. Always looking at my reference photo. Now let's render the dark areas around this eyebrow. Making sure I keep that highlighted white area intact. Adding another layer of darks here. So if the paper up, we're going to capture the snout, this dark area. And basically following the rough sketch guidelines that I've outlined here for myself and for you guys. And now I'm transitioning, And connecting the dots between the two shaded areas. Okay, that looks good for now. Let's move on to a different area. Let's finish off this portion. Capturing that edge highlight there with individual fur strokes. Making sure I maintain those highlights. Very important. You capture that contrast of dark and light. Now let's move the paper up and start rendering Gianni’s other eye. Again, filling in the darkest shadows in the upper eyelid. Now let's capture the roundness of her beautiful eyes with this dark edge. Make sure your pencils are sharpened guys for this part. Now let's draw in this corner tear duct area very carefully, slowly, but surely. It's a marathon, not a sprint. Now let's render the dark areas around this highlight. Don't be afraid to go dark guys. You can always pull it up with a kneaded eraser or a Tombow eraser. If you went too dark. Don't be afraid to make a mistake. You can always fix it. I promise. Now let's render the dark fur underneath the lower eyelid. Individuals fur strokes, filling in those darks. Now rendering the upper eyelid with individual fur strokes. Awesome, I think that looks beautiful! Next, we'll finish off this beautiful ear. Please make sure you're looking at your reference photo because the direction of the fur inside this ear goes all over the place. So do your best to capture that. Don't forget about your highlights. Preserve those whites. Now I'm going to go and capture the edge shadow of this ear. Now this edge is a lot lighter, so the pressure of my pencil is very, very subtle. I'm going to gradually transition from that dark shadow and create highlights. The key to create highlights is tapering your strokes. And spreading out your fur marks. Creating whitespace in between.
4. Drawing Fur Around the Snout, and Eyes: Let's move the piece of paper so we can better see. Ok, I’m going to angle my drawing so I can easily draw these fur marks in the direction that it's flowing. I'm pressing pretty heavily here on my pencil to create darker tones. Don't be afraid to go dark. Okay, let's turn it back and work on the edge of her beautiful face. Now let's fill in more of her snout, making sure I preserve those highlights. This is just the base layer. We will definitely add another layer on top of this with details. I'm constantly looking at my reference photo for guidance because the direction of the first changes depending on the section we're in. Now let's switch over to the other side of the snout and capture the dark tones there. Next, let's add more dark shadows underneath the eye and into the cheek. According to the reference photo, it looks like the fur is a lot shorter here. So I'm just dabbing the paper, kind of like stippling with my fur strokes. Sorry about that banging. It looks like there's some construction outside my apartment. So I apologize. In this section, the fur looks like it's a lot longer. So I'm gonna create longer fur strokes. Ok, That looks good. Let's move on to the other side and capture the same long fur strokes with the cheeks. I LOVE this dog. Such character. Again, shorter fur strokes, stippling action, dabbing. Do your best to randomize it, make it look natural. Alright, that looks good. Now let's go back to this area and add more shadows to the fur. Okay, I'm going to jump to this side, add more shadows and individual fur strokes. I like to jump around. As I see it.
5. Capturing The Nose: All right, let's start the nose. The Boopie nose! Let's fill in the darkest part which are the inside of the nostrils. Now let's create that center dividing line. I know it's hard to see in the reference photo, but it's there. I've drawn enough dogs to know. Now let's create that edge shadow underneath the nostril. Just fill it all in. Put some pressure on your pencil. Break your fingers. ;) This is just the first layer. So you can pretty much fill that in. Now onto the other side. Capture those shadows, guys. Don't be afraid to go dark. I know I sound like a broken record, but it's so important to capture those really dark tones and really light highlights. The contrast is key for realistic drawings. Yeah, Okay, let's zoom in here so you can really see what I'm doing. Rendering that edge dark, shadowed area, I'm going in circular motions so I don't create any individual fur strokes. That looks good. Let's move on to the top part. In this section, there's little white fur highlights that go above the nose. So I want to make sure I capture that. Rendering each hair individually, best that I can, and trying to maintain some highlights here and there. And then we're going to transition from this dark area to that highlighted portion on the tip of the nose? As I'm getting close to the center, I'm lightening up my pencil pressure, making sure I'm going in circular motions. I'm adding another layer of darks. Try and establish that edge. And that tip of the nose. It’s still in Shadow. Looking at my reference photo, it's still really dark. So I want to add another layer of shading around here underneath the nose. Creating that gradual connection from shadow to light. Make sure you're comparing your reference photo to your drawing, and constantly look back and forth. When you do that, you will see the difference of what needs to be lightened what needs to be darkened more, and add more layers as you see fit. I'm going to fill in more fur strokes right above the nose, trying to mimic these individual hairs that pop out. I'm going to render more shadow here in transition from that darker area into the highlight. One fur stroke at a time.
6. Drawing The Muzzle, Neck, and Cheeks: Now let's render the slight dark shadow underneath the nose. To make that mouth part. Do your best to follow the guide, the rough sketch outlines that I've created for you. Okay, that looks good. Let's move on to the neck area and capture those shadows with my 7B pencil. The neck is really dark since no light is hitting it. So put a lot of pressure on your pencil. Don't be afraid to go really black. It's okay. Now you can fill this in fairly quickly. I still like to create individual for marks, even though it's in the shadowed area. And just like that habit. There are these individual fur highlights that I want to capture. So I'm gonna go a little bit slower here. Render those out. Let's capture more darks. Filling in this area of dark tones. Hopefully your pencil is sharpened so you can capture those edges. I rotate my pencil every once in awhile, so I can sharpen my pencil while I'm drawing. It actually makes it last longer. Let’s move the piece of paper so we can better capture this last section of the neck. And I go back and forth between filling in the dark shadows and then adding individual fur strokes. I like to be unpredictable and switch it up every once in awhile. So it looks more natural. This is just the first layer of darks. We’ll probably add another layer down the road. I just want to create this first foundation. Okay, that looks great. Let's move on to this area. There are very light shadows on the whiskers and on the cheeks. Now I'm going to render a darker portion behind the highlights so that pops out. Moving on over to this side, capturing the edge of these whiskers. Okay, that looks good. Let's turn our drawing so we can better render the direction of the fur on this section. I'd like to turn my drawings because I want to be able to be comfortable when I'm drawing because my hand will end up hurting in the end. Capturing more shadows in this area. Now that I'm looking at my reference photo, creating more individual fur strokes, adding more layers as I see fit. Now let's add another layer on this side as well. Make sure your drawings are well balanced. I see now that it's darker in this area of the eyebrow. So let's capture that. Try squinting your eyes between your reference photo and your drawing. And you can better see the shading. Adding more fur here. Now that I'm seeing more shadows, it's not as light as I thought it was. And there, That's looking pretty good guys. I think we've captured most of the darkest of darks. So thank you for joining me. In this first section of this tutorial. We're going to finish off Gianni in the next video.
7. Adding Fur Details All Around: I have my 0.5 mechanical pencil. Let's capture the individual fur strokes. That's in her beautiful ears. We're going to capture the shadows right here. In transitioning from dark to light. Doing my best to randomize my fur strokes. I'm making them not the same length. Do your best to go one line at a time. I like to jump around a lot. Looking at my reference photo, I see darker shadows here or there. So I go to that point, go to that area and add more shadows and layers. Let's render these cute little flyaway hairs or fur. Now when you're drawing fur around the highlighted portions, make sure you spread out your fur strokes to create that light shining on top of the surface. Next step I'm going to rotate my drawing so it's easier for me to render these fur strokes. I suggest you do the same, whatever is comfortable for you. Again, I'm spreading out my fur individual fur strokes and tapering them from dark to light. Also, I'm not putting too much pressure on my pencil. Just lightly dab the paper. Very lightly, steadily, be gentle. I have a piece of tracing paper underneath my hands so I don't smudge my drawing. Adding more fur patterns underneath the eye. I rotate my drawing once again. Let's capture more dark shadows on the eyebrow here. Adding more fur on the side of her face. Making sure I don't create the same length of fur strokes. So it doesn't look too cartoony. That's where most people go wrong with drawing animals. They create the same type of fur or the same length. Or it's aligned in some way and fur is all over the place. So do your best to capture that natural growth. Going to add more shadows here in the middle of her face. Looking at my reference photo, it's still a lot darker than my drawing. Let's capture that. Now. Let's capture more fur strokes in this highlighted portion of her eyebrow, tapering. Markings lightly using your pencil. That's why I'm kinda whispering. Just lightly use your pencil. Now let's finish off the ear. Adding shadows. Lightly dab the paper. Please make sure you're looking at your reference photo. You should be looking at it as much as you're looking at your drawing, just going back and forth. So you know exactly what type of markings you should be doing, how much shadow you should be adding, what direction of fur you should be going. All that good stuff. I've muted my drawing video because there was just too much background noise going on and people outside. So you'll just have to watch in silence or just listen to my voice. Now the main key with fur is adding all sorts of layers. Always add layers to your fur. Now let's add another shade of darkness in the inner part of the eye, and outside the lower eyelid. It's a lot darker in my reference photo. So let's capture that. The bottom part of the eyelid here is a little tricky. The fur it rounds an edge. So try to capture that. Still adding another layer of fur markings. Doing my best to randomize it, placing them all over the place. Sometimes I'm randomly controlling where I place it and other times I'm just going wherever my hand takes me. Unpredictable really. Now let's define these edges a little bit more, making sure you know exactly where Gianni starts and where Gianni ends with a fur. Since we're not drawing background, we have to distinguish where her face ends. Now let's add a little bit more shadow around the nostril here, or above the nostril. Let's make sure that transition from dark to light is smoother. We really want to make sure I capture the depth in the shadows here and also maintain the highlights. There's little tiny white highlights in the fur. Now let's add another layer of fur markings around her mouth area. Very lightly tapping the paper and following the direction of the fur, making sure I'm looking at my reference photo again and again. Now you don't have to place each fur mark in that same exact place as your photo, but just get the gist of it. You can create your own artistic license here and there. But do your best to use the photo as your guide. Okay, That's looking pretty good. Let's move on over to the ears once again. Let's create a smoother transition from the highlight to the dark areas of the ear. Making sure we still have fur patterns there. Don't you just love the sound of pencil to paper? I can't get enough of it.
8. Capturing Details on the Cheeks and Chin: Let's move on over to her beautiful cheek area, where there's lots of highlights - the fur is white and gray. So lightly tap your paper creating these fur markings. Now if you think you've gone too dark, that's okay. You can lighten up those areas with a kneaded eraser and pull them out or Tombow eraser. Depending on where you are, please change the stroke length of your fur markings and the direction. I’m going to rotate my drawing again and make it easier for me to render these fur k. That looks pretty good. Let's go to the other side of her cheek. She's coming together, guys. Make sure you capture those very defined shadows, even in the highlighted areas. Changing the direction of my fur strokes, once again, going around the cheek, going down, meeting up with a darker areas. So all about connecting the dots, spacing out my fur markings to make sure I preserve that white area of the paper. There's still some shaded fur there, but not as much. So space them out. All righty, I think that's looking great, it's coming together. So let's switch on over to the bottom part of her mouth, her little bearded area. Again, there's still shadow in her white fur. So let's capture that. There's this really cool white stray hair. So I want to make sure I render that and shadows around it to make it pop out. There's a couple of these underneath her beard. I'm calling it a beard. It's not really a beard. It's just her chin. Now, if your hand is starting to hurt, please take a break, drink plenty of water. Hydration is key. Make sure you stretch, walk around. Don't sit for hours drawing because you might hurt yourself and I wouldn't want that for you. Longevity is key when doing art. And your hands are important, your back is important. Your mind and body is very important. So pretty please take care of yourself. I need you guys around for awhile. I have some very noisy neighbors, so I'm sorry about that. So let's add more shadow around this area and making sure that pops out. The key to light and dimension is creating shadow. Looking at my reference photo, I see there's my shadows of fur in this area, so let's capture those. I want to make sure I pop out those highlights even more. Let's add another layer of darks underneath the lips. Now let's go around and make sure we capture a little bit more layers of darks. Here in there. Looking at my reference photo, I see more areas that need work. So I'm going to jump to that.
9. Adding Another Layer of Darks: Okay. That looks really good. Let's move on to the top part of her forehead, adding another layer of darks. I’m back to using my 7B pencil. Creating individual fur strokes. Slowly layering your drawing like this works great because you can really compare and contrast your drawing and see the difference in value. Always analyze and make sure you're capturing those values and tones correctly as accurately as possible. I'm really sorry about the background noise. They are doing all sorts of construction outside our apartment. Please bear with me. Looks like I'm adding another layer of shading underneath the eye. It's still a lot darker in the reference photo. I want to mimic that around the ears. I’m putting a lot of pressure on my pencil here, trying to get those darks. Okay, So I'm going to zoom in and we're going to add another layer of darks in this part of her face. As you can see from the reference photo. It's definitely darker. So let’s capture that. I’m going to add another layer of shadow underneath. the eyelid here in the corner of the eye upper eyelid. Okay. It is looking good guys. Let's move on. Let's add another layer of darks around the eyebrows and the forehead next to the ear. Now underneath the upper eyelid, I want to make sure that it's really black and dark because there's no light shining through. I want to render more textures around this area now, quickly dabbing the paper with short strokes. Okay, That looks good. Let's move on to the next part. Adding another layer of darks here. Let's texture this area a little bit more with short fur strokes. Looks like this lower eyelid needs to be a lot darker. Looking at my reference photo. There's still a lot of shadow in this part of her face. So let's get it, let’s capture it. I see that the nose needs another layer of darks. It's still pretty light in my drawing compared to the photo. So let's fill that in.
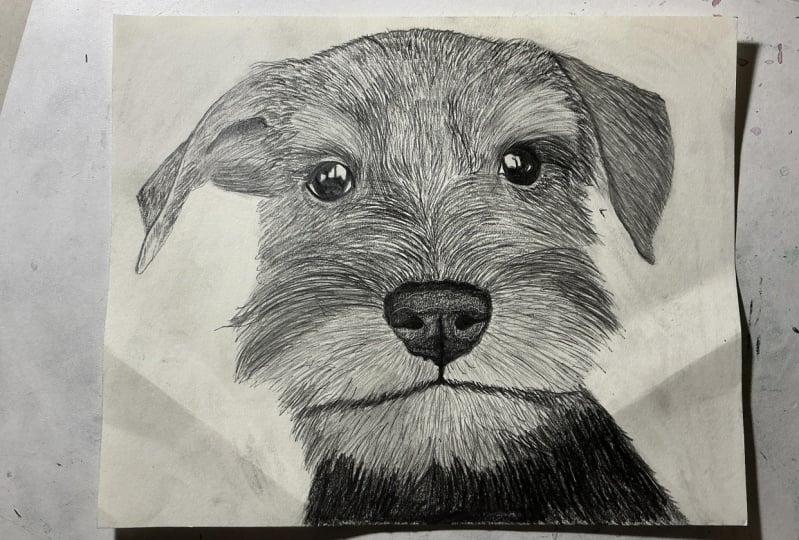
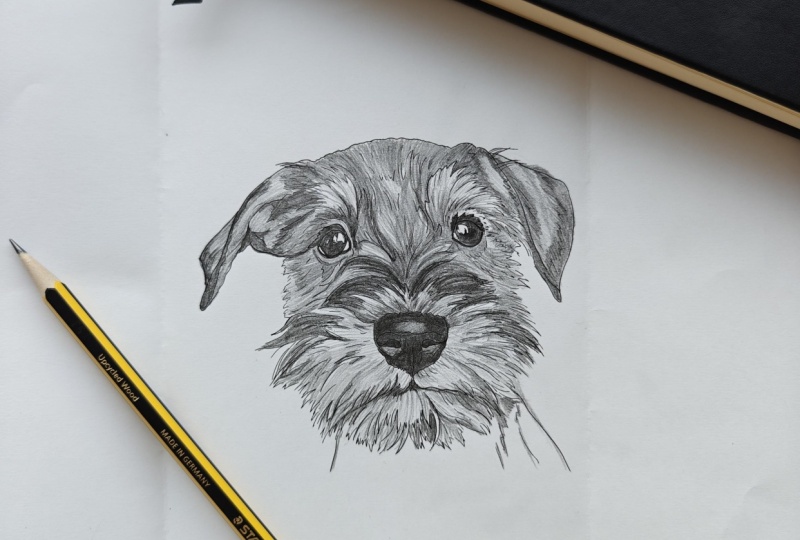
10. Finishing Details: Now let's finish off the eyes adding a little bit more value in the highlighted areas. Let's zoom in so you could really see what I'm doing. Even in the white highlights, there is some shadow. So let's capture those. There's still little shadowed reflections there. All righty, that looks great. Let's move on to another section. I see there's still a lot more shadow here. I want to add another layer, here and there, all over the place. We're getting close to the end, guys so hang in there. Make sure you guys are breathing. Sometimes I forget to breathe. Now I'm rendering some shadows around this highlight, making sure that transitions are natural from light to dark. Switching over to this side of the face, adding a little bit more texture and shade around this edge. I want to make sure I preserve those individual white highlights. Making those pop out a little bit more with more shadow. I'm going to do the same thing on this side. I see a little bit more shadows in-between those white highlights. Between the white fur. I'm going to work on the nose a little bit more, adding a little bit more texture. Especially around the shadowed areas. With the nose, I go around in circular motions. We're going to lay down another layer of shadows under her chin area, making sure those highlights pop. It sounds like they're mowing our lawns. So I'm sorry for the background noise. But hopefully you're enjoying watching the drawing or drawing yourself. Switch on over to my 7B pencil. There's this dark fur area right underneath her chin or next to her chin. So I want to capture that for contrast. Switching back to my mechanical pencil to capture more shade in the white area of her fur. Those transitions needs to be smooth and gradual from dark to light and vice versa. I'm really loving how this is turning out. Gianni, such a cute puppy. Hopefully, you're loving how yours is coming along. I’m going to switch on over to my 7B again to capture another layer of darks. Now that I see the overall picture, I can better determine where I need to add more value and tone shade. I'm going to zoom in so we can capture another layer of darks underneath the chin. I’m going pretty heavy with my 7B pencil here. And I just want to fill in this area. I'm not really concerned about creating individual first strokes because it's basically black. We are almost done, guys. This is the tail end of the drawing, just adding this layer of dark. Now I'm going to switch on over to the other side and make sure I capture these darks. You can tell that I'm shaking the table, I'm pressing pretty hard on my pencil. Don't be afraid to go really dark guys. It's okay. We are almost there. So close to being done. And voilà! There goes Gianni, look at her. She looks awesome. And don't forget to sign your work. Hopefully you are happy with your drawing. So thank you very much for joining me in this drawing series of this beautiful Schnauzer dog. I will see you next time. Stay safe guys. Bye-bye.
 Victoria Veluz, Multi-Passionate Creator, Entrepreneur