Transcripts
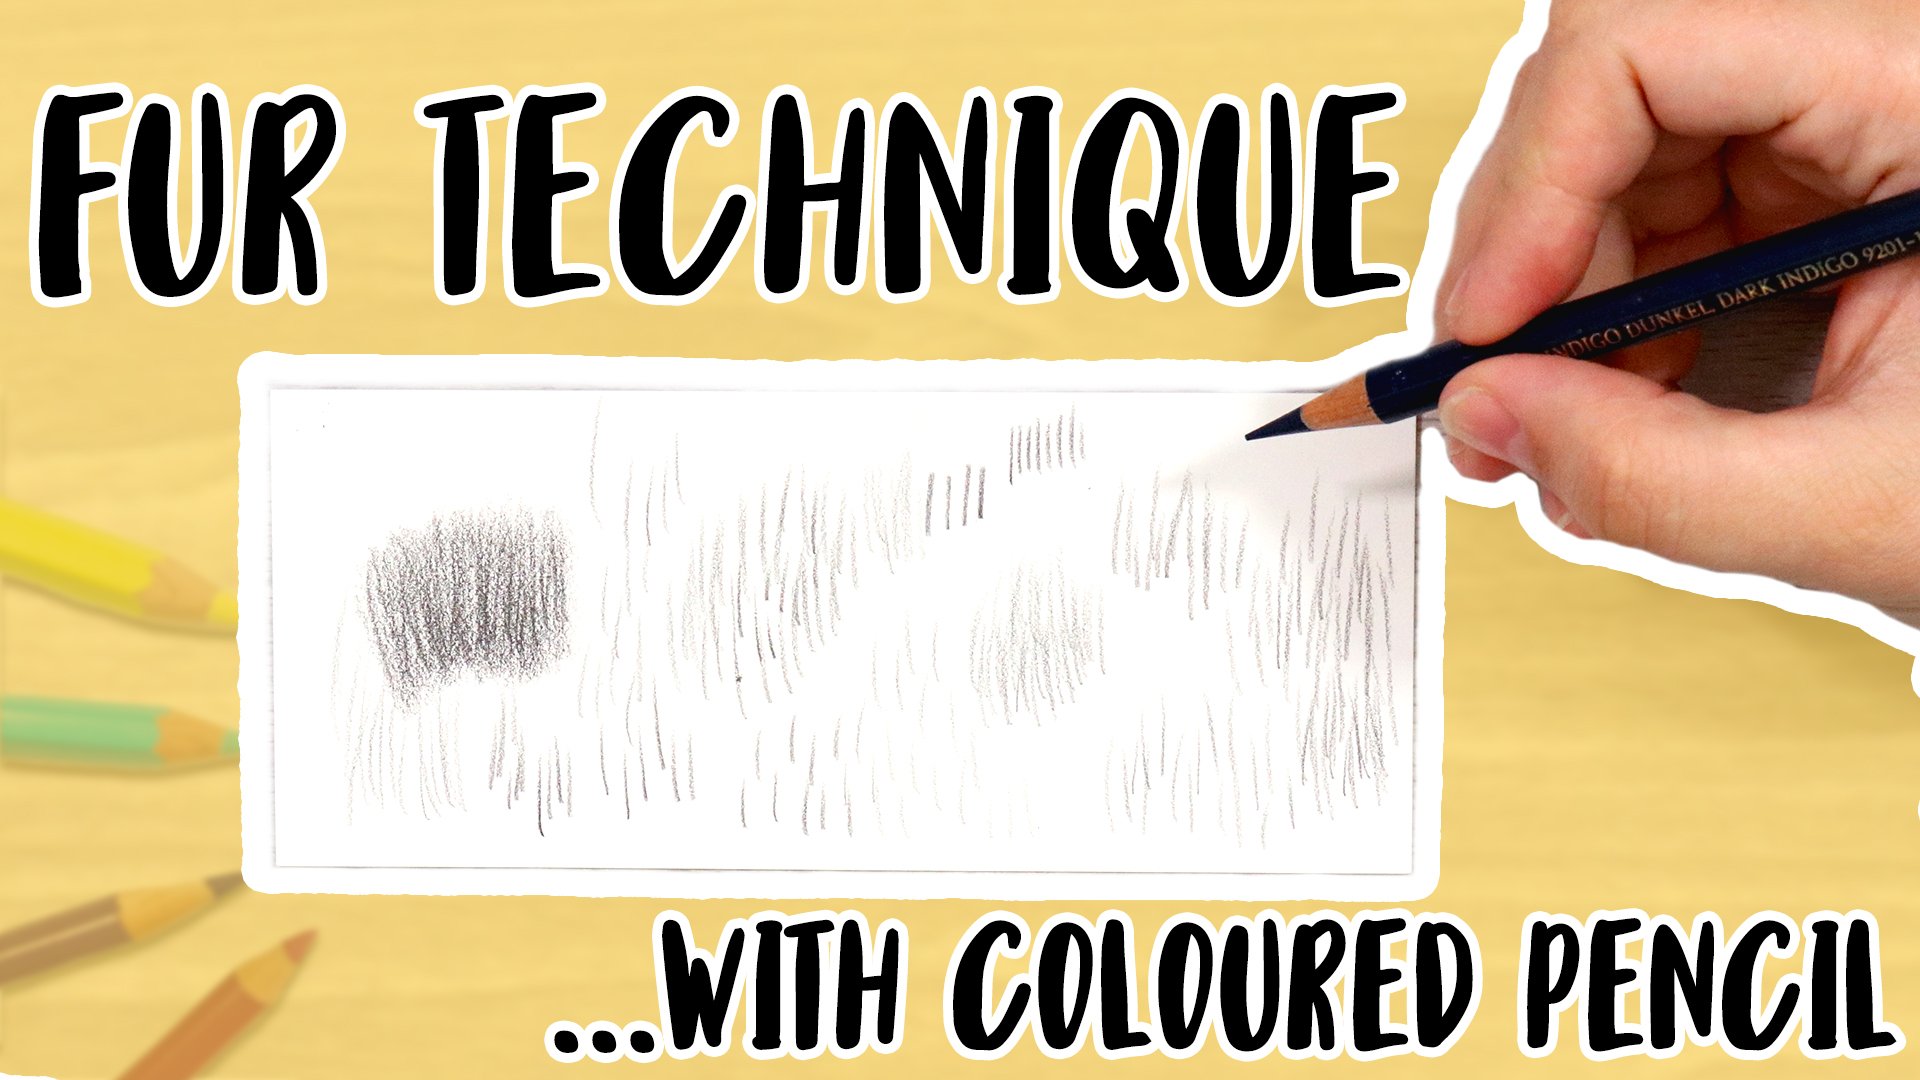
1. Intro Video Drawing Fur In Colored Pencil - 3 Different Ways: Hi, I'm Kristi and welcome to my colored pencil course. In this course, we're going to be drawing for in three different ways with colored pencil. First, what we'll do is use an etching tool to create detail by indenting the paper. Then we're going to slowly build layers step-by-step to create texture, detail, and value to create a realistic for image. Then I'll show you how to speed up the process by creating a base with marker before adding the colored pencil right on top of it. Then we're going to try a watercolor pencil base for the first layer and then continue to add their layers with colored pencil on top of that as well.
2. Creating Detail By Etching: For the first part of the course, what we're gonna do is start out with our first method of the fur. So which is going to be attaching and the colored pencil blending with solvent. Now the picture of the firm we're gonna do the same for, for all three options. Aba for the first one. And this is probably the most common and especially the way I started drawing. And it was using etching. And there's good and bad about etching. And depending on how you look at it, I etch using a this is a, an embossing tool. And you can get them online when small packs, they're relatively cheap. What I like to do is print out the image on this is on, on regular paper, this is on photo paper, so the coloring is little different, a deep black and white here, so I could see the lights and darks easy. But basically what we do is put the image over our drawing surface. You want to look at these circle line. There we go. And what you do is you're going to press the embossing tool into the paper and you actually going to make a dent into the paper without damaging it because the end of this round, so it's not really slicing it, It's more pushing it down. And what this does is allows you to put the pencil over the remaining part of the image without having putting pencil into those little grooves that we did. Because it's going to leave those out in hence revealing the highlights towards the end. So I'm going to hold it. You can either tape it if you want or just hold it like I'm doing. And I'm going to look at some of the brightest highlights for the brightest pieces of far. You don't have to do all of it. It's really your preference. This is a detail tactic to get your details in before you actually put the pencil down on the paper. So there's a few different ways you can do it. So I'm just pressing down and then if you were to hold this and kind of peak up to see, it's her very hard to see here, but I can see where I've been making indents. But you want to maybe practice on a, another piece of paper. If you're not sure if you're pressing hard enough before you put it on your drawing. And etching. Some people may say that etching can damage your paper, but some people prefer it as another tool to use in their drawings. I also like it as a tool. I think it's a very nice, clean way to add your highlights to an image without overdoing the highlighting towards the end, which can happen. But this does take time and it's a little bit strenuous on the eyes. That's one thing that I found. It's a little tricky sometimes to remember where you etched versus, you know where you were. You don't want to lose your place. Basically because you end up looking super close at your paper and wondering where those etched lines are. So if you miss some no big deal at all, we can always go over it at the end and add some of the highlights in a different way. You can use an eraser to take some highlights out. If we do blend and color does get in the grooves, that's okay because there's a different tool that I use to erase along those lines that go inside the crease of the stroke we did with the etching tool. And it basically takes away most of the pigment. And that's just with a thin Tombow eraser. But my, my whole goal here is to show you the different ways of creating textures and highlights with multiple tools and mediums. Because I think it really opens up your, your ability and your drawings to a whole different level when you have more tools at your side and you know what you can and can't really use with each other and what works for you as well. Okay? So that's gonna do it for the etching. And now you can, if you put the light under it, I can see where I have the lines marked out. So that's all you have to do for the etching part. And then the next part, we're going to start adding the colored pencil and we're going to be using polychrome most for this one.
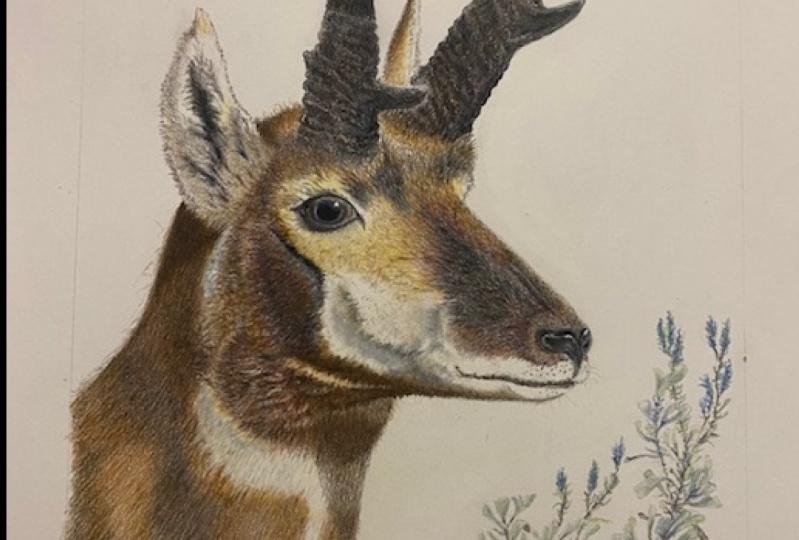
3. Transferring The Image and Initial Sketch Etching: So before we start our first drawing, if you're not comfortable with just free handing in finding where your darks and lights are. I'll show you how you can transfer it easy. Here's a graphite stick. You can use a regular lead pencil as well. And I'm just going to lightly put the pencil on the back of my printout. Just like that. Very simple. And let me zoom in. Now I'm going to place it the same way. Just want to make sure I've got my lines here now that's a little harder to see. Okay, that's about right. So now you can just take a, any pencil you want or you can take a, a regular pencil. And I'm just going to press very lightly and mark out where the darks and lights have hard lines between them so where they break pretty harshly. So like he has a dark patch here. Here. This is where the highlights and the dark break. Just to get the flow of the image. Sometimes this will help just to place it right. Because getting your drawing right is, you know, you have to do that first before you move on to other things. Because it really does make a difference if the drawing is, I mean, this is just a piece of paper, but if it was a full animal per se, then you definitely want to pay more attention to how accurate your images. Okay, so that's just a tiny, tiny little sketching of where I can start my darks and lights. So what we're gonna do is start with black, and we'll use my black prolly Chrome OS. And I'm going to start blocking out very lightly where my darks are. And with further I'm just going to use short strokes back and forth and take your time. And one thing with fors, you always want to follow the direction. You want to make sure that you're paying attention to which way the first flowing and which way your stroke should be. Where it gets super dark in here. That will be mostly just the dark colors. But like here, we see that the first going up this way and it's going to be bending over towards the highlighted side. So that's where you want to pay attention. Because this one, this is actually a really good one to try because there's a lot of different directions in this one. And this will definitely help you learn how to place things in for where they should go. So you just do one section at a time. There's no need to rush things. Just look at each little area and focus on which way you think that that firm needs to start going. This is sort of more or less just blocking in the initial layer to get our values correct. Now when I am going to use one as a big area here, I like to use just light pressure, very light pressure, and just kinda fill it in very lightly. Because when we're going to use solvent and what that does is it's going to blend it nice. And even. So when you blend it nice and even for your base layers that allows you to put more layers on top very easily without losing any tooth of the paper. And you're also gonna see you as you start putting color here, you're gonna see those etched marks that we did. And they're gonna kinda peek through as white lines. So just focus on where you see the darkest pigments. For now. This will help you to, you know, when you start a drawing, sometimes it's overwhelming and trying to figure out where do I begin. And that's why I like to kind of go in with the darkest color in very, very lightly blocked it out again, block out the sketch. And Mark whereabouts your darks and lights are going to be. And that will help you jump start the process a whole lot easier. Then, you know, just kind of starting one side and going to another. I find this way. It's slowly helps you build up the layers a lot easier and more accurately than if you're just kind of do it all at once or do one section at a time. As far as like left to right, I like to do one sort of grouping at a time, dark colors. Let's do the midtones and then the highlights that they end. Don't worry so much about each tiny, tiny little piece of firm. It's the idea of the texture as a whole. So always keep that in mind. Draw what, you know. Draw what you see. Don't think of it so much as for, you know, just think of it as a fluid. You know, it is hair but there's a flow and a pattern to it that is specific to this image. So sometimes we will psych ourselves out by saying, you know, this is a dog and it's not looking like a dog. But if you take your mind away from it and say, Let me do this shape here. Then I'll do this shape here and not focus on it. That's why sometimes I really like these like pieces of an image because we're not focusing that it's a dog. I don't even remember what animal this is, but I cropped it from far from one of my images. And this allows you to focus solely on that one location. So you're not getting stressed out about it looking like a specific animal. And starting off small like this is definitely one thing I recommend. If you're starting out. It really helps to break things down to a much smaller scale. So you can, you really do get the feel for how to do things a lot easier if you focus on one small portion of an animal at a time. Another thing to focus on and make sure you look at is the length of the fire. So for example, here we see that these are much longer pieces. And then up here, you know, they flow out this way. They're all connected that they stop. There's pieces that stop here, that stop here and so forth. So just keep in mind of the length. They're not all going to be the same length.
4. Adding The First Layers Of Pencil: Okay, now we're gonna take a mid-tone color, which is going to be a gray. And I'm going to use cold gray. Let's see, cold gray, I believe six. And I'm going to start doing a light layer over most of this. Because this is the mid-tone color basically throughout the whole thing. So just use your pencil with the side of your pencil and lightly add a layer. And then you really start to see those etched marks come through. And when you're doing a whole layer like this, that's when you don't really have to worry about direction because you're not going into the more of the detail part. You're not focusing on any specific shape. You're going over the entire image as a whole. So when you're using one color like this to do a layer or a glaze of a color. You don't have to worry about direction because we're going to be blending it anyhow. In always very light pressure, especially with solvent. Because we can blend with solvent and then layer more pencil and blend again and again and again. And this paper takes many, many layers. Now I'm going to take indigo blue. And this color is one of the staples I kind of used for almost every image. It's always in black. I use it to keep the black from looking too flat. And It's one of those colors that, especially with an image that's a cooler toned, grayish black. This is perfect to add in here on top of these dark colors. So I'm just gonna go over basically a lot of the areas that we did, the black end and start layering. Some of this can also fill in with this darker spot in the inside's going to be we can fill in this whole area down here pretty solid color because it's in the darkest spot of the image. Sometimes a lot of, lot of times when you're starting out and you go to pick your colors, you're so focused on the color, you're picking, not the value that you're going to be using. So instead of focusing on the color, focus on your darks and lights. Like if you were to have if this firm is purple and green, you know, it wouldn't be but purple, green and white, you'd focus on, you know, where are the dark purples? Where are the greens? Where the warm and cool colors and actually green and purple found inadequate. I a good example. But like, okay, say everything was blue. You're going to have your dark blues and your light blues. You can use that one blue, just like if you were doing graphite, you've pressed heavier for the dark and lighter for the lighter colors, and that's value your darks and lights. And that creates the contrast between, between the colors, no matter what colors they are, as long as you have the darks and lights, it's more about the pressure of your pencil in the amount of layers that creates the, you know, how dense is your color? No matter which color it is, you want to make sure that the values are right and that's what makes it look more realistic. Any area like you see here, where you see the fur, you see a breakup and then go into this big dark patch. That's when you can start just filling in the whole area with a layer versus drawing the first row. And I'm going to go back with the black and just add some more to the darkest sections. Another thing when we blend with solvent or auto odorless mineral spirits, I can never say that right? That will push the pigment around. And in turn, it's going to make us have to add half, add more layers because it's going to lose a little bit of the punch. Once you, once you blind. But it provides like such a perfect base painting to work off of. That's why we're just kinda loosely putting in these colors to block in. Okay? Now we're gonna take a litre of the greys. This is called grade three. And I'm going to do a light layer over the entire thing. Maybe a couple layers. Let's do a couple of layers. And the more that we add layers, the more you're going to see those etching lines come out. Okay, so the next color I'm going to take is one of the darker grays. So I'm taking the cold gray number 2, 33. And now what I'm gonna do is start going back into where the darker areas are and getting more of a deeper tone in here. Because we're ultimately going to go back with the black once we, because once you start adding a lot of layers, you can sometimes lose the contrast between the black that we initially put down. So that's why we just kinda go back and forth and it's, I find it a lot easier to do that. To gauge all your colors. Then to just have a specific route of colors that you choose. Going back and forth just helps you determine your correct values along the way. You see the chunks of for that break up. Well, you can clearly see a divide between the lights and darks. You can always start separating those even in the base layer stage. Because there they are so obvious and stick out. You don't have to wait for every detail towards the end. Like with edging, we did a lot of the detail at the beginning. So by working through it, it's really on each specific type of drawing. Your way of working on how, you know, it's really how you want to work as there's no right or wrong. This is just one suggestion from my point of view in how I like to approach something to make a little bit easier to work through along the way. Okay, I'm going to add a couple, maybe a little bit of a warm color in here. I'm gonna take the walnut brown. It's a number, just the number. A 177. And towards the bottom I just want to add a little bit of warmth very lightly. Because we want to make the darkest areas not as, not to flat. We want to give it a little bit of depth. So by adding more colors into the darkest areas, it will give you that depth. And sometimes you'll see colors that you wouldn't think traditionally would be in a drawing, but you'd be surprised at how many colors are actually in an image. If you were to take your computer and go into a photo program and open it and take the eyedropper tool to see what actual tiny, tiny color is in a certain pixel. You can break it down that close. And you'll be able to see what colors are in there versus what you thought was in there. It's very interesting what your eye will see versus what is actually there. Okay, I'm going to take the indigo blue again. And I'm going to go back to all of those darker areas and same with light pressure. Just get some more variant of color in here. And you'll see the etching marks are going to slowly really start popping through even more. And keep remembering that you need to focus on. We don't need to, but it's easier for you to focus on shapes. So or just patches of area instead of telling yourself I'm drawing for, which will probably throw you off. Because when you're trying to focus on exactly what you're drawing, you're shooting for exact, and you're shooting for realism. But approaching it that way doesn't always work because your psych yourself out by saying this isn't looking like the picture, this isn't looking like the picture. And then you get frustrated and then you end up giving up on it. Or I have in the past anyway. But if you just focus on That's why I like to why I zoomed in on one little area because by looking at it as okay. Darks, lights, groups of, for different clumps of far in different areas have darker values in lighter values. So that's what helps me to just forget what it is and just focus on the exact just what you're looking at, not what it is, but what you're looking at. So you're looking at a texture. Not so much for, for is a texture, but you're looking at a texture that you're duplicating. Going to take the black again. And now we're really going to hype up some of the really dark sections and start breaking up couple of those shadowed areas. And then we can blend and then we'll go back over it again. Okay, there's one more color I want to add before we blend and it's going to be a color that you probably wouldn't initially think would be there, but okay, so I'm going to add Ultramarine blue and it's number 120. And the reason is because I think that a lot of times when you're drawing something like this, getting some cold values and warm values in the right areas can make all the difference. So what I'm gonna do is actually go over the lightest areas with a light layer of this, yes, it's blue. But in these sort of tones, there are blue tones in here, in my printout. There's blue tones in here. And what it will do is make it so much more dynamic when we, when we blend it and then we go and add the highlights on the darkest values. It's just going to increase the realism. Because when you look at the pencil alone, you see, oh my goodness, that's really bright blue. How would you put that in there? But when you're mixing it amongst colors like this, it turns it down already. You know, tenfold. So you'll see what I mean when we get towards the end of this part. How it can make it just that much more interesting and much more realistic by adding certain tones of colors to this. In this case, it's going to really show the shine on the fire and the contrast with the dark. Okay, so now what we're gonna do is we're going to take solvent. Now, I use a it's called Gamma L. You can use any odorless mineral spirits and, or you can use any other method of blending. But since we etched, I want to show you how to do it with solvent that way because you don't want to saturate it to too much because you'll get all of the color into the etching areas that we didn't. We don't wanna do that. So I'm going to take a brush and usually I'll use like a filbert sized brush style brush. And that would be something like this. Just attack long bristle brush. And I'm going to dip it in the solvent. And I'm going to really wipe it off on a paper towel. Very, very good because you don't want too much at all. So I'm going to wipe it back and forth on a towel many, many times. And then I will start. So I'm going to use sort of the side and I'm not going to press hard at all because I don't want all of the pigment going into the groups that we made. I want to leave some of those out. Because the whole point is to show the edge marks as the highlight or one of the highlights in details. So just take your time with this part. Always want to start off with less than more because less you can build up on. If you put too much, then you're out of luck. Now where there's no etching, you can go move the brush so it's a little bit more heavy on where you are applying it to blend. Like right inside here you can use a little bit more pressure. Hello. Let me get a little bit bigger of a brush. Sometimes the super thin and white woman a little bit more of a personal account. One more time just to get some of those other small areas and then we'll let that dry. Great. So now we have that blended just very softly or just wanted to get some of the grainy looking areas flattened out a bit. And then this is going to be where we really go in and get all of those pigments really saturated in there to separate the lights and darks and build it up to look realistic.
5. Building Up Pencil Layers: Okay, so now what we're gonna do is really getting there with all the rest of the colors, with the same colors, but we're going to saturate even more. So we're going to start with the dark sepia 175. And we're just going to start building with a little bit heavier pressure than we were before. I would say light to medium. But we're going to start building in the collars on a smaller scale. So instead of doing bigger chunks of the areas, we can start looking at where those details really start to break up. So for example, down here, you can see where it looks like it's wet fur or something where the lightened dark really separate, really well. So you can see the brakes start adding some strands here and there. You can work in-between the etching marks. If you see them, you can go in-between them and work work around them. If you see some distinct areas of color that you want to add. I'm going to take the indigo blue again. I'm kinda going to go over all of those same areas. In addition to the etching, I always add another highlighting method, typically, when it comes down a far because first one of those things that, you know, you're going to lose a little bit of the etching no matter what, depending on where your darks and lights are. But you can always add other highlighting methods afterward, which is a great addition to your etching. It just gives a different, I guess, value to your highlighting the order details strokes because you have super thin edged ones. And then you can have the ones you put in that might be a little thicker in some places. Now we're gonna take the lighter of the Greys, have the cold gray it to 32. And I'm gonna do a light layer over the entire thing again is to smooth even layer. Then I'm gonna go back with that blue that we had before. And I'm going to go where the lighter areas are that are going to pop through for the highlighted sections. So the shiniest areas of the fur, and I'm going to add a layer, especially over those. Now you can see how doing a full animal can really take some time and colored pencil. So it's definitely one of those mediums that you have to have some patients for. Because if you don't want patients, it's not going to be easy to get through the whole thing. Because there's a lot of you do go back and forth a lot, but it's, I find it relaxing when, you know your cell enveloped in your work that it ends up taking so long. But when you get to that final result, it's, it's all worth it. All right, so I'm going to take the black and we're really going to start separating some of these areas. You need to really deepen the darkest areas. You can press harder to where you know that it's definitely super dark because we've already added all those other colors giving that dimension. So now when we use this in press a little harder, it's really going to show make sure your pencil is nice and sharp too. Okay, so we added some more black in there. Now I want to take the indigo blue again, go back over some of these transition areas and just get another layer in here. Came with the lightest, the lighter gray that we have. And actually I'm going to switch over to a cool gray from PRISMA color. This is the PC 10, 59. And this is basically a kinda wanna go over some of those really light areas. And this will also help blend that in a little bit. So where you see some of the really shiny. Areas of fur. You can kind of add this in just to start framing those out there. So it's adding a little bit more of that contrast. So I'm going to take the cold gray 233 is a little bit of the darker gray. And I want to go over the darker areas again and just add another layer. You're not going to see a huge difference at this point of adding some of the colors, but in the end it'll all make sense. And then a lighter gray one more time over the whole thing. Now I'm going to take the walnut brown. I'm going to start adding some more warm tones towards the bottom here in this patch here. All right, I'm going to take the prismacolor black, so little bit more. The wax black pencil is a little bit more. I find pigment. It, it really does get a nice deep black in there. Easier, I think. So now I'm going to just go over some of the super dark sections and really get that Madison. And then what we'll do is blend one more time before we do the final layer. So I'm going to take my solvent again, hit my brush. So you get different fresh. And don't forget to wipe it off bunch of times. And this is where you're going to see just that nice smoothness start to appear. Now, right now it's probably going to look pretty dark. But that's the beauty of highlighting is that we're going to have other means to pull up more highlights. So we're going to get the white pencil. You can also take your eraser. You can erase lines back in. That doesn't really always work depending on how many layers you have. But what I like to do is take the white pencil and go back over it and it really sits on top of it. Nice. Then you can take your pencil if you've got any, I mean, your eraser, if you got anything towards the outside, I mean, this is practice but that's okay.
6. Final Details: Now for our final layers and details. So once we have all of the main layers down, we're gonna go in with some of the Prismacolor pencils and start pressing in more of those as strong values to build up that contrast. So I'm going to start with my indigo blue. And I'm going to have it nice and sharp. But just kinda go over those areas where you see the heaviest of strands. So kind of in-between start to break up anything where you can start seeing some of the darks in between those highlighted furs or pieces of R. Because when we blend with solving, it does soften everything out. But that's what we kinda plot for a nice base to get down before we start to really press in more of the pigment. It's more of this as like the defining stage and the final layers of this and the details is a few different ways. We can continue with the detail we started with etching. And one thing I do love about teaching is the, you know, the effect that you can get. But one thing that I don't like is it's sometimes you'd have to kinda pull them back through, especially when you're burnishing and pressing the pencil harder, which is burnishing, pushing it into the tooth. When you do that, there's another method that I love to use. It's actually, I use what's called a slice tool. It is a ceramic knife. It's almost like a, an exact dough knife, but ceramic. So what it does it this gentler on the paper, it's less likely to rip the paper, but it actually pulls away the, the wax enough to get a nice fine detail line. So I'll demonstrate that as well towards the detail part of the video. Okay, now we're gonna go in with my black Prismacolor, which is number 9, 35. And now we're going to really get the darks in there and separate everything that we need to. And then when we do the highlights, it's going to pop out so much more. So the more contrast and value that you can achieve, the more realistic it will look. Sharpen this a bit. Just be wary when you do sharpen, you just gotta press lighter because you will break the tip of the pencil really easy. That you want it to be a nice sharp point for doing some of the lighter strokes for detail when you're breaking up the fire. Don't forget another thing too, that a lot of people forget following the direction of the far. So obviously you're not going to use your pencil is why, because that wouldn't make sense. So you want to follow the the flow of the way the Fargo. So like it does the curve here. You know, if there's lines that, you know, a wavy area far, you can tell that this bends over. So you wanna make sure you're just using your pencil stroke in the same way that the fur is actually in the direction of. Okay, Now we're going to take my white pencil from Prismacolor. And this is where I'm just going to kind of start to locate the brighter strands and pull those through a bed. And this is the other highlighting method. Just using the white pencil as it is. So I'm definitely a fan of combining different methods of highlighting. If it's necessary that certain drawings where you don't need to wear the highlighting is pretty minimal. But with far it's, I'd like to get different dimensions with the the highlighting methods because it's, it does make a big difference when you can kind of add different different methods to create different textures in the highlighting. So it's not as flat. Now I'm going to go back with my black. And I'm just going to kind of feather end of the lack for to blend that a little bit better. And the last color I'm gonna do is back to this blue, this ultramarine blue. Just want to add a little bit more of this tone in here because it's just, it makes it just that much more interesting and it's almost hyper-realistic. And you add different colors like this, based off of the cool tones and warm tones and not the exact colors that are in the actual drawing. But the way this mine printed out, it does appear to have a lot of blue cool tones in itself. That's why I'm just choosing to do this. But you as my printout where you have more warm tones. So in that case, you could use like a dark purple, like a black cherry almost to enhance some of the brighter areas that look a little bit tone differently. Okay, now I'm going to show you how to use how I use the, the Slice tool because it does make quite a difference. So this is a slice tool, and if you don't have it, that is okay. This is just another method that I want to show. You can use an exacto knife or something very sharp to kinda pull back. A lot of people do use exacto knife, so that's fine. But I just got these and I just really like how they work. Because it gets such a fine line. And it really helps to just enhance your drawings. Might be kinda hard to see on your end, but see right there. Just ever so slightly pulling some of the pigment away. You see how it's just pulling out. Actually just removes the pigment and leaves the paper underneath for you to see the detail that it's making. But especially something like feathers. This is one of those things that I always use the feathers because it's such a fine line hairs and feathers. It makes it so much easier to get that detail that I want. This just so many methods that I think a lot of artists, if they knew that they existed and if they knew that you could do certain things, they would be more confident in their own artwork and be more willing to try more challenging drawings. Let me see, It's not a huge, huge difference, but in the long run, say if you had a large drawing, it's gonna make a big difference. Because you're gonna be able to see all of this little detail and it's from a distance and up close it's going to look super realistic. But you don't want, you don't want to go too overboard with it, but I just wanted to show you the effect that this can have because it's definitely really cool. And then you can always go back. And like I want to add a little bit more white because it needs to be a little bit brighter and some spots. And then that's going to be it for this first one. And then one more time with the black to go in and really enhance any of the super dark areas, get that contrast really built up. And this is only the first way to draw for the next video, is going to be starting with a different type of base, which is going to be marker as a, as the base layers, then the colored pencil on top using the same image. And I definitely recommend checking out all different types of artists because everybody's methods are going to be a lot different and you'll find that not one way is right or wrong. I do a lot of different mixed things because I I liked the firm to look a little bit more. I don't know. I did a little bit more messy and not super super exact to what the two, what the image is because I like it to be a little bit more free flowing then, you know, super perfect hairs on mine. It's just one of my just kinda the way I work, I've always wear plate that but definitely check out different artists and different methods because it's once you find certain types of things that you'd like one artist might draw. You might not like the way I do it, but you might love the way another one does it or you like the way I do it and somebody else's, you don't. But there's so many different artists that have looked up to over the years and I've learned something from each one of them. So I encourage you to explore different, different artists and see what works for you. But that is the first one. And that is how to draw colored pencil for with etching. First, the colored pencil and then a couple of different highlighting methods towards the end. Now the next one we're going to start is going to be doing your base with marker.
7. Using Marker For Base Layer: For the next part of our video. And we're gonna do a marker base before building the pencil layers. So if you don't have these markers, that is completely fine, you can use Prismacolor markers, use any markers you have for the purpose of learning how to do this. Now this is just another method of building your layers in a different way and something a little faster. So the first one took a little bit longer because it's mostly building layers of pencil. Now when you do a marker base, you can get a lot of that pigment down before adding the pencil. So it's not as difficult to build those layers fast. This is just something to kind of bump up your speed a bit and something to make it a little bit more interesting. So I'm using the Tombow markers and they'll like a brush style marker. And I picked out some different colors here. And what I'm gonna do, basically you just start drawing. I'm just going to almost brush in where some of the lighter areas are and you don't have to be detailed. Crazy with this because you're just getting pigment down in grouping areas that you need to group. So just focus on grouping in the color according to the shapes. Now I didn't trace this one because we traced it in the last one. So this'll be another challenge for you is to kinda just free handed. Because after you did the first one, your mind already kind of nose placement of these strokes because you've been going over and over on the last one. So practice doing that too. And definitely encourage to start trying to free hand York. After tracing. It just helps it, you'll see that improvement. Because when you trace something, it's teaching your mind to learn the correct anatomy and the correct positioning of, of items and your drawing. So if you were to draw eyes, say you trace an I a 100 times, chances are you're going to be able to draw that I free-hand afterward. Because it's just a weird way. It tricks your mind into teaching you the correct way to draw something because you're drawing off of something exact. Versus when you start to learn and say anatomy for a face, they teach you, you know, the circle and then the lines, the grid. But you're not actually drawing the exact face yet. So it's current is subject to interpretation there. So it's, I find it much more helpful if you trace. You start learning by tracing and then practicing freehand and practicing the grid. The grid method. Both all of them are great, but it's, you'll be surprised at yourself when you actually see what you can do free hand after tracing for awhile. Just a little tidbit of info there. Alright, see, so this is not going to be clean, it's just gonna be a little bit messy, but that's exactly what we want. We just want to fill in some of these layers. And the tones don't have to be there all going to be lighter than what? You know, your pencil is going to be afterward. But you just want to brush down some of these light layers. I'm not going to use black for the market because the black marker is going to be super flat. And by using the pencil is just like we did last time. We're going to add different values into those pencils to make the black not look so flat. So that's why I'm not going to be, I'm going to use in just grays to create this base layer with markers. I mean, you can fill in all of this if you wanted. And then we'll go over it with a little bit of the darker color. This nice, almost cool. It's a cool gray color. It's got a hint of blue in it. So that's why I really like this one. And probably the darkest one I'll use. This one is, let's see. Now maybe too dark. Let's try this one. Maybe a little bit too light. Try one more here. They're called Tombow, Dual Brush. Dual brush pens. They are really great. Okay, I'll use this one. So now I'm going to go into what the darkest areas are and just add a few to mark it out. Because then we'll go over it obviously with all of the darker colors. But this just helps to create that base for you to be able to build on top of. Obviously, you have to wait for the markers to dry because they do. You can see the paper lifting a bit. But anything that speeds up the process of colored pencil is a great thing because I love, love, love colored pencil. That the only downfall is not all of us have the time to really spend on a drawing because some of the some drawings I've done take 50 hours, total 60 hours. It just depends. You know, it's not if you have the patients, you have to really be patient, but anything that can help the flow of speeding up the process of pencil is just a value in the colored pencil world. And it's just super quick. And just getting some pigment down to start our pencil process. But you see how quickly that was him. All we did was add some pigment with the marker just to get that color down. And so we separated our areas with the blocks of color, the lights and darks. So now when we do the pencil, you'll see how much easier that color kind of builds on top of it super quickly. Then if yours has it, this one comes with a blending tool. I'm going to try it just just because I don't think the blending tools do too much of a difference with the marker. I mean, it flattens it a little bit, but there's really not too much of a difference, so you don't really need this. I just kinda wanted to try it and show you. It does come up lineup prismacolor has a blending marker. I actually use that with the colored pencil to sometimes. But this sort of just fades it out a little bit. It doesn't do too much. But so that is just that quick marker face that we're gonna do. I'm gonna go back with the other marker, the lighter one, and just do kind of a light layer over anything that may have been missed. And then we're going to let that dry. And then we'll move on to adding our pencil layers with the same colors that we used in the first video.
8. Applying Pencil Over Marker Base: Okay, Now that we've added the market base will be going to go back and do the exact same thing that we did on the first one with the same colored pencils. So keep those same pencils out. And we're gonna go ahead and start with the polychromy was black to start getting our dark skin and continuing to use a light pressure just as before. Now that we have the base down, we don't have to do as many layers off of, you know, right from the beginning because we've already established some mid tones to put down there by using the marker. So this is just a, like I said before, just a great way to speed up the process of that. And I'm just coloring the groups, the light pressure or group of dark areas here. Now going so much into the detail of direction yet until you know you want to separate some of these hairs, you can start to block those out as well if you'd like. But majority of what I'm doing right now is just getting those those areas blocked in with the pencil over the market to get it nice and saturated. Before going ahead with the more of the detail part of the fur. And make sure that your marker base is completely dry. Because you want to make sure that you're not putting the pencil on any damp paper that just will not work well. The marker is water-based marker, but you know, you want to treat it as if it was like watercolor, just let it sit for a little bit and then let it dry really well before you go ahead and start out with your pencils. Now I'm just going to after all those groups that I just did, I'm going to start just kind of doing some stray strokes here to get the to work them into each other before I go into my gray. It's to build filled the texture on top. Okay, now we're gonna take the darker gray, which is the cold gray. And I'm going to basically do a layer over the entire thing. Because this color is basically all of the midtones are already down there, but this will help to blend the areas of the marker that are underneath. Blend it through to the pencil so it won't be we don't want to see any of the marker by the time this is done. But this will help to start blending these together. And so you can see the pencil layers a little bit better than just seeing the marker kinda throw it. When you're doing a nice even layer like this. The direction isn't going to matter because we have a circle of cutoff the hair and I'm doing the entire thing and an even layer. So you won't notice that the direction of the stroke in that case. All right, Now I'm gonna take my indigo blue. I'm gonna kinda go over those dark areas again, we're going to work in these cool tones. Okay, now let's take the brown and take the walnut brown. And I'm going to go down to some of these areas where there's a little bit more warm and start just doing some groups of pencil strokes here. To start separating some of these areas. Just a little bit. You don't really need too much of the warmer tones is most of this is more cool toned, but it's nice to mix it up to add just a bit of both towns in there. Okay, Now we're going to take my blue, which is the ultramarine. And I'm going to do a light layer over all of the light sections with the light hits the firm. All right, Now I'm gonna go back with my black and we're going to do another layer over the darkest areas to start to break apart the darks and lights a little bit more. So once you add more on top of that first layer, the darks and lights get a little bit hidden in there until you continue to work the pencil through and build more layers. Don't worry about the highlights. We're gonna do that at the end on this one. And we're going to try something different. So no etching, or we might try this nice tool, but I want to show you another option as well. Okay, so now the great thing about the market basis, you can blend with solvent with the pencil layers you just put on top. So that is a bonus to that. You know, you never know what supplies will work with each other until you try them. And I always thought that you could only use the solvent in certain situations, but you can actually use it quite well. Just like this on top of different mediums that you use underneath. So again, you want to make sure you take a lot of that solvent off the brush. You want to wipe it nice and clean. And you can start lending. Okay, so as we can see it, so it's pretty dark. A nice, fine, but it looks a lot more, almost hyper-realistic as well. One thing I like to do at this stage is once we've put the we've blended, I like to take my Tombow eraser and start to go through and just erase in some of the highlighted areas that need to be a little bit more Bolt. So we can basically we're removing some of the colors to some of the highlighted areas to make it easier. When we do get to the highlighting part of the video. I use it just like a pencil with the strokes. This is optional. You don't have to do this. This is just something I like to do sometimes to kinda get a little bit of a headstart on the highlighting. This will basically it's just to help you see more about we're going to be highlighting. Now what I'd like to do is go in with my prismacolor black. And this is where we're going to start really getting into the detail and getting the for looking how it should here. So I'm going to start with the black and then I'm going to go into the white or the light gray and blog in the very darkest areas in the very lightest. And then we'll do another midtone. Our goal is to start taking those blocks of color and start to blend them in by building the strokes of the fire and start working them into each other. If that makes sense, it's sort of like, you know, if you're trying to combine two things, you don't want it to be, so you don't want them to be so blocky next to each other. So we need to work in lighter, sort of feathered strokes to create that for a texture seamlessly between the blocks of color that we added. Okay, now I'm going to take that light gray and I'm going to start to work in some of the lighter areas so we can block it in and see it a lot better. And another thing that I feel like happens when you put the marker based down is you're really giving the paper, the pigment itself. So it's almost like working on a colored paper, if that makes sense, like a a gray tone paper. The white pencil sits on top of the marker much more bold than it does adjust doing it over the black pencil alone. So that is one thing that helps when we're doing a marker-based, because I see that you can clearly see that the white stands out pretty well on the on the marker versus when we did it before on the just the pencil alone. It just sticks to it a lot better. Okay. And I'm going to take the blue and I'm going to do a shade over most of the letter area. And then with my indigo blue, I'm just going to work more strokes in. I'm going to switch to the Prismacolor, indigo blue. Make sure throughout your drawing you step away from it to here and there because when you're looking up at first so close, you can kinda lose what you're looking at after a while. And by stepping away from it, looking back, you'll see things differently then, you know, as when you were staring at it for quite awhile, it's good to give your eyes that break. Okay, now what I'm gonna do is blend very lightly. I just want to blend a tiny bit. I don't want to go overboard. I just want to soften a couple of those areas. So I'm not even gonna put solvent on my brush. And we'll use the same brush and it's going to have a little bit of residue from when we blended a few minutes ago. And it's starting to come together. Okay, so now what I'd like to do is take the Prismacolor white. I'm going to make sure it's nice and sharp. And we're going to really get that contrast and the values placed in here. So I'm gonna go around and start drawing the fine hairs in the brighter sections. And I feel like the market, it just gives it a whole different, a whole different dimension of how the image looks when it's done. Either feel like it's more soft yet it's trying to find the word to say. It's I guess more bold or more. You know, the colors just seemed to pop out a little bit more because you do have that pigment base in there as if it were a colored paper. And you can press harder at this point. This is where we're getting those final highlight sentence so you can press harder. And then with my prismacolor black, I'm going to start getting in these final dark areas and get it all finalized. You can work backwards sometimes where you see the breaks in the pieces of fur. It's easier to work backwards sometimes than it is to try to draw the highlights on top. It's depending on how you applied it. All right, And that's gonna do it for that one. Now, as you can see, let's compare the other one. So very similar, but yet you kind of get two different looks with the highlights, the highlights on this one kinda pop out a little bit more than the one on the, on here. But it really all depends on what you're going for or what your style is, what? I just want to show you the options that are available to you. So you can really find your style and find what works for you in that, in that you enjoy doing. So, that's gonna do it for the market base. In our next video section, we're going to be doing a watercolor pencil base.
9. Watercolor Pencil Layer: For this section of the course, we're going to do a watercolor pencil base before we add the layers of pencil. So you can use whatever watercolor methods you have, you can even use watercolor paint. And this is, this is to demonstrate a few different mixes of pencils here, but mainly it's going to be black, gray, and white. And I have like a gray blue here. So whatever tones you have, That's fine. We're going to use the same exact color pencils on top. So as long as you have those, then you're golden. So what I'm gonna do first is take the black and with colored with the watercolor. You don't, you don't need a lot at all. So I'm basically just going to draw those groups of color again very lightly. And just fill in the entire block with all of the colors, the colored pencil, watercolor pencil. And you'll see when we go to put the water and activate that pencil, it's going to spread nice and even and get a nice smooth layer down. So basically we're just going to do the same exact thing we've done before. That base layer. You don't need to be super clean with it because this is just to get the pigment down before we add our polychrome Wilson Prismacolor pencils. So this is to help get the majority of the mid-tones down to avoid having to do it all in just the colored pencil. So this is just a quick, nice way to skip ahead to the actual drawing part with your pencils. And only thing is you do have to wait for this to dry, but that's, it doesn't take long. You can even take a fan or a blow dryer or something to dry it out. If you want to keep working on it and go faster. As you can see, I'm not being super specific with every stroke or just getting the base layer. So it's more fun, I think to do this layer because it's so free and you don't have to be so precise. So don't stress, just add some color down and you'll see what I mean once we blend. Okay, now I'm going to take the equivalent to indigo blue to dark blue. And do the same thing. And some of it in certain areas very lightly, don't need a lot at all. Definitely gonna go over all of where I put the black pencil. I'm going to put the blue there too. So it's not so flat. And now with the Mexican tick, the white, and just go over where the really bright areas I am going to be able to see it well. But when you blend with the water, it will lighten up in those areas. Not that it matters because we're going to go over it with the white pencil anyhow. But this will help not to blend it to too much into each other. And then the gray super lightly with this gray over basically the whole thing. Very, very, very, very lightly. Are right? And if you want, if you have like a blue gray that you want to use too. You can add a little bit of that. Dark blue will be fine too though. And like I said, when you print out your image, yours may look really different from my printed image as far as the tonal values, depending on the type of printer and the ink and whatnot. So don't be afraid to switch up the materials and use what you think would match your photo or how you'd want it to look. So you don't have to do the same exact materials as far as the colors go. It's not. The most important thing is the value, not the colors themselves. As long as you get the darks lights, a place where they're supposed to be, the color tone isn't going to matter. You're still going to get the realistic effect. All right, So now we're gonna take, I have a watercolor brush. You can use a regular tack lawn brush like a tagline bristle brush, just like we did with the solvent, but don't use the same one that you used with the solvent. You definitely want to make sure you have a clean brush to use with the water. So we just have a little cup of water here. You want to make sure that paper towel nearby. And always start with watercolor. Always start with a little bit of water rather than a lot because you want to gauge how much water will spread the amount of pencil that you put down. So I don't have a lot of water on here at all. So I'm going to add a little bit more water. Don't be so concerned about it looking exactly how you place the pencil because it's not going to look like that. I want to get the tones down. I just want to get a base layer down that we can build on top of so we don't have to spend so much time with just using the pencil alone to build our layers. So the difference between the marker, this blends into each other nicely so we don't have to try to separate it as much like we did with drawing the strokes on top of the marker. This is a nice wash of color. And getting our colors grouped in pretty quickly. And very simply.
10. Colored Pencil Layers over Watercolor Base: Now that we have our watercolor base down, we're gonna do the same exact thing that we did in the previous two. So I'm going to use my polychrome plus again and once again start with the black. And you'll notice the difference between the textures that it feels like once you've added a different sort of base layer between each one, the base layers, it doesn't make a difference in sort of how the pencil lays down versus just the pencil alone. But I like the watercolor one because it's very, very subtle. And it just adds enough of those base colors, the mid-tones to continue on and start building your pencils really easily and quickly. Then all three of them too, they're all going to look different. I've drawn this one twice already now. And I drew the same picture a few years ago and it looks different, all different ways. So don't ever, you know, if you look at your drawings and you see, well, it doesn't look like the previous one. Which one's better? Not one's going to be better than the other one. It's just a matter of preference and how you want the style to look. You know, if you want something more hyper-realistic, more realistic, photorealistic, if you'd rather it look super clean and a very fine hairs that it's really all in your style which you learn to develop as you go along. I still learn different things that I find that I like. And I feel like it fits me better than some other methods. So don't ever get to stress about that. Just try. That's why it's great to try all these different things and different methods to see what really, you know, calls out to you. And another thing with the watercolor base, that's great is you can also blend with solvent on top of this as well. Because the pencil is going to be covering that base that's now completely dried. Between the last video and this one, I did let it dry. So make sure that you you allow that time because you don't want to put the oil pencil on top of the watercolor pencil if the watercolor is still wet because it will not work. And I know sometimes that drawing the same image over and over the same textures can get a bit boring. But it's really important to see your development and see your, the changes that you've changed with each one that you learned something different. So you may approach it well, similar steps with the colors and whatnot, but your application will get better with each one because you're just for the simple fact that you're doing it three times in a row and you're repeating the same image. It's, it's just great practice. That's why I chose the same image for each one. Because I think it's important too, you know, improve on one image and really see your difference. Like if you ate in time, say you did a portrait of a lion five-years ago. Do that same exact portrait again and see your difference in your, in your ability because you will be very, very pleased to see how much you've grown. And you'll probably surprise yourself. Okay, now I'm going to take the indigo blue and go over lots of the same areas. Don't forget as you're working to keep looking back at your reference photo. Doesn't have to be perfect, but just keep in mind the placement of where about your strokes are going for can be one of those pretty daunting things to try to, you know, you could focus hyperfocus and trying to get us Oh, perfect. But it's really not necessary. It's just a matter of getting the texture in the. Flow of the firm in the right place, man. I used to overthink it so, so much. And now I'm looking at it purely as a texture, not as, you know, this is a piece of a black labs for I'm not looking at it like that. I'm looking at it as the texture that it is and the texture that I'm focusing on driving. Okay, now I'm going to take that gray from polychrome mouse and I'm going to do a light layer over the entire thing, just like the other two. And definitely feel free if you don't want to use the same pencil order or you want to do something different. Absolutely go and do. Use your own method in your own order of colors. It's this is to show you how I do it, but it's open to interpretation. This is just one way in every single artist will do things completely differently. So don't focus so much on which one was next after this one. By just knowing your values and your darks and lights, you've already got it. You don't have to worry about every individual colour and which specific color that you're going to use. Because the important thing is to get your darks and lights. Correct? And here's that blue. Okay. And then I'm gonna take the one that brown and add some bold warm colors. It's just in a few areas, not too much. Okay. Now I'm going to blend with the solvent. And I'm barely, barely going to use any. I really don't want to use too much. I just want to get a very light, a light lens. So we'd go on top with the prismacolor wax pencils. And then we're going to be pressing and everything nice and nice and saturated. And if you don't have the same solvent, I just used gam saw that you can use whatever solvent that you have two available to you. That goes with any tutorial that you follow from any artists. Most times, you know, just use the supplies you have. You don't have to go out and buy all kinds of supplies. You can use the supplies you have to the best of your ability and understanding of color theory and in value and whatnot. So if you learn those basics, you can really use anything. Obviously there's going to be quality differences, but, you know, the, the basic fundamentals are going to be the same. All right? So see how soft that one looks. That looks really, really soft. So by going with the Prisma color now using the, the white, the blue, the light gray and white. So it'll be these floor. I'm going to let that sit for a second. And don't forget if you want to, you don't have to call for practice. You can go around and clean up the edges and if you've got any elsewhere. All right. So I'm gonna take the black and you know, we're gonna do now is go back into the dark areas. Start building in our texture and clarity of the image and getting it nice and solid. So when you're doing the strokes that are pretty bold, you can just press down. Harder to get those in there. Like here, these ones are all pretty bold. And then just pay attention to the thickness or thinness of the lines that you're doing. And you can do patches and then yeah, you wanna do some hairs out. And you don't want to do like a block. You wanna kinda work it with strokes versus a shape as a whole, like a triangle like this, a sort of like a triangle shape. But what, we don't approach it that way, we approach it as a general shape, not the, not the literal shape. Take your time. Just go through and do the same thing as you did before. And each with each 12, you're going to notice maybe something different or you're going to be a bit more aware of maybe some areas you've missed before. That's one of the great things about doing the same image multiple times. It's just a natural way to teach your eyes to look at something differently each time. Okay, Now we're going to use the PRISMA color, indigo blue. And I get some nice blue tones in here. Indigo blue, I think I said it before is one of the colors that I, it's kind of a stable that it's almost in every single one of my drawings. Just because it's one of those awesome colors that you've mixed with any of the other darker colors that you're using. And it just gives it makes it a lot deeper of a color versus being flat. I think it makes a big difference in a lot of things. And it keeps it a little bit different. You don't want to always use the actual black pencil as a black pencil, but you can make it a little more vibrant by mixing lots of other colors in with it. If you're doing a warm tone picture, then you could use deep purples. And like black cherry is one of my favorites to mix with black. You can use like Phoenicia nomination read the one of the other dark, dark reds, but like a reddish brown, That's really nice to do in a, and a warm tone. And the blues I like to use for the cool tones, for using into the blacks of the drawings. All right, Now I'm gonna take that light gray. Make sure it's nice and sharp. This is a 10 percent cool gray from PRISMA color. And then by using the white to it almost garnishes into that, into the colors underneath. So it's making that blew a lot softer, which is really nice. And you can always burnish with any lighter color of your palette, of colors with any of your drawings, you always want to burnish with one of the lighter colors that's within your drawing. You don't want to burnish with something too dark because then unless it's other dark colors but you can oversaturated instead of blending but by burnishing. But most, a lot of people use white pencil, but I like to use a lot of the grays to burnish if it's something light. But that's very rarely do I varnish because it can hurt your rest after awhile. And I'm doesn't feel good. Okay, now I'm going to take the white before I go back with the black pencil and go to those extra light areas where the light is hitting it the most. Press too hard because it'll break. Okay, now we're gonna go into that black again. And this is where we finalize all of these darks. And then we can, you can work backwards into the white and get some of those nice separate hairs in there to give it a lot of contrast. So if you put the white pencil down, you've maybe put too much simpler. You can just go right back over it with the black and work. So let's show all three of these. Here are the three finished pieces. So as you can see, there's, they all look different yet similar. So we use the same color palette, just different application. And this one, you could say it looks a lot more fine and thin hair for, because of the two different methods of texture we use, which was the Slice tool and the etching, the marker. It almost looks a little more hyper-realistic because it's more bold, it's more saturated. The lines are a bit thicker. And this one is again soft, like this one. It's really all in how, which one you like better. I mean, this is just to show you options of, you know, what you're able to do with your supplies and with your materials. There's a lot of different options. And I think a lot of artists are afraid to try different things when you should find it exciting to try what works together. There's something to learn. I'm always going to try to learn it. So I'll always try something until it fails and you guys should definitely do the same. But I'm so thankful that you guys chose my course to learn about drawing for in the three different ways here. And I hope to upload more courses soon. And if you wouldn't mind leaving a review on the course, I would really appreciate it. I hope you guys learned something from this and I'll see you next time.
 Kristy Allen, Artist, Entrepreneur