Transcripts
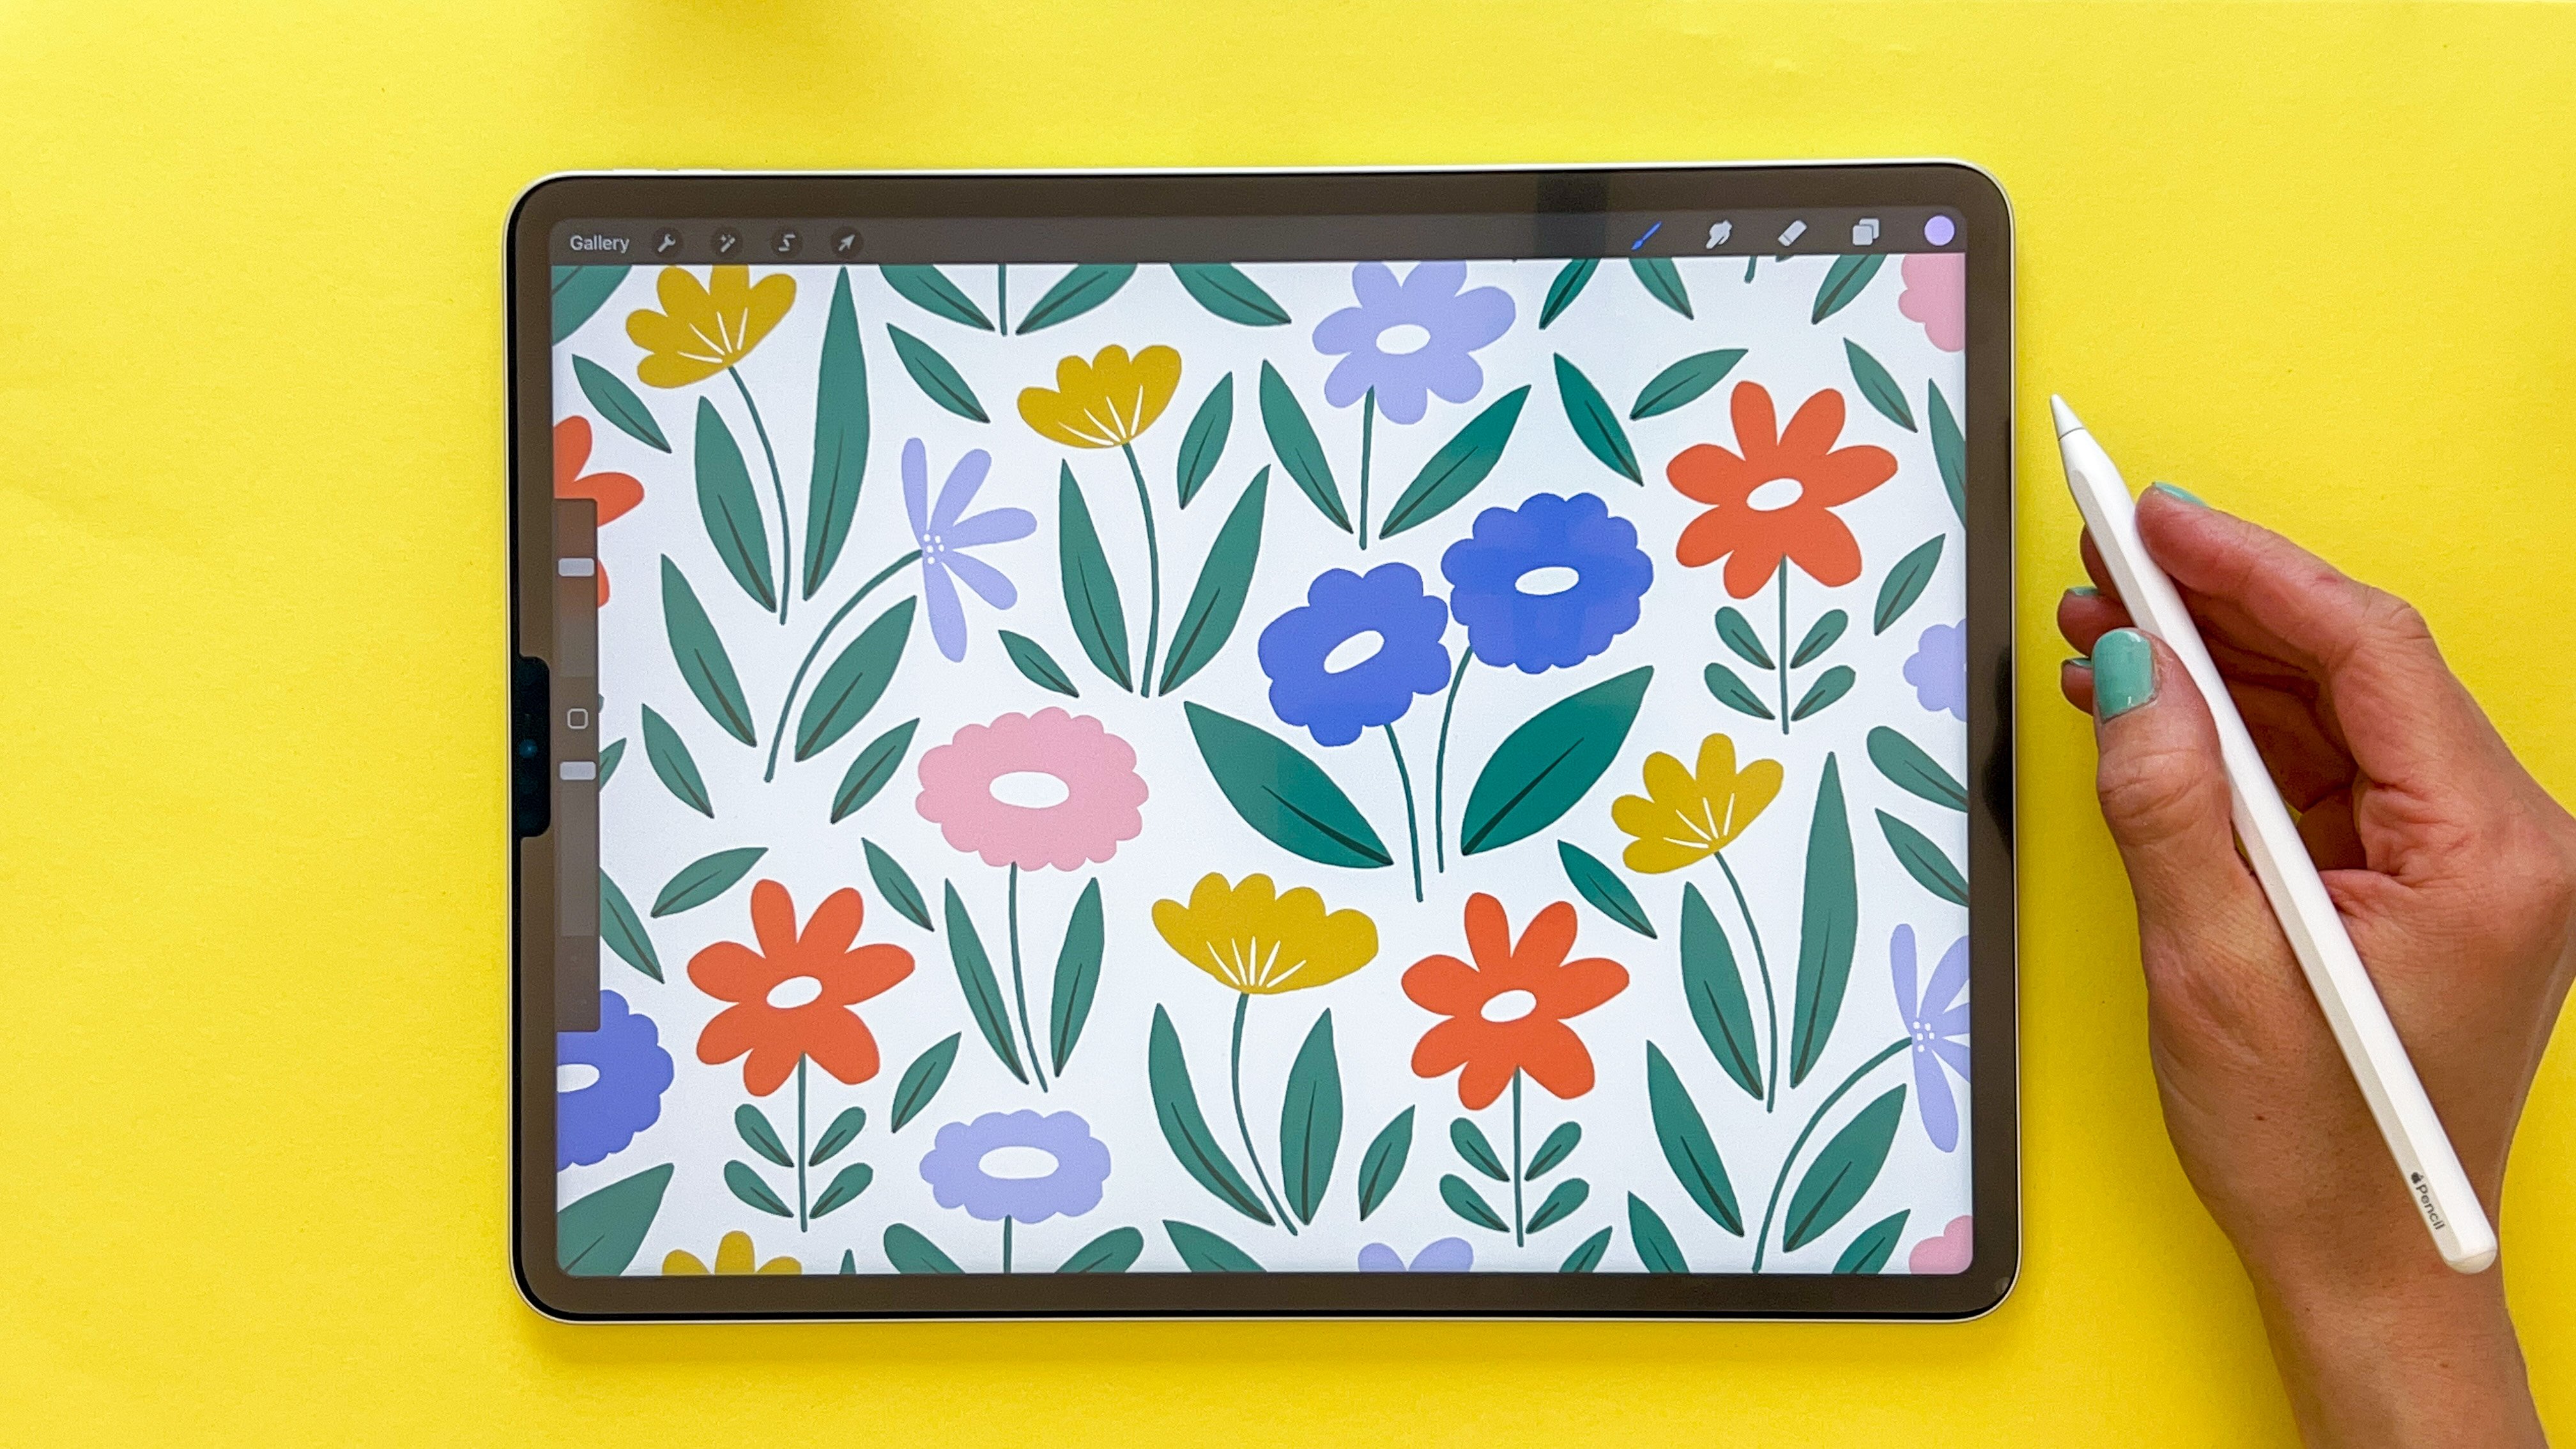
1. Intro: This is a class about something that you might think is easy peasy, but actually can be tricky. Stripes, patterns in Procreate. I will teach you how to create straight diagonal and one piece straight patterns. We will go step-by-step from simple, solid, straight stripes, to more complex and advanced textured one P and diagonal stripes. I will teach the technique that I use to create editable patterns in Procreate, so you can make changes to your patterns in the future. I'm [inaudible], a Swedish surface pattern designer who recently started to create more and more patterns in Procreate. One day I wanted to make a diagonal stripe pattern and thought it will be easy peasy. But I made mistake after mistake, and it felt tricky to get it right. After figuring out and trying many different techniques, I finally ended up with this process that I will teach in this class. This is a beginners friendly class, but it helps to have some basic understanding of joining me in Procreate to be able to follow along. I'll include a bunch of freebies in this class, three Procreate brushes and one Procreate color palette. So you can follow along and create exact same pattern as me, if you wish, for the best possible learning experience. By the end of this class, you will be able to create editable, straight, diagonal and wonky striped patterns in Procreate. You will know both how to make solid shapes as well as using textured brushes for more organic look. You can use your striped patterns as they are, or you can use them, for example, as backgrounds in other patterns that you create.
2. Your Project: Your project in this class is to create the different types of stripes patterns that I teach you in this class. The straight, diagonal, and wonky and you can choose to make them solid or textured. Be sure to share your project here in class. If you share it on Instagram, feel free to tag me with Maja Faber. I would love to see what you create.
3. Downloads: In this class, I've included a bunch of freebies, one Procreate brush set with some of our three favorite company Procreate brushes. You have the blobber brush, a solid brush with blobby edges, which gives you a fun and funky organic field. This will be perfect for our wonky lines patterns. The everyday liner is textured brush with a really nice drying texture, which you can use as an all around brush, or as a liner in all of your artwork. The everyday liners also available in our favorite company Dry Ink brush set, which is available to buy at my website, majafaber.com. The last brush is the dots and dust brush, which gives you this amazing texture to your drawings. The blobber brush and the dots and dust brush are created especially for my Skillshare classes, and at this moment they can only be downloaded in my Skillshare classes as freebies. If you want to use the same colors as me, to be able to follow along easily without the need of choosing your own colors. I've also included a Procreate color palette that I call sweet stripes. I also want to mention that you don't need these downloads to follow along in class, you can use any brushes and colors of your choice. To download these freebies, click on the "Project and Resources" tab here in class, and download the file that says download freebies. Or you can go to the URL that you see on screen now. If you download a PDF that says download freebies, you tap "Click Here to Download", "Open". This will take you to a form on my website where you write in your name and your email address , and tap "Unlock." That will redirect you to a Dropbox folder where you can download the freebies. To download the files, tap the first file, the brush set, tap, "Download", "Direct Download", and download again. Then go back and tap the "Sweet Stripes Color Palette", tap, "Download", "Direct Download", and download once again. Here you have your downloads in the browser, I'm using Safari. Tap the "Sweet Stripes Color Palette", and then go back to the browser and tap the "Brush Set." The brush set is imported at the top of your brush library, and the color palette somehow, most of the times and up at the very bottom of my color palette library. I will just drag that one up, because I like to have my current color palette at the top of my palettes library. Tap "Default" to choose it as the default color palette, and there you have your sweet stripes color palette to be used in this class. When you download these resources, you will be automatically added to my email list, which is the best place to be to get the news about my free resources, tutorials, classes and much more. You can of course unsubscribe at anytime.
4. Canvas Setup: Let's start this class with setting up our canvas. Tap the plus sign in the top right corner and new canvas, the little folder symbol with the plus. I will go for 3600 pixels square, which means 3600 pixels width, and 3600 pixels height. The DPI is set to 300 for high resolution and this will bring us a maximum layers of 47 to work with in this document, which is more than enough. You can choose another size of the document if you wish. It's probably easiest to follow along in class if you choose the same sizes as me. But the most important thing is that it's a square canvas. When you're finished, tap Create.
5. Straight Solid Stripes: The first type of pattern that we will create in this class is a straight stripes pattern, which means that the stripes or lines are straight, either horizontal or vertical. In this first lesson, we will go for solid shapes, so no textures. This is the easiest type of stripes pattern, and that's why we are starting with this one first. The first thing that we need to do is to set up our drawing guides. Because we want to make straight lines, we need guides to follow. Tap the Actions panel and turn on Drawing Guide and tap Edit Drawing Guide. To make it really simple here, I will divide my Canvas size, which is 3,600 pixels by 10. I will go for 360 pixels drawing guide. Tap down, and Here we have 10 squares in each direction of this Canvas, which will make it really easy to see that our lines are straight and it will go rather quickly to create this straight solid stripes pattern. The first thing that I always do when I create patterns in Procreate is to fill a background box. For this pattern, I will go for a white background, and I will tap and drag the color to fill the background of that layer. If you look in the layers panel, you will see that you have a white square, so you know that you have a background in that layer. Tap the plus sign in the layers panel to add a new layer. On this layer we will draw our lines. The easiest way to make straight solid stripes is to use the Selection Tool. Tap the Selection Tool and rectangle, and make sure that you have a color fill selected. Choose a color. I will go for the brown one in the color palette. With the Selection Tool selected, I will tap and drag to create the line. The size doesn't matter that much because we will zoom in and adjust the size. But just make sure that it's moving outside of the edge on each sides of your Canvas. Let go to create your rectangle. Then we will tap the arrow to adjust this shape. Here we will go in and adjust the shape so that it's exactly placed on our drawing guide. We will match up the dashed line of our object with the drawing guide. For this purpose, I found that snapping and magnetics is a little bit misleading somehow, so I would just turn that off and I will pull up my object, zoom in so that the dashed line on the object is exactly on the drawing guide. Zoom in and here I want to adjust the height of my line. To do that, tap Freeform. I will drag up the object so that the dashed line is perfectly aligned with the drawing guide. Zoom out a bit more. Last thing that I want to do is to make sure that my line is moving outside of the edge, so I will just drag it a little bit outside on the edge. Zoom out and zoom in on the other side and drag that one outside of the edge. The purpose of this is that this line will be repeated on the next pattern tile that goes here. If you have a little glitch here, you will see where your pattern tiles meet, and the pattern won't be seamless. Drag out that line outside of the edge, and then tap the arrow to place it. Now we have a line or a stripe that is 360 pixels high. Now I want to add more stripes so that the stripes are evenly aligned on my Canvas, in my pattern tile, and that the empty space has the same height as our stripes. Let's start to tap the layers panel, swipe to the right to duplicate your line, tap the arrow. For this, I will use magnetics. You could try to use snapping and see where it snaps. Sometimes it snaps good on your Drawing Guide and sometimes I find that the snapping doesn't work that good, but this time it work good. Snap it over there. Just to make sure I know that it's snapped in the right position, but I don't trust it so much. I will just turn off the magnetics and snapping, and I will actually drag the stripe outside of the edge this time round too, just to make sure that we don't have a glitch in our pattern tiles. Tap the arrow to place. I would just tap and drag that line so that it's beneath my other line. That order makes sense in my layers panel. Then I will swipe to the right again on my new layer, duplicate it, tap the arrow. Let's see if the snapping works this time. Turn on the magnetics and snapping. Somehow it didn't snap to the right position. It wants to snap just underneath the other line, but it doesn't want to snap in the position of the drawing guide. That's fine, I will just turn off the Snapping so that it's not in the way. Zoom in and make sure that my dashed line are on the drawing guide. If it is, I know that it should match up underneath too. Then I will just drag out the edges to make sure that our tile matches up, and tap the arrow. Drag that layer underneath just to make sure that we have the right order, to not make it all very confusing. Swipe to the right to duplicate that line again, and drag down to the right position. Zoom in, make sure that the dashed line of your object matches up with your drawing guide, zoom out. I will just adjust the sides, drag them out to make sure that the pattern type matches up in the edges. Tap the arrow, drag that layer underneath. Select the top stripe layer, which is this one, swipe to the right, duplicate that one, tap the arrow, and place my last line in the last position. Make sure to drag out the sides, and tap the arrow. As you can see, we have the layers in the order of the lines, and we have the same amount of empty space in between the lines or stripes as they are high. This is a perfectly aligned, balanced, evenly spread striped pattern. To make it a little bit more fun, let's change the colors. As these are solid shapes, you could just tap and drag the colors to the stripes. Make sure that you have the first layer selected. Now we just go for a pink color there. Let's leave the next stripe brown, and the next one after that, the third stripe, I will go for a beige color. Then let's go for blue, and the next one, tap the next layer, and orange. Now we have a five-colored striped pattern with solid shapes. Turn off your drawing guide to see how your pattern looks. Now we need to try out this pattern to make sure that it's seamlessly repeating, and that we didn't make any mistakes when we created it. To do this, tap the Actions panel, Share, and JPEG, and I will just save an image to my camera roll. Tap the Layers panel, the top layer, and I'll just add a layer at the top so that the image that I will import when I tap Actions, Add, and insert a photo. I will insert this photo of the lines pattern and it will be at the top of the Layers panel. Now I will turn off my drawing guide again, so go to Actions panel, Canvas, Drawing Guide, Edit Drawing Guide, and this time I will go for half of the size of my canvas, 1,800 pixels, and tap "Done". If you feel that this class is moving too quickly through the pattern-making process in Procreate, I recommend you to watch my first class of creating patterns in Procreate, which is called create an editable pattern in Procreate with color variations. Where I go through a very detailed the technique of creating patterns in Procreate. If this is moving too fast for you, check out that class first and then you can head back to this class. Let's move on. Now we have our image and we want to adjust the size to drag it down. So make sure you have Uniform selected when you tap the arrow, Magnetics, and Snapping. Tap in the corner and drag down until your image is 1,800 pixels, and tap the arrow to place it. Now we have decreased the size of half with our pattern. This is how we check our pattern for flaws; duplicate that layer with the image, zoom in to the center point of your drawing guide and canvas. Make sure that the yellow lines show up at the image, the dashed line of the image are aligned with your drawing guides and then tap the arrow. Swipe to the right and duplicate the image again. Make sure it's aligned and tap the arrow. Zoom out, tap the layers panel, swipe to the right, duplicate the layer, tap, and drag to place your image in the perfect position. When your lines are lined up, tap the arrow to place it, and now we can check out our pattern. Tap the Actions panel, turn off the Drawing Guide, and here you can see that your pattern is perfectly aligned. What we want to look out for here with these solid stripes are some white glitches where your pattern tiles meet. You can see where your pattern tiles meet if you turn off one of this images with your pattern tile. You can check out this area when you turn it off again, zoom in and see that everything is perfectly aligned. Now we have created a straight solid stripe repeat pattern with five different colors.
6. Straight Textured Striped 1: The next type of pattern that we will create is textured stripes patterns, still with the straight stripes. The first thing that we will do is to select our old pattern and duplicate it. Tap and drag to create a stack and tap into your stack, and we can name the first pattern to Straight Solid. The next pattern to Straight Textured 1. We will create a few straight textured stripes patterns. Let's start with the first one. For the first one, we will start with our pre-made pattern with the stripes and add texture on top of the stripes. Tap Layers panel, and swipe on the layers of the images to delete those ones. Here we have our pattern, all of these in our pattern, the background box and the stripes. Tap the plus sign in the Layers panel to add a layer. For this first textured pattern, we will add texture on top of our stripes that is the same color as the background. Tap to select the background color. We will choose the Faber company Dots & Dust brush. Here, we will just increase the size to 100 percent and add texture with the background color to all of our stripes. Here, we are actually adding texture also to the empty space in between our stripes on the layer. But it doesn't matter in this case, because I know that I want to keep this pattern like this, that the texture should be in the same color as the background. This is a very simple way to add texture. Now, to try out this pattern and make sure that our texture is aligned in a good way on the edges of our pattern tile. Tap the Actions panel, Share, JPEG. Save the image to your camera roll, tap in the Layers panel, the plus to add a new layer, Actions panel, Add and insert the photo of your image of the pattern tile. Then we can turn on the Drawing Guide, make sure that we have it as a guide. Tap the arrow, drag down your image to 1,800 one, and tap the arrow to place your image. This is one pattern tile that is half of the size of the original tile. Swipe to the right on the layer to duplicate that layer and drag it to the right. Now, I want to make sure that our pattern tile up in a good way. If you see the yellow lines appearing here with the drawing guide and the dashed lines of your image should be perfectly aligned with your drawing guide and then you tap the arrow. Swipe to the right to duplicate your layer again. Zoom in to make sure that you place it correctly. If you get this shape outside of your object, that seems like it's the edge of your object but you have the dashed line inside, then trust the dashed line and not this shape. I believe that this is some flaw in Procreate, and it shows this shape, but it really isn't there because look what happens when I place my shape now. It disappears. Make sure that you trust the dashed line of your objects or images and not the shapes that are shown. Place it correctly, zoom out, and now I can turn off our drawing guide. This is where we zoom in to see how our textured is tiled up. We want to zoom in here where our pattern tile meet the other pattern tile. To see that, you can easily turn off one pattern tile. Here, you can see that this is the line that we want to make sure that it lines up perfectly. Turn on the image again and make sure that you zoom in, in this line to see if you can see where your texture meets. You can see it, so that's perfect. Now we created our first textured pattern with straight lines or stripes. The reason why we could do that, so simply here is because of how this brush is created. It's irregular in the texture and it's seamlessly created. I made this brush myself, so I know that it is very seamlessly created so that you can see where the texture meets up in the brush. That is the simplest way to create textured stripes pattern. It won't work with all texture brushes, but it will work with some. In the next lesson, I will show you an example of what we will do if our texture brush doesn't meet up this seamlessly.
7. Straight Textured Stripes 2: In this next type of stripes pattern, we will add texture separately to the stripes. Let me show you what I mean. Tap "Gallery" select your straight, texture one and "Duplicate" that one and we will just rename it to number 2 and then tap into that new file. The first thing that we will do is to remove the layers with image where we saw how our pattern tile meets up. Then we will delete the layer with the texture, so swipe to the right and delete that layer. With this pattern we will also use our pre-made stripes pattern as a base and we will add texture separately to all of these stripes. Let's start with the pink one. Tap the "Plus sign" to add a new layer in the layers panel and tap that layer and tap "Clipping mask. " Now we created a clipping mask on this layer, which means that everything we draw on that layer will only affect the object on the layer underneath. Tap to select the color of your pink stripe and then I will go in the "Colors panel" and just select a little bit of darker and brighter pink color. We will use a different type of brush, and I will go for the "Artist crayon" under "Sketching" and procreate. Tap the "Brush", and let's try to take the largest size on that brush. Oops, make sure you're on the right layer with the clipping mask. Now everything that we draw on that layer only affects the object on the layer underneath. I don't want that much texture. We will just add a little bit of texture like this and then we will go ahead and do the same with all of these layers. Tap the brown layer and the "Plus sign" in the layers panel, tap the new layer above the brown stripe, select and fetch the brown color, go a little bit darker with the "Artist crayon" and I will just add a little bit of texture. The same with the beige layer, add a new layer on top of the beige layer, fetch the color, go a little bit darker with "Artist crayon", and the same with the blue layer. Now we are adding texture separately to these stripes which is a little bit more complicated than the first type of texture that we added to all of the stripes. If we look in the "Layers panel", we have the background layer, and then we have all of the stripes layers with an added layer on top that has a clipping mask with the texture. Now, if we try out this pattern, tap the "Actions panel," "Share" and "Jpeg." Save your image, add a new layer on top of all of the layers, and add your photo. I will tap the "Canvas" in the Actions panel and turn on the "Drawing guide" with our 1,800 pixels drawing guide. Tap the layer and the "Arrow" to select that layer and make sure that you have the "Snapping" and "Magnetics" turned on and then drag down your size until you reach 1,800 pixels. Tap the "Arrow," swipe to the right, duplicate that layer, and place it exactly in the right position. This is exactly the same process that we did before. We are placing the image, the pattern tile to see how it is repeated. That looks pretty good like this, but what if we turn off the "Drawing guide"? Here you might not see it because it's really subtle but on this blue line, I can see a very clearly line here. I can see where the tile meets up because it's a really clear line in the texture over here and you also have a little bit of line in the texture on the orange. But it actually didn't turn out that bad. Sometimes when you use some brushes, you will get a really sharp line where your tile meets up, but as we do have a little bit of line here, we will go in and fix this. To do this, "Delete" all of the image layers. Now we need to repeat this pattern so tap to select all of your layers, including the background layer, group them together. Swipe that group to the right and duplicate it. I will rename that group to original and then I will swipe to the right to duplicate the group again and again and again. Now we actually reached 47 layers, which I thought that we wouldn't do in this class. Let's just use the original layer for this purpose. That was my mistake but to make this pattern we need the four groups. So now we have 1, 2, 3, 4 groups and we will turn on the Drawing guide with the one that was in 1,800 pixels. Select one of the groups, drag it to the bottom left corner, make sure that it is aligned when you zoom in and then we do the same with all of these four groups. Then we can turn off the Drawing guide and we can see that this is the area that we need to work with just a little bit and here we have a little bit of line here on the orange stripe as well. Let's merge the layers that are supposed to be merged together. Go to "Layers" panel. Open up all of your groups, swipe to the right on all of the pink texture layers. We have a bunch of layers now, now we need to merge together, drag them up, and don't mind that this chaotic thing happens here. We will work that out later on, so just swipe them together to match them. Select all of the other pink line layers. Did I forget something? Yes there. All of the layers next in line, swipe them up and together and then the next one. I will just speed up this process a little bit because I'm selecting, I will just speed up this process a little bit because we've done this before. I'm selecting all of the layers that are supposed to be in one color. I'm just going to speed up this process because we've done this many times before. Then I swipe to the right on the groups and delete the groups. Then I will just go in and tap on the texture layers and tap "Clipping mask" on those layers again so that I will get rid of this chaos. Now it looks good again and now we don't have a background layer. Let's tap to add a new layer on the plus sign and I will just tap and drag to add a new background layer. Now we know that we need to work with the blue texture and a little bit with the orange texture. Let's go in the blue texture and you should have your colors in histories. I have my blue color here but you could also fetch the blue color from here and then we have the brush, Artist crayon. You could tap and hold on your Erase tool to erase with the same brush and we can see how that looks. If we just size a little bit and we could go in and just erase that sharp edge. That actually looks pretty good but I will also add a little bit of texture. Think that didn't look good so I will just add over here, I think. Something like that and now let's do the same on the orange layer. I will just fetch the dark orange color and maybe we can adjust by erasing and adding a little bit of texture there. Now we have fixed the sharp little lines that we had in our pattern on the texture and we can go ahead and try out our pattern again so tap the "Actions panel", "Share, " "Jpegs," save your image, tap "Layers" panel, "Add" a new layer, add your photo and you make sure you have your Drawing guide turned on, tap the "Arrow", drag down the size to the half of the size, and make sure you have Snapping and Magnetics turned on, and then tap the "Arrow" pad, and then tap the "Arrow" to place your image. Swipe to the right to duplicate your image, zoom in to make sure you place it correctly. Swipe to the right to duplicate your image again, make sure you place it on the right position and then swipe to the right to duplicate the image and place it on the right position. Turn off your Drawing guide and let's see how it looks. Now we can see that we don't have any sharp edges in these textures and that is how you create seamless textured stripes pattern.
8. Straight Textured Stripes 3: The next type of pattern is also a textured straight stripes or lines repeated pattern. But we will draw it from scratch. Tap gallery and tap the plus sign to create a new canvas. You probably will have your 3600 pixels somewhere around here. I will just use the same size, 3600 pixels. For this one, we will draw the lines with a textured brush. First things first, add a drawing guide. Let's add the same drawing guide, 360 pixels. Tap down and done. The first thing that we always do is to add a background box. So let's tap and drag a color. I will go for white and tap the plus sign in the layers panel to add a new layer. Then, let's draw with a color, I will use the brown color, and the brush, let's use the everyday liner for this pattern. Instead of drawing with a rectangle selection tool, we will draw our stripes with a brush. Let's adjust the size. I will go for the largest and Here, I will also use the lines as a guide and tap my finger to create a perfectly straight line and then let go. Here you can choose if you want to create just a thin line, or if you want to, for example, draw one more line. Tap and let go to create a perfectly straight line and you can fill in the shape if you wish. Now we have created a little bit of texture here because the brush in itself has some texture. When creating this type of pattern, I won't mind that my lines are perfectly 360 pixels high, because I think it's just nice if it's a little bit more organic and it doesn't need to be perfectly aligned. But I still want to have the drawing guides to make sure that the pattern looks somewhat balanced. Let's see what we can do. Let's create a two-color pattern this time. I will draw with, pink, and brown. Create a new layer for the pink one and let's just draw one line with the brush like this. Then fill in the other line with the color. You can plan this out a little bit better than I do here, but I will just go for something spontaneous. I will actually draw everything that is brown on the brown layer and everything that is pink on the pink layer. Some lines I will just draw with the brush line and some lines I will do filled in. Let's go ahead. I will go for pink again. Select the pink color, maybe just a line. Then, the brown color again; a thicker stripe for this one. This pattern will probably look a little bit sketchy because I didn't plan this out. I'm just drawing a few lines, but it's just to show you the technique and you can plan out your lines better of course. But this is to show you how to draw a textured stripe pattern with a textured brush. Let's do something like that and choose the pink one. Maybe we should draw a little line here. Fill that in. Here it's supposed to be a little brown line. Maybe a brown line like this. A pink line or stripe. Now I didn't plan this out. I want a brown line coming in between these pink ones. Let's just select all of these to make it easier. Drag up your lines, so that I get a little bit of space down here. Make sure that the texture is still showing at the top edge of your top stripe. Then, I might want to change the position of the pink lines. I used the selection tool. I don't need the color fill selected. I used the rectangle, select that line, and I will just bump it up, turn off the Snapping because that didn't help me in this case. Drag that line up, choose the brown layer, and add a little stripe here. Turn off the drawing guide to see how this looks. As I've drawn with a textured brush, I'm pretty sure that I need to fix my edges. So I will go straight away and group these layers together. Duplicate the group. This is the original group. Turn the visibility of the original group, duplicate the new group four times, turn on the drawing guide. This is the exact same technique that we've done before. Change the grid size to 1,800, select one of your groups, and drag it down. Make sure you have Snapping selected and drag one of the groups to the bottom left, one to the bottom right. Make sure that you align the lines of your objects and the lines of the drawing guides in the center. Zoom in here just as we did before. To the top right, make sure that you're perfectly aligned, and the next one, and drag that one up, and zoom in. Now we have all of our lines placed and as you can see, even when I didn't turn off the drawing guide, but I would just turn it off to show you, we have both the glitches in our pattern on the vertical, and we also have glitches horizontal where the edges of the brush doesn't meet up. That is just because this brush is textured and it's not surprising that it doesn't line up perfectly. First things first, let's select all of the layers with the pink lines. Swipe to the right to select them. Same process as we did before. Drag them above all groups, swipe to merge them. Swipe to the right on all of the brown layers, drag them above all groups, swipe to merge them. Then I will just delete all of the groups, open up my original, duplicate my background box, and drag that one up to make a background books of our pattern. Here we will work with the edges of our pattern tiles. Let's go ahead and start with the brown. We could do all of the brown ones first. You could tap and hold on the eraser to erase with the selected brush. We can go in, just resize a little bit. Go in and see if we can erase a little bit to make it look good. I found it easiest if you rotate your canvas so that you have your lines in this direction when you do this little detailed work with edges. First, let's go on all of the brown lines and I will just delete the little bit that doesn't look that good. Still, I want to keep it straight, so don't delete too much or erase too much. But it's actually also fine because if we delete a little bit here in the center, we will go in and add some more color with the textured brush. I will just delete all of this that doesn't line up. Now, I will go in with my everyday liner. Let's see, the size of the brush is a little bit too thick for this detailed type of work. I will go in and just test this. If I tap and hold, I will create a straight line and that might look best in some parts of these lines because if I just draw like this, it might not look that straight. Tap and hold to create a line and see if we can make that line look good and make the whole stripe looks seamless. For the purpose of this class, I will just do this rather quickly. But if you are creating a pattern that you want to use, I suggest that you are really detailed with this to make sure that it doesn't show where your pattern repeats. That looks better already. For the purpose of this class, I will be satisfied with this. Then I will go in on the pink lines and erase a little bit of the things that are really not matching up. Make sure that I have the pink color selected and that I'm on the pink layer. Always make sure that you're on the right layer. Then tap and drag to create straight lines. That might look better just as I mentioned before, but sometimes you might be able to just draw a little bit without needing to make straight lines. It's really a matter of experimenting and see how you can make this pattern look as seamless as possible. If we rotate our canvas now, I can see that this looks perfectly fine for me at this moment. Maybe there are some detailed areas like here that you can see where the pattern tile is. But I think it looks okay. Now we have our finished pattern and now we want to try it out. Share a JPEG in the Actions panel, save the image, tap the Layers panel, add a new layer, tap the Actions panel, insert your photo, turn on your drawing guide once again and make sure that it's 1,800 pixels. Then tap and drag to create a 1,800 pixels square of your pattern tile. Also, make sure that you have magnetics and snapping turned on. Tap the arrow, duplicate your layer, zoom in. It's the same process as we did before. That's why I'm moving through this rather quickly. Duplicate it again, zoom in, place it, duplicate it again, zoom in and place it. Turn off the drawing guide. Here you can see that you have a straight stripes pattern created with a textured brush.
9. Diagonal Solid Stripes: Now that we have created all sorts of straight stripes and lines patterns, let's go ahead and create diagonal stripes patterns, which is a little bit more complicated. So tap the gallery and we will go in and rename this to Straight Textured 3 and then tap the plus sign, and I will go for the same size as previously, 3,600 pixels. First step is to turn on the drawing guides just as before. So turn on the drawing guides in the Actions panel under Canvas, edit drawing guides and I will go for the same 360 pixels. So far, same process. Then I will add a background. I'll go for white again on the background layer. Tap the plus sign in the layers panel and a color that you want to draw your diagonal steps in. There are probably many ways that you can create diagonal stripes patterns in Procreate or at least a few ways. I find that when I need to calculate too much, I get really bored and I don't want to do it because I don't like math. So I wanted to create a technique that is more intuitive and especially more easy. This is the technique that I came up with. The first thing that we will do is to create one diagonal line on this square. When we do this, we will plan out how thick we want the line to be. So we will draw with a rectangle tool again because we will create a solid stripe. Tap and drag to create a stripe and then tap the arrow. Then I will just rotate my stripe 45 degrees, tap that three times so that I have my striped diagonal at this position. In this case, I find that the snapping and magnetics really doesn't work well for me when we are placing something in diagonal. I will just turn that off so that I have flexibility to move this object freely. What I do next is to line up the top of the canvas with my diagonal stripe and I want my dashed line to be perfectly aligned at the point of my top right corner. Then I will zoom out and here I need to make sure that I don't have uniform selected but free form. Now I will tap and drag out my lines so that it's moving outside of my canvas on both edges, really important. So that is the first step of creating this diagonal stripes pattern. Next step is to decide how thick we want our line to be and actually also how much space we want in between our lines. For this diagonal stripes pattern, I want an even amount of stripes and space. I want the same size on the thickness of the stripe and the thickness of the empty space. I know that my canvas is divided into 10 squares So if I want the same space in between as I want the thickness of the line to be, I want my line to go down 1, 2, 3, 4, 5 squares down, which will leave me 1, 2, 3, 4, 5 squares empty. The easiest way to make sure that I have this perfectly aligned is to zoom in here in the middle, where I both have the point of moving this object, make sure you have free form selected, and I also can zoom in to see the cross where my drawing guide meets up so that it's somewhere around there. If I will want the space to be smaller than the stripes, I will go down and I could go for six squares stripe, four squares empty space or seven squares stripes and three squares empty space. But to make it simple and to show you the basic technique, we will go for five squares stripes and five squares empty space. So zoom in again in the middle. Make sure that you place it exactly in the right position and then tap there. Now we have a stripe that is placed diagonal, exactly in the right position. The top right corner is the top corner of your stripe, and then it goes down diagonal. Next step is to duplicate this layer. Tap the arrow, and I find that it's easiest to place this line if I have the wide part of the line facing the side of the other line. If I go up here, it might be hard to place it because I will get a little bit empty space here and I need to be really thorough. So I will just flip it horizontal one time, vertical one time, which brings the long end of the stripe to this side, which makes it all much easier. Here I will need to zoom in. This is the tricky part because I want this line to match up and I still want to see the top-left corner here because I don't want any empty space there. So I need to match it up exactly so that it fills five squares diagonally. When you do, you tap the arrow and here you have placed your first diagonal line. This will be the base shape that we will use and it might look like two stripes but it is actually just one stripe that keeps going like this. So this stripe need to have the same color. If you would like to create a one-color diagonal striped pattern, you could just go ahead and do it like this and this is your finished pattern tile. Change the color of your solid shapes if you wish and you can use it like this. But if you want to create a multi-colored diagonal stripes pattern, then this is how I do it. You can merge these two layers together by swiping them together. Select both of your layers, tap group, then here, swipe to the right and duplicates. I will rename this to Original. The first one, just as we did in the previous lessons. Just to keep that one if we want to make changes to it. Then with my new group, I will duplicate it four times, and here to make it easy, I will edit the drawing guide and make it 1,800 pixels, just as we did before, to divide my canvas into four squares. Then I will take my first group- Use the arrow and oops, I needed to have snapping and magnetics turned on. I will adjust the size so that it's exactly 1,800 pixels. Then the new group, adjust the size so that it's exactly 1,800 pixels and again, two to the top right corner and two to the top left corner. This is actually the same technique that we do when we check our pattern for flaws where we adjust the size by half to check the pattern tile. But here we are actually rebuilding the pattern and creating a duplicate of our pattern, but we are also building more stripes. If you would like to have a two-colored stripes pattern, this is your pattern tile. Then you would go ahead and select all of these stripes, tap and drag, and you can select all of these groups, delete it. We will fetch the background box from the original layer and here you can see that you have all of the different pattern tiles. Swipe those together and if you would like a two-color pattern you could just recolor it like this. There you have one stripe that goes like this and one stripe that goes like this and there is your two colored diagonal solid striped pattern. But if you would like to have a four-color diagonal line pattern, then group these two together, duplicate It. I won't mind saving in the original at this moment. We have our original down here and that's enough. We will do the same technique again. Create four groups, adjust the size to half of the size, 1,800 pixels, 1,800 pixels,1,800 pixels, and 1,800 pixels. Now we will group this together. Open up all of the groups, tap the layers with the lines. Match all of those lines together. Swipe to the right on the groups, delete the groups. Open up your original layer, duplicate the background and drag the background up. Now we have all of the lines on different layers and what we can do now is to recolor them so that we can keep them apart. Makes sure that you have the line layers selected and how to keep track on this is that this line is the same as this line, and then you know how many colors you have in between. Here is the start of the pattern and here is the end of the pattern, if that makes sense. Now we can recolor. That one will be beige and then brown, pink beige. Let's go for blue on the last line. Brown, pink, beige, blue, brown, pink, beige, blue. Here is your finished pattern tile of a four-colored diagonal stripes pattern. I can see now that I have a little line here which means that I made a little bit of a detailed mistake when I created my pattern. I won't mind that now but the reason why I end up with this line is that I wasn't so thorough when I placed my pattern in the center with the drawing guides. When you create your pattern, if you will use it for something else than just learning purposes as it is that you are much more detailed and thorough when you adjust your tiles and create the pattern. But for now I would just keep it like this. Now we will see if our pattern works out. Export a JPEG, add a new layer, insert a photo, and then I can just drag that down to 1,800. Duplicate it, place it. You've seen me do this many times before but you should of course zoom in and be really thorough when you do this. I'm just doing it quickly now. Then turn off your drawing guide and here you have your diagonal stripes pattern. If you would like to have these lines on different layers, you can just switch off those image layers. Then you can go in and select the lines in the line layer with freehand for example. You can select this brown line, make sure you don't have color fields selected and this brown line, and then tap copy and paste which will give you the line in a separate layer. Select the first layer again, select your lines, copy and paste, and there you have the pink in one layer. Select the beige, copy and paste and select the blue, copy and paste. Tap the selection tool. Now you have all of the different colors on different layers. That is how you create multicolored diagonals, solid stripes pattern.
10. Diagonal Textured Stripes 1: Let's add some texture to our diagonal pattern. We will rename this to diagonal solid and then select that one, duplicate it, and we will add texture in the exact same way as we added texture on our straight pattern. I'll turn off the drawing guide. I will just delete these images, add a layer above all the layers, use the background layer color, and now we use the dots and dust brush to just add a little bit of texture. That is the exact same method that works with the diagonal patterns as with the straight striped patterns. I will share, export a JPEG of that. Add a new layer to check how our pattern looks when it is repeated. Add, insert a photo, insert my pattern. Add the drawing guide, and resize the pattern to 1,800 pixels. Swipe to the right to duplicate. Make sure you place the image in the right position, just as we did many times before in this class. Swipe to the right to duplicate it. There you have your diagonal striped textured pattern. That is the easiest way of adding texture. You could also do as we did in the other lesson, where we added texture on the different colors. That is the exact same technique as we did. So I won't show you that one. Once again, you can just go ahead back to that lesson with the straight textured striped pattern.
11. Diagonal Textured Stripes 2: The next type of pattern that we will create is also a diagonal pattern with texture, but with a textured brush. It's the same as we did with the straight textured pattern with the brush, but I will do a little bit differently as it's a little bit more complicated with diagonal patterns. Tap Gallery and I will just rename that one to diagonal textured 1. Select it, duplicate it, tap the new pattern, and then delete all of these layers with the image of the pattern tile. I will also delete the layer with the texture. Here we have a bunch of different layers. I will actually just delete the original layer. I don't need that one. For this purpose, I actually only need this layer with all of the lines. Because now when we will draw our lines with a textured brush, I will use this diagonal pattern as the template underneath when I draw. Because I find that it's a little bit difficult. You could match up, so let's type in 360 and see how it looks. You could try to type in the grid size and match up your diagonals within the grid. But it's a little bit complicated and I like to make things as easy as possible. Turn off the drawing guide and here I will use this as a template. I will just turn down the opacity. My opacity, I will keep to 50 percent so that you hopefully can see this layer on the screen. You can lower your opacity if you feel that it's too much visibility. Then I will add a new layer. Here I will use another textured brush. Let's use this blubber brush that is textured in the edges. I will go ahead and, let's create a four-color stripes pattern as well, just as this one, but with a textured brush. To start, I will use the brown color on the new layer and adjust the size probably to the largest size, and then I will try with a light hand to match up the lines here on the sides. Something like that. I will go for both of the brown lines. Either you can just draw if you want to have a little bit of an uneven look. But I think that I want a little bit of sharper look, so I will tap and hold to make it a straight line then I can fill it in if I feel that it's not looking good on all places. This brush is pressure sensitive so you need to have a smooth hand to make it an even stroke. Then I will just fill in that shape. Then I will go ahead with my other colors. Let's go for the pink one. Tap and drag it to create line. Maybe I will move that line down, turn off Snapping and Magnetics. It will only be in the way. Move that line a little bit down, zoom in, draw a new line. That matches up with my template underneath. Sometimes you might want to zoom in and the edges won't be perfect, aligned down and up along your diagonal line because you have a textured brush or a brush with textured edges. But we will fix these edges of the tile later on. Just continue to draw these lines with your textured brush. I will just speed this up a little bit for you because I think you're following along with what I'm doing here. I'm just drawing these lines with my textured brush. When you're finished, you can turn off the layer with the template underneath, and then we can select all of the layers with objects and tap Group. Duplicate the group and I will keep this group and name it Original. I won't need this layer with the template anymore, so I will just delete it. With my new group, I will turn on the Drawing Guide with 1,800 pixels, and I will turn on to Snapping and Magnetics. First, before I do this, I will duplicate the group four times. That just makes it all much easier. Then I will select the group, drag it down, make sure that it's perfectly aligned. One, two to the bottom left, 1, 2 to the bottom right, 1, 2 to the top left, and 1, 2 to top right. That's how you make a repeated pattern. Here we have our pattern. Turn off the Drawing Guide to see how it looks. It looks pretty good actually because the edge of this brush is so rough. But we have at least one part here that we need to adjust, something around there, and maybe something around there. Let's open up our groups. We will select all of the blue layers, tap and drag them, swipe them together to merge them, select all of the base layers, the pink layers, and the brown layers. Let's swipe them together to match them. Select the groups, delete the groups, open up your original layer, duplicate the background box, drag it above the original layer, and you can turn off the original layer. Then we will go ahead and see what we can do on these different stripes. Let's have a look at the beige stripe. Maybe we want to erase with the current brush. Tap and hold on that one on the beige stripes. That didn't happen, so choose the blubber brush and the eraser tool. That doesn't look very good, so I will actually draw the one with the right color selected. Draw that one over there. Maybe there's a little bit of something over here and there's a little bit of something over there. That beige line look good. The blue one have some small parts that looks a little bit too sharp. This is really detailed work. I will just do it quickly now for the purpose of this class. But if you do this to create the pattern that you want to use, I suggest that you are really thorough with these details. Now we adjusted all of the lines, so let's have a look at our pattern. Tap, Share, JPEG, save image. Add a new layer in the layers panel, tap, Add in the Access Panel, add your image, turn on the Drawing Guide, tap the Arrow, and drag down your image to 1,800 pixels. Swipe it to the right in the layers panel to duplicate. Place your images in the right position. Turn off your Drawing Guide and have a look at your pattern. For me, for the purpose of this class, this looks fine. But if I would go in detail, I would fix these little things as well. But for this purpose, it looks like a perfectly fine repeated diagonal textured pattern.
12. Waves and Wonky Stripes: In this lesson we will create a wave, a wonky stripes pattern in a simple way. Tap a new Canvas, 3,600 pixels square once again. This time we will turn on our drawing guide and I will actually go for half of the 360 pixels as we did before, 180 pixels. That will bring us smaller squares and 20 squares on each side. I'll go for the brown color and let's use the blubber brush for this pattern. You could go ahead and draw if you wanted a wavy line. What you need to do is to make sure that the line that you draw here meets up with something that comes around here. You could draw it like this wave, wave, wave, way, and that's a perfectly fine wave. But I will show you how to do a wave in a new fun way. Clear that layer and I will actually draw line that meets up here. It needs to be as thick as the drawing guides, just where it will meet up in the edges. There I have a line. To make it simple, I will duplicate this line so I know that I have a duplicate. I can turn that one off and use my first slide. Then I will go to adjustments and liquify. Hear you have all these fun different tools: twirl, which will twirl your line; twirl right, twirl left, and the pinch and you can expand, make crystals, edge and all of that. But I would use the push and all of these settings I will keep as it is. Now I'll just push up my line and push it down like this, and there I have created a wave. Let's do it on the next line as well. I will turn on that layer, drag down that line to maybe somewhere around here. Let's just do a few of these lines. This is just to show you the technique. I want to make a perfect pattern here, but I will just do a few wavy lines. It's maybe something like this. Now we have all of these different lines. This is the first one, second one and I will just arrange them in the order so that I don't get confused. Then I will go ahead and use the liquify tool again to push up, push down, up and down and up. Again, on the next line, liquify, something like that. Liquify again. I think I moved that one too much. Then the last one. These lines are pretty wonky, but I think it looks fun. Now we have our lines. Let's make this a pattern and for this time I will just keep it one color, brown. I will select all of my layers and I can see now that I actually forgot to add a background box, which is important when we will create our pattern. Add a background box on a new layer. Group all of these together. Duplicate the group four times and if you wish, you can create one group that you name original just as we did in the previous lessons to keep if you want to make changes. Then you will adjust the drawing guides to be 1800 pixels, which will bring me four perfect squares. I will select one group, make sure I have snapping and magnetic is selected and drag that one down to make it match perfectly with my drawing guides. This is the same technique as we did many times in this class. One to the top left, one to the top right, one to the bottom left, and one to the bottom right. Here we have our really wonky lines. Let's just move them into the same layer. Select all of the layers on the top. Drag them up, merge them together, select "Next Layers", tap and drag them above all groups, merge them together. This is just as before, we make sure that we have all of the lines that are the same line on the same layer. Something like that and then swipe to the right on all of the groups and delete it. Now I will turn off the drawing guide and let me see if I have any flaws and I have this little glitch here. But otherwise, I think that this pattern looks perfectly seamless except that little glitch. That one is the stripe that we will adjust. I would just select the color, select the brush. I'm not on the right layer. This is the layer and I will just draw in the little [inaudible]. But otherwise, this is a perfectly seamless pattern, even if it's a little bit wonky and strange-looking. But sometimes maybe that is the look that you want. Export the file, save the image and let's check out our pattern. Create a new layer, add the inserted photo, and I will add the drawing guides. Tap the arrow, drag down the size to 1,800 pixels, swipe to the right to duplicate. Make sure it's perfectly fitted. Duplicate the image again. Place it in the right position. Swipe to the right and duplicate, and place it in the right position. Then turn off the drawing guide. Here you can see your waves or wonky stripes pattern perfectly seamless repeated.
13. Recolor Your Patterns: Now, we have created all of our patterns and we will recolor the patterns. I will show you a few different ways. Let's go ahead and check out the straight solid stripes pattern and this is the easiest way of recoloring because you have solid shapes. This way you can just recolor by dragging a color to the different shapes. Really simple and works really good. The next way to recolor is to select your layers, so for example, turn off these layers. Select a layer, and make sure that you have "color fill" selected, and then you can go ahead and try different colors on that layer. That is also one way of recoloring. That works really well when you have separated the colors in different layers. Another way of recoloring, let's go into the straight textured striped pattern, is to select layer, swipe to the right with two fingers to create the Alpha Lock on that layer, which means that the background of that layer is transparent and you will only adjust the objects. Then, choose a color, tap the layer, and tap "fill layer." This is a great alternative if you have texture brushes, like this, because I found that it fills the texture really well, that is the other way of recoloring. The last way that I want to show you to recolor is to choose a color, select the layer that you want to recolor, and then tap the color to an object. You can drag up the threshold. When you reach 100 percent, you will recolor all of the objects on that layer. If you pull it down, you can see that the brown is shining through here. You need to pull up the thresholds so much so that all of the texture is filled. Here, it didn't feel so good, so pull up the threshold until all of the texture is filled, which is pretty hard. That is why I found that when I want to recolor something that is this texturized, the Alpha Lock method is the best method of filling textured objects. That way you will keep the texture and fill it with color. That was a quick little lesson about recoloring your patterns. If you felt that this was going too quickly for you, you can check out my other class, 'Create an Editable Pattern in Procreate with Color Variations', where I go through this step much more thoroughly.
14. Export: Now, it's time to export our patterns, and of course, this depends on what you are doing with your patterns after you have created them. For the purpose of this class, and to be able to share your patterns on Skillshare. You tap the Actions panel, Share, and you share a JPEG of your pattern. You can save your image and then you have your pattern in your camera roll to share it as a project here in class. You can, of course, export as many of the patterns as you wish and share them as a project. I would love to see what you creates.
15. Thank You: That's all for this class. I hope that you find it useful to be able to create all of these different stripes patterns in procreate and that you enjoy my simplified techniques to make it as easy as possible, even the more complicated patterns like the diagonal textured stripes patterns. Thank you so much for watching. If you liked this class, hit the follow button by my name to make sure that you don't miss out on my future classes. If you have any questions at all, please ask them on the discussions page here in class and feel free to leave a review to let me know if you enjoyed this class, I would love to hear your thoughts. Make sure that you share your project here in class and if you post it on Instagram, feel free to tag me with my app Faber. Thanks again for watching.
 Maja Faber, Surface Pattern Designer