Transcripts
1. Introduction: Video, I'm going to
show you how to create hyper personalized
coloring books, kind of like this
guy right here. Actually, this is not a hyper
personalized coloring book. This is just a coloring book. These are all about providing a unique experience to a
person that is dear to you. Listen, folks, I have eight simple steps for you to follow. So if you're ready,
let's dive in.
2. Decide who the coloring book is for: Step number one
seems very obvious, but if you're going to create
a hyper personalized book, you kind of need to know and
decide who the book is for because if I was to create a book for that little
girl who come to my house, her name is valia, and she is
a girl of a friend of mine. And she came here to our house
while we were renovating because her father is the guy who is our
interior designer, so he would visit us
several times a week. When this little girl was here, I would give her this book, and she would start coloring so she colored a few
different pages here, and that's really
what inspired me. So a little girl is going
to be very different from me creating a book for
Diana, for example, right? So I'm kind of torn
between the two. I'd love to surprise
Valia the next time she comes to my house with a
personalized coloring book. She would be like,
super happy about this. But I also kind of want to give Diana a personalized book. So I'm not sure yet which
road I'm going to go down to. That is step number
one. Like, figure out and understand
who the book is for. That is going to drive every single decision
you make for this book.
3. Pick a personal theme for your coloring book: Picking a personal
theme, obviously. So you kind of
need to brainstorm some ideas of what this
person is interested in, the kind of difficulty of drawing and coloring
you are looking after, and also the kind of messaging you want your book
to carry, right? Is it a purely image book? Do you want to have some
quote in that book? What is the person who is
going to receive the book? What's her or his state
of mind at the moment? Like, what are you trying
to achieve with the book? So all of these
questions will lead to you picking so for
me is decision time. I need to make up my
mind for this tutorial. Let's say I'm going with
the two books in parallel. So for each case study, I would say for each
step of the Sorial, I will show you some examples
for each target audience. So both alia and
on the other side, Diana who is an adult
and also my wife. So how do you pick a theme? Well, I would suggest you
start with a good old list. Okay? So me, I'm hesitating between these two
people Valia and Diana. So valia, she's 7-years-old. Diana is obviously an adult. What else do I have? I
believe she likes unicorns. Diana, she likes spirituality. She's great at coloring. She loves India, and
she likes positivity. So Walia, she likes
unicorn. What else? I know about her. She colors pretty well from what
I've seen in my book. She speaks Spanish, French
and Catalan, Alright. So several languages. And she likes flowers. Okay, I think I
have enough here. Maybe my overall theme for
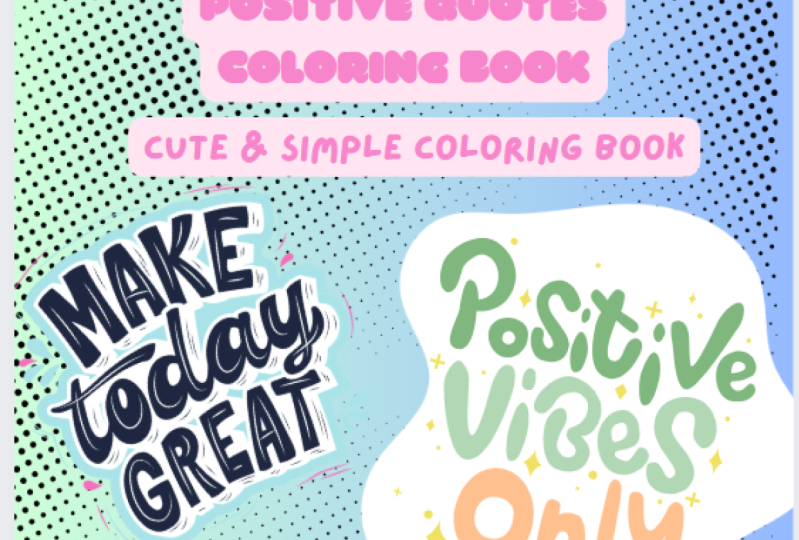
valia could be funny unicorns. Okay? And for Diana could be positive quotes with
three kids backgrounds. Okay? So the background in Diana's images is going to be the part where she can color, but there will be also some positive quotes along the way. So somewhere in the design. So that would be where I land. Okay? So for both
coloring books.
4. Choose a book format & lay out your pages: Alright, moving on
to the next step. This is step number
three already, and this one is
all about choosing a book format and laying
out the pages of that book. We don't need to
create 100 page book. I think around 20 pages
will be completely fine. But let me show you how
I would work on this. So you could start
searching simply for coloring coloring book search for coloring book,
Kit coloring book. Let's try to find that. You see, bunch of kit coloring books already with
different images, but they're not
hyper personalized. You see, this is the
main difference. Creating a coloring book
is relatively easy, but a hyper personalized
one, not that easy. But I just want to see
the format of this book. So I'm going to
click on this one. A four portrait. Okay, it seems like
A four portrait is kind of the way to go. Going to be easier as well. This is definitely an A four
format like a portrait. So I'm going to
use the search bar right here and type
in A four page. I'm not hitting
Enter or anything. I'm just seeing what are
the different options here. I see coloring page
A four landscape. This sounds perfect. So let's go for this one. You see, I have already a few
different templates here, but I'm just going to
go for a white page, this one right here. Perfect. I have my first page. So what I'm going to do is to immediately go
into Grid view, copy this, so Command C, and I'm just going to
Command V like a madman. Until I get 20 pages. I let's go for 22 pages. So page one and 22
will be the cover, and then two to 21 will be all of our designs,
our illustrations. Alright, so I have the
structure right here. I'm going to actually add a little textbox right here to say cover and then copy that. Last page there, paste, and this is going to
be the back cover. Perfect. And then all
of the other pages will be design my
customized design. Alright, I have
my document type. I have laid out the
structure of the book. Maybe page two could be
a personalized message. So I am going to copy that
textbooks, paste it here. So this could be a
personalized message to the owner of
the book. Perfect. That will make the book
even more personalized. Now, everything is ready. Let's move on to the next step.
5. Find your coloring images: Or the next step is
all about starting to search for and find
your coloring images. Okay? So we are going to
do this in two steps. So the first step will
be to have your images. And the next step will be
to have kind of, like, the cool backgrounds that will come behind
your images, okay? And you will see
that whether it is for valia or for Diana, we will have different
strategies here to really make both the image and the background as
personalized as possible. I have two versions of the book. The first one is
the personalized coloring book for Diana. I'm going to write
Diana in all caps. So from here, what I can
do is to go to file, make a copy, very simple. Now that I have all of the
structure, all of the pages, I can simply make a copy
personalized coloring book four, and then this one, I will call. Ya. And so just like that, I now have my two
coloring books, the one for Diana and then this other one right here for valia. So I'm going to be playing
on both of these documents, but what I want to show you now, how do you search
for your images. So for Diana, I want a positive quote that will be kind of like the
main image if possible, that she can still color
I imagine the background as some sort of intricate background that she can color with lots of shapes, lots of little swells and
even kind of looking like mandala kind of style
to remind her of India. So that's what I had in mind for Diana. Let's
start with that. So first, let's search under
my elements right here for some positive
quote positive quote. I'm going to go search for
graphics. This is what I want. Is. And so, yeah, what I recommend
is to just start large your search and then go narrow and
narrow and narrower. Okay? So trust the process. I want to find some quotes that are not cliche
that are still inspirational but not too
cliche. Smile each day. I like that, like
the smile each day. So I'm going to make
that big center. Okay, I'm going to
leap this right here. You want to find more
of the same style, click the three little dots. And I have a couple
of options here. I see this is part
of a collection, so I'm going to start
here in that collection. Yeah, Bingo. This is amazing. This is a ton of positive
quote right here, all written in the same
font and same style. So this is actually perfect. I'm going to start browsing
this so make your proud. This is good. Shine bright. Actually, you can be
gorgeous, dream big. It's a new day. I like
that it's a new day. Okay? It's a new day. I'm going to make this the
same size. And you know what? I'm going to delete both of
these and bring them back. I find a lot of good
quotes right here. I don't know how
many I have already. Let's see what the layers. One, two, three, four, five, six, seven, eight, nine, ten, 11, 12, 13, 14, 15, 16. I need four more. Do this. Alright, so I have
all of my quotes right here. What I'm going to do
is to select them all and then stretch them all. So they kind of all have
about the same size. Okay? So I kind of want them to fit this save zone right here. So now, what I'm going to do
is to speed up the video, but I'm going to cut every
one of these quotes and paste one at the exact center of every single page, right? So I'm not going to bore
you with me doing this, but I'm going to do it anyway. Alright, folks,
this is my result. So far, I have separated
all of these quotes that are at the same size and
just kept one per page. Alright, let's switch over
alia's side of things, right? So right here. So valia she's
a little bit different. She doesn't like
positivity quotes because I'm not sure
she can read yet, but she likes Unicorn. So I'm going to start a
different search from here and type in funny unicorns. Let's see. Okay,
graphics, funny unicorns. I have a bunch of unicorns, but they are not the
coloring type, okay? So there's one here. So if I see one, I'm
just going to click on the three little dots and see animal cartoon
vector Illustration. Yeah. Okay, so these
are cool keywords. So illustration vector, funny that I could
probably drawing. Okay, so I think I need to
fine tune my keywords here, Unicorns, drawing,
vector, uniform drawing. Okay, maybe I can
add cute in here. Cute Unicorn drawing, sticker, cute unicorn drawing,
maybe not vector, but sticker or lines. This is cool. Starting
to see some interesting, I have mermaid unicorns. I can see this is probably
part of a collection. Yeah, those are unicorn mermaid. That's a very specific
type of graphic here. So cute unicorn line
draw coloring book, cute unicorn coloring
book. Let's see. Let's add a U in
coloring Coloring book. Cute. Yeah, graphics now I
have a multitude of unicorns. They're not particularly
cute. This one is cute. This one is cute.
Let's see if it's part of a collection. It's not. So what I'm trying
to do here is to find this particular
graphic right here and see if it's part
of a collection or if I can find more of this
in the same style. Let's see. So I have
Valentine's Day coloring page. Let me see the more
like this if I can find some more
unicorns like this one. So it doesn't seem so. Maybe if I click on the
contributor's name. Okay, I see some
cool stuff here, like the dot to dot
kind of drawings, some nice robots, some
nice letters as well. I could use this as well, and she could, like dot
to dot her own name. This is nice for Diana I'm going to start
starring things here because there's a multitude of things I feel I can
use for both books. So valia, I need L. I need a
V. There's no here, L BLA. Okay, I need I and
the Vi is here, and the V is here. Okay, I have everything for
Val I'm not going to only use unicorns because she
might get bored a bit. So, you know what? There's some cool unicorns. But I would love to also find. So maybe here is another
one. This is also cool. This is nice for Diana. Let's go back to my
document and cute unicorns. So I'm going to try to find
something else, as well. So rainbows, stuff like that. Gonna click on the
rainbow Rainbow unicorn. So you see, I'm clicking
on different designs. This she'll probably like, This is also looking
for your star, go to your project right
here, go to folders, and all your projects, and you should see
your start right here. Now I have all of this
stuff that I kept here waiting for me right
here in my star folders. So okay, I'm going to start adding the designs,
okay, one by one. So I'm going to
speed up the video because you don't need
to see all of that. Okay, one thing I want to show you from here on this last page, I would like to write valia with these dot to dot letters. I only had the V and
an I, I believe. So how do I find
the other letters? Well, let me show
you how to do that. I'm still in my start folder, so I need to click on
the three little dots. And fortunately, I don't see any view more or
view collection from here because I am still on the star folder and it doesn't give me
all of the options. So my only option was to
click on the creator's name, okay, A and K color. From here, I can access
all of their design. And I see here the letter A, which is the next letter
I need after this V. So now I can click on
the three little dots. And I see this is
part of a collection. So probably all the dot
to dot, yes, perfect. I'm going to bring
in the A right here. I'm going to delete the V,
find the V back. There you go. VAL I A. Now, I have all the
letters at the same size. You see why I did that,
why I deleted the V, though I already had
it here on my page because I want to scale
them all at the same time. So now I have E valia. Yeah, okay, that's
the first one. Perfect. Ava even helps me keep the same distance
0.3 there you go. Now I have all of it
in one single word. I grouped it. You see? But yeah, Okay, so now
it's all here on my page, and all I need is a little
heart Unicorn, heart. Unicorn. R, yeah, I can
use this lover heart. Right. He have these two parts. So this is gonna be super cute. Now, let's see the entire book. Perfect. I have four
little illustrations, some rainbows, some robots, some unicorns, some cupcakes, some mermaids, some dot
to dt things, some mazes. I think she would be
super happy with this. Let's move on to the next step, which is to find some cool backgrounds to
complement our designs.
6. Search for some cool backgrounds: Alright, let's start
with alia's background. Okay? I believe most
of the coloring and the writing will
be done on the images. So not so much on
the background, unlike the designs for Diana. So here, I probably need
some subtle backgrounds. Okay? So let's get
into page mode, and I'm going to find some
pattern pattern background. Let's try with this
keyword and see if I can find some
cool background. So, for example, this is nice. I kind of like this kind of like mermaids scale
kind of thing. So this could work, but
I still need some sort of a shape behind my drawing. Otherwise, it's impossible
to color over it. And probably use a background
every three pages or so. So this one looks great. Probably could do
some stuff like that, so put it back, and then
here have something nice. I'm going to try this one. Set the images, the background. Yes. This is actually
nice. So let me see. I have background, two,
normal, no background. This, I guess, could
use a background. I go to use this checkered
background right here. This looks nice.
Okay, but I could probably then lower this page. So I have this. I have this one, doesn't need a background. The Mermaid right here could
use an aquatic background. This, for example, has
background Alright, so I feel like I need to
get back into great view here to spread my design. So, okay, I have three unicorns. I have mermaid. I have seahorse. I have starfish. Yes, that's good.
Then more unicorns. Then more unicorns. Okay? This one could probably be spread,
like, so mermaid. These two unicorns. Okay, I have a lot of
unicorns facing the same way. I'm going to bring the cat here. This one needs a background. Perfect. Now, back
into great view, I feel this is great. What I'm going to do
is to find the shapes. So these actually look great. And for the shapes,
I'm going to go for irregular shapes in my graphics. I feel like this one is great. Going to rotate it, and
then I'm going to make sure it covers the entire image. Like, so make it white and use the position button to
push it backward once. Okay? Great. I need to slightly resize my image here
and there you go. I have a page right here
that is ready to be colored, and I kind of like it. So great. Now, I can
move to the next page. This one right here, I need to find another shape
like this one, for example, you
see what I'm doing, I'm just using these
irregular shapes as a way to provide enough of a background for covering my entire drawing. Okay? I need to find
the right positioning. Probably, so there you go. There. Okay, so make this white. And again, use the position
button, push it backwards. Perfect. Yeah, this is nice. She can continue the color
of the grass and everything. Okay, Mermaid here, she already
has everything she needs. So no need to add a background, but here, yes, this one, we do. Okay. Now, I'm pretty
happy with all of this. Let me go back to GridView because these two here
are touching each other. Okay? So what can I do in
order to prevent that? So I could go like, so Yep this one could be
here after the robot. Okay. Now, this looks like a more even distribution
of these pages. So yeah, I'm pretty happy
with these results. There's just one thing
here with this Unicorn. Cute pastel background. I probably need to
change this image right here because it's not
matching the color palette. This is a more. Maybe I would like to have the cloud here. Okay,
this is better. Now I have a pretty much
consistent color palette with unicorn stuff, rainbow stuff, wavy stuff. Yeah, I think this is great. Alright, let's switch back to Diana's document and see a
very different vibe here, obviously, no rainbows,
no mermaids, no unicorns. This is all about
intricate background, stuff that she will spend
time and even maybe hours coloring around
these positive messages. So let's go to the
first one right here, it's a new date and go search my elements for some intricate
patterns background. Intricate pattern
background. Let's see. Again, I'm just going to
focus on my graphics, see, and yeah, I'm looking
for stuff like that, stuff that is quite heavy. So again, what I'm doing here, when I do this, to
stretch to my background, I click on it, and
I see if there is an option to stretch
the image to the background to
replace the background. Here, there is none
because it's not a photo, so I can simply do it manually. So I put it here and bring that all the way up and
make sure it's center. If you want to make
sure it's center, you can use the position
button middle center. So now, you see, this
is what we have, and this is going to be sent
to the back so that I still have this message
right here that I can position somewhere
anywhere I want. So I don't need to keep
everything in the middle. I could find a less
interesting spot in the design like here, for example, I set
the tone of, like, a color that I want
to give to this page if I wanted to by changing
the color of the letters, or I could give Diana more options to really
make this her way. So instead of having
black letters, I could have white
letters. Okay? So I could probably change
this color for white, but then I need to
change the color of the background for black. Yeah. Like, so she can
color the letters. And the shadows
here could probably be white as that's
not the shadow. That's just the
little dotted things. Okay, so here is my first page. Pretty cool. Since I enjoy
this background here, let me see if I can
find some cool stuff. So I'm going to go find more like this one.
Se more like this. And Bingo, there you go, Okay, so here, make change. So what I could do is use these corners that
are pretty cool. I have different ones. And I'm going to do the
same thing here that I did on this other page
on page three here. So I'm going to copy this quote. Bring it to my page right here. You will see Y in a
sec paste it here. I'm going to use the
copy style button. So I copy the style of this
and I paste it on this one, and I can get rid
of this. Perfect. So yeah, I'm going to place it right here in the middle, and I'm
going to continue. I'm going to do something
different here. You see the color is not black, so first, I'm going
to make it black. And second, you see it's square. So I cannot use the
lower angles here. So what I'm going to do
is double click on this, kind of crop the image, like so, and then I'm going
to copy this Control C, control V. There you go. I can flip it horizontally,
and there you go. I have created my
nice four corners. So just a little trick. Let's go a bit more
serious now with, like, a more robust mandala, something like this,
big and nice, like so. Oh, rotate that slightly. Okay, let's have a great
view, see where we are. Okay? That's pretty cool. Feel good about all of this. Feel like we need another
full page like this. Be creative or be creative, could be something different. Yeah, this tree is amazing.
Yeah, let's go for this. And by all means,
like, these designs belong to people, okay? So this tutorial is really
not about selling this stuff. Line, right? This is really your book or a book that
you create for love one. You do not intend to
commercialize these designs. You are just using them, enjoying them for
your own purpose. This is very important for
me that you understand and respect that because
I don't want you to start stealing the
design of other people. That is definitely not nice. So what I'm showing
you here is how to use what's in Canva
and have fun with it, like, enjoy it. Okay. And again, I'm
going to oh, yeah, I forgot to, I could
leave a few whites. Okay, let me see. Okay,
so some will be whites. Those on top of bigger, more like this one, for example. So I'm going to use
the Copy style button and scroll the way
down to this one. Oh, okay, be nice. What I can do is to group
them and I can reduce the size of this so I stick to the save
zones more or less. Okay, how much left? Okay, I'm going to speed up the video, but you kind of saw
my process so far. So yeah, let me just finish this quickly
and come back to you. All right, folks,
this is my grid view. I am finally done
for Diana's book, and I have my 20 pages with some intricate background,
sometimes not background, but I have organized
these yet to become colorful background
with my motivational quotes. And some of the quote I kept
in their original color. So with the white background
and dark letters, and some of the other quotes, I reversed this order, so I have a dark background
and some white letters. So Diana can choose
which one she so again, for both books, I have some
really cool backgrounds, both for Vaya and for Diana. So I'm pretty happy about this. I believe it's time we
move on to the next step.
7. Personalize your coloring book cover: Alright, personalizing
the book cover. Alright, so I need
something here that's personalized
message for the owner. I'm going to leave
this one blank. This one, I will
leave it up to you to really write a
personalized message, but just know that you
should do so on page two. But for the cover, we need
something really cool, okay? We need something that kind of reminds me of what's
inside the book, okay? So for the cover here, I have these letters under my project. I think I have
started some, here. So, let's delete the word cover, and I'm going to
bring the letters of the name Baia Bala. So. Alright, let's reduce
the size a little bit. Okay, this would make for a nice coloring
experience for her, and, I said I would use
this rainbow right here. Okay, so I'm going
to try to make the letters align on
this rainbow, okay? So I'm going to rotate them slightly Okay, this
is pretty cool. I can start coloring these. I guess. Oh, you know what? I'm going to choose colors
from this rainbow right here. Okay, so this pink I'm using the color picker to
choose some colors from the rainbow. There you go. This is quite cool. I can probably select
everything group, reduce the size a little bit. And now we have a
pretty cool graphic. Now the last thing we need to do is to find some unicorns. So cute pastal unicorns. Now I can use any kind of, like, cute unicorns
like this one. This one is nice, can be
sleeping. Maybe you know what? I'm going to cut this
valia illustration and put it at the back. And I can type something
here Liber perteValia. Okay. This book
belongs to valia. Okay, so I can change this
font for something more fun. I can try to have a
fun kind of font. Trying to find a
cool font hibernate. This is not bad. Yeah, tiro
Perten. Okay, this is good. I feel like I almost
have my cover. I'm going to delete that
and find a cute unicorn. This one. Okay, I'm going to go and fetch
some inspiration in my design page under
template, coloring book cover. Coloring book cover. Yes.
Kind of like these ideas. Okay, you know what? There
is some good ideas here. This font is really nice. Autumn let's change autumn
for unicorn unicorns. Unicorns, coloring book. Okay, unicorns. Let's just write it
in English so she can learn some more English. Okay, and this design goes away, and I'm going to
add a nice unicorn. Okay, this is cool. I need to replace these leaves for something more unicorny. And this blue also
could be more pastel. Yeah. Like so Unicorns
Coloring book. Now I need some art frame. Oh rainbows, rainbows. Yeah. Okay, I can leave it like so in just
one lasting nice corn horn. Like this perfect. Okay, this looks nice. And I think I'm
pretty much done with the cover for Vala
unicorns, coloring book. This looks great. So that's
my one design for this book. I will have a
personalized message, and then this book is
pretty much ready. I feel maybe I could have a more consistent color palette
for this homepage. Okay. So the way I'm going to do that is to grab this
color right here. Come and see, come back. Oh, yeah, I need to
delete and paste it here. Yeah. And so for the
background here, use the background color, okay, create a new one
again, color picker, and I'm going to go fetch this color right here or
I could try this one, which I feel is a better fit. And then for the text, I can use another
color from this. Yeah, I could try something
a little bit darker, for example, this
one right here. Yeah, Unicorns coloring book. Perfect. I am happy with this. Oh, you know what? I can
probably try one last thing. This is me being picky
with the colors. Okay, let's go for this.
We are good to go. And can I use that
for the last page? But I kind of like the name
Vala here. Okay, I see. I could use this last message
right here, paste it here. Okay, so I could delete
this whole page. And I'm going to grab the
first page right here, put it there and just replace this last background
for a background. Yeah, something like this
seem more like this. Alright, we are good to go. Maybe I have a little
text box here with my name so that they remember
it's a present from me. Okay, so let's paste
this one here. Fruta to leave Romans,
enjoy your book. And I'm gonna make
that 50 effect, the effect is going
to be background, going to use the white and letters are going to
be in a different color, which is this one have
another color P more. Okay. And then, again, the first page, this page. This second text box is going to be my name,
simply speaking. So okay. This one, I should say Ronnie. There you go. Add Esmoji Okay. Effects. Same effect. Yeah, color should be white. There you go. Alright. So this
is what we have right now. If we look at all the pages,
this is pretty funky. I would love to have
a book like this. Now, let's just wrap up
Diana's book as well. I'm going to speed
up the video for this one and show you
the final result. So yeah, let me do this quickly. Right, I'm done with
Diana's design. I opted for, like, a cute little couple. Ostrich kind of like cover. Okay, Diana's coloring book. So I kind of grab this font, which is called Lucky's
guy in both black and outlined from a
book cover template. And then if you look
at the last page, I went very subtle with
a little heart mandala. I wish you all the
best, Techero, which means I love you, Roddy. Alright, so I'm
going to leave it. So I have two steps to go. One is simply to look over your entire design and
fine tune any layout.
8. Fine tune your layout: Let's start with this
design right here, okay? So how can I fine tune
anything in here? I think I was pretty
cautious when I designed everything here. So I believe I'm going
to leave it like so. I could add a border here, but it's not 100% necessary. I think I'm going
to leave it, like, so don't forget to use this page number two to add
your personalized message. I'm going to do it right
now because I would need to think about it and you don't
want me to take more time. So yeah, I'm going to switch
to alias design right here, see if I can fine tune anything. I feel like this
first page could have some little bit of
texture in the background. So I'm going to search
for some pattern. So pattern, swells.
I don't know, something swirly, something
that I could insert. Something like this could work. Let me see. So I need to
cover the entire thing here, and I probably need to make this much more transparent,
something like this. Okay, and push this to the back. Okay. So now I'm talking. I have a much more
textured first page, which matches more
the rest of the Okay, so I think I'm good
to go with this. So let's move on
to the last step, which is to print
our coloring books.
9. Print your coloring book: So obviously, there are a ton of options for you to print
these coloring books. The easiest one, I would say, would be to download
it into a PDF. PDF standard would be fine. Then if you have a
printer at home, you can print it
there. It's up to you. Or if you want to be
a bit more fancy, you could simply
use Canva print. Okay? So how do you
use Canva print? Well, right here, under
your share button, locate the option that
says print with Canva. Now, this might not be
available in every country, but here in Europe,
it is available. So I could go print with
Canva and just find here coloring book coloring. No, Book booklets, book, notebook. Let's see booklet. Let's see if a
booklet would do it. No. Because a booklet
is more like a flyer. I need to come back to my book. Yeah, I don't see
an option to print my coloring book
immediately from Canva, which is a bit of a bummer. I was pretty sure I
would be able to do so. So I guess my only option is to print it myself right here or to send it to a professional printer
to have a hardcover, like, first and last page. So I'm going to leave it here. You guys can figure out how to print your own coloring book. I hope you enjoyed
this tutorial, which was a little
bit different. It was more like create
as I go kind of project. But I wanted to show you
how much you can find in the Canva library and how you can leverage that
for fun, as well. Not only, like, serious project. This is just, like, a
purely love project, make somebody that
is close to you, feel good and give them a
personal life experience, be it a 5-year-old kid or your wife it really
doesn't matter. Like, I loved creating
this project with Canva. It made me feel happy. So I hope it made you feel happy as well to watch the
tutorial and gave you, like, the motivation to do your
own book because this is very relaxing and I'm
really enjoying the outcome.
 Ronny Hermosa, Your Go-To Canva Guru