Transcripts
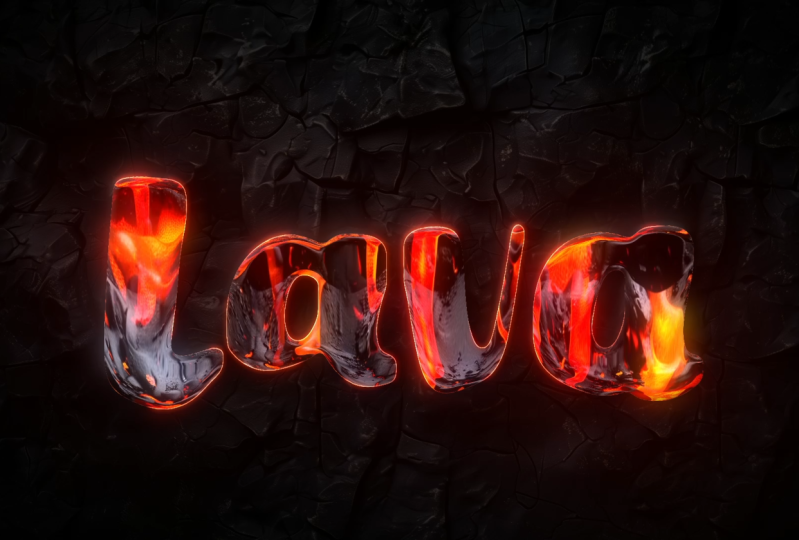
1. Introduction: Hi. I'm Jake in this class. We will learn how to create and use this lava
animation template, which does not require
any external plugins. You don't need to
have any experience working with Adobe
after effects. You can even download
the free trial version, and it will work fine. By the way, my
professionally made template is approved for sale
on Nevado elements. This is how you
know that knowledge which I provide is up to date. I'll explain each step we're going to make to
create this effect. You can use your logo,
text, lava textures, and background images
to get a unique look, or you can download
assets that I provided in the resource
tab to the class. I'll provide you all
needed knowledge, so you can understand
each setting and make adjustments to make
it exactly as you want. You can always write
your questions in discussion section under
any of my classes, to get help for me, while
creating cool effects. I think it's the
best way to learn this super while creating
interesting effects for fun, and to complete this class, our goal is to create your lava animation
after effects template. Happy to see in my class
a is also your result after following all the
steps. Let's get started.
2. Creating Text: Okay, so I'm using AW
After Effects 2024, but you can use pretty
much any version of AW After Effects.
It will work fine. If you cannot see some of the panels which you
can see on my screen, for example, this
character panel, you can go to window
and enable it from here or any other panel which
you can see on my screen, you can enable it from here. First of all, we want
to create a text, which we are going to melt. Let's click here to
create new composition. You can also click here or go to composition,
new composition. Let's left most click in it, and let's call it
your text or logo. Because here you can also will be able to place your logo, so it would also
work with logos. Duration, here we can
set to 15 seconds. Basically here is frames
seconds, minutes and hours. Let's set to 15 seconds, 30 frames per second, and FulhD, which is 1920 by
1080. And click the key. Let's create a text, just select this
horizontal type tool, left most slick in it, also left most slick and
hold and drag lick this to create a text box in which we
are going to type our text. We can just simply
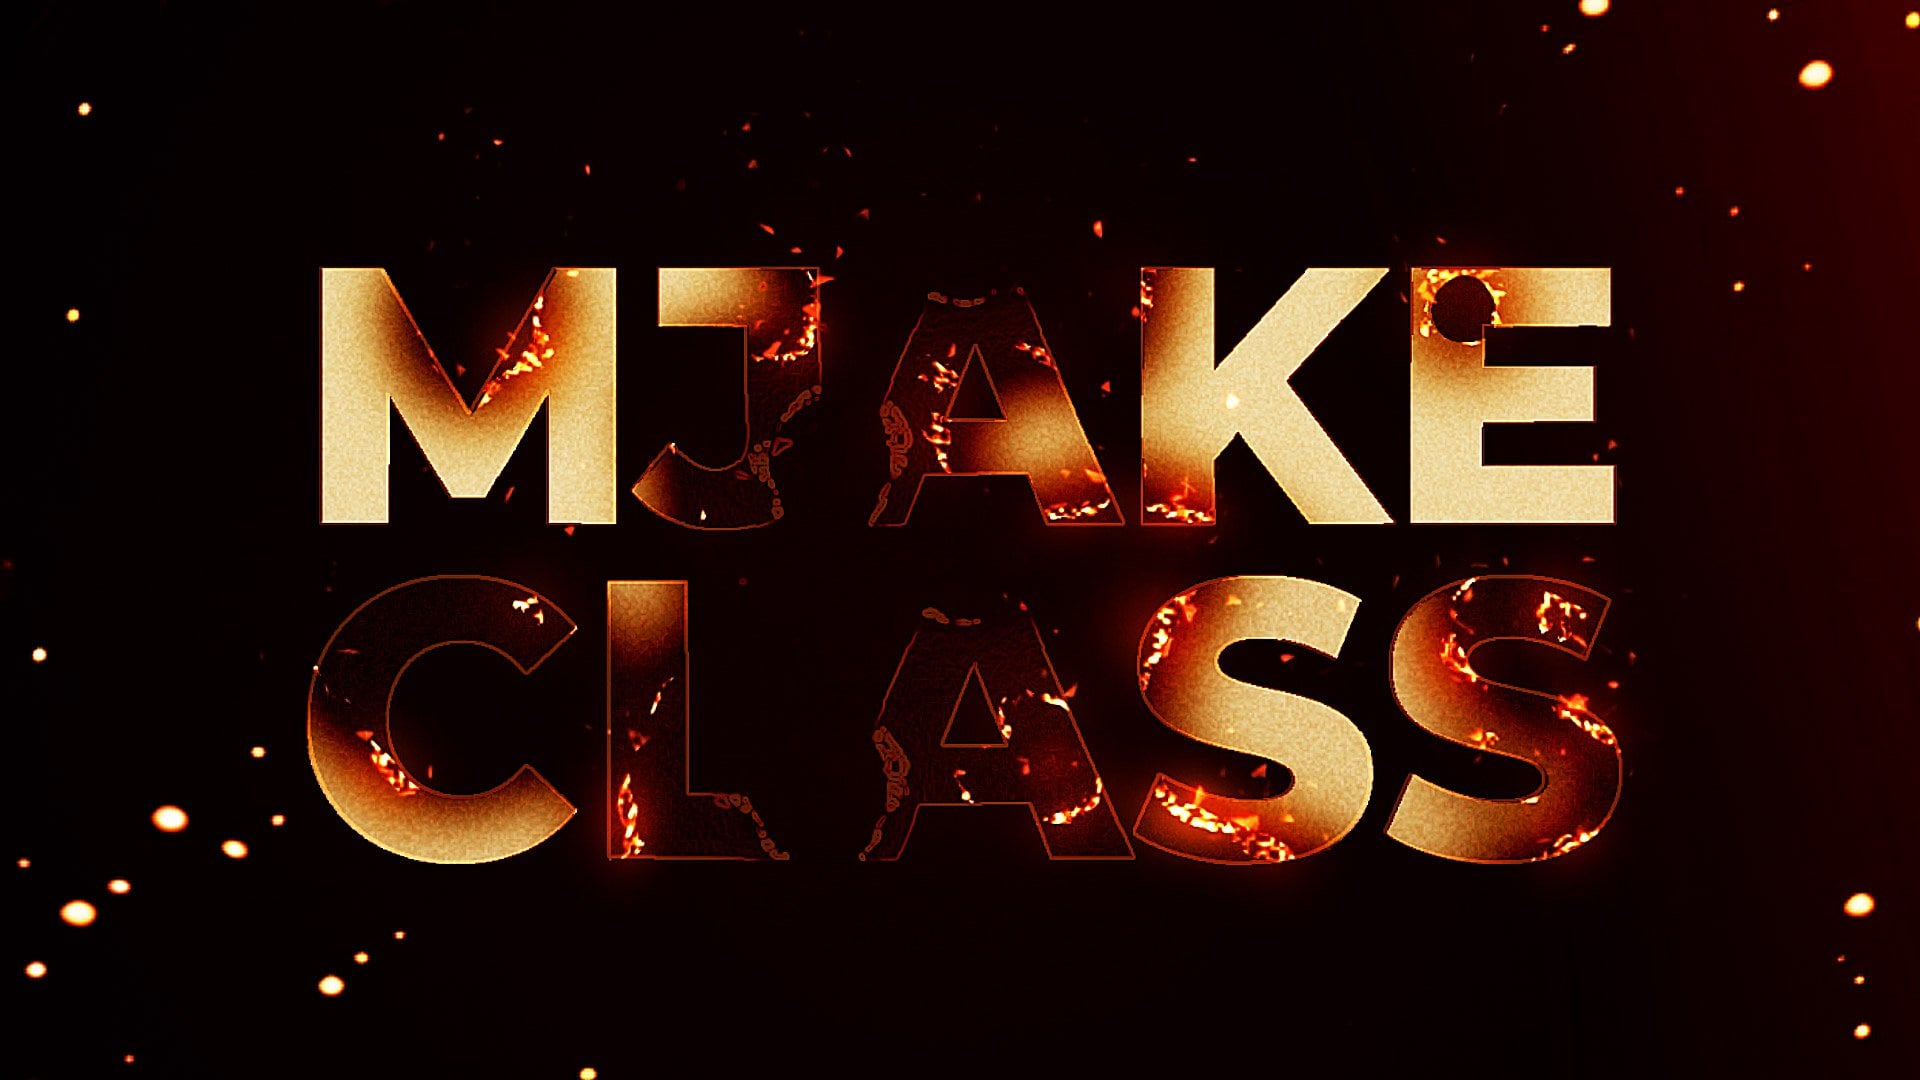
type word lava, or maybe let's try this one MG. Pretty much you
can use any fund, but more bolt kind of funds will work better
with this effect. So make sure to choose
something bolt like this or pretty much any
kind of fund you want. So I thought lemon
shake is kind of fun. Link to this fund will be in
resource step to this class. Basically, you'll see
this text document in which you'll find
the link to this fund. Click anywhere just lick here. Also, we can center this text, just select it, left
most slick in it, and click here in align panel to align horizontally
and align vertically. Once again, if you cannot
see this panel align, you can go to window and
enable it from here align. Now when we have our text, we can also add any kind of frames if you'd like to
experiment with this effect, you can just left
most slick here at rectangle tool and hold, and choose this rounded
rectangle tool. With this rectangle tool, you can also let most slick and hold and drag like
this to create a box. To adjust this box, you can click here on fill on the word, and not this icon.
Just click here. Let click and make sure
to select this non, so it will not fail. Also, you can click
here on stroke and make sure to click
here slid color. And click a key. Here we can
adjust the stroke width. I said it min to 23, but you can experiment
and see what you like. If you would want to
adjust the frame, you can just simply click here, scroll down here and here a rectangle, contents rectangle. In here rectangle path, you can uncheck this icon, which will allow you to adjust the size horizontally
and vertically. Enclose it here. Also, let's align horizontally
and vertically, and later we can use it to
see what we like the most. For now we can just
simply disable here by clicking
on this eyeball. Now we have our text or logo. The next video, we are going to create this melting
effect basis. Basically, we'll get
this kind of effect of melting for future improvements.
See in the next video.
3. Melting Animation: So now we have our logo, and let's start making
this effect of melting. What we need is to create
another composition. We can click here or
go to composition, new composition, and let's
call it melt animation. It should be the same size, foolish T, 1920 by 1080, 30 trains per second, and also 15 seconds
duration. I clear a key. Here in this melting animation, we can just lift mostly
and drag it here. We will see all of our steps. First one is to create a logo, second one, melt animation. Let's select this your
logo text composition. Left most lick, hold and Dragon rob inside of
this melt animation. First step to create
this melting animation, we need to duplicate our text. To duplicate this text, you need to select it and
press control D on keyboard. I'm holding control,
as you can see, n plus D. It will
duplicate this layer. With this layer on
top, we can rename it. Let's press enter on
keyboard, to rename it, and let's call it
displacement and echo. Because these effects we
will use to melt our logo. To drop these effects
on this composition, I'll need to have my
effects and precess panel. Let's go to window and select it here
effects and presets. Wait it for it to load up and just simply type here
displacement map. Here on the sort, select
displacement map, left most slick, hold, and drag on top of this layer. You can also select this layer and just left most
double click in it, and it also will
apply this effect. Basically, if we will
change these values, you can see that
nothing happens. This effect requires
to have a map So it will know in which way and how to
displace our image. So let's create a
map for this effect. Go to Project, and here by clicking on this
create new composition, icon or once again, here on composition,
click on new composition. Now let's call it
Melt Map. Click OK. Here we want to drop
our text or logo. Select it and drop it here. Here we want to expand these borders because we want
to use this as a source. This is why we've dropped
inside of our map, our text or logo. Because if we will
change to something else here in your text
or logo composition, which is source of this effect. It will also affect
the melt map. What we want to do is
to expand the borders, because if we will click here
on this transparency grid, you'll see that we don't have any values besides our text. And our displacement
map works basically in the difference between
the gray value and white and black value. First of all, let's expand
the borders of our text, Let's go to AX and precess
panel and type here minimax, here on the channel,
select minimax, and drop on our text. Here, we want to change
this value to 200, to expand it, and
to see the result, we need to change this
color to Alpha and color. This way, as you can see,
we've expanded our borders. If we will change
this to lesser value, you can see how we expanding
the borders of our text. Let's set it to 200. We need to have a
map which goes from gray to dark or white values. Let's create a new solid to
create this kind of map. We can go to layer, new, solid. Let's call it fractal noise because this effect we
will use and click. Here N ef and presets, let's type fractal noise, left no slick, and dragging drop on this
fractal noise layer. Here, we want to change
a bunch of things. Basically, we want to change this transform to higher value. Let's change it to leak 360. And complexity, we want to
change to lower value ek two. It will be low resolution, which has dark and
bright values. Also, let's add a
bit of contrast. Maybe let's set it to 160. We'll have these hot
spots and dark parts, and brightness,
let's set it to -20. So if we will go to this melt animation, which
we are trying to get, we would want to choose
in this project panel, our melt map, which we
are creating right now. Basically, if we will
left most lick and hold and drag in this melt
animation composition and just simply disable it go to this
displacement map and go to effect controls and change this displacement
map to melt map. Now if we will switch out
this layer which is below, because we have two
same layers and only enable this
displacement and echo, we can start changing
these values to get this kind of effect. As you can see,
it takes this map And accordingly to this map, it will change the
wordiness of our text, which is exactly what we
want for this effect. But we can tweak it further, so it will not go in any direction,
because as you can see, I'm changing just one value
and it goes right and left and to make it go
only in one direction, we want to have
here in melt map, Only gray and white values or
only gray and black values. To fix this, we want to
use a tritone effect. Make sure to select this
fractal noise layer, go to effects and presets
and type here tritone, select it and drop
it on fractal noise. As a base color,
we want to change it to 50, here at brightness, we want to set to 50, which basically will
make the gray value. If you will select all of these colors and change to gray, we can go to melt animation,
and as you can see, nothing changes, even though
we are change these values. But once you introduce
some color, for example, white can see that it will
distort in these white parts, which looks pretty cool. As you can guess, if
we will set to black, it will move not to the
left, but to the right. Let's experiment and
change it to black, and as you can see it moves
in opposite direction. This is basically
how our map works. For now, I want to change this mid tones to maybe like 79, you can just basically
type here 79, click on the mid tone colors
and change here to 79. And click a key, and this
one, let's set it to white. If we will go back
to melt animation, you can see that now we are
moving only in one direction. Which is exactly what we want. Now basically we want to
change not this first one because we don't want
to melt it to the side, so let's change this
first value to zero. Second one, let's
also change to zero, and here with displayhad, let's set it to beginning, and click on this stopwatch
on MX vertical displacement. Click here. Basically
what we've done, we've created a key frame. To see this key frame, we need to select our
displacement and echo. Layer and press U, and you'll see this keyframe. What is key frame? Basically, keyframe
is a point in time, which remembers the value
of serine property. In our case, this keyframe
in this point in time, which is 0 seconds, remembers this value of property max vertical
displacement. It means if we will set this time courser
here to the end, just le here and change
this value to maybe 188, We've created another
key frame as you can see by changing just one value. Now we have two key frames, one is zero, x one is
what we've said -188. Now after effects will try to
go from zero value to -188, and the process will get
this kind of animation. Basically, it just remembers
this flowing motion, which we've set from zero, -88. If you want to know which
kind of value to use here, you can just basically
go just before you'll see these other spots,
which we don't want, because it will not look
as a melting animation, because this is random dots, which will destroy the illusion. Basically, just
don't go overboard. And distort your image just before something like
this will show up. In my case, it usually
goes under 200. Maybe let's set it
to -190, to be sure. As you can see, we
have our first draft of this melting animation, which looks pretty cool, and you can always go to
melt Map and change here the evolution just to any number and go
to melt animation. You'll see that you'll
get other pattern. In my case, I liked
my first one, so I'm going to press control Z. Keep in mind that you can always go to melt map and change this evolution or change offset turbulence to
get different pattern. This is something you
should keep in mind if you would want
to tweak your look. Let's go back to melt animation. Second thing which we want
to do is not just to melt our text because now it
looks to dimensional. We want to add a bit
of three D feel. The best way is to add
a bit of thickness. To add some thickness, you want to choose this
displacement and echo composition and go to effects in
presets and type here echo. Select this under time echo, t most lick, hold, and drag and drop on this
displacement and echo. Position. Here we
would want to change to something like seven echos, and let's see how it looks. We don't get any effect. To get some effect,
you'll need to change this first value starting
from minus one seconds, and you will get this trail and you can go
even higher minus two. Don't worry if you'll get these weird edges because we
will fix them in a moment. You can always experiment
with this value, and you should aim to
something like this where you have just enough
echos to cover the Bit like this, and don't worry
about these small things. We will fix them a bit later. In my case, I can see
here a little gap, something like minus
two for me works great. But also, you can see
that we are getting this spanning
effect of the text. To fix this, This is why we
have also our original layer, because it will stay in place. As you can see, if
I'm going to disable this displacement and
echo composition, it just stays at the same place, which is exactly what we want, because it will cover
the part where it spans. Now, as you can see, it's just nice smooth
motion of melting, which is exactly what we want. Can also go to your text
and logo composition and enable our frame to see
this effect even better. Okay Let's fix these random
issues on these edges. For this, we want to create
an adjustment layer. Let's go to a layer,
new adjustment layer, and we can select it and
press Control Shift Y. As you can see, press
Control Shift Y, and here let's call
it bland echo. We would know what we are doing. Click OK. Also, it's
a good idea to save your project because DOB after effects can crash
from time to time. Let's go to File Save
S and click here, Save S to save wherever
you want on your computer. I'm going to call it
class and click OK. First effect which
we would want to use on this bland echo. Layer is fast box blower. Let's type here Fast box blower in effect and precess panel, left most lick and hold drag
and a on this bland echo. Here we can adjust the value. Maybe something like 15 should work fine because
now as you can see, we've blended all
of our image and we will not get these
issues on the edges. But as you can guess, we
get this blurry image. And to fix this, we want
to add a curse effect. Select it here under color correction curves and drop it here under fast box blower. We can do is to change this from channel RGB to Alpha channel, which basically will
allow us to change the curve, something like this. It's a good idea to start
here at the beginning to make sure that you'll get your
logo visible entirely. If you will move this line here, you'll get less of your logo. You can see here
you'll get more of it, but a lot thicker than
you had it originally, play with this value in
combination with the curves. For example, I could go
lower, something like nine, and as you can see, I preserving
a lot more of my logo. It would resemble your
original logo as well. W Discmination of
these two effects, we want to cover this gap here, because as you remember
here at the beginning, we've had this problem,
and now we fixed it. And make sure to go
as low on the blow. You can, but not too low. As you can see too is too low because we are getting
this issue back again. Maybe let's set it to
five or even seven and play around this curve and get in this really
nice animation. Second thing which we would
want to do is to melt and a bit move around this line
because as you can see, all the top parts of our
logo are perfectly fine. For more believable effect, we would want to
distort it as well. What we can do, we
can just simply go to this displacement
and echo effect, select this displacement map, press control C to copy, or go to edit copy, and then select
this bland echo and make sure to set your time
cursor here at the beginning, left mostly on display head
and move it to beginning. Then press control V to paste. Basically, we are not
just copied this effect. We also copied our key frame. If I'm going to press U, you can see that we still
have these keyframes, which we created on
this layer earlier. Now as you can see it melts and also melts these
top parts as well. But if you don't want
to melt it so much, you can set your to cursor
here at the last keyframe to be able to change it
or just left most double click on this key
frame and change the value. In my case, I would
want to have it lower, maybe something like -70. Basically, it will
distort the top part, but not as much as
the main distortion. Now we have the combination
of moving at here at the bottom of our logo and a bit of movement
here at the top. But feel free to play
around with these values. For example, you can go leg -500 and get the opposite effect. The top part will go faster. And this lower part
will go slower. But once again, don't go overboard because it
will mess up the effect. So my keys, I'm
going to left most, double click on this key frame, and I'll set to -70. And click key. Now we have
this clean looking animation. We can also press zero amped
to preview what we've got. This is our result,
which looks pretty nice. We intentionally make
it slower because we always will be
able to speed it up. It's a good idea to make
it slow at the beginning, and then we will
speed up if you want. Now we have this
really cool effect. The next video, we
are going to try to make it a bit more
three d dimensional, and also we will add a nice looking texture.
See you in the next video.
4. Adding Lava Texture: So now we have this kind
of basic animation, and let's make it a bit
more three D dimensional. Let's go to project
panel, and as always, let's click here to
create a new composition, and let's call it
three D Bovel effect. I click OK, in this composition
of three D bovel effect, we would want to drop
our melt animation. Selected and jag and job here
in three D bovel effect. So what we want to do is
to add a bunch of effects. First of all, let's
add a gradient ramp. Selected here gradient ramp
under generate left moslik, hold and drop on
this melt animation. So we would want to
change here these values. Maybe first one, let's
set it to zero as it was. And this second value,
let's bring up. As you can see, we're
bringing this point, which basically brings
this white color a bit up. I'll set mine to 970,
and this dark one, let's set here at brightness to 50 to get a nice gray
color. And click a key. Second thing which
we would want to do is to write most lick on our meld animation and go to
layer styles inner globe. Select it, left most slick
in it, and open here. Here we would want to change this blending mode to normal. If we zoom in on this effect
using scroll on the mouse, you can see that
we have this edge. We would want to change
this to nice gray color. Let's change this color,
left most lick on the color, and let's set it to
something gray, like 50%. And click Okey. Also let's set
opacity to be a bit lower. But first of all, we
would want to see it, so let's change the size, a bit bigger, something like 70. As you can see it
filled our letters, and this capacity, we can
set to maybe like 50. Before and after, we
can click on this ible to see this effect. If we will zoom out,
you can see that we are adding this a bit of
three D feel to it, as with this effect also. Final effect which we would
want to add is to write most slick on this melt animation
and go to layer styles, Bevel and amb motlck in it. As you can see, we already
have these nice highlights. We also want to
change these values. First of all, we
would want to close this inner glow and make
sure to open bevel amb, and let's change these settings. Size, we would want
to increase it, maybe something like 11, and don't go overboard, because as you can see it
doesn't look that great, so I'm going to keep it
saddle. I'm going to set to 11. Sf value, we would
want to change to leg 16. It would be a nice
subtle level angle. I would want to change to 90. It will be straight down light. As you can see, we're
getting shadows here and nice light here on top. Let's scroll it a bit down. Here, highlight opacity. We can leave it as it is. Shadow opacity, it's
a bit too much, so let's set it to 20. As you can see it's pretty subtle effect before and after, but it gives this a
bit of three D feel. Later, we will use
this as a map. Exactly as we did
before with this map, this will be the map
for our texture. It will wrap around
these edges a bit more. Let's create this exact texture. Using this map, we will apply
our texture to our logo. Let's go to Project panel and here click create
new composition. Let's call it a Lava
animation and click a key. Let's drop this three D
bible effect into it. Let's create new composition. Let's click here, and let's
call it lava texture. In the research sep this class, you'll find the BG folder and lava folder inside of ZIP file. If you'll open it, you'll
get these two presets which I've made for you just for free as also these backgrounds. Let's import, first of
all, our lava textures. Let's select it, click Import. Let's drop both them
into this lava texture. Let's see how I've created. As you can see, it's
basically any image of the lava or something
looking like a lava, because this one, it doesn't
really looks like lava, but it will work great
with this effect. Basically what we
would want to do is to have some images
from Internet, can use your own
images which you like. Any images could work
pretty interesting. Just try it out and some images works great
and some of them don't. But basically what you would want to do, you'll
have your image. I'm going to freeze mine to
show you how I've animated. Basically this is your image. You can just drop it here. Then press S on keyboard
and scale it up, so it would be a lot
bigger just like this, and then just simply
move up like this, then press P on
keyboard to create a keyframe here on the
position and here by the end, just simply move down like this. This is basically how you
can get this animation. This is exactly how I've did this animation
which I've provided. As you can see, it
just moves down, Just make sure that here at the center where your
logo is supposed to be. You have this some highlights because it will play around
with our animation a lot better instead of
using something which has dark or super white
texture inside of it. Use these videos as a reference, which should work fine. You can get really unique looks. Makes, I'm going to
press C shows a bunch of times because I don't
need to animate my image. It's already have
this animation, so let's also enable our time. Now it just moves as I animated. Now we have these two examples
which we are going to use. Let's go to our lava animation. This point, we can just
simply close this melt map because we don't need it this one as well and
this one as well. Let's go to Lava animation. Let's set it here at the start. I would be easier to find, take this L lava texture
and drop it here. First, the most obvious thing which we would want
to do is to take Alpha map of this map which we've created and
apply it to our image. What you want to do
is to click here, make sure to set your three
D bivel effect on top, Change here to Alpha Mt. If you are using
the newer version, you can just simply take this pick whip and
connect it here. Make sure to use this
pick whip and not this pick whip because this is two different kind
of pick whips. In our case, we would want
to use this under track mat. As you can see with
this track mat, we've tracked our texture
on top of our logo. If we are going to take a look, we already have this
kind of effect, but as you can see, it's
a bit to d dimensional. What we want to do is to
select this lava texture. And here and effects
and presets, let's type displacement map, and select here under
distort displacement map, and drop it on this lava texture and change it to first one, which is our map. As we did before, we can set
this first value to zero, and the second value let's
set to something like -120. Basically, what we've
done with this effect, we are just distorting this
image, as you can see. And you can play around
with this value and see what looks best
with your texture. For example, with this texture, something like -218 looks
pretty cool as well. And if you will open
this three D vel effect, you can see if we will not apply this
gradient ramp effect, we already ct getting
different results. So let's press conchal Z, conchal V. Basically
here at the gray part, it practically
doesn't move at all, and here at the widest
part of our gradient, it will distort a bit better. Also with these brighter parts, which we've created here, it also will distort a lot more. For example, if I'm
just going to disable this bevel and abos effect,
which we've created, you'll see that we have
this really flat l here and let's enable it here
and go to love animation. You can see that we already
have this feel of thickness. This is why we've applied
this effect, and once again, you can always play around with intensity to get more
pronounced bevel effect. This is how with this map, you can change a bunch of
values here just like this, and it will affect these bevels. As you can see, we'll
get a bit sharper edge. In my case, I'm going
to press controls. I'll go to leave it settle. But just keep in mind
that these edges, you can always tweak
here in bevel and amb effect in melt animation here in the three
D bevel effect. Here in the lava texture effect. We can always change
to a different of texture and see how it
looks with other textures. Basically, if you will upload any other image from the web, you can use it and sometimes it gives you even more
interesting results. Finally, in the last
video of this lass, I'm going to show you how
you can add this background, so it would be a
lot more visible, and also we will add a bunch
of glowing effects to make this effect look even more interesting. See the next video.
5. Adding Glow and Finalizing the Effect: Now we have this effect. Let's change maybe to this one because it
looks a bit cleaner. Let's create a new composition. Click here on the project
panel and click here, create new composition,
and let's call it background. Click a key. Also I would want to create the final composition,
click here, and let's call it to render Fool D. You would know that this composition
you need to render. And click a key. Let's
drop our background here, and also our lava animation, let's drop it here
to see it as well. Then we can create a
very simple background. We can just go to
layer new solid. Let's call it background. In click a key, we can add
some simple gradient ramp. And drop it on this background. Let's change this from linear to radial and move it
here at the center. This one, we can just
spread just like this. We can also swap the colors, and this top one, let's
make it a lot darker. Maybe something like
11 and click key. Here at ramp scatter, we can change this value, so we would not
have these circles. And change this ramp
scatter to 300. Now we have this
basic background, let's drop it below. As you can see now, we can
see our effect a lot better. Let's also open this
background composition. You can also locate it here, but make sure to drop it in our to render fools
decomposition. For now, we would want to
close some of these panels. So it would be not
so distracting, so let's close it
this one as well. Now we have just where
we are placing our logo, our texture, and our background. Let's go to file
import file and drop our background from
the resource step to this class, which
I've provided. Just select any background
which you like. I'll go with this one, but make sure to pick whichever
you like more. You can press S on
keyboard to resize it to make it smaller
or bigger if you want, and press t and
change the opacity. We would want to go to
really low value like 15 because we don't want
to be too much visible. Maybe even I'm going to select our texture and add
some curse effect, enjoy it here and add
some contrast just by moving this curve a bit down. Let's go to render polish
T. Now as you can see, we're getting this muted effect. Which is exactly what
we want because it will help us blend this
effect even better. We'll tweak a this
effect even more later, but the next step will
be to add a bit of glow. With this lava animation, we can just go to effects in precess panel and
just type glow. Select it and drag and drop
on this lava animation. It's cool about
this globe effect, that it also provides
a bit of shadows. As you can see, we are getting this nice little contact
shadows which we really want. With this first value
of globe threshold, we can change it a bit lower. But first of all, we would
want to expand this radius, so it would look much nicer. Maybe something
like 68 will work fine because we would want to
have these contact shadows. If we will go overboard,
you will blot it out. If you set this too little, you'll get two hot spot here
at the brightest points. Let's set it here at 70, but feel free to experiment on your texture because
on your texture, other values can work better. Glow intensity, we would want to set it a bit lower, like 2.3, so we will still maintain these shadows, which looks nice, and if I'm going to select
it and diselect it, you can see that we are
getting a bit more glob. With this value of
threshold effect, we can adjust which colors we would want to
be more present. As you can see as
I'm going bit lower, we introducing a lot of
different colors of low. Just make sure to play
around with this value to get the colors which
you would like. Just keep in mind that if
you'll go more to like 100, you'll get more
reddish color and 20, you'll get more whitish
color or yellowish. In Makes, I'm going to
set something like 37. As you can see, now we have really nice convex shadows
and a bit of globe. But we would want to
add even more globe. Let's this globe and go to edit, duplicate, and now we're
getting a lot more shadows. But the point of
the second globe is to add the actual globe, which will cover
the all ho effect. Let's change this globe
intensity to 1.5. Now our globe is more prominent, and the radius we will crank
up really nice and big, maybe like something like 500. To reduce the amount of glow
and this yellowish color, we would want to change
this color threshold. Move it it right and stop wherever you would want
to have your glow. As you see if I'm
going to go to 100%, it adds this nice glow and cuts off all unwanted
yellowish parts. Mikes maybe I'm
going to leave it at 90% before and after. As you can see, now we have this real and nice
glowing effect. And what I've added in
my original example, also is bevel and Ambus effect. We can just select this
lava animation and go to layer styles and go
to Bevel and Ambus. With this effect, we would
add a bit of highlight here at the top and a bit
of shadows below. So before and after, you can see that
we will be adding a bit of highlights on the top. Let's open it and
tweak it a bit, so it would look a bit nicer. Size we can bring it up. So now as you can see
as high as you go. You'll get this nice little
glow on top as well. In my case, I've used
something like 20, but we can go even lower and just basically
stop wherever you want. I may stop here and soften
let's set it to two. Angle, we would want to
have also straight down, L 90% shadow opacity, we would want to set it lower, maybe to 50%, but you can
play around with this value, so you would see what is
working best on your footage. Highlights, we would want
to decrease it way down 25, so it will not be so intrusive. Just play around how much of the highlights you
would want to add. Maybe in my case 44
looks pretty cool. But it's up to you to change it to wherever
value you would like to have a little bit of
nice glow here at the top. And next thing which we
would want to do is to add really nice glowing parts
on top of it because now it looks just like
some texture falling down, which already looks pretty cool. But we can amplify
this effect a bit more with really
nice glowing edges. For this, we would want
to go to a project panel and add this melt animation. Just select it and drop it here. Let's type here,
find edges effect, and drop it on top
and invert it. We would have only these lines. We would want to animate
them in such a way so it would add a bit more
glowing parts to our logo. We would want to
interrupt some of these parts and we can do this with the
fractal noise effect. Elected and drop it on
this melt animation. First thing which
we want to do is to change this blending
mode to multiply. As you can see, we already
have some highlights, which looks really nice. We can change this contrast to something really big like 950, so it would be more
prominent and brightness, let's drop it to minus 35. But you can play around
with these values to get the less or the more
of these highlights. Complexity, we also want
to bring down leg to two. And scale, let's make
it more like 200. Now as you can see
we already getting these really nice edges. It will give this
really nice highlights on some parts of our image. Let's sallow this
layer by looking here to see better
what we are doing. We would want to not
only animate like this, we would want to have
some animation within it. And I think the best way is to animate this offset turbulence. So make sure to set your time courser here
at the beginning. Click here on the stopwatch. So it will remember
this value and go here at the very last frame and move it a bit
further like this, maybe leg to 600. So if I'm going to
scroll through, We are adding this animation
and as you can see. These highlights also
moves along with our melting effect as you
can see by this edge. It also moves and it
looks really nice. Also, it will move here
along the letters. You can always press
on keyboard to see the key frame and even move it further if you
would want to have even more of animation
and movement here. Let's press zero numpad
to see how it looks. Maybe let's leave at
this more high value, but you can always play around
and speed up the animation if you would want to have a bit more movement in your video. What we also want to do is to
tent it, apply tent effect, select it, and drop
it here below, and click here to select
this second color. Something oranges like
this should work fine. You can just simply copy
these letters and values to get exactly the same
color if you would want or change to any other
color which you like. And click a key. To see better how it looks
as a final result, let's slow this layer, and also change this mode to add This way, you'll be
able just to enable and disable and change this color
to wherever you would want. Something orangish, as you
can see, looks pretty nice. Maybe a bit reddish
would work even better. Here is up to you, which kind of color
you would want to have this on these highlights. In these highlights, we can
also add a bit of glow. Let's type here glow. Drop it here and maybe
set first value to 56, intensity, maybe
let's set it to 1.1. Once again, you can
always tweak the color. The globe would be
exactly the same color as you would want it to be. Then let's duplicate this globe. With the second globe, we can get a bit more reddish color. Let's increase this
threshold to more reddish one by
increasing this value. Radius, we want to
change it to 35, it would be a bit
more spread out. If you would want to, you
can change this intensity. You can even add another glow, just press control
d to duplicate it. If you would want to
have a lot of low on your edges and make this
a lot more spread out, like 155, and intensity, we can drop it to 0.5. It will add just a bit of
int of this extra glow. Maybe if you would want to
have it a bit more yellowish, you can set it to 50. But the main color which you
can change is here and you can always adjust which tint
you would want to have, reddish or more yellowish. For example, this one, I
would decrease it a bit, maybe even more and
see before and after. As you can see, you can add a
bit of glow to this effect. You can also change this
mode from d to screen. If you would want
to keep the saddle or press t on
keyboard and reduce the opacity to introduce exactly the amount of glow
which you would like. Maybe like 70 will get
you a bit of saddle glow. Now it's pretty easy to
change any other text. So let's type here, for example, Lava, and you'll get
really nice effect. Also, you can always select your background and click here, left most slick and hold. And select this leaf stool. And then just left most
double click on it and press F on keyboard and
change this feather. If you would want to have a
bit of vignetting and set this feather to maybe like
700 or 500 and play around, maybe you would want
to simply disable this background and instead
enable more of this texture, which is also could
look pretty awesome. Finally, what you can
do is to go to a layer, new adjustment
layer and type here transform to add a bit of camera movement in
here under transform. You can just drop it here, and you can always just move scale to 150 or lesser value. If you would want to
have it a bit subtle, create a keyframe here
at the beginning. And at 3 seconds. Let's set it to 100. Press you and keyboard
to see these keyframes. You can click here on graph
editor and make sure that you're clicking here and
changing to spear graph, to see the same graph as
you can see on my screen and select this handle
left most slick and hold, and drag it to the left and to the top lick this to
smooth it out this motion, which basically
means that it will start fast and then
slower towards the end. This is how you can
get this basic, but really nice animation
of the camera movement. Just press zero pad to see the result and get really
nice and interesting results. Feel free to follow me
here on Skill Share. I have a bunch of classes
on VFX, free AI tools. Here you can find the newest
classes which I post. You can basically just here see more to see even
more VFX classes, if you would like, make sure to click here
on these buttons. I also have fundamentals
of DOB effects, complex VFfX, log animation, vientre result classes, and I recommend you to watch
this really short class, which takes only 12 minutes, but you'll get really
powerful result at the end. If you like this class, make sure to leave a positive review. It really helps to create
more classes for you. Also, share your
project with me. Basically you can find here
and projects and resource. Submit the project, and you can submit your work
which you've done. I'm watching all of them and give you tips
if you would want, and it's really cool to see your work after
completing my classes. Thank you for watching
 M Jake, Lets Create VFX & Cool Stuff Together