Transcripts
1. Introduction: Hi, I'm Jake, and this
class will teach you how to create a jumping light on top
of the piano sheets effect, which does not require
any external plugins. You don't need to
have any experience working with Adobe
After effects. You can even download
the free trial version and it will work fine. I'll explain each step we will take to create this effect. Provide you with all
the required knowledge so you could understand each setting and
make adjustments to make this effect look
exactly as you want. You can always write
your questions in discussion sections under any of my classes to
get help for me, while creating cool effects. I'm excited to see your projects after completing this class. It's the best way to
learn this software, while creating interesting
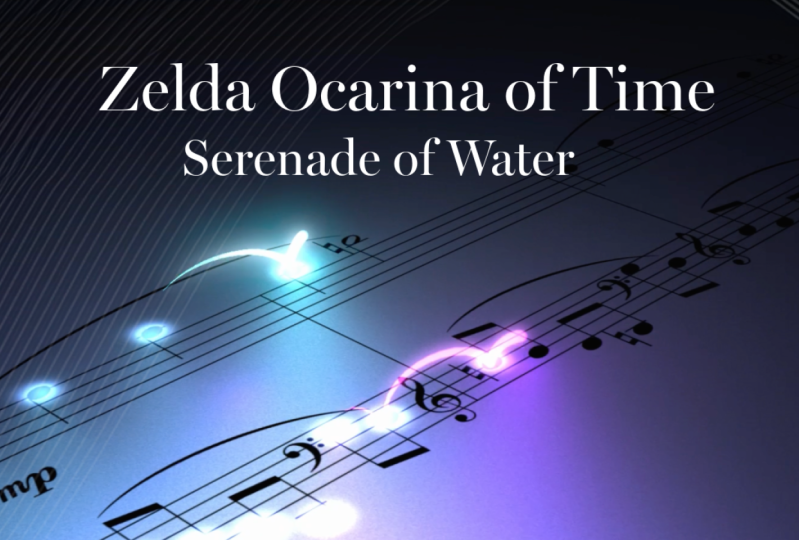
effects for fun. And to complete this class, our goal is to create
this jumping light on top of the piano
sheets effect. I'll be happy to see
it in my class as also your result after
following all the steps. So let's get started.
2. Preparing Piano Sheets: So I'm using AdobeaTorfex, 2024. I'm going to press
here on Standard, so I would have a
standard layout which should be
similar to yours. If you cannot see some of the panels which you
can see on my screen, for example, you can see
character panel here, you can just go to Window
and enable it from here, and pretty much any other panel which you can see on my screen. So I'm not going to
need this panel. I'm going to write
Mouse click on it and click Close panel. So what we need is to go
to File and Import files. These files, you'll see in
resource step to this class, so feel free to download them and just select them to Import. This music file might be not available if Skillshare will not permit me to use this music. But pretty much you can use any sangha you
want, download from I'm going to use this
as a sample because we are going to use it just
to get the timing right. And I'm going to show the
principles based on this music, but it can be easily applied to any music which
you want to use. Let's select all of these
files and click Import. And now let's create
new composition. You can click here
to New Composition or go to Composition,
New Composition. Just click here on
this little icon also. So dimensions could be fuliHD
which is 1920 by 1080. We need to uncheck this box, so we would be able to
set our parameters. So let's set to 1080, and let's call it maybe
final composition. 30 frames per second is good. And for our example, 12 seconds
will be more than enough. So here's our frames, seconds, minutes and hours. And background, you
can live as you want. I have mine set to
black and click okay. So first thing which
you want to do is to create a paper texture, and then we are going to apply
these notes on top of it. So let me quickly show you how I found these notes to
use, these piano sheets. Basically, you can
just simply type in Google piano sheets and the name of the song
which you want to use. The simpler song, the
better it will be. So for example, we can go to images to already see the notes. As you can guess the less
notes you have in song, the more beautiful
these jumps will be. So this is something
to keep in mind not to use too complicated
songs for this. So for example, I would
not choose something like this because if I'm
going to click on it, you can see that it will
have a lot of jumps, and it would look
not that great. So maybe something really
simple like this one or any other song which you know could be used for this effect. So once you'll find the
song which you like, for example, let's say
this one you like, you can just write
most lick in it and go to open Image New Tab. So this will allow you
to see this image in full resolution because we need as much resolution
as you can get, so it would look
really high quality. And simply, you can just write mostly in it and save
the image or just make it a lot bigger and just by using a
simple snipping tool, you can just simply cut
these notes for you to use. And the next video,
I'm going to show you how to create a paper texture and actually apply these nodes on top of it. See
the next video.
3. Creating Paper Texture: So let's create our notes. But first of all, I want to
be a bit more organized. So let's select these footage. We can just select one of them, then press Control,
as you can see, I'm folding control on my
keyboard and select the rest of them and just drop onto
this folder right here. Just call it footage or assets or whatever
name you want to use. Maybe let's call it assets. So first of all, I want to clean up these notes because
as you can see, we have a white
background, but instead, we want to use a
transparent background because instead of
this white background, we will use paper texture. So let's create a
new composition. I'm going to here, but you
can go to composition, new composition if
it's easier for you. Let's call it piano sheets. For resolution, we can go
with really high resolution. For example, we can
increase it because we will need to have both of
these on one single line, and it will be a lot
wider than this. For example, we can
just guess like 2060, and this is not
have to be so tall. Let's go with 510 and 12 seconds as we used before and frame
rate as 30 frames per second. Include K. Now as you can see, we have this white composition
in which we can just select these notes and
drop right in here. First one and second one. So basically, this
is the second one is continuation of this song. You can just select it here
and move it to the right. If you hold Shift on keyboard, it will move only in one axis, up and down or right to left. So basically what we
want to do is to arrange them so they would
fill our composition. You can see, for now, it's not filling entire
our composition. So this is why we would want to use something a bit wider. So let's spread out even more. If you are using
exactly the same notes which we have here, then we can use a
white composition like 3,688 because it's exact
composition which I've used. And here will be like 506. But if you use your own notes, you just need to experiment and just make it
wider. Or shorter. So your nodes will be
inside of this composition. So let's go back to
36 88 and click Okay. Make sure you just
to copy this number. It's supposed to be enough
to fit these both images. As you can see, now we
fitted them pretty well. By the way, you can always press Control Z if you accidentally
moved like this. So just press Control Z, and it will undo this. So now as you can see, we have all of our notes in one line, which is exactly what we
want because we would want our little light to
jump all of them, just like this in just
one single animation. But here we can see that
we don't want this part. So basically, we can
just use a simple mask. Just go to this rectangle tool, left most clicking it and just simply let's cut out
this part from here. So like this, we can
just see this mask one and change it to subtract, which basically we cut it
out this part from here. Also, we can just select
it one more time. And if you will hold
spacebar on your keyboard, just like this, our cursor
turns to move tool, so we can just basically move
around to see this part, and if you will let go, the spacebar, we got back
to our rectangle tool. So now we can just
simply cut it out these parts as well
because we don't really want these numbers, but you can leave
them if you want. So I'm going to click
Subtrack to cut them out. So also you can use Middle
click on your mouse, just middle click
hold and move around. It also will allow you
to moound your image. Basically, I would want
to select this one, this image and you can
just simply click this on this eyeball to see if you've
selected the right image. And with this rectangle tool, I just want to clean
up here as well. Here we can change to
sub track as well. So we would cut this part. You can easily go
to Selection tool and leftmost click on one
of the points of this, leftmost double click on
them and you can just simply change the size
by these handles. Adjust your mask. So now we've cut it out
them pretty good. Just let's make sure to
have them on single line. So basically, now
what I want to do is to have this one
overlap on this. This second image, I want to overlap with my first
image just like this. And also let's select
it and press S on keyboard to see the
scale because in our case, we would want to make
it a bit smaller, so it will align with
these lines better. So let's select
this value and just press down arrow
on your keyboard. It will shrink it a bit, and maybe 87 would work fine. Might not work
super perfect here, but it's good enough
result for us. So this is part
where it's aligned, and as you can
see, it's not that noticeable from
this point of view. So don't really be bothered with this not perfect alignment
because it will work fine. Okay, so now we've
prepared our piano sheets. We can just close them, and now let's create
a paper texture. So let's click here to
create new composition, and let's call it paper
or paper texture. This time we would want to use
the same composition size, which is 1920 by 1080, which is fulsD 12 seconds is good enough, and click a key. So here we want to create
new layer, layer, new solid. And let's call it paper texture. So first of all, we want
to change this color to more like a paper ish color. So let's go to
effects and presets. If you cannot see the panel, you can go to Window and enable it from here
effects and presets. So let's type here fill. We want to use this one
under generate fill, select it, and drag it drop
on this paper texture. Here you can just
click on this color and we can just choose
something paperish. I went with a bit
darker color just because I want to apply
a bit of texture, and it will make
it a bit brighter. So something like this
should work fine, you can just simply copy these numbers to get exactly
the same color if you want. But you can go with
any other color which you like best and cl okay. Then I want to use fractal
noise to add a bit of texture. So let's type here fractal noise here under noise and green, select it and drop
below this fill. We don't want to
really change much. We can just go to transform
and change the scale to two to get this really
small kind of texture. And second thing
we should want to do is to reduce the opacity. Maybe let's set it to 21, so we will see just a little
hint of this paper texture. We can also change this
blending mode to screen, so it would be a bit brighter. So now it looks pretty good, and this is our paper texture. So now, basically we have our piano sheets
and paper texture. And next video, we are going to make this kind of look and introduce a camera into our
scene scene or next video.
4. Making 3D Look: So now we want to combine
our paper and piano sheets. Let's close this
render queue because we don't need to
use this right now, and let's just drop
our piano sheets here as well as
our paper texture. Let's maybe set this on
top so we could see it. And let's parent
this paper texture right away to our piano sheets, which basically means that if I'm going to select
these piano sheets, this paper texture, follow along with our piano
sheets as one layer. So basically, to connect it, you can just need to
use this Pick Whip, select it and just drag and
drop here to piano sheets. You might need to click here on Toggle Switches to see
this parent and Link. Just make sure not to use
this track Mat Pickup, if you're going to click here,
use this parent and Link. There is a bunch of
ways how you can blend our nodes on top of
our paper texture. For example, you
can just simply go to Tagleswitches to see the modes and just simply
change this to multiply. As you can see, it already
blended pretty well. But in our case, I would want to make a few adjustments
to make sure to get this clean look in separate composition because we are going to apply
more effects to it, such as glow, things like this, which will be a lot
easier to make if we will have clean piano sheets
in separate composition. This is why we want to
use these piano sheets and just drop in
another composition. Just select it and drop on
this new composition icon. Now as you can see, we created another composition which called piano sheets to with these
piano sheets inside of it. We can call this piano
sheets clean because if we are going to select
these piano sheets and press Control
D to duplicate, we can actually use
one of them as a mask. So for example, this one below, we can just click
here under Track MD, select it pickup to this one
or just simply here change to Lamet if you are using older version of
Adobe After Effects. If you are using 2024 and above, you'll be able to select this track met and
connect it here. Now it's trying to
connect it via Alpha met, but in our case, we want
to change to Luma Mt. Let's click on it,
and as you can see the darkest
parts are cut out. We want exactly the opposite. This is why we can just
click here to invert this mask to make sure that
we've cut out this properly, we can just also apply a fill effect and see if we
have these kind of lines. Basically, we would
want to use a mask and simply just cut
these lines out. Basically with my mask, which is not really visible, let's change it to,
like, dark one. So now you can see it better. I just want to cut it
out these small parts, which wasn't visible before. And this is basically why we
want to clean up our notes, so it will look
really, really nice. You could argue that it's
maybe not necessary step, but if you want to have your
work look professional, you would want to clean
up these kind of moments. So let's click here to change this color to black and clicko. So now we have really nice
clean look of our notes. Let me explain why
this method is more superior than this one which
I've showed you earlier. Let's just simply delete this one and drop here
this clean one. It's more superior
because you can just open this composition and add
any kind of changes here, just add in a random shape, and we can just animate
it here and it will automatically become visible
in this composition. So this composition,
final composition will look a lot more cleaner and we can just separate
in different compositions, where we can add random stuff or really cool stuff
like this lighting, which we are going to use. So this is why we've created another composition where we
can apply future effects. So I'm going to delete
this shape layer, and let's go to final comp. Okay, so now let's do
the actual fun stuff. We can just select
these piano sheets, and we've connected
our paper texture using this parent it like this. And now we can just
simply click on the Staggle switches until
we'll see this three D icon, which basically
makes these layers three D. Just click
here and here. So both of them would
be a three D layer. And now we can just
select these sheets, press R on keyboard
to see the rotation, and we can just
rotate in any axis, just like this, which
is pretty cool. So first of all, I want
to rotate in X axis. So in my original example, I went with -61 degrees. But you can play around
and see you like best and also I rotated
to -47 degrees. And as you can see, we already
getting this kind of look. But for now, we can see that our paper texture is cut out. So let's select it and apply effect effects and presets
called motion tile effect. So let's type here motion
tile and just select it and dragon drop on
our paper texture, which basically will
allow us to expand our paper texture to
cover all of our screen. So something like 500 7,350 in width should work fine to cover
all of our image. So next step will be
to animate this path. So we would make
sure that we have a clean looking
path of our camera, which goes along with
our light trails. First of all, we want
to make sure that it's a lot closer to the camera, so we will see better
our light trails. So in Mase I would want
to make it a lot closer. So I'm going to change
this Z position. You just can select
your piano sheets clean and press P to
see the position. And this last value
is Z position, which basically makes us go
a lot closer to our nodes. So in my case, something
like -373 should work fine. And maybe let's move a
bit to the beginning. So first value, I'm
going to set to 2156. And I value, I'm
going to set to 3.9, which basically you can just play around with this
to make sure that your camera is about at the
beginning of our animation. So if you are using
other sheets other than which I provided in
resource step to this class, then you just
eyeball this kind of position which you like the
most for your starting point. And the next video, we are
going to introduce the camera, and we actually going to animate this path.
See next video.
5. Camera Movement: So basically, we can just
select this piano clean and just animate by this path,
which seems intuitive. But for this light trail effect, which we are going to apply, it will mess up the animation. So this is why we are going
to use a camera instead. So let's go to layer. New camera. We want to use a preset
of 50 millimeter lens, which basically the same, which we can see here
and just click Okay. So as you can see, we've added the camera and nothing changes because it's exactly
the same camera which after effects
uses is default. Also, to move our camera, we want to go to layer new
null object, and click on. We can also press
Control Shift Y to be able to change
the name of it. And let's call it camera
path and click K. So if you will turn
this to three D, we will be able to
connect our camera to this path and move
it in three D. It will be much easier
than just selecting this camera and pressing P on keyboard and trying to
animate the camera. As you can see if we
are trying to animate the camera it really
not behaves as we would want because
we would want to have this clean path
from right to left. And with this path, it's
almost impossible to animate. Also, it would be
intuitive just to select this piano layer and here camera path and just simply copy these values of rotation. Let's do exactly this -61 and this one is
irrotation to -47. And as you can see, it
lays down on our sheets, which is super easy to animate. But here's a little
unexpected thing which can happen if you will just animate this path and then just connect
this camera to null. So let's try to connect it, and as you can see it all
moves not as expected. So this is why we don't
want to connect right away. We can just press Control Z. So instead of
connecting the camera, here's a little trick
which I've come up with to animate this CM. And what we want to
do right now is to press P on keyboard
and create a keyframe. Select your layer, press
P to see the position, left mostly on the stopwatch
to create a keyframe. And if we zoom out using
Scroll on the mouse, you can see where
our nodes ends. So it's just
basically we can set our time cursor maybe right here and move this up till the
end of the edge like this. Of our layer of the sheets. So if you are new
to after effects, let me explain what is keyframe. Keyframe basically
the points in time, which remembers the value
of solving property. So in our case, we've created
first keyframe, this one, which remembers these values of the property position
in this point in time, which is 0 seconds. And we later created another keyframe at 3
seconds with these values. And now basically after
effects goes from this value to this value and creates this
animation, as you can see. And this basically will be
the animation of our camera. But once again, we
cannot just simply just select our camera
and connect it to this camera path because
it will mess up and use this rotation
properties of camera path. This is why I'm going to press Control Z to undo this step. And before connecting the
camera to camera path, we want to select
this camera path and press our own keyboard and change this rotation to
original to zero and zero. So as you can see, we
still have this path, but it doesn't have
this kind of rotation. So now we can safely connect
our camera to this path, just like this and
see how our camera travels along this
path up till the end. As you can see, this
path is a bit too far. Basically, we can just see
where we want to end our path. For my taste, I want
to end it here, so these notes to be about
here and then it will touch this last note and
fly out our light trails. What we can do is press
on keyboard to see these keyframes and we
can just basically create a keyframe inside of this
path, just click in here. And this last one, we can just simply select it
and press the lead. So now we have a perfect
path along the way. So this is a quick
little technique, which allows you to move
your camera along the path. Maybe there is much easier ways, but this exact technique I've used to create this animation. So now what we have
to do is to spread these keyframes to
like 12 seconds, so it will take up
all this space. And what we actually
want to do is to drop this music inside of this composition and
just time it well. So let's press zero numpt so you can see here
at the beginning, we want to have a
little pass because our light trails will come
here and touch our first node. So this is why we want
to select this keyframe and press F nine
and here as well. So now it will have a little
pass at the beginning, and then it will go faster. We can change this path a bit. We can just go to Graph
Editor and here if you will click here and change
this to dit speed graph, you'll be able to manipulate
the speed of our animation. So here, basically
you will be able to make it faster or
slower towards the end. As you can see by
moving these handles, you always will be able
to tweak to make sure that your camera can keep
up with this animation. So once we need
to make sure that it will go along at
the right timing, we can always come back to
our camera path and adjust the speed so it will
follow along as we want. It will be one of the last
steps of this effect. I can just simply say that if we will select this position
and go to Graph Editor, we can just tweak it a bit, maybe set it here at
influence of 20%. You can see a little
influence here. So it will have a
little pass and then it'll go all the
way towards the end, and here maybe let's
change it to 28. So this nice little path should be enough to keep
up with the music. But it's really
hard to tell right now because we don't
have anything to follow. So next video, we
actually going to create a path for our light
trail. See the next video.
6. Light Path: See this last is taking
a bit too long time. So let's just say we are
going to make the path for these first three parts. So it will not take
too much time because the same technique goes to this one and to
these nodes as well. Let's create a path
for these first nodes. So for this, we want to go
to layer, new, no object. We can just simply press
Enter and keyboard and let's call it Light one path. We want to also make it three D, and we want to make sure
that we are placing this light path in
exact right moment. To start this animation, we want to place our null
object exactly on this note. And with no object, it's really hard to find this
place because we cannot actually see where our
null object is in three D, and it's much easier with the light. So let's go to layer. New light. Let's create a light. We can leave it at point light. One, we will use
point light Type, and we can change this color
to whichever you want. In my case, I've used this
warm color, and basically, if you want to have
exactly the same color, you can just simply copy these values to get
this color. Click Okay. Let's also set this intensity
to pretty high like 177 because it will
light up our scene and it should be pretty
high. Let's click Okay. So for now, as you can see,
it's somewhere in our scene, and we cannot really
tell where it is. But it's much easier than
just in a object because we can just simply drag
by this green arrow, and as you can see,
it's right around here. So this time, what we can do, we can actually press P
on keyboard to locate our position and just move
this last value leftmost lik, hold shift, and move
it to the left. To reduce this value. As you can see, I've
said it to -1,400. And with this value,
we can bring it down with the second value. And as you can see for now, it's exactly on these letters. And just simply move it around, we want to make sure with the first value we're
moving left to right, with the second value
we're moving up and down. And with this third value, we are moving further away
from the camera or closer. So our goal is to place this light exactly
at this first node. So make sure to place it just
above something like this. So you feel like it's just
laid it up under this node. We can even go a bit up like this that we need to have this kind of feel like
it's laid up from behind. This is how we know
that this light is exactly on top of our node. And now we found our
place in three D, where null object should be because this process will take
some time and it's really important that you
will take some time to really find this place of the light on top
of this first node. Because when we will
animate this light path, it would be much, much easier. But the accuracy will
really depend from how accurate you'll point this light on top of your first node. So let's say we are
happy with this result. And as you can see, it
would be a nightmare to try to just animate
this position. Just like this. It would take a lot of time and it's basically not worth
it to do this way. This is why we created this
light path, no logect. So let me delete
the second keyframe because we want to go
back to our first note, where we found it
in three d space. And let's make sure to
not have any keyframes. So once you're happy with your light on top
of the first node, we can actually connect
to our null object. But before, we want
to make sure that our null object is
also in right place. So let's press P on keyboard. Make sure that it's also in
three D, by clicking here. So it's three D layer. So let's press P to see
only deposition and just simply select first value
and press Control C to copy. Here Control V to paste. Second value also Control C to copy and Control V to paste. And copy the last position of the point light in this space, control C to copy and
Control V to paste. So now as you can see
our null object is exactly at the same place
where our point light. And now, finally, we can just simply connect this light
to our null object. So now will be the cool part of the easy animation because
now we can just simply rotate our light exactly as we rotated our sheets at the
beginning of our class. So select this
piano, clean sheets, and press R to see the
rotation properties. We need to copy this rotation of rotation and paste into our
light path just like this. And then just select
this one of rotation, also control CoCpy and
control V to paste. So now as you can
see, we've placed our light in exact same
dimensions as our nodes. And now it will
be much easier to animate this because if we will drag by this
handle, as you can see, light follows our null object, and now it's much easier just to animate this light
along our paper. So I'm going to press
Control Z a bunch of times to make sure that
I'm in right place. At this point, we can just
simply close our light. We can even lower it
because what we want to use is our null
object of light path. So let's press P to
see our position. We can close this one, too. And to make sure that
we have a right timing, we want to take this
music and place it above and press
LL Fast on keyboard. As you can see I'm pressing L. And if I'm going
to press LL Fest, I'm going to see the wave form, which is exactly what
we want because we can see where the first
node appears. So let's place our time cursor
here at the first node, and also let's click on this light one path position
to create a keyframe. So after effects would
remember this first position. So what we can do is just simply scroll through
at the start. With the wheel on the mouse, we can just simply zoom out. And now by these arrows, we can just simply
move our light like this to make sure that
it's out of our frame. So now as I can see, we
can just simply move this slide it to go
to the first note. And now we want to
move the second node. So let's move it just like this and find this second node. As you can see, we are going to make sure that to
place our time cursor exactly these spikes
of our melody and then place this keyframe just
beneath our spikes. So it will be exactly
the way we want. For now, we don't
want to really spend time on this arc motion because we will add
it a bit later. Now we want just to
make sure that we are placing our key
points at right time. And to see it a lot better, we want to create a new light. So let's go to Layer, New light. This one we will change to
ambient because we want to have a bit of light in our sin, not just from this one point. Ambient light could be neutral, so let's set this color
to white and intensity, we can set it to really low
value like 55 because we just want to fill the light but not to bring too much
light into our scene. Click Okay. Now as you can
see we've added our light, but we don't really
have a fall off. So this is why we can use not ambient type light and let's maybe change
it to point light. Just click here at ambient light and change this from
ambient to point. Now we can just simply move up in scene, and
as we did before, we can just press Peon
keyboard and move it closer to our scene like this. Then we can just move it down to make sure that we have a
nice looking vignette. And finally, what we want is this light to follow
along with our camera. So this is why we want to connect this ambient
light to camera path. Let's make sure to bring it
down to this camera path, so it would be easier to use this pick web and
connect to camera path. Now this light will
travel along this camera, as you can see,
it's just stuck to our camera and it's
illuminating here. And if we will disconnect, you'll see that it will stay in place and we will
travel through. So I'm going to press Control Z because we would want to have this light to illuminate
our whole animation. So now when we've
set up our light and it's much easier to
see the nodes itself, we can just simply move to
the next spike in the melody. And by just using these arrows, just make sure to place our
light on each of these nodes. Here's another spike
and then just move it here to another spike. And just repeat this process
to complete your song. I'm going to do only
first three parts because mainly you can just do it
to the rest of your melody, and I just don't want to waste too much time
of this class. So as you can see now, I've created this kind of animation. To the first three path because exactly the same you are going to do to
this part as well, just by creating another path, another light for
these jumps as well. So for now, we have this
pretty linear path, and it's exactly what
you want at this point. To add this arc motion
of this jumping, we can just simply
select the span tool. Select your path and just
click on this rectangles. Just let mostly hold and drag. So as you can see, just
by dragging this that, we can create this arc motion. So basically, now we have this
arc motion for this jump, and we want to add all
of these ones as well. So basically, you can just
simply click and drag and as you can see it immediately mess up
our first arc motion. Let's press Control Z. Here will be a bit more
complicated because now you will need to hold
Alt key on keyboard. It will allow you to create arc motion only from
this point in time. As you can see, it
will not mess up this first arc and it
will add this second one. Same thing you would want to
do with the rest of them, hold old key on keyboard. As you can see, I'm folding
old and leftmost li and drag up just like this to
create another arc motion. Then just scroll through
and create here as well. And my advice is to go over this line with a bit
higher jump like this. It will look more interesting. So as you can see, we
have this big jump, little jumps, and big jumps. So this is how you can add a bit more interesting
kind of animation to your scene just by adding this a bit more
exaggerated jumps. And then you can just play around and create
jumps which you like. So here I'm going to
live as small jumps, and here I want to
have a bigger jumps. And once again,
here small jumps. We can just scroll
through to make sure that we able to change our
path exactly as we want. And by the way, if you want
to change the previous one, you don't need to hold Alt. Now you can just
simply drag it just like this without
holding old key. But if you are
creating for new path, you need to hold old key again and just
create a new jump. In any case, you can
always press Control Z to undo and fold Old and
redo this jump again. If you would want to
change any of these jumps, you can just left most click
on them without Alt key, then fold old and
create another path. Basically, I'm clicking them
and then Alt key and create a new path if I would want to
adjust this jump in motion. Now we can just simply
press zero Numpad and see if these jumps looks
right with the nodes. So as you can see, it looks
pretty good because we can really feel like this
light hits these notes, and we can hear the sound. In some melodies, it probably could be a bit harder to see these spikes
because as you can see, here I cannot see any spikes, but here I can see the spike. So you need to be careful and find the spikes of the notes. So your melody will hit
at the right timing. So this is also will be pretty crucial part to get the timing right
because in next videos, we are going to add this
really nice light trail, as well as this
light up animation. See you in the next video.
7. Light Up Animation: Okay. So once you get your path, you need to make sure that
it's aligned properly with the sound because now we
are going to stylize it. So first, really easy part is to add this light on
these little notes. Let's do exactly this. It will be pretty easy to
do is basically you can just use this piano
sheets clean. Just let most click and drag and drop on this composition
to create new composition. And as you can see, we've
created our new composition. We can write most click in it and go to composion settings. And here you can
just simply call it light animation notes.
Let's click Okay. Okay so now we have this
new light animation notes, and here we can just basically
create our animation. Once again, to get
the timing right, we can go to final Comp and
copy our music, Control C, go to light animation notes, and press Control Vito
paste and press LL to see, once again, our spikes. So this process will be pretty easy because we
just need to create simple elaps which we are going to cover
all of these notes. So basically, you just need
to left most click and hold and change to
the ellip stool. Zoom in into your
image here by using scroll on the mouse and
just with middle click, you can just move around
and make sure that we are creating a nice little
circle on top of this node. You can start from the center, left mouse click, hold, and hold Control, so it will create from the center and something like
this should work fine. So as you can see, it's not
a perfect circle like this. It's a bit squashed. So something like
this would work great and just release it. Okay, so now we've
created this shape. We can just basically press R on keyboard
to rotate it a bit. But to rotate it
from the center, we need to fold Control, Alt and home on keyboard. As you can see, we've moved our anchor point to our center. So once again, it was
Control, Alt, home. Or command fault home
if you're on the Mac. Then just press RN keyboard
and rotate it a bit. It will just cover the
note a lot better. So now we need to make
sure to set the stroke to none clip key and fill, we want to set it to white. And now we would want to
add some glow effects. Let's type here
effects and presets glow and under stylize, use this low and dragging
drop here on our shape layer. Basically, here you can play
around with these values, but I'm going to just
tell you what I've used. Basically, this is the
radius of our glow. As you can see if I'm going to increase this value
of intensity, it changes the
radius of the globe. So my intensity was like six, and radius was like eight to
get this really tight glow, then I've duplicated this glow, press Control D to duplicate. And second glow,
I've set it to 25 to get a wider radius
and intensity, I've set to 8.5, and by the way, make sure to go to
Project panel and make sure that you're working
in 16 bits per channel. With the glow, it's
really important to work in this bit rate. Can hold Alt key on keyboard and left most lick
in it to change it. As you can see in 32 bits, it works really different. So make sure to hold
Alt and swap with the left most l here until
you get 16 bits per channel. And you'll get
exactly the same glow as I have on my screen. So finally, I want to go to Effects and Controls and
press Control D to add another glow to have really nice and bright glow
here in our composition. We can click here on the
Tuggle transparency grid, and basically to
animate them in, we don't want to use just a simple
transparency animation like this because it
will look not that cool. But instead, we can
use a scale animation. Select your shape layer. We can press Enter to rename it and let's
call it light up. First. And once again, select your music, press LL on keyboard to see these spikes. And now we can just
simply animate the scale, go up from the first spike. So let's cut this layer to this moment and press S on
keyboard to see the scale. And here at the beginning, we want to set to zero. So it's completely invisible. Create a keyframe, and then just let's go to our
preview panel here. If you cannot see this panel, you can just go to here window and enable this preview panel. And just skip six frames. So as you can see,
I'm directly on top of this keyframe, then one, two, three, four, five, six, and now we can just set
this value to 100%. So basically, it
will lay it up and select both of these
keyframes and press F nine, so it will laid up
just like this. It's really cool
animation because if you're going to
go to final comp, you're going to see
that this light will be just lighting up our node here. And to see it, you just
need to drag and drop our composition into
this composition here. But we don't want to
just drop it like this because it will be a nightmare
to reposition it instead, and a press Control
Z to undo this. We want to select
this piano clean, press Control D to duplicate it and swap this layer
with this layer. So you need to select this one and select this
one which we've created, late animation, and make sure
to hold old Keyon keyboard. As you can see, I'm holding
old and left mostly here, dragging job on top of
this duplicated layer. And as you can see if
I'm going to release it, it simply swapped these layers. What we can do is to disable the audio because we have
audio in our SN here. And now, once we are
scrolling through, you can see that this
light lights up. And we have this really cool
animation of it lighting up. It's much more interesting
looking than just having a simple
transparency animation. And we can make it
look a lot cleaner. But let me quickly show
you how you can just add these notes to
all other parts. You can just simply go to our light animation notes and press Control
D to duplicate, move to this second spike. Then make sure to move
it to the second node, then go to the second
spike to this next spike, Consul D, move it here. So it will start here, move over, and just simply
cover all of the nodes. Duplicate, go over, and
move it, and so on. So you will have this animation of them lighting
up just like this. And you'll need to go
through to make all of them. I just don't want to waste
any time of this class. Just make sure to line up with these spikes in your music. So let's go to final Comp. And now as you can see, we have this nice lighting up animation. And also, as you can imagine, we would want to make
this look a lot more interesting than just
this white blob. To make this look
more interesting, we can go to Tuggle and
switches and changes to ED and it looks a
bit more interesting. But we can add
really cool effect if I'm going to here
to see effects and presets or we can
just simply close this panel to see on
effects and presets. We can apply effect
called CC blabs. So here under the sort, select this blabse
effect and drag and drop on our light
animation notes. To see the full
name of our layers, you can just simply
click here and jrag it by this little dash. To use all cool things which
this effect can provide, we actually need to create a bump map for this effect
to work really nice. To create a bump map, it's really easy to do, but you need to use the
clean piano sheets, once again, select it and
drop it on this create new composition basically
let's apply a fill effect. Here undergenerate,
drop it here on this piano sheets clean
and set it to white. Also we want to
duplicate this layer, and on this layer below, we want to change it to black, just like this, just to have
this outline of our nodes, and we actually
want to have this a bit more visible than now. So we want to use
effect called minimax, and here the channel, select this effect and drop
it on this layer below. Here set to maximum and set this channel
to Alpha and color. And radius, let's set it to one. So now, as you can
see we are getting this as our bump map. So let's also write mostly here at this
free space and go to composition settings
and change this let's just call it bump
map and click a key. Basically, it will help
us define these edges of our nodes and make it a bit
more three D dimensional. So let's see what I mean
just by going to final come, and let's go to Project panel
and just drop this bump map below of all of
our layers because we don't really need to
see this composition, and we can even disable it because we are going to use only information from
this composition. And let's go back to our
light animation notes and go to effective controls. And now, finally,
in here blobbiness, we can use our bump
map in bb layer. So let's change it
to this bump map. And already you can see that
we have some changes here. But to get the exact
look which we like, we need to change these values. So softness, I would want to change to, like,
something like three. So as you can see it already
jumped inside of our note, which looks a lot better. And cut away, let's
set it to two. So we also will apply this effect on these
edges of our nodes. So we will have really
nice looking highlights. So this is pretty
cool because now you can see with this effect, we are getting a bit
of light on our notes, which makes our notes a
bit more dimensional. And we are getting a
lot more pleasant way to cover this note,
as you can see. And as you can see,
we really getting these nice metal looking
shapes on our effect, which gives you this feel like it's a bit more
three D dimensional, which looks really, really nice. And by the way, you
can always play around with these values
to see what we like best. Also, what I would
like to do is just to duplicate the light
animation notes and press Control
D to duplicate. And this below, I
would set to normal. And here we can just not
use a blabbe effect. Instead, we can use also
really cool effect, which called CC glass. So in effects and presets, let's type CC glass
effect and drop it on this light animation below
layer of this light. So let's delete
this blabse effect, and let's try to use
CC glass effect also. So what we want to do
is to go to surface. We also want to change this bump map to bump
map, which we've created. And also, we want to set
this to really small value like 1.6 and height, we can set to four. And displacement maybe
let's set it to 155. Also we want to go to light, and we can use after
effects lights, which basically our lights, which we've used here
in our composition. So let's click Okay.
And as you can see, it already takes the colors of our light, which I've used. So basically, here you
can play around and choose what you like and
use or effects lights, which is a lot more neutral
or after effects lights. I'm going to leave at
after effects lights so we would have more
color in our scene. And once again, you can always play around with this value. To get exactly the amount of
this three D fill of metal, as you can see, of this
effect, as you want. So in my case,
maybe I'm going to use something really small, like one and one, just to add a bit of thickness
to this effect. And before we move
to the next video, let's maybe add a bit of
color correction because I already want to see
these warm colors, which you can see in
preview to this class. So it's pretty easy
to do Is just to go to layer adjustment layer. Let's set it above a fall. And let's rename it to CC, which stands for
color correction. And basically, I want to
add some curves effect. To add a bit of contrast,
just like this. And also, I want to add
hue and saturation effect. And basically, I want to crank
up the saturation to 24. And as you can see,
we already get these really nice and warm
colors into our scene. And the next video, we
are finally getting to make this really
nice light trail, which will jump on top of our notes. See
in the next video.
8. Light Trail Effect: So let's finally
learn how to add these light trails on our nodes. Basically, I've used
a particular system, which is built in
to after effects, so you don't need to have
any external plugins, which can be pretty expensive. Okay, so let's create
a layer, new solid, and let's call it
light one trail. Let's make sure it's comp size. Let's click here, M C size,
and let's click Okay. We are going to use effect which called CC Particle world, not particle system,
but particle world, which basically a three D
version of this effect. Let's drag and drop on
this late one trail, which is exactly what we want. Now let's apply some changes to this whole thing to get the exact look as you
saw in the preview. So first of all, let's
go to grid and guides. Let's disable all
of these checkboxes because we don't want to
see all of these things. We just want to
see our particles. And let's close it here. And birth rate, I want
to crank up to 500, so it would look pretty solid. And longevity, I would want
to change to smaller value because I want them to
die off a bit faster. Then here in Producer, we can link this
position to our light, not exactly to our light, but to our light path. And it's pretty easy to do. What you want to do is
just to leftmost lick. While holding old
Keyon keyboard, Leftmost click on
this position X. And here we can just simply
paste our expression. In resource step to this class, you can find this
expression C file. Basically, you can just open it and copy this first expression. Select it and press
Control C to copy. And basically go to this
producer position X, select it, and press
Control V to paste. So basically, as you can see, it moved to the point in X axis. For this expression to work, it's really important that
you have this name right, exact the name which you've used here in path for light path. For example, if you will mess up this or change to
any other name, you can see that we'll
get this orange bar, which means that
it doesn't work. So make sure to use in this expression exact
name which you used here. So I'm going to press
Enter to be able to copy this name and just
make sure to use here. So basically, whatever name
you have, it will still work. Just make sure to paste in here. But if you've used exactly
the same name as I've used, you'll have no problem
with the pasting of these expressions in
each of these axes. So let's copy the second one, select it, and here
and position Y, old old Keyon keyboard, and left mostly on
this Y position and press Control V to paste. Same thing we want to do with this last one, move it here. Hold skill on keyboard, leftmost click on position Z, leftmost click, and
control VT paste. Once again, you'll
need to rename all of these Light one paths to exact same name which
you've used for your path. As you can see, now
it looks pretty big, so this is why we want to select our light trail to be able to see this effect.
Let's close it here. And what we want
to do is to change this radius to
really small value. In our case, we even
can change it to zero. Just set it each of
these values to zero. Next thing which we want
to do is to go to physics. It set to explosive,
and it's fine, but we just don't want to
use any of these values. So basically, once
again, we can just simply set them to zero as well. So let's set each
and every value of these values of this
physics step to zero. So now as you can see, we are
getting somewhere because we now have our
trail, which we want. So let's go to particles. Here we can just close it
and here close it as well. And here in particle type, we will change it
to a faded sphere, which already looks
pretty interesting. But we want to change
the birth size to 0.15, so it will be smaller. Then that size, we
will set to zero. So we would have this
tapered and start variation, we can set it to zero,
and max opacity, we can set it to 100%. So it would be super visible. What I want to do is to go to effects and presets and apply mate choker effect and
just drag it up here. I just want to cut
out these kind of not clean parts because
as you can see, we have these edges and it doesn't really
look that smooth. So with this matchuker effect, we can just simply change geometric softness to, like, 47. So we will have this really
nice and thin light trail. And here in choke we
can set it to maybe 77. And maybe let's set
it this to one color. So let's apply fill effect. And with this fill effect, it would be much easier to change to whatever
color you want. So basically, you can use these values if you would want
to use same color as I did because there's too much
variation and we don't really need that much variation in
this little light trail. By the way, we will use this as a center of our light trail. It would be a bit thicker, but we want to have a
bright, nice center. And then we will add a bit
bigger glow on top of it. So talking about glow, let's add a bit of glow
under stylized glow, we can just type here
effective presets and apply here below fill. So glow threshold, we
can set it to maybe 61, and radius, let's set it to
something big, like 116. So it would be just a
bunch of glow in our shot. Can duplicate this glow, select it and press Control D, and now we can see
this white radius. But this time, glow radius
I want to set to zero, which basically will blow
out into white color, more like whitish color. And this radius, I'm
going to set it to 33. With this threshold, we
can change the color which we are going to
use for our light trail. So just keep in mind
that you can change this threshold to introduce
some colors if you want. In my case, I just
want this hard light inside of my glow. And maybe I'm going to increase
this intensity to 4.1. Okay, so as I said earlier, I just want to make this as a light inside of
my light trail. So let's change
this mode to add. So now it looks even
more interesting. And basically, I just want
to duplicate this light. So select it and press
Control D to duplicate it. And with this second
light, we are going to add a bit of glow around
our main light. So just select this bottom
one and let's apply some changes to make this
second light as a glow. So what we can do is to use
this met choker and set this geometric softness to
55 to blurt it out a bit. And Coker, we can set to 33. So we'd have this glow
around of our main glow. And in glow itself, we would want to
decrease this value to 0.4 of second glow. So before and after, you can see that we've added this really nice goldish
color into our scene. So now we getting this really nice color
and jumping glow. Final thing which
I want to add is a little lights below the
notes which already light up. If you take a look here closely, you can see that it has this little lights cones
below of each light. It's pretty easy to do,
but as you can see, it adds a bit more magical look if we are going to add
a little light here. So the next video, I'm
going to show you how to add these little lights
in pretty easy way. So see your next video.
9. Finishing the Effect: So, finally, let's
add a bit of light here below these notes, which will add a bit
more magical look like it's not just white color, and it really has
some light to it. So this is pretty easy to do. Basically, what we
want to do is just to find our light path
and light itself. What we want to do is to select this path and press P
to see the position. And basically, what you
want to do is to select this point light and press
control D to duplicate. And just link with our path. So basically, it will make
this light stay in the place, as you can see here. So if I'm going to press Control
Shift H, as you can see, I'm pressing Control Shift H, we can disable all of these
outlines to see it better. And as you can see,
it looks a lot more interesting than just
having this kind of light. One thing you want
to do is to select this point light which we've created and change the color
to any color which you want, just simply to distinguish them from other lights
in our composition. And what we want to do
is to animate them. So press T on keyboard. We want to set this
intensity lower because it's too high to 100, create a keyframe and
about six frames earlier, we can just simply set
this intensity to zero. So let's click here
one, two, three, four, five, six,
and set it to zero. So now we can just
cut this layer here and see how this laid up. And stays light here. So what we want to do is to copy this animation because we would want to make another
copy of this point light, press Control D, to
duplicate, set it above, set it here to this
second one, and cut it. Then press C and press
ControlV to paste this intensity and make sure to have this
kind of animation. And later, you can change
this to also yellow color. Just make sure to
place here this light, which we've duplicated
and unlink them. Make sure to unlink only on this keyframe of
this second node. So I'm going to unlink it, and basically, it means
that it will stay. So as you can see it stays here. You can see that it emits light. And once again, we find
the next node here, just simply duplicating
here, cut into this moment, link it, once again,
selecting this light, which is linked setting
this time concept to the next, light, duplicating it. And cut into this moment
and I'll link it. Same thing you want to do
to the rest of your lights. If you would want to add this really magical and
nice looking effect, just make sure to add these
animations here and here. So these lights would
be not so bright. This part is not that important, but it really gives a little
something to this effect. And once again, you
can always go to CC color correction and adjust your contrast
and brightness. Also, you can adjust the saturation if you like to get these really
nice and warm colors. And basically, you can
really play around and even animate the lights goes
off or wherever you want. The same thing you can do with this other light
because as you can see, I just made this a
lot of lights and then introduced another light and just change the color of it. Basically, to change the color
of it, it's pretty easy. You can just go to your
light, which is the main one. You can also change it to any other colors just for you to be able to
easily find it. So basically, for another
light if you would want to use in your composition
for these lower notes, you would want to go to lights
and change to blue color. As you can see, we already
changed this color, and you would want to go to these light trails and
also change this color to blue and this color to blue
also of this light trail too. As you can see, just by playing
around with these colors, you can really manipulate
how these colors look. So as you can see just
by changing a bit. You can get this second color which you see in the preview. And of course, these
lights as well, you would want to change
to blue color as well. So they would also
match your new light. So this is basically how you can add another light into
your composition. I just don't want to waste time to repeat all the steps
which we already made. You can always animate
this to go out. Like to zero again. In this light animation presets, you can press S on this laid up, and it will light
up and lay down. So maybe this is something
you are interested in. So as you can see, this
is how you can add this little animation
of this one goes out. So this is something you
can play around with, maybe even make not
go out completely, but stay really small
and nice like this. So this also can look
pretty interesting. Final thing which you can add is using this camera
which we have here, we can add here in
camera options, depth of field, which
basically adds a real blur. We can just open this
aperture to maybe like 33 to see the blur
and blower level, let's set it to also big value 275 to actually see
the blur and finally, what we want to do is to find
this right focus distance. You can just lower it until you'll get something in focus. For example, now you
can see that this is around here and
here is blurred out and just simply reduce this focus to make sure that you focus something around
your light trail. So maybe something like
1330 should work fine. As you can see,
now it's in focus. So play around with this value until you'll get your focus
exactly where you want. I really like this,
how this looks. So I'm going to repeat this animation and
select all of these. And basically, I'm
going to paste here as well because I think
it looks really cool. By the way, if you want to
play around NPV much faster, you just need to disable or light trail because it
takes a lot to render. Also, you would need to
disable depth of field, and now it already will
be a lot faster to work if you would want
to tweak these parts. So this is something
to keep in mind. If you would want to
preview a lot faster. So make sure to disable them while you're working
on other parts. By the way, you can always go to these clean piano sheets and add some draft
shadow effect. If you would want to
have them a bit on top of our paper like it's
floating on top of it, something like this and reduce
the opacity to like 25 or maybe even 15 because you just want to a little
hint like it's floating, and it adds this three
D feel to it as well. And make sure that angle
is right, maybe leg down. As you can see, with
this and without it, it really adds this three D feel even though you've created
this in offer effects. Feel free to follow me
here on skill share. I have a lot of classes on VFX. As you can see, you
can click here See More and find even more effects, as well as I have
a free AI tools, which you can use to
create really cool stuff. This section is for new classes, which I'm creating
pretty often and also fundamentals of
Ado after effects, which basically
gets you covered on text animation and
even logo animation, as you can see, Also I
have some complex Vefts. If you want to learn
this kind of stuff, DaVinci Resolve class
for color correction, color grading, and a
bit of skin retouching. I really recommend you
to watch this class. It takes only 12 minutes and you'll get really powerful
result at the end. By the way, feel free to
submit your projects, and I'll give you feedback
if you want and leave positive review because
it really helps a lot to create more
classes for you. Just follow me here
on skill share, and I'll be happy to see
you in my next class. Thank you for watching.
 M Jake, Lets Create VFX & Cool Stuff Together