Transcripts
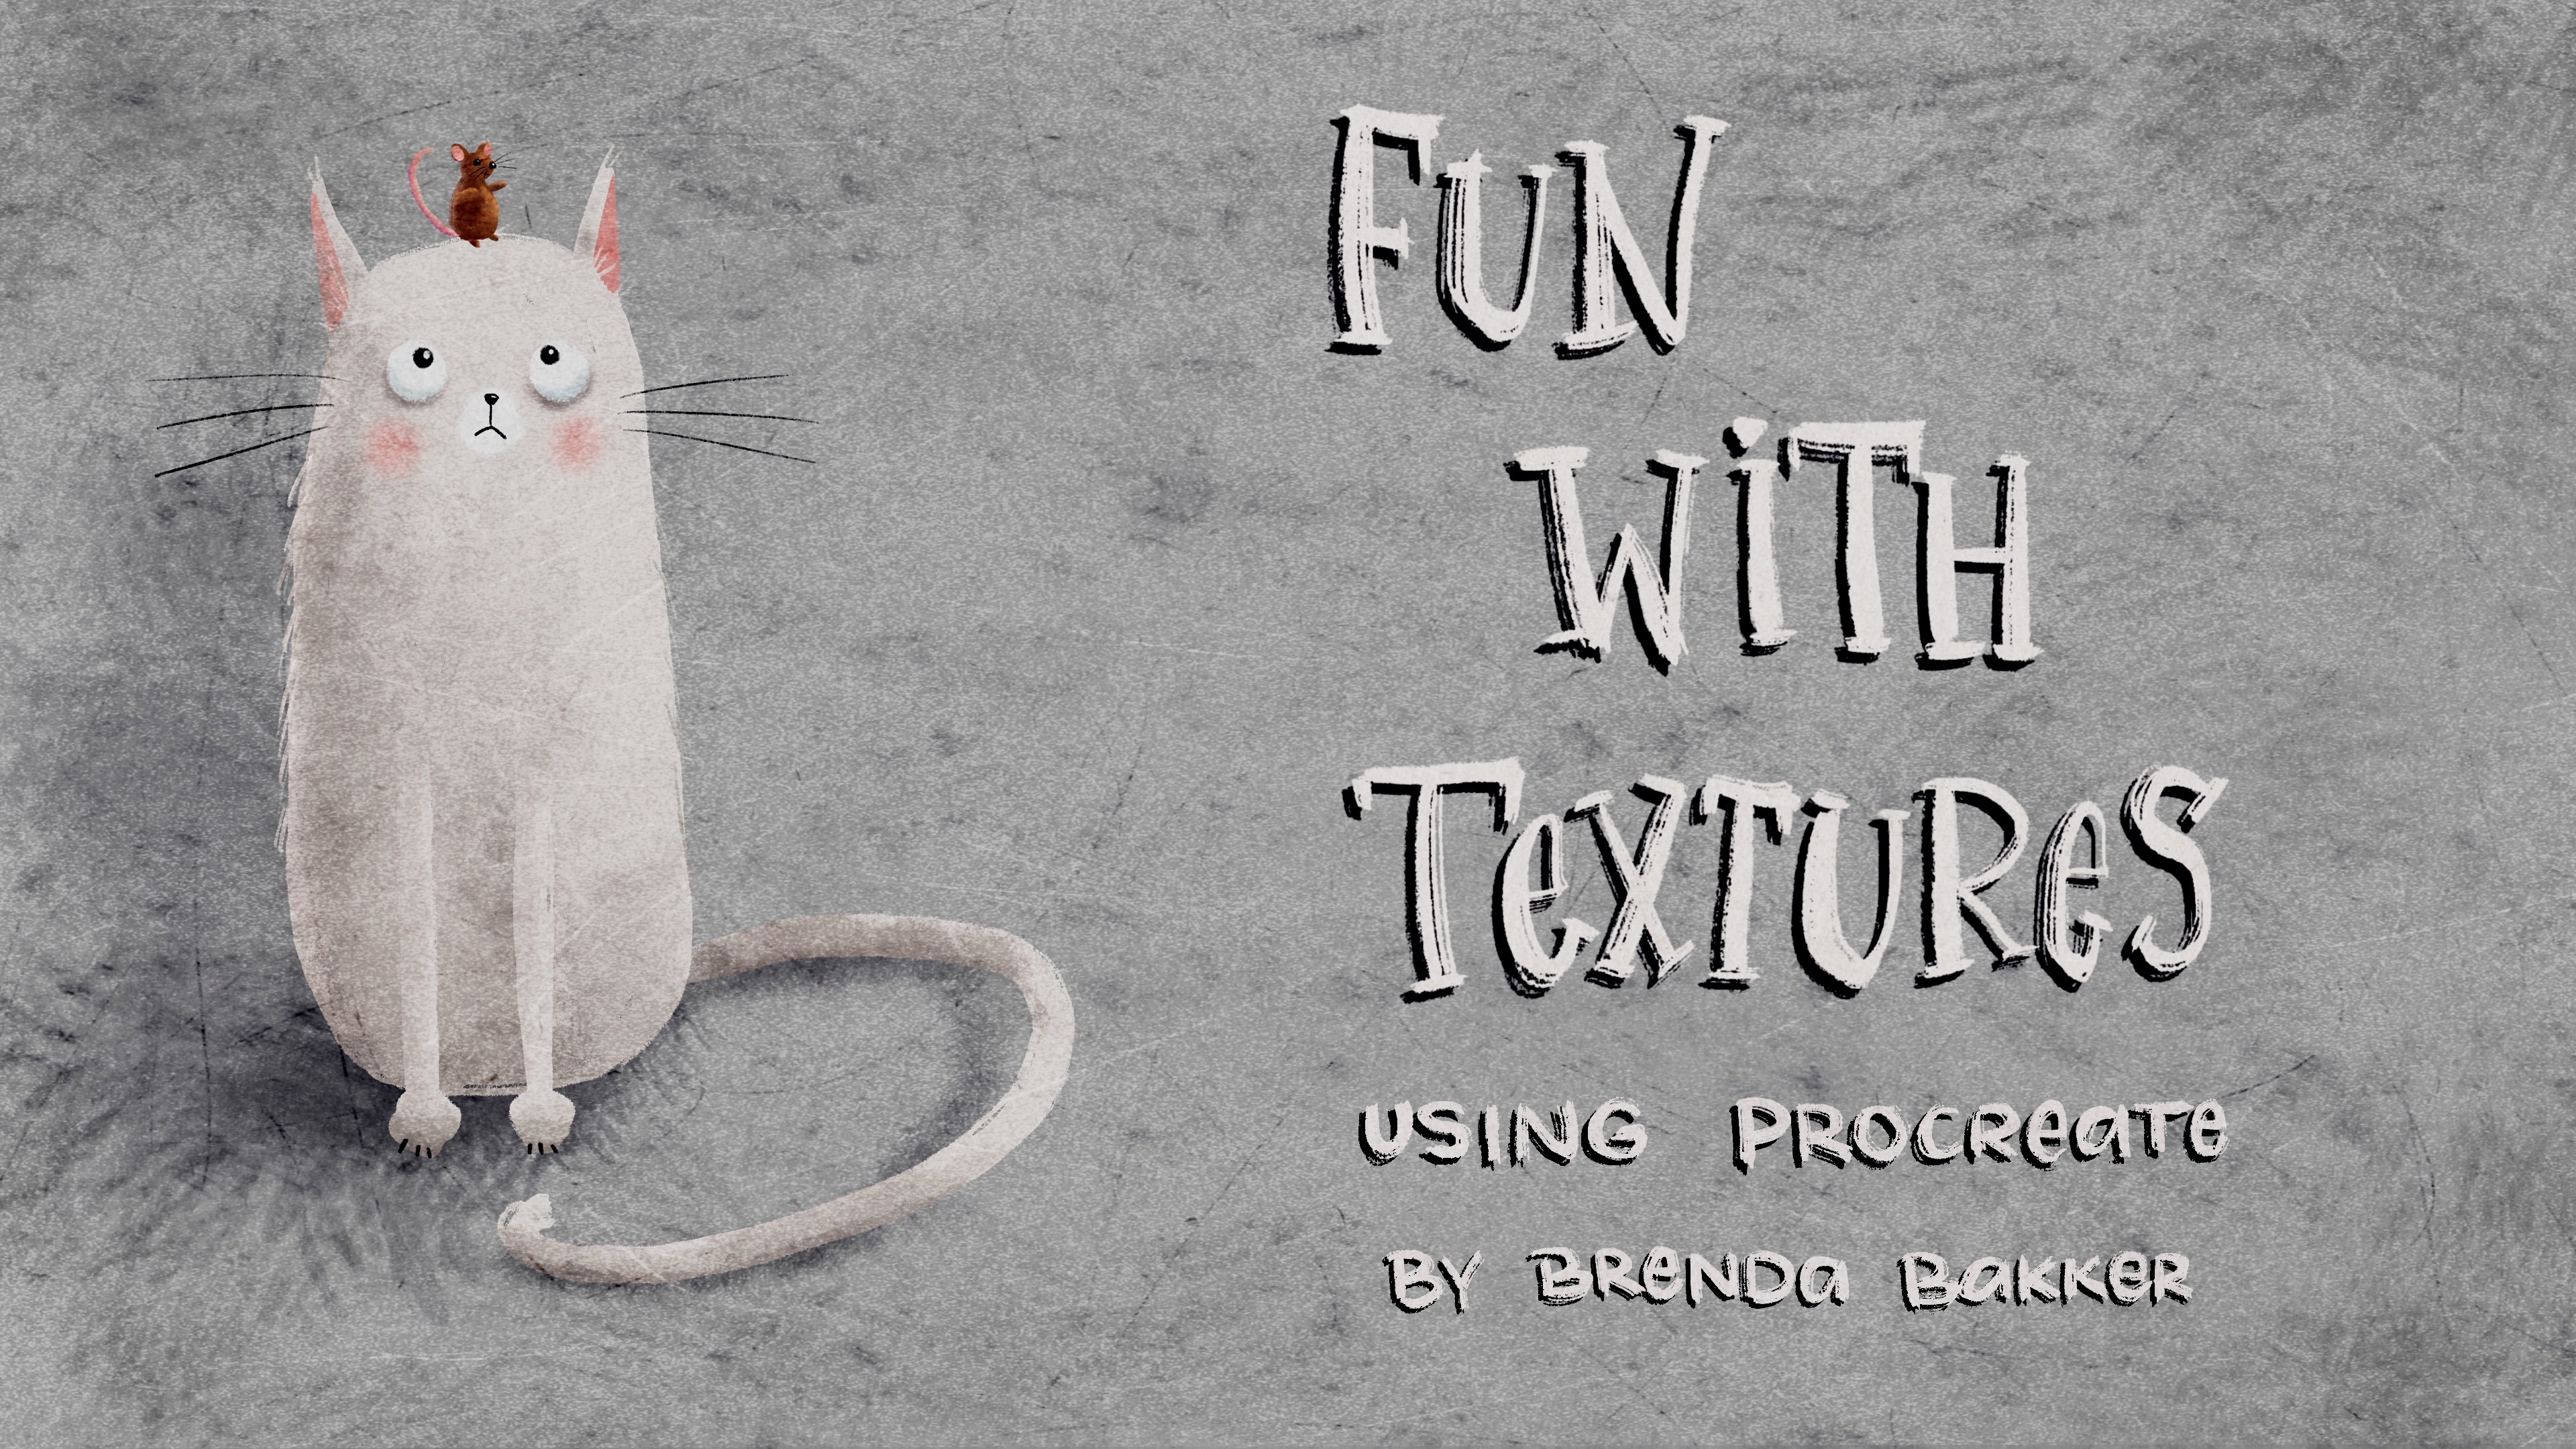
1. Intro: Hi, and welcome to my
new Skillshare class on how to illustrate characters
using Procreate's. My name is Brian that Bucher. I'm an artist and teacher
based in the Netherlands. In this class, I will
show you my way on how I do my illustrations with
lots and lots of texture. We will start out with
a little bit of basics, but not for too long. Because I think you will learn a lot of
drawing on the way. This class is not especially
on how to draw characters, but more the use of texture and how to illustrate
using Procreate. That's the main
part of this class. Of course, I will be explaining a little bit
about the basics on character design and the
angles of two phases. I will also show
you a little bit on how you can draw
different hairstyles. But the main part
of this class will be about how to illustrate characters with lots and lots
of texture using Procreate. I've created foam brushes
for you to work with, but you are free to take
your own brushes with you. Also, I prepared
especially Canvas for you, which already has a
lot of texture in it. So it will help you a little
bit with your end result. If you are as excited as I am, then let's get in and
let's get started.
2. How to import brushes, swatch and canvas : For this class, I designed
a couple of things for you. I designed procreate canvas
with lots of texture. I designed a fun brush sets, which I will explain to
you in the next chapter. And I also have a color swatch. So let's import those. If you want to import dose, you have to get to the Skillshare class and find here the projects
and resources section. You have to be on a browser
for debts because it won't work in the IP
version of Skillshare. So you go to the
Projects and Resources. Here you can see
three resources. The first thing you will come
across is the brush set. You simply tap on it. It asks you to
download, tap on that. And here you can see
you're downloading. Now it's ready. It will be the top one. You click on it, you
go to your recent map. There, you can find the brushes. It will import right away. And you can find it by
clicking on the canvas. And there you see
your brush library. It will be on top of
the brush library. That will be your newly
imported brushes. So let's go back to the website. The second one you want to import is the
character swatches. Simply tap on it, download it, you
can find it here. It will be the top one. Simply click on it again, go to your recent map and
it will be at the top left. And you will find it when
you click on your Canvas, click on your color chart. And if you see your
color palettes, you can find it all
the way at the bottom. There It's a
illustrates characters. And these are the colors I'll be using for almost
all my characters. So if you want that,
you can get it now. And for the last piece, the texture canvas,
simply tap on it. It asks you to download again. Download. It will take a
little bit longer. You can tap on it and it's
the first thing on top. Click on it and it will
import right away. The part where you can find your new canvas
which was imported, is always the top left one
at your procreate gallery. So on top of everything, you Procreate gallery,
left of a part. So now you're ready
to get started. So let's dive in.
3. A quick canvas explanation: So let me start by
explaining the canvas. I've created a canvas for you. And on the canvas you see the textures you
have to keep on top. That is one paper like texture. So when I zoom in easy, roughly paper like texture, I need, wow, what's
all in the name? And when I remove that, you just see plain blank square. So this paper texture gives
it a real hand-drawn look. Then below that you
see two kinds of textures, which I've created. And there are some
hatches in some scratches and a little bit of noise
I've combined to it. These two are exactly the same, but I'll duplicate them. And you can play with
the opacity of those. And you can hardly see
anything with the texture. When the background
color is light, but when it's grayish, you can see them right here. So you can see some hatches and scratches and some light
and dark are pieces. When you will color
in your color, it automatically will
have any texture in it. And when I now play with
the opacity of these, you can see it change. You can make them and
create them to your liking. So that's why I
kept two in there. Because one would be yeah. Maybe for some of you to later and some of you
would like it less. So that's why I put two in there and you can
easily play with it. It's also depending on
the color hue using. The darker the color, the more it will be feasible. So that's all about
the paper texture. You could leave them on top and draw everything
underneath there. Let's go changing to
a white background. Let's go and explain
the brushes.
4. Explaining the brush set: So for the brushes, I created a small
thumb brush back. I will be using
mostly the dry ink to create my colors
and my illustration. And I'm using a drop fail
for the easy and fun part. If you know me by now, you know, I have a short attention span. My drawings wouldn't have to take much time because
then I'm easily bored. So I've got six B pencil
just from procreate. I gotta dry ink
brush from Procreate but with little bit of yeah, maybe I tweaked it a little bit. I can't remember anymore what I exactly did because I'm
drawing with it for years. I've created some
scratchy leaves. Those are very fun. When you're drawing. You can easily getting those leaves and you can
see those marks in there. So it's hand-drawn and it's fun, so easily fix and you can easily change the shapes and
sizes by that part. And so you will only be using a clipping mask and do some
easy shadow and highlighting, which I'll be explaining
in the full tutorial. You can use that the
rough texture brush, the name says it. It's a rough texture
on which I'm using for almost everything
in this illustration style. I've got a streaky dry brush. This is a hard one
because it's very well. Sometimes it does a
lot and sometimes it doesn't do hardly anything, but that's the fun part and that's giving it
its handmade look. And a lot of unexpectedly
streaking in your drawings. I also create a
little stripe marks. And these are just fun hatches. And when you use it
with your fingers, it will catch the darkest tip. And with your pressure
sensitivity of your pencil, you can use it
darker or lighter. Also, you can use
bigger or smaller, That's with every brush, but it's a screen orientate it. So you have to, if you want to have it sideways, you have to tilt your paper. So that's what I want to
say about this brush. And we have some
fun brushes again. So these are fun dots, I create it and I use them
in my drawings lately, a lot for fun background
between leaves or something to cheer everything
up because I think route dots are very hippie dots. Also soft flakes. Soft flakes have to be in a lower opacity and then
you can create soft, gentle, well, you can
use it on animals, you can use texture fabrics
or anything you like. So that's fun. Or even in
a background, if you want. Play with its sibling
tech, texture brush, it's like some skin
or letter kind of texture you can play with. I created an, a pine needle brush for the Christmas,
upcoming Christmas, you can create easily some
pineapple leaves needles. So I think that would be funny. So I shared it with you. And a deadline or brush. I think this is also, well, I told you dots are creating
happy, happy marks. So I'm very happy for this one. I didn't know how to use it, but I think it has
lovely, lovely streak. And also these are very
fun leaves as well. I have a star liner for almost
exactly the same brush. You can use those if you want. I've got one. Dot brush. Also. Very funny. I like this one a lot. I've been using these in
my illustrations lately. And most importantly, and that's what I'm
going to explain.
5. Explaining the face building template: Soda template I created is just to help you with a
little guidance. Make it a little bigger
for you so you can see it. This is the template
we're going to use. Or if you want to
or if you don't, it's okay with me. But for me it's just
a straight line and a straight guide. So this is my rounded edge. We're in where I could
build my face and I'm going to a new layer on
top of that so I can change some
things if I want. I can create a
roundish, square face. But I can also make the
chin a little smaller, more feminine and pointy face. It all gives character to
your person you want to draw. So you can even
create some cheeky, squeezy and more
voluptuous cheeks. Well, you can change it
to more square hits. Or if you want to
draw a male heads, males have more bony kind of square three marks
in their faces. So that's what all can
change your person. So this is the outline. I have here, a big
space for the eyes. You can draw around in it, but you can also draw
these kinds of ice in it. You can draw in fact any
kind of AI you would like. Here we have no, it's straight between the
eyes just to make it more cartoonish and more character illustration
style for the mouth. We ever line here. These are the marks
for the ears. So I can come in here
and go out there. But I can also create a lovely elf ear or something
like a rounded air. You can choose any
shape you like. You can play with debts. It's just a guidance
you don't have to use. It's like I do, but just let it guide you
simply through your work. So this is the mark for
me for the eyebrows. I liked those six
ones right now. So I can draw an
eyebrow like debt, but I can also
make it more soft. Creates even smaller ones. So it's just a guideline and
use it to whatever you like. We're going to do a whole
illustration like I do. You can see my workflow and how I create my illustrations. But this is just how you can
use it to your own liking. So I would say, have fun with this and all
the brushes I provided. And let's get started.
6. Drawing faces in different directions (the basics): The basics for drawing hats, that's the most
important thing, is, well around phases are almost always like an egg shape
or some roundish shape. Now we can divide the
face in two parts. So if you create a cross, here will be approximately, will be the eyes. We have eyebrows,
nose in the middle, and we have a mouth. And approximately the same sites where the eyes
are, already ears. And we've got a little neck. The cross is to make the eyes and the nose point
in one direction. So if I want to
draw my same face, but I want to look at a little
bit sight words I can use and draw this
approximately this way. My notes will be angled. My eyes will be looking
that way and automatically, my creature, my character will be looking
the other way around. Same goes for upward. When I want to look upwards, I create a boat. It's going like this. The ears will approximately
be at the same angle when you put your fingers against your ears and you
tilt your head backwards, which I'm doing now, but
it's on screen for you. You can see and you
move your head upside down your ear stay approximately
in the same direction. So when it's looking upwards, you will see the
underside of the nose and the mouth will be here, and the neck would be
something like here. And also with looking downwards, the equal creates your eyes. Up here, denotes will
be going like this, and the mouth would be
feasible underneath there. And the ears will be
approximately the same way. And you can see the
top of the head with the Harris almost on top. So those are the basic
shapes of the head. So I created a
template for you and because I want the face
to be more illustrated, but these are the
kinds of basic shapes. You can also tilt your head
a bit like when I do this, no, I'm going to
select this piece. And I can tell that's
most of the characters. We'll be looking more lovely if you already give some
directions to the hat. So if you keep those
things in mind, you can draw every
creature which you like. So let's make it a little
bit more complicated.
7. How to draw eyes, noses and mouths: When you dive into the eyes, you can dry, draw
different kinds of ice. You can draw eyes like
rounded with some pupils in here and some eyebrows. Just going to draw one
just to speed up this because otherwise
we can draw for hours and hours and I don't want my class
to last that long. We can draw eyes like this. Those crazy Disney eyes and those lovely
eyebrows they have. You can even draw eyes like this when you
start out with a ball. These are more
realistic looking eyes. But we want to keep
it stylized rides so you can draw any shape, a closed eyes, maybe like
this, and some eyelashes. Same goes for gnosis. Gnosis you can draw like this. You can draw nose is like this. You can draw on
those is like this. You can draw noses like, well, whatever you like. Sometimes people use
these kind of noses or gnosis with a dent
and a bubbly on it. So different kinds of nodes is different kinds of eyes, mouth. People mostly use is this so
they can create lips around it and erase the step. Let's bet 40 cartoon drawings. I mostly use a small line
with a lovely smile, bump at the edge, but you can draw
anything you like. You can even draw a
life laughing mouth. So choose your style and
make it to your own liking. Create Split teeth in it. But I mostly don't
draw real teeth. But you can go as far
as you want it to go. Well, these are
just a few examples which I've drawn to make you
see and create your own. I like these kind of eyes, also very much so. Little rounded and then
little rounded here. You can also draw
these kind of eyes. Some people would love to
draw these kinds of ice. Well, it's all to what you like. Feel free in your illustration. What you want to draw. Everything is possible. So let's get on and now explain my templates
I've made for you.
8. How to build and sketch the head: So now let's get started
on the real deal. I started out with the
face templates to create a stamp for our character. We can play along with that. We can resize it, make it larger or smaller. We can distort it by
making it smaller. When you choose distortion, you can make smaller face
or just an even wider face, so you can do whatever
you like with it. Keep a reminder. This is just a template of
how you could draw a face. You can look at, search for your own ear, your own eyebrows,
your own eyes, your own nose, and
your own mouth. Even you can choose your
own shape for the face. And that's what I prefer. And that's why I'm not
providing you a ready to use stamp for face so you can
create your own face. So how do we use that? Well, I stamped it here. Make sure my placement is okay. Just sort of in the middle for me because we're now going to pay attention to draw the
character and how I do that. So when I have my layers, I changed the opacity a little lower and put it on multiply so I can
always see it on top. So I'm going to sketch
from their own. And I will do that on top. Also later on, my sketch will
be above all my coloring. So maybe I can lower the
opacity a little bit more. You can still see it now. And I'll go and sketch. So I go to the sketching pencil to six B pencil from
Procreate itself. For me, I like to use a sort
of a round square root face. So I started at top. Go to the sides. Look where they match just
from this point to there. And I'm going to
make a chin again. If you think the
shapes aren't correct. So here you can see it's
a little bit flattened. You can go back and draw
it a little bit round, but you can also easily go to the magic wand
and choose liquefy. And with Bush, you
can easily drag those lines a little bit outside or inwards,
whatever you like. So you can make small
changes with that part too. So I'm going to erase
the part I don't meet. For me. I can, yes, I can use
the symmetry tool, but I like to prefer everything hand-drawn and not too precise. So that's why I
don't use that one. Except sometimes for the eyes, but we'll get to that. Sometimes. I even don't. So here you can see those dots for the ears
I've explained earlier. So let's get creating one ear. And it's kind of
like this shape. And you can make it dead
one or even death one. You can choose ears you like. And this is also
just a guide just to templates on how you
could use the templates. I'm going this time for big round eyes and a little nose. Also, a little mouth right here. My eyebrows, I like very thick, so I took those marks and I've gone a little bit
upwards and downwards. Little bit upwards and all
the way down to that point. A little bit upwards, downwards. Sometimes I have to
change my rotate my view, and mostly I will
draw them by hand, but eyebrows are also
very hard to draw. Exactly the same. So perhaps you want to duplicate those two. That's also possible. So now you already have the
basic shape of the head. From ice, you can choose. I would like to draw them runner in the
middle and upwards. A little with big eyes, a little neck, downwards. You can choose for the eyes. Also like these kind of shapes. Everything is possible
to use your own, your own liking. For the ears. You can just be
completed with this, but you can also take it a
little bit of a five shape. So this one will be reversed. So it's up to you. It's up to you.
9. Sketching the hair and clothes from reference: So for the sketch part, I have to apologize
myself because some of the sketching of the
design from this girl, God lost while recording. So I will show you
exactly how I did, but it could be a little bit different than the end
result, but don't matter. I've chosen reference picture from Unsplash because I
liked this cute lady. I liked her outfit
and I liked her hair. It's by Mathias Ferrero. It's a free to use from
unsplash.com picture. So I use this girl only a
little bit for her reference. So apologies for taking slider different sketch
then in the end results, but it will be
approximately the same. So depart for me. What I always find very difficult to do
is creating the hair. So I'm always going
upwards a little bit. Well, you can hardly see it, but it's always coming
from out of there. So don't go slightly
downwards but just go upwards and it's a little bit in
front of her eye and you can hardly see the air. So I think this
one is going here. Then she has a little
bit of a French like so, always go outside of the head. We have a little piece
coming from here, going down that way. And on the other side we have a little fringe
coming from here. So also this way like so we've got a little Abdu is coming
in front of your ear. A little Abdul from the
back of their heads. So this one is coming upwards. Then we have a messy bun. So I would like to draw
that as three dots mostly. So you won't have one on top. So that could be very lovely. Then some hair sticking out. Remember it's just
a messy sketch right now at this moment. So some hairs on
the back as well. And maybe some loose Harish a little bit outside of her hair. Before the closing part, I can see she has something
coming out from here. It's going all the way on her shoulders and
it's going inward. So I'm drawing this piece right now inwards a little bit down. I can see, Can't see
it in the picture, but this is loosely gumming. Like so. Then this
one is coming here. And on this way, it's coming from behind. I'm going a little
bit like this. My original sketch, sketch. I made this a little bit larger, but I can show it to you. This is coming like
also this way. You can draw whatever you like. I see a little bit of a
shared coming from here. And it's getting almost
rid of it everywhere. And then I can see it here. And from up her shoulders, this will be coming right
from here, like so. And in the original
piece, I created, this way, making this
a little bit darker. I'm so sorry, I lost
the original one. I could be a little bit darker. These ones are getting
behind her ears. So behind her French. So I guess this is
approximately what I did and I can guess
the original with me. So I'm going to get
rid of this one for now and put on this one so
you can see what I did. It's almost the same. Almost the same. So that's how I did my sketching
from a reference photo just to so you can see
a little bit of how the clothing come together or how to hair
desk gum together. So that's fun. So let's get on from here.
10. Color blocking the face : So now what are we doing? Her face? And I've created an
illustrated character swatch. This is what I use
for my drawings. So these artifacts, colors, and you will see how I use this. These are the cheeks
and lip colors. This is a grayish white, which I'll be using mostly
for anything right into picture because I don't
want to use pure white. This is a pure white
and pure black because sometimes
you will need it. And these purple, sometimes I will be using that
for the shadows. But let's start out with a face. So I go to my dry ink brush and I go to the first color
you will be seeing, create a new layer underneath
the drawing sketch. And this is on multiply, change the opacity
a little bit so it's feasible but not to hurt. And let's start with the
outline of the face. So make sure you're
underneath their lines. I will include the ears right
away and create a shape. If you don't like the shape
of the face once you do that, so you can make little changes
by using the Liquify tool. You will get it under
the magic ones. Maybe I did it too quickly
for you, sorry, Liquify tool. And there it has to be on pushed and you can
change the size. So liquefy. You can bring into
shape you like. Maybe there's a
little bit wider. So you see I'm underneath the hairline so I
don't get a white gap. And now I can drop fail. If you get little
lines, nearly outlines, you can hold your pencil, do a drop thresholds. So there you can see
some changes I've made, but because I've been
using it already, it will take the
same thresholds. So this is the first
layer of the face. And because my next line
will be underneath my face, I will go into create a layer underneath it for my neck line. Make sure I close it. And I'm coloring. Also with a drop fail. I leave to close for now. We're going to go and
make the face first. So I'm going to create a
new layer on top of this. Don't mind shadowing
that will come later. And I'm going to start
out with the eyes. So I'm going to
this grayish white, light gray, some procreate
called light gray. And I'm going to create for my eyes the shape I
like in this case, I would like a round shape, so I'll hold it there. Did my finger on it and I've perfect drum circle and
I also drop fill it. And on top of deaths, I'm going to use
a clipping mask. Because I want my black for the eye only feasible in
the white of the eye. So I'm going to choose,
well, maybe not. Now, let's create a
perfect black that's okay. Created to my liking. And this is almost
hardly the onetime. I will be using a Copy and Paste sometimes
for the eyebrows too. But I'm going to group these together, duplicate the group. And then move this one. And I will flip it horizontally. And I can move it
to this area here. Now I've got two
of the same eyes. And then on top of the eyes, I will be doing some
light fall in it. Go to this one also. And I think she's
already very cheerful. And I can group these together. Can I group these together? Group? Yes, I like that. So these are the eyes. And I'm going to do
the eyebrows now. On a layer on top of debts. I choose dark brown. I could even make it
a little bit darker. Maybe I will do that. Maybe I don't. The dog of the
neighbors is barking. I hope you don't mind. I think I'm going to
duplicate this as well. My flipping it horizontally, moving it over to
the other side. Otherwise, I could be
spending lots and lots of time on how to create
the perfect eyebrow. And we know the perfect
eyebrow doesn't exist, so, but for this one it's okay. Maybe I can put it
a little bit lower. I merge those together. Now there are two in one layer. It's easier to fix for me. Yes. Oh, a new layer. I will be creating a small vein. I will use the pencil for
debts, creating the nose. You can draw the nose
however you like, and same thing for the mouth. I can also do the
lines for the ears. And I think we're ready on
the flat colors for the face. So let's get on to the close.
11. Color blocking clothes and hair: So for the closing also counts
to shirts is way down low. Then we have the jacket, and then we have the
color of the jackets. So I'll start off
with top layer that, which is the color
of the jackets. And I will be doing
that's between yes, it's going to be on
top of the skin here. So I'll be on top of
the skin here as well. So I'm going to start off
with a blue color and I will call it picked it
from her jeans jacket. So for me, it's on the way
you put in your gestures. For me, it's just my fingertip and hold and I can
do a color pick. So I'll make sure my lines are closed
because I want to do a drunk fill the
whole color for me. I'm still on my pencil
and I want my dry ink. So I'm going to do
this all over again. It happens to me as well. It's just like a little
bit of what you see. It doesn't have to be perfect
if you know me by now. You know, I don't
like perfect at all. So these ones are here. Maybe a little bit,
not a straight line. Make it believable,
it could fit here. So I have to erase a little bit. Not too much. Yes, that will be it. Below that, I can see a
little bit of the shirt, but this layer comes first, which is all the way
on top of her shirt. So I'm going to do another
layer with deaths. This is a little bit
too big and too low, so I'm going to erase that part. Maybe a little bit more by this. Yeah, it fits
marked or her size. So I'm going to layer
below that and I'm going to create the rest
of our jackets. Dry ink again. Yes. I'm going to draw
her shoulder line. I'm going to create
a half circle, but I'm going to
close it in here. Otherwise, it would go all
the way over her shirt. So now I have to do
it in two parts. That's okay with me. And now it seems it's
just one flattens part, but we're getting there
when we were using shadows. And now for the shirt, I have to go to
the grayish white. And you can see a little bit
of her shirt underneath. So I'm going to create a
new layer and I'm going to be underneath her color because it would fit
underneath her color. So here you can see a
little bit of her shirt. And here as well. I can color these
all the way in. And now I can see she
has an ugly lump, so I have to make her shoulders a little bit higher because this
this wouldn't fit. I go back to the same color, my dry ink and the layer I
created her shoulders on, it has to come from here to make it more believable. So these are close. And now the hardest part, we're going to do her hair
her hair is going to be on top of everything of her
face because you're hurt. It reality can't fall before
your eyes or your ears. So let's draw that on top. Now. She has yeah, it's looking
black but it is never black. Almost never. So I'm going to
choose dark brown. Make sure we're on top. And let's get creating
the French part of it. So this is one part. I can create a lovely new part. So just blocking
in colors for now. Underneath that, there is a new string coming
out from her ear. So I'll be doing that all new layer also
underneath debts. Because it's coming
out from underneath. Yes. I knew what I did wrong. I didn't close it. Now I can color it in. And so we have the back of our heads also that is
coming from behind. So create a new layer
underneath that. Close it. Just make invisible
lines behind the hair. So I've closed that. That's on top of that. But behind the French there
will be a fun ponytail. So I bring it a little bit, a layer on top of this. So this is her French,
we call it pony. Ponytail is an English
start in Dutch, and that's why I'm
always confused. Silver fringes over here. The messy bun has to
be behind a French, but on top of her head,
on top of her head. Behind the French,
they're in-between. We have the funny bone. So let's create some fun parts. I do this in two
different blocks because I want to have it messy. Otherwise, I could
get one big happy. And I want it in little pieces. So maybe create a little
bit here as well. Yes, and then some strings
coming out of that one. You can do that with as
much fun as you like, maybe some Harris from here. And we redoing that out
the back of her head also. So some lovely strings coming upwards and maybe some birds coming down. Maybe even some curly
hair from the back. And this curly hairs
from the back weekend, get it from all the way down. Create a new layer. All the way down. Not too much. It has to be believable. And maybe just make
it to your liking. Sometimes I don't
believe the hair, so it has to be
believable for me. And maybe you want to have some hair in front of
her jacket as well. So make sure you're coming
from behind the face, but on top of or jackets, It's all about placements right? Now when everything
is on a new layer, you can also change it later. So for now, I think I
like her like this. So let's get on to
the next part and bring in some shadows
and some textures. Let's start with
the shadows first.
12. Creating shadows, highlights and textures : So when I want to
start with my shadows, I always leave everything
of my layers on because I will see what kind of shadow the hair will
bring onto the face. I have a different approach of doing my shadows on the face. And I will show you
that this is my face. You're already
eyes and eyebrows, and the nose and mouth
are on top of this. I'm going to replace
directly above the face. So I'm going to create a new
layer on top of the head. And I will put it
on clipping mask. Now, everything I
will color will only be happening on the face. For now. The weird part, weird
part I'm going to do. I will show you. I go to my colors and
take the darkest color. I can get. The rough
texture brush. For that brush I'll be using. Well, it doesn't matter almost what size because
I'm on a clipping mask. I'm going to smash her
entire face with this color. One layer. When I pick up the brush, I can get even more color into it because the
pattern will change a bit. And now she's way dark
weight too dark for me. But here's the trick. I go into the color underneath here, and I'm going to
lighten her face again. Just in the middle of her
face, leaving the shadows. A little bit in the hair lines. I didn't lift my brush. It's a little bit with the ears. Not too much. But you can see I've lived
in the area a little bit. I'm going to lift it again and I'm going to
lighten it again, leaving again the shadows a
little bit with the hairline and at the bottom
part of her face and she's way too dark
now for what I like. I'm going even to the
color I start with. And I'm going to do this again. Making smaller parts or cheeks could be a
little bit rounder, good, catch more sun. So that's what I'm
going to bring. They're also a little
bit more light. I lift my pencil again. You can see them. That's the texture would
be a lot finer if I lifted because there are
more ducts disappearing. I think here could be a
little bit more shadows. I'm going to bring some
shadow back again. Starting with my darkest color. Maybe that's enough. Maybe I don't even
erase it or do a double tip or
something like that. For now, I'm going to
give her more highlights. Remember, we started
with this one, then we went to this one
than we did this one. And now I'm going to take an even lighter color
for the highlights. So we're cheekbones could be highlighted just a
little bit here as well. Also a little part. Eyes, nose, just a little pot. I'm going to make this smaller. I'm going to highlight
the tip of her nose. Lifting it creates
another piece. And now I need some shadow
underneath the nose as well. So I'm there. I'm going to put that color, that medium color. Go back to my highlights. On top of that. Now she has lovely nose with
some highlights and shadows. And even if I would take
away the lines of her nose, she has a little bit of a highlight
diagnosed with shadows. I'm also going to move to sketch so you can
see it's there. She has a lovely little nose. Only mate with color and
no lines or whatsoever. So you can see what color and shadows and highlights
will do to your painting. So that's where it comes alive. Put these on again. I'm going to create some shadow and
depth behind her eyes. So I'm going to be on top of this one That's
below her eyes. You see, this is the
group we did the eyes in. And I'm going to be underneath the eyes and I'm going to
the darkest color again, making a small, still
with the same brush, the rough texture brush. I'm going to be making little darker shadows
behind the eyes. Then she would live
a little more. Just a little bit on top with
most underneath the eyes. Also. A little between the nodes. Yes. And maybe I will give
her some blush right away. I do everything on a new layer. I want to keep everything
with the eyes a little bit with the I. So I put group
this if I want to, but then it will be
harder to visit the eye. So I'm keeping this on
the layer of the skin. I'm going to create
a new clipping mask. Go to a brushy color, choose the lightest
one in the middle. Let me see what
size I can create. A little blush lifting because
I want a softer texture. And maybe a bit here as well. So a little bit of shadow. So then she has some
lynch of a color. Maybe when I zoom out, I think it's too much already. So I'm going to smudge
that a little bit. Yes, I think I like
her like this than she could have some eyelashes and that will be
on top of the eye. Go to my well, my dark color which I'll
be using for the eyebrow. So I go back to my
dry ink brush again. Create a little bit of an
outline, hardly visible. On this side. You don't even see it because it will be
underneath the hair. Just a little dash, eyelashes at the bottom, and just a little
outline of the eye here. And for me they are
getting to eyelashes here. So she's looking happy. Okay. The mouth I won't
color in her lips, I think because she's
a very young child. So not much of an eye shadow, not much of lipstick. Just so natural freckles. And I think that
part will be done. The freckles, I'll also do with a darker, this darker color. And just create to
your own liking. I put those on multiplying. And nobody opacity for a
lovely blend in color. So it's just feasible,
not too much. I have to get rid
of my drawing here. Yes, I think that's way cute. Yes. Put on my sketch layer again. Now I'm going to create a
shadow on the neck line. So I'm going to visit this part, creating a new top
of the on this, create a clipping mask as well. Choose the darkest color, choose the rough texture brush. And because my son is
coming from this side, this will be very dark. Also within the jacket, there will be some shadows, so I'm going to color it in
almost everything again. And then you guessed it. I'm going to lighten
it up a little bit, but leaving the sides
a little bit darker. It's up to you how
you like to textures, do you want it roughly then
you don't lift your pencil. And sometimes I do and
sometimes I don't. Even the highlights, more bits. Yes. I think I like that. Well, that's what
we're going to do. Creating some shadows and
highlights to make it come more illustrative in life. So let's get onto the tickets. This one is underneath
her colors, so there will be some
shadow along those lines. So also clipping mask again. And for the bird, I'm going to choose
the color, fill, the color picker, and I'm
going to use it on my canvas. I told you my canvas has a little bit of
color burn in it. So it will take a
slightly darker color then I've used before,
and that's what I want. So on my rough texture brush, I can see a slightly
darker color. And I'm going to be drawing just underneath it so the
color will pop out itself. So that's not hard thinking. It's just making use of the program and
working in layers. Because we are having some
highlights coming from a pair. I will be choosing the color we had and make its way lighter. And I'm going to also be giving it a little Smartsheet texture
with the lighter color. Same thing I'm going
to do with our color. Going to create a clipping mask. And my shoulder will be
inside of this part. Also be about here because
this part is laying in shadow. This part will be
catching more sunlight. This part a little less. So. Let's go and create some shadow. First, we have a dinner history. This is also dark. This will be dark
all the way up to here and then the
weight on the inside. But then here it would catch
a lot of lights already. So creating the
lighter color again. For this part, I would like
to use my scratchy brush. The dry streaky brush, create an even lighter color. And go slightly here. And this brush is
very weird behaving. So sometimes you
would see it and sometimes it doesn't pop up. But that's what makes
it so much fun. And scratchy. In fairy hand-drawn,
this would be too much. I can undo it or just even
smush it a little bit with the same brush or eraser with the same
brush I'm holding it, it will select the
cleruchy equivalent brush. So I think her jeans jacket
could be almost finished. For this part. We're going to put in
some details later. And let's get on with the
shared because the shirt also has darker parts and
lighter parts, not much. Also on a clipping mask,
choosing the whites. The white gray, make it
a little bit darker and create some shadows using the
rough texture brush again. Yes, I think that's fun for now. And I still don't believe how this color could be behind her neck because it's
being in front of here. So I'm going to see if I can
move that a little bit away. The color parts know
is the color part. I'm going to liquefy it, see what it does. Yes, I'm missing a
piece of our skin. So I'm going to
move this anyway. And I'm going to move
her skin right to there so you can learn from
my mistakes and errors. So I'm going to dead
layer again of the skin. Make, make sure you
take the basic layer. Everything else on
top clipped off it will move along with it. So go back to the liquefy again and also move
that part a little bit. And now it's more
believable for me. The fun part, Let's go to the
hair in the next chapter.
13. Bringing the hair to life: For now, our girl has lovely
hair, but it's so dark, you can hardly see
any strings of hair. So we have to put that a little
bit with our imagination. Remember we did separate layers, so everything we can do on
separate layers as well. So for me, I will
be starting with the fringe part and I will
put a clipping mask on that. So I'm going to take
this color again, it's a little bit darker than I hit with width.
I started with. It's a little bit darker
than I started with. So I'm going to lighten
this a little bit. On the rough texture. Yes. And then I can create a
little bit of light on top, but it's still too dark. We can't see it. Now, it's coming
but not too hard. You can see it right here. But not too much, but it's okay. Start slowly. And we bring it in. As we go. Remember, I only have
the fringe part here. Select it. Create an even lighter
color, lighter brown. Yes, there were two will come. So I take the pieces
that are on top because they both get
touched the most sunlight. And even my son is
coming from up here. There will be some light
coming from here as well. So I think we'll
be ending up with a lighter brown
girl because I want to show you and teach
you some hair as well. So she could be a little bit
of a red brown kind of hair. So the same layers, the same colors I'll be using
on every layer of hair. So I'm going straight
forward to the next part. Use clipping mask. These were the ones that
are in front of here? Yes. This is her messy been pulled a clipping
mask on there as well. Remember they're not
where I had three parts, so I'm going to highlight
all those three parts, then it would get
more texture already. We go even lighter. But if we go back there, clipping mask on the layer, this is what it was behind. So not every part has already
lighter pieces in it. And I think this one, the fringe could be
lightened again. And pieces on the
knees here could be a little bit darker because
they're not in direct sunlight, so Well, let's get a little bit. I'm only where was I I was
going to be on this parts. Yes. I will go to light for debts. Remember, we had
some parts here, so don't forget those. But also, sorry, clipping mask. Also remember these should
be a little bit darker, so we only give it one piece of lightning
colors on top of that. So now we're going to create
new lighting on top again. But forgetting those last parts. And go to my fringe part and I will do it on a
new layer because sometimes I don't
like what I've done. So I could easily get
rid of them again. A little bit lighter,
a little bit to the orange yellow side. And just every time go
little bit smaller to the highlights just
so for every piece, cows go from the
darkest color to everything to a little while. Remember, the darkest color
is the most biggest part and the lightest color will be smaller parts at those strings. So I think this will be
light enough for now. Maybe a bit at the
front of her hair? Yes. And maybe her BUN could be
a little bit more lightens. On those three pieces? Yes. And maybe a little bit
on top of those scratches as well so they could get a
little color for the hair. I'm almost done.
I'm now going to create single strings of hair. I'll be doing that
all the way on top. So I don't mind in on which
layer I am. That's okay. Because maybe I want
to go outside to create some more
messy hair strings. So we'll be doing that with a lighter color and
the darker color. So maybe even a little lighter. And I'll be using, I think the six B
pencil for debts. So I could define the
Hirsch a little bit more. I don't have to do with
them all the way down. So sometimes I'll only be
doing the lighter colors, only in the lighter parts. So this one is coming
from up there. This is to hurt. And sometimes it's just a
little bit of trial and error. And take a darker color, well as the darkest. So you can definitely
see them in here again. Maybe some curly streaks
outside or whatever you like. Sometimes I want to do
some loose Harish also. To make it more fun. Create a little bit more
cuteness to the girl. So that's why I do it
on top of everything. So I think our girls
almost finished, but let's see, we can create a little bit
of more texture. I can do it, get rid
of my sketch now. I think I don't need it anymore.
14. Refining the clothes: I think we're going to create some textures
on her clothing. I think that could be put
to use a little more work. Not too much on her
face or the hair. I think that's already done. So let's get back
to her clothing. I'm going to create
a clipping mask. This is on our color. So we're going to create some
fun, more textures there. And I think I'm going to use my black as my color and
create an overlay layer. And the black part in overlay will darken
the color underneath. So I can make some fun. Textures or, well,
these are soft flakes. You can see what that does. A little bit of spots in there. And you can play with
the opacity of that. If you don't like it too much, you can play with
it a little bit, but I like lots of texture, so I'm going to create
new layers on top. If we have enough layers, yes, I can see it. How many layers can I use? Confers information layers
to another for yes, this one is not too, too
large for a weekend. Go and create some
more fun around here. Don't worry, don't worry. Clipping mask again,
putting on an overlay. Maybe with this part also, also ferry from the
stripes reusing. And this one is
screened orientated. So if you want to have your
stripes in another direction, you have to tilt your canvas. So I think these are fun, maybe in some white as well, because I also like
the overlay layer in white so we can create
more texture in it. And we're going to do this
on her jacket as well. So remember the steps we did. Put it on overlay. Choose black first. First I start with the
dots. Soft flakes. It a bit down the opacity. Not too much. New layer. I didn't do it on oh, because it's an overlay, but you can see it on
the background. So I have to put it on clipping mask as well
because maybe we'll do a lovely background
later and then it's only clipped
on the jackets. So creating a new layer, put it on clipping mask. We'll be using the little
stripe marks and also whites. I think she's sweet already. Well, for now, I'm going to give some
details on the jacket. Let me see. I will put it on top of
everything on the jackets and I will go to
my great whites. Go take my six B pencil
and I'm going to roughly do some stitching work. And I think I'm going to do that with the dark blue as well. So I took the dark,
take the darkest color I can color pick from here. And I'll be using it for
outlining and detailing. So Dara, where you cannot see where something is beginning
as something is ending. You can create a
little bit of depth. When he did. So, I think this will be fun. Also, the t-shirt does need a little bit more off details. So you can create maybe
a little bit darker. I think that looks sweet.
15. Finding my way for a fun surrounding : Can we choose a
lovely backgrounds? I think so. Mostly when I choose blue, I also choose orange
because blue and orange are the opposite colors and
they would be very nice. So let me see if we can create a lovely
background for it. So I go all the way to the
back and I will take my blue. I don't know why I'm going
directly to the opposite side. Choose a bright color because I think that would
be looking nice. And what do I use for debts? What do I use? I can choose this
one so I can create a lovely white orange leaves. Yeah. Now, I'm going to create an
overly shape behind her. And they'll be choosing my
dry ink brush for that. And I make sure do I
want to overlay SHE or maybe rough square. Rough square will be
fine too. This is fun. At least. I think it's fun. I want her mostly I want
these parts to be in there, but I liked her hair squeezing out or
something like that. Maybe. I'll do something
funny with that. But then this
doesn't make sense. Maybe, maybe, maybe let me try and see what we
can do with that. I don't know. I don't know What should I do? Maybe I will put everything on top then I
have to select everything. So I go all the way, select all those
layers in a group, the whole drawing,
everything I've drawn. But I want to keep those layers. Well, let's get this
program to work. It's supposed to do all
the work for us, right? I also always group
my drawing with it, my sketch because, well, if I want to change
something, I could. So this will be fun. It's popping out. I think. I love how this is
turning outside of the box because we like
to think outside of the box. Also this is peeping out, so I like that. We can also create lovely
other things behind it. So then I want to turn this off. And I've given you
some fun brushes, at least I think they're fun. So I create a scratchy leafs and let's pick a
lovely color, green. Maybe a grayish green. Also fun part to do is create
on top some lovely leaves. So she's coming, popping out from behind some
bushes or something. That seems funny. I'm going to get rid
of this mess here, or maybe I'll be
leaving it there. Now. We're going
to get rid of it. I don't like it. So go choose my selection,
choose free hands. Roughly going into this
shape and create this mess. Gone. Three finger swipe
down and cuts. So I think she
would look lovely. And then we can use
those textures again. So please do a clipping
mask on top of that. Create a darker color. So more saturation
and more darkness. So I go downward
and to the right. So straight right downward. Go to the rough
texture brush again. And I will go and
make it smaller. And I do it near the stem so I create a little
bit of darkness. I can use a little
bit bigger size. I can get rid of this girl already because we
don't need her anymore. Thank you for being here
and being to her health. I love how this
brush is textured. So you can see a little
bit of those gaps in here. I made them especially this way because I liked that
hand-drawn look in it. Go to that green again and
choose a little greener, a little lighter
and a little bit more to the yellow part. And use it on the top
parts of the leaves. Sometimes the leaves
are a little bit messy and went
through each other. So there you could have picked different layers or
just take it as you go and create how you think you would like the flowers and
the leaves to go. And we can also play
with a little bit more yellow and do the
streaky dry brush again. Smaller size and create
some streaking marks there. And with the pure whites, I can do with a pencil. Also another clipping mask. I love to draw these
kind of things. And to even writing it up, I created some
lovely fun brushes. Again. You can use these
brushes to your liking. So perhaps you want to
create a new layer, new layer, new layer,
bring it down. And so we can use it to create some lovely new flowers
behind that as well. Just to bring in some more fun. And so I created some fun ones. Well, it's just sorry, you can use them and just find out and play with
them for yourself. So I even created one with stars so she could actually
have bumped her head. Well, that's fun. I think it's fun. So you can play with them, you can use them
how you like it. So I hope you liked her and I hope you liked
the illustration we made. And I hope I've given
you the tool to come up with your own characters
and have fun with those.
16. A couple of examples for faces and hair: So did you remember in one of the first chapters that I
showed you how to create this. Now you can create your
own heads and now you can make it sideways
or up and down. Well, this was done easily with a simple noses and
eyes and ears. But how would it look
like if you will be doing that on the illustration
character, we just did. Well, I met you some examples. So if I go here,
this is disturbed. We made, so we can see the
eyes here and the nose, and the mouth, and
the chin, neck. And here I've got a lighter
part and I've created some layers so I could show
you how it would look like. So this is one of the
phases we make in class. Just fun and easy one. But if you want to have
it with different eyes, just changing the ice already and changing the
shapes of the head. You can immediately see you got a total different
characters. So that's is something how much little details like this can change your
whole character and the whole person. So for fun, hairdo, adding the hair will be
very great to do so. But you can see this
character if I now change this again to the earlier
head I created before, things see, it's another
total different girl. For instance, when we
want to create something like doing it sideways,
it's just easy. You can use the same template. But you remember
when I showed you? Well, I didn't
actually show you. I told you when
tilting the head, the ears stay about
the same height. So if I just draw my face
and turn it sideways, so the nose would be at
exactly the same spot here. And the mouse could
be at the same spot. Also, the ears at
the same height, but maybe a little more into the middle of this
section of the head. So what would that look like? Like? So I also deal with the head a little bit so you can
see the eyes are a little bit more upwards,
towards the ears. So this is how you
can play along, still using the same
guidelines I provided to you, but just with some
small changes which I've told you from
this one before, you can create those
same adaptions. The one part you
have to think about slightly is that this will be
a little bit further away. So it could be a little
bit smaller, not too much. Well, maybe if you want
it to be fun character, you can make it way smaller
but slightly smaller is okay. Just a dash, not too much. Just make sure you don't make it bigger because it
will be further away. Also, you cannot see
the whole eyebrow. It will be turned
backwards on the hat. So this is just one small
piece I wanted to show you. Now, let's go over and look
at some fun hairstyles. Like now, this is my
head where I'm playing with from the example
I just showed you. And let me check in
and go to the brush. Again. My pencil. Just go like this. With my pencil on a new layer. I always do my hair
all new layers. Well, let's create some curves. Let's make, let's make
this a curly girl. Remember, I always start
on top outside that, well, for me my most characters would have a parting into hair here. Just make some funny
movements in the hair. From for some nice small curls. And also maybe going from here. And then you have to get rid
of this part of the hats. So let me create a mask for
debts so you won't see it. So creating a mask and
with black and a pencil, I can make it less visible. Then you can see
better the shape of the head and see if there's
something that's missing. So she has lovely
little curls like this. New hairstyle. Maybe I do a
stippled line for the heads. Then like, well,
choosing my white again. Because when I do white, you can really see it. Double-tap. Great white. You can see
a bit where it should be. So let's create bigger curls. Leg more like a wavy look. Way too big now. I don't like the last part. So mostly I could have my
trials and error again also. And sometimes I do
some 40 outside waves. I can make a girl who was
drifting off a little bit like almost the
opposite direction. So you can get more phone
lines towards the hair. And then we can do some strokes and follow the
curly lines a little bit. You know, remember the lines
we did at the last piece? This is wavy hair. You can do totally
different hairdos. So you can create a
short, short hair. So we can also have females with short
hair or if you want, or if you want to do a
boy, It's also great. Just some blocks behind the ear. I thought doing hair was the hardest part for me to
discover how to do that. So you get total different persons by changing a hairdo just
like you can in real life. So let me do one with
straighter hair. I've shown you this one. I did a little bit
of the eyes also. It's also on that same layer. So this is how you can
create different hairstyles. Also, do them every time on different layers and
just have fun with it.
17. Final thoughts: Thank you for watching this
class until the very end. I hope I've taught you a lot
about how you can create an illustrative character using Procreate and also a
lot about textures. And I hope you have a result
you're very proud of. I will encourage you to change everything to your own
liking and your own style. So each and every one of us can have their own
different styles. Don't forget to post your projects in the projects
and resources section of this class for me and everybody else to see what you
made out of this class. And please do leave me
your view of this class. That would help me a lot.
If you're on Instagram, you can also tag me at
Duke level so I can easily find your post and maybe I
can show them in my stories. So thank you again for
watching this class with me. I hope you had fun and maybe
see you in the next class.
 Brenda Bakker, Sharing my skills is sharing my joy