Transcripts
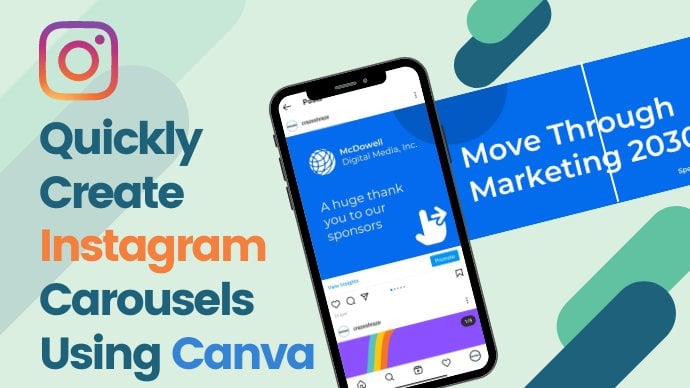
1. Introduction: Hi there. My name's Alex, and today I'll be showing you how to create an Instagram puzzle on Canvas. Let's start.
2. Setting the Dimensions: First thing we need to do is set the dimensions of our nine post puzzle. What Instagram post is a 1080 pixels in width and height. Therefore, in order to achieve a three-by-three puzzle, we need to multiply that number by three, which gives us 3,240 pixels in width and height. On your Canvas homepage. Click on Create a design. Click on Custom Size and add in the dimensions. Then click on create new design. Once you have your blank Design, go to File on the top left corner and make sure that Show Guides and Show Rulers have check marks next to them to make it easier for us to see and how the final hosts will look like. We will now create nine bucks is using gridlines. Click on the ruler on the left side and drag the first grid line, 21080 pixels, and the second grid line to 2160 pixels. Even if you're off by ten pixels, it doesn't matter. Repeat the step using the top ruler. And there you have it. Now it's time to get creative.
3. Choosing the Colours: If you click on the color icon on the top left corner, you can search for pilots that have been created by Canvas. You can also get inspired by searching on Google. You can get a lot of inspiration there. I've already created my palette for this design. As you can see here on the left. I'll keep the color codes visible for you throughout the tutorial.
4. Creating the Structure: Before we start adding our shapes, Let's change the background color to the light blue. You can go ahead and search for blob in the search bar and the Elements tab, and start adding them to your design. Once you have them in place, go ahead and change their color to the darkest paint from our palette. Let's add some circular blobs as well. You can change their color to yellow. Oops. Let's also add some dots. So it can't change the color of the dot. Hu deselect it. So let's select another set of cuts. These ones will work. Go ahead and change that color to the bronze color. I'm going to two more sets by copying and pasting. You can also use these shortcuts to elements forward and backwards.
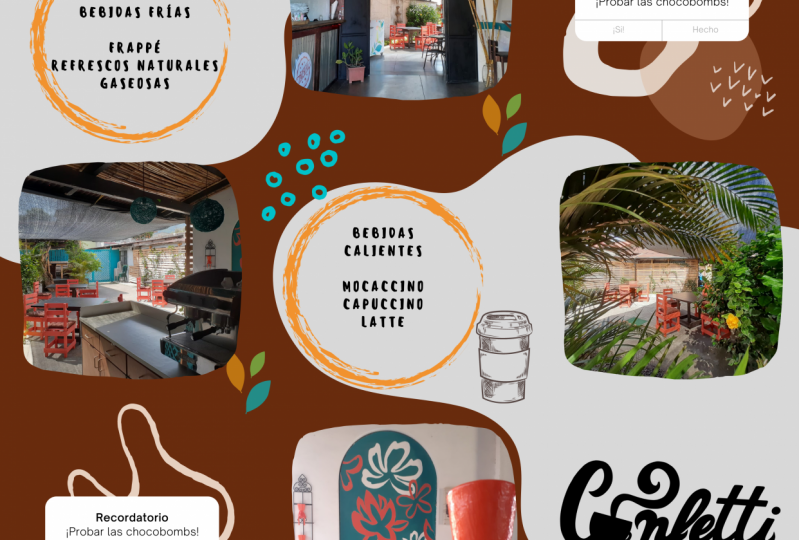
5. Adding Pictures: But the elements and scroll down to the frame section and select two frames to add to your design. Now on this frame to be a little bit bigger. Next we're going to add some fully rights. You can go ahead and change the color to white. Now I want to copy and paste this polar array twice to add to the bottom left corner. Let's go to the photos tab and search for a picture style. So called depolarize. Not afraid to have to manually resize the photo and send it backwards behind the polarize electron. Doesn't change. We can simply drag the photo on top of them. Let's zoom in a little bit to see more clear that hi.
6. Adding Text: Click on the template tab and search for reminder. I want to add a reminder to one of the posts and Canada has already made templates we can use. Let's go with this one. Delete the background by selecting it and pressing Delete. Let's change the text to I need vitamin C and recenter it in the box. Select it and copy and paste it to our original design. And then resize it to fit the post. I'm going to change the color to white and adjust the transparency to 100. You can delete page 2 by clicking on the trash can on the top right corner. Now let's add some text by clicking on the Text tab on the left. And by clicking on the first add a heading. I'm going to write travel often in this box. And choose the bronze color and resize. Copy and paste this text for the boxes on the top. For travel, often go and search for the font, major motto, display. For good vibes only. Boy, use the font name that Roomba. We're also going to reduce the space between the words by clicking on the icon with the three lines and double arrow on the top barn. For vacation mode, we'll use the font name Anton. Copy that text box. I also wanted to add some text to our Polaroid. Let's go with a Sharpie type font. Reduce the size of the text, and center it within the Polaroid. And for vacation mode, I want to add a type of On button. So let's search for that by searching for the word ON and the Elements tab. To prevent from elements going into the frame. Press on command or control when moving elements around it. I also want to reduce the space between both words. Using the Shift key. Select both the on button and the text and center both items. And we're done with the text.
7. Adding Finishing Touches: In the search bar under Elements, search for metallic brush, stroke of God. And drag the stroke to the design. Resize it, and place it in between the lesbian picture and the girl reading a book on the beach. I also want to add a goal element to the top left coast. Flux it and drag it as well. Send it behind the pink blob. Now I'm going to use the gold dust chokes the resize it and place it on top of D2 Polaroids on the bottom left corner. Kind of like Washington. I also want to add a pink square behind the gelato picture. To do that, I'm going to click on effects. Under Shadows, click on drugs, click again on drop. In order to open the settings. I'm going to change the direction to top-right. Change the color, increase the transparency to a 100. But just the virtues 0, and increase the offset by a little bit. Not really sure why it's black right now, but let's read, change the color to pink. I prefer the light pink. And there you go. Our design is finally done. Download, click on Download on the top right corner. Make sure the file type is PNG and click on Download.
8. Splitting Your Design: To split our design into nine Instagram posts, we are going to use image splitter. So go ahead and search for image splitter on Google. Click on Upload Image, and then click on the Upload icon to upload our design we just downloaded from Canva. Your design will appear with a three-by-three square overlay. If not, make sure that you have three rows and three columns on the left side, drag the corners of the square to the corners of the design to make sure we have the full design, click on Split image and your post will download as a zip file in the order in which you should post from one to nine. Last step is to send these posts to your phone and then upload them to Instagram. And we're done.
9. Final Thoughts: I would love to see your design, so please share your project in the gallery below. I would also greatly appreciate if you could share your experience and give me feedback if you want to get notified when I post a new class, don't forget to head over to my channel and click on the Follow button. I hope you enjoyed this course. See you next time.
 Aleksandra Andzic, Designing Better Together