Transcripts
1. Introduction: Did you ever feel like a brown thumb, like every plant you buy, you're going to kill? Well, I know the feeling and it's not a good one. Hi, my name is Carmen Whitehead and I'm a plant enthusiasms, sometime is called plant whisperer. I have about a 150 plants in my apartment that I've been collecting over the past five years. I've learned quite a few things along the way and I want to share those tips and tricks with you in this class. This class is for you if you're a new plant parent getting your very first plant or someone that has a few struggling plants and feel like you need some guidance in your plant journey. This class is meant to give you some skills that every new plant parent needs to not only help their plants survive, but to thrive as well. Every plant has the potential to grow and be its very best. The key is knowing what the plant needs to achieve that. Basically, what is the plant recipe for that particular plant to have its best life? Some plants need more light, some plants need less water. You can apply these key ingredients to each plant's specific needs. Now those key ingredients are what we're going to go over in each lesson. We're going to go over lighting. We're going to go over soil. We're going to go over watering, which is very important. We're going to go over pots and pot size. We're going to talk about fertilizer and the importance of feeding your plants. Finally, we're going to talk about humidity. Does your plant need humidity like this begonia here? Being a plant parent can be so rewarding both physically and mentally. Watching something grow under your care is one of the most satisfying feelings you'll have. In this class, you'll learn the skills you need to develop that confidence to watch your plant grow and thrive under your care. Let's get started.
2. Class Project: Now let's talk about your class project. I'd like for you to select a plant from a local nursery, using the skills that you learned in this class, those key ingredients, to make that special recipe for your plant, for your home. Take a picture of that plant, where you've placed it in your home, tell us why you selected that plant, and why you placed it in that particular spot in your home. Basically, what is the recipe for that plant, in your home? Then post that picture and all that information in the project gallery. Don't feel overwhelmed about this project. Have fun with it. Go to the nurseries, ask questions, look at the tags, and remember those skills that you learned. If you need to, come back to them and refer back to them to get a little bit more clarification. You can do this, I know you can. Let's get started turning that brown thumb green. Let's start with the first lesson.
3. Best Lighting: Let's start off with the very first thing you need to know lighting. Sometimes you can control it, most of the time you can't, with the weather and the way that your windows are facing and such. There's a couple of things you need to know before you get started on picking your plans regarding lighting; and for that, we're going to need to go back to high school biology and geography. First of all, high school biology. Photosynthesis. What exactly is photosynthesis? Photosynthesis is the process by which green plants and certain other organisms transform light energy into chemical energy. Basically, it's what makes the plant grow. That energy that they get from light, from carbon dioxide, that is what makes the plant grow and thrive. There are certain plants that can survive in low light, certain plants that do well in medium light, and certain plants that really thrive in higher indirect light, meaning no actual sun hitting them. The next class we need to go to is geography. You need to know your North, South, East, West, which direction is your window facing or are your windows facing? The best direction would be West and South windows because they get the brightest light and can get even some direct sun, depending upon how close you put the plant to the window. Next would be East-facing, and that's what I have. All of my windows are East-facing. All of my plants get morning light, dappled sunlight, bright light the rest of the day. The next one would be North-facing. North is probably the one that gets the least amount of light and probably low-light plants would do the best. They're not a plant that needs very bright light. Now this is true for the Northern hemisphere. For the Southern hemisphere, my Australian and South African friends, it would be backwards for you. Your North-facing window would be the best and brightest light, whereas your South window would be the least amount of light. Keep that in mind depending upon where you are. Now that we're out of class, let's talk about some plants that do well in low light, medium light, and high indirect light. Low light is where you are furthest away from a window and have no natural light really hitting that area. I have an area like that near my kitchen and I have all my Sansevierias or snake plants or mother-in-law's tongue as they're sometimes referred to in that area because I know that this type of plant, this genus of plants does well in low light. They can survive low light. So I put all of them there, and really the only light they have is a small table lamp that I have there with a small grow light bulb that is more for ambient light than anything. Snake plants are good or Sansevierias are good for low light areas where you get the least amount of light. Now, medium light is when you're about 10-15 feet away from the window. I have this Neon Pothos in here in my plant room and it's about all I say about 11 feet away from the East-facing window. I used to have it closer and look what happened. It got some direct sun and it got a little bit burned. That's something you need to be careful of and watch your plants to see if they're too close to the light source, they may get burned like this one. So I moved it away into a medium light area, and look how beautiful it's doing. It's maintaining that beautiful neon color and doing well. Sometimes you do need to move a plant, that's a tip for you. You do need to move a plant if you see it's not doing well in that lighting area. Now, plants that need more sun or high indirect light. I'll show you some here that I have in front of my East-facing window. They sometimes get dappled early morning sun, meaning I can control the blinds by opening them just a little bit to let a little bit of filtered sun in just for a little while and they'll do fine. It's not enough to burn them, but it's enough to give them some high and bright light. After the sun moves later on in the day, it's bright light that they receive there, more direct sun. Now, some that can survive in direct sun, maybe your succulents or cacti, if you have them inside, those can be put by a window and get some direct sun and not be hurt by that direct sun. Now let's say you need to supplement your lighting. You have an area where you really want to place a plant, a plant that needs a little bit more lighting than you can give it naturally, you're going to need to supplement it with some grow lights. There's lots of them out there. You really do need to do your research. I have some that I put in desk lamps, that I put in adjustable lamps, bulbs, things like that. You do need to be careful with those and putting plants too close to them because they can burn the plant too if you have it too close and the wattage of that bulb is too high. Do your research on that if you do want to supplement your lighting with a grow light. But it is a wonderful way particularly during the winter months when you don't have a lot of lighting to supplement that lighting and keep your plants, maintain them throughout the winter months also. Finally, when you are at the nursery checking for your plants, the tags inside the pod will tell you if that plant thrives in low light, medium light, or high indirect light. Make sure you read that. If it doesn't have a tag, ask the nursery employee, and if you still don't have an answer and you're not quite sure, do your research first, look it up online to see exactly what kind of lighting that particular plant needs to maintain its beauty and to thrive. Now that we've covered lighting before, I'll let you go on to the next lesson. Let's talk about some things you need to take away from this one. Know your directions. Are your windows North, East, South, West? Know which way they're facing. Know which kind of lighting that particular plant needs. Does it need medium lighting or can it handle low light? Finally, do your research on grow lights before you purchase any. Let's get on to the next lesson. We're going to talk about soil.
4. Does the Type of Soil Matter?: Welcome to lesson number 2. We're going to talk about soil in this lesson, and what different types of soil there are, and if you need to buy special soil for your plant. Now, when you buy your plant at a nursery garden center, it's going to come in a growers pot with the soil that it grew in. Sometimes that soil isn't the very best soil to leave the plant in in a long-term basis. I tend to wait at least three weeks before I consider repotting that plant into new, fresh soil, better soil. The main reason is that I want that plant to acclimate to its new environment. It's gone through a little bit of a trauma, moving from the garden center to a home. Maybe the weather was bad outside when you had it outside in the moving process. It can be a little bit traumatized, so I leave them in the area that I want to place them more permanently and let them get acclimated to that humidity, to that lighting, to that environment. Then at about three weeks, I'll take a look at it and see if a soil in the pot needs to be changed. Now, there's a couple of ways that I determine that. Is that soil a fast draining soil? What is fast draining soil anyway? Well, it's pretty much what it says. Soil that lets water run through quickly, but let's the roots retain enough water to moisten them and give them what they need, but doesn't hold onto too much water in the soil where the roots are hanging out in there in wet soil. That is not good. They don't like that, and it's the quickest way to root rot and killing your plant. You want fast draining soil in your pot. Now one of the ways you can determine that is by looking at it. I'm going to show you here a couple of different soil mixes. One of them is soil mix from nursery pots of plants that I have already repotted. You can see that it's mainly just soil, and not a lot of other mixes or ingredients to make it fast draining. To make it fast draining, you want some chunkiness in that soil. To get chunkiness in it, it's not by feeding it donuts or sweets or anything like that, but adding ingredients to that soil that will help the water run through a little bit quicker and a little bit easier. You can see these little white rocks, those are called perlite. You can get them at the nursery or garden center in bags of them. There's also another kind of rock called pumice, that does the same as the perlite. Pumice can be a little bit more expensive and sometimes a little harder to find in certain areas. I like to add a little bit of orchid bark to my mix to make it even chunkier, not too much. I also like to add a little bit of worm castings. What are worm castings, you ask? Well, it's pretty much what you think. It's worm poop. But don't worry, it's organic. It's one of the best organic fertilizers you can get for your plants. I tend to add that to soil that I may be mixing myself, like this one here. Now, I like to mix my own soil and make my own recipes, and mix it up like I was mixing up a batter or something. You don't have to do that. You can buy bags of soil that's already mixed, that already has many or all of these ingredients that I just mentioned to you, and it's ready to be used. You don't have to store those extra bags anywhere. My suggestion to new parents is always, get the best soil, the best potting mix that you can afford. The costs out there runs the gamut, and I'm sure in different countries, it's different also. Here in the United States, you can get a bag of regular big box store brand mix for about $5. Or you can go with a more organic, no synthetics in it, a more organic mix, a mix that has all of those other ingredients in it in a good proportion, and has worm castings and other natural organic fertilizers. But that bag is going to cost a little bit more. It's going to be $20 or more for the same size as that $5 one. Don't break your budget or make yourself poor over buying soil. Get the best one that you can afford. Before we go on to the next lesson, which is watering, very important lesson, let's go over what we talked about. The main points that we talked about in this lesson of soil. Always get the best soil that you can afford. Don't break your budget over buying designer soil, or soil that you heard so and so uses. Get the best one that you can afford. Make sure that it is fast draining soil that has enough chunkiness in it to let that water run through quickly, but retain enough moisture to feed those roots. Never let your roots sit in water either. But we're going to go over that in the next lesson. You know what, I'll meet you over there in the next lesson and we'll talk about watering.
5. Don't Overwater Your Plant!: Watering your plants, it's probably the scariest thing a new [inaudible] parent will do because they're just not sure if they're over watering or they are underwatering. It can be confusing sometimes what a plant wants. In this lesson, we're going to talk about how do you determine if that plant needs water. Is the plant thirsty and wants some water? How much should you give that plant. Do you give it a little bit? How often do you do that? We're going to go over all of that of how you can determine what the best watering schedule is for your plant and how much. Now most plants, when they come with the tag, you can see here that it will tell you more or less in general terms what the watering schedule is for that plant. You can see on this lipstick plant, it says to water when the soil is dry and water thoroughly. Well, what exactly does that mean? Is that every seven or 10 days or every three weeks, what is that? You don't necessarily know right off the bat. You're going to need some time to get to know your plant and see what that schedule is. The best way to determine if your plant is thirsty is to see if that soil is dry. I use a few different ways on determining if a plant is thirsty and I say, I use the term thirsty a lot in that way because I almost look at them as people. But one of the ways is your finger. Put your finger down in there. Does it feel moist when you bring it out? Does it still have soil attached to your finger? It means it's moist. Don't water it. If you put your finger down in there and you don't feel any moisture, it seem almost even hard to get your finger down in there, it comes out, it's dry, nothing attached to it, it's probably thirsty and wants some water. Now, if you don't want to get your nails dirty or some dirt under your nails like I'd like that. I also use this here, this moisture meter, and this one checks for light also. I always make sure that it's on the moisture setting. I just put it right down in there and it will tell me on the reading there. It has a little red zone, little green zone, and a little blue zone. Red being very dry, green, moist, fine, leave it alone, blue, it's very moist. Really leave it alone. This plant could probably use some water because when I put this down in there further than my finger, the soil was dry. Moisture meter, I probably would say if you're going to get something an accessory other than your watering can, a moisture meter would be the best thing for you to get because it will help relieve the doubt that you may have if that soil is dry or not. A moisture meter is good. Another way that I use, and as you get more into your plant parenthood, you'll learn these little tricks with each plant. You'll get to know each plant. If the pot feels really light, then it's probably thirsty because there's not moisture or water in there. If the pot feels kind of heavy, then it's probably got some moisture still in there. That method really comes with time. You get to know your plant, you get to know how it feels when it's been watered and it feels wet or heavy or when it's dry and it feels lighter. Another way that I use to tell is sometimes the plant itself just tells me by my looking at it. This little piece, lily right here, is a little bit of a drama queen, because when she's thirsty, she will let me know. I'm going to show you a picture here of just a few days ago before I watered her. She was so, so droopy and look so sad, her leaves felt very, very thin. That's another way by looking at the plant, by seeing if the leaves are droopy, by feeling the leaves, if they feel very paper thin and not a little bit waxy or leathery almost when, after they'd been watered, then you know that that plant is ready. As soon as I water her within a few hours, she perks back up, the leaves go up and she's happy again until the next watering. You've determined if your plant is thirsty and wants water. When you water, like remember what that tag said? It said water thoroughly. That means water all the way through that water comes out the bottom of that pot. It's essential that you also have holes at the bottom of that pot and water all the way through when it comes out. I'm going to show you here of my watering a plant where it comes all the way out the bottom. That's where that fast draining soil comes in and is essential. Once you've watered it all the way through and the water comes out the bottom, if you have a little saucer at the bottom of it to collect that excess water, that's when you dump it out. The last thing you want to do is leave that water sitting there where the plant would try and suck up that extra water and that's when you over water. You don't want to leave any standing water in the little saucers or in the pods that are cover pots or decorative pots, you don't want to leave any standing water in that. Once your water and you water all the way through, maybe have a little bucket or something like that where you can pour that excess water out and not leave your plant sitting in excess water and its roots sitting in excess water. Very important. Let's talk a little bit about the type of water, and there is different types of water. Rainwater is probably the best water you will give your indoor plants if you're lucky enough to live in an area where it rains on a regular basis, I would put a bucket outside and collect some of that rain water and use that rain water to water your plants. Now, makes sure that it is at room temperature. You don't want to shock the roots of the plant with very cold rain water, so make sure it's at room temperature. Here in Phoenix, Arizona, I don't get that opportunity to collect rainwater very much. In the area that I live, the water is a little bit hard, meaning it has a lot of minerals in it, calciums and things like that that are not good for foliage tropical indoor plants. They tend to leave brown spots on the leaves, they tend to leave white deposits of calcium on top of the soil. What I use for my indoor tropical plants is filtered water. I purchased a water-filter for my kitchen faucet, and I fill my bucket. This is about maybe a gallon size bucket or maybe two. Every time that I water I fill this up at the sink with that filtered water. It is been of miracle for my plants and getting rid of tips, brown spots, and getting rid of those white deposits on the soil, the extra minerals, you don't want to give your plants those types of extra minerals. Make sure you check to see if your water is a little bit hard. You'll know if your water leaves like water spots, white water spots, that means it has a lot of calcium more minerals in it. You'll want to check that out. Well water I think is pretty good. You probably won't have too many minerals in that, but that gives you some options there. Now, if you do want to get distilled water, purchase gallons of distilled water at the store, you can do that. It's a little bit cumbersome in getting all those gallons to home, to water your plants, and also getting rid of all those plastic containers too. You may want to think that route too, but distilled water is perfectly fine also. Let's go over what we learned in this lesson about water before we move on. You want to make sure that you're giving the best water you can to your plants. Rain water is the best, filtered water and well water are good, distilled is good. Make sure you don't give them hard water. You want to make sure that you water thoroughly all the way through that the water comes out the bottom and that excess water you get rid of. You want to make sure that you check your soil before you water it with the moisture meter, your finger, whatever method you find works for you, do that method to determine if that plant needs water. Now, as you do these waterings, you'll notice a pattern of about every 7-10 days needs watering. This plant about every two weeks needs watering. You'll get the schedule down and you'll also notice that during the winter months, you'll want to back off a little bit on the watering because in the winter months, the water does not evaporate as quickly as the summer months when it's warm and a lot of plants go into dormancy and when they are in dormancy, you don't want to water them as much. I tend to back off maybe a good week longer than I normally would have for those plants. Those are things to keep in mind. I will see you over in the next lesson.
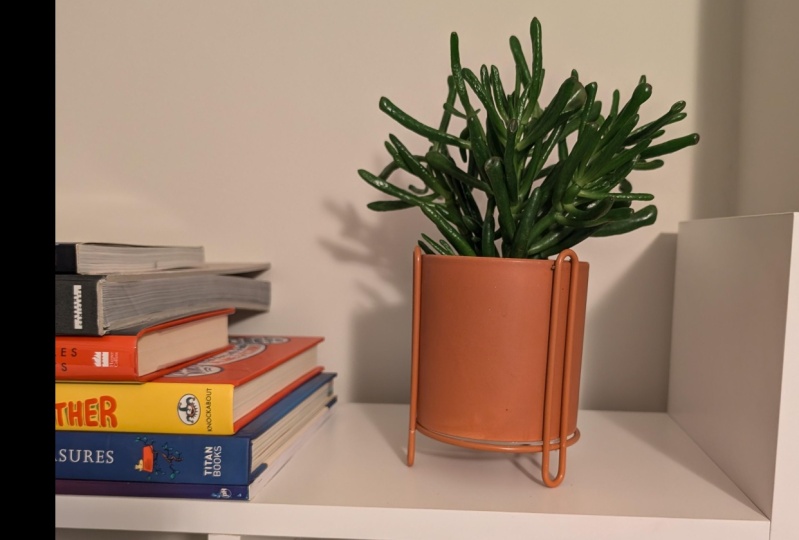
6. What Type of pot Should You Use?: Now that we're getting the plant recipe together for your plant, let's talk about the vessel it's going to be in or the pot. Does pot size matter? Does the type of pot matter? Yes and yes. First of all, let's talk about size. In the case of plant pots, bigger isn't always better. Most plants will come from the nursery already in the right pot size that it needs to be in. At least for another year or two until it outgrows that pot. I would highly, highly recommend not putting the plant into a bigger pot, thinking a way to grow into that pot. Or I have this pot, that's the only pot I have and it'll just grow into it. It won't, because it probably won't last. What will happen is that the soil in that pot that is too big for that little roots system will stay moist longer. You'll think that it's dry, you'll water it again and it'll get into this vicious cycle, end up getting root rot and the plant will die basically. Don't put it into a pot that's too big. Now for instance, this is a four-inch pot here. Once this plant gets too big for this pot, I will go up a size. Typically pot sizes will go two inch, four inch, six inch, eight inch. The next size up will be a six-inch. Sometimes you can find a pot that's a five-inch and I can maybe put it into that, but never go more than two sizes above it. Always just go up to the next size. Reason being is that you don't want that soil to be wet for too long and lot of plants like to be snug in their pots. Not root bound and I'm going to show you a picture here of what a root bound plant is, where you see the swirling of the roots that have nowhere else to go in that pot except swirl around at the bottom. That's a sign that the plant is root bound and that it needs to be re-parted. Many times also, you'll see roots coming out the bottom of the pot. That's another sign that it needs to be re-parted. But again, just go up a size and that will give just enough room for that plant to grow some more and not too much where it will have the soil too moist. Now that we've talked about size, let's talk about types. I have all different types of pots. I don't necessarily have all of my plants in terracotta, although I love terracotta, it's a very Southwest thing. Living here in Arizona. I have just almost all of my succulents and cacti in terracotta. There's a reason for that, because terracotta is very porous, it basically breathes, which means that the soil in here will dry out much quicker than the soil in this plastic pot, even though it may look like a terracotta, but this is plastic, so it won't dry out as quickly as this one. This is ceramic, same scenario, it won't dry out as quickly as this one. For instance, my plants that are cacti and succulents or my snake plants. I have most of those in terracotta because they like to dry out a little quicker and they don't like to be in wet soil very long at all. That's something to keep in mind. If you are going to have the aesthetic look of all terracotta pots, that's fine. Just remember that they do dry out a little bit quicker than ceramic or plastic. Here's another kind of terracotta is just the different color. You can get them in different colors, but it's the same type of material with the same breathability. This ceramic pot that has this begonia will dry out much slower. But that's good because this begonia likes it a little bit more moist than say, that Easter cactus there. That's a good thing. My begonias or more tropical plants, I will have in a ceramic or plastic pot, or I can combine the two. This is a Terracotta pot, but inside is a nursery pot. This try to scan to hear that likes to be a little bit more moist, will stay more moist, but I get the aesthetic look of a terracotta pot. This is what we would call a cover pot, decorative pot, or I think it's a French term, cashpo. I can easily maintain the plant in its nursery pot, but give it the decorative look of a decorative pot. They come in all shapes and sizes as far as decorative pots. This one, I have it out in my living room with this [inaudible] in it. I can easily switch them out. When I need to empty the vessel of the water that may have collected at the bottom after my watering it, it's easy to do. There's lots of decorative cover pots that you can use while still maintaining your plant in its nursery pot and just simply putting it in there. Or you can plant it directly into its own pot, a terracotta pot or ceramic pot. But always, always remember that no matter what pot the plant is directly planted into, whether it's the nursery pot or a terracotta pot or ceramic, make sure that it has a drainage hole and make sure that that water can get out when you do water it. To wrap up this lesson before we move on, size does matter when it comes to pots. Don't go too big when you are ready to repot your plant. Just move up a size. Remember, terracotta can breathe, ceramic and plastic will maintain moisture a little bit longer. You can also get decorative pots of you want to go the route of maintaining your nursery pot, but having a really nice decorative look. Let's move on. We're going to talk about nutrition, fertilizer.
7. Your Plants Are Hungry, Feed Them.: In this lesson, we're going to talk about nutrition or fertilizer. Every plant needs some sort of nutrition. Whether it gets it naturally from the soil outside if it's planted in the ground, or if you give it to the plant by some type of organic material or a fertilizer. Now, most plants will come from the nursery. Sometimes you'll see it with little white pebbles, little granules or little green granules. Those are an extended release fertilizer, and those are perfectly fine, you can leave those in the pot. Most plants will need a refreshment of their fertilizing in the growing months. That means from spring to fall, when most plants are actively growing. Once they've been dormant over the winter and they start to wake up, that's when you can start fertilizing them. Now, what's the best type of fertilizer? Well, the best one that works for you and your plants. You'll see when you go to the garden center, there are many, many types of fertilizers out there. My recommendation to you is to select a all-purpose house plant one. This is just one that I have here. That's a name brand one, and there are others out there. There's organic ones that are made for house plants. Again, the same thing as with the soil, select the best one that you can afford because they can cause a bit of money also. One of the things that you may see on the bottle or the jug are some numbers, three numbers on the front. This one doesn't have them. They are actually listed on the back. But many of the fertilizers will have a number like 10-10-10, 10-5-8, something like that. What do those numbers mean? They're actually percentages and they stand for nitrogen, phosphorus, and potassium. Those are the main ingredients that plants need to get more nutrition. Nitrogen promotes leaf development and phosphorus plays a key role in the growth of roots, blooming, and fruiting. Potassium also plays a key role in root growth and development. My suggestion to you would be to get basically one that says all-purpose plant fertilizer, indoor house plant fertilizer, or if you see the numbers on there, get one that has even balanced numbers, 10-10-10, 15-15-15, something like that. Remember, those numbers just represent percentages of what is in that fertilizer. This is a concentrate version of the fertilizer. I would basically get a picture full of a gallon typically, is what the instruction say on here. I like to dilute my concentrate a little bit more than what it says on the instructions. Because if you give your plants too much of a good thing, and you know too much of a good thing isn't always good, but you can damage your leaves and burning them and getting brown edges on them and there's no coming back from that. The leaf will be permanently damage. To help me avoid that, I dilute it a little bit more. For instance, if it says a teaspoon per gallon, I'll give it half a teaspoon. I usually half the amount that it recommends to put into a gallon of water. That helps me give it just enough nutrition but also will prevent me from over fertilizing it and damaging the leaf. Most instructions on these fertilizers tell you to do it every watering, which you can. That's fine especially if you're diluting into that safe. I tend to do it every 2-4 weeks, at the least once a month during the growing season. Sometimes I'll forget and it'll end up being once a month, and that's perfectly fine also. On the more frequent side, every watering. On the less frequent side, about every month. This is just a more synthetic one but they do make organic ones. If you don't want to use any type of liquid concentrate, you can also use the real organic stuff in that is the worm castings. We talked a little bit about worm castings in our soil lesson. As I mentioned, these are actual worm castings, worm poop. I tend to give these also if a plant is not ready to be repotted, the pot size is still good. I'm not going to give it refresh soil that may have worm castings in it. I don't necessarily want to liquid fertilize it. Then I will sprinkle about a scoop full on top of the soil depending upon the pot size, less if it's a small pot like this one. Maybe about a scoop full of this six inch pot or an eight inch pot. I'll sprinkle on top of the soil and then work it into the soil, so it just gets just beneath the soil. With each watering that I give that plant, these worm castings will release the organic nutrients that that plant needs, and you can't get more organic than worm castings. Now, when my daughter was living with me, she had a fish tank. In every couple of months or so, once a month maybe, she would empty part of that water out of her fish tank to refresh the water in there. Well, I wouldn't have her throw that water out. I would use that because what's in that water? Fish poop, fish castings. I would use that to water my plants with. They do make fertilizer that's called the fish emulsion. I don't necessarily like to use that because it does have a little bit of aroma of fish. So I don't necessarily like to use fish emulsion in my indoor plants. They do recommend it, I think, for tomato plants and things like that. But if you have a fish tank and you change the water out, as long as it doesn't have any other chemicals in it, the algae in it, the fish castings in it, all of that is natural organic stuff that will help your plant also. That's one route of getting some organic nutrients to your plant that you may already have. Let's go over some important points on this lesson before you move on. On the frequent side of fertilizing, every watering during the growing months. On the less frequent side, about once a month, and only during the key growing months, spring through fall. Most plants do go into dormancy during winter so you don't want to fertilize during that time because the plant is not actively growing. If you want to go the very organic route, you can go the route of worm castings or fish emulsion, things like that. Those are very organic materials and are very, very healthy for indoor plants. We're almost done with our plant recipe. Last thing we're going to cover is humidity.
8. Humidity or Not?: Let's talk a little bit about humidity now. Most plants that you would find in the garden center do not require higher humidity. They'll do perfectly fine with your average household humidity of 30-40 percent, somewhere in there. For instance, this ZZ plant is perfectly happy in regular household humidity. This will even do well in an office environment, so no need for higher humidity there. But my angel wing begonia here is a tropical plant and it does require higher humidity and I need to give it that higher humidity if I want it to continue looking as lush and beautiful as it does here. That higher humidity can be 50, 55 percent sometimes up to 60 percent, depending upon some tropical plants. Tropical is the keyword there. They come from the tropics, Ecuador, places like that that have jungles and that have a very humid environment where these plants thrive. You're bringing them to Arizona here where our average humidity in the summertime and particularly, is like 15 percent outside. That's very dry. If I want to have plants like that in my home, I need to give it that extra humidity. For me to do that is fairly easy and there's a couple of ways I can do it. One of them, the most obvious way is getting a humidifier. Now here in my plant room, I do have a humidifier and in this room is where I keep all of the plants that definitely need higher humidity, 50 percent or higher. Some plants that I have in here because I don't have anywhere else to put them and they can handle that higher humidity. I don't necessarily keep cactus or succulents in here because those require less humidity. They come from very dry environments and they won't necessarily thrive in the higher humidity environment. Now, if you don't want to invest in a humidifier, there are a couple of ways that you can add humidity to just one plant. One of them would be to put a tray underneath this pot, fill it with pebbles, put some water in those pebbles and you'll be making your own little micro-climate there. As that water evaporates, it will give that plant humidity. It will raise the humidity around that plant. Now, there's a couple of key things with that method. You don't want the water high enough where it will touch the drainage hole at the bottom of this pot and go into the pot. You don't want the water accessing the soil inside. You want the pebbles to be high enough to elevate this pot out of the water. Now you will need to replenish that water every few days as you see the water evaporating. That's one way of doing that. Other ways of doing that are to have perhaps open glasses of water nearby that plant. As that water evaporates in that glass, it will give humidity for that plant. Finally, another way of doing it is to spritz the plant with a little spray bottle and some water in it and you spritz it maybe once or twice a day and that will provide some humidity for the plant. Those are ways you can do it if you have just one or two plants that require a little bit higher humidity. When you have a few dozen, then you may need to look at getting a humidifier for that. But you can completely avoid all of that and just make sure that you get plants that don't require higher humidity. For that, you just look at the plant tag and it will tell you on there, does well in household's humidity, requires higher humidity, so you can look at that and say no, this one requires higher humidity. I can't provide that for it, I'm going to stay away from that plant. That's how you can avoid getting into one of those plants. Providing higher humidity isn't something you necessarily have to do. Like I said, you can stay away from those plants and only get plants that do well in regular household humidity. But if you do, you have some options there. Now, I'll see you in the next video for some final words.
9. Final Words: You did it. You went through all the lessons. That's wonderful. How do you feel? Do you feel a little bit more confident? I'm sure you do. If not, don't worry, it'll come to you. We've gone through the six main ingredients that your plant needs for your plant recipe: light, soil, water, pots, fertilizer, and finally, humidity. Another key thing to take away from this lesson is to read the plant tags. That will help you get started on that plant recipe because it's all there, you just need to decide for it. If you are not sure, research the plant on the Internet. Take a look on the Internet and see what it says on there, if the plant is for you before you make the financial investment in buying that plant. Now, don't forget to do your project. I'm so looking forward to seeing your pictures and seeing your plant recipes and what you selected. Thanks so much for joining me in this class. Bye-bye.
 Carmen Whitehead, Plant Parent & Enthusiast