Transcripts
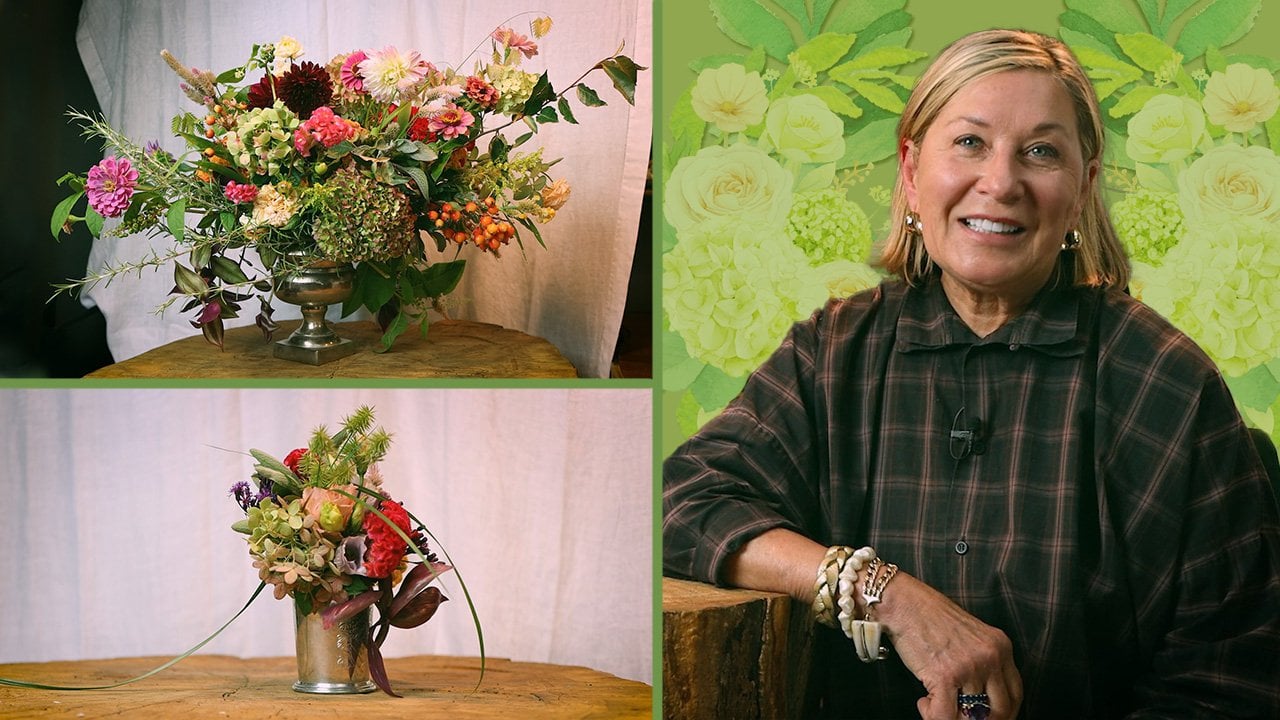
1. Succulent Arrangements Intro: Hello and congratulations on your big event, whether it's a wedding and anniversary of ProM, whatever it may be. My name is Carmen wide head and I'm going to show you in this class how you can make your event even more unique by using succulents in your floral arrangements. Now at this point you're probably thinking about flowers and what kinds of flowers you're going to use for your florals, for your bouquet, your boot nears, massages, et cetera. Well, I want to give you a little bit different idea to consider. How about using some succulent is some rosettes in some string succulents in your arrangements, whether it's just the bouquet or the just the blue nears, you can pick and choose. And you can combine them with cut flowers for a really unique look, or go all the way and use only succulent, which is really fantastic. I'm gonna show you in this class all of the supplies you'll need for the three arrangements, a bouquet, of course, Cij, end of the year. And then I'm gonna show you how to put each of those arrangements together. At the end, I'm going to give you some tips and tricks on how to continue enjoying those succulents. Because unlike cut flowers were you throw away or maybe freeze dry them afterwards. You can use these succulents and enjoy them for many, many months, if not years afterwards. And I'm going to show you how that's done. So let's get started with the first lesson in showing you the supplies you'll need for your first arrangement. Let's get to it.
2. Class Project: Okay, For your class project, I want you to share with me the arrangement that you made, whether it's just a coarser edge or only a boat near, or if you made a grand bouquet or all of them. Take a picture of it and uploaded into the project section and tell us about the event. And tell us all the wonderful compliments that you got on it because I'm sure you did. I'm looking forward to seeing all of your projects and all of your creations.
3. Succulent Bouquet Supplies: Today I'm gonna be using these rosettes to create a succulent bridal bouquet. These are the perfect size for this type of project. So I have various rosettes and I've also picked some cuttings from my own garden that I'll be using to give the bouquet a little bit more texture and a little bit more variety. I'm also going to be using some strings of beads in spring of bananas for a little trailing effect on it. I'll be using a couple of different types of floor wire, 22 gauge wire, and a little bit thicker 808 wire. Some wire cutters, some needle nose pliers, scissors, floral tape. And to finish off the bouquet, I have some burlap ribbon along with the lace on it. So let's get started.
4. Preparing Succulents For Bouquet: For these larger and heavier reserves, I do use a double wire technique using this 22 gauge wire IP or sit through the very base of the Rosetta, going halfway through, turn it, and then use another piece going the other way. So you basically have a cross and then you would simply folded over and twist them together. These wires are 18 inches long, so it's the perfect size for this type project. Don't worry about the length variance on each of your rosettes. You will be given a chance to cut the wires later. Simply put it all together with some floral tape member to stretch it so you can activate the stickiness silver, and tape it all the way down. For succulents that have a very thin stem like this, gracilis, Red Book Pagoda. I simply fold over the wire in a U-shape, the succulent on it, and then secure it with some floral tape. This also works for these more tender succulents like this, Kaelyn coli Chocolate Soldier. Just lay it right on the loop and secure it with some floral tape. Now, these pieces here have a little bit woody or stems. So the same procedure can be used to place them together, lay them on the loop of the wire, and then simply secure them with some floral tape. Now for the strings of beads and strings of bananas, I simply take a 22 gauge wire, loop it over and use the needle nose pliers to close that loop, secure it with some floral tape, and then simply bring the wire, loop of wire back over. So it will have a trailing or dangling effect. On this portrait of Kiara Africa variegated, I use the 18 gauge wire, which can be difficult to bend. So use the needle nose pliers, lay the long stem on it and secure it with some floral tape.
5. Putting Together Bouquet: Now that you have all of your pieces together, lay them out in your one. Select the Rosetta that you want to be the centerpiece. You shouldn't be in your biggest one. I selected this one here that has a little flower bloom stock from it. And then you'll want to start bringing your other rosettes just underneath it. You don't want them all on the same level. You want to create kind of a dome effect, securing the wires in one hand and then bringing in other pieces. You can bend the wire as needed to have the Rosetta or the succulent face out. And then continue the morning and adding pieces. Now this portrait of Power Africa, I added not very far down. I wanted it to stick out a little bit from the bouquet. And then just simply continue turning the bouquet, adding in pieces, making sure that you don't have any holes in the bone. Okay. And for the string of beads and streaming of bananas, what I did is I took the wire and put it in right down through the center of the bouquet. Grabbing it with my other hand and pulling it through, this will give a trailing effect right from the center of the bouquet. Then you can add it on the edge. But I thought it would have been nice effect coming out of the center of the bouquet. And once you have them altogether, I took a piece of 22 gauge wire starting at the top and working my way down, wired the handle altogether. Then took some floral tape in, secured that starting at the base, going all the way down, secured it with some floral tape. Once I got to the bottom, I cut the ends of the wires to make an even end of the Bacchae. One of the final touches is this ribbon, burlap ribbon. I started at the very top, twisting it all the way down and then security with these baroque ends. Now, I worked my way up spacing the pins, going up to the top. This secures the ribbon, but also adds a really nice touch to the handle. And then just simply cut the last pieces off there. And there you have it friends, a complete succulent bouquet. This will keep for a couple of days to simply spritz it and place it in the refrigerator. And once the event is done, you can take it apart and have the succulent plant it up.
6. Boutonniere Supplies: Today I'm gonna be showing you how to make these succulent mutineers and course sausage. They're super easy to make. I'm going to start with some of the succulents that I've received from Mountain Crest gardens. These are cuttings that I received in various shapes and sizes. And I also went outside and pick some foliage from around at my apartment complex and rosemary, some beads, some flowers from a red yucca. And I'm going to be using all of these. I'm trying to use all natural products, no artificial flowers or anything. I've got some 22 gauge wire and some floral tape to bind everything together. And I'll need also a wire cutter, some scissors, and then also some ribbon, whether it be just regular ribbon or maybe even some lace ribbon. So let's get started.
7. Make Boutonnieres: The first one we're going to make is with a calendar boy, Tillman tos of panda plant. You can see it has dried the stem there and calloused over. And I did take off a couple of leaves down at the bottom just to make it a little bit smaller for a group near, I'm using 22 gauge wire to pierce the stem. This is going to make it easier for us to hold everything together. Now you want to be careful with your fingers when you're piercing the wire through that you don't poke yourself. Visit these are sharper and it will draw blood. Push it halfway through, bend it over and you're going to want to twist some of the wires together and you're going to secure all this with the floral tape. Now the stickiness of a floral tape activates when you stretch it. So you're going to place it at the very base of the stem. Twisting and pulling the tape gently. You pull too hard, it will break. Or you can start again where it broke. And then just twist along and combine all of the wire together. Now I did cut the very tip of that to make sure that there was no wire poking out there. Now you're gonna get your leaves. I did take off some of the bottom leaves on these little stems to give me a full stem. Layering here is what you're going to be doing. Little beads that are off of this lush. Just adjust as you feel needed. Then bring in your succulent and adjusted. Holding everything together with your left fingers. Adding one last little detail there. And you're going to be securing all of this with some floral tape. Again, start at the very base. And when you're securing all of these pieces together, I would go around the base at least three or four times to make sure that everything is holding together because this succulent handy a little bit top-heavy so you wanna make sure that you've got it secured at the very top there, and then start working your way down again, pulling gently on the tape and working your way down. And that will combine all of your pieces. Now that everything is combined, I'm going to add one last little detail to the anterior. I'm taking a marker or pen and you can use a pencil whatever you want and simply twirling it up to add a little curly cue detail to this MOOC near. Since it's a wire. It's easy to curl it up and that adds a cute little detail to this boot. Near the final detail will be this how panned? This is what will be used to attach the boot near to a lapel. And there you are. Our first boot near complete. The next group near Oregon do is with some rosemary. I've taken up the bottom leaves and taped it together. We're going to use this flower from a red yucca and this MOOC of area on these red Yucca buds, I'm going to take off some of the bottom buds and also cut it. So I can have a little bit of a stem to be able to combine everything together. On the such a varia, there's just about an inch or so, maybe half an inch of stem there. So I'm going to use my 22 gauge wire impure sit right through the base there. Again, be careful with your fingers. Sometimes you really do have to apply some pressure. And you're going to push it through, going about halfway. And then bend the wire down and twists together and make them ready to be taped together. In this literature, varia has actually a little baby at the bottom. It's going to be okay when we're done with all of these, once the wedding or the event is all over, all of these succulents will be able to be taken apart and planted. So those little babies will be just fine. And we start our floral tape here at the base, again, gently tugging at it to activate this. Submit and twirling all the way down to combine the wires. Now we're getting ready to layer and combine all of our pieces together. We have the rosemary in the back, the sprig of red yucca flowers and the edge herbaria in the front, again at the base, start twirling. It makes sure that you take at least three or four times right at the base before starting to slowly move down. Combining all of the pieces. Once all of the pieces have been combined, I'm going to use this ribbon to give it a little bit of a finishing touch. I've stretched it out and laid it on the back about two or three inches. And then I'm going to start wrapping it around the wire all the way down to the end and then coming back up. So it's going to be a double layer of ribbon on the stem here. Then you can definitely just go down to the bottom, cut it, and even secure it with some hot glue and just leave the little bit of ribbon at the top there. And I decided to go back up. And I'm going to tie it once I get to the top. And what I do here is I loop a piece around my thumb, securing it. Holding it with my thumb. I cut off about three or four inches and bring that piece in, loop it into the piece I was holding. And that will tie a knot. And then there will be two pieces in the back of the book near. And that was secure it. You can secure it even more by adding some hot glue, but it's pretty tight there. I don't think it's going anywhere. And then the final piece will be the pearl pan to be used to attach it to the lapel.
8. Make a Corsage: The last piece we're going to do is of course Cij. Now this is going to be a little bit bigger. So we're going to want a little bit bigger. Stan with leaves and some sprigs there. And we're going to use a couple of succulents. This Hello bada, jade plant in this little bit larger Rosetta. Now, this Rosetta here on the very tips has some pink, reddish color that's going to really combined great with the flowers from the red yucca. Now if you need to take off some leaves down at the bottom that may be dead or just need to come off and you can do that. I'm going to show you a little bit different way to anchor your succulent to wire. Now this kras Scylla has a little bit of this thin stem. So what I've done is I've done a U-shape of the wire and just laid it on onto the wire there. And then I will attach it with the floral tape. And this is a little bit easier way to anchor succulents that have smaller stems to the wire. And you would do the same floral tape procedure, just tugging on the floral tape and twirling it all the way down. And that will secure this succulent that has a little bit smaller stem. But the herbaria you can see there that I've already done the same procedure and anchoring it. Now we start the layering process with the leafy stem there and just work with your sprigs there. And sometimes they lay differently. If you turn them around, you want to remember that this is going to go up on a lady shoulder. So you want it to lay as flat as possible and start adding the succulents, the jade plant here. I decided to go ahead and tape these pieces together to give me a little bit easier play with them. So I take these three pieces together and then I started layering. And I realized that this red yucca flowers had some buds that we're not letting my jade plant lay flat, so I decided to take those off. And that way the jade plant can lay flat a little bit easier. Adding the last little sprig there before adding the edge Bavaria. Now on these areas, they're on wires so you can turn them a little bit. If you find that the succulent is sitting too straight and you want it to look a little bit more forward. You can just pull it forward a little bit. And then that will turn the wire and it will be looking out instead of straight up. So you check it just before you do the floral tape, combining everything together. And then just wrap it around the base all the way down. And here I'm going to add a bot, very simple ribbon bow. You're going to do a loop leaving about three or four inches extra ribbon there. Scrunch it between your fingers, between your thumb and finger. Do a loop. In scrunch it between your fingers and do the same on the other side. And you can do as many loops as you'd like to make it as full as you like I did two on each side. And then cut leaving about three or four inches of ribbon. And the way that I'm hold this together is I'm going to put a wire through the loop and then twist it together, holding it together. And I will attach this to the course site with some floral tape. And that will be my final floral tape around the stem, securing everything together. And there you have it. Friends, a beautiful Carson edge for the mother of the bride, Mother of the groom. And you can combine and work all these pieces together to make it a set.
9. Final Tips: Well, I hope you enjoyed making those. Let me give you some final tips on how to take care of them until your big event. I wouldn't make them two to three days at the most before your event. You can place them inside of like a takeout container or plastic baggie and put them in the refrigerator. They'll keep until then. Just fine. Once you are done with the event, don't throw them away. Take apart the bouquet and the Buton years and plant them in some dry soil and you will have succulents routing in no time. Hi.
 Carmen Whitehead, Plant Parent & Enthusiast