Transcripts
1. Introduction: What's growing on gardeners? Have you ever wanted to start your very own vegetable garden, but you don't know
where to begin? Or maybe you've been
gardening for years, but you want to kick things up a notch and take them
to a whole new level. While you're in luck
on this course, I'm going to teach
you how to start your very own annual
vegetables from seed so you can build the vegetable garden
of your dreams. This course will go
into great detail about the seed starting process. And drill down to a level
that beginner gardeners can understand no matter how
new you are to this process. But I will feature
countless tips and tricks that I've learned along the
way from years of experience. So intermediate and advanced
gardeners can learn plenty of helpful techniques to become more successful
gardeners too. By the end of this course,
you will know why starting your own plants from seed is better than
buying transplants. What supplies you need
to start your own seeds? How to select or make your
own seed starting mix. How to plant seeds. How to create the
optimal conditions to maximize seed germination. When you should start
seeds for best results. And what seeds are
actually best, directly sown into
your garden instead of started as transplants
indoors. Now onto the course.
2. Why Growing From Seed Is Best: So why should we start
our plants from seed? Well, the first reason is cost. The cost of transplants has become downright
embarrassing over the years. In fact, my local big box
stores are now selling individual transplants for
$6 apiece. That's crazy. And if you want to buy
a single tomato plant that is mature and
laden with fruit, they cost as much as $20 apiece. You are never going to get $20 worth of tomatoes
off a single plant. By comparison, you can
buy a seed packet with as few as ten to as
many as 100 seeds in it for only a couple dollar. So for the cost of one
transplant at a big box store, you can start potentially 100 or more
individual seedlings. The second reason is
variety selection. If you were buying
transplants from a nursery, you were only going
to have a handful of fairly generic
varieties to choose from. But if you grow your own
vegetables from seed, you will have
literally thousands of different varieties to choose from of all different shapes, sizes, colors, hardiness, disease resistance
levels, et cetera. Just over the years, I've
accumulated dozens of different varieties of seed
packets for tomatoes alone. The diversity is
absolutely off the charts. And when you experiment with all of these
different varieties, you will find varieties that perform best in your climate. And you'll have
interesting colors and flavors that you simply will
never find anywhere else.
3. Seed Starting Supplies: The next step is to gather
your seed starting supplies. And these can be anything from professional level quality
materials that you go out and purchase to old containers that you save and
repurpose to cheap, homemade DIY solutions for
starting your own seed. Now, if your goal is to start your seedlings inside
transplant trays, you will probably
have to go out and purchase these
transplant tray bases. And I purchased a
multi pack of these. You can get them from
almost any online retailer or big box store that has
a lawn and garden section, But what you decide to
put inside is up to you. For example, you can buy one of these multi celled
inserts that will come in all different counts and
sizes that will fit right in. Or you can repurpose some old containers
that can go inside. For example, these are old Bonnie transplant
trays that I've held onto. Instead of throwing them away, you can put these inside
the tray bass and start your seedlings in there
for out an additional cost. Or if you don't want
to start your seeds in individual seed cells and fill them with some
type of potting mix, you can go out and you can get these bottoms for
starting peat pellets. And you can go
purchase peat pellets that will snap right
into those bottoms. And these peat pellets
will give you a clean, sterile medium for growing
individual plants. I will have more on these later. And these products come in all different shapes and sizes. You can buy smaller trays, larger trays, et cetera, if you don't want
the standard size. And another thing that
you can do is to make your own homemade
plant containers. You can make them out of
things like plastic cups or egg cartons or any other
kind of throwaway medium. I'm using right here,
a pickle container to start some shallot seeds. And it's perfect for that
because it maintains humidity. It has a lid that I can
keep on for that humidity, but also vent it for a
little bit of fresh air. And if you look inside,
what do you see? Dozens of healthy
shallot seedlings. Another piece of equipment that I consider to be critical to your success growing from
seed is a seedling heat mat. These heat mats are used
for germination purposes. They provide a gentle
bottom heat to your seeds, and that will both decrease the amount of time it
takes for the seed to germinate and also dramatically increase your success rate
for seeds to germinate. Now these come in
all different sizes. You can get them as small as one single individual seed tray. Or you can buy a huge
seedling heat mat that fits numerous containers where you can start
hundreds and hundreds of individual seedlings indoors. One of my absolute favorite
pieces of equipment for starting seeds is a seedling
heat mat thermostat. A heat mat thermostat allows you to fine tune the warmth of a seedling heat mat and pair it with all of the different
things that you were starting. The thermostat will come with
a temperature probe that you'll simply install
into one of the cells, and that will ensure that your seedling heat mat is
neither too hot nor cool. You will operate in
that Goldilock zone where everything
is just right now. If you're starting
your seeds indoors, you will either need a very
intensely sunny window, which many people
in higher latitudes will not have this time of year, or you can go out and get
yourself grow lights. I have chosen to buy
LED grow lights, and they are very intense while using little to no energy, so they don't give
off a lot of heat. So if you're starting your seeds in your office like mine, it's a non offensive light that doesn't cost a whole
lot of money to run. The last piece of
equipment that I recommend you invest in is a timer for your seedling heat
mat and your grow lights. You can either go out and get an old school manual timer or you can do what I did and go out and get yourself one of these smart timers that you can control with an app
through your smartphone. This has two outlets, one for the ling heat mat
and one for the grow lights. And I have it run for 16
hours every single day. It automatically turns
on at 06:00 A.M. and off at 10:00 P.M. I run it for 16 hours. Because you must understand that grow lights are not nearly
as intense as the real sun. You need a lot more
light coming out of grow lights than if
you were growing these outdoors and
intense sunlight. So 16 hours on, 8 hours off is usually what
you want for your seedlings.
4. Seed Starting Mix: Now that you have your seeds and your seed starting equipment, let's talk potting mix. You effectively have three different options
for starting seeds. When it comes to the
seed starting medium, you can either go out
and you can purchase a pre manufactured
seed starting mix. You can make your own DIY, homemade seed starting mix, or you can start your seeds in peat pellets or
cocoa core pellets. Now if you're a new gardener, I generally recommend you
keep things simple and go out and buy a pre made
seed starting mix. Anything off the shelf
that specifically says seed starting is
going to be pretty good. Then you just go out
and you get yourself some of these
individual cells and then you fill the
cells about 80% of the way with
seed starting mix. This will eliminate a lot of variables and keep things
simple if you're a new gardener now for my more
expensive transplants like individual pepper plants, eggplants, cucumber plants,
tomato plants, et cetera, I love using these individual peat pellets
because they are a sterile growing medium
that is not going to contain any kind of
fungus, gnat eggs. So chances are you're not
going to get some type of fungal disease or
a pest infestation if you start your seeds indoors. So to me, the extra cost
is worth it when growing the more expensive temperature, critical annual vegetables for things like
lettuce or onions, where you may want to
start a lot of seeds, they will not be
economically viable. But again, for those big
tomatoes or the big peppers, it really is worth
it, in my opinion. Now the way this
works is simple. You will have to buy
special inserts that go into your seed starting trays that hold these peat pellets, But then you will just
hydrate them with warm water, and after a few minutes, they will absorb the
warm water and they will puff up into a
big fluffy pellet. Then you will sow your seeds
into the peat pellets. And after about a week or two, they will germinate on your seedling heat mat and you will wind up with something like
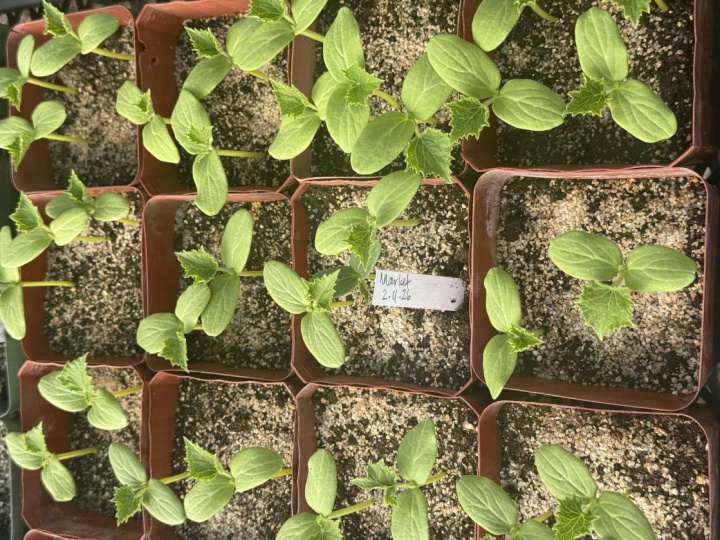
this a couple of weeks later. These are pepper plants
that I started in, the same individual seed pellets and they are just
beautiful and perfect. Now for more advanced gardeners, or gardeners that are starting
hundreds or thousands of seedlings and you want to save
money on bulk potting mix, you can make your own. One option is to go out and buy these big tubes of peat moss. Or you can go out
and you can buy these dehydrated
cocoa core bricks. Now, as the name suggests,
they are dehydrated, so they have to be re, hydrated
before you can use them. And the way I like
doing that is this. Take the cocoa core brick
and then place it in a container at least five times the size of
the brick itself. Then put a large pot of water on the stove for boil
and pour the boiling, or nearly boiling water on
top of the cocoa core brick. Make sure that it's deeper than the actual depth of the brick
itself by several times. Then put the lid on to
hold in all of that steam, and in about 30 minutes
the brick will re hydrate. Then take the lid
off, let it cool and when it's safe enough
and cool enough to handle, take your hands and work
it through the medium. And then unfluff it until
it's light and loamy. To make the seed starting mix, take your peat moss or hydrated cocoa core and mix
it at a ratio of four parts, peat or core to one part. Horticultural vermiculite. The horticultural vermiculite
will make the seed mix lighter and lomiar and more
evenly retain moisture. Now if you need a
faster draining mix or you're starting larger seeds, you may also want
to consider mixing in one part of perlite as well. One part of perlite will increase the drainage
rate of the mix.
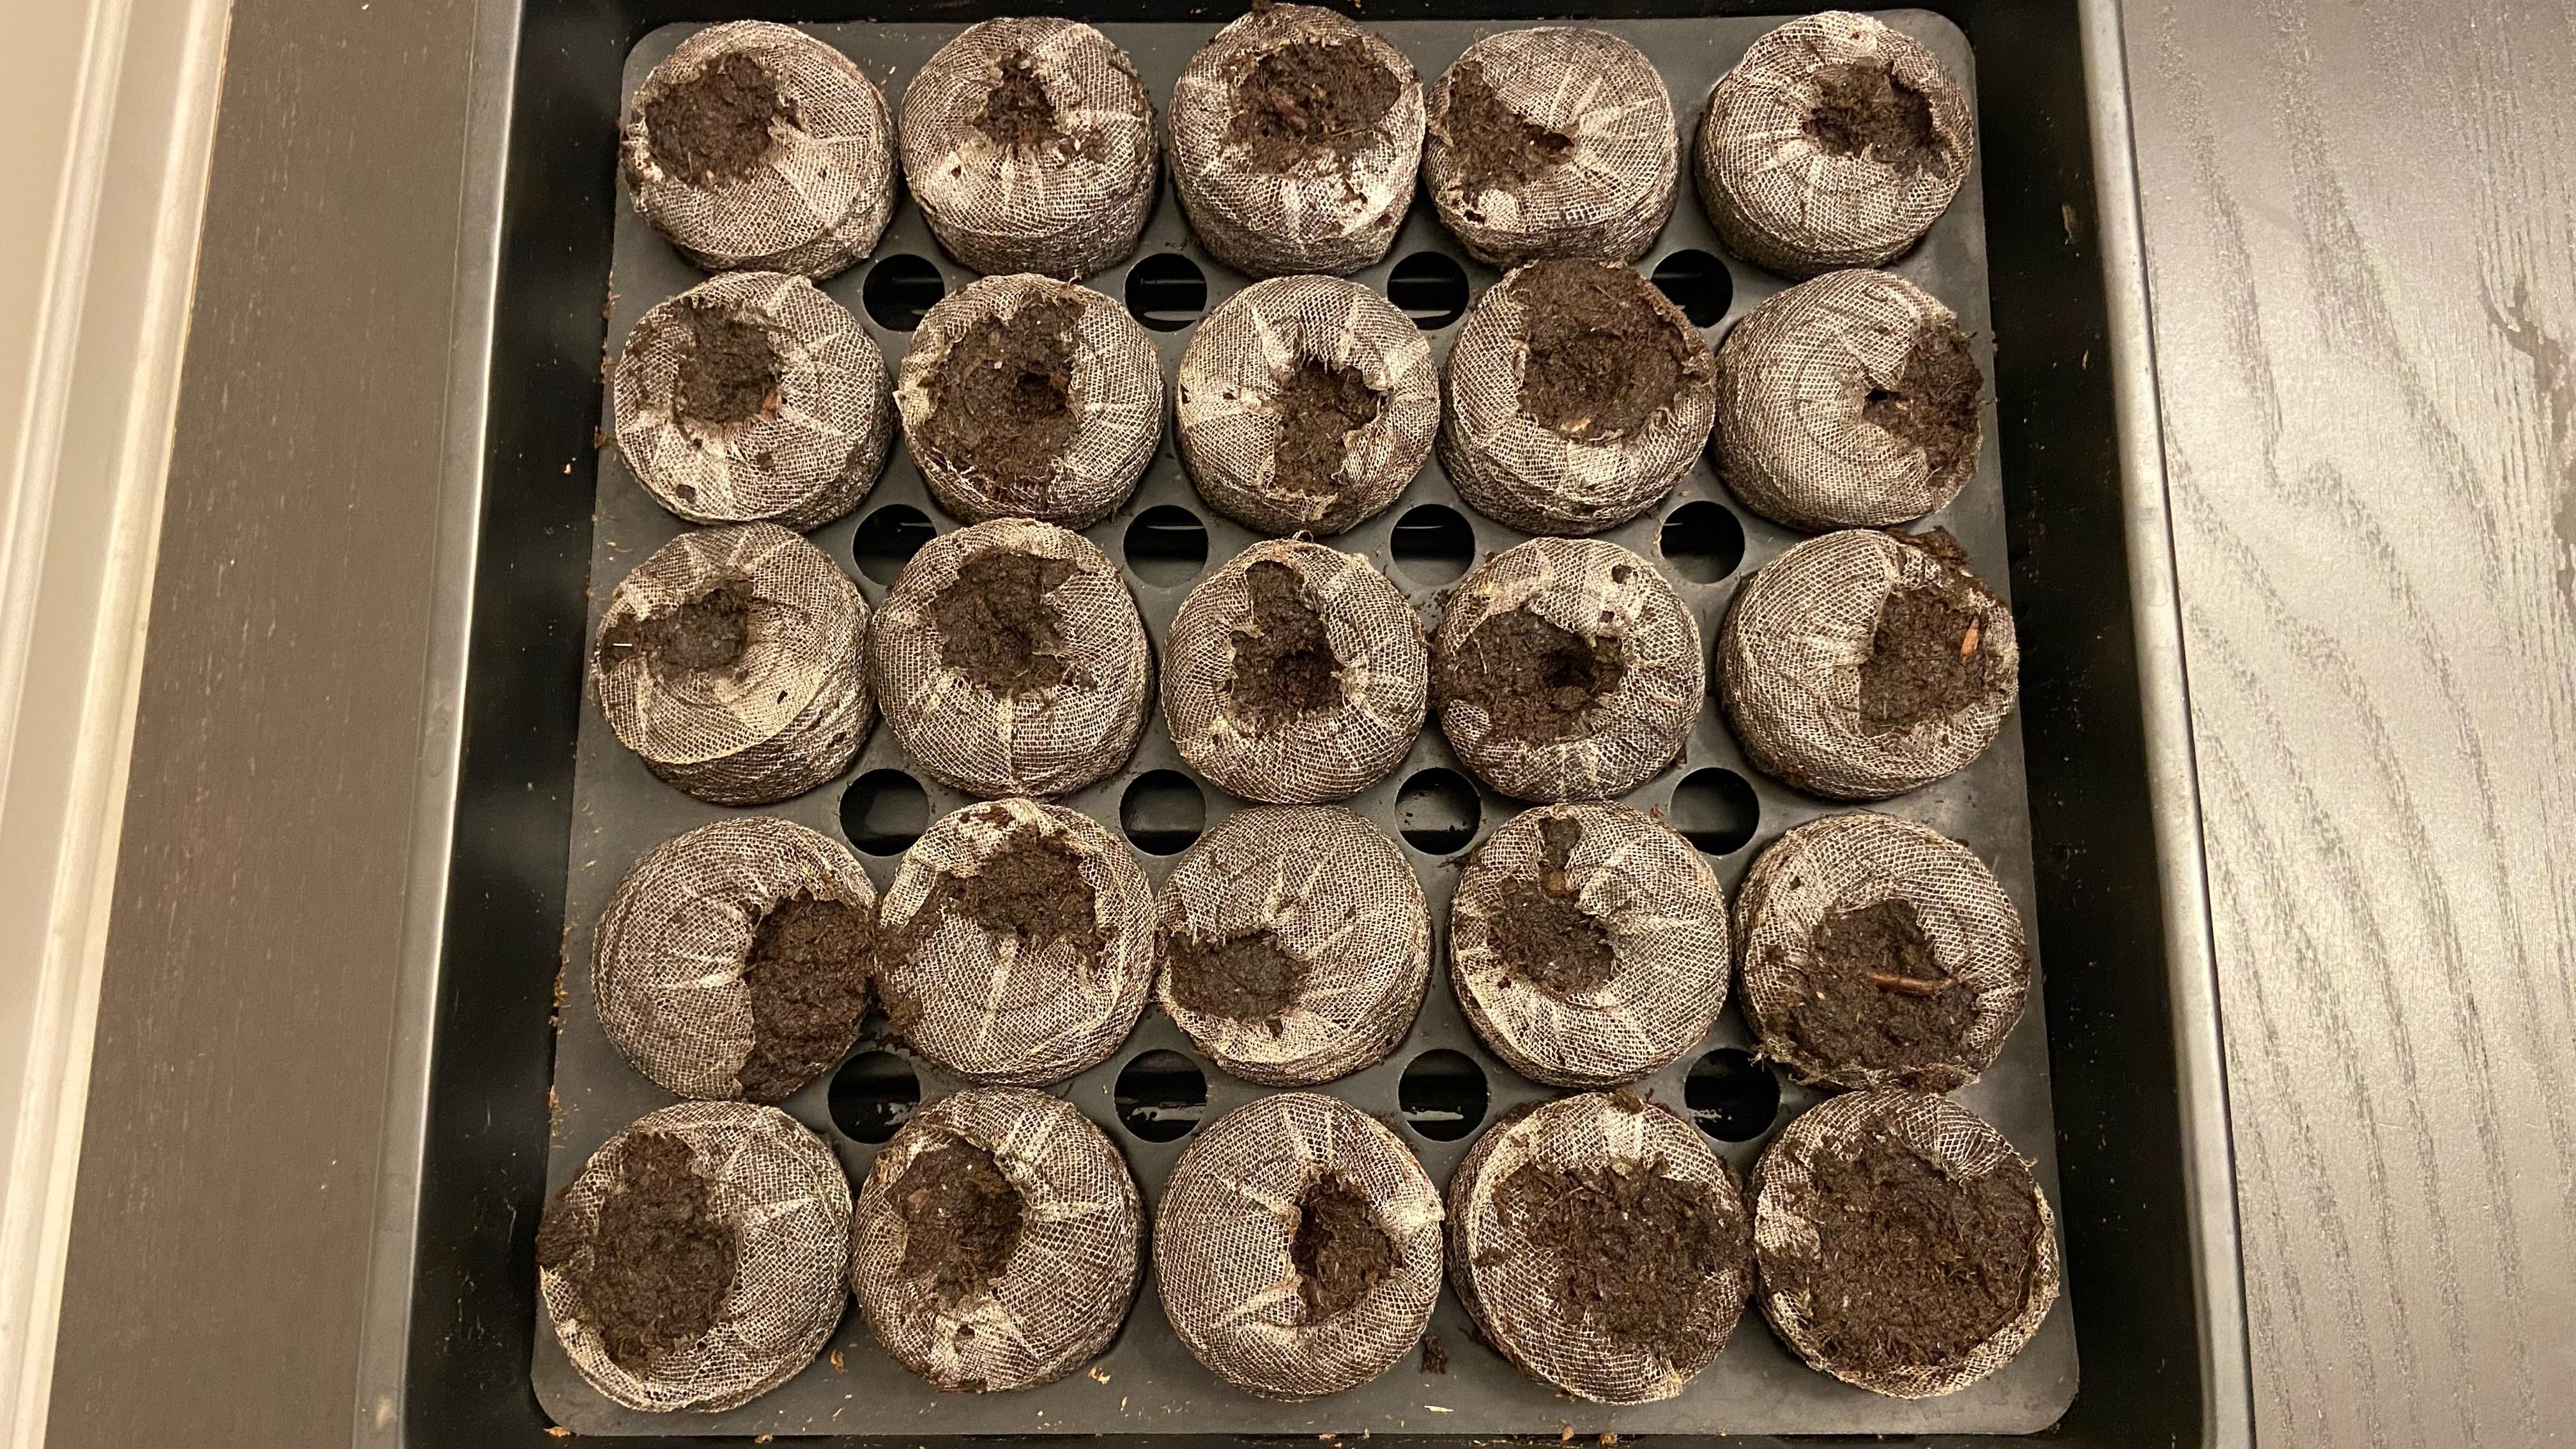
5. How To Plant Seeds: And now we are finally
ready to sow our seeds. And the most important
thing that we have to research first is the
seed sowing depth. Now the overwhelming majority of seeds out there need to be buried anywhere 18-14
of an inch deep. But always, always, always consult the
seed packet because each seed packet will tell you exactly the depth that you
need to sow the seeds at. Now, when it comes to
seed sowing depth, always be conservative. It is better to
actually be a little bit shallow than a
little bit too deep. If you sow your
seeds too deeply, it is possible they will not germinate and they will
rot below the surface. So always, sow them a little
high if all else fails. In fact, some smaller seeds
like lettuce, onions, and carrots can actually
germinate just by being sprinkled on the top of the soil as long as
things don't wash away. Now regardless what seed species you're sowing or what
medium you're swing in, we are going to be seeding using a technique called overseeding. And that simply means we
are going to be putting more than one seed
per individual cell. And we must do that because individual seeds do not have
a 100% germination rate. They can fluctuate
anywhere 60-90% So if all we do is put one seed
per cell or peat pellet, we are going to have a
bunch of cells where nothing came up and we
just wasted our time. So for that reason,
we want to place at least two seeds per cell
for more expensive seeds, and for cheaper seeds we can place as much as three
or four per cell. So we can almost guarantee that something comes
up in each seed cell. Now, regardless if
you want to use a peat pellet or an individual
cell full of potting mix, I will show you how
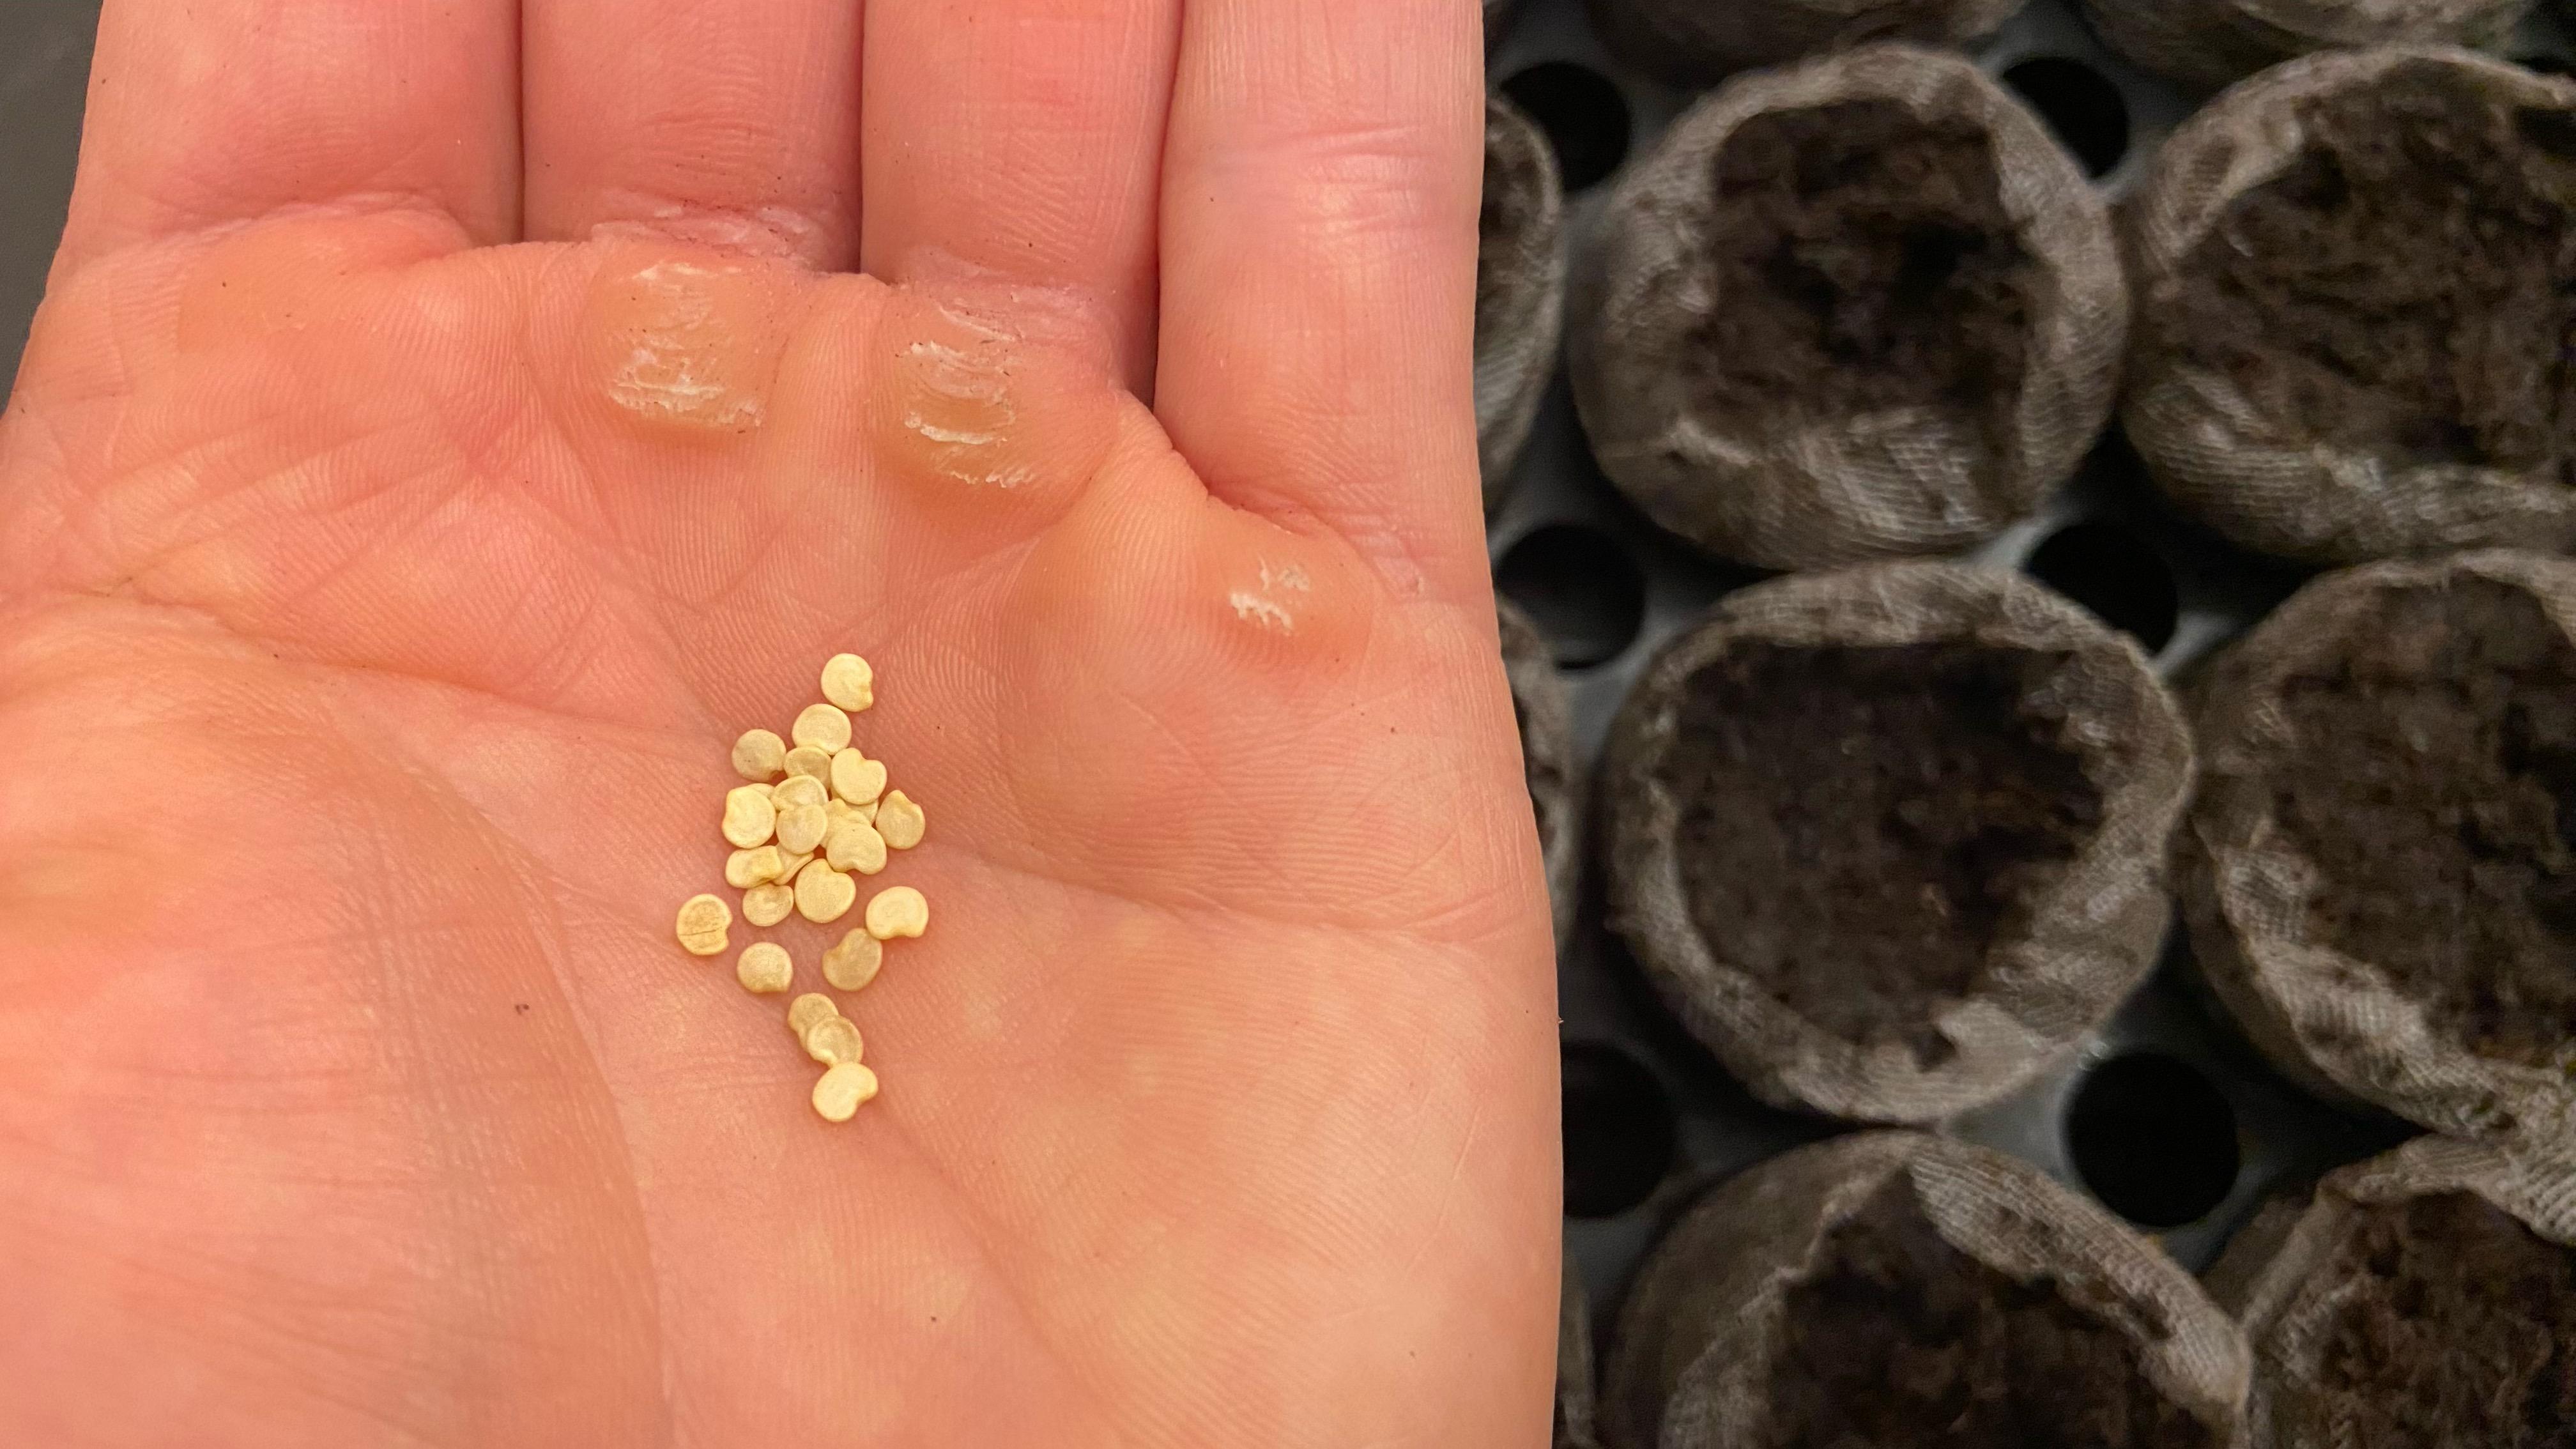
to sow the seeds. We will begin with this hybrid
tomato seed right here, which is a very expensive, but disease resistant and highly productive variety
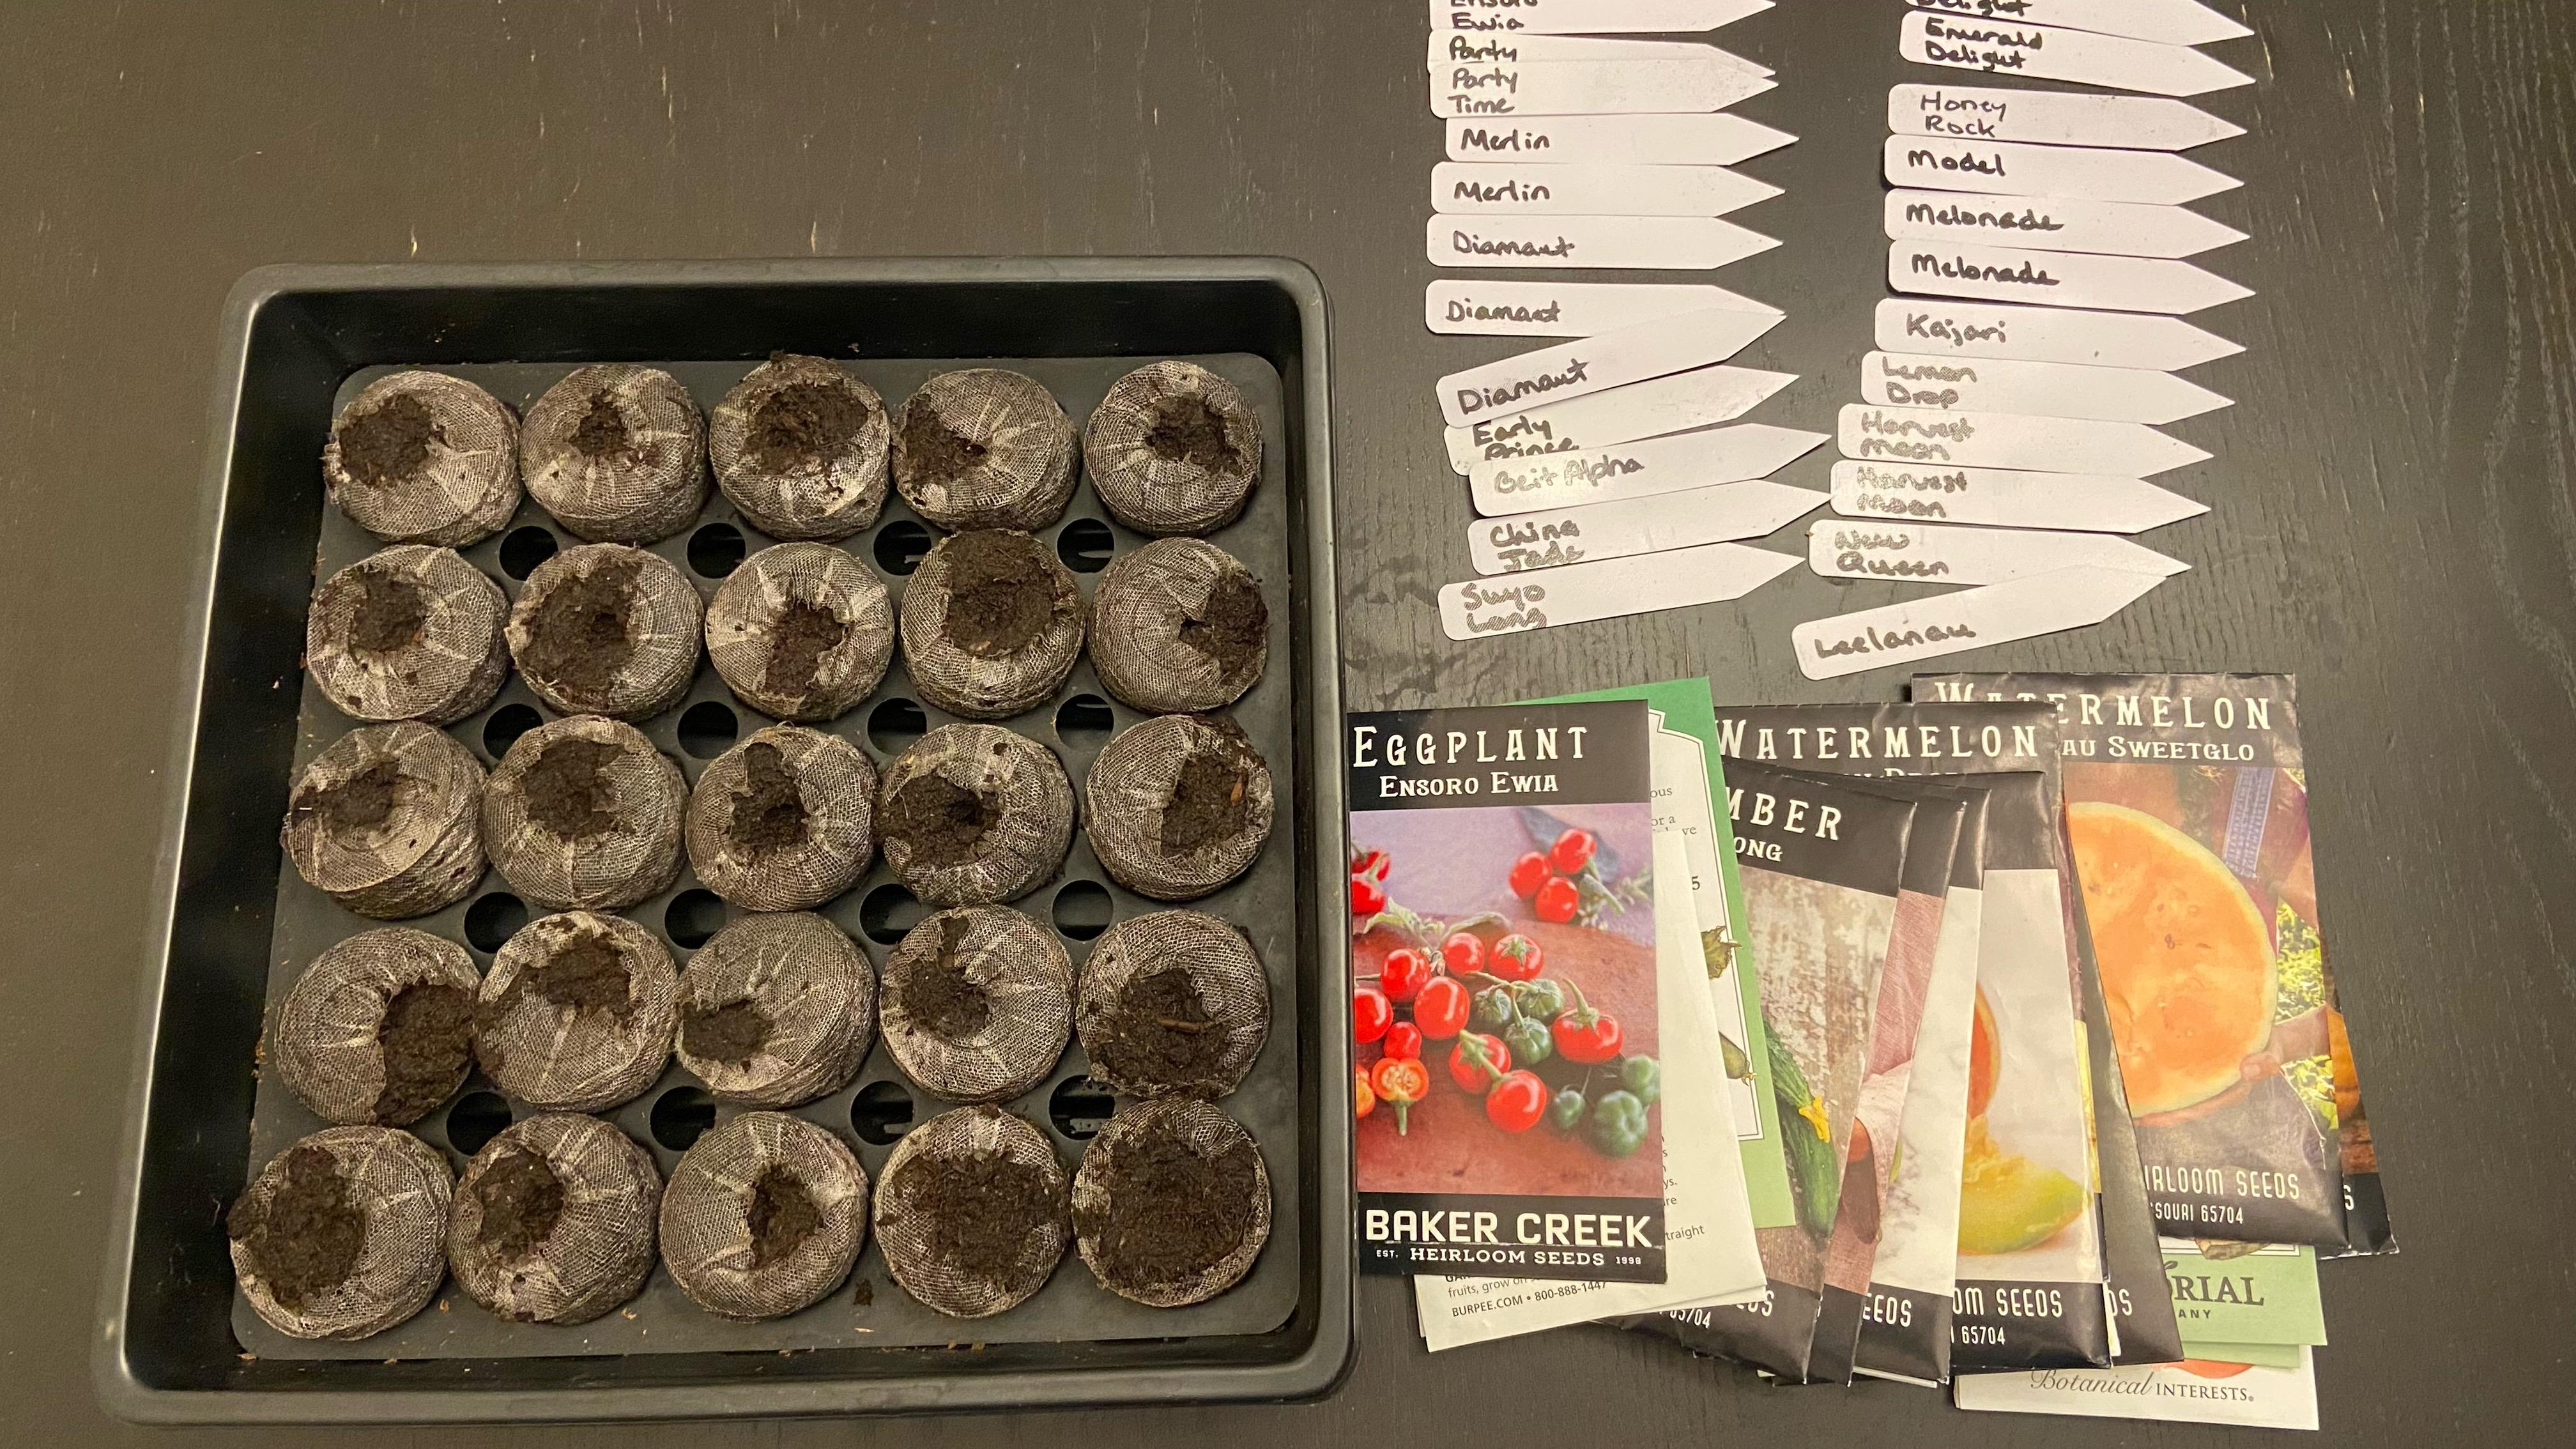
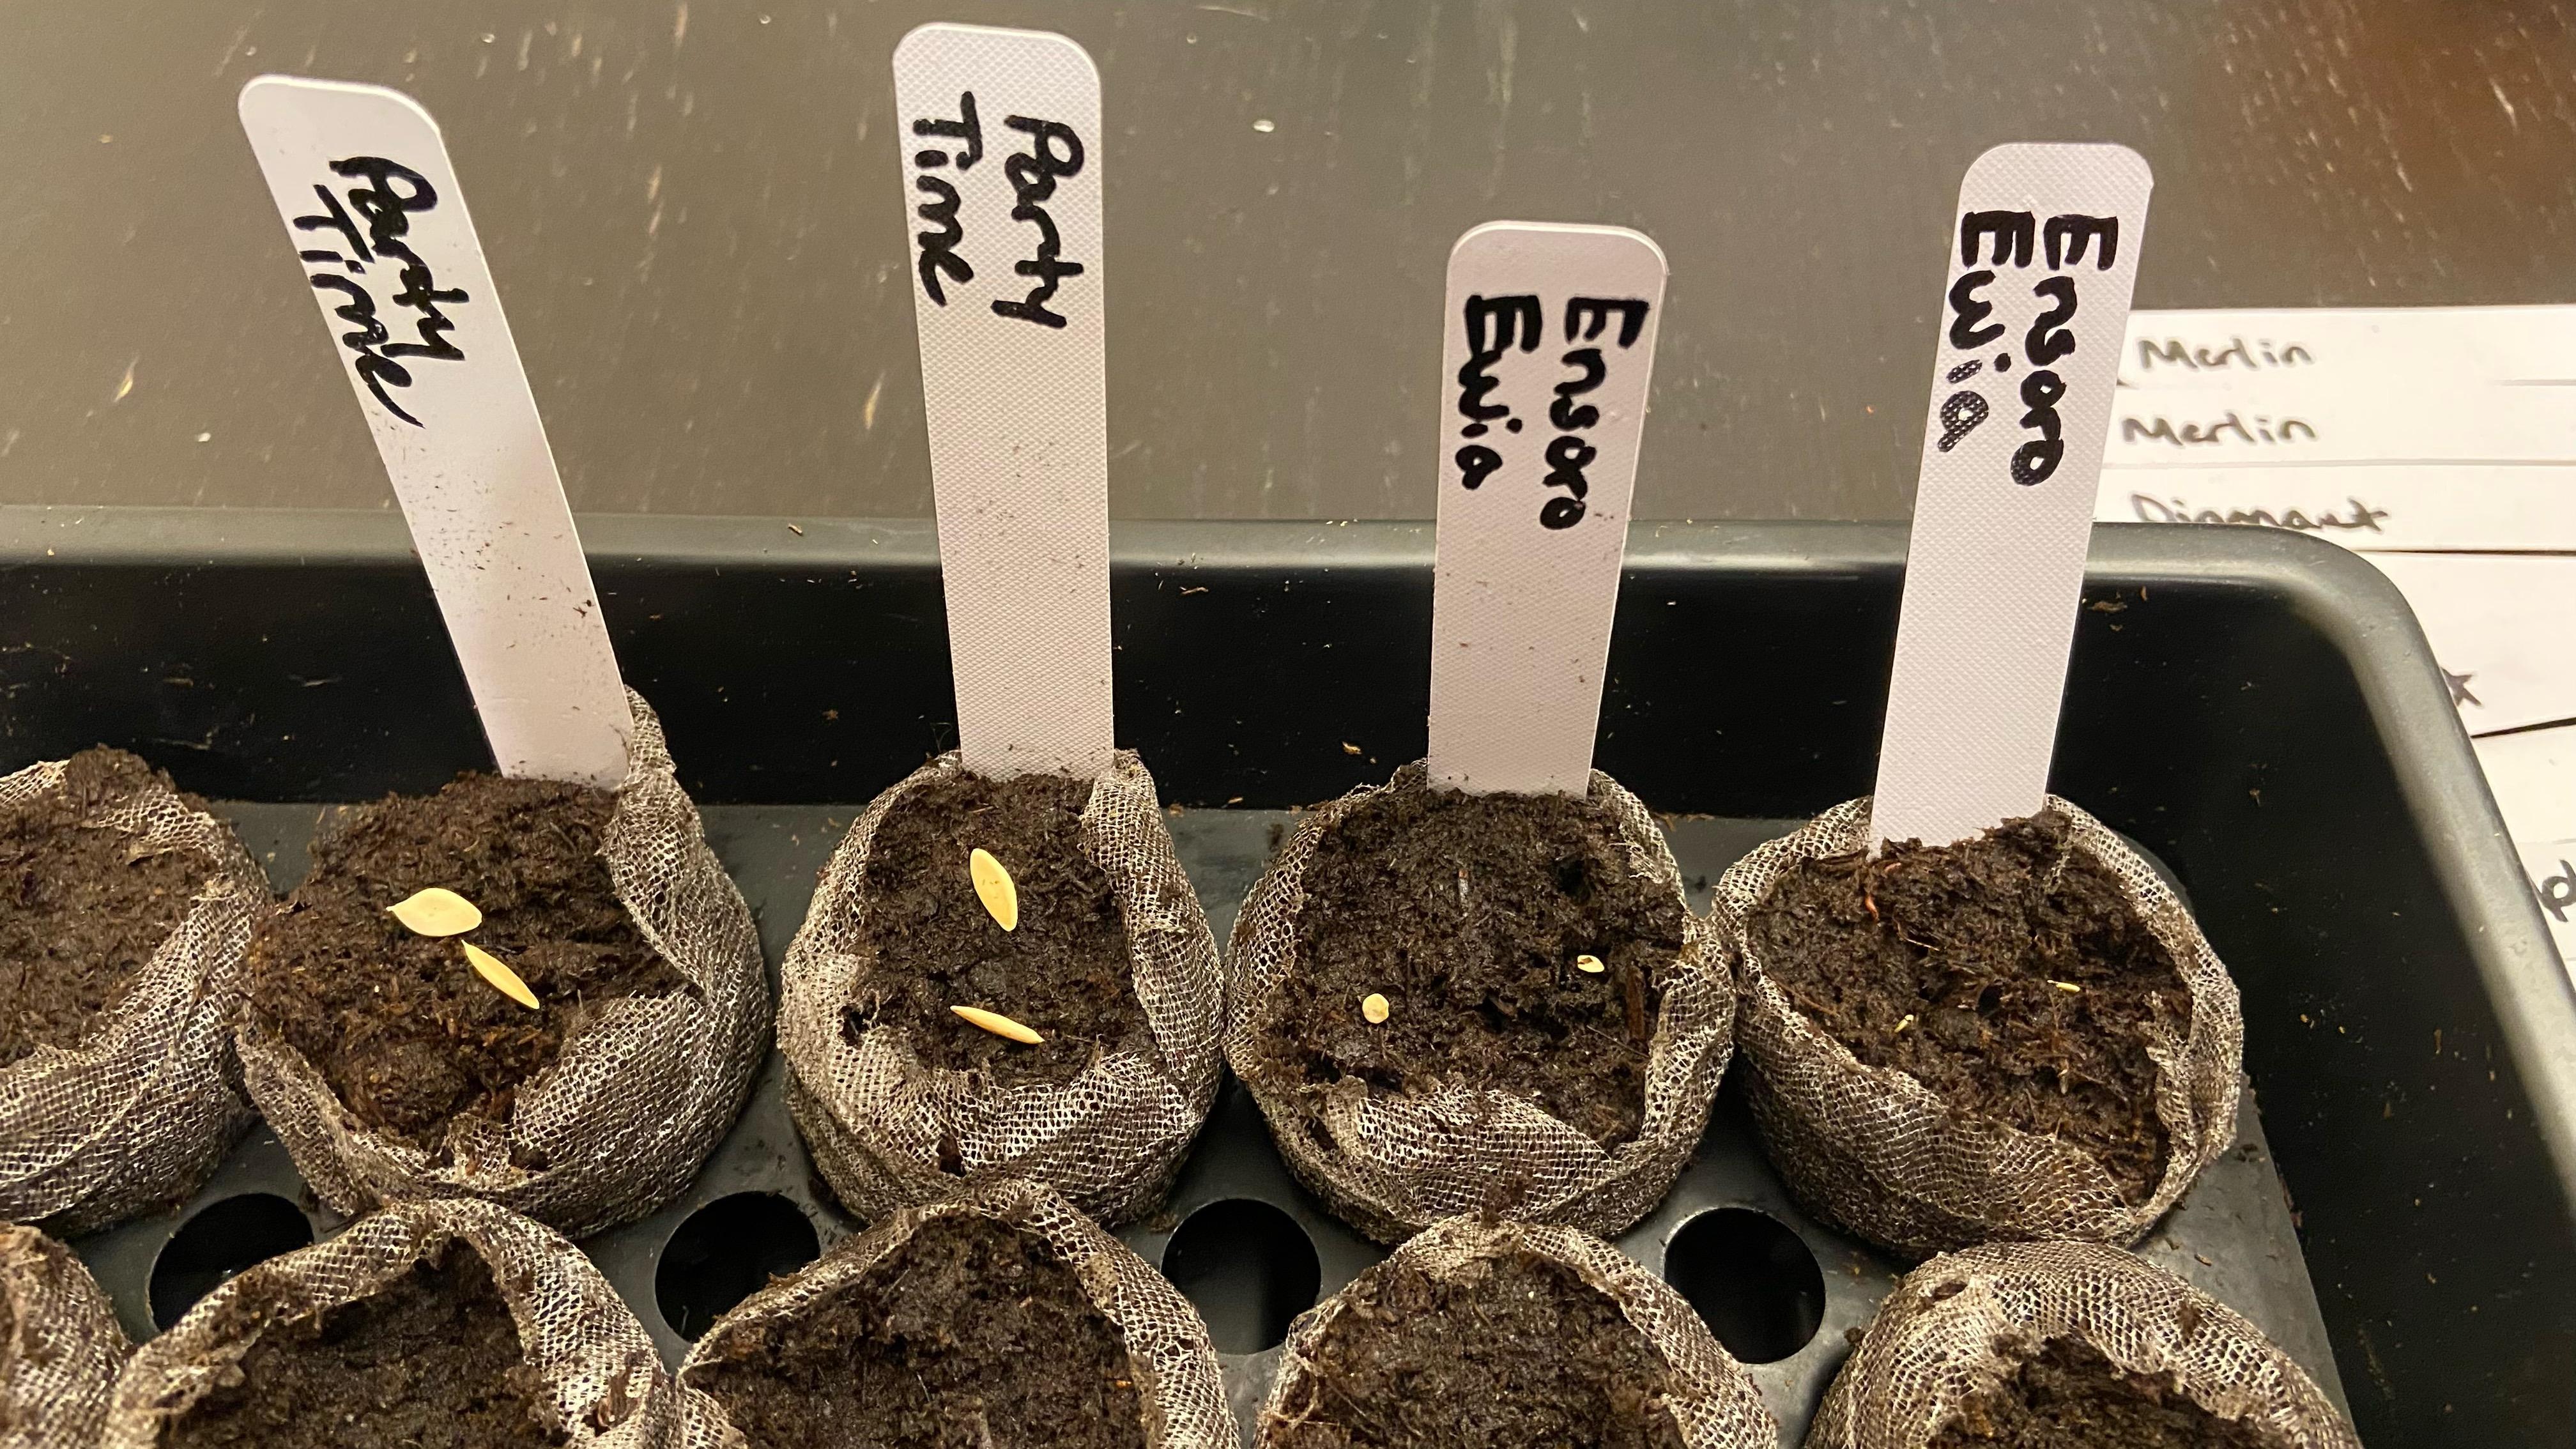
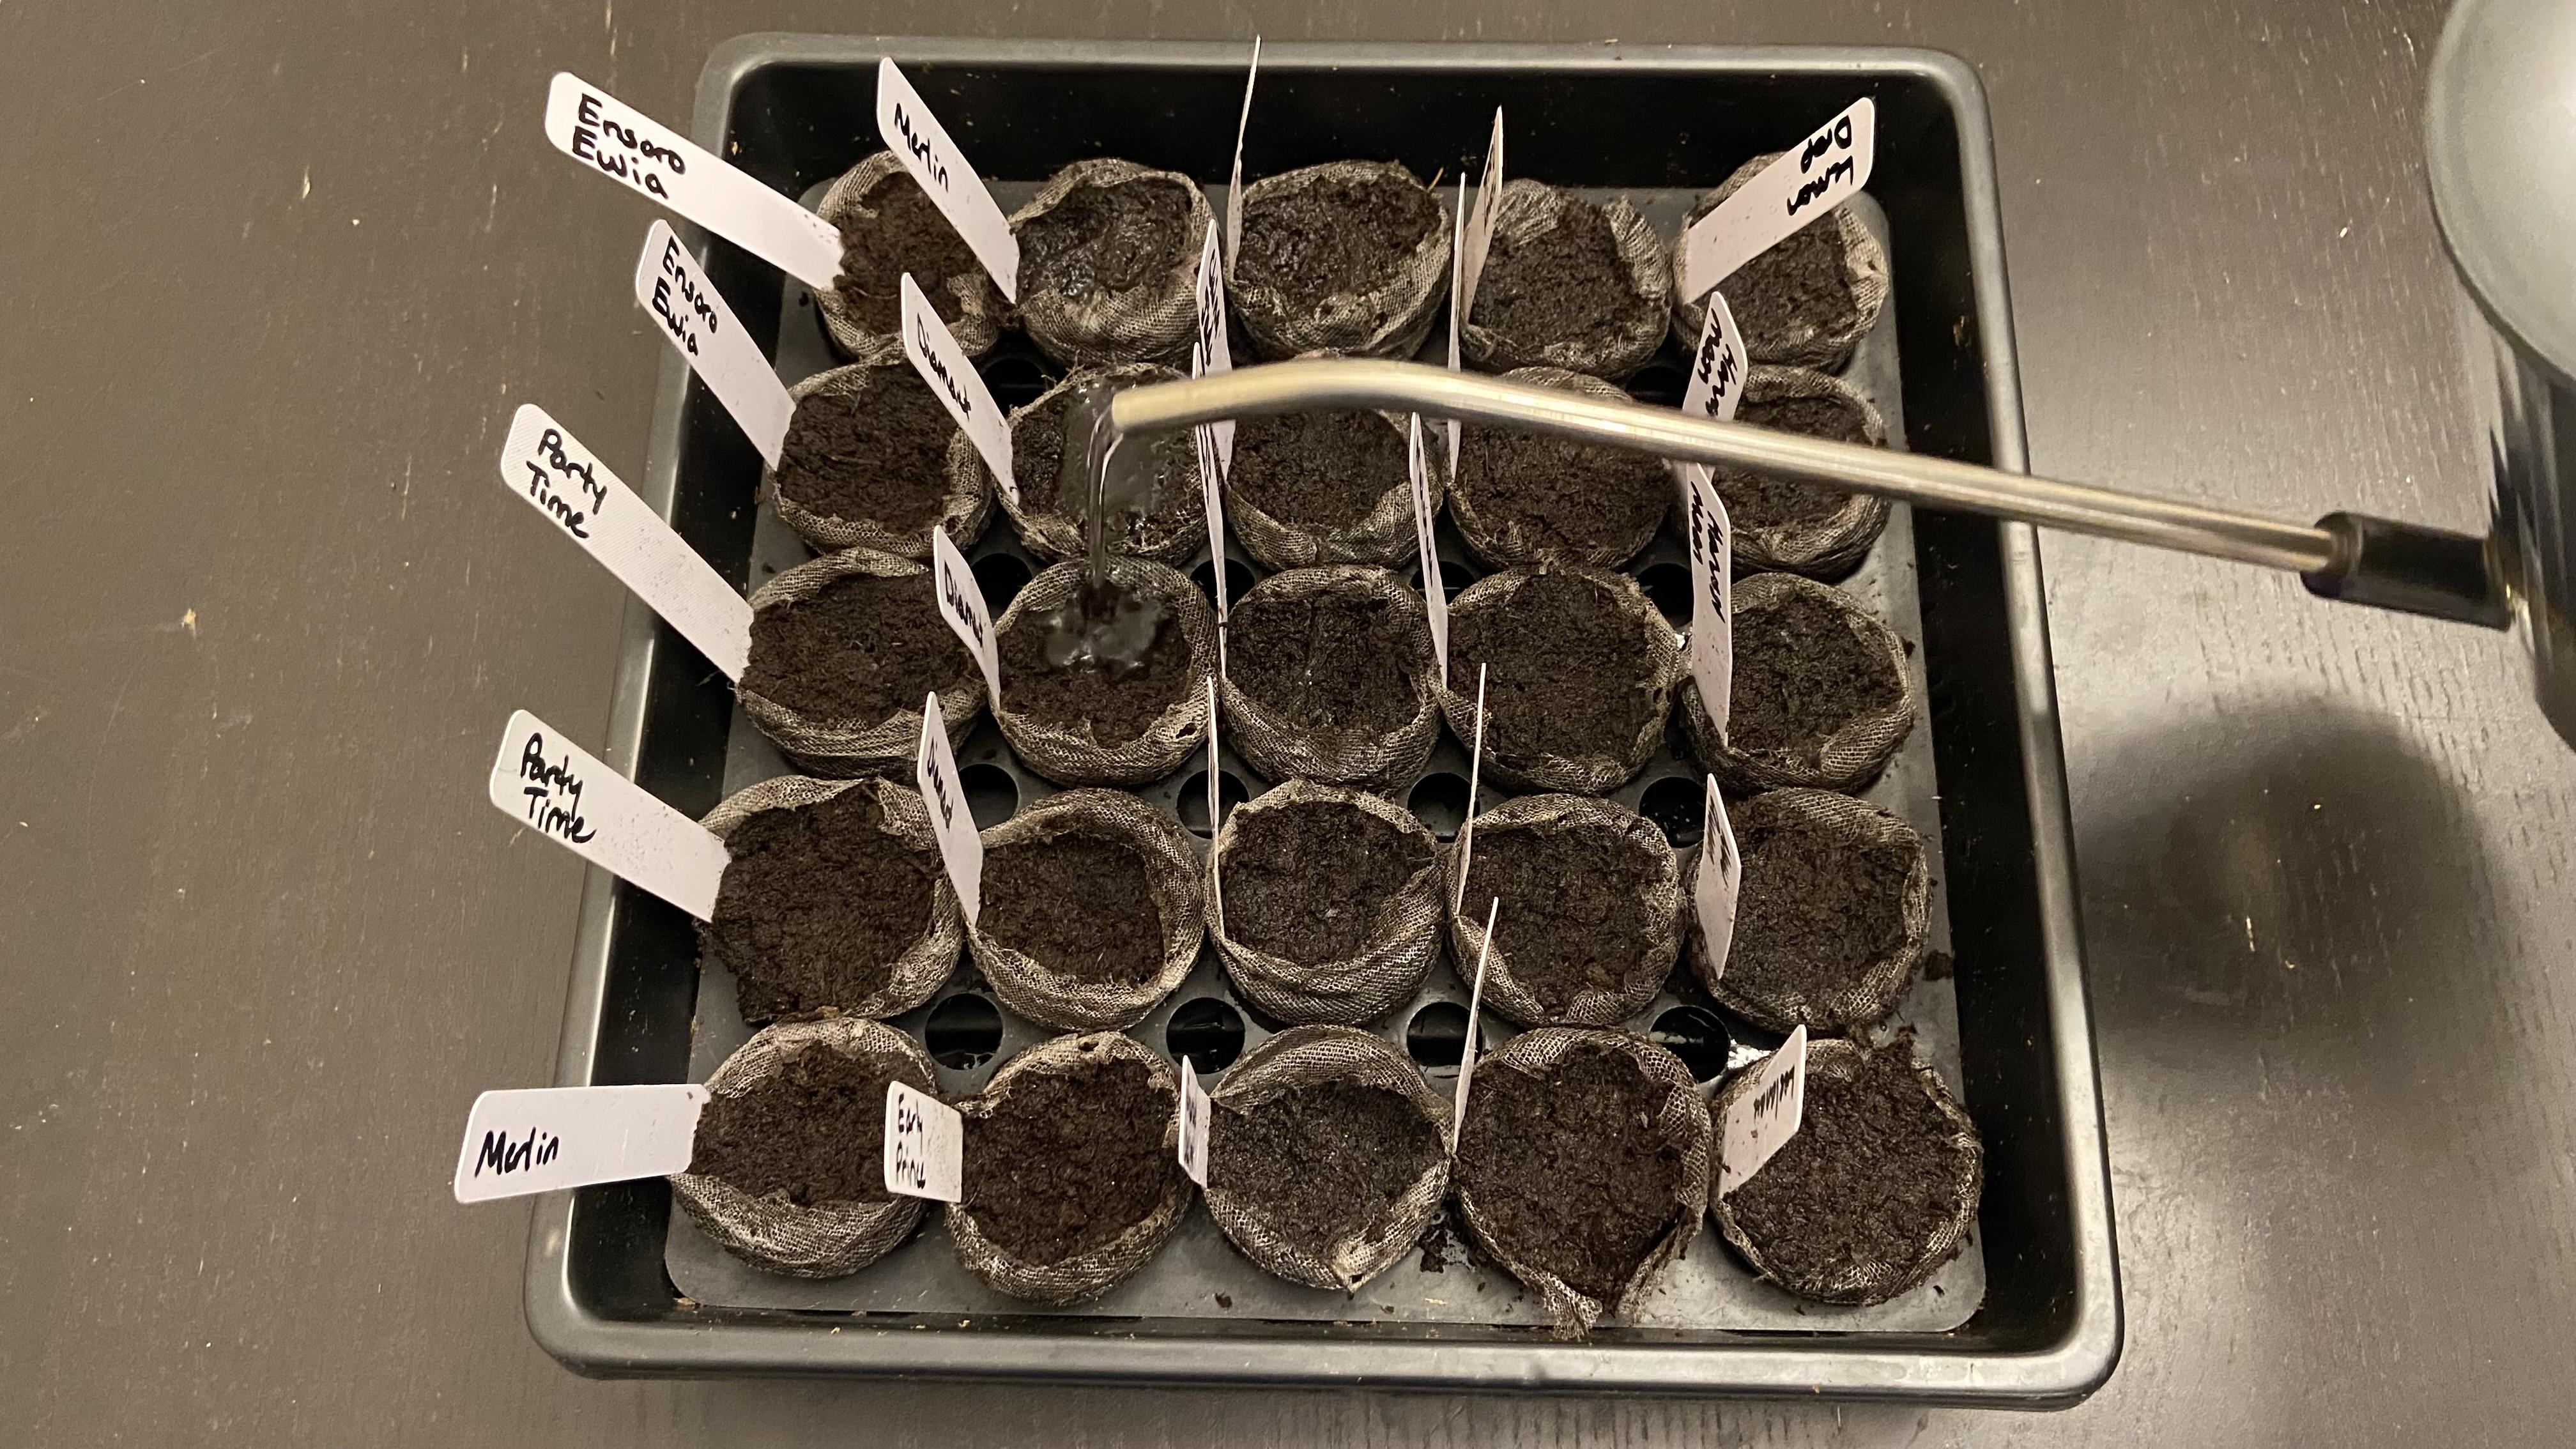
called Super Sweet 100. Before you begin, please
make sure that you have your plant labels ready because you don't want to
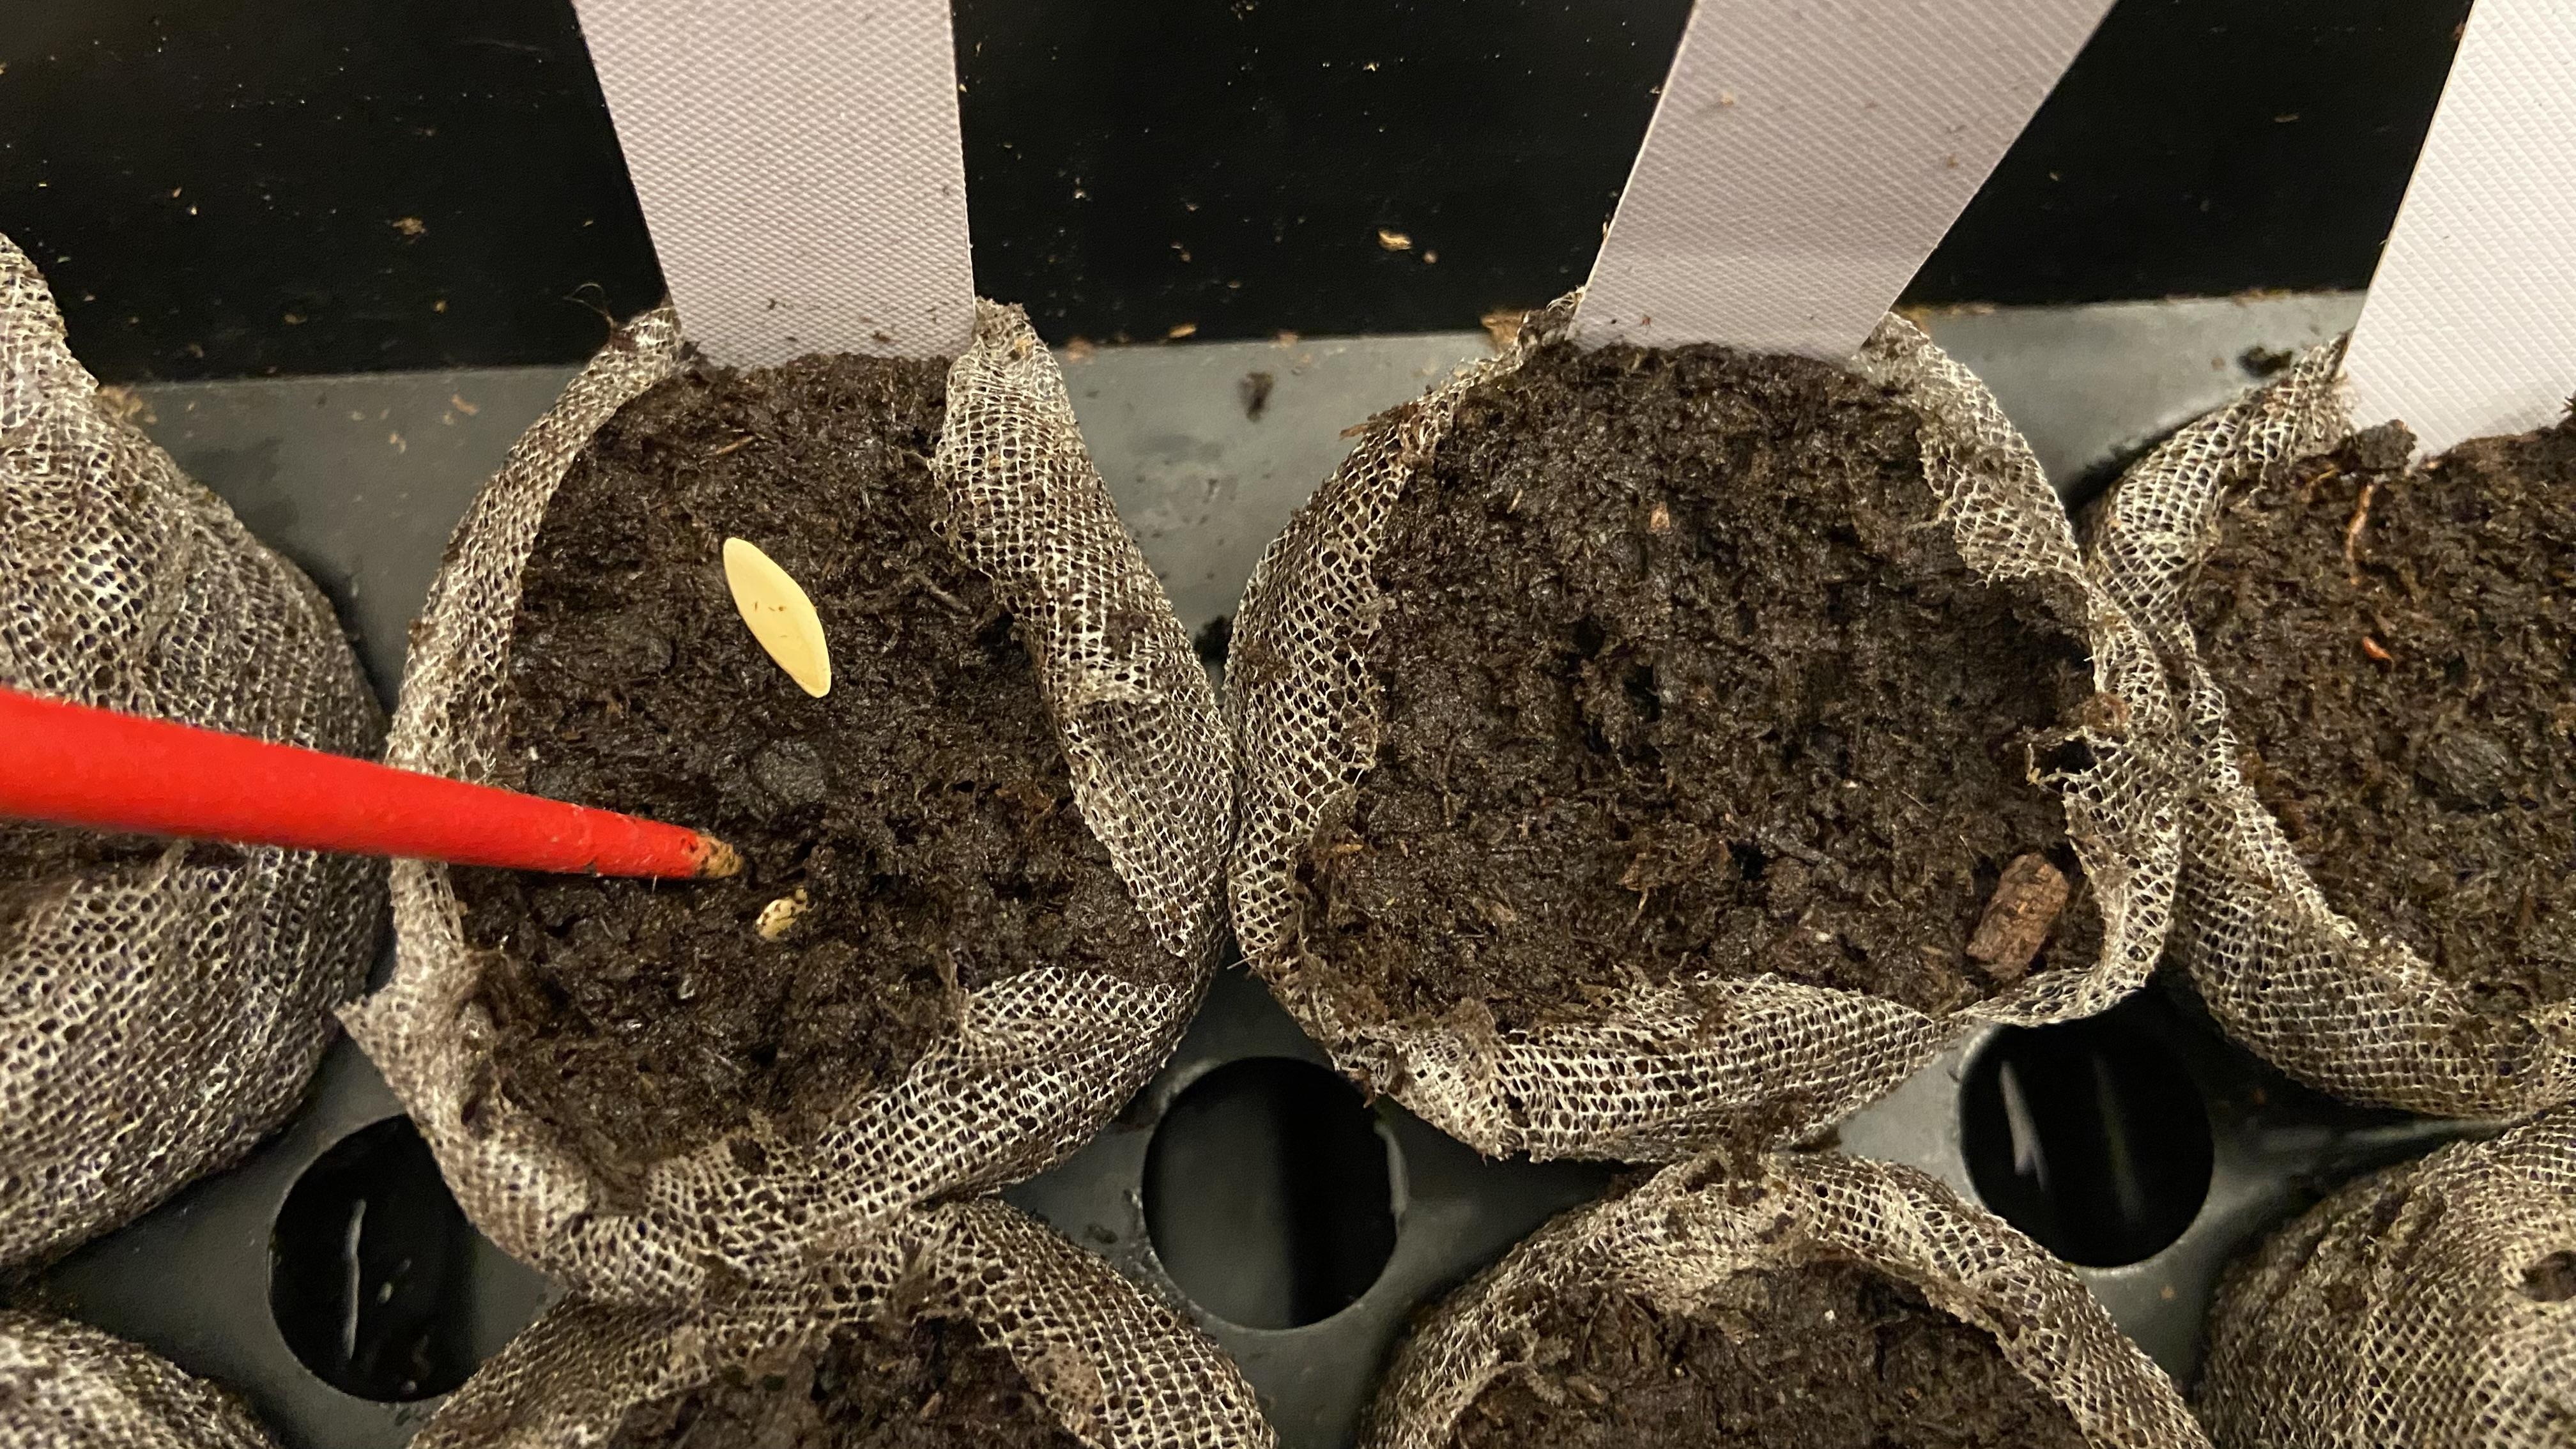
get anything mixed up. The first thing
we will do is sow this peat pellet and we
will fluff up the mix. Each of these seeds should
be planted 14 inch deep. I like using this chopstick because if you take a chopstick
and you lick the tip, it will easily pick up
each individual seed and then you can place that
into the seed cell. Then we will take
that, we will place them roughly a
quarter inch deep. We will cover them up. Then we will place the
individual medium on top. And then take the
end of the chopstick and we will tamp it down. Now for the seed
cells with the mix, we will take the chopstick
and we will just make two little quarter
inch deep holes. And then again, we will pick up each individual seed
with the tip of the chopstick and then place
them in each of the holes. And then once they are down, we will just lightly touch
it with our fingers. Then we will place our label to make sure that we don't
forget what anything is, and then we will lightly
water things in. That's all it takes to sow seed. When starting many
seedlings where you're sewing many different varieties
at the exact same time, it is a very good idea to have your work surface area prepared and everything labeled
before you begin. If you can't label all of the individual plants like I did with these
individual peat pellets, you can also draw some type
of diagram that will tell you exactly what varieties are were and then you can reconcile
the labels later. Once you have everything
pre labeled and laid out and you have all
your seed packets sitting out and ready to go, you can sit, buckle down and put everything in in an
assembly line fashion. This way you can be as efficient as possible
and get all of your seeds sown as quickly as possible with as little
room for error as possible.
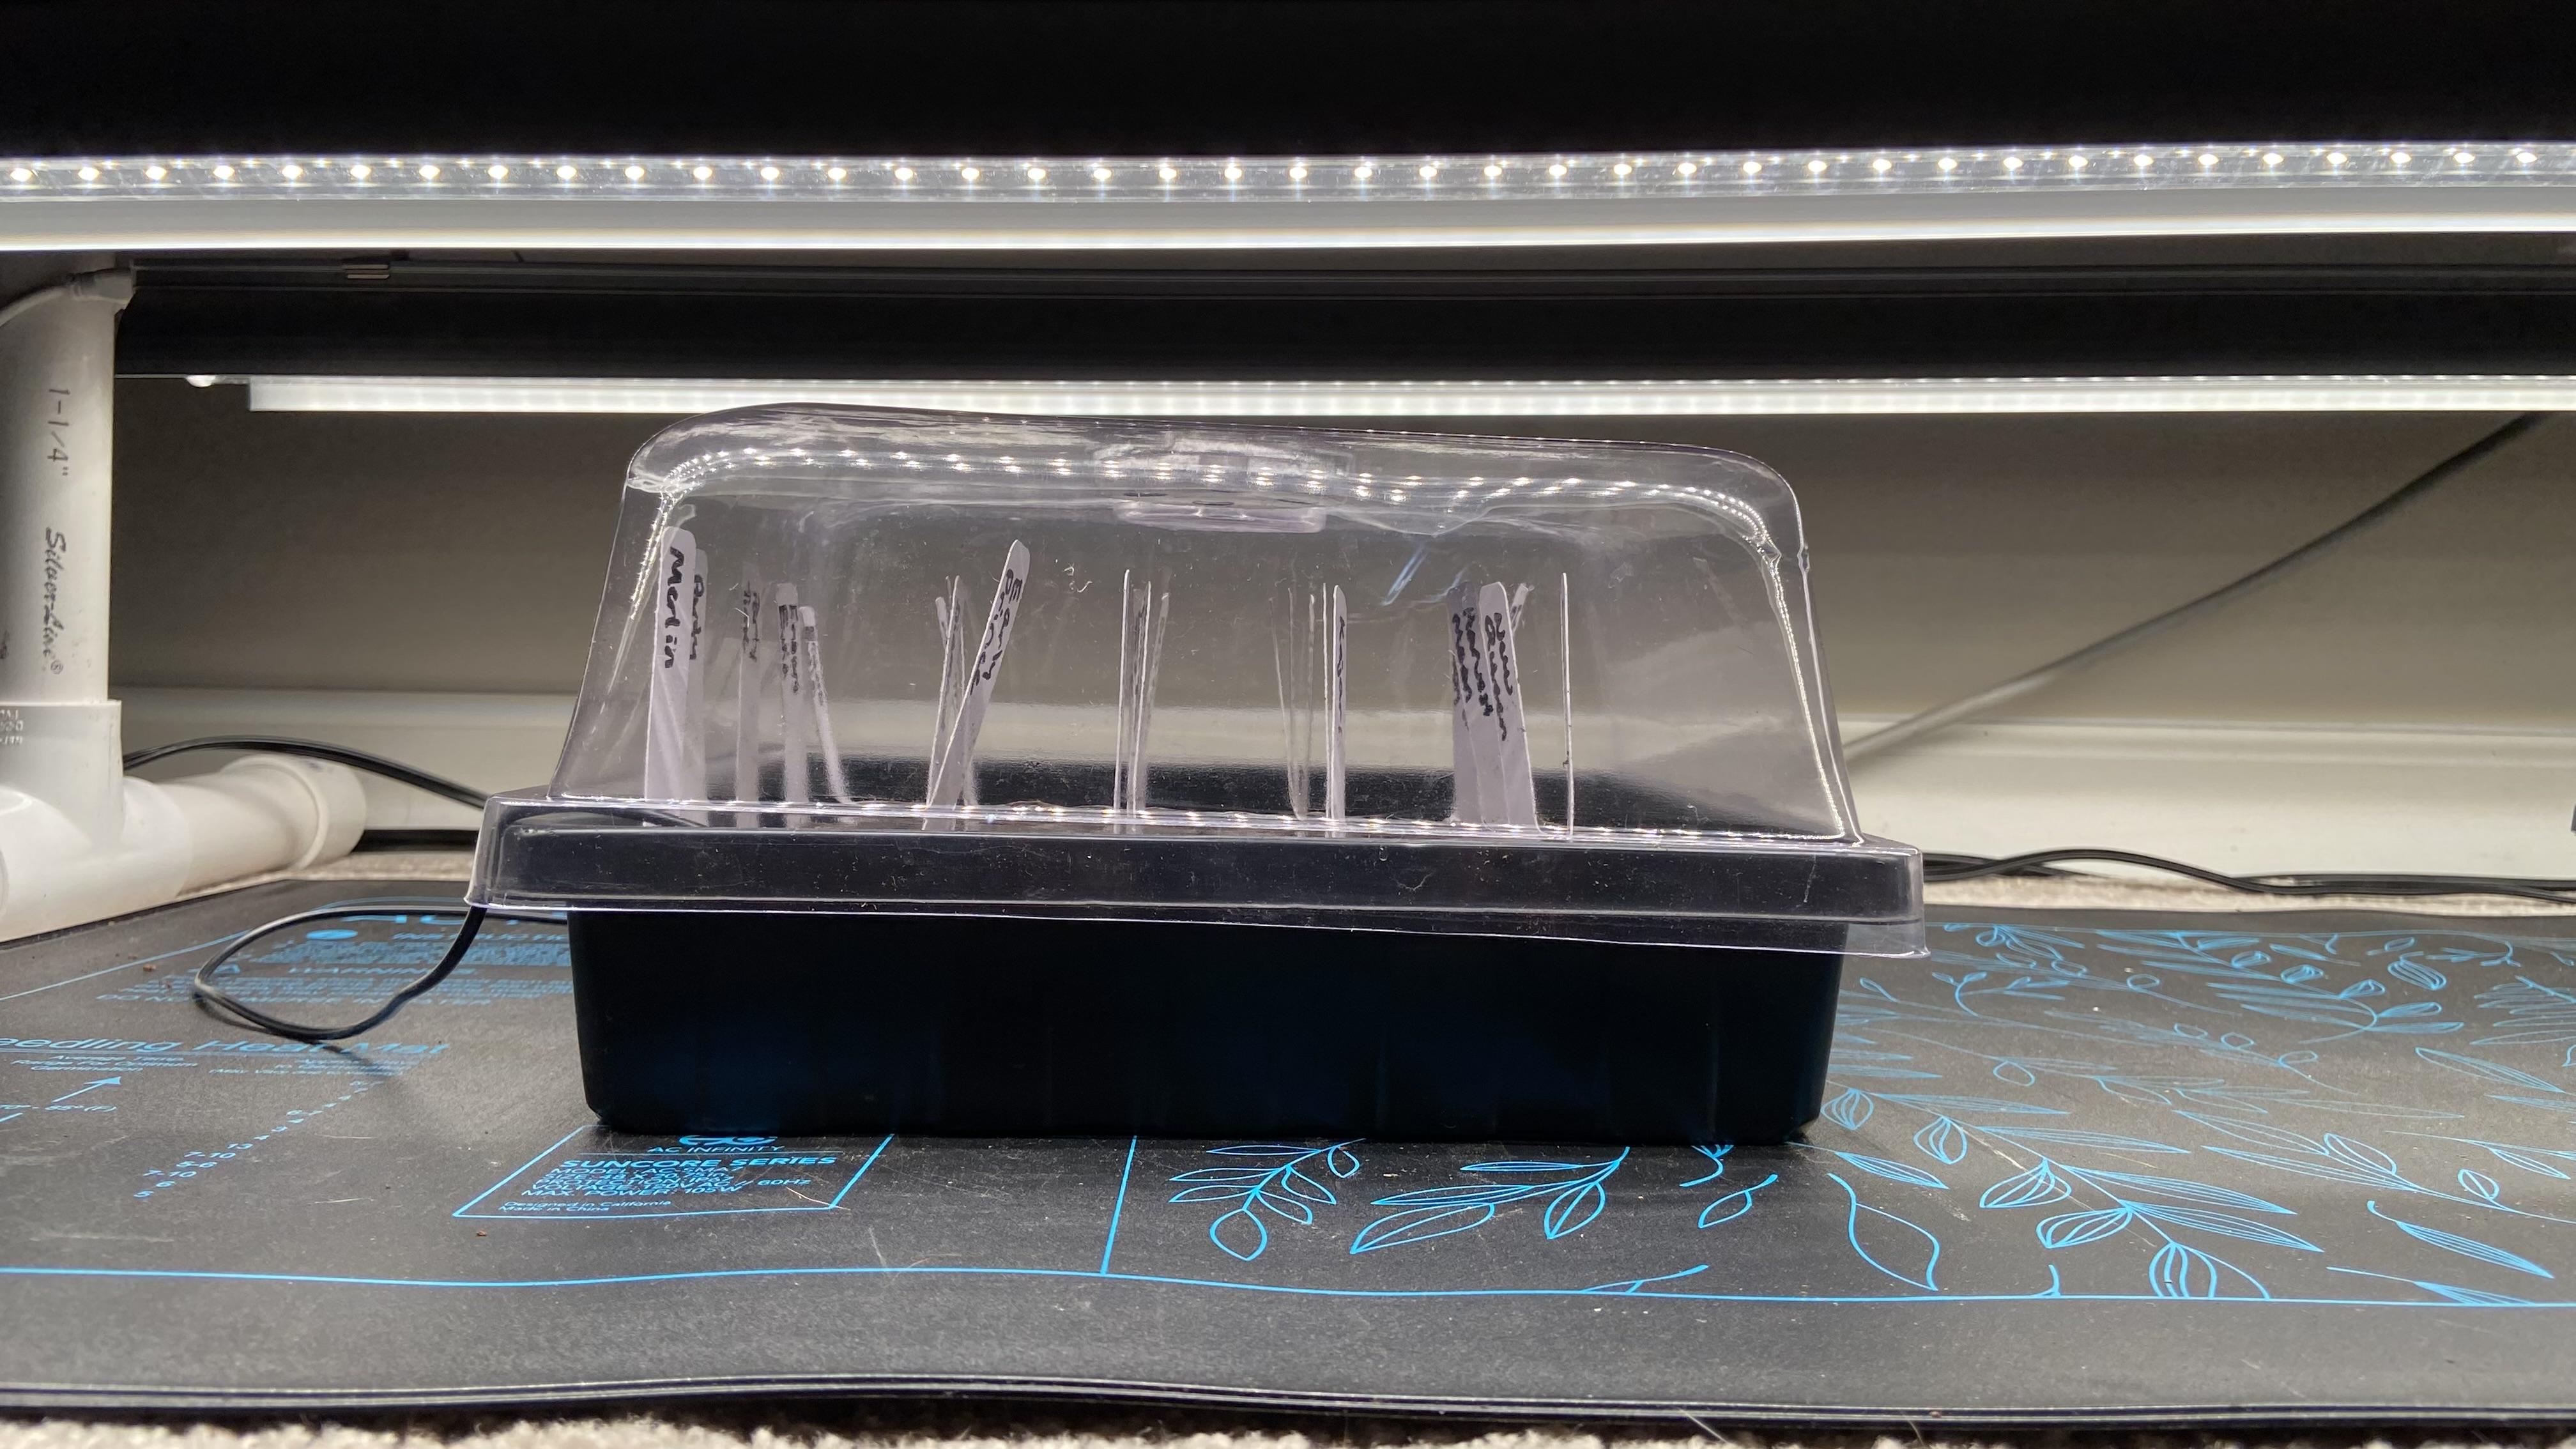
6. Maximizing Seed Germination: Once your seeds have been sown, they must be placed in a warm protected area for germination. Now, if you happen to live in a warm climate
where the days are 70 to 80 degrees and the nights are 50 to 60 degrees
consistently, and there is no
chance of frost or freeze or cold
temperatures anymore. You can theoretically have these seeds germinate outdoors, but if you're like me and we haven't reached that
point in the year yet, and it's still pretty
chilly at night, we must bring them indoors to a controlled environment
for germination. And for most of us,
that is going to be indoors under grow lights on a seedling heat
mat controlled by a thermostat and plugged into a timer to
regulate the timing. Now when it comes to seedling germination
temperatures, generally speaking, your cool season vegetables
can germinate with cooler soil temperatures than your warm season vegetables. Well, what do I mean by that? Well, your cool season frost tolerant crops like lettuces, brassicas like cabbage,
mustard greens and broccoli, your leafy greens and parsley. Well, they can germinate
in soil temperatures of 70 to 80 degrees Fahrenheit
very well and very quickly. But your warm season frost sensitive crops
like your tomatoes, peppers, cucumbers, squash,
pumpkins, melons, basil. They like germinating in
warmer soil temperatures of about 80 to 85
degrees Fahrenheit. So adjust your seedling
heat mat thermostat based on what you are growing. But if you're growing
cool season and warm season crops
at the same time, say you're growing broccoli, cabbage, peppers, and tomatoes. Simultaneously you can find
a happy medium temperature, Generally about 80 degrees
Fahrenheit is okay to make pretty much any plant happy and will germinate
fairly quickly. Some of the larger,
higher quality seedling heat mats
actually give you a little chart on them that tells you exactly
what temperature for germination is
recommended and how many days for germination
at that temperature, on average it will take. Once you get your soil
temperatures dialed in, most things will
germinate usually in about seven to 14 days as
long as the seed is fresh. Old seed may take longer
if it germinates at all. And things like hot peppers can take a notoriously
long amount of time, closer to two to four weeks. The hotter the pepper, the
longer it takes to germinate. So that's why you see
plants like my tomatoes, they pop up in usually
seven to ten days. So they're nice and big. But the peppers
are lagging behind and some of the hot
peppers haven't even germinated yet. This is all after one to two weeks, you should start seeing
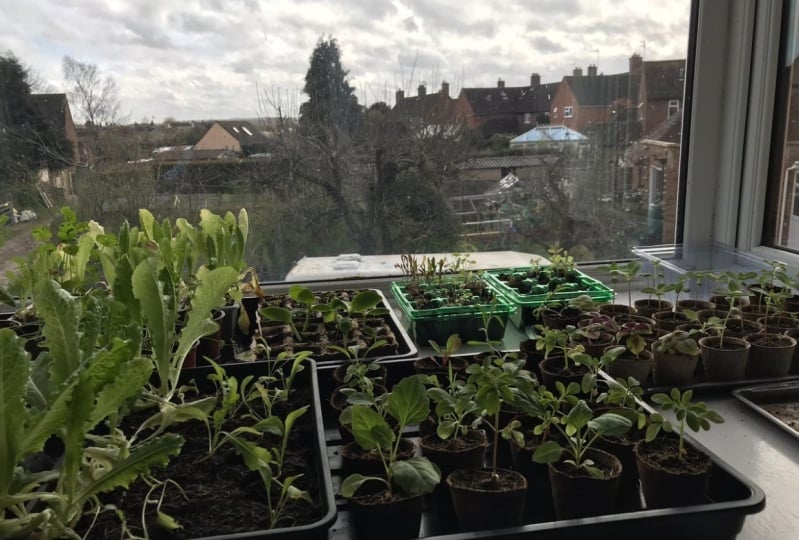
little signs of life like this little green stems beginning
to break the soil line. About two to three weeks after germination, this is
what you can expect. You will start to
see true leaves developing on your tomatoes, and your pepper plants will be starting to develop true
leaves of their own. Your pepper plants
are going to take longer to grow than
your tomato plants, but generally speaking,
these will be ready for transplant in about six to eight weeks
following germination. Usually about three to four
weeks after germination, you will have to
transplant your seedlings into a larger container
because they will begin to outgrow the
original peat pellets or the smaller seed
starting cells. And this is what you
will wind up with in about six to eight weeks
after germination. This is a tomato plant
that is at about the seven week mark and it is prime and ready to go
out into my garden. This right here is the
perfect looking transplant. To get a huge jump start
on the growing season.
7. Cool Weather Crop Seed Starting Schedule: Now that you know how to sow your seeds and get
maximum germination, when should you actually
begin sowing those seeds? Well, that is
highly dependent on what you are growing
and where you live, what your unique climate is. First off, let's start off
with cool season vegetables. Cool season vegetables are
like the name implies. They are vegetables that like cooler temperatures and
generally speaking, can tolerate frost and freeze. Most of these cool
season vegetables can tolerate
temperatures down to around the 20 to 25
degrees Fahrenheit range for a brief period of time and will recover
from a hard freeze. These are things like
your red leaf lettuces, spinach brassicas like
mustard greens, cabbage, brussel sprouts, broccoli,
Kohlrabi, collared greens. All of these things can grow at least through a portion
of the cold season. And all of these things are highlighted in this
tray right here. This is all cabbage
and broccoli, and brussel sprouts and
mustard greens and parsley, all very cold hardy, which I can still plant out into my garden when it's
freezing out some nights. Now generally speaking, if you live in zone eight or warmer, you can grow a lot of these cool season vegetables year round. It's currently the
middle of February. Here in North Carolina, I am in zone eight B
and I grow things like kale and Swiss chard that you see right here all year round. I have lots of garlic
that is coming up the big green heads
behind the garlic, they are mustard greens. And if you're willing to protect things with a light cover, you can have things
like collared greens and cold hardy red leaf lettuce growing all throughout
your winter. So if you're in a slightly
warmer zone like me, you can grow these cool
season vegetables year round. Now if you don't know your
plant hardiness zone, all you have to do is go
to a search engine and type in USDA plant
hardiness zone. It will take you to
the USDA's website. You will type in your Zip code, and it will tell you your zone
If your hardiness zone is too cold to grow cold hardy
plants all winter long. What you should do is this. You will want to
look up your last spring frost date. And you can
do that either by going to the farmer's almanac website or consulting a search engine, and then type in
last frost date. And you will have many different websites that you
can look through, type in your Zip code, and it will give you your
approximate last frost date. Now your last frost date is the day in spring that is on average when it
won't frost after. That being said,
on some years it still frosts after
the last date. So you still need to take a look at the weather and be mindful. But generally speaking,
you want to use an amalgamation of different last frost dates
that you looked up. Take an average of them
and go with that date. And then use this math for your cold season vegetables. You want to take your
average last frost date and subtract about
45 days from that. So if your last frost
date is April 15, your new date is
going to be March 1. The reason why is about 45 days before your last frost date. Generally speaking, it's mild
enough that you don't get any bad freezes that could kill these cold
hardy vegetables. So take that new date and then subtract six
weeks from that, and that is when you can start your cold hardy greens indoors. So again, if your last
frost date is April 15, take March 1, subtract
six weeks from that, that is when you can start
your cool season veggies.
8. Warm Weather Crop Seed Starting Schedule: But what about everybody's
favorite veggies? Warm season veggies. Specifically your night shades, things like tomatoes,
peppers, and eggplant. Well, they are really easy to know when you
should start them. Simply take your average
last frost date and subtract anywhere 6-8 weeks. And that is when you want
to start your tomatoes, eggplant and pepper seeds. Your night shades.
Those tomatoes, peppers and egg plant, they
cannot tolerate a frost, so you can't put them out into your garden until all frost
and freeze danger has passed. So start those seeds six to eight weeks in
advance of that date. And then when that
date comes around, consult your two week forecast. Make sure everything
is in the clear. If there are any
questionable nights that look to be
dipping below 40, don't risk it. Hold them for about another week and then reassess the weather in a week. That is why you
don't want to start your seedlings too early
because if they get too big too quickly and they really have
to go out right at that last frost date
and you're having a bad year where things
are colder than normal. They may get leggy
indoors and they may get root bound
and start suffering. So generally speaking, it's better to be a
little conservative and start your seeds about a week or two behind than to
rush them out too early and have them
either killed by a late frost or they get
too big and root bound. But beware the cucerbit
family of vegetables, break all of the rules, and your cucrebits are your gourd family that
includes cucumbers, squash like zucchini, summer squash, butternut
squash, pumpkins, gourds of course, and
melons like cantaloupe, honeydew, watermelon, et cetera. They germinate in only
a matter of a few days. And they are super tropical. They do not tolerate
nights below 50 degrees. So because of that,
because they germinate so quickly and they are so
cool, weather sensitive, you don't want to plant
them out into your garden at least three weeks until
after your last frost date. Because they
germinate so quickly, they get viny and you won't have anywhere to put them if
you start them too early. So for your cucrebits, I recommend starting those seeds one week before your
last frost date, and then put them
out into your garden three to four weeks after
your last frost date, when all of the nights have
warmed up sufficiently.
9. Crops That Should Only Be Direct Sown: And finally, are there any veggies out
there that actually shouldn't be started from transplant where
none of this works? Yes, there are classes of veggies that
break all the rules, that you do not want
to start indoors and should only be grown
directly into the soil. And some examples of those direct sown veggies
are things like carrots, radishes, beets, and
other root veggies. They do not do well from transplant because
they are a root. Once they root in, they do
not like being disturbed. So those veggies should only be sown directly
into the garden. What you see right
here are carrots. Carrots should only
be directly sown into the garden because they are a root veggie that do not
like being disturbed. They are notoriously
difficult to germinate, especially in cool weather, but once you get
them to germinate, they are very cold hardy. I've had carrots survive
eight degrees Fahrenheit, no problem uncovered,
and they did just great. One of the advantages to carrots is you can
sow them early, and if you live in a
warm enough climate, they can stand and
basically stay dormant and refrigerated
for you all winter long. Same thing with radishes. Radishes germinate in
only about three days and they're ready to
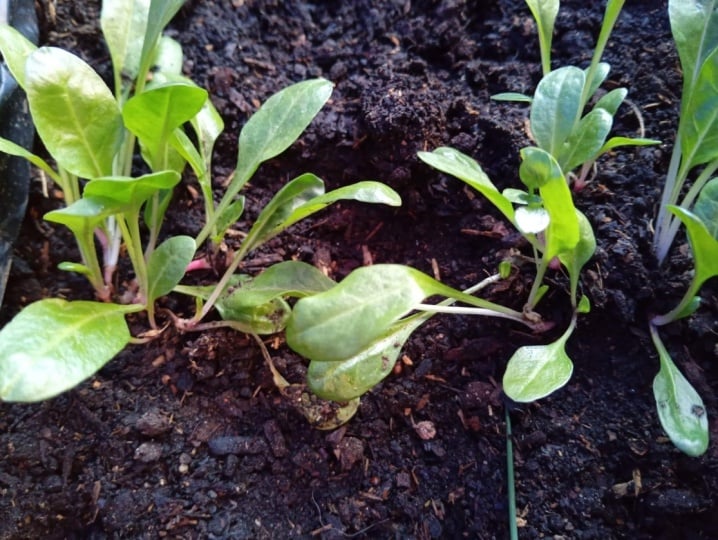
eat in about a month. Everything that you see there is radishes that are almost
ready to be eaten. We have some more baby
radishes coming up here, and then in the bottom here we have more carrots that were sown and they are starting
to break the ground and germinate your root veggies. Generally speaking, don't
start them from transplant. Directs them only, and one of the final exceptions
will be garlic garlic. You sow the cloves and it
is incredibly cold hardy. Most places you can plant garlic and have it
survive all winter long, that is to be
planted in the fall.
10. Conclusion: That is virtually everything you need to know to get
started growing your own veggies from seed for the vegetable garden
of your dreams. Now I realized that there was a lot of information
in this video, but still as
comprehensive as it was, it is not everything
that you need to know. But that's okay, because
the only way that you will truly learn is by doing so. Take the advice in this video and go out and actually do it. Your classroom assignment is to actually plant something,
start some transplants. And you know what, don't worry
if you fail the first time because mistakes are the best learning experiences
that we can make. I have been gardening
for the better part of 30 years since I
was a little kid. And it is just a wonderful
passion of mine and I have made more mistakes
than I can tell you. And every time I've made one, it has made me a better
and better gardener. And now since I've
made so many mistakes, I've learned so much, most years things just run on autopilot. So the best way to be a great gardener is to start
out just being a gardener. Thank you all for
watching, and I hope that you
enjoyed this course. If you did, please make
sure to leave a comment. I would love to
hear your feedback.
 The Millennial Gardener, Anthony