Transcripts
1. INTRODUCTION: Welcome to this Houdini course where you will learn
the workflow from the very beginning
with an empty scene to the final rendered image. This course is part of a series of small
Houdini projects. You will learn how to
set up your project. The importance of references, scale and proportion,
modelling techniques, layout, camera setup, lighting, shading with Redshift and
iterating on renders. Let's get started.
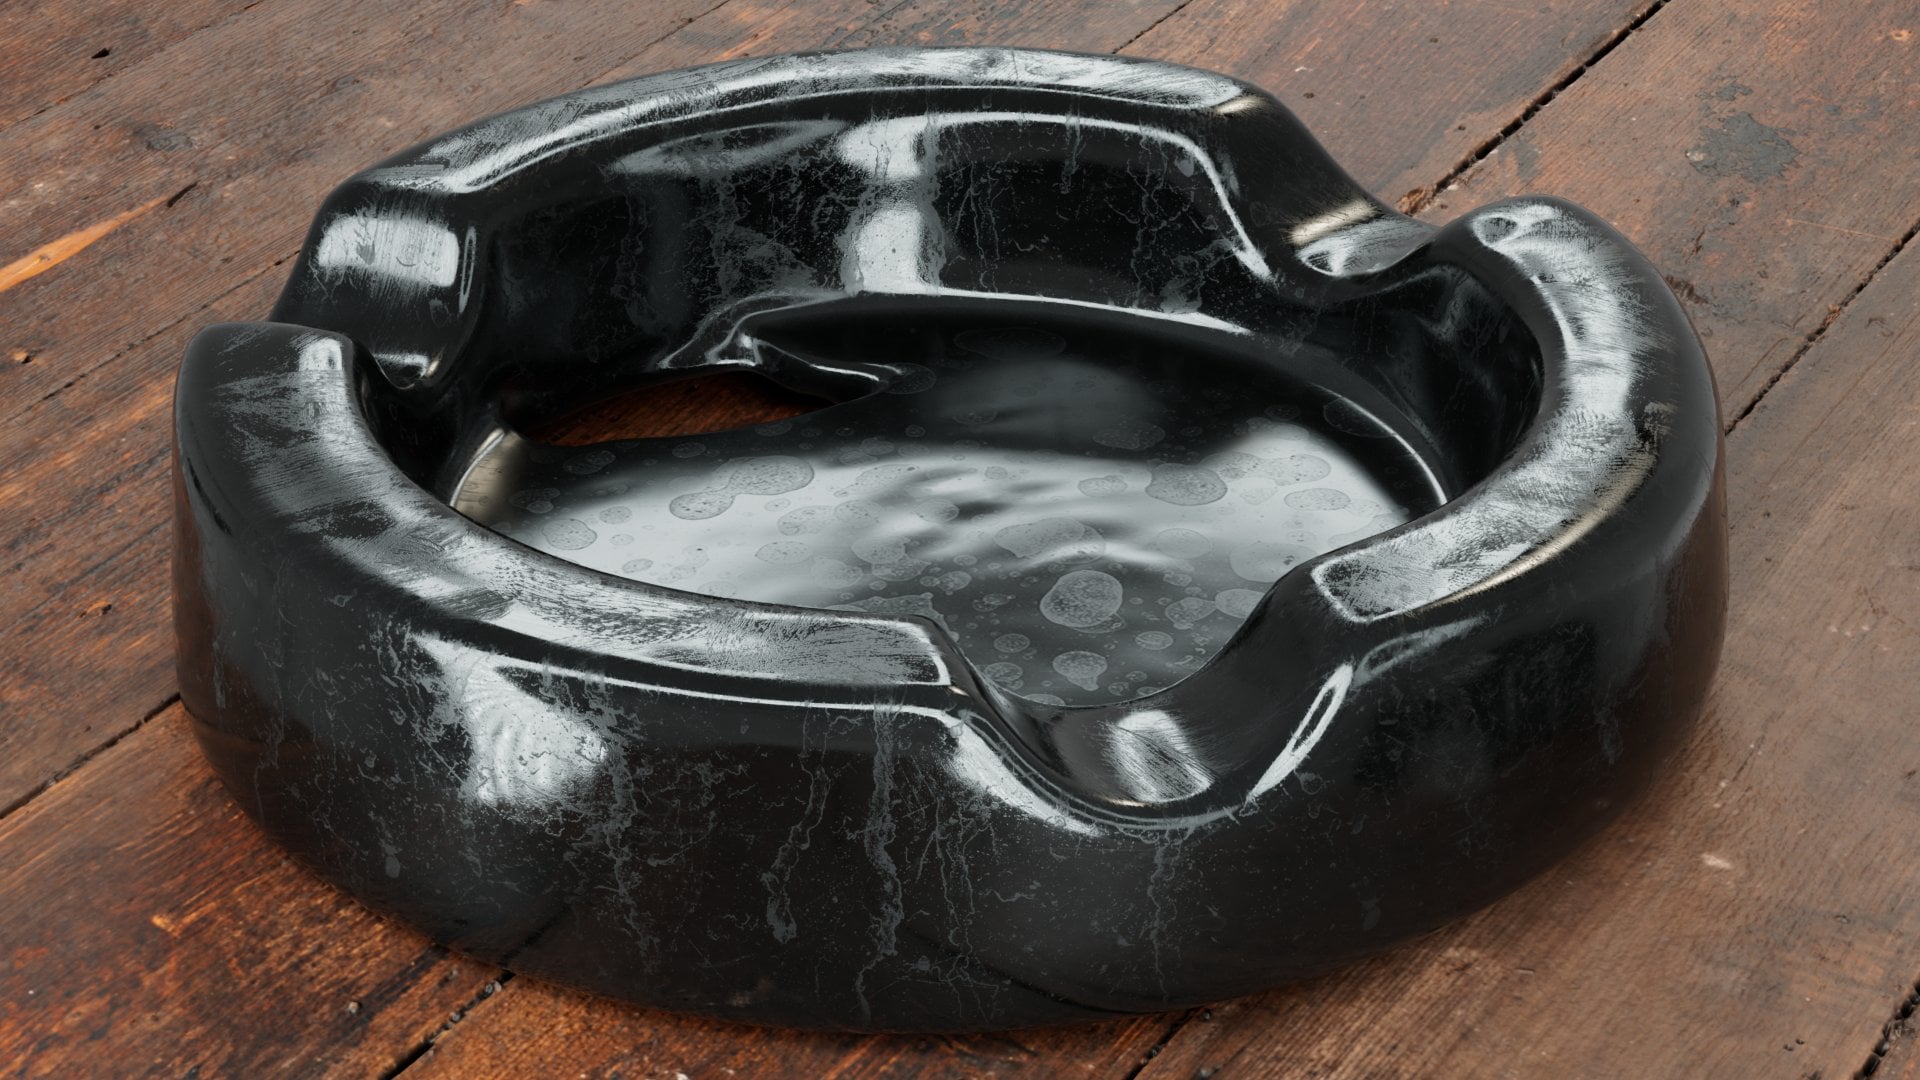
2. MODELING: CUP: First we start with
a project file, new project, and I'll
just put it for now. And the F projects and
name it, name the folder. These come by default, and
I've added one for references, accepted file, save $1 job. It takes me to the folder structure
that has been created, an unsaved the Houdini file. Because the first
was just a folder. Except this is what I have. I've got my coffee cup holder with subfolders within the file. Good. What's the next
step is preferences. We need to break references. Every time you need
to model something, you go and get the
references for that. I will select a copy, paste these inside
here because I want all my information to be
inside the project folder. And let's view them, okay, Now you can view your references in a different image viewer. Or you could have
them inside Houdini. And inside Houdini. It's
either the main view, what you see in here or
a separate 13 panel. So if it's a separate
floating, floating panel, there are many ways of doing
it, but this is one of them is viewers composite view. What I'll do, I'll just
keep it inside here. I'll split this one in half. Left, right. Okay. Let me make some more room, more space. Good,
minimizing these. And I'm going to
switch to this when I switch on taking to
the image context, or I need to do is add
file and dollar job. I'm not going to take
me to references. And by default, you
will find it like this. Well, if it is, if it is numbered
sequentially like this, because that's what I've done,
1234, then Houdini things. Well, maybe this is a sequence. Do you want me to read
it as a sequence? This is relevant
for simulations, animations rendered sequences. And that's not the case in here, it's just references, so
no, thank you very much. I'll just select all of
these and click Accept, not what happened,
what happened? They folder has been created. I don t need to press
Tab on the image. Network creates an folder and
then go inside and do that. If you bring in it, it will know you want to have that it
will create it for you. This is named after
the first image. We don't want that we need for
change to forensics. Good. Alright, dive inside. You got a layout that
doesn't work for us because it looks
like a staircase. Let's press L to select them and press L will give you an
optimal layout for your nodes. One, I want to see all of
them at the same time. That's what I want.
Okay, let's do it. So let me make it four
columns by four rows. And then make sure
that's selected, and then make sure the
display flag is on. Good. So what I'll do now
is just minimize some of those things because I
don't need them for now. I don't need them. These
are my references. I have too much information displayed these labels on them. They are quite
relevant for renders, but not for references. Let's disable the show labeled
part and close it again. There you go. Okay. These are my references. This is what we are going to use as a case to demonstrate
the workflow for modelling, because this is not about
modelling a coffee cup. You are going to model a coffee
cup that looks realistic. But this is more than that. This is about the workflow. For right. Now, you have noticed
that I've chosen one color for the top, one specific color for the lid, and quite similar lighting
conditions, mostly interior. I want to see this
whole domain interior. I want to see how the
light reacts with the surface reacts to the
light, especially the Delete. Alright, now, now
that we have this, we need to move
to the next step, which is even more important. No, it's not modelling. It's this Kao. Them think, yeah, fine. We can just bring in a human reference scale and
continue modeling. Know, there are two situations. Number one, you are making something that
exists in real life. If it exists, it has been manufactured and this
isn't something in nature, then you just grab dimensions from your
references in nature. If it's manufacturers,
you have datasheets. So we need to go and
get our data sheets. Let's do that. So go to manufacturers
of whatever you are modelling if it exists
and get the dimensions. Simple. Base, height, I'm going
to select the medium. These, these kind
of medium stuff. Base top height based
on height. Nice. Okay? These are dimensions. What's even more important? Dimensions is proportions,
meaning the top one. How big is it on the bottom? 85/60, 85/50, 6 5085/59. So what I'll do is number one, because they are different. You notice this is 59, this manufacturer has
56, and then four. This one's about 60 to think
which one should I go for? Simple calculation interval
56 is the men, 60. 60 is the max. Okay, good. I'm gonna go with higher because when I use a larger dataset, I have a more
representative interval. This is just an
example. I'm just showing you two as an example. And then you do
the same thing for the proportions when you calculate 85/60 is going
to give you a number, 1.41, 0.5 years,
something like that. If I divided by 56 is going
to give you another number. Now, you take the minimum, you take the maximum from
those manufacturers, five, several manufacturers, and
he creates an interval, and that's your proportion. Okay, let me see
how to do that now. What if it's a fantasy thing? You always start with a reference and in
your concept art, any professional concept artist knows reference scale
needs to be there. So you're going to find
something like a human scale or something that gives
you an indication. But for things that
exist in real life, accurate dimensions should be, it should be used as
a starting point. You don't want to
change it later. That's your choice, but starts
with accurate dimensions. Good. Let me just use
this one as well. We don't need it. Alright, so let's now move to the geometry part and
start making some stuff. Geometry coffee cup. That's what's at the top. And then circle, circle C. If we now start, let me just bring in
this, not this one. The parameters. Right? Radius. I'm just moving to the
right that explain and give it some some divisions. Now, the radius is huge. If you don't get your scale
right at the beginning, you end up with the coffee cup, the size of a house. We don't want that. So radius, this has to be changed.
How do we do that? To make it blatantly obvious, this shall be a post-it note. Let's change the color. I can change the color. This was with the C, press C, and then you bring in
the column, right? Dimensions and proportions. For this one, I will go
with the base diameter. In Houdini, we work with
radius, which is fine. You just reduce equals
diameter divided by two. So base radius. The proportions, sorry, first the height, because that's not in
relation to anything. Then the proportion,
what I'll do, instead of saying base
radius on top radius, I'll say top to bottom. The number here I have
chosen is zero point. I'm just making sure a
number is 0.0, 3535. The height is 0.13. The proportion 1.3 is 30%. The top radius is 30%
bigger than the bottom. So whatever dimension
you have on the bottom is going to
be 30% more than that. This is how you make sure not
only your dimensions work, but your proportions
hold together. So we have this now we can start populating it in the circle. Let's bring it back like this, maybe this now, this is the max. We now can start
populating this. This is base circle,
base circle. This is the bottom one.
I'm going to change it. Number one makes sure that x and z Always, always the same, meaning, copy parameter
based relative reference, whatever happens
in on the x axis. Good. I can type it. I can type
it, you can type it. But when Houdini is, so we need to make sure that we're efficient.
Efficient means. If I can ask this circle to read this
radius from somewhere, It's a lot easier for me. But I can't ask the
circle to read from this textbox while I can do is make it a parameter because
this is the parameter. So chill, I create a node and then make it a set of
parameters for it to read. This is scale. Then I will edit the parameters. If you are here for
the first time, don't worry about that. We just need this number, this number, this number. What are they,
integers or floats or zero point,
something, one point. Anytime you have the points,
that means it's a float. Float. Let's move
on. Float, Float, bringing three fellows, move on. Given name, radius
or base radius. I will not call it. The default can keep it zero,
but it doesn't make sense. Let me put the right
number here on. The next one. That's going to be my height. Heights. Heights starting point was 0.13 and it's going
to stay like that. But a habit have a
number other than zero. This was supposed to be
proportional portion on the lumber was 1.3. Good. Right. We're done. Click Apply, not accept,
apply, then accept. Then you will be able to see your parameters. What is this? Nothing. It's just not that
it's doing nothing. It's just holding
the data for you. You want to read
it. Let's read it. Let's give it a lovely color
fast to make it visible. I want these to be green. Or any color you choose. But I want them to, for
ease of visibility, I want to have the same colors
that I know this one is reading from this radius, copy base circle based
relative reference. So whatever IT engine
here, it changes in here. And now where does it go? It's so tiny y, because that's how small a coffee cup is in
this world space. Good, right? Are we done here? We have
an option down the road. You'll notice I'll be
working with open circle. I have closed here. There's no option
to work with open. Ok. Now, this is, this is something
that we're working with very, very often. The common steps. Why do I not go with open arms? Because in one of the
money, the closed one. So it's just a choice. I'm starting with a closed
I'll make it open later. I'm just telling you
that well, you could, you could start with an
open and inclusive data. I'm starting with a closed
and open a lighter. Let's get the top part. Transform. Create another circle.
Just transformed this one. I'm going to call it top circle. Good. This is my top circle
because it's going to be reading as
well from this same. All gets my height copy
parameter on the TLB, the Y translate in Y
based relative reference. There you go, it's
gone somewhere. There you go, up
the scale as well. Let's not forget the
proportion p parameter. I'm saying. Scale this one by 1.3. So based relative reference. But because you need to
make sure that they are equal in x and z,
it's not distorted. I just copy this 1 m³ and
base relative reference. Now you could paste
this one here, but it's a choice. I always want to make sure that this reads from this,
not from somewhere else. Okay? This way my proportions
are accurate. Good. We're done. We're done with these two. We are going to merge. Sorry. I think I can do is just show you something
how to make the merge. Let's select both of them. Press Option or Alt, and then drag from anyone
unusual, get your much. Good. This is much now, so
we have both of them. Next is to create the shape that is in-between because I've got the polygons now
in the wrong area. These are supposed the
beginning to the empty. Then I'll close this one later. But let's get the
bridging part here. How do I do that? Well, first, I need to get
just the circles, Just edges. So let's fully pot. And this is one way
that's not patch. I meant path, path. Okay, And then same story here. Drag, drag, option, drag. There you go. So we're back to
that story of Open. Remember that? Open, OK. It's just because I'm going to need the closed
one for something else. Okay. So keep it closed and
then open the air. Good. Let's move on. Now we're going to scan this fellow to be able to
get the shape of the cup. Nice, it's done.
Fantastic. Oh, the normals are reversed. So I
need to reverse. The normals are inverted. Okay, there you go. It's
just a hollow shape. We will it's quite thin, so we need to give it some
thickness to the extrude. Well, I'm going
to need something before poly extrude American
public street for now. But you will notice
when you keep working overtime by experience, you will note that some nodes
create overlapping points. Let me explain this. In this merge I, it tells you here
160 points clear. Now, when I did this skin, I ended up with 162. Whoa, don't Amendment. Where did this come from? Okay. Well, I do know
it's overlapping. So I'll do because the
circle may have been not properly close in terms of points, some
were overlapping. And then when you scan, it does duplicates the points at the closing of the
so-called 1.0 point, point down, that's two points. I'll do is fears. That's something you develop over time with experience that, well, you don't want to
have duplicate points. They can have some
nasty results later. Fuse. Make sure your views
is not excessive by default for something that
looks like this, It's okay. Then what am I getting? 160 points. That was my starting
point, correct? Yes, that was my starting point. Good. Now, this is out of the way. Let's go back to our extrude. It's gonna be
something quite tiny. We're just going to create
a little depth in this. Cop, distance. On the go, we have
created a tiny, tiny, tiny wall here,
just a bit of thickness. Now, I don't have the
insight by default. Let me do that output
back, and there you go. You've got your
inside part as well. So this has enough thickness. Why do I want that? Because I want the inside
to be treated differently, shaded, differently
than the outside. These cops come in
two variations. You either have it
brown inside and brown outside, or brown outside. And inside is white
and the lip is white. Not delete the lip
when it's open. Okay? This is gonna be white and
outside is going to be brown. That's what I've chosen, and the liver is gonna
be white as well. So what do I need to do? Simple, this is my starting
point for everything. I will just split. Now I don't have
enough to split, but let me show you
first we split. I want to split the inside
with this narrow edge here. I want to have them
separate and then I want to have the exterior separately. How do I do that? I just
need to select my group, but wait, I haven't
created any groups. Of course we need to go
back and create the groups. I'll do we do that. We'll extrude, has the option of exporting the groups
it has worked on. So I just create these groups and give them
some meaningful names. This is my outside
and inside and stuff. I'll just call it
white because well, I know I know it
needs to be white. So both of them are white. Meaning the inside
edge here is white. Good. Now I have my groups
and I can set x, give me just the
outside, please. Split gives you hear what you've selected and here all the rest. So let's get a no for having just to have a
clear as this workshop. Just want to have
everything clear. These nodes are not doing anything other
than making sure, you know what's going on. This is for the inside. Okay. So you see the inside? This is my inside and
this is my outside, and both of them are in here. Good. Now we can work on them separately because this
needs to be treated differently than this
and grouped differently. Right? Now. This is another way we
go now to move to the lip. And the lip shall be taken from the transform from the top
circle because the lip is up. Let's take it from
there and say no. For lip. You don't need to
add these nodes. I'm just added them for clarity. Okay, I'll keep repeating this. Just makes sure that
you know, what what we're doing and why we're
going with this part. Okay, I'm starting
with this one. I'm going to make it a
little bit bigger than one. What you could do
because I need to do is in relation to
the crop itself. The lip is slightly
bigger than the crop. Water. Just template this one. Click here and the templates, the rest of the cop, right? Let's work on this one. I'm going to transform
it, making it bigger. This is how big is this? Make it this big pot, making sure not a lot actually. Both. We go but making
absolutely sure that copy parameter z and x are
the same at all times. Here we go. I have now a starting
point for the lip. These numbers are what
works for me now you can change the numbers
the way you like. Good. We don't need the polygons are completely perfect as well. Why is poly path? And then you go, you have a starting points
to fully wireless. That gives you, by
default huge radius, which I'm going to bring down
to something meaningful. This is to a G. I will go down to the divisions and all you have
for ago with 16. Good. And this transform here. And made sure that when
I will just merge them. So that you can see when I
bring in these two together, this one, they are
perfectly aligned. Hey, nice, Good. Okay, So what's next? The lip is now kind of reddish. We can move to the bottom parts, which is quite an easy one. Now. We take the bottom
from the base circle. So this is for button on the Pacific. This, I just get one polygon. I need a bit more than that. I can go with the poly
Extrude or, you know, what? We need to show you
some more nodes thick and that's taken is one that you can use. It's already has some
defaults created. It's like a poly Extrude
with preset defaults, easier to use. It,
That's quite physics. It takes care of a lot
of stuff that you don't need to take care of
yourself. They can. And the radius, again, the depth is huge. Just tiny, tiny bit. That's it. This is the lower part. We bring them together as
well, and that will give us, let's change this to this, these two here.
Remember this one. We call this is our cope with everything
including down but wait, hold on to them and they don't come in this shape, do they? Because generally this
bottom path is elevated. So let's create exactly that
little gap that you have generally transform the wrong. That's what I'm
going to transform. I'm just moving it up by
this much salt on it. Okay, now we have
our starting point. This is the cup that
is without delete. So generally this
is as a base mesh. We haven't added any
new these we haven't cleaned or stop, we haven't. And at any material stuff, this is the base mesh for
a cup without delete. Now I'll go and I'm going to do is create the starting point. You know what? These are? These lines are going to start messing
with each other. What I'll do is Shift S, that's going to help a bit. Make them look a bit more beautiful. Organize this better. Let's clear this mess here. Because I want, hopefully
this is working. That's supposed to
be number three. So this goes there. Yeah. Okay. Just making
sure it looks okay. Right. The lid where do we
get the lid from? Where it needs to
start from the lip? Because that's where its
position is and not four, but from the transform, this from the size of the team, the real size of the lid. And this is sort of the lip. This is my starting point for the lid on ticket from
here and save up for it. You are going to notice later I'm just connect
this one as well. Later, you're going to notice that once we keep
working on this, there's gonna be a lot of stuff. And this nice concise
graph is going to look really huge
with some small steps, a lot is gonna be done
to reach this shape. And instead of
having it all here, I can create a folder. So what I'll do it like
this subnet subnetwork, which is nothing but a
folder saying, well, I can call it make it. So we'll dive inside, will make the live inside here. And when we go outside, the output is well, the lid. Okay, let's do that. Let me just go inside. And what I'll need to
do, we've got a surface. I want to see the lid in
relation to the to the cup. So what I'll do
is bring it back. I didn't create it. Now, I'll do I'll
just create top, bottom or create
here a duplicate. So have seen abusing people. One is going to show me the lid in relation to the cup,
which means everything. And one is only when I'm
working on this way, whatever I do is in
the right proportions, at least visually you see
it, nothing is going wrong. So how do I do that? Very simple. I make sure that let me see. I'm going to call
this one from there. That's got it. What I'll do, I can connect it later is
have this one selected. This one, template,
template, this one. And I bring this,
I can freeze or pin the selection,
meaning stay here. If I go inside the
subfolder, don't follow me. Click frozen the views for us. Just look at this bond. Now. If five, this one is not
frozen, this one is frozen. If I go inside this one,
I can work on both. See it in relation to the cup, and then work on
this one separately.
3. MODELING LID PART 1: First let's reverse
the normals because this is pointing in
the wrong direction. I'll go with a reverse. Okay? Then I will need
to make this big enough and bring it down because the lead is
supposed to cover all of this. Let's have a transform. Transform. We'll have two things. Number one is because
we're going to start from the bottom and will go up. Okay. So we'll bring it down
tiny bit like this, right? Just about enough here and make it big so it covers
the lip here. That's gonna be 1.65 because I need this to be
equal copy parameters. We'd said based
relative reference. Good, There you go. Now, this is your
starting point. We want to go from the bottom
and go all the way up. And it's going to happen in
a combination of going up, an inset up or down, and inset up or down
the inset up or down and insert a few times. And that's how we'll get
there. Okay, let me show you that we do for
the extra two. So fully extrude. Let's call it up one.
So we're giving up. And we'll do it with this much. Alright? Alright, I just
have this one hard. I said, okay, then
what I've done, what I've done is
use the distance. In other instances, I'll
be using another option, but for now we use the distance. Okay? Let me export
the front group. Not just output the front, but create the group for that. And then use this one in
my next poly extrude. This public street
is going to be an inset instead of one. This inset. So I remove this and I'll
make sure every time I'm using the extrude front group that came from the one before. Instead by how much? This much. Now, what do you see? Can you see it's a very, very, very tiny is this one here? See, it's this tiny insert here. That's what I mean by this. Okay, good. Let's go up again. So I'm going to say up, is I need to export. Yes, extra font is already
activated because I've copied it from the other good, from the other node, right? This has to use extrude font and export it
again and distance. Let me just check
the distance again. That's going to be this much. So you get the idea. We're going to be
moving like this, up or down and then in set
up or down and then insert. So let's bring in
another inset now, drag and drop, Alt,
drag and drop. I've got this one selected. We're acting on this and
we're re-expressing it again. Okay, good. The other inset showing
B of this magnitude, that's going to cover this
part here, this part, right? And then we're going to go down, is copied up and cool
it down, down one. To be able to create
this tiny gap, gap that you find in here. There's a tiny gap coming down. So that's what I'll do is by how much I could use it here. But for a change, I will show you that
sometimes it's safer to go to transform X to
refund global, global. And you use this
instance for the y. You could do it either
in distance or in here, but it's safer when you use in your moving in global scale, safer to do it here. This is now going down and
then there is an insect again. Insert up or down inside of
our data. Inside of our data. That's what we'll do. Copy, paste. There you go. This is
my son, the inset. Actually, I should
leave this one alone here and then show you here, because this is just to
show relative to the cup. This is my inset.
Go up, we go up. We're just keep in mind. We're using this as a group
and we are exporting. Again. I didn't need to tell it to do it every time because
I'm copying a node that already has this in there, I will copy paste this one
is called cope up 3.6 kip. Use it to transform the
global, transform global. Um, this is this much good. And then we have another inset by this much. And we should be, we should be fine with the
next step which is down too. Should be done like the base
shape is going to be there. For the most part. C global. There you go. Okay? This is now, this is now what we have. This is the base shape. We are good to go. This is the starting point
for further work. Now this needs to be
cut. Let me show you. We have this needs to be caught. So this one needs to be
caught me to lower this part, we need to create a whole
big hole here for drinking. And tiny, tiny hole generally. Sometimes you have here but
I prefer to have it here as if by accident it
almost never happens. But if by accident it spills on your
finger, on your hand. But if you have
it in the middle, the middle somewhere
here, then it does not. It just spills here. You don't get it on your hand. So let's do that. But I will need to export
one more group here. I'll come back to it. Okay? So what do I need?
I need to split split water to be able to work on individual parts.
I need to split them. So what do I want to work on? First? I want to work on
making the drink in home. This bit here. Let's make that. To do that, I don't
need the whole geometry to drag the whole
geometry with me every time I need
to do something. I just need this upper
part here, sorry, this, this, this circle here. That's all I need.
How do I get it? Simple? When I did my insect, remember, this was an inset. This is a down, down. This is an inset. Well, this inset has
done the work already. It's already there. I need
to output the side group. It's already there. I just need to make
it into a group. Once I have it, then I come
to my split here and say, you know, that group
side, give it to me. That's what I get. I just
want to work on this one. The split gives you on
this side here the rest. So why don't we show
what we've got. We've got no. Again, the nulls are only to clarify for you
what's happening. I think for drinking homes and I'll drag except circle. You could call this
drinking circle. Doesn't make any sense
whatsoever, but you get the idea. This is this, and this
is everything else, but this top circle, right? Okay, We'll work on
this one separate. Make some space here. Alright. What are we gonna do? Simple, we're going to make a whole row is done
with the Boolean. Boolean using a sphere,
a distorted sphere. So let's make one
sphere, a tiny sphere. That's going to be
with these this size. 0.00, 30.03. Can you see this sphere?
Now? You can see this view. Why? Because it's a tiny sphere
and it is at the origin. Wait, what do I do with
this sphere at the origin? If I want to make
a Boolean up here, 20 to bring this one down, no. Or you need to bring the
sphere of how do I do that? I'm not going to transform and transform it until it matches, eyeballing it and then
maybe missing it. Don't waste your time at that. Just matched toys, which does a little bit more
than matching the size, matches the position as well. This takes the
required GMOs geometry to move, move this sphere. And we read here, much size. It has jumped. Good. What do I have? So if I say show me
this one completed, I mean, you get it
moved to the center. Why the center? Because if I look
at this much size, actually in this case
match position translate. The size, is this activated? I can activate it,
but I don't need it. I just need this.
It says center. What I could've done
for the z axis, this is the z-axis. Well, I could have done is change it to a minimum and
then starts moving it. Offset a little bit here. But you know what, It's a lot easier and simpler and clearer. Just have a transform
after them and say, Can you please
move a little bit? I'll do that here. Z-axis separate. So if I want to move something, I don't need to get inside
the image size and then start messing with offsets
and minimums and stuff. It's possible but simple
Transform would do. I'm done, I'm done. So all I need to
do now is pulling. Every time you put in two things that are not of the same nature, you need to change the
type, treat as well. Sphere is a solid and this
looks like a surface. So I'm going to plug one on his side and the
other on another side. Here. Let me remove
this template here. I need to make sure that my
sphere is treated as a solid, but my b, my surface is
treated as a surface. So I'm just select this surface. Here, it says a to b. And what happened?
Well, this one got cut, but that's
not what I want. I want subtract B from
a legal operation. You could do whatever
you want with a boolean. All these operations we
work in with subtract. So I'll do it with the p
minus a, not a minus b. There you go. You've got to drink it all. Nice, We're done. Let's move on to the next. Let's merge it back again. Merge with the all except
we've done the work. Thank you. Let's move on now. Good. What's next? Next is making sure we cut this one in half and then we can work on each one
of them separately. One needs to be lowered
and the other one is to have a very tiny hole. Okay, let's cut them
from this except all this one I will split. Now what I'll get
is the other group which is front, right? To make money doing things right side on this is supposed
to be all the rest. Okay. Then here, I'm supposed
to get front only. Yes. There was a problem
in the view port. It didn't show it at the first. Okay, So this is extruded front, which is just the top primitive. Let's cut it in half. Not really harmful.
Well, we'll look at you can use operation
strategy is a very big word. Operation, remove or cut. What I'll do is
I've got my points, not foreign 36 already know that because I'm
using AT divisions. And if I look at this, I've got a point numbers. Okay? I will cut it 4-36, and this gives me this, but this is the Remove. I need a real code. Just know what God, just keep everything as he hasn't cut it. Simple. Let's say. Good. Now I've got
two primitives. I will select this
one procedurally, this is not possible, so I'll just
highlight it in red. I like to highlight sometimes stuff that is not
possible in red. And what I'll do now
is I'm trying to do. What I'm trying to
do now is group IRange grew by range. Okay. I'm trying to do is select one of these two in
a procedural way. Saying, well, I'm
going to give me, give me a group of primitives. One of 21 of its
group, one of them. It pick the wrong one. Okay, fine. I don't care. Give me an offset. Okay. Then it picks the right one. Good. Now another
aspect, this right one, what I'll do is I'll say split and use the
group one here. And on this one what I'll do, I'll just pull extruded. We know that the second
primitive is here. So the first one is here, and the second is here. The one that needs to have a whole tiny hole is gonna be
here. I'll come back to it. We'll extrude. This
is my transform. Global. That's what this is what I need. This is all I need. Well,
I can't see it here. And this is meant
to be useful when I connect to the output. Only then, because
that's sub network, regardless of where you are, you have your display flag. It will always read
from your output. So if I now merge this
here, it will show me this. But to make it, to
make it useful, I need another merge
that simply print it, brings everything, all
the bits and pieces. Here we go, Bring
the other bits, which is here as well. I think. Yeah, then we've
got the full thing. I prefer to have this
one visible with the full cup so that I
know what I'm doing. Because it reads
from the output. This merge is only for
visibility, right? Again, I'll do the same thing. Which Shift S to make these
curves look much better. Old and not you. I'm not sure. Sorry, Control Z. That's that didn't work. I'm just move this one
alt and move this away. That's all. Just make it a little
bit of space here. Okay, good. That was for accessibility
purposes only. This one is done. Let's move to the
other primitive, which is a tiny, tiny hole. This is the one that will get
the tiny hole. Same story. You want to make a hole in a primitive that's gonna be sphere and Image Size and a Boolean
with some transforms. So let's bring in a sphere. This one is going
to be really tiny. That will be, instead of
using this three times, I'll just come here and
making this one smaller. It's really tiny, believe
me, it's very small. You can't see it
Here. It is there. Believe me. Let me bring
it opening, see it. I'll do it much size, bringing it up so
much this sphere to this tiny, this for Tony, how this
primitive, primitive form. Primitive. I know whatever
size it has jumped. Now it is there. You can see it as a Boolean. Same story. This is
a and this one is B. It actually doesn't matter much. As long as you treat each one the way it's
meant to be treated, you get the right operation in the Boolean a versus
a, B versus BA. Put in here, the first one, the a is a solid sphere, the second is a surface. So when I come here,
what do I get? Well, b minus a. There you go. This is your very, very, very tiny hole that we've
created, the primitive. Now, quality to move it a little bit because
it's not mentioned the Senate between the center. Most of them have
it somewhere here. Okay. So let's move
it. Let's move this. I'd like to change this one
to be able to see it as well. I'll move this here. Instead. This vacancies here as well. All right, transform, transform it after the match
size and before the Boolean. And I shall move it by a very, very tiny amount in
the z direction. And then you go, this
is what we have here, one for drinking and a tiny
one for just make sure that the cup doesn't squeeze
when you when you drink it. There's some
evacuation thing here. It's called airflow. Okay, next bit is going to be to merge all of these
together with the rest. With absolute rest. That's what we
already have in here. Bites, we've done it. You used to be for visibility. Now, For real, this
is the full thing. This is our starting point. You could consider this
one as a starting point. Of course, we're going to
add some finishing touches with the beveling
and everything. But you have choices. If you want to
stick to this shape which is rather flat, then
this is what we have. If however, you want to have
something that looks like this elevated or this
elevated, then let's do it. Show me. Now. First off, let me look at
the number of points, 1131. We have, we have done quite a few Booleans and
quite a few operations. Poly extrusions and whatnot, fuse and this kind of stuff you just developed by experienced that quantity to
seven operations, you end up with
duplicate points. Now, be very careful
with diffuse fuse is to make sure that any duplicate
points get merged. However, the threshold snap
distance can be dangerous. Have you noticed we've lost
this tiny hole because it has considered that all of them
are supposed to be merged. That's not what I meant.
So I need to make it even smaller to make sure
that this is maintained. And only those that are
perfectly overlapping on each other on merged to
have a tight geometry. Okay, good. What have you got? 889 points. What was this at the
beginning? 1,131. Right. So we want to make sure our
points are not duplicated. Good.
4. MODELING LID PART 2: Now we shall move
to the part where we elevate this drinking
side here, this part. Now there is the
simple way of just selecting the points and moving them up with
a soft transform, because that's what
we're gonna be using, not a normal transform. But I would rather have
you learn more techniques, especially that we
aren't Houdini. And Houdini makes great
use of attributes, and it's a great time, great opportunity to demonstrate
the power of attributes. So what I'm going to do is have procedural selection
of this area here. Let's do it with attributes.
How do we do that? So number one, on, say, this part's not this one. This one. This big ball is going
to be for selection. For the elevation elevates. The ring. Can cite. What do we do? Remember one. This is going to get, we're going to use an attribute. So we're going to tell
Houdini, you know, what? Those points that
have this attribute. But I'm going to
create, move them up. And everything else
you keep your senses. Okay, so how do we do that? Well, the simplest attribute to create is color are
the most common, but you could use whatever
attributes you want. Let's go with color. I'm gonna give this
one black color. Black. Why is it black? Because it's zeros. And I'm gonna be using
one of these numbers. One is going to be zero, and on the other side
is gonna be one. So I'm telling
Houdini less than, you don't care
about the black and red and attributes stuff. Just look for the numbers. If you see a point that has
a zero, keep it where it is. If that point has a one, move it up. What is one? And our HelloWorld one
for this one is red. What I'll do is I'm going to
use this very same sphere, the abused in here because
it's reuse it transform. I'm going to take from
this transform, this one. Okay? And I'll say no, Just to clarify, bring it down. It's time to make some space. Down here. This is for
the eating and drinking. This sphere we're going
to use for the veterans reconcilable in
its current shape? It's only the size of the hole. I want a bigger size, be able to cover the
other primitives. Simple. You go to transform
and make it bigger. This is where we are going to
learn some more techniques. So the scale is going to be spraying this one
a little bit down. Notice the scale is
going to be in the y. Let me start with this one
fast because you can see it. Okay? So it's now bigger. Used to be one. To be able to cover more
of these primitives. I'm going to turn it
into two things will break now because
we are working. How far are we from the origin of where we've
created this sphere? We're this far, quite far. Okay? The height of the cup far. So if I now tell this
to scale down to 0.5, is going to jump over
what just happened. Well, it has scaled based on the centroid
that was created back, was at the origin on the Y. And we don't want that. So how do I tell Houdini that
I actually meant to scale it and keep it where
it is like scale in relation to its
position. Don't move it. Simple. Whereas the private, private is its own centroid, which is dollar c x for the x, dollar, for dollar,
dollar for the set. Simple. Now, it's back to
where it used to be. Let's show this. Good. Now we're covering
how many primitives? Primitives, I guess
this is good enough. Squeezed it because I
don't want to select the other primitives. Alright? Why am I working on primitives? Becomes, I don't want, if I work on points, they are going to cover more
harder to select the sphere. Okay, I need to do it manually and I don't
want to know that. And I might end up spilling on the other sides
here the primitive. So what I'll do is simply
started primitives. It's lot easier and
give them a color. Color, color. Remember, this one was black. I don't need to
remember anything. Going to make it look black. And this one is red. And I need it to be
at a primitive level. Same story here. Let me go back. Primitive so that when
I say an attribute, transfer requires
some energy transfer from the red to the black. You go, when you click, it turns, all read anything. This is not what we're
supposed to happen, right? Because this is just a
sphere that covers this. It's supposed to transfer the Read Only these primitives
here, not to the rest. Yes, because our threshold
attributes now, primitive, by default, it knows
you talk about color, but it doesn't hurt
to be explicit. For primitives
because we're working with a primitive color. Then conditions, this is
threshold is really a lot. So what I'll do is reduce it until I get only
these primitives. And I've already done that. So I'll just get the threshold, which is 0.002. Now if you move it to bed, you cover more or less primitives, but this is all I needed. What have I just done now? Simple, I have given these primitives something unique that makes them blatantly obvious. To target. If I want to
target them, I can see them. They look different than
the, than the rest. If I can see them within,
you can see them. Good. So if I consider an attribute, then Houdini can see them
as well. What do we need? We need now to start,
start the soft transform. Now, I need a step before this, but let's put this off
transform, soft transform. I plug this one here. Nice, Keep it going, this one. Let's expand this for now. I need the y for x and I need
this important soft radius. And the radius is
going to be critical. However, soft
transform, before we even start talking about
anything acts on points. And I have primitives. What do I do? Symbol,
attribute, promotes. I'm going to promote from primitive to points
from those color. Then you notice now
that these colors here become used to be
hard. Look at this. This is the output. This is what point is this
is with primitives software because this point is read, this point is black. So this one is saying, half, this primitive is mine, that one and say, okay,
this half is mine. It's black and it's fading. Summer is the point. So it's not the primitive. Why am I doing all this? Because this one
talks two points. And if it talks to points,
we need to give it points. So now that we
have, for instance, I can say is attribute promotes. And I need to turn these
ones into a group. Now we need to
group the ones that have one, which is red. Let's create a
group. You could do it with the group bought. What I'll do is because we need to find excuses to
teach you more stuff. What I'll do,
attribute triangle, we're gonna get into a dangerous zone called
the x-coordinate. You think it's gonna be
really simple. Really simple. You know, this,
it's this simple. Let me, let me type in
plain English for you. I'm going to start
with these signs, which tends Houdini don't care about this. I'm
not talking to you. I'm talking to myself
or to the audience. This plain English, this
is a comment not code. Points are red. Put them in a group called
give them more of a name. I'll just call it red points. Red points. Now let's get it a little
bit closer to the formula. We still keep it
as plain English. If color red is higher than zero, we know the red, black is zero. If the color of the red
channel is Color of Law to ROI of the red
channel is more than, it's higher than zero, which
makes it closer to red. We're increasing the red. Then do the same thing
for them in that group. That's what I mean. It's
still have enough space here. Otherwise it's going to go
this way and keep moving it and we move it to code. It's very simple,
very, very simple. We are going to tell Houdini, if this then this done. Okay. The color, what's the color? How can I tell the red
channel of the cornea? Simple vector at CD, the color x x, y, z, x is the red channel
is the channel XYZ RGB is higher than zero. As the condition we're
done with the condition. Then create a group,
put them in a group. So create a group, group
and call it red points. Red points. This action is true. Make this action
through zero is false. One is true. Simple. That
wasn't scared, was it? So this is a way of
creating a group. Now if I see, I've got some leftovers that
needs to be cleaned. Primitive groups from
the extrude era. And I've got my newly
created point group. Now we'll do some cleaning. Step. Don't worry about that. There's a step where we go through some brutal cleaning of everything to have
a clean geometry, lightweight geometry. But for now we are going to
work at this point group. Okay, good. Now that this one is done, we can use the soft
transform because the soft transform
talks to the point. And when you click, you don't see any primitive
groups because it only talks to
points, red points. Okay, Let's have a look. Nothing happened because we have not asked it to do anything yet. Let's move it a little bit up. Move what? Those red points. You click anything,
Something happened, but don't think
that's what I wanted. We noticed something happened. Again. Yeah. It's moving the
whole cup, the whole lid. It's about the radius. So the radius is too high. That's half a meter. I don't want just
a tiny little bit. See, when you reduce the
radius of this fall off, then you get this done. Well, mostly with the overall
shape before polyethylene. Should we make some room and clarify things a bit
by removing the color. The color has been useful. Thank you very much, goodbye.
So let's remove the color. Clean. Actually, what I could
do, good clean everything. Yeah. So you have the possibility
to clean using attribute, delete, group delete, or
simply go with green. But this clean is
a bit dangerous. Dangerous if you
just keep it as is. This remove degenerate
primitives. It does remove primitives
that you need. So keep it in and just say remove all attributes,
all groups. Which means I have now
successfully assassinated. All the red points group, extrude front,
extrude side group. And the color that was
very useful in selecting. But for now, thank you
very much. Goodbye. What I could've done is group
delete, attribute delete. Because the clean
can be quite brutal. If you don't know
what you're doing. So Group Delete. I can say group on everything, star, delete everything
and attributes. Just delete everything. Points. What I've got here
are colored points, vertex nothing, no entries. So this is a bit equivalence
of what I've done here. Could do it with the Clean,
could do it with this. Alright, choose whichever
one works for you. For now, I'm just
going to go with a clean and making sure I deactivate this, remove
degenerate primitives. Alright. This is our final base shape. Is this still a base shape? Yes, because we need the
final touch of polyethylene. Now, have you noticed that there was that story
of degenerate primitives. What I need to do after poly bevel and it's just
gonna be even more messy. So I need to fuse again, but not now. First
we played bevel. Okay. What? I want to put it beveling to be clean because I know
endpoints. Okay. Let's views. Using is one of those things. Let's, let's use this by now. And again, we're gonna go with a very tiny number to make sure we don't lose
this tiny hole here. We're good. We're good. We're good. I'm going to fuse. Ended up with 877. We have here 889. We did have problems
with some points. Okay, Nice. Let's move now to making
this stuff look much more like a coffee
complete poly bevel. Want to bevel this one
I'm going to do manually. Okay. Polypropylene, what I'll do is simply select, I'll
break this one. I'll just close
this one for now. I think. I'll focus on this poly Bevel. Select, select here edges. Let me close this one again. Edges, I select these ones. I'll do poly bevel and at
multiple levels, these big, big ones are going to have
a wider polypropylene. Tiny ones that you can see in here will get smaller beveling. That overall shape
looks quite nice. So Shift, double-click, you get almost the whole
circle in this case, because these are for
some reason not included. But for now, it's okay. I'll make sure I select only
those that are visible. So let me click back again. I don't want to select
something by accident. Shift, double-click. You go. This is about this. I think this is what we need. Now. This is what I
need to call it bevel. And I wanted to go a
distance of this much, but I want to have quite a nice round six division this way. Okay, Good. This part is done. I'll do the same thing. I'll just paste this. I will change the points, but before actually
teaching the points, every time I do poly bevel in, I feel the need to
fuse this fellow. Fuse it with this much
what I can do it after the first American to offer
the second analysis. After the second. That's fine because it's doing
the work anyway. Let's do it after
finishing polypeptide. Let me select my points here. Edges, I mean, so
deselect this and then I'll select this
tiny, tiny, tiny ones. This one, Shift, click this
12 or three hidden here. Let me get this one. This one. This one. What have I got? I've got five circles. These are going to be treated
differently. Click, Okay. It's too much here
because I need to change the, I've just copied it. I need to change the distance to something much more subtle. Divisions. We don't
need that many. We just need three
divisions for these. Okay, Let's polygons. We're good, we're good. Now fusing is going to be less problematic for the next step because once we move
on to the next step, we need to have
everything right. All I need to cover is this edge here. I don't like it. I want
it to be poly beveled. So what I'll do is
simply selected. Placenta, and half
your desired distance, number of divisions. Or it could go with six or less. It's an aesthetic choice, right? We're good to go. Okay? And when we are good to go, what do what do we need to do? Well, fuse every time
you use dendrites, tools like polyvalent, stop and whatnot, make sure you fuse. And every time you use, make sure it matches the size
of what you're working on. This is too much, much lower. This way, I get to
keep this tiny hole as well on the geometry,
so they're good. 39673967. It appears we didn't need
it, but it doesn't hurt. Just a good habit. Now, let's clean again because do we have
anything to clean? Be big money to clean and stuff here because it's gonna
be cleaned anyway. Alright. Alright. Yeah,
I think it's okay. We're good. We're good to go. So output, I don't
need to highlight it. I'm going to have the display on because automatically
it picks up the output. If you have this note in
there, if you deleted, then it's going to rely
on your display flag. Let's go back. Now. We can have a look
at total view. Select this here,
and select this. 11 of them has an issue at
mismatch of attributes. One has got a UV and
gentlemen, it's got normal. Okay. Okay. We'll
take care of that. Don't worry about
them. Don't you worry about them. Okay, good. Now that we're done with this, we need to move to making sure each one of
them has only two. Really have a bit more
space here is that you have the possibility
to see everything. I want to create groups, but before doing that, I want to give them proper UVs. So this needs to have a UV. You type in WV, and you end up with a
massive toolbox of UV tools. Fantastic. The thing is, it comes with experience that some shapes are just lot easier if handled
with a specific node. This case, all I need is, well, project, UV project. I want to project using
orthographic box, cylindrical. This shape is cylindrical. So I click project. Now you need to make sure you have it initialized
to best plane. I think it has picked up this because I've
done it before, but it may look a little bit distorted the
beginning, just initialize it. It will do it to
best plane, right? Same story for this one.
It's the same thing. It's a cylinder. I know it has some edges
here, but it's a cylinder. So what I'll do is UV project, copy-paste this one
on, initialize it. Okay. Cylindrical. We're done with the UVs for this fellow's, we move to the next one, which is the lip.
Where is the lip? This is the lip. This one. Okay, Now let's use something
else for the lip UV rap. Because it is not a
straightforward one. I will simply say, well, I'll just keep
it as it actually, as a matter of fact,
let's split this 11 of them is going
to be my UVs. You the viewport. That's
what it shows me. This was my UV for this. This is the UV for this one. This is UV for this UV unwrap. And I'll go for this bottom 11 of the
easiest ones to UV unwrap. I just say option Copy paste. And this one also
gets a UV unwrap. And that's what we
get now, we're not using similarly the space here. So what I will do as
possibly a UV layout. And I'll say make
sure please that I am using use scale islands to
match their surface areas. And I do that, then it takes
care of the proportions. Not one is bigger than the other one compared to what
it's supposed to be. What I'll do as well as due
dates for the next one, which is the lid. And the lid is not the
most straightforward one. So I'm gonna go with
another unwrapped. But because it's going
to be a black color, you see it here, just
the black color. I'll be using some textures
for imperfections. But what I can do for that, I can use try planet projection. So what I'll do simply use UV unwrapped UV layout just we make sure we're using
optimal distribution. And the most of what
we have of the space, we have islands, skin on, swash their services, and the default works
just fine for us. Okay, good. What have we got? We have
got everything with UVs. Now there's something that has a mismatch with
the normal because we did not create the normal at the very end,
we'll fix the normals. Okay? So step number one, after getting all
the base shape, right, is the UVs. Now I want you to have
your stuff a little bit organized on use this, bring it down, make it a little bit. Let's
make some space. Press C black, collect UV's. That's for all of them. Make sure everything belongs more or less in the same place. Okay, good. What's in here? I've got this look at this mess, look at this mess, look at this mess coverage num
non-compact. What is this? Well, this came from
the layout notes. Some of them have layout, UV layout, some of them don't. And the UV layout
creates this stuff, coverage and stuff should you
want to work with that at this stage is just making it this top heavier,
the geometry here. So we're going to clean. Clean, right? I'm going to make it this car. And what do we want to
use in the clean, simple? I want you to remove everything. Remove all attributes, all
groups except the UVs. Because if I remove
everything here, it will give me b.
Oops, where's the UV? I've just worked on my UVs. They're gone because
it has killed the UVs. So how do I tell Leni, dude, don't touch the UVs. It's star for
everything with this. So in here, which is
except, except UVs. When I do that, then
I get my UVs back. Vertex attributes, UVs. This is all I need. Arrays, everything. Just keep this, Okay, and copy paste the same
story for all of them. May be thinking, why don't
you just do it at the end? Because I want to group each
one of them separately. Okay, I need to create a group. So this needs to be why? Close this and then put it here. Then it's not supposed
to be like this. Should read from here. This should be here. Another 131. This is becoming quite annoying. Let's call this whole
thing Alt, drag, connect. I'll drag, connect
on drag and connect. You go delete. Now I can get my message. That's it. Simple. Do we have a clash? Do we have a warning? There is no war in
with the normal. Okay. But we don't have normal. Okay. Because we have
removed it with the clean. Okay. So now we need to
have proper novels. So normal. Because for this
one, I don t need to have them all
separately and I need to create some groups here. So what is this? This is a, let's call it, this is a cop outside
Corp underscore outside. Lets us look at
this cup outside. Outside of the cup, we
don't need the UVs anymore. Let's look at this.
This is cop-out side. This is the group number, the group we say group one. I can read it directly from
the name by saying dollar. Read the name of the node. And that is going to be a
group. Wants the group here. Primitive group coupled side. Clear. That's all I need. Position. Uv's. Later on, I'm going to add the normals to everything
and the primitive group. That's all. I can use the
primitive group for material assignments or for any other purposes
when I export. Geometry. Let me drag
and drop this here on. This shall be the inside. The inside, I mean, including the top edge beneath the lip. Same story here. Same thing here. Why
go to all of this? What easier? Another group? And this should be,
what is this group? Space? Clean? What is this? Not? The lip will
happen to the liver. Display issue. Clean. We've got removed, degenerate. Did I not tell you
Did I not tell you? It is one of the most
dangerous knows. Some of the some of the okay. Yeah. I have to disable, remove degenerate
prints. I forget this. Sometimes. It has removed those primitives because I could actually
do is use this. Fuse it after the poly wire. Excuse it. I still have. Let's check in here
for those degenerate, degenerate story is
going to be still there. Zero. Right? If I activated
degenerate stove, there you go. Diffuse
has fixed it. Okay. Okay. We don't
have an issue with that, so but I keep it out for now. Good. So this is my lift. Then. There's my, what was now. This is the bottom of the cup. The famous lit one
with the most work. See how it looks like this. With this sub network folder, you don't need to have
all of this stuff. Just for visibility purposes. A lot better. If you actually want. This is an HDD on itself
just to have an input with a circle maker HD. But for now it's just
a simple subfolder. We're done. So I need to do is select
all of these connected here. I'm going to merge. Let's visualize
this whole thing. The right UV scale
for everything. Nice. We're going to add our normal. We don't have it here, just have TUV and the primitive groups. They useful primitive groups for shading for
material assignments. Now, I have B and a new V. Now we have everything we need and only what we need when it comes to exporting
a geometry. Don't do it in a messy way because the size is
going to be huge. The more attributes you have, the more groups, the more
mass you have in here, The heavier your file. Now imagine doing that on a simulation would
suddenly frames. That's just going
to be unnecessary. Ram usage for nothing. Okay? So this is lightweight,
only what you need. And we have reached the
point where we reach now. The famous know is named out. Cope with late. Obviously you have the option to say there's another
COP without the lid. Consists split. Give
me the lid here. I'm saying give me everything. But delete everything except delete this as yeah, I could do that or I
could just do it like this and also have
the lead separate. Should I just want to delete separately
for whatever reason. But if you want, now, when you reach this
stage, you're done. We'll just now
exploring options. You've got without
the without the lead. This is just the lead ball. Chances are you want to
have it in the right place. So transform. If you want to have a little
table, something like that. Transform on this one, how do I move it to the origin? Because this is like flying. I come to the
Translate and I say, remember that story
of dollars cx, that's been relation
to the centroid. I'm going to say is
minus dollar Cx, which is ticket
back to the origin, minus dollar c x. Same story. Minus e, y minus. Dollar. Now what happened now? It, it is really at the
very origin or the origin. That's not, if you
want to put it on a table that's not
less than zero. So the half is on top and the other
half is at the bottom. If you want to have it all
as sitting on a surface, then you have another
transform, sorry, just match. But you can have another
transformative it manually, but it would make sense. Or you could use a b box, which is another
way of doing that. Plenty of ways, plenty
of ways. A line. I need to show you
as many as I can. There you go. When you click on that. This is like an quick
way of making sure whatever you have goes
back to service level. There's nothing
beneath the surface. Canvases your lid out. Okay. This is your cup. Without lid. Your lead on this as
a cup with a lid. Nice. Good. Are we done? Can we now go ahead and start
the next phase, which is the shading. You don't want to do that. You do not want to do that
because this is just a coffee. Coffee could have been a
lot more complicated thing with a lot of nodes
and computations. You actually never want
to proceed from here. Working on this. This is not for work. This says out for a reason. This famous OUT know, for a reason, get it out. Because it didn't you
bake all the work. That has been Houdini
term cooked is there. Then you can import the
geometry without computations. You only use the computation
of reading the geometry. We don't recalculate
this whole mess. So when you have the out, you need to export. And that comes with a
rope geometry output. And you connect it. Now,
where's this going? Is this going to be used
inside with any yes. Then by default,
geometry output, an exporting node
says BJ audit, BC, which is side-effects
way of telling you this is the preferred, this is the lightest,
the fastest, the most efficient way of
working within Houdini. So anything you
bring in in Houdini, It's a lot better, much faster to change
it into BGO SC. Should you want to work
with it somewhere else. Fine. You can do that alt droppers
without copying it. And then I can call this BGO, and I can call this OBJ. Should you want an OBJ? That's fine. You can do that. Then I can now change
just, just the extension. How does Houdini know it's OBJ just by changing
the extension. Well, obviously
we need to change this and give it a
meaningful name. I want this to be dollar job
and sort of cool or hip. Yes, I wanted to go to the
geometry node, which remember, File New Project, Geometry
folder J0 does this one. There are some
folders that comes by default for a reason when you export defaults here to G0, then this dollar OS is actually
saying the hip name is the file name with any
file name Doorways is the name of the node. I don't want all of this. Remember the frame number
and then the extension. We don't need all of this stuff. It's just a coffee cup. So it's not frame. So just one frame. Coffee with it. That's it. I'll just copy the same thing. Actually, the whole
thing on bring it here, change all this. This is it. This is all you need to do. Should you want to
have other formats you can export in
other formats for, but for our purposes now, we're going to go with this one. Same story is going
to happen for base. You can just use another
geometry output and you export these last bit. Make sure you click, well, if it's just a static
geometry matrix in Dallas, they are in the current
frame is just frame one, it's just the geometry. We don't care about
the animation path. Click save to disc, and then the OBJ file click
save to disc as well. Although we will not be using
it with using the video, because we will stay
within Houdini.
5. BACKGROUND LAYOUT LIGHTING: Let's create a background. Gray inside just the box. I want only the back side
and the bottom side. But first let's get
the right shape because we want to have enough coverage so it
covers the whole frame. And let's move this up by copy parameter based relative
preference and divided by two because half of it was beneath zero and the other half was absorbed,
just moving it by half. Okay. So this is what I have. I don't need a box, I just need the backside
and the bottom side. I can select manually
these and delete them. But what about learning some more techniques and exercising and getting
used to proceduralism? I'm going to group, I'm going to create a group
of the ones I want to keep. I want to delete the rest. Okay, let's do that. This group is called,
it's going to be called, Keep this going. We'll start with the base
or with the primitive. Right? Good. What is gonna be? It's a primitive and we
don't use the base group, we use the normals. So keep binormal. I want this one here. Enable. I want it to be in the minus y. So minus y. Here zero, just whichever
primitive pointer is pointing down, selected please, and
put it in the group. When I do that, I get
everything selected because the spread
angle is humongous. Zero. It's very good. I just want exactly pointing in the minus
one That's one selected. Let me copy paste this drug on track and call it the primitive. I'm here. What I will do, I'll keep the same name, but I don't want to replace it because I've already
done some work here. I want to add to it. So that is a union
with existing. We come down here and we say the z axis pointing to
the minus is at zero. I'm pointing in the minus one. What do we have? We have this one set
exit as well because it has union with this one. We have a group now called Keep. This is our group,
two primitives. Now we delete the rest. We can say delete. Again, there are different
ways of doing it. You could do delete,
can do blast, you can do multiple ways. Delete and you can say keep or delete nodes
selected and you're done. Or you can say delete selected
everything except keep. Delete everything except keep. But it's about the same thing. It's just showing you
multiple ways of doing it. Okay. This is now done. I need to do is
make it look like a background because now
it's just two primitives. First, let's reverse the normals because it's pointing
in the wrong direction. And let's give it some
curvy shape here. And we can do that
with pay sub-divide. It's not going to
be, It's not going to look great at the beginning because it's not
really had in mind, is the shape is good
starting point. But it's even more elevated here than the
copulas is no good. I need to make sure
that the sub-divide only act on the area that is
not protected by an edge. So I need to create
an edge here. And I can either
do it manually or simply use a divide node. Not by default, because by
default it looks like a mess. Default is convex polygons. These equal, this one. Come here down to the
breaker polygons. And then I want to make this one smaller and move it a
bit back in the z-axis. Remember that R such
that x is -0.7, e.g. this way, I have it pushed all the way back
there. It's only acts. This part is
protected with edges, enough edges so that it doesn't get moved towards the GOP. Good. Alright, we're
done with this part. Noted to sub-divide
is not enough. I need some more depth. And this is now enough. Good. The background is done. But we're not done because
every time we make a geometry, we need to clean the mess. Everything that has been used
and he's no longer useful, needs to be removed. That's a primitive group.
Let's remove that. Delete. Hunt. I
could say keep off, simply say everything.
Nothing is needed for now. Alright? But on need UVs. So I can do is either
give the UVs here, will survive the whole process, or a DVs here, it's your choice. For change, I'm
going to add the UV, so the beginning UV unwrap
and I will have it here. What it gives is interrupted in six planes because this is now a box and it has ES6 planes. So when you come all
the way down here, it keeps the UVs position. Uv. This is what
we need for now. Are we done? Yes, we are done. We can have our null and our
art truly, truly means out. It's not just a way
of naming the null. It's telling Get out of Houdini
and then come back again. I know it's just a
simple background, but you want to get in the habit of exporting and re-import in your stuff TO out on that, just keep it as AC because i going to be using it inside Houdini and that's
more efficient. It's okay. You can keep hip if you want. I just prefer to just drop. Because when you
do the pre flights and stuff for the scene, looks at which one is not job and I want
everything to be job. Good. J of older, fine. This is going to
be my background. Alright. Press. Making sure it's just one frame. Save to disc. Make sure that I work
on important geometry. Remember, we have exported this, we've exported now this file
and disable these ones. But to make my statements
so loud and so clear, I'm going to create a
completely new hit File, new video with any file.
You don't need to do that. But just so that
we keep in memory, remember firmly, you never
worked with an autograph. So let me create a new hit File, New File, File, Save, and I'm going to
call it shading. You don't have to do that. But as I said, make clear that we do not work
on the node network. We work on impulsive
geometry. Okay? Make some space. I'm going to need
this one for now. Here's what I'm going
to do. I'm going to have my references here, my render view here, and denote network here, and the scene view
somewhere here. But before moving to the shading itself,
we need some layout. So importantly as the geometry and create cameras and lights. So first off, geometry, or you could say geometry and
we could start with a file, which is the same
and go inside file. I will call this coffee cup on. I bring in my coffee cup. Right. Jail. Couldn't cope with
it. There we go. And then same for
the background. Here it is. Good. Right? Now, Let's first quickly
starts a cover. New camera. Look this one here. Position this in such a way that you see the main features that you want to
see in the object. I want to turn this
around. So instead of changing the color
and the background and just simply transform, rotate my coffee cup. Rotated on the y-axis by -90. This way, I can see all of
this, these shapes here. And the lighting is going
to come from this way. And we can see how the light interacts with every pulse
and the shadows and stuff. Whatnot, surface imperfections. Good. Okay. So this is for the
geometry or the camera. Your camera has settings. You want to make sure that it
sees what it sees and then it does it properly.
In the view. You have your focal length. We are copying the product photography
rules and guidelines. We don't go any lower
than 54 focal length. You go lower. You have distortions
between the proportions. So this is going
to be way bigger. Viewed, seen because
the Falkland creates distortion compared
to the bottom here. 50 and above. It doesn't distort
the proportions to a point where it
becomes really inaccurate. In our case, we'll be
using 55 resolution. Start with something small
if you want a fast response, I'll just keep us
by default here. Later on. If you want to render high resolution, we
can change that. The most important part and almost always forgotten
for a camera is to make sure that your
object is in focus. Ok, Alt, and drag this. Let's look at the camera. This is our camera. Let me press Enter, which brings this gizmo here. You can also press here. Now, if I click on
this square, right? I mean, right-click and
choose focus handle. I click on that. What do I see? I see the focus handle. If I ask you, where
is the focus now? And you answer, I don t know, that's the wrong answer. So here's what you
need to do all the way back and discover
how wrong this is. This is where your focus is, which means that your
copies out-of-focus. Often people create cameras and von, change the resolution. And sometimes if
they really feel like tweaking the focal length and then it will get
completed a focus. Your stuff needs to be in-focus. So let's move. This book is all the way here. Closer. There you go. Now, this is the focus, the sharpest part of the focus. This is the range. This range Is your
creative decision. You want to have it bigger. You want to have the
background blurry. That's your choice. But if you mess up this square, you don't know what
you're doing in terms of camera focus. Okay, so let's make sure we
have it in the right place. Good. Have we gotten
this one out of the way? Yes. Let's move on. Let me change this gizmo back to orientation
handle. This way. If I go back to my
camera and look it, then I can see I can
even move the camera this way using
these handles here. Lovely. Okay, camera done. Yes. Alright, let's now
move to the lights. I'm going to use
Redshift lights. So I have a tab
here for redshifts. If you don't, you
just come shelves. Obviously cabbages. Then you activate it here
because I want to control click on just this would
only see everything. Control click on
the lights down. This creates an item. I was just going to call it, don't actually, let's
call it a studio. Because this is going to be an HDRI that I will
bring from HDRI haven, I'm going to use you
could just go to Eastern. I haven't I haven't. Dot com is theorize and indoor. And then you search for studio and you get
plenty of them, go for one that has less colors, so you don't get
contamination on your course. So what I'll do is under light, there is texture and
you want to always avoid using just a corner like this because this
is not the reality. Reality is a rich
light information, not just flat white. So I click on this color job. Thanks. For textures photo studio. I use mine as color space, ACC G because that's
what I've done. It worked on it to make it SSG
and luminous only for you. You bring it in as HDR
with extension HDR czar. And you go for
utility, linear sRGB. This is what an HDR and EXL are if they have not already
been converted to a CCG. Now, once you tell
redshifts that it is going to take care of the
ECG condition by itself. There's intensity,
exposure zero. For now. We're good to go just say Save, I'm just creating these
are default values mostly. And then later we'll come
back and tweak them. Next is going to be my light. It's going to be an
area lights I Control. Click on the earlier slide that creates a lights
and puts the viewports. Look into the light
and look in it because it knows it's convenient for you
to move this around. I can move it this way. It gets a bit closer, something like this, and
start tweaking, obviously, where we don't have an event, even launched the
Redshift render, but we know we need the layout. So I'm working on the layout
bit now and slightly on the setup of the lighting
will work on the weekend. The lighting once we
bring in the render view. But for now, I know I want a light that is not this bright. Bring it to something that just makes the viewport something
you can work with. And then I want
to change I mean, move remove the
lock. Move around. Actually, I don't I
don't like see in the background of this dome. So let's come back
to a studio to dawn. On. There is a background
somewhere in their environment. Round. And also, if I just
headlights on me, then this is a lot easier
because the light information, I want to see it in
the render view. It's almost useless in
the viewport for now. For now. This is going to be
a soft box. Again. Always use textures no matter
what light you bring in. You don't want to
have fake flat color. For look dev, you
can use flat colors, but preferably use textures
with luminance only does what in a studio is meant by neutral color, not flat. By neutral, they
don't mean flat. They mean neutral
illuminance only. Okay. So this
no-good used extra. That creates this
tab here for you. When you click on use extra. And I click file,
sorry, failure. And bringing this softbox, where did I get
this softbox from? Simple. You just go
get it from internet. It's HDR labs.com. And you search just
such HDR labs, softbox, and you get this right. You get, I think, HD or an ear XOR versions. Okay. What I have is an ACG version. I don't need luminance only because there are no
cognizance of box. So I bring it in and I say, I say ACG, you say what rights? You say utility
because if you're using your exert that hasn't
been converted, ECG it, you say utility again, linear sRGB, because an HDR, you XOR is linear. Good. Now that we're done
with this part, we're going to slightly
tweak to scale. Because if I look at this, it's huge is going to
cause all sorts of issues. I wanted to be artistically matching the scale of the cup. Not really much it as in
same size, same shape. So I'll go back to
the, where's my size? The shape, and size. Now change this to something
that works on the cup only. Why? Because it's
going to give us a very beautiful gradient. On the sides. When you look from the camera, you can have lovely gradient of different shades of
blue here and here, with the shadow coming this way. If it's big, area light, then the shadows are soft. This smaller the area lights. The harder and the more
straight the shadows repeat. Now, this is just a setup. We will see once we have
everything laid out, do I have everything I
need for the layout? Just a very quick check is
I think I'm good to go. Let's organize this a
bit and have it have a thinner like this. Some housekeeping here. Lights, but equally
redshift lights. Camera geometry. We're good. There isn't a lot,
but we could have this whole muscle under a
tab and then click geometry, but we don't have much going on. Save. Then. Now that we're ready with all of
this, I'll say camera. Camera. We have the right
focal length, the right focus. And we know we have
chosen the resolution. It's not gonna be slow because
it's too big for trial and error and error
for R&D delights. Both are using textures. They are using textures
with the right color space. Split this one in half. Left-right. I will have my oh, no, that's not what I meant. Spain split it top and bottom. I'll minimize this one. This one I turn into a
redshift render view. Because this I want to
be my composite view, my references because yeah, look deaf and shading. Lighting is something
you do with every possible
unimaginable useful reference in front of you. So what we're gonna do is
simply do the same thing. Because this is a new file. I'll just bring in
the references again. Very quick. Shouldn't take
as much time to name them. Select L for layouts. A four-by-four. Make some space because we don't need all
of this stuff here. For now. Activate the display
flag for all of them. Remove the labels again. And there we go. Every reference, we have gathered the one from
the top as well. Good. Okay. It's going to be mostly
something that looks like this. This is the closest match. This, this is the closest slide, and I want to have these
two, something like this. Okay, good. Now we shall start the shading,
which happens normally. Normally you would have your
shaders in the math context. But what I wouldn't say
normally it's a choice. You can either have them
in the math context, which is material
creating materials here. Or if you want, your material, should you
want to move the background, copy it to another file, and copy it with the
material that's much easier to have your
material inside here. Okay? So what I will do is I'll
just give it a material. I'm starting with
the background. Bring back the scene view. This one. Probably simply just have the camera pointing
like this. Yeah. Good. Alright, I've got material and here I just material network. It's a bit like working
in the math context, but we would bring in
all of that inside here. So when you copy this main
folder, it goes with it. This is going to be just
keep it mathematic fine. And that is material builder, shift material
builder. Not Blender. Blender. As material
builder writes background, we starting with the easy ones that you get a little
bit used to it. This is just a material that has two things,
color and roughness. So I'm starting with, I'd like something that looks
more like this or this. If you combine this and this
is gonna give you a color. So what I'm trying to
do is find the most aesthetically counterbalancing
or complimentary, the most aesthetically
complimentary color to the cup. The cup is going
in the orange-ish. So I need to go on the blues on the opposite
side of the color wheel, on the blue here. Okay. So sorry that fits
somewhere here. This is a cop, so I need
to go somewhere here. So I already have the
chorus of wasting your time with the, the numbers. Here we go. This is your red. Good. Now this is the
blue that I have found much as best as a complimentary
color to this one. Okay, so let's now
fire the first render. I close this,
bringing the camera. We haven't assigned
the material yet. We can do that. Material. And the background
background assigned. That's for the background. What I will do is just assign a place holder
material for the copy. Now, we need to do some
more stuff here much later. Not now. I need to show
you what the problem is and how to what
the solution is. First-off is material
and botnet network. So that when you copy it, again, it goes
with its material. And Redshift material. Builder. This is the least
placeholder or temporary. It's nothing. It's looking just to make
sure it has something. It's just the default one. We don't want to care. We don't want to
do anything yet. Just see what we have on Render. And I don't need now
this render view, sorry, the scene view. For this to show up. Just close this beauty. Come on. Render. Okay, here we go. It has begun. Good. So we have information. We have lights that we
have not tweaked yet. Folks on the line, what
we've just done, the layout. Okay, here's what I
need to do before we work on the shading. First, delighting. This to-do
light has this intensity. If I go up, then I can click on this and keep it
rendering. It's too much. If I go down, it's lower. I'll go with one as intensity. Now. Normally lighting to have it accurate and to make
sense professionally. Debates with exposure. So what you could
do is exposure one, but it's going to be here too
bright. I can go harvest. But I prefer to keep it
at zero in this case. In other renderers, I can go with one or two
and reduce the intensity. But in this, 11 is
already bright, 1.0 is already bright. So it is much more
professional to work with exposure than to work
with density because exposure exists in real life, intensity is just
the multiplier. Exposure is something
you find that a camera, you know what that is. If you increase by one exposure or two, then you know
what you're doing. Okay, let's stop this. I need to do. I don't like
too much information. So Snapshots, view, render information,
don't want this one. And even the snapshots, I had been making
some snapshots. I don't need the date. I don't need resolution
at this stage. I don't need all of the time. No. I draw to have some clean frame one
frame time perhaps. Yeah. To keep an idea of
when it was done. That's it. Nothing else. Oh, sorry. Camera. We have only one camera, but it would help a lot when
you have cameras. Cameras, camera and time. Good to know if we
want to go back. I haven't made any snapshot yet, but if we do it now,
Okay, Let's do that. Right. So lighting
studio, we're done. As a starting point.
I'm okay with this. Let's now move to the softbox. Now let's bring this
up a bit higher. Shall we click on the
continuous monitoring? Let me get it a bit brighter. This is the value I
want to go with y because I get this here. I, I'd like to do at
the same time is just bringing this move
the light closer. I can look through the lights. It doesn't crash.
Let me save again. Save. Look through the lights,
look through softbox. Then I can get a bit closer
while looking at this. Okay, here's the thing. It's redshift thinks
gives priority to what you are looking through in your viewports as
immediately changed to this. I need to bring it back
again, which is fine. Okay. Just quickly. I should have looked
at first softbox lock and bring it a bit closer. Look. This is much better because I want to
have a subtle lighting, but a lot closer. Okay, Let's see what
we've got here. I prefer this, I
prefer this a lot. So here you have those grades gradient from this
Bryce to darker. And then you have a
rather straight shadow. If you make it wider. If you make this area wider, you'll have the shadow
more towards the outside. Okay, good. Let's bring this one back. I think this works
for me for now. I can run that again. Okay. This is what we get as
a lighting starting point. We can change the
lighting again, tweak it. So you've got lighting
first, then shade him. Then if you need to
tweak the lighting. Alright, I'm done with this one. I'll just say, I will
keep it as a snapshot and delete this
snapshot because I don't need this and this one is just done it
even to rename it. Good.
6. SHADING: CUP: Let's create some materials
for the coffee cup. This is going to be outside. This is white. This is LID. Assign these materials. 1231 is going to be
outside, goes with outside. Lead, goes with lead. And the rest, which is the
bottom inside on the lip, are going to be white. Dive inside. I would like to have
a cardboard material here with some logo. Okay. Where do we get from? Simple. You can either
go to my gas cans, get cardboard, textures of
calm, and get cardboard. Polygon, like a cardboard. Or simply search for
cardboard texture and character PVR maps. Or you get boxes
delivered, right? They look like this. You can take that
picture yourself and make the PBR materials. Okay, that's one. And then I want to have a logo here or some funny message, which you can do is
get a vector that has a bright background and a dog
foreground or the opposite. Why? Because the logo is
going to be used as a mask. This is the one that
I will be using. I have deliberately
increased the canvas to allow for more space
to avoid repetition. Okay. So do you need to
have grayscale? Now? You don't need
to have grayscale. What you need is a
bright and dark values, even if the background is dark than the
foregrounds to be bright. So this is for the purposes
of the masking for the logo. First, let's work on the cardboard and then
we bring in the logo. Okay, to avoid any confusion,
you are beginning. You want to work a bit by bit. Otherwise, but can be
both at the same time. But let's start with a texture for the cardboard I'm
going to be using. I'm going to be using
let me just show you this one over here. This one, okay? Okay. All right. So let me call this
card board corner. And let's bring in
the cardboard color. Set, the color space correctly. What is it as an input? It came in as an EAX arm that has not
been changed into aces. Find redshift will
do that for us, but we need to tell redshift what what was it what
did you bring in? I brought in an XOR. Xor is a utility. Linear, sRGB, linear
as your keyword, linear utility, linear sRGB. Good. Let's duplicate
this a few times. On Done, name this
one, roughness. Bringing the roughness
and change this to what? Well, it isn't the XOR, but roughness is
treated as data, which means it needs
to be seen as rho. Rho is 0 at the bottom
here. You'll see it now. Row, same story for the normal. Bringing their normal lab first, then set it also as row. Now, we connect this
to the base color. If you want to see the
whole material Expanded, we can do that. Right? Base color, Roughness goes through roughness,
reflection, roughness. That's for reflections. And the normal where it needs to have something to be connected. It needs to have a
normal map node, but a normal map node is
also inside the bump. Now, redshift has one node that treats both
normal and bump, and it's confusingly
called bump map. It does both. The the bump as height field or the
normal wheat belt spaces. I'll set this as tangent space. Connected input. Then I have the choice
to connect this either to the bump input, okay? Now you know that
this is the output. And because it says Bump Map, you connect it to
the bump input. It is normal, but it's
treated as normal. And when Richard knows that. So this is the input. If you want it to be
here and you're using another material that has
another normal or bump. Or if you're using
the same thing, then you say, You know what? I'm going to connect it
at the very end here. The final stage. That's
what I'm going to do. Why? Simple, because when
I will bring in the logo is going to be
using the same textures, but I'll make it darker. So let me first rename this to called Save and
see what we have. Let's turn to this. Alright, we're rendering
too much stuff. First off, we can't
keep doing this. So I'm going to
select this region, get this thing here, and stick only to the cup. I could have optimized it more if you want
to remove the lid. Work only on this one. Remove the background. That's your choice. I keep it as is for now and only re-render this
part over here. Now, what I choose
is first to rotate. This. This is an
aesthetic choice. I want to rotate my
texture by 90 degrees. I find some features interests in there and because
I'm rotating this one, everything else
needs to be rotated. So copy parameter and based relative reference
in the roughness. Same for the map, for the normal map based
relative reference. So all of them are rotated. You don't want to
have the color. One way and roughness, normal map another way. The wrong roughness
and normal and height. Now that I'm done with
this, random again, right? So we've got some nice features. There is some noise dots here. Okay, Now this doesn't look
anything like my references. It's the starting points, but the color is off. Simple. We can tweak the color. Now. Let's work on the color first. Then we work on the
roughness color. What I need to do
is make it closer. I can do that closer
to the reddish. Let me show you. This is more red. This has more red. And even this has
more red in it. It's closer to this
more red in it. So I need to add the red. By adding we need
to work with color. I can use the color correct, but there's something
specific for this channel. Red channel, blue channel,
green channel range. This is color change range, which I can use because it splits in each
one of them and say, Can you want to act on
this red channel here? You can do that. Well, I'm going to do one point to increase the new range. This way. When I render, I get more red. Well, that's all I get. It does not look
like the reference, but I'm I'm on my way. Let's name this a clear way so that we know
what each one is doing. Then let's now start
tweaking color, correct? I'm going to use it to
be too much reference. Now this has quite a few, this is a toolbox with
quite a few things in here. Number one is going
to be my saturation. This is pale, almost sorry, I'm looking at the wrong map. This was supposed to be
reference, reference. This is a bit pay on it,
something more saturated. So I will increase
slightly the saturation. Perhaps. This could be something okay. Okay, we're getting there, we're definitely getting there. This is much this one
is much closer to this. I want something in
between this and this one that can look a
little bit like this. But you already know we have reached one
of the references, but we still need to tweak
the contrast, tell you why, because these dots over
here that you see, I want to see them clearer. Meaning bringing the detail because this is a real texture. So let's bring in that detail by increasing a bit of contrast. The bright spots
want them brighter. Dogs books want them darker. Okay, Let's re-render
of this day. I can click on this progressive
rendering IPR thing and then let it do the render
every time I change. But because I want to do it for you as a beginner
step-by-step. So change one
parameter at a time, then look at the difference. Now, obviously, we can
every time take a snapshot, something like this, and
that's what I want you to do. And the name, the snapshot with contrast 0.6 or
something like that. Every change you make,
you can do that. I'm used to this now, so I don't need to
take snapshots. I will do that when I get to the final, final tweaking bit. But for now, I know I
need more contrast, some more gamma, sorry to
correct for the contrast. Okay, we're getting there. From now on. It's just a matter of
aesthetic choices. What would you like
it to look like? Okay, you could bring
it back against a note. I don't want the contrast. I don't want to go,
um, I just keep it the way it was on port five. It was okay. So it's an aesthetic choice,
matching the reference. Now that we know
that we're done with this, let's say the color. Okay? One more thing though. If you look, we have changed, increased the red,
then started tweaking. Now what do you think
is going to happen? Let me take a snapshot, remove this remove these
two snapshots actually, because I don't need to,
I don't need this one. And what do you think's
going to happen if we swap the order, change the order first, which we then we add red. What do you think's
going to happen? Well, let's ask redshift Toby. That looks different.
Let's take a snapshot. This was the first. This was the second only
look at the difference, same nodes in different order. Now this is something
you want to be aware of. The sequence of events matters. You're adding more red to changed colors or two
unchanged colors. It's a matter now of
aesthetic choice. Which one would you
like to go with? I'll keep it like this for now, but you can do whatever
works for you. But let's now work on, well, not too fast. We don't go to the logo yet. We need to work on
the other maps. Now, when you work on
the roughness map, you want to see it as a color. So what I will do is connect
this as a base color. Let's re-render. This is my roughness map. This is what it looks like. Let me look at the roughness
map in the project folder. Where are the maps? I have texts for texture. I've got cardboard, and this
is my reference map here. It's got some tiny dots.
I want to bring in. I want to bring in because
in here it doesn't look just looks wise.
I don't have enough. I don't have enough water. Enough contrast. Let's add some contrast. Shall we? Do we do that? What color? Correct. And we add the contrast. This is supposed to feed both the roughness because that's the real and
actually only change. I want the color to
see what I'm doing. So for the contrast, I believe I go quite
brutal on this one with about because
this isn't color. Just because this is not color. This is just data row mask. For roughness. I'm going to go close to one. I never want to touch one
because things start breaking. But 0.15 already in danger
zone, which is fine. Let's see what it looks like. Did we bring in the bright
spots compared to the dark? Yes. Okay. Now, you can go with
this or we can go with a different contrast level. I'll keep it like this for now. What I'll do probably
is just make it darker, slightly darker, which
means less rough. The overall roughness is
less rough by five per cent. Okay, let me run that again. This is about enough. And again, it's an
aesthetic choice. The tools we use are technical, but the look we're
going for is aesthetic. Artistic. Are we done? Yes, let me use y. Got this, and then connect
and say, let's render. Now with the roughness tweaked. This is what a cup looks like. Good. I'm going to take a
snapshot of this. Let me delete this
one. Delete this one. And keep just lost. This is a lot closer to
my references, right? This is a lot closer. And from that from now on, it's just a matter of how
much time do you want to spend to make it perfectly
match one of them? Because now it's already
within the range of the order of the references. Good. Are we done with the cardboard? Well, as I said, you
can keep tweaking, but for now we can call it
a day for the cardboard. However, we need to bring
in another material now, a copy, paste this one. And keep the same connections. Because I'm using
this for the logo. Let's rename the logo on the ILP using this
texture for the logo. And I think, sorry,
what do you mean? I thought you're going to
use this one for the logo. Yes, it will be a mosque. Which means I'm going to use this texture with everything
that you have seen in is I'm just going to make it darker for the mosque area. Let's do that. So this is going to be a layer
on top of the cardboard. So the logo is a layer
that comes on top. What if it's a layer, then
I need a serial layer. And I put the logo on top of
the cardboard using a mask. Mask is a texture that I
will bring for this one. Okay. Let me bring it. Texture is this one. And because this is a PNG, what do I tell redshifts?
What's the input? What am I bring it
in and bring it in? Utility is RGB texture. That's your key word for XR. Linear, HDR, linear. When it's PNG, JPEG, sRGB. And let's rename this to own logo mask score. This material needs to be darker than this one.
So how do we do that? Simple. We can either, we can either start from here
and make it darker. But what I prefer is to make
it pop up, feel different. I prefer to say, well, these are for the
background. Thank you. I'm going to start from that
tail unsaturated texture and make that one
darker color correct? This is how I want
to change the color. So same texture, a
different treatment. Now call this bar. Can. Darken, means we're going to reduce the Gamma
symbol magnificently. Let's do is half first to see
what this thing looks like. So I forgotten to connect
the material layer. Let's render. And we see something, there
is something happening here. Now, it's just a
matter of aesthetics. Let's bring in this
thing to the side and look at how we want to tweak it. So it's in the mosque and it's about rotating
it and scaling it. This is where it's
useful for me to lunch to IPR that
does it continuously, constantly offset here and bring it all the way
down and starts moving. Okay. You don't need to go down. Okay. Good, good. I'm just rotating
using the offset. Okay. We could go with this size. We could create like this because see why
this is a good size. I'm going to use a size
I have already set, and this is just an
aesthetic choice. Whereas my size, here we go. I'm going with scale. First off, copy parameter. We don't need anything
to be distorted. So same scale, 0.662. Now this is just my choice. It has jumped before because the offset reacts to the scale. So I don't worry about that. I'm changing set as well. You go 0.2 to three. Something like this. Aesthetic choice. I want to make it huge,
humongous be covering. If you look at the cop, you see all of it. And just a tiny bit here
of edge without the logo. Okay, So we are now done
with the mosque in bits. Do we need any, any, any thing in terms of roughness, we can do that, but I'm not gonna do
that because we were using exactly the same texture. What we've done
is simply made it darker using this
starting point. And we're just used an
unchanged color image, not grayscale or
black and white. Good. So this is now for this, let me just take a snapshot. This is for our
cardboard and logo. Now we're gonna move
to the next one.
7. SHADING: LID: Material. Let's go through the LED and
now start working on this. Now, I want to make sure that my render region is
only on the lid. Let me bring in my references. I want it to be black. So let's turn this into a block. I will copy this color
coded parameter, this channel, into
the reference. Let's move on into the other channels. Start.
I can change this here. Now. I don't want to have black, this black because this
is going to be zero. I want to have zero point something to stay away
from the CG black. Same applies to the white. We want to stay away from one. So I'll just bring it
to something higher. And let's render this. This is a perfect surface,
perfect CG surface. We need to introduce
all sorts of subtle changes here and there to make it
look more realistic, Let's start by introducing
some subsurface scattering because this is plastic and
it's not going to be huge. This is 0.02 in the corner. Okay, it's not gonna be huge
because it's a thin surface. So let's copy this. Reference, reference. Reference, reference. I'm going to go with a color
just slightly brighter than the diffuse color. And the weights. Let's have this as
something that doesn't, that takes into account
that this is a ten surface. So not too much
and not too deep. Okay, let's render
this. Alright. You know what I should've
done for you, for you. Let me bring it
back again to zero. That may render it. Save a snapshot, let me
say visual snapshot first. And I will call it color. All the steps, just
the color only. Then my subsurface scattering, how much and how deep that was. Perhaps. Prove it just to make it. As for now, a tiny bit
more visible for you, I will get this brighter is just to show
you the effect, okay? Right. I will save this one as
subsurface scattering. Subsurface scattering
is by Clare. I saved this. Right? You will notice, you will
hardly notice a difference. We're introducing theory
because this is a thin surface. We're introducing a very, very subtle change, right? So that's what we want
every time, subtle changes. Now this is the subsurface. I will do. I will add tiny
layer of coating. This is not the
coating that you would find on the car material, but it's so tiny that you will hardly
notice the difference. And this is the set of gradual, subtle changes that we
want to start introducing. Not too much and, uh, better off without wanted
100 per cent glossy. Ok. And for the IOR, I want to go to one
point to the IOR. For the for the plastic. Initially, we kept it as is. We do keep it as low as 1.5. Because for plastic, it's
actually for most materials, it's anywhere
between 1.4 and 1.6. And plastic is no
exception in this case. Alright. Let's now obviously
even from time to time, bring it back my
region and re-render. This is then a layer of code. Tiny, tiny, tiny layer of code. Alright, let me save
a snapshot and say, perhaps you would
like to see the Difference. Let's do this. Is gonna be a, there you go. Hardly any noticeable
difference. But we're introducing
those things that altogether they will get
us to where we need to be. Alright? So how far are we from this? Quite far, because this looks realistic,
has been touched. And you can find
that this is not a perfect surface
in terms of look, in terms of light reflection. There's some roughness in there. Now this looks
perfectly uniform. Let's break this. How do we break it? By introducing variations
in the roughness? How do we introduce
variations in the roughness? Now what is this? That's going to depend on the type of object
that you have. This is touched by hand. Hand means we need
to figure out where to find our fingerprints. So you go to either make us cans and
get some fingerprints, imperfections, or you can
find them in polygon as well, because there is
a free one here, but this is a bit too much. So what I will suggest is, please always go subtle. So this is the keyword for everything in terms
of look Deaf. Always go subtle. If I have the choice
between this and this, which one would you go for? This one? If I have the choice
between this one? Say this one, which
one would you go for? I'll go with this one. So
always go with the most subtle. Then you can add, you can try this one and
see how it looks. It really looks like you don't want to
drink from that cup. This is more like a
manageable, okay? So let's bring in some texture. In here. I will make some space. Again. Let's bring it a texture. I will just simply
copy paste the pipe for my fingerprints.
Imperfections. A, because this is an XR. What I will do, I'll
just say this is linear, but wait, this is roughness. Roughness is treated as data. Data is rho exactly. I'm going to select as my role. Here we go. This is cool,
this finger prints. So first off, what I
will do is connect this one to the base
color just to show you. But let's, let's bring
in the render region. Safe than sorry. The scale is going to matter. So always when you're bringing something, check your scale. Does this look like
a reasonable scale? We can't see much. If we can't see much
of what we can do is just for us to be able
to see what we're doing. Color, correct? And that's bringing
the Gamma down to 0.5. There you go. This might
be reasonable scale. I can see your fingerprint. It's probably too small. Probability is small, but
this is using the UVs. I haven't used it yet. Let me use the try
planner now I just wanted to bring into
color correction to see what we have in there. So try planner. And what have you
gotten to try planner? We have x, y, and z. So it's important to
make sure that the, all the surfaces facing the x, we'll get the same
continuous texture. And then if you want to
have a different one for y, fine, you can uncheck this one. And you have a different one. And the z, z, you can
have different ones. So if you have three
different textures, one for fingerprints,
one for Adam, Noah, like liquid style stuff. You can connect this one to a y and then the
rest of the x and z. But I'm going to use the
same for all of them. So same image for all. Connect this like this. Okay? Alright, let me send it here, tripod on the planet. Now, let's render,
Let's find them. First off, the trip
planner is going to be off in terms of
scale. Look at this. This looks like
other amendments. Wears a finger. Show me a finger. You can't see it. Well, this kid is
off. Scale is off. So if you can't see a finger for fingerprints,
the scale is off. Let me first change the size because when we
introduced the dry planner, the scales a little different. For the fingerprints, which
I will do for this scale. A couple of bolometer. This one's reference and I
will make it full twins. This is a finger. This is a bit too big. A could go with this molar. Okay. Let me go back to my four. We've got four. Alright. So I have
this finger here. I want to keep this scale. Let me then, okay, I know what? If you look at this random,
there's light here. Now, this is an
aesthetic choice. I want to bring that, that thing, that
fingerprint here. I want to move it
a little bit so that I can see it clearer here. Shall we do that? Let's
just move it a tiny bit. It's gonna be here. And it's just an
offset of some much. I want to move this
one a bit to the left. That's what we wanted. Because I want to see some of
this probably even further. Some of this on this
rice reflection. All of it, just half,
something like that. Good. Now that we're done
with this in terms of scale and making sure that it is C. This is continuous. You can see this goes, continues here, but you don't find it
on the top side here, on the top side, which makes
absolutely perfect sense. Your finger is not going to and wrap the whole lid
from all its sides. It just touches the sites
or touches the top. Good. Now the trap on
here works brilliantly. Let's now look at
the blend modes because we don't want to
have harsh transition. Yes. Your finger is gonna be here, but it's going to touch
this edge a little bit, so I want to continue here. How do I do that when I increase the blend amount to
something that is very high and the blend curve and bring it down just to tighten
up that overlap. Okay. I'll bring it down to one. Save. Lets you run there. Okay. Do you see it now? Do you see it has
continued tiny bit here. It's very subtle. Ways subtle. So you can
see it's a bit pixelated. But why did we get a bit closer? Sure, we save. Let's go. So the camera just keep
this one where it is, perhaps rename it as full cup. We need to get closer. Now. I'm going to have another camera and say
Create new camera. Look. Let's get closer. Because when we work
on subtle stop, we want to be able to see it. Okay, good. Now,
this is fine for me. Let me go back to
my Render View. And I shall we name
this woman lid. Save. This is not picked up. What I possibly can do is
those three open again, hopefully you it's
been picked up. Yes. Has been picked up. Now, let's render with the lid on no render
region, please. Stop it. Good. Okay. Much better. Now, Can you see here? It's coming. It's
coming, it's coming. Here we go. Here we go. Okay, can
you see this bit? Can you see this bit here is the continuation of this one. That's what we have introduced. Weird. Let me go back to my Material. Try planner and that
the blend amount, blend amount makes
it go further. Blend curve tightens
up around the edges. That basically is what it does. That's what I'm doing here. Okay? Very subtle changes. This makes absolutely
perfect sense for finger would touch
this part and this part, not the top, not here, but it will spill
on the edges here. That's, this part
is spilling on DHS. Enough subtlety here. We're good with that. This is good for
me. I might move this one ever so slightly. It's an aesthetic choice now. Maybe I'll sleep. Good. Now that I'm done with this, this is not specific color. This is supposed
to be roughness. So let's move this
roughness down then. Now, this color correction was supposed to be for
visibility purposes. I may choose to
ignore it or use it. If this gamma down, and let's call it Gamma down. Write down this. If I keep it as is and put it, reflection, roughness,
what's going to happen is, I guess whatever team as values
original in the texture. But by making it darker
and make it more glossy, look at the references here. What do you see? Is this
rough or is it more glossy? It's more glossy. Okay,
so I will need this one, but you know what? Let's
ignore it for now. Let's ignore it for now. Let me show you the difference. I think this has
been activated by accident citizens that
we don't want that. Right. Let me save,
let's save this one. Snapshot render. Now, I'm rendering
using the color, right? This is not what I want is quickly
troubleshoot this. Doing something wrong here. Obviously, refraction, roughness of connected
it to the wrong one. You may have noticed that
it's reflection, roughness. Reflection roughness. Now it will make sense. Let's think of what's happening. Okay, we get it. Very subtle. Bought. This is, these are
the original values, white and black on grayscale values that
came with the file. This does look anywhere
near my look at this. Look at this look
at this one here. Okay, this, does
this look like this? No. Okay. So the original values
that came from the file, don't trust these because
they don't do what you want. So it's just there
as a starting point. This is my way of saying, okay, I want them to be darker. Remember this one? This is how I want it to be
as a starting point. We can tweak it further,
but let's look at this. Let me save the wrong one. I'm just calling this one
default values. Default. We know this is just
the default values. And now let me
change it to darker. Darker means more glossy. The closer to white,
the closer to black. Be glossier. Okay, this makes
a lot more sense. And that's exactly
what I wanted here. So this slide, I want to
see the roughness in here. We're not, we're not done yet. There's a lot of other steps, subtle ones that
we need to take. Good. So this is a good
starting point for now. Let me, and another subtle layer of bump using these
very fingerprints. Now, what am I going to do? Means height. Height is elevation, so I'm going to slightly elevate these rough areas
from the surface. You may be thinking or
you also have your mind. It is not normally elevated. I'm just telling, you know, what we're gonna do is that subtle, infinitely
small, Greece. Whatever you have, what do you leave on the
cup when you touch it? If it's crazy. Infinitely tiny elevation.
That's what I want. That's the level of subtle changes I want to
introduce bit by bit. So let's bring in a bump on, I'm going to connect
from the final one. From here, use it as an input. So this, all of this is
now used as an input. This is my my finger print. And perfection. I'm using it as a bump as well. I'm going to connect this to I could either
connected again to the bump input
here or send it straight to the bump map here. Now, obviously, please do not press Render because number one, we need to make sure it's a bump because I'm using as a bump. Notice the normal height scale, one is outrageous because we're talking about
fingerprints. So height scale on it to bring it to something
infinitely small. So the number of zeros should
be intimidating a lot. I'll go with five
to five halves. Okay. There's a story
behind the five and the 25. Let me first render this
because this is default. Let me save this one. This is gamma down, Gamma. Let's run that S1. This is what bump. This is where the bump
this is too much. This is too much bump. I
know it looks very small, but still it is too much
because these are fingerprint. It's even more subtle. But why did I bring in five? Because I'm going
to need it later. Let's save this. Just finish the random. Okay? But it could, could have done
is removed the background, removed the copying, and
focus only on this one. But let's keep it as is for now. Let's save this and
call it bumped five. It is not five, it's four
zeros and then five. But just so you know, now this is actually the
value I want to go with, which is a half, the five is 2.5. Let me explain what
I'm trying to do. This is so small. Alright. Let me render again. Let me explain. This
is what I want. Yeah. Can you see it? This is what I want. It's this insanely small bump. It's very tiny. You can hardly
tell. It is a bump. I'm just helping the roughness. Adding some more bump
to the roughness. Good. Very, very subtle changes. This is what I want. This is the value
I want to go with. Now we haven't finished
when finished? A long way before Venice. We haven't finished. We're still working on
the subtle changes. Its 2.5, let's call it 2.5. It is not to confine, but it's four zeros and then
you add the 25. Okay, good. Now, I'm going to remind
you later of this number five because I'm going
to add another bump. And when you, when
you blend the bumps, it divided, it divides by half. So this is what I
want to have, 2.5. Remember that one. Sorry, let's noted. It's 2.5. Keep it there for now. Keep it there. What else do I want to do? Now? Look at the reference. Is the reference. This is plastic. Alright, let me see if I can see it's from probably this one. This is not gonna be very
obvious because from the top, I need something
from the top angle. I think this is the best,
probably even this one. You can notice that this
is not very, very limited. Quickly try to make it
bigger as such, okay. Yeah, lot better, a lot better. Can you see this slight Dante? Dante has a bump that the
surface is not uniform. This is plastic,
this is not metal. And even if it's metal, it may have gone through
some dance over time. But this is this,
see this bit here. This one here. This slight elevation. This is not even. I wants to introduce
some unevenness. Well, let's do that. Right? So this is a fingerprint story. Let me save finger prints. And now we want to
introduce some texture. We could use a texture,
but you know what? Lets me use a noise instead. Maxon Noise. And same story because I want it to be a bump. This is not about roughness. This is about the
unevenness of the surface. So Bump Map. But let's look at noise itself. Connected to the color. It's not connected to anything
else, just the color. Perhaps, perhaps I would leave
everything as if everything, it's gonna be a bit slower,
but let's leave everything. Now I've over it. Yeah,
it's over I this one. You will not be able to see much because I need to bring
the Gamma down again. Noise can change the seed later, but for now, let's look at this. Let's render. It's too slow for our purpose. Let me disable the
roughness and the bump. Disable the roughness
on disable the bump. Just so it goes a bit faster. Well, I'm trying to do is get the Noise feature to be visible. Or you can see,
let me stop here. You can see, I can't see much. Sees a bit DOCSIS be
bright, can't see much. Let me bring in
reduce the gamma. See what I'm doing. So Gamma, Let's bring it down to 0.1. I'm exaggerating, but you
see what we're doing, okay? This is too much
system, much 0.5. Perhaps. You can see the difference between
this and this. What I can also do is
introduce some contrast. Now, I don't want it to be huge. This is covering half the cup and then the dark part is
covering the other half. This isn't what I
want. I want to match. My reference. Reference says
there's something in the middle here
which is this small. Not going to reproduce
exactly this, but I'm going to
reproduce the same scale. It has to match the same scale. If there's a dent or
there's an elevation, it is this small, Let's do it. Let's bring the noise down in
terms of the overall scale. Whereas my scale as
an input, right? Yeah, we'll keep it as object. Let's bring it down to
something like this. Let's re-render again. That's what I want.
This is okay. Yeah. Okay. This is much more like you
can you can tweak it further. But this is what I want. See this says one small bit. Let's bring the reference back. Always the reference. This is about this. Now, the top part is
going to be here. So you've got the center is going to be
elevation or down. And this is the center and
this is the center to center. So when you look at these, it's going to be an even. Let's bring in this
one as my bump. But wait, wait to be careful. The Gamma and the
contrast I haven't used. The gamma was only for me
to see what I'm doing. If I introduce the bump, these values is
going to be crazy. So this is just to
see what I'm doing. I'm not going to use the Gamma. I'm just going to take it
straight to the bump map. And the bump map, again, I'm going to go with theory, so HTML value, okay? Perhaps even less. Let's keep it like this for now. But this was another
one, is a bump. Bump is connected here. The bump map. I know we need
to use both and we'll do it. But first, let's look
at this one separately. I can't see much because
I have kept the color. Let me remove the color. Now let's see it the
way it is meant to be. With this as the roughness. Reflection this time
flexion reference. This is a bone. Okay. Only if I
leave this as is. There you go. Can you see it? This could be a bit too big. But don't you worry about
that. We can reduce this value or reduce this scale. Just so you can make
it abundantly clear, I'm going to leave it
as this, but you know, you can bring down
the values, okay? So if I now I'm not
using this bump, I'm just using this one
to see the bump separate. Now let's merge both of them, which is the bump blender. I can bring in a vase and this input and then use this
one as my final bump map. Because it is, I'm
blending both. I'm going to do half-half blend. Wait, 50 per cent. Now this is going to
take away from my 0.00, 025 because this is
gonna be divided by two. Now I want to bring
back my five. So the final result
is going to be 25. This is why I wanted to
show you this five here. So this is gonna be
divided by two here, which is gonna give me 25. Okay? This one I'm going to keep as is because it will be
divided by two. It will be a half this. I wanted to show you
the full scale of this. Let's save and run that again. It's a lot more subtle
now because I've divided this height scale of 25. It, It's now like 121 to five. It's a bit like if you had used this one alone and one-to-five. Alright, it's this exaggerated. It's very subtle,
subtle, subtle, this subtle everything gets
you to where you need to be. Let me first make this
isn't really final. You could tweak
it a bit further. But let's say combined, combined layers of subtle stuff. Let me compare. We compare two. I have something down. You have caught this one. I
actually haven't made it. It's a lot better to look to see some contexts.
Let's do that. Let's do that.
Let's change this. I want to compare
to the full cup. Okay. See it from far. Okay. Let's compare. Good. I'm going to save it and
just call it Final Four. Now. Finally lit final cup. I want this to be my a, I want the one with the
color alone because I'm comparing two before I've started adding my
subtle changes. So here's, here's what you get. I get C. So now this is the
perfect CG look. On. All of a sudden, we bring in subtle changes. See the difference. That's
what I'm talking about. Just very, very subtle
differences combined. Okay, Now this is about the lid. We're going to move
to the next step.
8. 6 SHADING: REST POSITION: Something that's quite important
to know is that when you introduce some
textures or noise, texture or noise, and you
start moving this around. If you're not careful, you're going to move the noise, not with the object, but if you move it to lose
is gonna be different. If I move the cup here, it will be different for the fingerprint
and for the noise. Okay, so let me explain, let me experiment. Just connect. Actually adjust
this to the color. Render this. Let me remove our
enough be a save. Let's run this. Okay, I'm introduce this
and make it actually wider. Because I'm going to move
the cup here as well. So do is transform, coffee cup transform, merge. I want to have two cups. Let's transform this
one, the scene view. Transform this one. Here. I'm trying to demonstrate the problem
of space and noise. Now let's render again
just the region. What have you
noticed? The cup has, is the coop is
swimming in the noise. So the moment you move it, it actually has moved to
another parts of the texture. We do not want that. If you have an animated objects, that is going to be very embarrassing, you
don't want to do that. So how do we make sure this problem does not
occur is very simple. There is something
called a rest position. How do we do it? We
add a rest node. Rest position. This is then going to be my
original position. Thus the rest position here. Then if I make any changes, I plugged them here, then I can move
this one back here. Show view inspector geometry. Points you find now
that our points have not just p as position, but the rest position
freeze as is. And take this freeze in position as the basis for
the movement, for the noise. Okay? This here. Here's my texture. And I am using this try planner. So it's this dry planet
that's doing the work of matching the
texture to the object. This try planner is now
production spacetime objects. Now, I need to tell it
to pick the reference. If I say Reference, then it picks up
the rest position. Okay. Let me save. Render again. Now that is referenced. It will work. Well for this one because
for the other one, actually, what just happened? I have deprived the first
one from the rest position. So we don't need
to do is make sure both of them get rest position. Just how it used to
be. Merge these two. I'll get both of them
with position frozen. So you need your rest position. Now, we don't need
to have two here, 1.2 because normally the
object is just once. But I'm doing this,
duplicating it here for the purposes of
demonstrating this, you can see this feature here. You can see it's a bit brighter because it's closer
to the light. But it's exactly
the same feature. Now, this happens only once, so we wouldn't need
to make one too. We just need to have one. Therefore, I'll just
now remove this one. And keep this one
as is my knowledge. Connect this here. There you go. If you want to first
connect your material, then gets this one here. It's going to pick
up the position, say No out or render. Because we're using a file. But still the rest position
of any changes will happen. This one will happen here. Okay? So this is for changes. Good. Now that we have this one
out of the way, we save. A little problematic. Okay, Good. Now that we have
this out of the way, let's move to the next step. Let me render again
for the noise. Let me go back for the noise. Here. This was for the texture for the dry planet literature,
for the noise. It does pick it up
automatically with object. Okay? So if you have a this one, if I use this one as noise, then let me say this. Then move it to the
side and render again. Because I have a rest
position and noise here. Already picks it up. Then my features are the same. No, it looks a little brighter because it's
closer to the light. You know what? Let's Move this fellow here. Save it. I want it to be blatantly
obvious for you. Split further, so it's
going to be a bit darker. There you go. It's exactly the same
shape wherever you move it because you
have a rest position. The noise picks up
the rest position. Are we good? Yeah. Okay. Now, let's remove this from the color and bring
it back toward, it was just the usual. Just set this one back to zero. And render. Remove. Mind keeping this as
a reference actually. So remove the region
is magnesium. I don't need to re-render
again because this has always been this has already
been rendered here. Okay, good. Let's now move to
the whites material. Well, how can we see the why is because it's inside simple. We're just going to
remove the lid this late. Sorry, this cop comes with bottom copying side
coupled side lit, lit and lip with if I remove this, what's
going to happen? Five, we'll get rid of
my Delete or blast. Blast is faster. I'll just do delete for now. Delete lid. That's it. Remove the lid. I'm now left with this. The material that I have
already has bottom, inside and lip
assigned to white. So I just go to the white. Okay, It sounds like this
with 0.50, 0.50, 0.5. Now, this isn't the color we
want because this is gray. Let's render the only actually just the part that just the top part. That's all I need. Let's render. Okay, It's unfortunately
picking up the background from the snapshot
15, but that's fine. We don't care for now. This is 0.5 gray. I want to turn this into white, but wait, wait, wait, wait. What did we say? We never get anywhere close to zero and anywhere close one. We don't use these figures. So let's bring it down. Copy parameter based
relative reference, base, relative preference. Good. I want it to be 0.8. Not bad as white. That's more realistic
because one is CG white. Okay, let's render this one. These things are annoying me. I mean, we render everything. Okay. It's probably a bit too bright, but that's because the light
is very close to the cup. Don't want it to be
that reflective, so probably increase
the roughness. Height, 0.50, 0.35. This thing normally
has a very tiny film, very tiny sheet that makes
sure that stuff doesn't spill. And that thing is
a bit reflective, but not to reflect. I don't want it to
be too reflective. Probably 0.25. Roughness. Now, I bring in
the region symbol. Now, do I want to
introduce any sorts of imperfections in
the form of dirt, in the form of leakage, in the form of fingerprints. You don't want that
because you wouldn't drink from that Capuchin this case. Yes, I would like it to
be as clean as possible. So let's keep it like this.
9. RENDER AND VARIATIONS: This is our final render. And let's look at
it closer. Okay. This is how it looks like with those
infections from fall. And if we want to get closer than this is
what it looks like. An evenness and the surface include in here as
well a little dent. And you have your fingerprint, Roughness, Bump as well. Very, very tiny. What you want to do is iterate, experiment, do the first, the second time, third
time and fall time. Not only for this,
but also not only for this kind of
fingerprint and noises, but also also e.g. the mask, the logo
that you're using. I have here 15 variations. You can see that, well, the more you iterate, the more choices you have, and actually the closer you get to what you want to achieve.
 Film VFX