Transcripts
1. 01 Introduction: Thank you for taking this class. In this class, I will
teach you how to make this delicious egg bread that
is used for Texas Toast. First, I will teach you
how to make the dough. Next, I will teach you how to prepare the dough for the first. And then we will let it
after the first rise, we will punch it down and
let it rest for 10 minutes. Next, we will form the loaves and put them
in the bread pans. We will let the bread rise again and then we will bake it. Finally, after the
loafs are baked, we will let them
cool and then I will show you how to slice the
bread into the Texas Toast. I am a self taught baker
and cake decorator. Many years ago I decided I wanted to open up
my own home bakery. I didn't feel like my cake
decorating skills were at the level that it needed to
be for opening up a bakery. So I took some classes, watch some videos, read
some books, and of course, did a lot of practice until my cake decorating
skills were at the level that I felt like I could open up my
own home business. I then opened up my business and I had this business
for several years. Part of this business
was going to festivals and farmers markets
at the farmers markets. Brands like this are
excellent to sell. As I said, I had
this business for several years until my husband got a job offer
across the country. We felt like this was
a good move for us, and so I closed down my business and we moved across the country
to New York City. Here I do not want to go through the steps to open
up another home business, but I still love Bay. As a retired teacher,
I like to teach. I have decided to share my skills with you
on skill share. This class is aimed at the
baker that would like to learn how to make a yeast bread. I'm excited to teach you
the skills in this class. Let's move on to lesson
number one, Making the dough.
2. 02 Making the Dough: We are ready to start making our bread dough in this bowl. I want to add my flour. Before I measure my
flour out though, I want to loosen it up. Instead of sifting it, I'm just using a whisk
to lighten the four up. Now I want to measure out three cups of flour
to put in the bowl. There's 12.3 I also want to put my yeast
into the bowl, and for that I need
four, a two teaspoons. So this is a two teaspoon. Another two teaspoons
and a two teaspoon. Now, I just want to turn this low to miss that altogether. This is ready for the liquid. Now we're going to go
over to the stove and get the next part
ready in the saucepan. First, I want to
turn the heat on and I'm going to keep it at
a medium temperature. Then I'm going to add
my two cups of milk, butter my sugar, and my
two teaspoons of salt. We just want to heat this till the sugar and salt is dissolved. The butter is most of the way melted and the milk is lukewarm. We don't want the milk too
hot because if it's too hot, it will kill the yeast, and we do not want
to kill the yeast. The main reason I'm stirring
is to get that sugar dissolved and to keep the temperature all
the same temperature, I have my spoon actually on
top of the butter for now. Because by keeping
the butter moving, it's going to help
it melt faster. At some point it's going to
melt enough that my spoon will slide off or the
butter will slice. But for now, it's just resting
on top of that butter. You can see the milk is getting
that buttery color to it. You see, I still do
have some butter left. As I bring that up to show you, it's about halfway melted. I'm not sure I'm going to be able to get back on top of it. I'll just stir it now. I do like to test it that's
starting to get warm, maybe another half minute
to a minute at the most. As I touch that, it is
lukewarm or it's warm. Now, I'm going to take this over to the flour
for the next step. We're now going
to pour this into our flour and yeast mixture and turn this on to mix it up. As you can see right
now we have more of a batter than a dough, but it will turn into a dough as we add the
rest of the flour. But first, we're going
to add the eggs. We want to add the first egg for about 30 seconds. Turn that off. Kind
of scrape this down. Make sure everything
is down in there, both there and on that center. Your beaters may not
have that center, but you do still want
to scrape it down. And then we're ready for our second egg for
about 30 seconds. Now I want to add my last egg. Now that this is big stem, I'm going to turn the
speed of so high. Before I do that, I want to stick my cover
on just to make sure. Then turn high and
we're going to let, this has been beating
for about 3 minutes. We're now going to take that off and take our beaters out. We're going to add
our dough hook. Now we're going to
mix one of flour at a time in until we get our dough to the
right consistency. So we're first going to
add the 31 cup at a time. Then the last cup we
will just add sparingly. We want to dump
that first cup in, mix it, now we're going to
dump the second cup in. Let that mix, we want to get
that to actually mix all in. Now we're going to
add the third cup. We should be strange to see
a very loose do forming now. At this point I'm going to
turn it off so I can scrape down the sides because I'm getting ready to
add my last cup. And my last cup I want to add just a little
bit out of time till I get that
dough little bit. That mix ten, you see it? To start, perform a nice dough, turn it up just a little bit so that dough
will mix better. Add a little bit
more that to better. Now you see it's
starting to get a dog. It's starting to pull away. Feed that up a little bit. And you can see we
have a nice dog there. I want to push this away. And I don't have that much, so I'm going to add
that last little bit. Now we're going to need
this for 5 minutes. We'll be at topic to the.
3. 03 First Dough Rise: Our dough is needed
for that 5 minutes. You can see we
have a nice dough. I'm going to take that dough, hick out the dough off of
that middle section there. So it's all one thing of dough. Before we take that
out of the bowl, I want to spray this bowl
down because this is the bow. I'm going to put the dough in, and I don't want
the dough to stick. Now, I'm going to
take this out of this bowl and pretty
much form it in a ball. It's a sticky bowl right now. And stick it in the bowl. I now want to just quickly
spray the top of that. Now, I'm going to cover
this with the towel. We are going to let the dough rise for an hour and 15
minutes to an hour and a half, basically tell it's double in bulk when you look at this bowl. That means we want it to be at least to this line right here and possibly
all the way up to there. We'll be back when
it's done rising.
4. 04 Punch Down and Rest: Our dough has been rising
for well over an hour. As I uncover it, you can see that it has risen to the point that I
said it needed to rise. We're now going to just
punch the dough down. We do this by bringing the
dough in on itself like that. Then we want to take this, do we want to divide it into
two equal balls like that? Then we're just going to let
this rest for 10 minutes. After it rests for 10 minutes, I'll show you how to form it and put it in the loaf pan so it
can have the second rise.
5. 05 Forming The Bread: Our balls have been resting for about 10 minutes and we're now ready to put these
into our pans. But first we need to take our
pans and spray them down. Then we're going to
take our first loaf. And I want to put
just a little bit of there as I work with it. And I'm going to
place my loaf here, I'm going to form
it into a loaf. You can roll it out if you want. I like to just form it as I go. When I think I have my
loaf the right size, I just want to
print it it there. We're going to let it rise in there and I'm going to do
the same with the other one. To take my dough and I want to roll it a little bit because I want to smooth it somewhat, put it in my pan, kind
of flatten it out a little bit so it
can all as the same. And now we're going to
cover these up and let them rise again
until double bolt, which is about the
top of the loaf pans. So we'll be back again once these have risen,
double, and bolt.
6. 06 Second Rise: Our bread has been raising about a half
an hour to 45 minutes. We're going to now preheat the oven and let the
bread finish rising. I'm going to turn
the oven on to 375. I'm going to bring my bread over and place it
on top of the oven. The extra heat that
has come in from the oven will help give
it that last raise. We're going to let the
oven preheat and let this raise another
ten or so minutes, because that should be how
long it takes the oven to preheat and then
we'll bake it.
7. 07 Baking and Cooling the Bread: Our oven is preheated and our bread has raised
a little bit more. As you can see, it's
getting close to the top. We're now going to
put this bread in the oven on the middle, bread giving space
around the bread. We're going to now let it
cook for 35 to 40 minutes. We'll be back at that time to
show you how it turned out. Our timer is about ready
to go off on the bread. There's the timer. As you can see, we have
a nice brown color. We're going to take it out, we're going to let this cool in the pans for
about 10 minutes. And then we'll dump
it out and put it on the cooling rack to let it
cool the rest of the way.
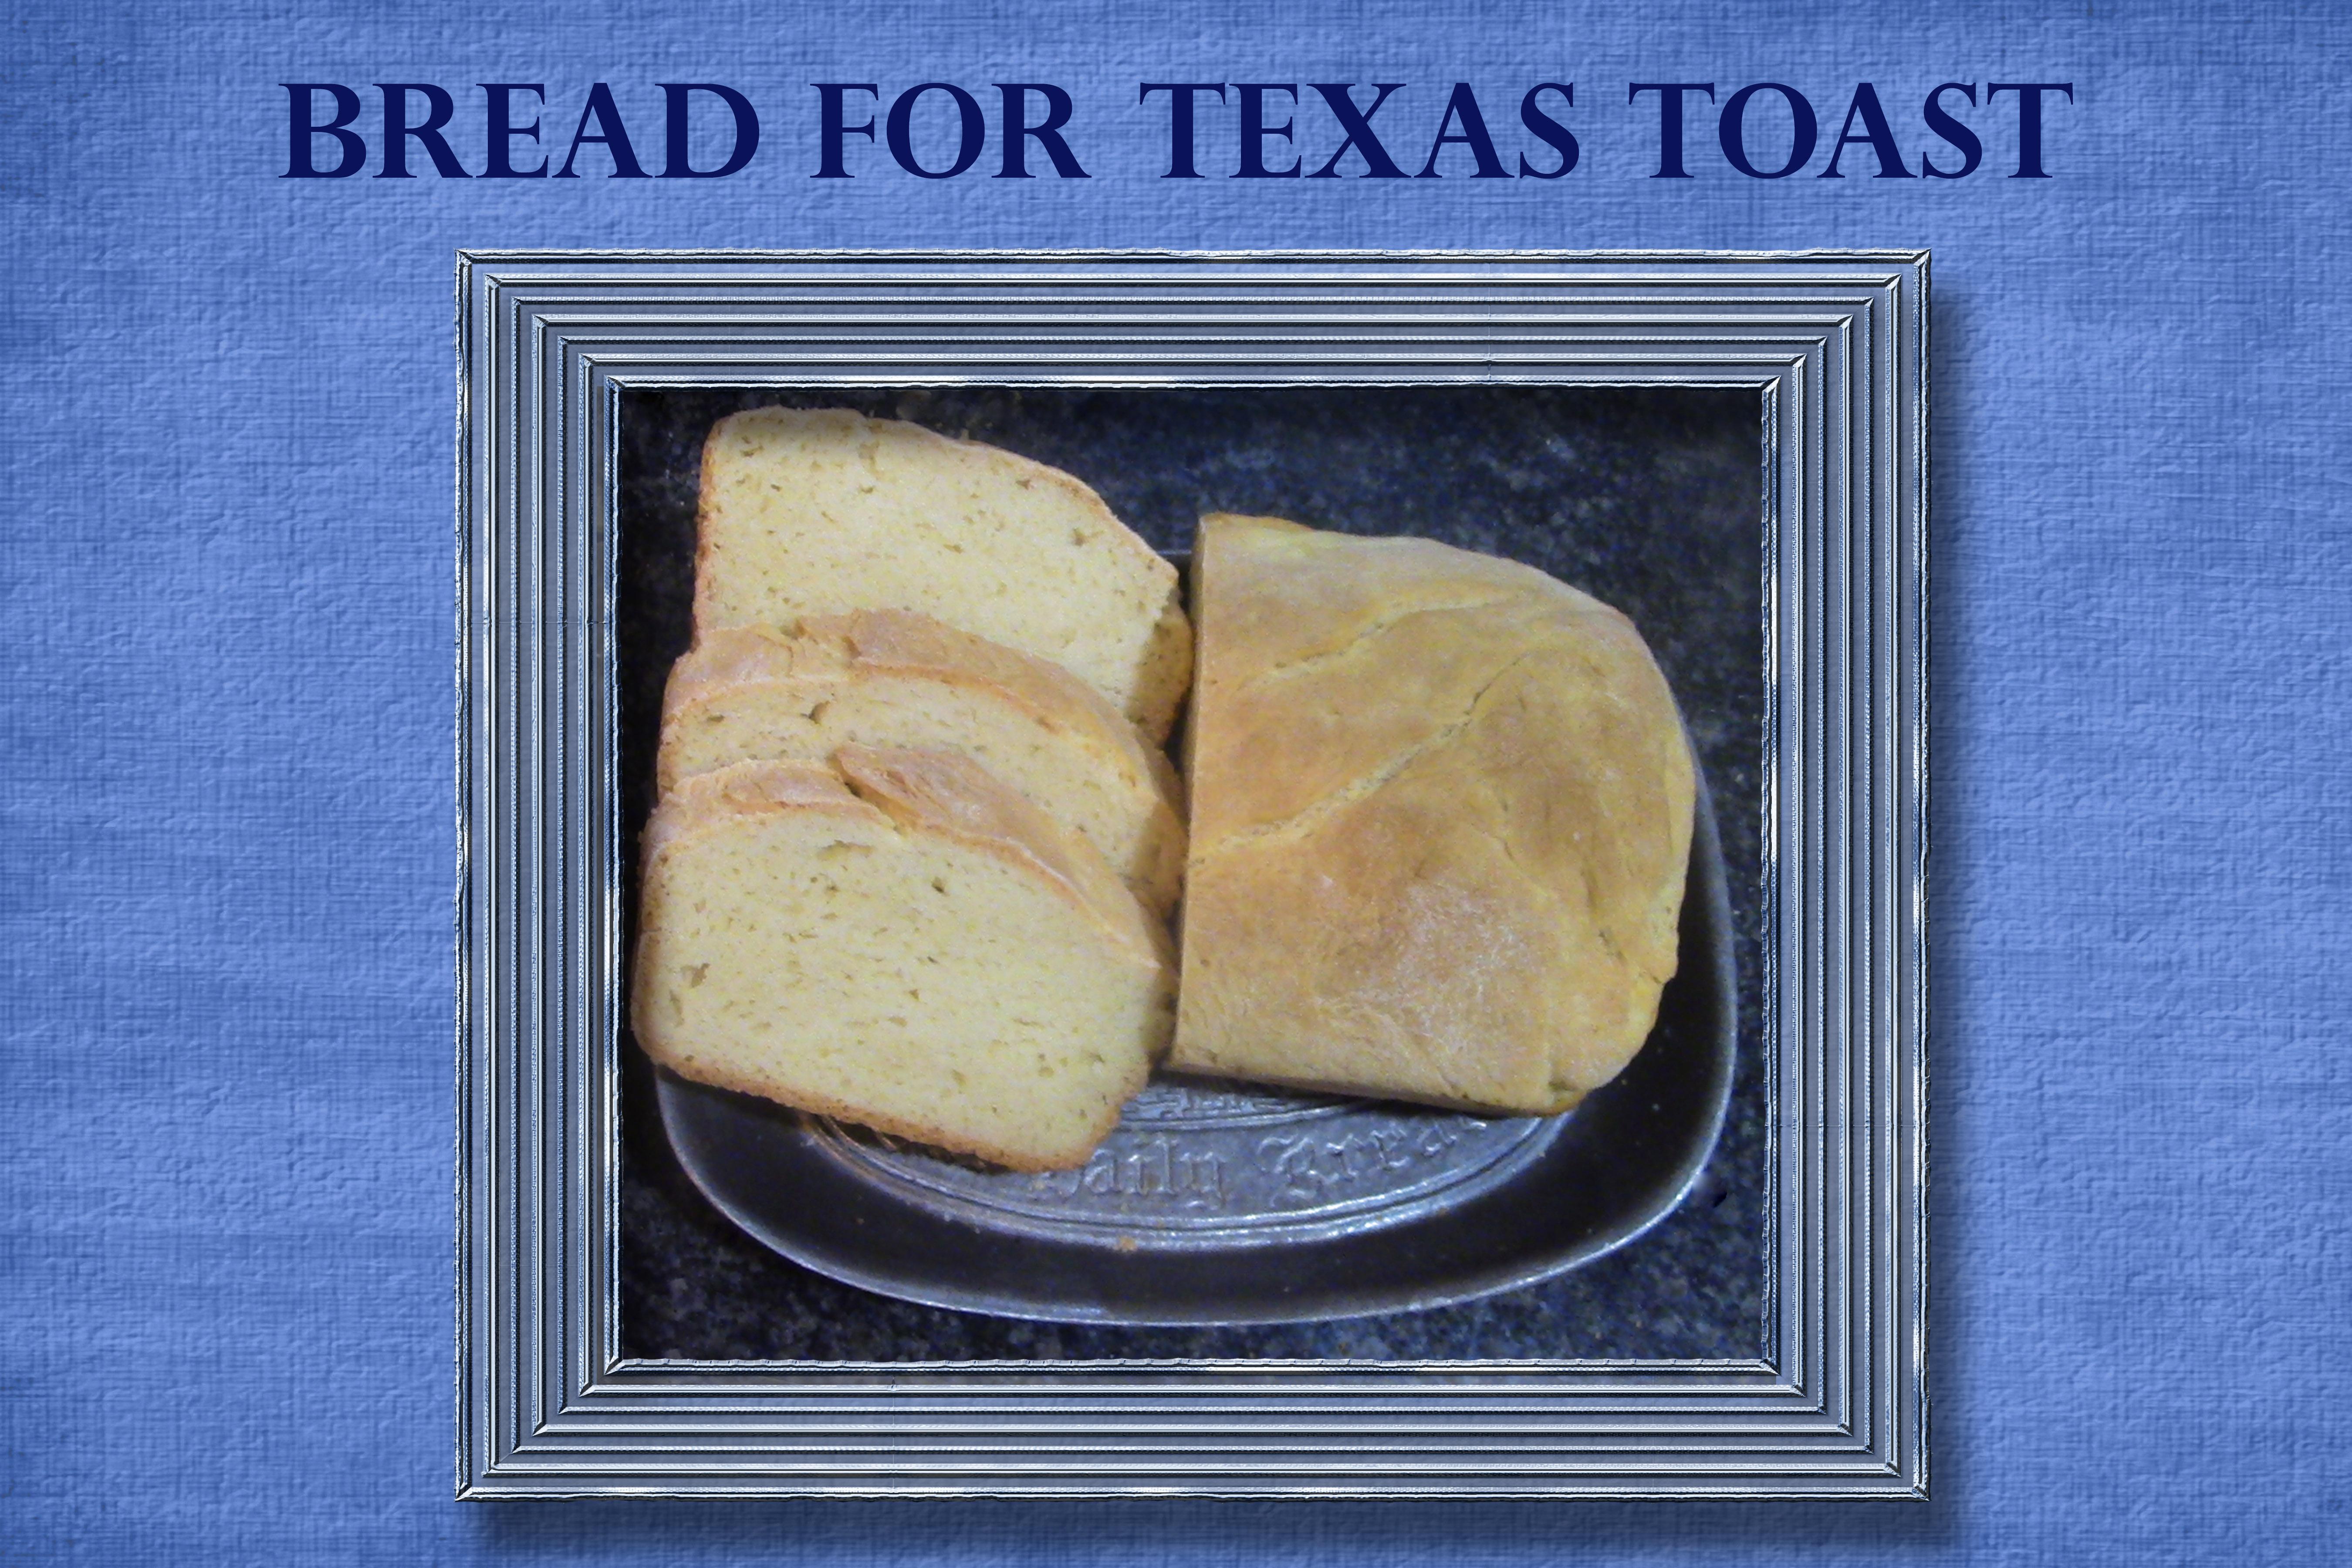
8. 08 Slicing the Bread: Our bread has cooled
now we just need to slice it so that we can
use it in French toast, garlic bread, or whatever else we want for using
it to slice the bread. I'd like to start at this end, and I'm going to
definitely cut this first one very thin because I
don't like using the crust. Now remember, Texas toast is, are you going to want to do, if you've got one
of these things, go a couple instead of just one, you're getting it thicker. Let me just stop there and
pull one out to show you. You can see just
how thick that is. If you don't want it that thick, you can always cut it thinner. It's up to you.
9. 09 Final Thoughts: Thank you for taking this class. We had fun making our
Texas Toast egg bread. We first learned how
to make the dough. We then prepared the
dough for the first rise, and we let it rise. After it had risen, we punched it down and divided
the dough into two parts. We then let this
rest for 10 minutes. After that resting time, we formed some loafs
and put them in. We then covered the bread
and let the rice again until double in size after they
had risen the second time, we put them in the oven at 375 and let them cook for 35 minutes
after they had baked. I let them cool first in the pan and then
on a cooling rack. And then I showed
you how to slice the bread to get that
nice fat Texas toast. I hope your bread turned out
the way you wanted it to. The recipe is in the
project section. And your project for this
class is make this bread. Please make sure to take a picture of your
bread when you're done and post it on the project page and
tell us how it went. I look forward to
hearing from you from my kitchen to your
kitchen half baking.
 Nadine Thomas