Transcripts
1. Welcome to the class, let's bake cookies!: Hello, I am Rita. I am a pastry chef
from Lisbon, Portugal. I'm also a cookbook author and a Youtuber specialized
in desserts, in pastries, mainly
anything sweet. Welcome to this class where
I will be teaching you my favorite way to do cookie
trays or cookie boxes, an assortment of cookies, using just one dough and then flavoring it and shaping
it in different ways. You will learn how to
make this master dough. It's very, very simple,
only four ingredients. And this makes those kind of cookies that are very
buttery, crunchy. But when you are eating them, they kind of melt in your mouth. They are similar to
the Danish cookies in terms of texture and flavor. This particular dough is very, very versatile because it's quite neutral in
terms of flavor. So you can add any
kinds of flavors. And also you can shape
them in different ways. You can shape it
with your hands. You can cut it with a knife, or you can roll it out and
cut it with cookie cutters. You will learn how to make this dough and eight
different cookies, eight different flavors and
eight different shapes. Class is more oriented
to the holidays in terms of the flavors and
the shapes of the cookies. But obviously you can
do them year round and adapt these cookies
to any occasion if you're looking for an easy
way to have an assortment of cookies to offer your
guests in your home, or if you're looking
for a sweet present to give your loved ones, this is the class for you.
2. Making the dough: Let's start by making the dough. And with this amount, you will be able to make
around 70 or 80 cookies. So that's enough for a
big tray of cookies, or about two or
three cookie boxes, depending on the size. For convenience, I will leave
the written recipe both in grams and cups in
the class resources. Let's check out the ingredients
and start with the dough. We will need butter. You can use salted or unsalted
is up to you icing sugar, plain flour and corn starch in the bowl of the stand mixer, Place the butter that should
be soft at room temperature, add the icing sugar, and then using the
paddle attachment, start mixing it at medium
speed and mix it for about two or 3 minutes until
everything is very creamy. If you don't have a stand mixer, you can use a
regular hand mixer, or even just a spoon
and some elbow grease. You should have something
that looks like this, a very thick and smooth
cream At this point, add the dry ingredients, the flour and the corn starch, and keep on mixing just until the dry ingredients
are incorporated. It should take about 1 minute. The dough should form a ball and it should
be very smooth, soft, but it shouldn't
be sticky at all. It should have this
exact consistency. It's like a play
dough consistency. If your dough is a little
bit thicker than this one, you can add just
a tiny little bit of flour until it's like this. Now that our dough is ready, we are going to divide it in portions so we can make
different kinds of cookies. I'm going to use my scale, and I'm going to
weigh eight pieces that have the same weight. But if you don't have a scale, you can just eyeball it. Now that our dough is divided, we are going to make our
different kinds of cookies. And today we are going to go big and make eight different
styles of cookies. But obviously, you
can use this dough and do only one kind,
or two, or three. You just have to
remember to adjust the quantities of the flavors that you're going to
add to the dough. The eight flavors that
we are going to do today are vanilla diamonds,
chocolate chip cookies, gingerbread style cookies, white chocolate and
coconut lemon cookies, strawberry tumprint
cookies, orange and almond and walnut
snowball cookies.
3. Vanilla diamonds: Let's make the vanilla
diamond cookies. We will need vanilla paste or extract a little bit
of flour and sugar. We will add the vanilla
to this portion of dough and we will start mixing
it with our hands. And since the vanilla is wet, it will make our dough
a little bit sticky. So we'll add a little bit of flour so it doesn't
stick anymore. As soon as the dough has
the same plate, though, consistence than
before, we will start rolling it into a
small log shape. It should have more or
less an inch diameter. And then we will put
some sugar in the table. And we'll roll this log on the sugar so it can
stick to the dough. Then we will roll it
in cling film and take it to the fridge for
about half an hour. And then we can unroll it and slice into cookies if they
are not completely around. When you cut them, you
can adjust them with your fingers and give
them rounder shape. And then place the cookies on
a tray with parchment paper and bake them in a preheated
oven at 170 centigrades, or 340 Fahrenheit, for
about ten to 15 minutes.
4. Chocolate chip shortbreads: Let's make the
chocolate chip cookies. We will need chocolate chips or chunks to mix into the dough, and then some more chocolate
to cover the cookies. Add the chocolate pieces
to your dough and then mix them very well so they can
be very evenly distributed. And then do as we did before
for the vanilla cookies. Roll the dough into a small log that has more
or less an inch diameter. Roll it in cling film and
take it to the fridge for about half an hour and
slice the cookies. Place them in a tray
with parchment paper, Give them a rounder shape
with your hands if you want, and bake them in a
preheated oven at 170 Centigrades or
340 Fahrenheit, for about ten to 15 minutes. When they are completely cooled, melt the chocolate
and dip them halfway. Shake them a little bit so the excess of chocolate
can drip off. Place them in a tray with parchment paper and
let the chocolate dry, and you can take them to the fridge so the
chocolate dries faster. They will be ready
when you can take them off the paper very easily.
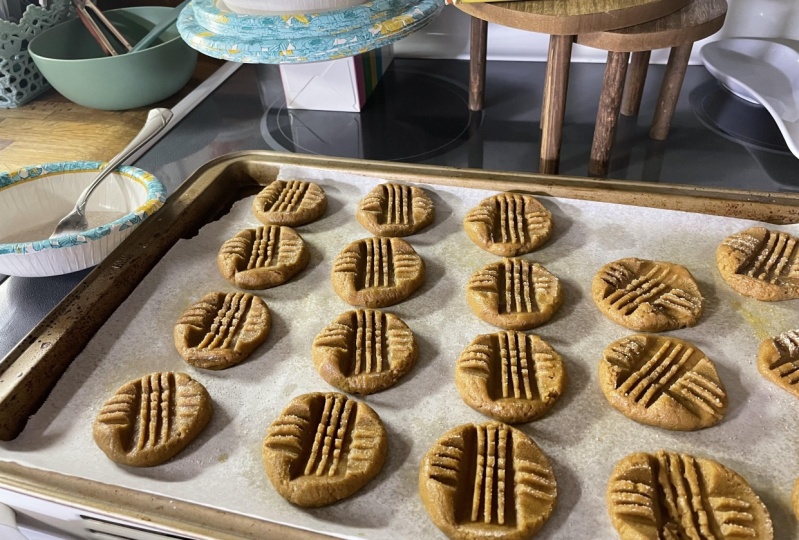
5. Gingerbread style cookies: Let's make the gingerbread
style cookies. We will need cinnamon,
ginger, and cardamom. If you prefer, you can use
other ****** or just cinnamon. If you want a simpler cookie and a gingerbread
man cookie cutter, add the ****** to the dough and mix well until
they are very well incorporated and the dough has a smooth consistency
and uneven color. We will roll this dough
between two pieces of parchment paper until
it has more or less, 14-18 of an inch. That's about 5 millimeters. We will take the dough to the fridge for
about half an hour, and then we can start
cutting our cookies. You can re roll the cookie
dough that it's left between the pieces of
parchment paper and cut more cookies until
the dough finishes. Usually since the
dough is chilled, it doesn't need to
return to the fridge. But if you feel that
the dough is soft, you can take it to the fridge already rolled out
for about 10 minutes. Place the cookies in a baking
tray with parchment paper, and bake them in a
preheated oven at 170 Centigrades or
340 Fahrenheit, for about ten to 15 minutes.
6. Coconut and white chocolate squares: Let's make the coconut and
white chocolate cookies. For these cookies,
we will need the dough plan and
then we will cover it after baking it with white chocolate and
coconut flakes. We will roll this dough between two pieces of parchment
paper until it has more or less 14-1
eighth of an inch. That's about 5 millimeters. Try to give it more or
less a square shape and then take it to the fridge
for about half an hour. After that time, we will
start cutting the cookies. And for this particular cookie, I'm choosing to make squares. Obviously, you can do the
cookies any shape you want, but for the squares,
it's pretty simple. You just cut them with a knife. Place the cookies in a baking
tray with parchment paper, and bake them in a
preheated oven at 170 Centigrades
or 340 Fahrenheit for about ten to 15 minutes. Let the cookies cool completely and then melt
the white chocolate, And dip the cookies
more or less halfway. Shake them so the excess
chocolate can drip off. Place them in a tray
with parchment paper, and before the
chocolate dries out, sprinkle it with a coconut, and then let the
chocolate dry completely. You can put the tray in the
fridge, it's much faster, and the cookies will
be ready when you can take them off the
paper very easily.
7. Lemon Christmas trees: Let's make the lemon cookies. We will need for the dough, lemon zest and a
little bit of flour. And then for the
glaze, icing sugar, lemon juice, and a few drops
of green food coloring. If you want, add the
zest to the dough, and since the zest is wet, it will probably make your
dough a little bit sticky. So add a little
bit of flour until the dough has the same
consistency as before. We will roll this dough
between two pieces of parchment paper until
it has more or less, 14-1 eighth of an inch. That's about 5 millimeters. Take the dough to the fridge
for about half an hour, and then cut the cookies with
the shape that you want. In this case, I'm using a small Christmas tree cookie
cutter, and as before, you can re, roll the
dough and keep on cutting shapes until your dough finishes bake the cookies. As I explained before, for all the other flavors and
when they are cooled down, let's make some decorations
with a little bit of glaze. Add the lemon juice
to the icing sugar, and mix until you
have this consistency that is very flowy and it
falls easily from the spoon. If you want to turn it green, just add a tiny
drop of green food coloring and do some
decorations over the cookies. Let them dry completely
at room temperature. It should take
about half an hour and they will be ready when the glaze is completely dry and it doesn't
stick to your fingers.
8. Strawberry thumbprints: Let's make the strawberry
cam print cookies. For these cookies, we
will need some jam. I'm using strawberry, but you can use other flavors of jam. And some sugar roll the dough into nine or ten little bowls. You can just take pieces out
of the dough and roll it. Or you can do, as
I am doing here, I like to roll the dough into a thin log and then
cut the pieces. I find this way, the cookie balls have
a more even size and then we just have to roll them between our
hands to shape them. And then roll each cookie ball
into sugar to coat evenly. And place them in a tray
with parchment paper. With your tongue and the
help of the other fingers, make an indentation in the
center of each cookie bowl, and then fill it with about
two a teaspoon of the jam. Bake them in a preheated
oven at 170 centigrades, or 340 Fahrenheit, for
about ten to 15 minutes.
9. Orange and almond cookies: Let's make the orange
and almond cookies. For these cookies, we
will need orange zest, a tiny little bit of flour, and sliced almonds add
the zest to the dough. And since the zest is wet, it will probably make your
dough a little bit sticky. So add a little
bit of flour until the dough has the same
consistency as before. We will roll this dough
between two pieces of parchment paper until
it has more or less, 14-1 eighth of an inch. That's about 5 millimeters. Take it to the fridge
for about half an hour and then cut your shapes. You can use any cookie cutter. I'm using a round fluted
one, and as before, cut all your cookies and re, roll the dough until
you finish it. Then place them in a tray
with parchment paper. And brush the cookies
very slightly with a little bit of water so
the almonds can stick. Place some flaked almonds
over each cookie. Don't overlap them and
press them slightly, and bake them in a
preheated oven at 170 centigrades or
340 Fahrenheit, for about ten to 15 minutes c.
10. Walnut snowballs: Let's make the walnut
snowball cookies. For our last cookie, we will need chopped
walnuts and icing sugar. Add the chopped walnuts to
the dough and mix very well. And then with the dough, we will make about eight
or nine cookie balls. You can take pieces of the dough and roll
them, or you can do, as I'm doing here,
just shape the dough into a thin log and
cut pieces, and then roll each piece into your hands until you
form your cookie balls. Place the cookies in
a baking tray with parchment paper and bake them in a preheated oven at 170
Centigrades or 340 Fahrenheit, for about ten to 15 minutes. When the cookies are
still slightly warm, roll them in icing sugar very
well to cover completely. Be careful doing this
because at this point the cookies are still a little
bit soft and very fragile.
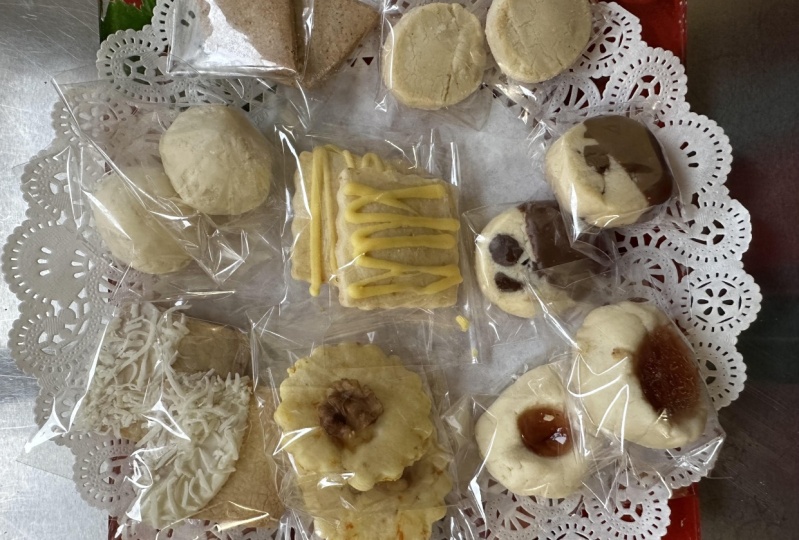
11. Let's assemble a cookie box!: Now that our cookies
are all finished and cool down, they
are ready to enjoy or to put them in their
cookie boxes or tray. And we are going to
assemble a cookie box. Now, if you are not going
to do this right away, you can store them in
an airtight container and they will last for
at least three weeks. You can use any shape
of cookie boxes. It's important that
your cookie box closes like an
airtight container, so the cookies are well stored
and they don't get soft. All you have to do is
arrange them as you like. And as simple as this, your cookie box with eight different kinds
of cookies is ready.
12. Goodbye and class project: And now that we have
our cookie boxes ready, it's time to end the class. I really hope you have
enjoyed it and are now inspired to
create cookie boxes. And actually I
will invite you to assemble a cookie box as the class project
for this class. Don't forget to upload
the picture so we can all see your cookies
again. I am Rita. I really enjoyed my
time with you in this class and I will see
you in my next one. Bye bye.
 Rita Nascimento, Pastry chef, Youtuber, Cookbook author