Transcripts
1. Introduction: In this video, I will show
you how to use a ruler to one of the groups studios
most useful functions. Specifically, I will show you how to use a radial line, rural. How to draw a radial
lines with it. Radio lines with
radial curved rainfall with parallel lines, rural. And finally, how to
use a depression. Brian. Hi there. I'm now with the
Matsuda one God. And lecture teaching manga
at a university in Kyoto, Japan, at the Munk
School in France. You know what radial
lines are in manga? It is used in Japanese
Manga to direct the readers attention
to a person or object, to surprise them, or to
convey fast moving scene. This is a very important and commonly used
basic technique. It is very difficult to draw directly using the
practitioner drawing methods, which is why many professional
and Japanese manga artists started by training
themselves in this technique. In other words, it is an
advanced technique that is almost inaccessible
to the inner butt with Clip Studio Paint, CSP, anyone can do this
easily and quickly. There's no doubt
that characters are the most important
part of drawing manga, but they alone cannot accurately convey the content of
the manga to the reader. Among only complete. When all three of these
elements are present. The background, which conveyed location
or the characters, and effect line, such as radial lines to indicate
their condition. As you know, drawing
beautiful background is very difficult and it is almost impossible to improve your
skills in a short time. Lines, on the other hand, are very easy to do with CSP. When you watch this
video all the way through and follow
my instructions, you will be able to draw beautiful lines at a
professional level. I ready? Okay, let's
get started right away.
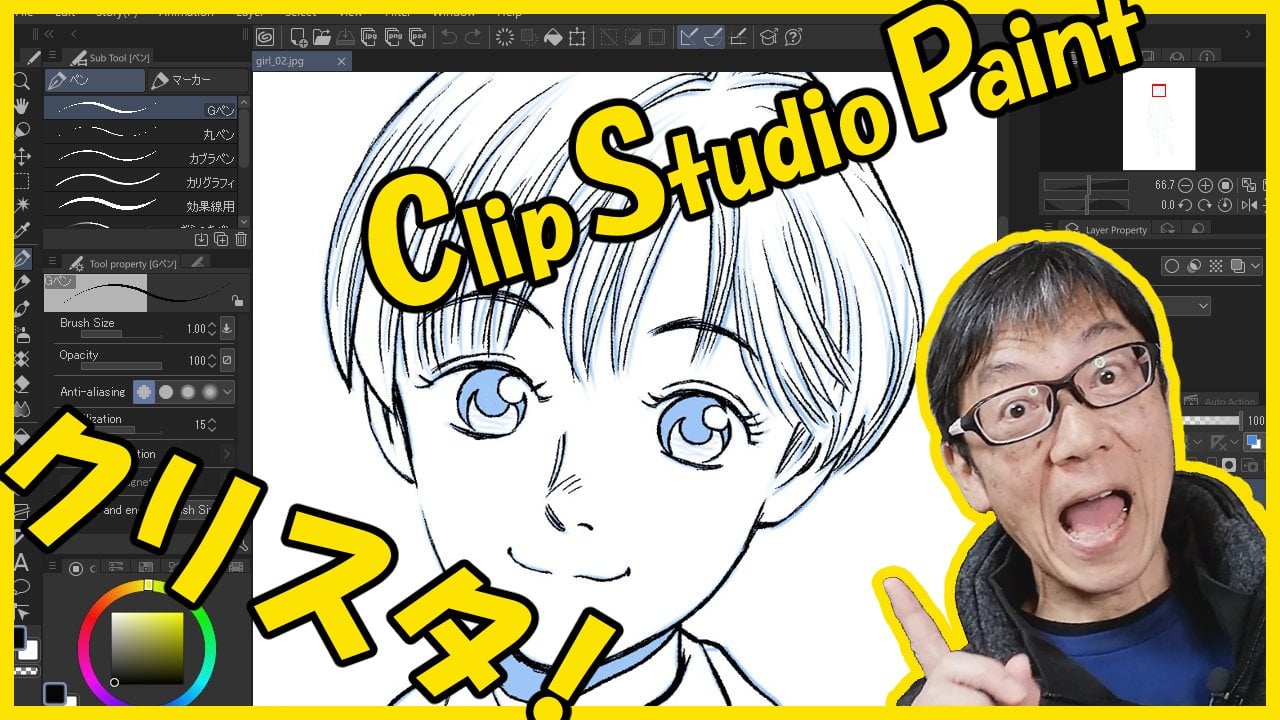
2. Preparation for the Radial Line Tool: First off near CSP
Clip Studio Paint. Have you done it? Okay,
Then let's get started. I will use a Windows PC
screen to explain this. As both Mac and iPad screens
are almost identical. The iPad differs from the Windows PC in a few
areas, but don't worry. In those cases, I will show you the iPad screen and explain. Often this fire you have
downloaded and saved. If you don't know
how to open it. What's the inking preparation
section of my video? This time, I will drag and
drop that file to open it. Click on this icon to
create a new layer. Then double-click on this
layer and rename it. Radio rise. Of course, you can draw on
this layer itself. But if you do so, once you save it, it will be difficult to modify
the next time you open it. It is therefore
more convenient to create a new layer
and draw on it. Then select the row
from the toolbar here. And click on the special
rural in the sub to Window. Click on special rural in
the two Property window. Anesthetic, the
radial line in it. Then click on the
point where you want to place the center
of the radial line. You see that purple symbol here. This is a mark that represents the center
of your radio line. As long as this
marker is of Disable, you can only draw a
straight line towards it no matter what
curve you try to draw. This means that it is
the same as an invisible rural being placed on
the purple marker. This is rural too. Very useful, isn't it? Look at the Layer window in
the bottom right corner. You can see that there's
a new rural icon here. Next, select a pen. There are many different
types of pens available. Select the textured pen. Actually you can draw the
same lines without Japan mapping pen or any other band
by adjusting the values. But to save you that travel over changing because of
values every time, use a textured pen this time. First, set the brush size
to about 1.4 millimeters. Make sure that the
opacity is set to 100. If this is not set to 100, you will not be able
to draw black lines. Next, look at the starting and ending section a
little further down. If you don't find
the starting and ending here, click this button. The same goes for
iPad, uses tap here, tap here, starting and ending top here and
top brush size. Then here, top here,
and top percentage. Next, top these to you
now see three icons. And look at the tool
Property window. Now you can see the new item
starting and ending here. Okay? Check both of these, then change the values to 100. For both. This indicates what percentage
of the total line is shop. For example, 100% means
a line like this. 50 per cent means this. 20 per cent means
this, and so on. I recommend 100 per cent. But you can set it to what
ever number you prefer. You can also change it
by sliding this file. Next, uncheck, starting and try to see what kind
of line you can draw. Draw the lines slowly
and then replace it. Do you see what happened? It's a bit hard to see. So I mean, it goes like this. The ending part of
the lighting has changed to a sharp line. It's fun, isn't it? Next? Now, try drawing a
line with starting checked and the
ending unchecked. The line looks like this. The starting part is sharpened. Boss checks on. What does a line
look like this time? This is it was the starting
and the ending sharpened. So depending on what kind
of line you want to draw, you can turn these
checks on or off. It doesn't matter which
one is turned on as long as the center
part can be sharpened. In the traditional drawing. Radio lines are mostly drawn from the outside
towards the center. That's what I do when
I draw in that way. However, when I draw
this study with CSP, I do the opposite. That is, I drove from the
center towards the outside. This is because it
is easier to make the overall shape
more beautiful. You can try drawing
the same way as I do. Okay. Starting and
uncheck ending. Press the Delete key to erase all the lines you
have drawn so far.
3. Draw the Radial Line: Now then let's practice first. Start from this area and draw a line all the way to
the edge of the canvas. When you release the pen, you can see that it has become thin and sharp in
a beautiful shape. Draw more lines. One thing to note here, the edges of the lines
on the center side of the canvas should be drawn so
that they form a triangle. You see Next, change the brush size to one
millimeter and draw some lines. Again. Draw the lines so that
this part is triangular. Now change the brush size to 0.5 millimeters and draw some
lines in the same way. Then change the brush
size to two millimeters. Drawing the same way. The brush size can be any
number of millimeters. Try actuary, drawing
a few lines of different thicknesses to
find them on you like best. One more note before
you start drawing. I said earlier that
the lines should be drawn so that they
form a triangle. In addition to that, draw the tips of
those clusters of lines in a sort of circle. It doesn't have
to be a nice one. Press the Delete key to erase all the lines you
have drawn so far. Now start drawing. Check starting in
uncheck, ending. The number here is 100. The brush size is 0.5 millimeters
and the opacity is 100. Do you see the purple
mark in the center? Okay, let's get started
from the center outward, from the center to the edge. Repeat this process. Adjust the starting
position of the lines so that the clusters of
lines form a triangle. Center to the edge. Center to the edge. If you're not used to, this, draws the lines slowly, okay? From the center outwards. Draw them so that
they form a triangle. This blank area
should be shaped like a sort of circle from
the center to the edge. From the center to the edge. You can end with this. If you want to make it
a bit more powerful. Add lines throughout from
the inside to the outside. From the center to the edge. Don't rush when you
are not used to it. Draw slowly while considering the balance between the
overall shape and density. Now, that's it. The overall color has
become much darker. It feels more powerful
them before, doesn't it? The most common mistake
beginners tend to make is to square off the
tips of the radio lines. It looks like there's
a white Squarespace. A bit weird, isn't it? Let's compare it with
the previous one. This has a round
space in the center, which do you prefer? I'll give you the tips. Again. The first thing to do
is to draw the clamps so that they form
a sharp triangle. Secondly, draw the tips of doors masses so that they form a
sort of circle as a whole. These are the two
most important tips for drawing nice radial lines. You will not get it
right the first time. So practice again and again. Now annexed, I would tell
you how to get out of a tricky situation that every beginner wooing
count goes like this. Hey, what's going on? I can't draw a line at all. I have no idea what's wrong. There's a rural icon and
there's also a purple mark. I have selected. Textured brush size
and opacity of pine. Starting is checked
and the value is 100. Now why can you draw anything? The cause is here, the color of the ink. The ink color is
white or transparent. No matter how much
you try to do, you can not draw a line at all. To be precise. You can draw a line. But because of the
color of the line is white or transparent, you cannot see the line. If you cannot draw a line, first, check the
color of the ink. As long as the ink
color is black, you can freely draw
lines like this. Another important part is here. As long as these two
buttons are switched on, no matter how much
you try to draw a line that isn't straight, you can't draw it at all. You can only draw beautiful
Street Radio lies. But if they're switched
off, this happens. If you can draw lines but not straight lines
towards the center. These buttons here
are switched off. Ticket. Your iPad doesn't hop
these buttons. No program. Just tap here. Are these two icon switched on? If both are on, it is. Okay. But if not switched on, both.
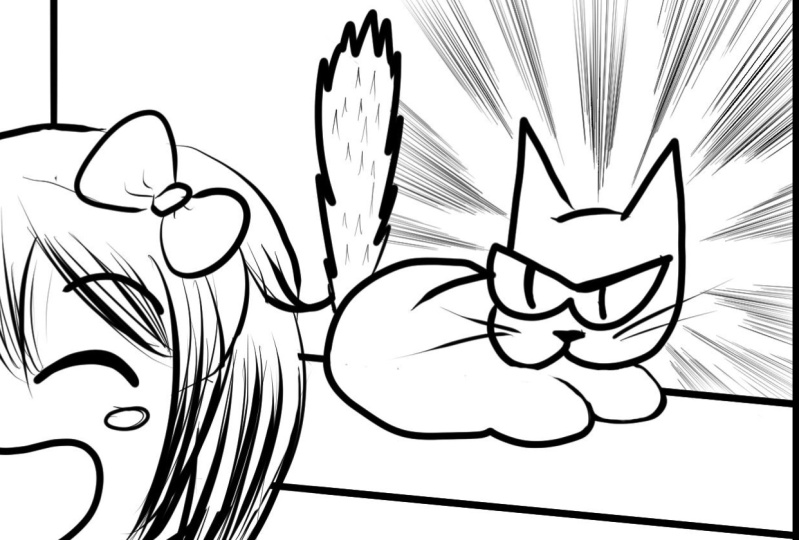
4. Radial Curve Ruler: Next, I will explain
the radio club rubra. With this radio curve, you can create the
impression that the object or person at the center of the
radial curved lines is somehow eerie or distressed. Before placing the rural, create a new layer and
rename it radio curve. Select a pen and draw what kind of curve you
want to draw on this layer. Once you have a rough
idea of what you want to draw, select the Mura. Select radio curve. Make sure this is selected. Then, as you did with
the radial line. First, click on the
point where you want to place the center of
the radial line. Try moving your pen. You can see that some
kind of black line extends from the center
point and furrows your pen. Clicked around the
apex of the curve of the black straight line has
now changed into a curve. Click on some curve
vertices in the same way. It doesn't have to be completely the same
curve as a pen line. Okay? Finally, double-click. The line that was black has
now changed to purple, right? The radio curb Aurora
is now complete. Let's see what kind of
lines you can draw. That textured pen. You are free to set the
brush size to any number. But let's set it to 0.5
millimeters. This time. Your opacity is set to 100. Then check studying and
set the value to 100%. Now, draw. You can easily
draw a beautiful radio curve. Again. The same care should be taken as when drawing
a straight radial line. Makes sure that the
central side of the line clumpy is triangular. Then after you have
drawn some lines, leave a little space and
add some more lines. Instead of a uniform shade. There is a density
of the lines so that some are darker
and some are lighter. This will make it
more beautiful. Now you have drawn it. What do you think? I want to make the overall
coloring a little darker. So I add a few more lines. Now, it's finished. The elbow color
has become darker and more powerful than
before, hasn't it? This is a radio curve, rural. Select eraser. Erase the older
hanging lines with it. However, if you try to erase lines with
our rural visible, you can only erase them by following the
curve of the rural. So what do you do? Turn this item off. Then you can move the eraser independently of
the curve observer, erase the overhang
and clean it up. Are you concerned
about the dura? If you print the
image as is the rule, wherever you know the print. And if you save the
image as a JPEG, etc, the ruler will
not be visible. So you don't need
to worry about it. But if you feel that
they're in the way, Click on the other leg. See it's gone.
5. Radial Curve Ruler with tips for iPad: Next, make the brush size
thicker and draw it, create another new layer. Actually, you can move this
rural to another layer. Of course, you can create different Burrus
on the new layer. But if you want to
use the same ruler on another layer,
you can do this. Just drag it easy, isn't it? On the iPad, it is
slightly different. Drag this icon from
bottom to top left, bottom left to top right. See domain and
played back slowly. See, let's drag it
to the other side. This is the fastest
way to move the ruler. However, this method is somewhat
difficult for beginners. So I will show you another
better way that is easier. First, tap and hold this layer, the layer with
rewrite, this window, it will then appear tab
showing all layers. You see that the
icon has changed. This is the icon showing the status of
showing all layers. Try selecting layer two. You can see that you can draw
lines along the dura on it. But there are times
when you want to draw lines that have nothing
to do with that. One way to do that is
to turn off this cycle. I mentioned before. I'm showing you another way. Again. Tap and hold this layer. And tap here, which I think
now has a tick on showroom. You will then see that
rural is no longer visible. And the Red Cross is displayed. Now we can draw lines on all layers that have
nothing to do with Aurora. Well, what if you want
to remove the Red Cross? N shows a rural tap on
the Red Cross. That's it. The rural PSA again, hide the layer you just drawn
by clicking on the icon. Set the brush size
to 2 millimeters. Set the opacity to 100, check studying, and set
it to 100 per cent. Then I draw it. Oops, I can't draw
along the rubra. How did you solve this program? Yes, you have to turn
on this icon right? Now. You can draw nicely, drawing the same way as before. Make sure that the tip subs
a clumps of lines form triangles and that the density of the lines is not uniform. You have drawn it. Now, erase the overhang. Turn off this icon, select the eraser
and erase them. There you have it. If
the ruler is in the way, you can select another
layer and save it as JPEG or whatever
format you like.
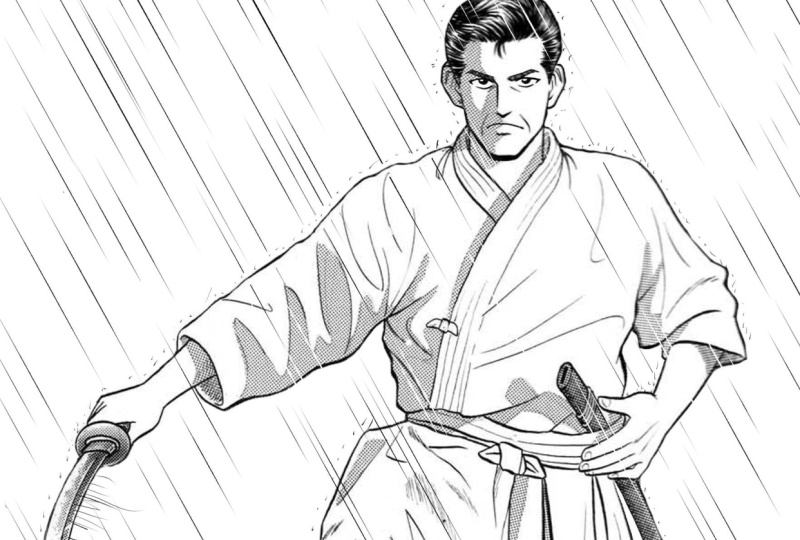
6. Draw with a Parallel Line Ruler: In this video, I will show you other drawings using
special for us. First, I will show you
how to draw the rain. Open this file,
select the Aurora to and choose the special rural. Thank click here and
select parallel line. Then create a new
layer and rename it. You could draw rain
falling vertically, but vertical or horizontal lines tend to show roughness
in digital drawing. So here I draw them diagonally. Select the parallel line rural, and try drawing diagonally
on the Canvas with your pen. You should now see
three purple lines. These are the parallel
lines, rural. If you look at the layer, you will see that our
new icon has been added. Next, select the Pen tool. The brush size should
be 0.5 millimeters. Then check both
starting and ending and set both to 100 per cent. Now let's start drawing. Allows you to draw a beautiful
straight lines without having to move the pen carefully to make
it look like rain. Vary the length of the lines rather than
making them uniform. And the same applies to
the density of the lines. Draw them so that
they are not uniform. Next, add some white lines. Change the ink color to
white, then continue drawing. You don't need a
lot of white lines. Just draw lines in the dark areas so that
the white lines standout. However, the lines should not cover the character's
face too much. In particular, avoid
covering the eyes. You can be done with this. If the ruler is in the way, click on another layer. If you are drawing more
heavy rain, add more lines. The more lines, the
heavier the rain. Luke's, let me try change the ink color
back to black and add more rain lines as before at the lines in such a way that
the lines are not uniform. Making some areas with more
lines and some areas with fewer lines and a few lines
to the front of the body. Lines while keeping your
eyes on the overall balance. Finally, change
the color to white again and add some white lines. Now, you have drawn
a heavy rain. Here's a special tip for you. This is a small but highly
effective technique. Okay? First, turn off this icon to draw lines that
have nothing to do with. Then reduce the
brush size a little. Change it to 0.3 millimeters. Then draw a lot of very short lines on the
upper part of the body. Like this. These little dots
depict the rain hitting the body
and bouncing off. Now you have completed
what they think.
7. Decoration Brush: Finally, I've showed you how
to use a decoration brush. First, thetic, the
rural as before. Then select radial line again. Next, create a new layer
and rename it decoration. On the area where you want to
send over the radial line. Then select the declaration
to select ruled line. Then select the star. Try moving the pen in the same way as you
draw the radial line. You have drawn the star
radio ads with radial lines. Make sure you draw them in a scattered manner that
they are not uniform. Next, try changing the color. Set the brush size to
about 13 millimeters. Before you draw, delete
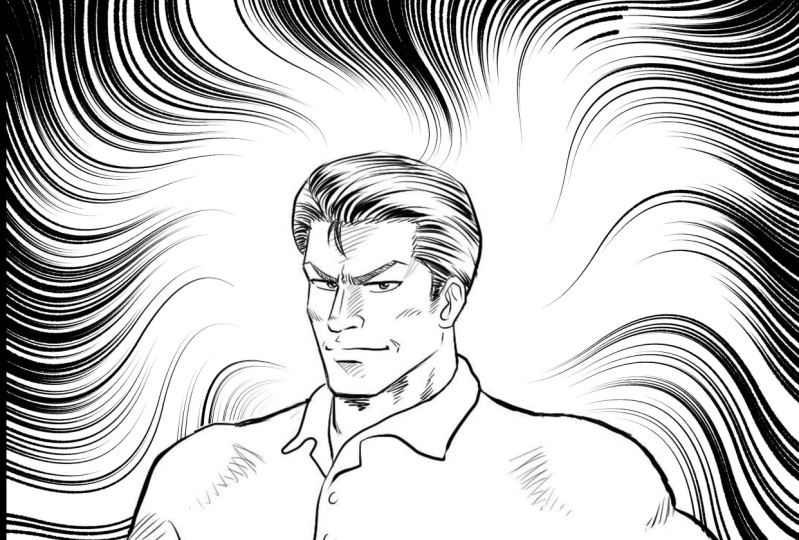
these black stars. The the key. What did you do on the iPad? Yes. You tap the icon of-of. I change the ink to yellow. Yellow stars. Now Radio. Next, change it to red. Then change it to blue. How about that? Interesting, isn't it? Let's try another rural
concentric circle, rural hide this layer. Do you remember how to do it? Yes, you tapped, DID. Then create a new layer and
rename it equation two. Now select concentric circle as before, that in the center of the face. And drag. As you can see, the ellipse contracts freely. See. Make it a circle. It doesn't have to be exact. And tap the canvas again. You can see the purple lines. This is a concentric
circle, rural. Make sure you see the
icon on the layer. Then go back to the
declaration to again, try drawing with a pen. Now you have drawn the star
in a beautiful circle. Try it with another colors. First, change it to red and draw the star
in the same way. Next, change it to yellow
and draw the same way. See, this is a
concentric circle, were easy, isn't it? You can, of course
also draw black stars. Change the ink to black, and draw them in the same way. If the ruler is in the way, click on another layer. Now select the
declaration to layer. Hit the Delete key to erase all the styles you
have just drawn. Now select melody. And droid. Interesting, isn't it? You can draw a circle in front of his
character like this. Or you can erase the unwanted parts so that they are hidden
behind the character. Now, let's erase
the unwanted parts. Turn off the icon above
to use the eraser freely. Select the eraser
tool and erase it. The declaration to layer again and use the Delete key
to erase everything. Try other brushes. Now click on clothing. Then select chain in the list. Increase the brush
size slightly. Now, dry drawing. Oops, this is not good. What do you do when you can't draw a line along the rural? Yes. This icon is switched off. So switch it on. Then, as you can see, you have drawn a
beautiful circle. Select the declaration to layer again and delete everything. Now select the chain. Let's draw them. It's a bit small. Increase the brush size, a little, tinge it to
about 20 millimeters. Then draw it again. Yes, it looks good. Now aesthetic thing, chain. As for the brush size. Well, I was selected to
about nine millimeters. This is the thing chain. Next, select raid. The brush size should
be slightly larger. This is braid. How do you like this? Decoration brushes? These expressions may not
be used much in the manga, but they could create
some interesting effects. If you are illustrating, think about how you can use
them effectively and use them as tools to help you
create great drawings.
8. Conclusion & Notification: Hi. Thank you for watching my video all the way through Hawaii. Is you get a better
understanding of that in CSP. I'll be delighted
if CSP became more familiar to you and digital
drawing became more. The next video, I will explain
about home and coloring, which are also essential
functions of CSP. I hope you will watch it. Thank you.
 Nao Matsuda, Manga Artist, Lecturer