Transcripts
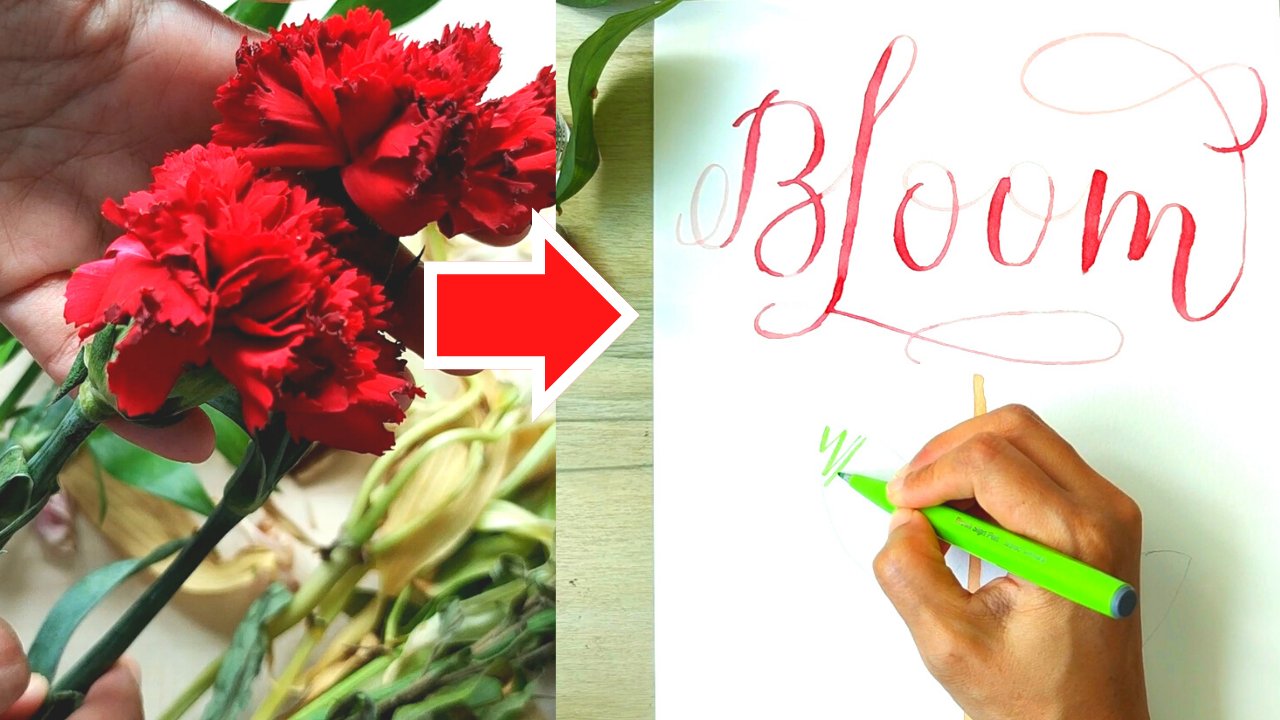
1. A Walm Welcome and Class Navigation: So many beautiful colors around us in the natural world
and also in your home. You can call me joy. And I'm here to take you
through the process of creating natural Alcohol Inks. So here's what we're
going to do together. Fast. I'm gonna share with you and Introduction to Alcohol Inks. Then I want to tell you the best Paper to use
with Alcohol Inks. Maybe for many of us, we started with watercolor. And I want to just
share with you the different effects that you get with watercolor as well as with a special kind of paper. Then I'm going to
take you through a walk with me as we look at all the natural
ingredients that I see and my favorite spots to
get these natural inks. After the walk outside
and we come inside. And I'll share with you
some of the products in my kitchen that I
can also use for Ink. This class is divided into two, the garden CVs as well
as the Kitchen series. And in the garden CVs
or share with you how we extract the colour
and some FUN project. Same thing with the Kitchen. Some things that you can
extract colour from, and then I'll share with you
what are some fund projects? All the videos that I shared is concentrating
on the process. But maybe you might want
to have more details. And I have this handy-dandy
printout that is placed under Projects
and Resources tab so that you can
follow along easily. So first, let's start off. What are the basics
that you need to know to make your
own natural Alcohol?
2. An Introduction to Alcohol-extracted Inks: So these basic things about
making natural Alcohol Inks are going to be very
useful for you as you follow along this class. First, what are the
components of Ink? What makes Ink ink? When we're putting Ink together, we need both a colouring
agent and an alcohol carrier. In the case of alcohol ink, your colouring
agent is something that you can find anywhere. You can go out on your walks, or you just go outside. And you might be inspired by beautiful colors from nature. Petals, seeds, leaves, barks, fruits, ******, and so on. So keep your eyes peeled for the beautiful
colors on nature. And the other main component
is gonna be your carrier. So this is going to
be your alcohol. Color is gonna be
extracted by Alcohol, and Alcohol is going to
carry the ink along. The two things about creating your own natural
Alcohol Ink is fast. They have the spirit
of experimentation. Now, the tons that
I'm gonna be using, The Botanical method
that I'm going to be using in my videos, could be very different
from the plants that you have in
your own backyard. So it's really about
tinkering and seeing what works for your
own native plants. When you're gathering natural
materials For Alcohol Inks. Remember, don't
uproot wild plants. If you're picking the flowers, makes sure that
there enough flowers degenerate seeds, the next crop. Sometimes I also just pick
the flowers on the ground. Barks, don't peel them from the trunk because for some trees they are really harmed when you peel off the
back from the trunk. So just pick those
that have fallen onto the ground or
on reboot branches. Leaves, don't leave
any punches bear. You might want to
just pick a few from different branches. Next. The other important component
is the Alcohol carrier. This is really the
vehicle to carry the colouring agents that have been extracted
by the alcohol. Because you're gonna be
working with alcohol. I always say in my other videos that when you walk with
natural materials, it's gotta be so delicious to microbes and other
particles and so on. But when you're
working with Alcohol, Alcohol and itself
is disinfecting, it may not be as crucial for you to sterilize your
equipment and so on. It's a good practice still. When it comes to
tools and equipment. If you're like me and us serial hobbyist and you
have so many hobbies, but you're also a minimalist. Then you got to cut down on the number of tools and
equipment that you have. What's important is simplicity. You don't need to
have any reservations about not using a specific tool. Do a specific thing, and sometimes you can improvise. Here's a full list of some of the tools and equipment
that you will need. If you're processing
your colouring agents, you will need a
funnel and filter. The filter can be anything,
can be achievable. It can be a coffee filter paper. This is because you need
to separate out the plant or botanical matter away
from the alcohol ink. You will also need
these containers. Make sure that you only
use them for ink-making. You'll need a pot, a large bowl, and a glass container
for storage, as well as another
one for mixing. That when you're
walking with Alcohol, Alcohol really
stains. It stains. So please make sure that you wear rubber gloves
to protect your skin and also have rags handy the clean you're
walking surfaces. I also like to put plastic on my walking surface so
that it protects it. You may also need
mixing tools like glass rods, spoon, or domestic. Note that if they are plastic,
they're going to stain. So it's probably going
to be disposable. Paper, not this. You can't substitute. Yupo Paper is the Paper to get when you're working
with Alcohol Inks. Next comes the process of
creating the alcohol ink. And I like to keep
things simple. So these are just
the two letters you need to remember when you're
working with Alcohol Ink. Not even A-B-C-D. Just add with this at Stanford for
one, your agents. What is your colouring agent? What are you going to use?
I going to use plants. Are you going to use pods? Are you going to use
parts of the plant, leaves or flowers and so on. What is a colouring
agents that inspires you? Next is just have to think about what kind of alcohol
you're going to use. Green Alcohol, high proof
alcohol which is recommended. So just see what works for you. Then DIY, There's the white creating ink if
you're not going to use it. So in this class, I share with you some
of the ways that I use my Alcohol Inks and I
hope that gets you inspired. As you follow along
the video with me, just remember these principles when we are always extracting
Colour with Alcohol. Therefore, don't
rush the process. It takes as long as it takes, and sometimes you have To
Recharge the material, meaning the first time with the first batch of
leaves, It's not enough. You need more colors, and therefore you need to
do a Recharge the rent, a dose of patients. Jesse, so processes
and that's it. You get your Ink. Ingest a bit. I'm going to bring you
to the studio with me. But before that, come on a
walk where I bring it to my favorite spots to get my natural materials are
creating my Alcohol Inks
4. Color Extraction (Bath Stage) in Alcohol: We're now going to be making botanical based Alcohol Inks using different
parts of a plant. I Appiah, the butterfly
blue P power venture, penny, more of them here. And also hibiscus flowers. They don't have to just work
with the petals of a flower. Because here, I've also collected the emphasis
on the lily flower. Lastly, I have
pundit deeps here. We're going to extract
the colors from these botanical
ingredients using Alcohol. I will do that is passed. I'm going to put each of these
components into a beaker. Then we will immerse
them in Alcohol. Here's my Alcohol bottle. One crucial thing for
you to remember when Mickey Inks is
that it can stain. These monsters. Protect your hands
and walking surfaces. That I placed plastic on
the surface of my table. And you can see me
also wearing gloves. It has been a sobering
lesson for me several times. So this has been a public
service announcement. My friends, protect
yourself and your hands. Just to recap, at the
hibiscus flowers. Leaves, friendship, any flowers? Leaves, the anthers, and the butterfly blue
P flowers here. I am using chopsticks, but you can also use a glass stirrer to start the
plant material in Alcohol. I'm just going to measure out 20 milliliter of
each liquid fast and pour it into each ICA and then see if I need
to add more data. Now what EPA quantity of botanical materials that
you're working with? Just make sure that
alcohol level is enough to cover the surface
of all the ingredients. The lovely puck
about working with botanical ingredients is that as you're creating your Inks, you are accompanied by
such lovely smells, especially the ones
that there's just too bad that these frequencies cannot come through
the screen though. For example, I'll read
friendship, any flower, petals at this uplifting fresh tropical thinks
the green pandemic. They keep us warm deep. The delay on Monday. Different botanical ingredients have different absorbency. So just make sure that deaf
enough alcohol at all times that the level of alcohol is higher than the level of
your botanical ingredients, they can always add more so that the botanical
ingredients you have a fully submerged at all times. Now you still and make
sure that all surfaces of your botanical ingredients are in contact with the alcohol. Let's take a look at this
pandemic, the beaker. It doesn't take long at all. But the colour to be extracted, it's reading bright green. Have a clean paper towel handy so that it's
convenient for you to wipe the Alcohol off your
chopsticks so that you don't contaminate one beaker with the colour extracted
from a previous beaker. Let's check on our bench. Penny, you can see that the
petals are really pale now. This means that the colour
has seeded into the alcohol. Now for Lily has
quite predictable. It has always had this
amazing staining power, so we can already see how much the colour has been
extracted so easily. The alcohol is not
a deep amber color. I wanted to show
you the effect that Alcohol has on
butterfly blue P bar. Because you might find
it really interesting. They can see that it's colour is not at all soluble in Alcohol, neither is it soluble in oil. However, if you had seen
a previous video of mine showing how to create
botanical water-based inks. Butterfly, blue pea flower is completely co-operative
and soluble in water. Now why did you show you this? Because it's really
important to be open to experimentation when you first start working with
botanical ingredients. And to get acquainted
with the special quarks. I'm going to be adding
more alcohol to the pandemic leaves
and the hibiscus, both beakers off-camera. Let's come back an
hour later to see how our Extraction
Process and falls
5. How To Recharge Alcohol Ink With More Colour: Like most botanical ingredients, colors are more subtle
than using synthetic dyes. But we can always pump
up the concentration of natural colors by process
called recharging. Now, DIY seeds have already seated the colors
into the alcohol. So we call them spent. What was going to do is
we're going to top them up, fresh cut up leaves. We're going to replace this leaves which had
been immersed in Alcohol for the last hour
with fresh cut up leaves. Now, I have a tip
for you to give you a greater adaptability when working with botanical
ingredients. For some dark matter, especially cent of
fragrance Extraction, which I've talked about in my sensation series of classes. The longer you leave it in
Alcohol upto certain point, the more intense
descent becomes. Remember that botanical
ingredients are living materials that
are ever-changing. But if you leave panda
leaves out longer, this green is going to transform into yellow, which is fine. If you want that effect. But if you want the
green color effect, then you need to work with
the Alcohol Ink and use it up as soon as possible after you have done your color Extraction. Alright, back to a
recharging process. Now what you need
to do is to prepare another container with
the filter funnel. When using alcohol
as much as possible, use gloves as the material
rather than a plastic. Glass stands up much better
than plastic when it comes through resisting the staining
effect of alcohol dice. Prepare a mini filter paper suited to the size
of your funnel. Here. I cut a circle, folded into two, and then fold it
into half again. Then I open up one flat and fit it to the top
of my glass panel. Now, we have an empty
beaker to decant into a filter funnel
and filter paper. I will pull the Alcohol die from our beaker with the pundit
leads into a new beaker. And then the Scott, the needs. If your funnel is small, be patient while the
Alcohol Ink is draining. Now that you have
all the alcohol out, Let's do a Recharge. Please. New plant material
into the filter, Alcohol Ink. Make sure that the
surface of the leaves are all in contact
with the alcohol. Now you can keep
doing the be charging pocket until we get the
intensity of color that you like
6. Differences Between Yupo Vs Watercolour Paper: When you're working with
handmade natural Alcohol Inks, you will get different effects with different types of paper. At the back, at Yupo Paper. And on top I have
Watercolour Paper. So what are the
differences Between Yupo Paper and
Watercolour Paper? When what the Meta Yupo Paper is actually made of plastic. It is Tree free Paper
and it's syntactic. As oppose to Watercolour Paper, which tend to be made
of plant materials. The Watercolour Paper
that you see here is made of 100% cotton to. There is also a difference in terms of the surface
of the paper. Now for Yupo Paper, it is completely your
watercolor paper. The surface, if not as
smooth as Yupo Paper. How smooth it is
depends on whether the Watercolour Paper
is hot pressed, cold pressed watercolor paper. This one that I have
is hot pressed. So it is smooth in terms
of Watercolour Paper, but definitely has some texture compared to the
surface of Yupo Paper. Three. Firstly, we looked at how alcohol ink behaves On Yupo
Paper Vs Watercolour Paper. Then you can see On Yupo Paper, get the ink, just bread. But when we drop alcohol
ink or watercolor, that because what the
colour is absorbent the states and it doesn't spread the way it does On
Yupo Paper. Full. There's just something
magical about Yupo Paper. If you've made a mistake, I can just remove my Ink from the Yupo Paper if I don't
like how the infant's out. Now let me just demonstrate. I'm going to put a few
drops of alcohol ink on this and then I am just
going to wipe it off. This is one of the
major benefits of using Yupo Paper when working
with Alcohol Inks today. Then lastly, Fine. These two works were
completed a week ago. And something I wanted to highlight about
Yupo Paper is this. Now look at how flat
the people live. In contrast, when there's a lot of liquid on
watercolor paper, the paper fibers will absorb the liquid and it causes
the paper to walk. You might see an evenness
of bending of the paper. Just like how when your paper books get
caught in the rain, the pages no longer
life flag right? Now. You don't have that
problem with Yupo Paper. I hope that this gives you an overview on the effects
that your hand me. Alcohol Inks can have. These two types of
paper in theory. Next, we'll get to see
the effects in action
7. Case Study: Lily Leaves Alcohol Inks On Yupo Vs Watercolour Paper: Here I've a piece of Yupo
Paper and another piece of watercolor paper of
the 300 gram weight may from hundred percent cotton. Once the England on the paper, alcohol evaporates
quickly, you can see the dye from the
botanical ingredients start to emerge. Now, I've created Lily Leaves, Alcohol Ink separately
from this class. And I just thought it'd be interesting to
start off with it. I placed a few drops of the
Lily Leaves ink on both Paper so that you can see
more examples of how ink behaves on
different Paper. Leaves. Could you see flecks of the leaves that the
Alcohol Ink leaves behind? So pretty. But this Watercolour Paper, because it is absorbing. So when you drop the alcohol
ink on it, it just plots, sits there for you get this cycle of Ink as
opposed to Yupo Paper. Now we talked about how in a previous video that
it is not absorbent. What happens is when
you put a drop of alcohol ink On Yupo Paper
and then you move it around. All. You can even
prove it with a straw. The ink will flow across the paper rather than
sake through it. Again, you can see flexor green, which gives the Lily Leaves
Ink its own unique character. Again, I want to emphasize that up botanical inks
and living Inks, they react with the Alcohol, the get oxidized by
the air, and so on. Initially when I first
created this drop of ink, the colour was a medium green. But one week later you can see now it's quite yellow brown. So if you wanted to
preserve the green color, you might want to use a
fixative that my help. Or you can always
take a picture and create a print of
your alcohol inks. But generally, for me, color transitions
from botanical adjust the most interesting part of working with
natural ingredients. It's about journeying together with our botanical materials. I find the changes
absolutely fascinating. Natural inks just so much more dynamic compared to working
with synthetic dyes or Inks, you just develop this
sense of appreciation of impermanence as you're being
transported by the changes. I hope that this gets
you excited to see what the rest of the Alcohol Inks we created together will look like
8. Sampling The Botanical Alcohol Inks: Now let's do sampling The, see how the ink
behaves and commingle. I'm going to take a few drops
from each beaker and drop them onto each paper next to the labels that
I've already written. Let's talk about what's
inside each beaker. This one containing panda lead has been be charged three times. So the green you can see is quite intense and concentrated. Let's place these
drops onto the paper. Now you can see why I keep emphasizing for you to
protect your services. Because when you play
move Alcohol Inks, it's just too easy to stay new tools without
even trying to hide. Next, let's look at a red rose petals and I'll drop that Alcohol
Inks over here. Now we take our red
hibiscus Alcohol Ink. You'll notice there's still wet Alcohol Inks traveling
across the Yupo Paper. A reason why I wanted to put the inks together is
because I wanted to show that even try Alcohol
Inks can get reactivated. So you can get an
ever-changing competition, but just reactivating
your alcohol. Now your alcohol ink piece
does not have to be static, even though the inks are dry it. But if you were to look closely at the surface
of the alcohol ink, you can see a film on it. Sometimes I felt that out the pollen that
sometimes I don't, it really comes
down to preference. Sometimes like the green
flex from the leaves. It could be nice to see how the character of the Lily
actors are called incus, like when you see pollen
on top of the Alcohol Ink. Lastly, we take a look at our rate venture
penny Alcohol Ink. The petals are quite pale
and translucent now, which means that a
lot of the colour has been leached
onto the alcohol. You can see that the
alcohol solution is a light pink in
color to the eye. We're now going to let all
our Alcohol Inks air dry. You can use a blow dryer
for them to dry faster. But I find that if you hold a blow dryer too
close to the people, sometimes accidentally, I find that it blows
away all the ink. So I'm just quite content to be patient and to let
nature take its course. It's been 30 min. But let's do a review of
our Alcohol botanical inks. I just want to emphasize that these inks will
continue to change. And what you see right now
is just a point in time. Your own changing journey will
start with a panda leaves. Quite predictably. The Alcohol Ink is green in color and it matches what we have in the beaker right now. Then this light pink area at this comes from our
fresh rose petals. This might come as a surprise to you because in the beaker, the dye looks like
an amber color. Instead. I can't convince enough How
exciting I find it to be. Working with
botanical materials. It is thrilling to
experiment and to be open to change your assumptions about what the colour
might turn out to be. Now, this purplish
area comes from our red hibiscus flowers and Colour desk match what
we have in the beaker. What can I say? If you're familiar with
botanical materials, the colors respond differently according to the Extraction
Agent or the carrier. When I extract the colour of bread hibiscus in a water bath, the colour of years
more towards greater than this purple
color here, isn't it? So that botanical materials, which is unpredictable, this area of yellow comes
from the Lily methods. You can see the yellow specs of pollen that the
Ink leaves behind. Now again, you can
always fill that out, but I've chosen for this class, they just show you
what it looks like. And lastly, we add this pale pop-up that comes from our
red picture, penny flower. Like dependently, if you want
a more concentrated color, you can always do a recharge
refresh pump material. I just want to make a quick
emphasis above filtering. When I think that
as you can see, flex when the pollen
from the lady at this, if it looked like gold, that's it gets The Botanical Alcohol
Inks its own character. Just want colour and clear ink. You can always fill the alcohol ink out
of the Extraction. One thing I love about
using Botanical Inks is how nature's color palette are always complimentary
and go well together. This really helps
when you're trying to create a bigger
piece with the Inks. Because then you can
be competent about your color choices when you're
working with botanicals. It's what we're going to do
together in our next video.
9. Design: Alcohol Ink Colour Blending: We have just been sampling,
I'll Alcohol Inks. For now. Let's
create a full piece. We have even more because
that you see here. So let me introduce the
full cast of characters. We have a green panel
Leaves Alcohol Ink here. Then we have the pale pink
venture penny ink on top. You remember that? We create
them together while back. At the same time, I do have some new characters who would be pleased to meet your Quentin. In this beaker you are
already familiar with. This is the Alcohol extract
of fresh rose petals. I also want you to meet cousin, which I created separately
from this class. This beaker contains
dried rose petals, not fresh like the ones
we created together, but right, because I want to show you
something interesting. Next, we have our Lily
at this Alcohol Ink, and our newest member of the cast is this
metal stoma bury. It is used in
Southeast Asia to kill many elements and also happens
to create a lovely die. This is created the same
way we created at the Inks, where I placed the berries in a glass beaker and then submerge them in Alcohol
to extract a tie. For this piece, we
are using Yupo Paper. The method is just
bombing drops of ink and letting the Inks
interact with one another. But it's also needed a separate beaker with
alcohol that you can use as the Blending or
cleaning solution or something that you use
to clean your dropout. If you're using a same
drop-off or different Inks, you cannot cause have
separate beakers, but different inks
if you choose. Yeah, I'm using 95% alcohol. Now what I think you'll find
the most interesting is the time-lapse of how the
Inks blend and change. So do lookout for that as we head towards the
end of this video, before I do it with you. Are you ready? Let's go. Coulda inks match together? He gets a very dreamy feel. Yes, the close-up with all those lovely spikes
of botanical method. It just gives details
to the finished piece.
10. Design: Straw-Blowing Alcohol Inks: How are we ready
for another piece? We're still using
Yupo Paper this time. You're familiar with
the Alcohol Inks that we have created together
in a previous video. And I've also prepared a Blending solution
to rinse my drop. The method for this
involves me using a straw, but I blow air to guide the Alcohol Ink and
help them this bus. It's much easier of course, if you have a Lazy Susan or just a kickstand that rotates, it will help you to control the direction of the
Ink this puzzle is, instead of moving our body
around other people around. Now, I'm just going to blow air through this drop
across the paper. Makes Arctic the yellow from the anthers Alcohol Ink
and drop them here. Next to the green inks
from the pandemic. If I switch between
different Inks, Vince my Dropbox in the
clean alcohol solution. Now I'm just going to
blow this drop across the paper and turn
the people while the incus wet selected
find the flow. Monitoring. You can just concentrate your inks in the
middle of the paper. But I do want to
hack the calmness. Also feel that big reminder. Protect your services
because if you're Alcohol, Inks builds on the
corners of your paper. Do you a table suffix? It can be challenging to
get the steam out. All you have to keep stuffing, you want to clean up the spill? I find that the
infant quite pale. So I'm going to
pair them up with a stronger color so
that Dan know Colour get some of the areas
are already dry it, and that's the
coolest thing about alcohol because it is
fast drying and you can see the resulting ink pretty quickly compared to some
other what the base dies. But if you put fresh
ink onto the area, the dry Alcohol Ink is reactivated and you
can manipulate it. Again. I find working with Alcohol Inks very forgiving,
easy to work with. It may not be as precise as Using what the
colour and a brush. But working with
Alcohol Inks has just chill go with the flow
kind of vibe going for it. Remember that I mentioned botanical Inks change
throughout their lifespan. So I'm just gonna leave it to dry and make changes
at the continuance trying enjoy the time Let's of this piece at
the alcohol ink dries up
11. Design: Polka-Dotted Alcohol Inks: Here's going to be
a simple piece, but I'm going to show you how the Alcohol Inks behave
on Watercolour Paper. Yet seen in other videos, how the Alcohol Ink is very dose out what
the colour Paper. It just sits around
where it is dropped. Because the cotton fibers of the Watercolour Paper absorb
it through the paper. For this piece, you will see drops off the ink
all across the page. And why not? Right? Because
poker dots are often. This video is speeded
up so you will get a super path look at how the Alcohol Ink takes
the Watercolour Paper. I also tried to clean up the
piece by adding gold mica, which you will see in
the finished piece.
12. The Kitchen: Spice Possibilities For Alcohol Inks: The previous videos have
been about creating natural Botanical Alcohol Inks using plant materials
from the garden. But you can totally create Alcohol Inks from teaching
material as well. I hope that this section
we'll get you to explore greater possibilities for
creating your own natural inks. I've already done
two Examples of such inks using materials
from my Kitchen, which I will show you. And then we'll create
another example together using Turmeric
in future videos. The ingredients that
I've already made, if athlete cinnamon, I break up cinnamon sticks and put them
in this colored bottle. Now calls you can
use any bottle. Although a dark bottle is
better because it blocks out the light and it doesn't
degrade whatever is inside. Or if you have a
transparent glass, you can just put the
whole glass container into a cabinet. The point is to block out light. Although our camera cannot pick it up because our
bottleneck is so narrow that are cinnamon sticks inside, submerge in Alcohol. If you make this, you can smell the
cinnamon fragrance notes. Just for wanting you. It might make you crave
for cinnamon rolls. Anyhow, the color Extraction
process goes like this. I placed the cinnamon sticks
into the bottle and then pot enough alcohol so
that all surfaces of the cinnamon sticks
I exposed to alcohol. Then I kept the bubble and
leave it for a few beats. Alcohol is by itself disinfecting ingredient and
the cinnamon sticks I dry. So I didn't worry too much about gray mold or
anything like that. If you want brown flecks in
your cinnamon alcohol ink, you don't have to filter it. However, I choose to. Sometimes I felt that my Alcohol
Inks, sometimes I don't. Depending on the effect
that I want to see. Here. I felt that the Alcohol
Ink a separate thing, the alcohol on the
cinnamon sticks, and then place the filter
ink into this bottle. The other Kitchen ingredient
I worked with, black pepper. It is the same process of matching the black
pepper seeds in Alcohol. And then doing a
filtering process to separate died Alcohol Ink
from the black pepper seeds. I then placed it here
into this bottle. Yet seen another video of mine. It is the same process as extracting sense all
creating a teacher. I thought it'll be PFK-1
to just share with you the colour that
these materials created. Here's our Yupo Paper. Now let's start
with black pepper. You can see for APA that
the colour that has been extracted is
a green brown hue. It is quite interesting, right? Because you would
have expected pet, maybe something a
color closer to black. Now, I'll show you the
sentiment Alcohol Ink. This one is a lot
more predictable. The colour is a reddish brown, just like the original material. Now let's see what
they dry into. There we go. Next step, we will be
creating a kitchen base, alcohol ink it together from scratch off the rate
the Kitchen Cabinets
13. Extracting Colour From Turmeric: The Kitchen ingredient
that I've chosen for us to work together
with is Turmeric. Turmeric is a Spice that
has a special place in my heart because I
remember when I was young, my mother, but fried
chicken quite often. But before she fries chicken marinate and coat the
chicken skin with Turmeric. Now this will give the
chicken golden color after it's bright, look so appetizing and tasty. But today, we are going to use Turmeric in a different way. Not so much on our foot plate, but more in the studio, colors from the Kitchen. My hope is that you get to expand your mind to
possibilities are creating your own inks with
whatever ingredient that you have on hand and you garden
or even in your kitchen. I do love working and
experimenting with natural ingredients to see what mediums are suitable for which kinds of
natural ingredients. Let's understand Turmeric
a little bit more in terms of its solubility
in different liquids. On the left, I have
a beaker of water, and on the right, I'll be filling the
beaker with alcohol. The reason why I've chosen
Turmeric to create with you is that because amongst all the natural ingredients
I've worked with, Turmeric gets the
most vibrant colors. Very unlike other botanicals, which are usually giving
off a very subtle color. They can just recall the black pepper and cinema
Alcohol Inks you saw earlier. Because those colors
are very subtle, much like other botanical inks. I previously worked
with Turmeric as a standout because it
creates a very intense die, even without the
recharging process. Now this class is all
about Alcohol Inks, but it's also worth
comparing how Turmeric behaves in water versus Alcohol. And don't forget, if you're
working with Turmeric. Step one is to make sure that all your surface
is protected. Now, I'd like to show you
the difference between Turmeric and water and
Turmeric and Alcohol. Paul, some powder into
each of these beakers. Now see, I already
spilt some Turmeric. So remember, I know I saw
like a broken record, but protect your services. Turmeric, unlike cinnamon. Buns. Take your chopsticks
and resolve the powder. You can see that the EPA and Turmeric don't play well
at all with each other. The Turmeric doesn't
fully dissolve in Rapa, and you can still see
Turmeric powder suspension. So this means it's not going to make a very good
what the base die. But let's check out how
it behaves in Alcohol. Well, not all the
powder dissolve. It still leaves behind a very intense yellow on the Alcohol. Use this Alcohol Ink. We will next filter
out the powder. I prepared a beaker glass bundle and cut the paper that
exactly fits into off bundle. You probably noticed
that I don't feel the out my natural Alcohol
Inks all the time because sometimes I
want to see the bits of pollen of flex up
leaves and materials. In this case, I think the excess Turmeric
powder will be too intrusive to
our final piece. And out prefer to just work with the yellow of the
Turmeric Alcohol Ink. Most of our Alcohol
Ink has built-in, do even just the Turmeric
powder on the filter paper. And you can already see is
such an intense yellow. Now let's get the playing and experimenting with
what is Ink can do
14. Design: Alcohol Ink Wash : Let's create a kitchen
landscape on Paper. I'm bringing back
our black pepper, cinnamon, and the filtered
Alcohol Ink From Turmeric. I have my brushes and I'm just going to do a wash
for this piece. Let's start with
subtle colors, dust. I'll make a few drops of the black pepper and
then have a Wash. Washing it with the brush. Now my cinnamon in a bit more black pepper. And lastly the most intense
color out Turmeric. Don't get shocked, okay, the colour is super rich. Here we go, look at the
vibrant color of Turmeric. I'm going to lead this a
try and share with you the time-lapse so that
you can see how the colors are
developing at the dry. I hope that was been
watching how cinnamon in the middle part of a piece
behaves as it dries. Now the Turmeric Alcohol Ink is really the star of this piece. It dries into quite an
even finish and coverage. I hope that this
inspired you to have FUN experimenting and playing with your own handcrafted Alcohol
15. Thank You! And Your Class Project: I hope you're getting all
sorts of ideas about where to extract your colors
from and what you can do with your alcohol ink. So here's what I like to invite you to do for our class project. When Pick a natural item from
the garden or the Kitchen. Then hello there at process
that I talked about in my previous video to extract the colour from
this natural item. And Snap a picture of your
alcohol ink that you have created and post your design
to our class project. If you liked this class, I also have other
classes on natural dyes, as well as creating
our own natural inks. If you'd like to get
in touch with me or have questions that
I can help you with. You can visit the
community section of this class and post
a new discussion. Or you can find me
on Instagram at join hands and on my website,
join hence.com. Thanks for taking this class and I'd love to see you
in another one.
 Joy Tay, Maker