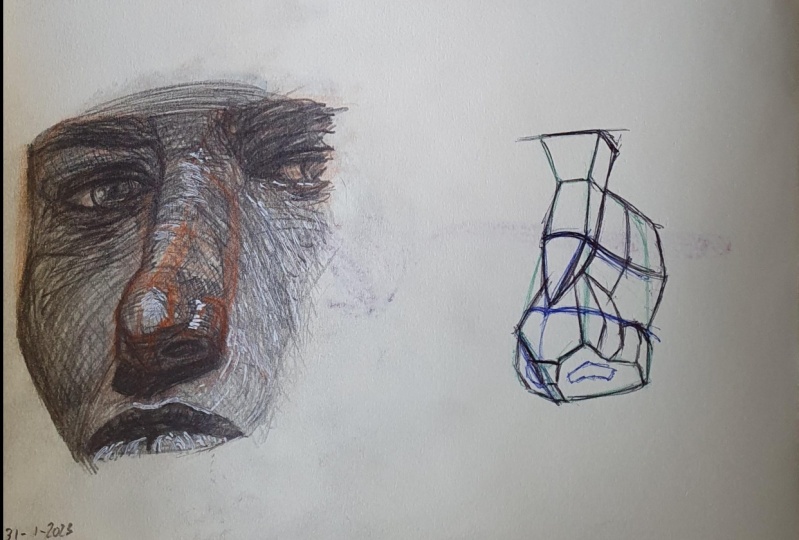
Transcripts
1. Course Trailer: Hi, my name is Ethan When I'm a portrait artist and teacher. And in this course
you're going to learn a powerful system for constructing the nose that will allow you to draw the
nose from any angle, even if you're a
complete beginner. By far, the most common mistakes artists make when drawing the nose is they simply don't
understand its structure. So they resort to just copying the outline
and what they see, which results in a
flat cartoonish knows. Well, in this course, we're going to fix that
once and for all by demystifying the structure
and anatomy of the nodes. First, you'll learn
how to simplify any nose into its
most basic form. Then you'll learn
how to layer on anatomical details that will instantly inject your nose
with a sense of realism. Just these two
steps alone will be a game changer for your drawing skills
because they'll allows you to approach any nodes
from any angle and quickly establish a
three-dimensional structure that you can then refine
with more detail. You will never again
have to stare at a blank page and be overwhelmed
not knowing what to do. Once we have the basic
structure establish, you'll learn how to
use the planes of the nose to make your
drawing even more realistic. Understanding the planes is the secret sauce to being able to share the
nose at a high level. To help you put all
this into practice, we're going to do a bunch of drawing exercises with
different knows types, lighting conditions,
and camera angles. We'll use tracing exercises
to teach you how to look at our nose and be able to see is underlining
structure and planes. Then I'll show you step-by-step how to translate
that information into a beautiful drawing from the initial land to a
finished rendering. In this section,
you'll learn things like how to use soft edges and shadow mapping to make your drawing realistic
even without any shading. This is crucial because if you can't make your drawing
look three-dimensional, just using lines, then you're
shading is doomed to fail. You'll also discover how to use hatching and crosshatching to enhance the form of your nose and add a dynamic
energy to your shading. And a whole lot more. The drawing demonstrations
will be done digitally, but all the concepts
and techniques will work for any
medium or software. So even if you're using
traditional pencil and paper, you'll be able to follow along with everything
we're doing. Once you're comfortable
drawing and shading noses from observation, I'll show you how to
apply the concepts you've learned to drawing stylized
and exaggerated noses. This is where it will get really fun because you get to be creative and design
interesting character types. You're not just copying
the reference anymore, but making it your own. Lastly, you'll discover how to easily draw noses from
your imagination. Being able to draw
from imagination is an extremely important skill, but it's one that so many
artists struggle with. And the beauty of this
constructive drawing method that you're going to learn is that a trains you to draw from imagination from
the very beginning. Once you understand the
structure of the nose, you'll be able to construct M manipulated in any way you want. Well, I hope you
are excited to take your portrait drawing
skills to the next level, and I'll see you on the inside.
2. Materials (For Digital Artists): Before going into the lessons, I want to quickly go over the materials I'll be
using in this course. Now, I just want to make
clear that you absolutely do not have to use the
same materials as me. In fact, I made sure that all
the concepts and techniques in this course will work
regardless of the materials. But just in case you're curious, here's what are we using. All the drawing demonstrations
will be done digitally. Don't worry if you want to use traditional pencil and paper, you can do that as well. And I'll lay out the
recommended materials for that in another video. As far as digital is concerned, I'll be using Adobe
Photoshop CC, but pretty much any
other drawing software will work just as well. Within your drawing software, you only need three things. Layers, which will act as
your paper, the brush tool, which will act as your pencil, and the Eraser tool, which will act as your eraser. The paper. In this course, are we
drawing on toned paper? And we can create that
paper very easily. When you first open Photoshop, you'll be greeted with a window that looks similar to this. Just click on Create New
to make a new document. You can set the size
to whatever you like. I'll make this 124 by 18 ". Then hit Create. Alright, the first thing we
need to do is turn our paper. This default background
layer is currently locked, which means we can't
make any changes to it. So I'll click on this icon that looks like a
lock to unlock it. Let's name this
layer background. The fill the
background or select the gradient tool on
the left side menu. Or you can also press
G on your keyboard. Now, right-click on the icon and you'll see some
additional options. Select the bucket tool. Next, go to the color picker and select what color you
want the paper to be. I'll use a middle gray value, but you can use whatever
color you like. Then click on the canvas to
fill it with that color. And as our tone paper. Now, we can draw directly
onto this layer. But the problem with that is if we need to erase our marks, it will also erase
the background color. So here's what
we'll do. Instead. We'll click the lock
icon to lock this layer so that we can't make any
changes to it by accident. Now, click on this icon to create a new
layer on top of it. And we can draw onto this layer. This way, if we need to
make any changes will only affect our drawing
and not the background. In fact, I like to separate my drawings into several layers. E.g. I. Might put the
lay in on one layer, the base tone shading
on another layer, the hatching on another layer, and the highlight on
yet another layer. This way I can make
changes very easily. If I don't like to highlight
on the bridge of his nose, I can select the
highlight layer and erase that part without affecting the rest
of the drawing. If I wanted to see
what the drawing would look like without
the base tone layer, I can click this
icon that looks like an eye to turn that layer off. Let's turn off the hatching
layer as well to see what it looks like with just the
lane and the highlights. That actually looks pretty cool. And I might have
never known that if I didn't separate my drawing
into different layers. I can also just reduce the opacity of the base tone
layer to make it lighter. So as you can see,
using layers is a very powerful way to
utilize the digital software. The brush. You can access the brush
tool here on the Tools menu, or by clicking B
on your keyboard, you can access the
brush setting window by clicking on this icon
in the upper left menu. With the brush tool, you can use different brush tips to
create different effects. The brush I'll be using
in this course is the Kyle's ultimate pencil hard. This brush just mimic the
look of a graphite pencil. It should be available as one of the basic brushes that come pre-installed in Photoshop CC. Just look under
dry media brushes. As a quick note, when
using the brush tool, make sure the mode
is set to normal. Now, if you don't have access to this brush for whatever
reason, don't worry. Any sketching brush will do as long as it can make
a line of work. When drawing the three
settings you can play with to create
different effects. The size of the brush, the opacity, and the color. E.g. let's set the brush
size to a small value. This allows me to make
thin parallel hash line. If I wanted to make
things darker, I can cross hatch
over the first layer. This hashing technique is used to add texture to our shading. If I wanted to cover a big
area with an even tone, I can increase the
brush size to really large so I can do
it more easily. You can change the size using the top menu, but when drawing, I find it much easier to use the left and right bracket
key on the keyboard. Press the left
bracket to decrease the size and press the
right to increase it. If we wanted to make
our marks lighter, we can of course, just reduce the pressure
we put on the pen. But another way to do that
is to adjust the opacity. E.g. if I lower the opacity of my brush
using this top menu. Now, when I shade, you can see that the
tone is much lighter. This allows us to add value gradually and create
smooth gradations. I can also use the color picker to switch to a
different brush color. Usually I'll use a dark color to draw the lay in and shadows. And I'll use white to
create the highlights. The eraser for erasing
will use the eraser tool. You can access it here on the left menu or by clicking
E on your keyboard. Again, you can access
the settings menu by clicking this icon in
the upper left corner. Like the brush tool,
you can choose different tips for your eraser, which will create
different effects. Let's go under general brushes and pick the soft round tip. This will give you our eraser a very soft border by lowering
the hardness to zero. Let's set the size
to something small. And when will you raise? It will look like this. Now, if we increase the size, they erasing will
look like this. If we lower the
opacity of the eraser, it will make the erasing
much more subtle. Now we can erase much more slowly and gradually
build up to what we want. If you want, you're erasing
to have a sharper edge, you can increase the hardness. Now, the erasing will
look much more defined. My favorite way to use an eraser is to lower the
hardness to zero, increase the size to really big, and decrease the opacity. Okay, now I can
gradually fade out these patches to create
a smooth gradation. We can also use it over
the top of other erasing. And we can use it over the hatch lines to
make them more subtle. Alright, and that's pretty
much all you need to follow along with the lessons
using digital drawing.
3. Materials (For Traditional Artists): Even though the drawing
demonstrations in this course, we'll be done digitally, all the concepts and
techniques still applies for traditional
pencil and paper. If you'd like to follow along
using traditional tools. Here's my recommendations. For the tone paper. I recommend these
Strathmore 400 series. This paper has a
relatively smooth surface, which makes it work well with
a wide variety of mediums. But feel free to use any brand or type of tone paper you like. In order to create
our lane and shadows, we'll be using a dark pencil. For this, I recommend a
simple graphite pencil. The brand doesn't really matter. So use whatever one you like. In the course, you'll hear me mention lowering the opacity of my digital brush in order
to make lighter marks. To get the same effect
with a traditional pencil, you simply just need to lighten the pressure
on the pencil. One trick that can
make this easier is instead of holding the
pencil close to the tip, you move your hand further back. This will put less pressure
on the tip as you draw. Another option that can
make drawing lighter marks easier is switching
to a harder pencil. Graphite pencils comes
in different hardness. On one hand of the extreme, you might have a nine h, which means that
the LED is really, really hard and will make
extremely light marks. Right in the middle would be HB. And on the other end, you might have a nine B, which has a really, really soft lead that will make really
dark marks very easily. Although you can
buy pencil sets, that will give you the
whole range of hardness, you really don't need
that many pencils. You can pretty much
do everything with just the HB pencil and varying the
pressure you put on it. Now, if you're
using an HB pencil and having trouble
keeping your marks light, you can switch to an H
or two H. Switching to a harder lead
combined with keeping a light pressure should be more than enough to
get the job done. If you want it to
make things darker, you can apply more pressure
or switch to a b or two b. Another thing you
might see me do in the course is increasing the size of my brush in
order to shade a large area. To accomplish this with
a traditional pencil, you can simply shade using
the side of the pencil. This allows you to make
very broad strokes and cover a large area
with an even tone. If you need help
smoothing out the tone, you can blend it using
a blending stump, a tissue paper or Q-tip, or even your finger. And of course, if you prefer, you can use any other
drawing tool like charcoal, color, pencil, etc. Since we're using the tone
paper drawing method, we'll also need a white pencil
to create the highlights. For this, I recommend the General's white
charcoal pencil, but any other pencil that
can make a white mark will do just fine for erasing. I recommend a kneaded
eraser because it allows you to raise more
gradually the chorus. You might see me using
the digital eraser to gradually fade out
the edge of the drawing. To accomplish this with
the traditional eraser, just shape the eraser
into a ball and tap it against the shading
to gradually lighten it. You could also lightly brush the eraser against the paper. And if necessary, you can smooth things out with
a little blending. But of course, the
best way to create a smooth gradation is to lighten the pressure on your
pencil gradually so that you don't have to use an eraser in the first place. Okay, That's all the
traditional tools you'll need to follow
along with this course. Again, you absolutely do not have to get
these exact tools. Feel free to use any
materials that you have available to you as long
as they get the job done.
4. Nose Structure Explained: The biggest problems began
his face when drawing the nose is that they don't understand the
structure of it. So they end up just
trying to copy the outline and what they
see in the reference. And this often result in a very flat and
cartoonish drawing. In this course,
we're going to take a constructive approach
to drawing the nose. You're going to learn
how to break the nose down into simple forms and then gradually layer on details until you have a
three-dimensional knows. The biggest benefit of this
approach is that not only will allow you to draw
realistic noses from reference, but once you understand
how noses I constructed, you'll be asked
to draw them from your imagination as well. So let's take a look at
the first layer of detail, or what I call the
simplified nodes. In its most basic form, the nose is really just a triangular wedge
sticking out of the face. But once you add a
little bit more detail, the form starts to morph
into something like this. It's still pretty
much a wedge form just with a few subtle changes. So let's go over the parts and see why they look
the way they do. The actual nodes can be broken
up into three major parts. The bridge, the tip, and the wings of the nostrils. The bridge is the hardest
part of the nodes. And this is usually
the part that's broken when you
have a broken nose. The tip is the part
of the nose that sticks out from
the face the most. The tip is also sometimes
called the ball of the nose because this area
has a slightly rounded form. You might hear me
use the word ball and tip interchangeably. And the wings and the
last row is the part that widens when you
flare your nostrils. It's also the area
that you pinch when you're trying to
block out a bad smell. The simplified nose has
three major planes. The front plane, side
plane, and bottom plane. The front plane is made up of the front plane of the
bridge and tip of the nose. The side plane
contains the side of the bridge tip and
wings of the nostrils. It helps to show how
the nose gradually slopes down and
connects to the face. And the bottom plane consists of the bottom of the tip and wings. The bottom plane is divided into two parts by this
vertical center line. That helps us to distinguish
between the left and right nostril and can make it easier to draw the
nose and perspective. Lastly, we have
this trapezoid or keystone shape
called the glabella. It sits above the nose
bridge between the eyebrows. The glabella is a
very useful landmark because it connects the
nose with the eyes. When drawing the nose, I usually like to
start there first. Okay, so that's all the information
you need to know for now. We'll dive deeper into
the anatomy later, but for now, just get familiar
with the basic parts. And in a future lesson, we'll learn how to draw this simplified
nose step-by-step.
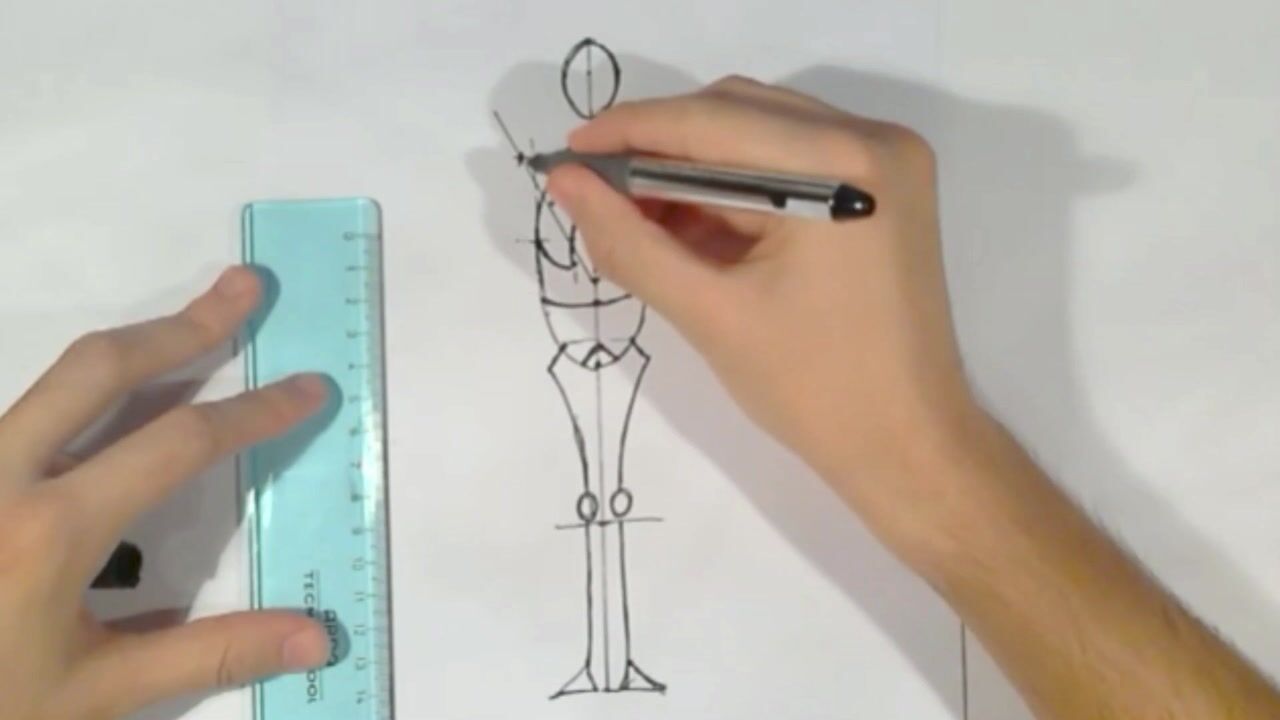
5. Simplified Nose Drawing: Alright, so now let's draw the simplified nose step-by-step. We'll start with the
standard front view. I'll begin by drawing in the keystone shape
of the glabella. The top edge will
be slightly longer, the bottom edge will be shorter, and then we'll just
connect the sides. Now, one of the hardest
thing about drawing the front view is keeping
everything symmetrical. So to help us do that, we can draw in a vertical center line straight down the
middle of the glabella. This will help us
to keep everything centered and symmetrical. Next we'll draw in the
nose bridge and tip. Now the bridge will be
narrower towards the top and then gradually widens as
it approaches to tip. And once again, we can draw a horizontal guideline to make sure that things are
even on both sides. And then the lines will turn
and come to a point like so. Notice how the glabella, nose bridge and tip together basically
looks like a neck tie. Next we'll draw in the
bottom plane of the nose. Again, we can draw this horizontal guideline to make sure that both
sides are even. Notice how the corner of this bottom plane
looks kinda like the letter M. So that's one good way to remember
how to draw it. Now, there's a short
central line that separates the bottom
plane into two parts. And then we'll just connect
the corners to close it out. Lastly, we just need to
draw in the side planes. The top edge will curve like this and then come down to
connect to the bottom corner. Now, the reason the top
edge is curved that way is because we're leaving
space for the eye socket. And notice that the bottom edge is curved in the
opposite direction. So the top edge is curved one way and the bottom edge is
curved the other way. Now just do the same
for the other side. Again, we'll put in a guideline to keep both sides symmetrical. And that's it for
the front view. Now, before we draw
in the other views, I'll draw in these
guidelines and make sure that all the major
landmarks line up. This way. You can see how the nose changes as we see it from
different angles. Okay, now let's draw in
the three-quarter view. Again, we'll start
with the glabella. Since the nose is turned away, the gold bellow will be
slightly foreshortened. In this case, it just means
that it will appear slightly narrower and the size will
be slightly more vertical. Once again, we can draw in a center line to help guide us. But this time instead of the center line dividing the
glabella evenly in half, it's actually
shifted to the left. This is because since the
nose is turned to the left, that side is now further away from us and we'll
see less of it. While the right side will
be closer to us and we'll see more of it. Again. The bridge will gradually
widens as it approached the tip and then
comes to a point. Once again, notice
that the point of the tip has been
shifted to the left. And we're able to see more of the right side and
less of the left side. Of course, if the nose was
turned to the right instead, the perspective was
shift in that direction. So in that case, we would see more of the left side and less
of the right side. Okay? Now we can draw
in the bottom plane. From this view, we can see
that the bottom plane angles in to show that the nose is
protruding from the face. From this angle, the
bottom plane will appear wider than compared
to the front view. And lastly, we'll just
close out the side plane. Notice that in the
three-quarter view, we're only able to
see one side of the bottom plane and
not the other side. Okay, now let's draw
in the side view. Again, we'll start
with the glabella. From this angle though, it will appear as a
simple straight line. Now there's some
variation in the way the glabella till some people, it will tilt forward with the front plane facing
downwards slightly. And others it will
tilt back with the front plane facing
upward slightly. In this case, we'll keep
it simple and just have the front plane of the glabella
facing straight ahead. Now, the nose bridge will
angle out from the glabella. The bridge and typical
nodes does curve slightly. So even from this angle, we'll see a bit of
it peeking through. Next, we'll draw in
the bottom plane. From the side view,
we can really see how the nose is
protruding from the face. And lastly, we'll close
out the side plane. Okay, so that's it for
this simplified nose. Go ahead and practice drawing
these diagrams yourself. And in future lessons, we'll see how we can develop the simple form into a
fully realistic knows.
6. Nose Anatomy Explained: Now that you understand how
to draw the simplified nose, we can layer on some
anatomical details to make it look even
more realistic. But of course, in
order to do that, we need to understand
some basic notes anatomy. So let's go over that. When we peel back the skin, we can see that the nose is
made up of four main parts. The nasal bone, the
lateral cartilage, the greater lack cartilage, and the wings and the natural the nasal bone is
this part here. And that forms the top
half of the nose bridge. Next to the nasal bone is a much larger bone
called the maxilla. This bone helps to create the
side planes of the nose and allows it to transition smoothly to the
rest of the skull. The maxilla is a
pretty large bone, but with regards to the nose, we only care about this small portion that sits
next to the nasal bone. Attached to the nasal bone
is the lateral cartilage. The lateral cartilage forms the lower half of
the nose bridge. How the lateral
cartilage connects to the nasal bone can have a big impact on the
look of the nodes. In some people, the
connection between these two parts is very
seamless and smooth. And others, there will
be a slight angle change where the lateral cartilage
connects with the nasal bone. Further down the nose is
the greater Alar cartilage, which forms the ball
or tip of the nose. The greater Alar cartilage is actually made of two
separate pieces. And we can see the
separation between them running down the
center of the nodes. In some people, this
separation will be very visible even
through the skin. Also, notice how the cartilage curls up as it
connects to the face. This is a very important detail when we're drawing
the bottom portion. Lastly, we have the
wings of the nostrils. The wings actually made
up of fatty tissues and you might hear them
referred to as all our fat. Again, notice how the wings crow up as it attaches to the face. The wings together with the
greater Alar cartilage, forms the openings
of the nostril. Okay, now that you understand
the basic anatomy, we're ready to see how all this information translate into an actual nose drawing.
7. Anatomical Rhythms Drawing: One of the best ways
to inject anatomy into your drawings is with the use
of rhythm lines in music, or rhythm describes
the relationship between two or more
musical notes. In drawing a rhythm
line describes the relationship between two
or more visual elements. It's basically a
shorthand that helps artists remember
complex information. So let's see how we can
add anatomical rhythms to this simplify nose to
make it even more realistic. We'll start by drawing
in the separation between the nasal bone
and lateral cartilage. Proportion wise,
this line will be one-third of the way down
the front plane of the nose. This isn't a hard rule because proportion can vary widely
between individuals. But it can be a very helpful guide when
you're starting out. Notice how this line is slightly curved to show
that the bridge of the nose is rounded and
protrudes forward slightly. This line will continue down
the side plane to show how the side of the nose gradually slopes down
towards the face. And we can draw this
horizontal guideline to make sure that the
other side is symmetrical. Next, we'll sketch in the front portion of
the lateral cartilage. Cartilage will
taper n and come to a point at about two-thirds
the way down the front plane. Again, this is just
a rough estimate. Notice how the bridge
of the nose is. Why does at the point where the nasal bone and
lateral cartilage meet? This is an important detail to keep in mind when
drawing the bridge. Now, we'll draw in the
greater ally cartilage will start with the center line that separates the two pieces
of the cartilage. The top edge of the cartilage will angle upward until it hits the corner of the
bridge and then curve downward to
connect to the side. And we'll do the same
for the other side. Again, we can use a guideline
to keep things even. The top edge of the
ally cartilage will look a bit like the top
edge of a heart shape. Next we'll draw in the
separation between the greatest ally cartilage
and the wings of the natural. The line were angle in
towards the center of the nose and then turn the corner to connect
to the bottom plate, making the angle change coincide with the guideline
just for convenience. But that's not a hard
rule or anything. Where you place this
line and how you draw it will affect how
big the winds appear. And that can vary a lot
with different knows types. I recommend you play around
with the placement of this line to see how it
affects the look of the nose. And lastly, we'll sketch in
the openings of the National. I'll start by drawing the
top edge of the nostril. Notice how this top edge is broken up into three
line segments. And they essentially mirror the edges of the bottom plane. So this segment roughly
matches this edge. This middle segment
roughly matches this edge. This segment roughly
matches this outer edge. So basically we're just
drawing a smaller version of the surrounding edges with a little variation so that
it looks more organic. With the bottom portion, we're just doing the same thing, except there's going
to be this notch that goes up into the nostril. And that notch is basically
to illustrate how the wings and Alar cartilage hooks up
as they attached to the face. And I'll redraw the bottom edge to make that even more clear. That notch and the
bottom is probably the most important detail
that you need to remember. One trick is to notice that
the opening looks similar to a bean shape or a
quotation mark. Okay, now we can do the
same for the other side. The bottom and center
portion of the nose, we'll have a slightly
pointed appearance. And that's it for
the front view. As you can see, just by adding a few simple rhythm lines
onto the simplified nose, we're able to quickly create
a pretty realistic knows. Okay, now let's draw
in three-quarter view. I'll go ahead and draw in these horizontal
guidelines and make sure that all the major
elements line up. Again, we'll start
with the separation between the nasal bone
and lateral cartilage. And we'll continue that line
down the side of the nose. Next we'll draw in
the front portion of the lateral cartilage. Then we'll sketch in the
greater Alar cartilage. The far side will be
slightly foreshortened. So we're only going to see a little bit of it
peeking through. The ball of the nose has
a slightly rounded form. So our curve the center line out slightly in
order to show that. Now we can draw
in the separation between the Alar
cartilage and natural. Lastly, we'll draw in the
openings of the nostril. Again, we're just
following the contour of the edges of
the bottom plane. And then adding a notch
at the bottom to show how the Alar cartilage and wings
curl up towards the face. And I'll redraw the bottom edge to make that even more clear. And I felt like this tip
is looking a little weird, so I'll just fix it real quick. Don't be afraid to
erase and adjust your drawing until it
looks right to you. This process of trying different things is actually how you develop your sense of proportion. They're much better. Alright, now let's
catch in the side view. From this angle, we won't be able to see much of
the front plane. And the line going down the side of the nose will look
more straight than kurt will only see a little bit of the front of the lateral cartilage
peeking through. Next are curved the
tip of the nose, the show, it's rounded form. And then we'll draw
in the top edge of the greater Alar cartilage. Next we'll separate the wings
from the Alar cartilage. And lastly, we'll sketch in
the openings of the nostril. Again, notice how the
bottom of the nose curl up and n. Okay, so that's how you draw
the anatomical rhythms. Go ahead and practice
these yourself, and I'll see you in
the next lesson.
8. Nose Planes Drawing: So far, learning the
simplified nose and anatomical rhythms has allowed us to draw a pretty
realistic nodes. But in order to
shade the nose well, we have to understand is planes. So let's see how we can
make some slight changes to this drawing in order to fully flush it
out with the planes. I'll reduce the opacity
of the current layer. And then draw on a separate
layer on top of that. If you're working with
traditional pencil and paper, you can simply lighten
your drawing with the eraser and then draw
over the top of that. Will start by redrawing
the glabella. That will curve the
bottom edge lightly to show that the bridge
is slightly rounded. The bridge of the nose
will be widest where the nasal bone meets
the lateral cartilage. And then it will
taper into a point. Next we'll add a small side plane to the
bridge of the nose. Really helps us show that the bridge has a
slight thickness to it and helps it to pop
forward from the face more. We can see this thickness
in the nasal bone and lateral cartilage in the
anatomical diagram as well. We can add a side plane to
the glabella region as well. Again, this helps to give it
more thickness and depth. Next we'll draw in
the tip of the nose. It will be slightly angular and interlocks with the tip of the bridge like cell. At the bottom. Instead
of coming to a point, it will have a flat edge
going across like cell. Then we'll draw in some
smaller points under this tip. This will help to
show how the nose begins to turn in
towards the face. Together these two
planes look a little like an hourglass shape
from the front view. And let's not forget
the separation between the two pieces of the
greater ally cartilage. Next, we'll change this edge
of the bottom plane from a smooth curve into three
short line segments. The first line will go down
slightly and then come across and then back down again. So this edge has a bit
of a stair-step pattern. Then the line will angle in towards the center and curl up. Basically, we're just taking these rhythm lines and turning
them into line segments. Now let's do the same
for the other side. Do your best to keep everything is symmetrical as possible. Next, we'll redraw
this separation between the tip of
the nose and wings. Notice how this
line contacts right where there's an angle
change in the lower edge. Now, we will show that
the wings actually has a front plane
with these lines. And then we'll show the
side plane of the wings, which will only be able to see a little bit of from
this front view. Do the same for the other side, show the front plane. And then the side plane. Now we can close out the tip
of the nose with this edge. This plane helps to
show how the tip is a rounded form and has
a side plane to it. And I'll just redraw
the nostrils so that it's more centered
within the bottom plane. Lastly, we'll draw in the
side plane of the bridge. We're just going to divide
up the side plane so that instead of being a smooth
curve towards the face, it has several definitive
angle changes. Now, I just want to
mention that this is just one way to design
the planes of the nose. There are many other
ways out there. And once you're comfortable
with this version, I would encourage you to study other versions that you
can find on the Internet. I recommend looking
up nose plane on either Google
or pinterest.com. You can even try designing your own version of the planes. This will help you to understand the structure of the
nose a lot better. Okay, Now let's
turn off the under drawing so we can see
these planes better. Now to show the form
of the nose better, we can draw a cross contour
line that goes along the tip. The line would angle up and then goes across the
front and the wings. And then it will climb
up the side of the tip. Now as it goes across the tip, it will curve slightly because the tip has
a rounded form. And then it would climb
down the other side, across the wings and
then down again. If you're having a hard time
drawing cross contour lines, just try to imagine there's an ant crawling and a straight
line across the form. The cross contour
line is basically just the trail that this N will leave behind as the cross, cross, cross contour exercise is a great way to deepen your
understanding of a form. Okay, so that's it
for the front view. Now let's draw in the
three-quarter view. Again, we'll lighten
the under drawing and re-establish the glabella with the bottom edge slightly curved. Now we'll redraw the nose bridge and add in a small side
plane to show its thickness. And we'll add some thickness
to the glabella as well. Next, our chisel out
the shape of the tip and slice off a tiny
portion of the bottom end. Remember the tip is
slightly rounded, so will occur the
center line out. And we can draw the center line along the bridge as well
to show that there's a slight angle change where the nasal bone meets
the lateral cartilage. Next we'll add in the center plane at the
bottom of the nose. From this angle, we can
really see how these planes show the nose curling
up into the face. Next we'll break up the edge of the bottom plane into segments. And now in the line goes across
and then back down again. Here the wings will curl
in towards the center. Then we'll draw in the
outline of the wings. And this line will separate the front plane of the
wings from the side plane. So here's the side plane. And then we turn the corner
into the front plane. Next we'll close out the tip of the nose and connect
it to the wings. And I'll just redraw the nostril and
re-center it slightly. And lastly, we'll
break up the side of the nose into smaller
plane changes. Again, if we were to draw a cross contour line
across this nose, it would go up the side
plane of the wings, then across the front plane, and then up the side of the tip. And then it would curve as it goes across the front plane. Let me just add a center line to the front view as well just
to keep things consistent. Okay, now let's draw
in the side view. We'll start with the glabella. The bridge of the nose
will angle out along the nasal bone and then angle in slightly along
the lateral cartilage. So from this view, we can
really see that there's a slight angle change where the nasal bone meets
the lateral cartilage. And here's the side plane to show the thickness
of the nose bridge. We can also see a thickness to the glabella
from here as well. Next we'll draw in
the tip of the nose. From here, we can only see a little bit of the front plane, but we can definitely see the tip curving
outward slightly. Now we can show how the nose
Crow in towards the face. Notice how there are three
distinct line segments to show that turn. Next we'll break up the edge of the bottom plane
into line segments. Establish the shape
of the wings, and separate the side plane
from the front plane. Notice how from this angle
we can see much more of the side planes of the wings as compared to the front view. Now close out the nose tip. The side plane of the
tip appears quite large. From this angle. Redraw the nostril and
chisel out the side planes. Now let's turn off the under drawing and see what we have. Again, the cross contour line
will travel up the side, across the wings and
then up the tip again. And we would only
see a little bit of it as a cross
the front plane. Okay, So that's it for
the planes of the nodes. Go ahead and try this
exercise for yourself, and I'll see you in
the next lesson.
9. Front View Nose (Tracing): Now that you understand the
structure of the nodes, we're going to see how to
apply that information to actual noses by tracing
over these photo reference. This will give you a chance
to see how to modify the rhythms and planes to
match different knows types. Okay, let's start
with this front view. To begin, I'll reduce the
opacity of the reference. And I'll go ahead and lock it so we don't accidentally
draw on it. Then I'll create a new
layer on top of it. Let's call this layer
simplified nose. And we'll draw on this layer
to create the tracing. If you're using traditional
pencil and paper, you could simply print out the reference and
trace on top of it. Okay, I'll begin by
establishing the glabella. Glabella usually
sits at the top of the nose bridge
between the eyebrows. But other than that, we don't really have a super obvious landmark that tells us where the
glabella should be. So to some extent we do
have to guess at it. But that's okay. We don't
have to be perfectly precise. The job, the glabella
is to act as a home base from which we can build the rest of the nodes. As long as we're in
the general ballpark, it should do his job. Next, I'll draw in the front
plane of the nose bridge. The front plane will
widened towards the tip and then turn the
corner to come to a point. Then I'll draw in
the center line that divides the bottom
plane into two parts. Next, I'll draw in the
edge of the bottom plane. His natural is
curling quite a bit. So I have to change the shape of this edge in order to
match the reference. Then we'll do the same
for the other side. Lastly, I'll draw
in the side plane. His nose is quite wide
towards the bottom, so the xy plane has to angle out quite a bit in order to
connect to the bottom plane. Okay, So that's it for
the simplified nose. Let's turn off the reference and see what that looks like. So as you can see with
just a few simple line, we're able to capture the basic
structure of these nodes. If I was drawing
this nose myself, this is what I would visualize
on top of the reference. And then I would draw
this on my drawing paper. And it will give me a
very good scaffolding on which to build the
rest of the details. Now we have to do is add in the rhythm lines to make this a little
bit more realistic. I'll start by drawing in the connection between the nasal bone and
lateral cartilage. Again, we'll have to
guess at where this is because it's not super
obvious on his nose. Next we'll draw in the
lateral cartilage. This one is a little
bit more obvious. In fact, on his nose
we can actually see the area where the lateral
cartilage connects with the tip of the nose and the separation
between the left and right Ally cartilage at the tip of the nose is
pretty obvious here as well. So we'll add in that
line to depict it. Then we'll draw in the
heart-shaped rhythm lines that connect the tip of the nose with the
wings of the nostrils. Then I'll draw in the
opening of the National. Lastly, I'll draw in
the separation between the wings of the natural
and the tip of the nose. Here has nationals are
more of a bell-shaped. So I'm going to deviate from
the standard model and make this separation angle out slightly in order to
match his nose type. Alright, so that's
our rhythm line. Now let's turn off the reference to see what that looks like. Okay, it looks pretty good. Okay, so now that we have all
this information filled in, we can lighten these
and draw in the plains. So I'll go ahead and
lower the opacity for this layer and then
lock it as well. Then I'll put a new layer on top and let's call
this one nose plane. Okay, again, I'll start by
re-establishing the glabella. Next, I'll draw in the nasal
bone and lateral cartilage. Then we'll add some thickness to the lateral cartilage
and nasal bone. Then we'll add some thickness
to the glabella as well. Then our design, the shape of the front plane
of the nose tip. Then we'll draw in
the bottom plane as they turn and
connect to the face. Now, I'll change this edge of the bottom plane into
smaller line segments. And I'll make sure to show how the national curls up as
the connects to the face. And we'll just redraw in the
opening of the National. Next, I'll put in the side
plane of the tip of the nose. And then we'll close out the shape of the wings
of the nostrils. And then lastly, I'll draw in the side planes of the bridge. The side plane is pretty
clear on his nose. So it's pretty easy to know
how we should design them. And even though the left side
of the nose is in shadow, and we can't see it as clearly. We can simply copy the
information that we establish on the right
side over to the left. And it also helps to make the
nose look more symmetrical, which is always a good thing. Also with the xy plane
is I'm deviating from the standard model that I'm not putting in the
vertical plane breaks. I could, but I didn't feel
like it was necessary here because the side of his
bridge was pretty smooth. So again, that's
something that's discretionary and you can definitely adopt
the standard model to fit the person
that you're drawing. Okay, so that's the nose point. Let's turn off the reference and see what that looks like. I just want to point
out that this is not the only way to break down
the nose into planes. There are many, many
different ways to do it. And in fact, if I were
to do this nose again, I would probably come up with something slightly
different each time. The shape of the planes
might be slightly different. There might be more
or less of them, but the overall structure of the nose will still be the same. So I encourage you to copy and study from the examples
in this course. But feel free to experiment with your own designs as well. Once you get good at
these tracing exercises, you'll find that you can
look at a nose and break it down into its structural
components in your mind. Which of course will help you tremendously when you're
drawing and shading it. So go ahead and give
this exercise a try, and I'll see you in
the next lesson.
10. Front View Nose (Lay In): So now you understand how to break down the
structure of the nose. We're ready to
start drawing them. We'll start with
this front view. I'll start by sketching
in the simplified nose. Since we already done
a tracing analysis of us knows we can simply use
that for our reference. If I was drawing this normally, I would simply visualize
the simplified nose in my mind rather than drawing
it onto the reference. And that's something
you'll be able to do as well with
more practice. But until then you can always do a tracing of your
reference first in order to become familiar with the details before you
start your drawing. And as you can see, the process I'm going through is exactly the same as what we did
in the tracing exercise. The only difference is that
now I'm taking more care to ensure that the proportions and placement are as
accurate as possible. Because the simple
structure will serve as the frame for
the rest of our drawing. And I use these
horizontal guidelines to make sure that both
sides lines up properly. Next, we'll sketch in
the side planes of the bridge and do the
same for the other side. Next, we'll draw in
the rhythm lines to fill out more of the details. Again, this process is exactly the same as
the tracing exercise. In fact, we can use the finished tracings from
that lesson as our reference. Draw in the heart-shaped
rhythm lines that connects the
ball of the nose with the nostrils and put in the openings of the nostril. Once that's finished, we
can lighten everything and draw a more refined
laying on top of it. If you're working digitally, this simply means lowering
the opacity of your layers. And if you're working
traditionally, you can use a kneaded eraser to gently erase the lines
and make them lighter. Then I'll add in a
new layer on top. Let's call this one lane. Now I can look back and forth at the reference and carefully
sketch in the details. Because I have this light
under drawing to guide me. I don't have to worry as
much about the proportions and can focus more on
capturing these small details. Here, we can sketch
in a little bit of the eye area just to give the
drawing in some contexts. As I'm doing this, I'm
using the plane of motion that we established
in the tracing exercise. Although I'm not going to just
copy over the planes like we did with the simplified
nose and rhythm lines. Instead, I'm using the planes where I think it's appropriate. While at the same time mixing in details that I see
in the reference. If we do this nose
using just the planes, it can end up looking
really stiff and robotic. So we want to use some planes
to give the drug structure, but also incorporate
the organic details that we see in the
reference as well. Now, we can fill in the details
around the nose bridge. The side of his bridge is
pretty defined and there's a small plane with a
noticeable value change. So I'll sketch that in here. The left side of the cast
shadow, a soft edge. So I'm using these
parallel hatching lines to simulate that. The cache shadow
plays a major part in giving the drawing dimension. So I usually like to
exaggerate a little by making it slightly bigger
than shown in the reference. Next, I'll draw in the
separation between the light side of the
nose and the dark side. This can be a bit tricky
because unlike the cast shadow, the form shadow is
not as obvious, but just do your best to
design the shadow shapes. Here's where knowing
the nose plane can be really helpful
because the separation between the light
and shadow usually coincide with plain
changes in the notes. Also, notice how I'm using light parallel hatching lines
to create these soft edges. Because the nose
is a rounded form, the separation between light and shadow will be very
soft and fuzzy. I'll use an eraser to
lighten some of the lines on the lit side so that it doesn't overpower the shading
when we put it in. Okay, so that's it for the land. Notice how by simply separating the light and shadow
using soft edges, the node is already looking
very three-dimensional. You want your land to
already look convincing and realistic before you move
on to the shading phase, the lanes, the foundation. And if that foundation
is not solid, the shading is not
going to go very well. So take some time to
examine your lane and see if there's any proportional
errors that needs fixing, then we can proceed
to the shading.
11. Front View Nose (Shading): To start, I'll create
a new layer on top of the lane and call it base tone. I like to work on separate
layers because that allows me to make changes
to the drawing more easily. But you can just draw on a
single layer if you want to. And of course, if you're
working traditionally, then you don't have
to worry about all these layers business. Next, I'll lower the opacity of my brush and make the
brush size a lot bigger. And we're just going to fill in the shadow side of the drawing with an even light base tone. As you can see, by making
the brush size bigger, we're able to fill in this
area much more quickly. If you're working traditionally, you just use the side of
your pencil to shade more broadly and use less pressure
to create a lighter tone. If you're having trouble
maintaining a light pressure, you can just switch
to a harder pencil, like a to H, which will help
keep your marks very light. Once the base tone is set, we can add in the hatching. I'll create a new layer
and call it hatching. Then I'll return
the brush opacity and size back to normal. I'll start by putting
in dark hatch lines in the opening of the nostrils
just to fill them in. Next, I'll fill in the cache
shadow under the nose. I'm going in this diagonal
direction because I feel like that flows with the shape of the
shadow of the bus. Well, you can play around with
other directions as well. The most important
thing is to keep the spacing between
the lines consistent. Next, we'll fill in the
plane of the nozzle. Notice how I'm changing the
direction of the lines. As I go around the nostril, I find that this has a nice
flow to it and it makes the hatch lines
look like they're curling into the nostril. For this middle plane, I'll have the lines going
horizontally across. So the basic idea here
is that we're using these hash lines to not only
fill in the shadow areas, but also to distinguish
between the planes, the nose, and describe the form. For these upper plains, the lines will go across the wings and then climb up the sides. Then across the ball, the nose. You might recall that
this is exactly like the cross contour
line that we drew across the nodes in
the planes lesson. These hash lines we're
drawing are basically just dialyze cross
contour lines. That helps describe the form. For the bridge of
the nose are have these lines climb up
the size of the bridge. And then they'll slope down
towards the face like cell. Knowing how to design
these hash lines can be really hard because there
are so many possibilities. And as you can see, I will
test out different designs. And if I don't like it, I'll just erase
it and try again. As you do this more and more, you develop a sense for
what will look good. You can also study the works of other artists whose
crosshatching style you like. I like to go on pinterest.com
and collect a bunch of cross hatching
drawings that I like and then copy them
as study exercises. Then I'll try to incorporate that style into my own drawing. Okay, now that we've filled
in the main shadow areas, we can move on into
the half tone. So I'll start by
continuing the hash lines that were climbing up
the side of the bridge. And have them curl over and across the front
plane of the bridge. This will help to convey the
roundness of the bridge. We want to keep the hatch lines
in this area more subtle. So you'll want to keep a light
pressure with your pencil. If you're having
trouble doing that, you can always reduce the
opacity of your brush. If you're working traditionally, you can switch to a harder
lead pencil or like a to H. Then I'll go back over portions of these
lines to make them darker. The idea is to accentuate the core shadow that separates
the light and the dark. Next I'll add some
very light hatch lines along the bright
side of the nose. Again, since this side
is hit by the light, we want to keep our hash
lines extremely subtle. But we do want to use the
hash lines to convey that this portion of the nose is
protruding out from the face. Okay. So that should do it for
this round of hatching. Next, I'll put in
the highlights. I'll create a new layer
and call it highlight. I'll keep the brush opacity at around 50 per cent because I want the highlights
to be more subtle. And I'll switch the
brush color to white. If you're working traditionally, you can simply switch to a white charcoal pencil or
some other white pencil. Let's start with the
obvious highlight at the tip of the nose. And there's a more
subtle highlight on the left side as well. Since his greater ally cartilage is separated into two parts, the peak on each
side is being hit by the light more,
creating these highlights. And because the light is
coming from the right, the right side of the nose
has a more intense highlight. As you can see, as soon as
we put in these highlights, the tip of the nose immediately
looks more rounded. Next there's a another
highlight on the side of the wings where a second light source
is hitting the face. I'll add a much more
subtle highlight on this side as well. Now, add some highlight to
the right side of the bridge. Notice how even with
the highlights, I'm still using cross contouring hatch lines to help describe
the form of the nose. The hash lines are following the same patterns
as the shadow side, except we're just using
a white pencil instead. I'm also going to go over
these lines a second time to darken the portion of the bridge that's
protruding out the most. And I'll also add just a
few light lines going in the vertical direction
just to give the corner of the bridge a
little bit more definition. Next, we'll put in some
highlights around the nose. This area is getting
a lot of light, so it's quite bright. Here. As I'm designing
these hash lines, I tried to keep some
principles in mind. For one, I tried to vary up
the length of the lines. Don't make all the
lines the same length because that
will look boring. But don't just randomly vary up the length because that
will look chaotic. Instead, have a pattern to
how the length changes. E.g. if I start out
with a long line, then I'll make the next
line slightly shorter so that all the lines
gradually tapers to a point. And if I start out
with a short line, I'll make the next one
slightly longer and so forth. That way your design
will seem intentional. Also, I tried to vary
up the direction of the lines and the
shape that they form. E.g. if I have a triangular
patch of horizontal lines, then next to it, I'll try to put a rectangular patch of diagonal
lines to mix things up. Think of these patches
of lines as puzzle piece and you're trying to fit them together in a way that
looks interesting. Okay, so that's pretty much all the elements
of this drawing. The nose looks pretty realistic. And honestly we can just start right here
if we wanted to. Now, if we wanted to bring it to a higher level of finish, it's just a matter of
repeating the process we went through and
refining the details. So I'll go back to
the base tone layer, switch the brush color back to blue and increase
the brush size. And our work on the
halftone area to create a smoother transition between
the light and the shadow. I'll also add some value to the shadow side to
increase the contrast. This will help to make the
light side appear more brilliant and give the drawing
a more dramatic effect. As you can see, the
more tonal value I add in the subtler the
hash lines become. That's a balanced that
you can play with the, you want your drawing to be
more tonal and realistic. In which case you would
make the tones darker? Or do you want the drawing to
be more linear and stylize? In which case you
would keep the tone slider so that the hatch
lines could shine through. Also, let's work on the halftone area in
the light side as well. Again, the goal here
is to just smooth out the transition
between light and dark. The hatch lines are
helping to describe the forearm and add
energy to the drawing. And the tonal shading is
helping to smooth out the transitions and make
the drawing more realistic. There's a little bit of
subtle Halftone that goes down the center
of the tip to create the separation
between the ally cartilages. So we'll put that in as well. Be careful not to
overdo this part. Okay, Next I'll go back to the hatching layers and add
in more subtle hatched lines. I'll add some
curving hatch lines along the edge of the
shadow at the tip. This helps to better define the core shadow and also
stylize the drawing a bit. Next are also emphasized
the core shadow along the bottom plane of the wings
with the short hatch lines. You'll notice that emphasizing core shadows will be
a repeating theme. And my drawing, I
find that this is a really easy way to make a drawing more
realistic and dynamic. Next, I'm going to switch
to a soft edge eraser. Our lower the opacity way down. And I'll make the
size really big. If you're working traditionally, you can just use a
kneaded eraser for this. And I'm going to just go
around the drawing and lighten the edges so that everything
gradually fades out. This helps to create
a vignette effect that makes the drawing
look more attractive. If you're working digitally
on multiple layers, you might have to click
back and forth between the layers to make sure that you erase across all of them, which can be a bit of a hassle. So that is one benefit
to just working on a single layer or a
drawing traditionally. But overall, I still find that the benefit of working on multiple layers
outweighs the con. We can also use the
eraser to lightly knocked back any areas that we
feel is too intense. So I'll use it on the
highlights in the bridge of the nose to make them more
subtle and gradually fade out. Lastly, I'll just add
some finishing touches to the highlight areas around
the edge of the nose. I'll make the area closest to the nose slightly brighter in order to emphasize
how the tongue gradually fades out as
we get further away. So that's it for our
front view knows. To recap. We started by
lightly sketching in the simplified nose
and rhythm lines, which serve as the foundation
for a more detailed land. Then we add in a layer of base tone to separate
the light and shadow. After that, we add
in the hash lines to further describe the form
and stylize the drawing. Lastly, we add in the highlights to describe the light
side of the nose. Okay, so go ahead and try
this exercise for yourself, and I'll see you in
the next lesson.
12. Side View Nose (Tracing): Okay, so here we
have a side view. Let's start by establishing the basic structure of the nose. So the first thing I wanna
do is notice that there is a slight angle going between
the left and right eyebrow. The left eyebrow
slightly higher, and it slopes downward
slightly to the right. The reason that is is because
we're looking slightly up at this nose and so that's causing it to appear
in perspective. The line going across the brow is converging downward
towards our eye level. So as I established
the glabella, I'm going to make sure
that the top edge of glabella follows that same angle and so does the bottom edge. Now, I'll close the
side of the glabella. Next we'll draw in the
front plane of the nose. Now, even though this nose
is mostly in the side view, It's not a perfect side view. So we can still see
a little bit of the front plane of the
bridge peeking through. The front plane will be at its widest point,
right about there. And then it will turn the
corner and come to a point. Next, I'll draw in the division, the center line that
separates the left and right side of the bottom plane. Then we'll draw in the edge that separates the bottom plane
from the rest of the nodes. And then just close
out that bottom edge. You're all in the far
side of the nose as well. Okay? And then lastly, I'll just
draw in the xy plane. Okay? So that's it for
the simplified nodes. If we were to turn off the reference dose,
what it will look like. So as you can see with
just a few simple lines, were able to get a pretty
realistic read of the nose. And if I was drawing this nose, I, this is what I would visualize
on top of my reference. And it's what I would
draw on my drawing paper. And it would give me a
very good foundation on which to build all the
rest of the details. Okay, so now the next
step is to add in the anatomical rhythms to make this nose a little
bit more realistic. I'll start with
connection between the nasal bone and
lateral cartilage. Now, there's no obvious
connection on her nose. It's very seamless. So we're just going to take
a guess and that's okay. We don't need to be
perfectly exactly as long as we get it in the rough ballpark. And actually, the line that's going across the bridge is
a little bit to horizontal. I'm going to erase it
and redraw it and make sure that it follows the same angle as the top and bottom
edge of the glabella. So any lines that goes across the face or the nose has
to follow that same angle. Okay, so now I'll draw in
the lateral cartilage, the front portion of
the lateral cartilage. Alright, and now the line that separates the left
and right Ally cartilage. And next we'll put in the
rhythm lines that goes from the ally cartilage to the
wings of the nostrils. Now we'll separate out the winds from the
rest of the nose. Like so. And then lastly, I'll just draw in the
opening of the nostril. Okay, so now let's turn off the reference and see
what that looks like. Cool, it looks pretty good. Okay, So now the next step
is we're going to lighten these lines and draw the planes
of the nose on top of it. I'll start by establishing
the glabella again. Except this time I'll add a little bit of thickness to it. Then we'll do the same thing for the lateral cartilage
and nasal bone. And some thickness to there. Now for the tip of the nose. Now I'll draw in the bottom planes, like so. Okay, and now let's
break up the edge of this bottom plane into
smaller line segments. Draw in the side plane
of the tip of the nose. Now we'll close out the
wings of the nostrils. And then I'll put in this
side plane to the wings. Notice how I'm putting
this plane break right, where there's a value
change in the nostrils. So this plane of the wings is lighter and this
plane is darker. And right where
that value change happen is where I
put the plane break. And that's a good
general rule of thumb. Whenever there is
a value change, that's usually an indication
of a plane change. Because as the form turns, whichever side is
turning away from the light is going to
get darker, right? We'll draw in the nostril
organ, opening up nausea. And lastly, we'll just
put in the side planes. Okay, so now let's turn off the other layers and see
what the planes look like. Okay, go ahead and
try it for yourself, and I'll see you in
the next lesson.
13. Side View Nose (Lay In): Alright, now let's
draw the side view. Once again, I'll start by sketching in the
simplified nose. Feel free to use the tracing
exercise as a reference. Or if you'd like to
challenge yourself, you can try visualizing
it in your mind. In this case, the nose is
seen slightly in perspective, so we have to pay
close attention to the angles of the lines
going across the nodes. E.g. the top edge of the glabella is sloping
downward towards the right. That same angle has to be maintained for the
rest of the nodes, including the lower edge of the glabella and the bottom
edge of the nostrils. I actually made a mistake
in the tracing by making the right corner of the
chip higher than the left. Now the angle at the tip of the nose is at odds
with the other angles, causing the perspective
to look incorrect. But I'll fix that mistake
in the drawing itself. Okay, now we can add in
the anatomical rhythms. There's the separation between the nasal bone and
lateral cartilage. Adding the center line that separates the greater
Alar cartilage. Draw in the heart-shaped
rhythm lines. Separate the winds from the nose and draw in the
opening of the natural. Next, we'll lighten
everything and begin a more detailed land. I'm going to exaggerate the outline of the
bridge by giving it a slight bump at the connection between the nasal bone
and lateral cartilage. And then I'll add another
bump at the tip of the nose. I find that this makes for a more interesting silhouette than just a smooth nose bridge. As I'm drawing, I'm looking
for places to incorporate the plane information to give
the drawing some structure. But with female noses, we do have to be careful
not to overdo it with the planes because it can make the nose look
more masculine. In general, female features
will be more soft and subtle, and males will be more angular. So we have to keep that in
mind as we make our designs. Notice how I'm keeping the
soft edge light and diffuse by using a bunch of tightly
grouped parallel hatch lines. While the hard edges
are darker and crisper. This is really important to helping the drawing read
three-dimensionally. I'll go ahead and
draw a portion of the mouth to give the
nose some contexts. And we definitely don't want to forget about the cast shadow. I'll draw in a little bit of the eye area to close out
at the top of the drawing. Once again, before moving
on to the shading, we want to look over the drawing to see if there's anything
that needs fixing. I feel like the mouth
is a bit short, so our extended out a bit.
14. Side View Nose (Shading): All right, To begin the shading, I'm going to increase my brush size and
reduce the opacity. Then I'll fill in
the shadow area with an even layer of base tone. Do your best to
keep this layer of tone as smooth as possible. If it's too scratchy
and chaotic, it can distract
from the hatching that we're going
to layer on top. While we're at it are also
darken the opening of the nostrils and other crevices where less light would
be able to get in. But I'll be sure to let these darker areas transitions smoothly into the
lighter shadows. Okay, now we're ready
to add the hatch lines. I'll start with the cast shadow. I'll have the hatch lines
radiate out from under the nodes and follow the
curve of the cast shadow. For the wings, the
hash lines will wrap around this plane like so. For the bottom planes, the lines will wrap
across the form. So a general rule is whenever
there's a plane change, I'll change the direction
of the hash lines. This helps to keep the
different planes separate from each other and give the
drawing more dimension. Next, we'll add hatch lines
to the half tone areas. Make sure to keep your
strokes here lighter to differentiate it
from the shadow areas. For this patch here, I'll have the lines going up to match the angle of
the nose bridge. For the glabella, I'll
have the lines climb up the side and then across the front plane to show the rounded
form of this area. There's lots of
different ways to design these hatch lines. As one of the reason why
I like hatching so much. You can have a lot of fun experimenting with
different looks. Then we'll fill in
the eyebrow a bit. For the lips are basically
use vertical hash lines, but with a little bit of a curve to show the roundness
of the lips. I'm essentially replicating
the subtle crack lines that naturally
appear on the lips. Sometimes the best
cost contour lines are the ones that already
appear on your subject. We just have to incorporate
them into our drawing. The corner of the
lips are darker, so I'll also add some lines radiating out from the corner
to increase the value. Also go back over some areas
in the nose to darken them. I'm not making any
new lines here, just darkening the ones
that are already there. This helps to give
the hash lines some variation in values, which make the drawing
more interesting. I'll add some curving
hatch lines around the tip to emphasize
it's rounded form. And also to accentuate
the core shadow there. Okay, now let's add
in the highlights. I'll switch the brush
color to white, and I'll start with the brightest highlight
at the tip of the nose. Adding the highlights is
always my favorite part is we really get to see
the drawing come to life. The bridge will again use curving line to show
it's rounded form. Then I'll darken the corner of the bridge to make it
stand out from the rest. I'll also add a few
lines going along the bridge to accentuate
the corner even more. Let's brighten up the edges
of these highlights a bit. Next, I'll add some tone
to the side of the bridge, but we'll keep them
really light and subtle. Now, let's add some highlights to the area around the lips. I'll just have the lines follow the curve of the
upper lip like so. And I'll add a little bit of
accent to the philtrum area. Lastly, there's a
thin highlight at the edge of the
glabella as well. Okay, now that all the
pieces are in place, we can get a good idea of
how the drawings look and what adjustments we need to make to bring it to
a higher finish. To start, I'll add
a few hash lines to the halftone area to make the transition between
light and shadow smoother. Next, I'll add some
loose hatch lines to the areas around
the nose and lips. The main purpose of
these lines is to allow the drawing to
gradually fade out. Later. I can use an
eraser to lighten these lines and make them
fade even more smoothly. Then I'll darken the
eyebrow area a bit. Again. I'm still thinking about letting the drawing gradually fade out. Now, I'll make my brush
size really big and reduce the opacity and
refine the base tone. I'll go along the
edge of the shadow to smooth out the transition
between light and dark. And I'll also further darken the shadow areas of
the nose and lips. Lastly, I'll switch to a soft edge eraser and
make the size really big. And I'll go around the edge of the drawing to create
a gradual fade out. While I'm at it. I'll
also knock back some of the highlight areas to
make them more subtle. Okay, We're pretty much done. But looking at the nose, I noticed that the tip
is a little bit flat. So I'm going to
extend it out a bit. It's never too late
to make a correction. Now since the tip
is extended out, I'll go ahead and extend
this highlight area as well. Alright, that's it
for the drawing. Go ahead and try it
out for yourself.
15. 3/4 View Nose (Tracing): Okay, So here's a three-quarter
view of the notes. Let's start by tracing
in the simplified nose. I'll start with the glabella. I'll put the top edge right around where the eyebrows are. Again, this is just
a rough estimate. Next we'll draw in the
bridge of the nose. The widest point will be right near the bottom of
this highlight. And then I'll angle in
towards the center. I'll put it in the center line that divides the bottom plane. Notice how this line angles
in towards the face. Next, we'll draw the edge
of the bottom plane. That's a pretty noticeable
stair-stepping that happens from the tip of the nose to the wings are lateral. So I'll try to capture that even in this simplified
and tracing. And we'll do the same
for the other side. Obviously, this side is
going to look quite a bit different because
of the foreshortening. Then we'll connect
them to the center. And lastly, we just have to draw in the side of the nodes. Okay, that's a simplified nose. Now we can add on the
anatomical rhythms. I'll start by roughly locating the connection between the nasal bone and
lateral cartilage. And we'll continue that line
down the side of the nose. Now, draw in the
lateral cartilage. And then put in the
center line that divides the greater
Alar cartilage. Make sure to have
this line curve out slightly to show the
roundness of the tip. And then we can
continue this line into the heart-shaped rhythm that contacts the wings of the nose. We'll do the same
for the other side. But again, this side is
quite a bit foreshortened, so we're only going to
see a tiny bit of it. Then I'll trace in the
opening of the National. The opening on the far side is going to be quite a bit smaller. Now, the most important thing to notice about the
three-quarter view is the fact that
the tip of the nose overlaps the far side natural. And this is actually one of the most common mistake that
beginners make when drawing the nose from this
angle is that they fail to capture the
overlapping lines. Show that the tip of the nose is in front of the far side wing. So I'm gonna go
ahead and draw in the edge of the
tip of that nose. And you can see how that
line overlaps the lines of the opening on the last
row as well as the wing. And that's what's
going to convey to the viewer that the
tip of the nose is in front and the far side
wing is in the back. Alright, so next we can lighten everything and draw
the planes on top of it. I'll start by retracing
the glabella. Then we'll do the
bridge of the nose. Next, I'll add in some
thickness to the bridge. And we'll add thickness
to the glabella as well. Okay, now let's design the
shape of the tip of the nose. So I'll begin with the
bottom edge of the tip. Since here is easiest to see
where the plane break is. There's light up on top and the shadow in the
bottom right where the light meets the shadow is a good indication
of a plane change. So I'm just going to put
a line across there. And then we'll just
follow the edge of the shadow to find the
other side of the shape. Once it gets into the lighter, it gets a little
bit more subtle. But I'm seeing a
sagittal plane change going like this
towards the bridge. Okay, Next we can draw it in the bottom planes of the nose. Be sure to have these planes incrementally curl
in towards the face. Then I'll break up the other
edge of this bottom plane. The tip of his nose
is protruding out quite a bit compared
to the wings. There's going to be quite
as steep angle going from the tip towards the
beginning of the wings. And then add the wings, the line is going to go across and then down again
towards the face. And from there it's going to
curl in towards the center. Now let's do the far side wing. Here. I'm mostly just tracing the outline
of the reference, but I'm breaking
that curve up into smaller line segment to give
it more of a geometric look. Next, we'll draw in the
outline of the wings. The separation between
the wings and the tip on his nose is slightly different from the
standard model, where it goes down first
and then angles inward. So that's an interesting
characteristic that I do want to capture because it's what make his nose a little
bit more unique. And we can see
this little bit of a shadow towards the
edge of the wings, which as you know, usually
indicate a plane change. So I'll put in a little
plain break right there. Now the side of the bulb is nows is sloping down
pretty gradually. So I'm actually going to
put in two separate plane breaks to create a smoother
transition as it slopes down, rather than just having one big plane going straight
down towards the nostril. And I'll just trace in the openings of the
National Real quick. Lastly, we're going to
draw in the side planes. Here. I'm actually going to extend the planes pass the
simplified tracing. The reference, you can
really see where the nose begin to protrude
out from the face. And that's where I'm going
to put the plane break. And since the side plane
of his nose is pretty big, I can put in the
vertical plane break to detail it further. Okay, So now let's turn off the reference and see
what that looks like. Alright, so that's
the plane tracing. Go ahead and try this
exercise for yourself.
16. 3/4 View Nose (Lay In): Okay, so now let's
draw those nodes. I'll start by drawing
in the simplified nose. Since the top edge
of his glabella is putting in line
with the eyebrow. I'll go ahead and establish a straight line for the
eyebrow and glabella. And then from there we
can draw in the glabella. And next we can draw in
the bridge of the nose. Next we can draw in the plane. One of the advantage
of starting out with the simplified
nose is that we can really focus on the proportion and makes sure that
everything is correct. Because we don't have a lot of details in this initial drawing, we can see proportional error
a little bit more easily. So I noticed that the left side of the nose
is a little bit too wide. And I'll go ahead
and correct that. Okay, now we can draw
in the xy-plane. Alright, so now let's put
it into rhythm lines. There's the division between the nasal bone and
lateral cartilage. Now I'm drawing the
lateral cartilage itself. Here's the center line going
down the middle of the tip. Will extend that line into
the heart-shaped rhythm. Next, I'll draw in the
opening of the natural. For the far side. Now shrill, I'll be sure
to draw in this edge of the tip of the nose in order to show that overlapping lines. And then against
that edge we can draw the opening of
the Far Side natural. Lastly, I'll draw
in the separation between the tip and the
wings of the natural. Alright, so now let's
lighten everything and draw the laying
on top of it. So usually with the
three-quarter view, I like to start with the
silhouette of the nose. I like to exaggerate
the silhouette. So I'll add a little bump at the bridge and I'll have
the ball protrude out more. Notice how I'm drawing mostly with straight
line segments, with just a few curves to
round out the corners. In real life, the nose
contains a lot of curve, but rather than copying
those curves exactly, simplifying them
into line segments. This helps give your drawing more structure and
it forces you to think more about how you want to design your lines and shapes. Beginners tend to over rely on copying the curves
in the reference. They think that if
they could just copy the reference precisely enough, the drawing will look good. And sometimes that works out, but most of the time
it just result in uninteresting drawings
that lacks structure. So I want to encourage
you to start drawing more with straight
and less curves. There's one concept was a huge help to me when
I first applied it. Once you become
more experienced, you can adjust these straight to curve ratio to suit your tastes. But in the beginning is good to practice using more streets. Alright, next, I'll
establish the edge of the shadow that runs
along the bottom plane. And then I'll put it into
this little line break here to establish the middle
of the bottom plane. Then let's draw in the
opening of the National. Alright, so now let's draw in
the wings of the nostrils. Okay, now let's draw in
the bridge of the nose. Here I'm going to rely on
the plane information quite a bit to inject some
structure into this area. Normally the bridge
is quite hard to draw because everything
is so subtle. But because we know
the plane information, we can take some liberty
and add in details that may not be all that
clear in the reference. Make sure to keep
your marks here really light, because again, this area is very solid
on the reference, so we don't want to overpower
with a lot of hard edges. And I'll sketch in
the side plane. Again. I'll try to keep
this area really subtle. I'll keep my lines really light and my marks really
soft and diffused. Next we'll sketch
in the cast shadow, rather than trying to
match the curve of that cache shadow exactly as
it appears in the reference. I'm going to simplify it into a few straight line segments. And I'll also add in the philtrum area under
the nose as well. This cast shadow is actually a great opportunity to use
it as a cross contour line. So as the shadow go into
the divid of the philtrum, I'm going to curve the
shadow in order to show that changing
surface of the face. And once we get past the
surface of the philtrum, the shadow will curve
back the other way. Next, I'll draw in the eyebrow to give the
drawing some contexts. And looking at the
drawing, I feel like the tip of the nose and the far side wing needs
to be extended out a bit. So I'll go ahead and
make that correction. I think that philtrum
and cast shadow needs to be extended
downward as well. Again, if there's any correction that needs to be made now, the best time to do it. So don't be shy. Then I'll just add
a little bit of shadow mapping to the
wings and tip of the nose. Okay, and that's
it for the land.
17. 3/4 View Nose (Shading): Now before I begin
the shading process, I'm going to take the
eraser and lightly knocked back the lit area around
the bridge and tip. Since this is where
the light is hitting, we don't want a bunch
of dark lines in this area competing
with the highlights. Next, I'll increase my
brush size and lower the opacity and add an even layer base tone
in the shadow areas. I also darken the occlusion
shadows in the opening of the National and right
under the wings. Since less light is able to
get into these crevices, they're going to be darker
than the rest of the shadows. Alright, next we can
apply the hatch lines. I'll switch my brush back to 100% opacity and lower the brush size to whatever
I was drawing with. For the cast shadow, I'll be sure to have
the hatchling curve when it gets to the
divid of the philtrum. That way we can tell
the viewer that this area is different
from the surrounding. The size of your brush
or pencil can be really important when creating
these hash lines. So if you think that your
hatch line is looking off, try adjusting the size
to see if it helps. I find that if my brush
size is too small, the hatch lines will be too thin and I end up having
to make a lot of them to fill in an area
which gives it a different look than if
my brush size was bigger, creating thicker hatch lines. For the nose. I'm still sticking to the rule of whenever there's
a plane change, there's going to be a change in direction of the hatch lines. And I'll add some quick hatching
to the eye area as well. Next we can add
the hatch lines to the subtler halftone areas. Let's add some light hash
lines to the wings to create a smoother transition
between light and shadow. For this, I'll lower my
brush opacity to around 50%, just so I can keep
my marks later. Of course you don't
have to do this. You could just keep your
pressure really light, but lowering the opacity
can make this a lot easier. Alright, Next I'll
have the hash line climb up the side of the bridge. Then I'll have them curve
over the front plane of the bridge just a little bit to show that that
corner is rounded. Now, on the other end, I'll have the line slope
down the side of the nose. This part can be
pretty tricky and requires quite a
bit of dexterity. So take your time with it. One of the reasons why having a larger brush
size can help when hatching is that you
don't have to make as many lines to
fill up an area. Having to make less
lines mean that there's less opportunities for
you to make a mistake. Alright, so now let's add in the highlights and see
what that looks like. Alright, I'll put
some highlight on the front plane of the bridge. I'll keep my brush opacity at around 50 per cent because I want the highlight
to be more subtle. And I'll switch the
brush color to white. I want there to be
a smooth transition between the dark hatch
lines and the highlights. And right now I
feel like they're a little bit too close together. So I'm actually going to take
my eraser and lightly erase the edge of the
dark hatch lines a little bit to make more
rooms for the highlight. For the tip of the nose,
I will try to design the highlight into an
interesting shape. And I'll add some highlights around the cast shadow as well. Again, here we can
have a little fun and add some flourishes
to the lines. Next, let's add some highlight to this portion of the face. Since we're getting close
to the edge of the drawing, I'm going to keep these
marks light so we can begin to have
everything fade out. Next, I'll go back into the hatch layer and reinforce
some of these lines. And my goal is one to accentuate the core shadow and make it
a little bit more prominent. And to, to add some
variation to the hash lines. We don't want all
our hash lines to be the same value because
that will look boring. So by making some areas
darker than others, it creates more interests
and our drawing. And I'll further darken the cast shadow area that's
closest to the nose. Next, let's darken the
nostrils or more because we definitely want this area to be the darkest
in the drawing. Okay, now let's go into the
halftone area and again, just increase the
value of some of these hash lines to
create some variation. Of course, you don't
wanna do this randomly. Look at the reference
and see what areas needs to be darker. So the two main
areas I'm seeing is the patch of value right above the rhinoceros and the area at the side of the nose
and near the eye socket. When I darken an
area of hatch lines, I tried to avoid cross hatching
over the existing lines. In other words, I have
the new lines going in the general same
direction as the old lines. This helps to preserve the flow and energy
of the hash lines. When you cross hatch over
an area too many times, it can flatten out
that area and you lose the cross contouring
benefits of your hatching. Crosshatching. Is it wrong? And I still use that a times
even in this very drawing, but I tried to use it sparingly. Next, I'll switch to a large eraser and
decrease the opacity. And we'll just
lighten the edge of the drawing to make everything
gradually fade out. Now let's do the same to
some of the highlight areas. Lastly, let's go back
to the base tone layer, switch our brush
color back to blue, reduce the brush opacity, and add in some subtle
half tone to create a smoother transition
between light and shadow. This should help to
smooth everything out and make the drawing up here a
little bit more realistic. It can be pretty easy to
overdo the half tone. So take it slow. Put a little bit of tone down, then step back and look at your drawing to see
if you like it. Then add more as needed. Next, let's darken
the eyebrow area and the eye socket as well. We want these eyebrows
to be a lot darker. So I'll switch back to the regular full opacity brush and add in a bunch of
hair-like strokes. Try to mix up the direction of the strokes to give it
an organic hair texture. And lastly, I want the
highlight at the tip of the nose to be the brightest
spot in the drawing. So just go back over
it one more time. Okay, and that's
it for our nose.
18. Up Angle Nose (Tracing): Okay, so here we have a nose in three-quarter view with
an extreme upshot. The first thing we wanna do is establish the angle
of the eyebrow. This is really, really important for drawing noses
in perspective. The lines that are going
across the face will be tilting a certain angle and we want to make sure
we capture that. And the place that's easiest
to see that too is at the brow line because there's an obvious line going
across to eyebrow. Once we have that
line establish, I'll draw in the rest
of the glabella. Notice how the glabella is quite a bit foreshortened
from this angle. Now since that brow
line is so important, I'll go ahead and find it in the rest of the nose as well. So the tip of the nose, we'll have the
same angle as well as the two corners of the wings. Now, the reason the lines
are tilted that way is because since we're
looking up with the nose, our eye level must be
somewhere below it. And if you've been through
my perspective course, you know that as the
line that are going across the nose
recede away from us, they will converge towards a vanishing point
at the eye level. Since this nose is
turned to the left, the lines going across the nose is moving away from
us towards the laugh. That's why they all seem to be angling down towards the left. They're converging towards a vanishing point on that side. This nose was turned towards
the right than the lines going across the nodes will be tilting down towards the right. Then we can connect the corners to fill out the
rest of the nodes. Okay, so by keeping
everything simple, we're able to establish
the perspective quickly. Now that we have that, we can add in the
smaller detail. So I'll add in that
little pointy corner at the tip of the nose. Draw in the center line and connect it to the
corners of the wings. Here we can see how the
corners of the wings are much lower than the
center of the nose, creating this slight curve. That's because the nose is
a wrapping around the face. And so since we're
looking up at it, we're able to see that curve. Now let's turn off the reference and see what that looks like. Okay, that looks pretty good. It definitely looks like a
nose if viewed from below. Next, we'll draw in
the rhythm lines. Since the bridge is for sure in all the details will be
pretty congested in there. So drawing it can be
a little bit tricky. The heart-shaped rhythm
will be curving in quite severely to merge
with the bottom plane. Since at this angle, the side plane of the wings
will barely be visible to us. Then I'll draw in the
opening of the National. It's pretty hard to see the
opening given how dark it is, but I'll do my best to
take a guess at it. Okay, now let's
lighten everything and draw the planes
on top of it. I'll start with the glabella. There's the lateral cartilage. Then we'll add some thickness
to the lateral cartilage. And let's add some thickness
to the glabella as well. Because of the foreshortening, everything is really congested. So I'll turn off the
under drawing so that we can draw the planes
a little bit easier. As I'm doing this, I have
to make sure to keep the initial angle of
the nose and mind. Again, that's the
most important part about drawing nodes
in perspective. As we're drawing can
be easy to forget and let that angle is
sort of level out. But we got to keep reminding ourselves to
maintain that ankle. Then let's draw in the
center of the bottom plane. From this angle, they appear quite a bit larger than normal. Now let's put it in the
edge of the bottom plane and draw in the opening
of the natural. Now, we'll draw in
the little bit of the side plane of the nozzle
that's peeking through. And then draw the side
plane of the tip. Lastly, I'll draw in the
side planes of the bridge. And the foreshortening can make the tip of the nose a
little bit tricky to draw. So I'll keep readjusting it until I feel like
I've gotten it right. Okay. That's it for our tracing. Go ahead and try
this for yourself.
19. Up Angle Nose (Lay In): Alright, I'll start by
drawing the simplified nose. Again, it's super important to establish that angle
of the eyebrow. Then we'll draw in the glabella. Now let's find that same angle
for the tip of the nose. And then we'll connect
it to the glabella. Then we can draw in
the bottom plane. Make sure to maintain that angle between the
corners of the wings. Then we can close
out the side planes. Okay, now that we have the
perspective established, we can add in the
smaller detail, like the little point
at the tip of the nose. And we'll draw in the center
line of the bottom plane. Now let's draw in
the rhythm lines. There's the separation between the nasal bone and
lateral cartilage. Notice how everything is really foreshortening
crunched together. I'll draw in the
heart-shaped rhythm that connects to the wings. And also since the nose is
turned towards the left, all the details will be shifted slightly
towards the left. That's because we're able
to see the right side more and less of the left side. And then lastly, we'll draw in the opening of the National. Okay, so now let's
lighten everything and draw the actual
layer on top of it. I'll start by defining the
silhouette of the nose. I'll make sure to capture
the fact that the tip and center of the nose overlaps
that farsighted natural. And make sure to show
how the winds and the natural curl back
in towards the face. Now, I'll sketch in the
border of the bottom plane. And let's expand the opening
of this natural a bit. I'll put it in a subtle
line break here to show the thickness of that
center portion of the nose. I always find that that's
a tiny detail that makes a big difference in making the nose look
three-dimensional. Now, let's draw in
the little bit of the side plane of the wings that's visible from this angle. And then close it out with the
side planes of the bridge. I'll also draw in the philtrum and a little bit
of the upper lip. Notice how even the
corner of the lips follow the same angle as the rest of the lines going
across the nodes. And let's add in a little
bit of the eye area as well. Okay, so now I'll use soft
edges to map out the shadows. This is really going
to help the nose look more organic and
three-dimensional. Does actually not that many
shadows on this nodes, which can make it harder
to show off the form. So I wanted to take
full advantage of any shadow that is there. Okay. And that's
it for the land. Now we're ready for the shading.
20. Up Angle Nose (Shading): To begin the shading,
I'll increase my brush size and
lower the opacity, and I'll add an even layer
base tone to the shadows. There's not a whole lot of
shadow with this drawing, so it should go pretty quickly. I'll go ahead and
add some extra tone to the opening of the National. I'll also use the base tone to darken some of the
Halftone area as well. Okay, Now we can add
in the hatching. Let's start with the
opening of the National, which will be the darkest
part of the drawing. I'll have the hatch lines along this bottom plane
go across the nose. And then I use some
subtle hash lines for the bottom
planes of the wings. Now let's add some
abstract pattern to the eye socket area. Okay, now we're ready to
move on to the highlights. There are two bright highlights
at the tip of the nose. And the light is also hitting the mouth area beneath the nose. The edge of the lips is
catching little bit more light. As well as this little
spot underneath the wings. There's a little
bright spot near the top of this nose bridge. Then I'll add some
sloping hatched lines to the bridge of the nose. I'll be sure to keep
these line quite subtle. Okay, Now for the
refining stage, I'll switch back to
the dark pencil and add some accents to
the shadow areas. Now also add some light
hatching to the half-tones. Then I'll emphasize the
edge of the shadow areas. Then I'll go back to
the base tone layer, increase my brush size and lower my brush opacity to around 50%. Then I'll darken the
shadow areas some more, as well as fill in
the eye socket areas. Okay, now let's take our eraser, decrease the opacity to around
50% and increase the size. And we'll just go around
the edge of the drawing and fade things out gradually. Also lighten some of the
highlight areas as well. Then I'll just add some tiny
dark accents here and there. And that should do
it for this nose. Okay, go ahead and try
this drawing for yourself.
21. Down Angle Nose (Tracing): Okay, so here we have
a nose that is tilted down and it's also slightly
in a three-quarter view. So now let's see how this
nose will break down. I'll start by establishing
the glabella. If we look at the brow line, we can see that it has a slightly down tilt
towards the right. So we're going to want the
top and bottom edge of the glabella to have
that same angle as well. I also find the
bottom of the bridge and make sure that it
has the same angle two. Now we can find the corners
to close out the bridge. And then once we have the
perspective establish, I'll draw in that
little pointy tip at the end of the bridge. And let's erase the extra line. Okay, now, I'll draw it in the central line of
the bottom plane. Since there's nose
is turned down, we're not going to see all of the bottom plane instead
is going to get cut off. And so we're going to see a sharp edge at the very bottom. Next was fine, the top
edge of the bottom plane. And you notice that since
the nose is tilted down, this edge will have a
slight upward tilt to it. Okay, so now let's draw
in the side plane. Now the top edge of
this side plane will normally sloped down
in the standard view. But since the nose
is tilted down, it's going to shift
the perspective. And so that line is going
to angle upward slightly. And the same principle will hold true for the glabella as well. Now I'll just do the same
thing for the other side. We're barely going
to be able to see the bottom plane peeking
through on this right side. And there's the side plane. Alright, so now let's draw
in the anatomical rhythms. There's a connection between the nasal bone and
lateral cartilage. Here is that rhythm line
slopes down the bridge, is going to wrap
around the nose in a way that makes it look
like it's curving upward. There's lateral cartilage
and there's the center line. Alright, now we can draw in
the heart-shaped rhythm line. Let's put it in the separation between the wings and
the rest of the nodes. And then I'll just
add a little bit of an edge to this top
side of the glabella. Okay, so now let's lighten everything and draw
the planes on top. I'll start by retracing
the glabella. There's the nasal bone
and lateral cartilage. Now let's give it
some thickness. And I'll actually
change the thickness of the glabella to make it line
up with the nasal bone. Now let's draw in
the tip of the nose. And the bottom plane will not
going to be very visible. And so we're only going to see a little bit of a
plane peeking through. Now let's chisel
out the shape of the wings and then connect
it to the ball of the nose. I'll add a little plain break
to this side of the wing. Let's do the same
for the other side. Because of the foreshortening, this side is going to
look very compressed. And lastly, we'll just draw
in the side of the bridge. For this, nodes are actually
divide the side plane into smaller plane
breaks in order to better show how that nose
is sloping down towards the face and are actually change the thickness of the glabella one more
time just to make it line up with that new
line that we put in. And that's just a
matter of taste. You can do whatever you
think looks the best. This plane model is pretty flexible so you can
change it to your liking. Okay, that's it for the
plains of this nodes. Go ahead and try
this for yourself.
22. Down Angle Nose (Lay In): Okay, to begin the drawing, our sketch in the
simplified nose. But the brow line is tilting downward slightly
towards the right. So make sure that the angles of the glabella and the
nose matches that. I'll find that same angle
for the end of the bridge, and then we'll connect
it to the glabella. Now let's draw in the little tip and find the end of
the tip of the nose. Okay, so now we can sketch
in the bottom plane and close out the side. And let's do the same
for the other side. Now let's draw in the
anatomical rhythms. Notice how this rhythm
line is curving up as is wrapping
around the nose. That's a very important
detail that we want to keep in mind as
we're drawing this nose. Now let's catch in the
heart-shaped rhythm line. Line was still look
more or less the same as the standard view. And now we'll just
separate out the wings. Okay, so there's
our scaffolding. Now, let's lighten
everything and then sketch the more refined
nose on top of it. I'll start by finding the
edge of the nose bridge. That's usually the
best place to start, in my opinion, when drawing noses in the three-quarter view. And I'll find the outer
contour of the bottom edge. Now let's find the
other corner of the nose bridge as well as
give it some thickness. Here I'm going to start using really soft parallel hash lines to suggest and the subtle
soft edges of this area. Next I'll draw in this nostril and add a little soft plain
break right about there. Let's sketch in the
nasal labial line. I'll put a few angle breaks in the line to make it a little
bit more interesting. So I'm definitely exaggerating these angle changes
relative to the reference. And then we'll do the
same for the other side. I'll add a hint of a
cast shadow that's created by the thickness
of that nasal labial line. And let's sketch in some of the AI area to give this nose
a little bit of contexts. Now we normally do this anyway, but I find that
with noses that are appearing in perspective is even more important to give it some contexts so that the viewer can make sense of
what they're seeing. We're not gonna go into much
details, withdrawn the eyes, but I do want to
at least suggest the outline of the
eye sockets there. Notice how I'm really
keeping my edges very soft. That's the key to drawing these areas and keeping
them more abstract. So with this nose, I'm
taking a bit more of an intuitive approach and jumping around the
drawing quite a bit, just adding little details
here and there as I see fit. And that's really how I normally work when
I'm not teaching. And in fact, that's how I would recommend you work as well. One should get more
comfortable with the drawing process
because it allows you to develop the nose more evenly and have a better feel of
what is going to need. And we'll add in
that little more. On the side of the bridge, the light is coming from
the left-hand side. So the shadow will be mostly on the right side of the mole. Normally, I would
advise you ignore those little texturing details and focus on the
biggest structure. But since you're probably more comfortable with
drawing the nose now, we can dive into those little
details a little bit more. So now I'm just going to
go around the nose and start doing some shadow mapping. Designing the shape of the
shadows with soft edges to fill out the
three-dimensionality some more. Here, I'm trying to
design the edge of the dark core shadow that
runs along the bridge. The edge of the shadow
is a bit complex, so I'm just going to do my best to simplify it in
a way that looks interesting and still retains the characteristic of the nose. I tried to leave little gaps
here and there and also make some areas thicker and darker while the areas
are thinner and lighter. And I think that's left now
shows a little bit too wide, so I'll trim it down a bit. So the land is mostly
pretty much done. I'm just examining all
the little details to make sure that there's nothing major that
I want to change. Now, even though I can't really see a clear cash-out
on the reference, I'm going to cheat
one in any way because I like how it
makes the nose look. Okay, So now before
moving onto the shading, I'm just going to lighten
some of the lines on the lit side of the nose just so they don't compete
with the highlights. Okay, so that's it for the land. Now we can move on
to the shading.
23. Down Angle Nose (Shading): As usual, I'm going to begin the lane by adding
in the base tone. So I'll increase my
brush size and decrease the opacity and just cover all the shadow area with
a light layer of town. The rest of the
bridge is also in shadow, so we'll fill it in, but I'll keep the tone here
slightly lighter just to differentiate it from
the other shadow. And I'll let the
tone gradually fade off as we get higher
up in the glabella. Let's add a little
bit of tone to the underside of
the nose as well. That's going to help
the nose pop out a little bit more
because it suggests that less light is able
to get into that area. Okay, now we're ready
for the hatching. I'll just put a bunch
of parallel hash lines along the front
plane of the bridge. And then I'll have it
sloped down the side plane. Let's fill in some
of the eyebrow and also the eye socket area. Now let's fill in the
shadow side of the nose. And the reference.
We can't really see the details in this
area very well. So we're just going
to go along with that and keep our hatched
lines loose and abstract. I'll change the direction of
the hash lines periodically and wages the shapes together
in a variety of ways. Okay, so now let's go into the lighter halftone area and add some hash lines
in there as well. Let's fill in the shadow
of this nasal labial line. And I'll continue those hatch
line into the lighter side, but I'll have it
changed direction so that it looks like it's curving around the
forward of the skin. Alright, so now let's
add in the highlights. I'll go along the
corner of the bridge to soften out that
corner a little bit. But also to make the form of
the nose part forward more. Next we'll have these lines
slope down towards the face, but make sure to have
them angle upward slightly to match the perspective
that we're going for. I want these white
hatched lines to look like they're a continuation of the dark hatch lines that are running along the front
plane of the bridge. And that's a pretty
obvious highlight running along this edge
of the eye socket. He has a slight crease
between his eyebrow. So I'll put a little
highlight right next to that line in order
to emphasize it. Next, let's add some highlights to the area under the nose. And I add a little subtle
highlight to this mall here. Okay, So now I'm gonna
go back over some of these hash lines and reinforce them to
make them stronger, to give this highlight
areas some variation, I want to make the corner of the bridge stand out even more. So I'm gonna go back over
that area one more time. Now, in the reference,
we can see that there's actually a second
light source coming from the right and it's creating a rim light
along the bridge. So I'm going to
take my eraser and remove the dark tone
from that area. Then we can add
in the rim light. I love room lights
because they can make the drawing look a lot more dramatic and pop the forum
forward quite nicely. Next, I would just ask them
Abstract highlights around the edges of the drawing to allow it to gradually fade out. Okay, so now I'll switch back to the darker brush color and reinforce some of
the hatch lines to give the shadows
and variation. I'll go along the edge of this core shadow on the
nose to accentuate it more. But be careful not to let these darker hash lines
spill into the rim light. And you can see how that
softening the transition between the darker shadow area
and the lighter shadow, giving the bridge a
subtle gradation effect. Let's reinforce some of the hash lines on the
shadow side as well. And I'll make this cast shadow darker where it's
closest to the nose. We want to create
enough variation in the shadow area so that it doesn't just look
like a flat plane. There's some details
happening there, even if it's unclear
and out-of-focus. Next are accentuate
this core shadow along the nasal labial fold. And I'll use some
crosshatching to add some texturing to the
front plane of the bridge. Now, I'll just create some
loose abstract patterns around the edges to let the
drawing fade out gradually. He has a very small
divot in his skin, which I think adds a
little nice texture. So I'll add that little
detail to the bridge. Next, let's go back to
the highlight layer and accentuate some of
these highlights even more. Let's really emphasize
the corner of that bridge since it's receiving so much
light from the left. And I actually put
the highlight on the wrong side of this
forehead wrinkles. So let's fix that. Since the main light is
coming from the laugh, the highlights should be on the right side of the wrinkle. Next, I'll increase my
brush size and lower the opacity and just refine
the base tone layer. I'll darken the shadows and soften out the transition
between light and dark. Okay, so now we can switch to the eraser tool and gradually
fade out the edges. Remember to be really delicate
and gradual with erasing, you can always erase more, but you can erase less. Also soften up some
of the highlights in the lit area to make
them more subtle. This will help to
give the drawing even more line weight variation where some areas are really bright and some are more subtle. And then we'll just
do one more round of refining where we really punch up some of
the darker areas to give the drawing
more contrast. How darken the eyebrow area? And I'll also darken some of
the deepest shadow areas. All right, and that's it. We're all done.
24. Cartoon Nose (Lay In): Okay, Now that you
understand how to draw the nose accurately
from observation, let's see how we can manipulate the nose to create more
stylized drawings. This is where we just
throw likeness out the window and just exaggerate the proportions and see what kinda interesting
notice we can come up with. For me, this is where
drawing gets really fun because you get to
be really creative. Okay, let's start with
the simple side view. As always, I'm going to start by drawing the simplified nose. But this time instead of
following the reference, I'm going to be
changing things quite drastically are really,
really exaggerate. The bump at the bridge
of the nose and add quite a few angled changes are also position the wings of the nostrils quite a bit
higher up relative to the tip. One good method for starting the stylized drawings is to pick a few areas and just exaggerate their proportion
to an extreme level. So you can make them really
big or really small, really long, or really short. In this case, I'm going
to exaggerate the bridge, the tip and to a lesser
extent the natural. And don't feel like you
have to know exactly how your drawing will look before
you make your first mark. I usually don't know how my
drawing will turn out either. I just start drawing the
simplified nose with a general idea of how I
want to exaggerate it. And then I'll iterate on that
and make changes as I go. Alright, now that we have the simplified nose and
rhythm lines added in, let's lighten
everything and draw a more refined nose
on top of that. So here I'm playing around with different ways to design
the curve of the bridge. And I also think the
tip can be a little bit bigger just to push the
exaggeration even more. Let's make the nostril a little
bit bigger and higher up. One other thing that's so
freeing about drawing like this is that you don't have to be
a slave to the reference. You can make changes
however you see fit. Let's draw in the eye area
as well. As you can see. I'm deviating from the
reference quite a bit. Ultimately, I'm trying to
go for a very over-the-top, cartoony style, but
with a hint of realism. Here, I'm adding in the crease
of the nasal labial fold, or more commonly known
as the last line. Now let's get rid of the construction lines so we can see our drawing
a little bit better. I still feel like
the bridge and tip can come out a little bit more. So I'll go ahead and
make that adjustment. Next, we can chisel out the planes to give the
nose more structure. This is where having the plane information memorized will be extremely helpful. So I highly recommend that you do a lot of practice drawing those plane diagrams from memory until you can
comfortably recall them. And you can see how I'm playing around with
different ways to design the planes to make
it look more interesting. This process of trying
out different ideas can really help you better understand the
structure of the nodes. You can see how by simply changing where you
place a line break, you can drastically alter
the look of the nose. Now, I'll go around
the perimeter of the shadows and
soften out the edges. I'm using light
parallel lines to make these areas broader
and more diffuse. And you can see how the contrast between
those softer edges and the harder edges give the nose more
three-dimensionality. High. Once I'm relatively
happy with the land, I'll begin the shading process.
25. Cartoon Nose (Shading): Let's start by putting in the
light layer of base tone. Once again, I'll increase
my brush size and lower the opacity to make it easier
to create the base tone. In the reference. The light source is coming from the sun,
which is higher up. So most of the shadow is under
the nose and eye socket. One of the most difficult
part about drawing a nose for imagination
is the shading, especially if you're going
for a realistic look. And that's where having a reference can be
really helpful. So even though I didn't use the reference March
during the lane except maybe to establish the general perspective
during the shading, I'll be using it a
lot more to help me know where to put the
shadows and highlights, at least as something you
can do until you gain more experience with
shading from imagination. And I'm actually going
to extend the shadow of the nasal labial fold in towards the tip
of the nose more. I feel like this is going to make for a more
interesting shape with the shadow mixing
in with the highlights. Next, we can add
in the hatching. Let's start with the
opening of the National. Here, since this
area is so dark, you can almost feel it
in completely with tone. Next, I'll add the hatch lines to the under plane
of the nozzle. And I'll change the direction
of the hatch lines of the central plane just to differentiate it from
the other areas. Next, let's shade
in the cast shadow. Again, notice how I'm
having the hash line go in a slightly different direction
from the other areas. I'll have the hash line along the shadow of this fold
emanate out from the natural. And then I'll just add some loose abstract
patterns to the eye area. We don't want to bog down this area with a
bunch of details. And because we don't want the viewer's attention
to go there, we want the focal point to be at the nose and our darken in the eyebrow a bit to differentiate it
from the eye socket. Okay, next, we can add hatching
to the halftone areas. Be sure to keep the
lines here quite a bit lighter than the shadows. So I'm just going to fill
in the planes that sits between the shadow planes
and the highlight planes. And already you can see
how that Halftone really helps to make the nose a
lot more three-dimensional. Okay, next let's add
in the highlights. Most of the light is
going to be hitting the planes that are along
the front of the nose. I'll add some cross
hatching along the outer edge to make
the bridge pop out a bit. And this plane of
the wing will be catching a lot more
light as well. And there's gonna be a
pretty strong highlight area next to this cast shadow. I'll try to design some
interesting patterns and allow it to
gradually fade out. Add a little bit highlight to the brow ridge area as well. And that's going to
be a highlight along the nasal labial fold as well. I'm just going to keep it
pretty simple and abstract. Again, we want to start
thinking about how we want to let the drawing
gradually fade out. And let's add a really
bright highlight at the tip of the nose that can really
help to make the nose pop. Okay, So all the pieces
that are in place, now we just have to
add some variations to make the drawing a little bit more interesting
and realistic. So I'm just going to go
back in and darken up certain areas of the hatching
to give it more variation. I'm mostly focused
on accentuating the core shadow area that
separate the light and shadow. I'll darken some portion
of the Halftone to give the sense that there's
a subtle gradation. A gradation implies that
although the form is smooth, it's not completely flat and the light is hitting some
area more than others. And also add some
darker line way to the bottom portion
of the nose as well. This can really help to reinforce the
lighting scheme where the light is coming from the top and the shadow is at the bottom. And every once in
awhile I'm adding a few like crosshatching
lines that goes across the main hash
lines just helps to add some variation and
interests to the shading. We want to do this
sparingly though, so that we don't lose
the direction of energy that's created by the
first layer of hatching. Then let's repeat the same
process for this area here. Now, I'll lower my
brush opacity and increase the size and go back to the base tone layer and try to soften out the transition
between the light and shadow. So I'm just going to create
a smooth aggregation is I can go in from the
shadows into the light. And I'm also going to
use this opportunity to darken some of
the recessed area. That isn't going to be
getting a whole lot of light. Once we're done with
that, I'll switch to the eraser tool and lower the opacity to
around 50% or sell. And we're just going to go around the edge
of the drawing, enlighten the edges so that the drawing can
gradually fade out. I'll also use the
eraser to knock back some of the
highlight areas so that we can have
some value variation in the highlight as well. I really love how fading out the edges gives the drawing
this dreamy quality. And it really helps to frame the focal point of the drawing and bring the viewer's
attention there. Besides adding in
the highlights, this is probably my
second favorite part of the drawing process. Once things are soften out
a bit with the eraser, we'll come back in
with a dark pencil and add some refining
touches here and there. I'm not doing anything new here, just repeating the same process that we've already went through. I'm just being a little more
subtle with everything and really looking at the drawing as a whole to see what it needs. I want to add some
line weight variation along the bridge of his nose and make it
look more interesting. So I'll use the eraser to fade the line where I think the light will be hitting
it most strongly. And I said, We're all done. As you can see, even
though we've exaggerated the proportion to a
pretty extreme degree, because we have all
the core elements of the nodes present. It still looks realistic
and believable. Okay, for your assignment, I want you to follow along with this video and draw this
knows exactly as you see it. Just so you know how the
process of exaggeration works. Then I want you to find a
reference of a nose inside view of your own choosing and draw a stylized
version of it. You don't have to stylize
it the same way I did here. You can do it your own way. Be as creative as you want. But be sure to include all the core elements
like the bridge, the wings, the bottom
plane, et cetera. Remember, if you get
stuck for ideas, just pick one or two parts and make it really big or small. That'll be enough to give you a very unusual stylized nodes. The point of this
exercise is to help you get used to
taking the reference, manipulating it, and
making it your own. Alright, so have fun with this exercise and see what
you can come up with.
26. Caricature Nose (Lay In): Okay, so here we
have a front view of the nose with a slight uptake. Now let's draw a stylized
version of this. Except this time we're
also going to incorporate a little bit of exaggerated
perspective as well. So I'm going to make it look
like we're looking up at this nose at an even more extreme
angle than the reference. Start by drawing the glabella. Because we're looking
up at this nose, I'm going to have the
top and bottom edge of the glabella curved
downward slightly. This is because the nose
has a rounded form. And you can think of
it like a cylinder. Whenever we look up
at the cylinder, we're going to see
a downward curve. And conversely, whenever we
look down at a cylinder, will see an upward curve. Next, let's draw in the
bridge of the nose. I'll draw a center
line down the nose to help us keep
everything symmetrical. Notice how the bridge is quite a bit shorter than our
standard front view. That's because since we're
looking up at the nose, the bridge will
be foreshortened. And the more extreme
the uptake is, the more foreshortened it is. Since I'm trying to
exaggerate to perspective, I'm going to make the
length of this bridge even shorter than what
we see in the reference. I'm also going to
make the bottom of this bread quite a bit
wider than the top. Again, that helps to exaggerate the perspective because the
bottom of the bridge is closer to the viewer
and therefore will appear a lot larger
than the top portion. Next, we'll draw in the
bottom plane of the nose. Here we're really going to
exaggerate the size and make this area a lot larger
than it normally appears. That's because when we're
looking up at the nose, we're pretty much seeing this bottom plane at a
direct full-on angle. And so it doesn't appear for Shorten like it usually does. I'll draw more guidelines
going across to help me keep everything
lined up on both sides. Notice how the bottom edge of this plane has a very
severe downward curve. Again, that's to reinforce the fact that we're
looking up at the snows and it's
wrapping around the face. Now we can draw in
the side planes. Now let's add in
the rhythm lines. Notice how the connection
between the nasal bone and lateral cartilage is placed
higher up in the nose. Since the top of the bridge
is further from the viewer, everything there
will appear smaller. So I'm making sure to stagger the details so that things get progressively larger as it
gets lower on the bridge. Now let's add in the
heart-shaped rhythm line. Here we're going to see a
really severe angle change as that rhythm line really turns the corner in order to
connect to the wings. Since we're really
looking up at this node, we're not going
to be able to see the side of the wings very much. Then I'll draw in the middle
portion of the bottom plane. Notice how this area is way, way larger than the
regular front view. Now the way I want to
stylize this nose is to make the wings of the nostrils
really long and flat. So I'm going to stretch out the shape of the
opening quite a bit. And I'm actually
going to shave down these heart-shaped rhythm
lines a little bit more to emphasize the fact that we're
now going to be able to see much of the side
plane of the wings. And then I'll just separate the winds from the
rest of the nodes. Okay, so this should give us a good idea of how to approach the perspective and also how we want to exaggerate
this particular nodes. Now let's lighten everything and draw a more refined
version on top of it. I'll start by retracing
the glabella and bridge. Let's add some thickness to the bottom half of the bridge. The top half of the bridge will have some
thickness as well. But from this angle we will only barely see it peeking through. And I'll add some thickness
to the glabella as well. Here I decided to exaggerate the nose even more
and draw the tip as if they were so large
that it's covering up the bottom portion
of the bridge. Overlapping form is a
really great way to add a sense of depth and three-dimensionality
to your drawing. And I'll go ahead and make
the bottom plane even larger than the
initial under drawing. Now, we can play
with different ways to design the shape
of these planes. Notice how the bottom plane and wings form this
triangular shape. I'm really going to
lean into that triangle and stretch the wings
out really wide. And I'll try to play with
the shape of the opening of the nozzle by bending the
curves in different ways. Next, let's draw in the
side of the bridge. Notice how the top portion of this area is quite a bit
smaller than the bottom. Now I'll draw in the
philtrum and a little bit of the mouth area to give
the drawing some contexts. Normally the philtrum
should appear foreshortened because we're
looking up at this nose. But I'm going to make
it a lot longer in order to give this nose a
more whimsical appearance. Just be aware of that
by making it longer. I'm implying that the
philtrum is really, really long because even though
it's for showing is still looks longer than a
normal size philtrum. Let's add in the
eye area as well. I'll play with
curving the brow line to make it look a little
bit more whimsical. Just to mix it up,
I'll keep this area as simple and leave
out the eyebrow. Notice how when we're
looking up at the face, the brow looks like
it's curving downward. Okay, so that's
pretty much our nose. But before moving
on to the shading, I want to make sure
that I'm really happy with the design. So I'm gonna keep tinkering
with the shape of the wings until I get the exaggeration
that I'm looking for. I want to push the wings out wider to emphasize
the triangular shape. And I also want to make
it thinner in order to contrast it with the
thick ball of the nose. And I just make
some minor changes to the bridge and i area. Lastly, let's draw
in the cast shadow. I'm going to look at the
shadow and the reference and adapt it to my own nose. Notice how unlike the
rest of the nose, I'm using a very light
parallel hatching lines to create softer diffused edges. Our map out where the light would be
hitting the bottom plane. Let's map in the shadows
on the cheek carriers. Now, before moving
on to the shading, I'm going to take an eraser, enlightened some of
these lines in our lane, especially the area that's
going to be hit by the light. We don't want a bunch
of dark lines and these areas competing
with the highlights. Okay, now we're ready to
move on to the shading.
27. Caricature Nose (Shading): Our lower the opacity of
my brush and increase the brush size and add in
an even layer of base tone. Then we can add in the hatching. I'll start with the
opening of the nozzle, which will be the darkest
part of our drawing. Then I'll add hatching to
the bottom of the wings. Notice how the hatching
lines gradually change direction as I progress. This helps to keep things from looking boring and repetitive. For the center portion, I'll have the line going
across down the middle. And then it will have a slight
angle change on the side. For the cast shadow, the
hatch lines will curve around the face and then curve
upward at the philtrum. So the reason the lines at
the philtrum are curving upward is because the form
of the philtrum is concave. In other words, it's curving
in towards the face, whereas the rest of the nose is curving out from the face, which is why those areas
has a downward curve. Now let's fill in the shadows
on the side of the nose. And I'll add some hatching to the right side of the
bridge and eye socket area. Here I'm deviating from the reference of it
because in the reference, it's lit on both
side of the bridge. But I feel like adding
shadow to one side is going to show off the form
of the nose a lot better. So the lighting scheme
we're going with here is that there's a strong light
coming from the left, which will make
the right side of the nose slightly
darker than the left. And there's also another light
source coming from above. Now let's switch our brush color to white and add
in the highlights. The light is coming
from the left, so it's going to be hitting
these planes quite strongly. The ball of the nose
will also be cashing a lot of light from the
light source above. And the planes on the right side will also be catching light, but it should be quite a
bit less than the left. So I use an eraser to
fade out this portion. Okay, now let's add some
highlight to the bridge. Let's lighten these
dark lines even more. So we'll have room to
draw the highlights. I'll have the highlight slope
down the side of the nose. And there's another
plane of the eye socket should be lit by the
light source on the left. The side planes on
the right will also be lit by the light
source from above. And lastly, we'll put some
highlights in the mouth area. Next I'll switch back to the dark color brush and add
some variation to the hatch. Lines in the shadow are dark in the crevices since last slide will be
able to get in there. And let's really dark in the
opening of the nostrils. The area below the nostrils
should be quite a bit darker since last slide
is getting in there. So I'll reinforce
the hatch lines in this area to
make them darker. I'll also use some
crosshatching to darken the edge of the core shadow
in the bottom plane as well. And also accentuate the edges of the philtrum
and cast shadows. Now, I'll lighten
my brush opacity to around 50% and add the hatching
for the half tone areas. I'll have the lines
gently curve over the glabella to show the
rounded form of this area. Let's design some abstract
hatching pattern for this eye socket so that we can have this area
gradually fade out. I'll do the same for
the left side as well, but we'll keep this area lighter since the light is hitting
here more strongly. Now, I'll switch my
brush color back to white and add in some
subtle highlights. I'll also use some
crosshatching to put a highlight along the
corner of this bridge. That area will be
sticking out the most. So it's probably going to be catching a lot of light
coming from the left. And let's add a bright
highlight to the tip. I add some accents
to the edges of these bottom plains who make them pop out a little bit more. And let's do the
same for the edge of the mouth and the
eye socket as well. Okay, now I'll switch back
to the base tone layer, increase my brush size and lower the brush opacity and just darken some of the
recessed areas and edge of the shadows. I'll also work the
halftone area in order to smooth out the transition
between light and shadow. Now for the front part, I'll switch to the eraser tool, decrease the opacity
to around 50 per cent, and increase the eraser size. Then we'll just go
around the edges and fade things out gradually. Now we can add some
small finishing touches to the drawing as needed. Let's emphasize the core
shadow along this bridge. And I'll darken some of the outlines of
the planes to give the drawing more structure and also to create some
line weight variation. And the edge of the
shadow on the side of the nose is still
looking a little bit harsh. So I will take my eraser and soften the edge a
little bit more. They can fade out
more gradually. And that's it. Well done. Now, your assignment is
to follow this video and draw this node so you can
see how the process work. And then pick a front view nose and draw your own
stylized version of it. Okay, have fun with
this exercise, and I'll see you in
the next lesson.
28. Feminine Nose (Lay In): Okay, so now let's try drawing a nose completely
from our imagination. As you're going to see,
the process is really exactly the same as what
we've been doing before. That's the beauty of this constructive approach
that we've been using. It lends itself seamlessly
to working from imagination. So once again, I'm just going to start with the simplified nose. Since we've been drawing a lot of over-the-top masculine noses. Let's swing back
the other way and draw a really
feminine, dainty nose. To achieve this, I'm
going to curve the bridge of the nose quite
severely the other way. So instead of having the bridge curve outward
away from the face, I'm going to have a curve
inward towards the phase, giving it almost a
flat appearance. And rather than
having the bridge widen as it get
closer to the tip, I'm just going to keep it
the same width throughout. Then. I'll just draw in the bottom plane and side
plane like we always do. Okay, next we'll draw
in the rhythm lines. The lateral cartilage will
look the same as usual, except now it's just going to follow the curve of
that nose bridge. And the heart-shaped rhythm will again follow the curve of the bridge rather than
protruding outward. And I'll make the National quite slim for this particular node. Then we can draw in the
opening of the nostril. Okay, now let's
lighten everything and draw a more refined version. How retrace the bridge and add a slight little bump
at the tip of the nose. I'll put it in a
very subtle edge to divide the wings from
the rest of the nose. Next, I'll add in the outer
edge of the bottom plane. Now let's design the
opening of the nostril. And we'll add a slight hint
of the Far Side natural. I'll put it in a
subtle delineation to show the center
of the bottom plane. Now let's turn off
the construction line so we can see everything better. Next, let's draw in
the cache shadow. I'll imagine the light
coming from the left, so the cast shadow will be
appearing on the right. I'll try to keep the shadow
more of a graphic shape. And that's pretty much
all the details we are going to be adding to the snows. The thing about family and noses is that they're quite smooth. And so in order to make
the nose look smooth, we actually want to leave out a lot of details and
keep things simple. Because the more
detail we'll add, the more it's going to
texture the nose and make it look more rugged. As a minor adjustment,
I'm just going to make the tips slightly larger in order to further exaggerate that C curve
of the nose bridge. And that's it for the land. Now we're ready to move
on to the shading.
29. Feminine Nose (Shading): Let's begin by adding
in the base tone. So I'll lower my brush
opacity and increase the size and fill in the shadow areas
with a light smooth value. Do your best to imagine which planes the light
would be hitting. The other planes that aren't receiving light
should be in shadow. Now let's add in the hatching. I'll start with the
cast shadow and just how the hatch lines that
radiate out from the nose. One tip is to allow
your hash lines to go past the edge
of the shadow, which will help to keep
your hatch lines shredder. And then you can use your eraser to clean up the spillover. Then let's fill
in the opening of the nostril with a dark value. I'll put some subtle
horizontal hash lines along the center of
the bottom plane. And then let's fill in
the Far Side natural. Then I'll apply
some cross hatching along that edge
to soften it out. Again, the name of the game here is to keep things settle. We don't want to
overdo the shading because that can make the nose look a little bit
more masculine. Then let's darken the portion of the cast shadow that is
right under the nose. Okay, now we can add
in the highlights. I'll start by defining the corner of the
bridge on the lit side. As you can see, this immediately makes the nose look a lot
more three-dimensional. Let's put in a bright
highlight at the tip. And I'll add a lighter
highlight on the wings. Next, I'll add some
crosshatching to the highlight on the bridge just to
soften it out a little bit. Then let's add some highlights
next to the cast shadow. This will help to
make the cast shadow look more dramatic. Lastly, I'll just add some very subtle highlights
along the side of the bridge. Okay, so now that all
the pieces are in place, we can just slowly
refine the drawing. I'll switch back to the
dark pencil and add some variations to the cast
shadow and core shadow areas. Next, let's take the eraser
and fade out the edges. Are lighten these
highlights along the side of the bridge to
make them more subtle. Let's fade out the cast shadow near the top of
the nose as well. Then I'll add some tiny accents to the highlights
to make them pop. And that's it, we're all done. So go ahead and try
drawing this notes for yourself to see
how the process works. And then try drawing your
own nose from imagination. You can choose to draw a feminine looking nose or any
other nodes type you like. And if you're having trouble drawing a nose from imagination, you can use a reference
for inspiration. So have a reference available, but put it away and don't
look at it as you're drawing. Then if you get stuck, you can look back
at the reference to help you know
what to do next. Okay, so have fun
with this exercise.
30. Orc Nose (Lay In): Okay, so now we're
going to venture into the realm of fantasy art
and draw an aurochs nodes. So let's see how
that process works. I'll begin by drawing in the eye structure that's
going to surround the nose. Since this nose is going to
look a little bit unusual, I want to give it some
extra contacts so that the viewer can really tell that they're looking
at an org snows. I'm going to draw
the nose and eye as if we're looking
slightly up at it. So the brow line, as well as any line that's
going across the nose and eyes will have a slightly downward
tilt towards the left. Then I'll draw in
the simplified nose. Since this 4k is going to have a really thick and
protruding brow ridge, the glabella will be angling in towards the face a little bit more severely than the
normal standard noses. Also, the bridge of the
nose will be very short. So that's one of the
distinguishing characteristic of an orange knows
that I've been able to notice is that the
bridge is very short and the ball of
the nose is very big. In comparison, you can see me drawing lines
across the nodes in order to make sure that I maintain that
perspective ankle. Okay, Now I'll draw it
in the bottom plane. With this Noah's, the bottom
plane will be really big. N 0 also stretch further
down the face way more than the
average human nose. The mouth and nose
will look almost like an upside down pyramid. And I'll sketch in the
eye socket as well. Now let's draw in
the rhythm lines. Again, the nasal bone and lateral cartilage
will be really short. And there won't really
be a separation between the wings of the nostrils
and the ball of the nose. Instead the wings
and then bar will basically joined
together as one piece. And I'll try to design an interesting shape for
the opening of the nostril. Okay, now let's lighten
everything and refine our design. I'll add in the center
of the bottom plane, and I'll stretch
the bottom plane even further down the face. Now let's draw in the
wings of the National. I'll put a little plain
break in the wings, but the wings and front plane of the ball will join
together as one big plane has some thickness
to the nose bridge. Now let's draw in the eyes. I'll try not to get too
detailed with the eyes since this isn't the
focus of this drawing. And also, if you
haven't been through my eye drawing course yet, all this information might
seem a little bit confusing. So for now, just
copy what I'm doing. And if you'd like
to learn more about drawing eyes in detail, you can check out
my course on that. And I'll give him a pretty
thick nasal labial fold to give the face some character. Let's imagine that the
light is coming from above and also
slightly to the right. So there'll be a cast shadow
right underneath the nose. This eyebrow is a little bit
too high up, so our adjusted our sketching some furrow
wrinkles in his brow as well because Orcs usually have a slightly
angry expression. I'll add a few wrinkles, shadow in the bridge of the
nose to make it look like his nose is sort of scrunched up a little bit in a corral. And I just soften out some of the edges of the core shadows. I'll give him a little
bit of a deep division at the center of the
tip of his nose. And just for fun, let's add in some scarring to make them
look more interesting. So he'll probably have a little
battle scar on his nose. And maybe one more right
around the eyes is if someone swiped a sword
right over his eyes, and luckily he
closed it in time, but it's still love her scar
as kind of a classic one. And I'm actually going
to use this car is a cross contour line
to describe his face. Rather than just laying
flat on its face, is curving in and out according to the topography of his face. So not only will the scar add
a story to this character, it will help us to make the drawing more
realistic as well. Okay, so that's it for the ln.
31. Orc Nose (Shading): Now let's start the
shading process. Our increase my brush size
and reduce the opacity and add a layer of base tone
to all the shadow areas. Now, we'll put it
in the hatching. I'll have them radiate around
the opening of the natural. I really like how
this accentuate the unique shape of
this bottom plane area. And then let's fill
in the natural. Now I'll try to put it in
these horizontal hatch lines in a way that makes it look like is a continuation of the hash line on the
neighboring plane. And then let's fill
in the cast shadow. Here. I'll have the
hash lines radiate out from the crease line
to make it look like that nasal labial fold
is really protruding out from the face so that we get a sense of its thickness. Now let's fill in the eyebrows. And I'll put it in some
abstract hatch pattern for the eye area. We don't want this to be the
focal point of the picture, so I'll try to keep
it simpler and then fill in the scars
to make it look like it's more sunken
into the face. Now let's do the same
for the other eye. Okay, Now let's put
it in the highlights. I'll start with these cards. Since the light is
coming from the right, there'll be a slight highlight along the left edge of the scar. So you can see how
putting that slight highlight right next
to the dark shading of the scar really
makes it look like the dark areas sunken
in and right next to it is a little bit
of a rim that's sticking slightly up and
catching more light. Okay, Now let's
put the highlights on the front plane of the nose. Again, notice how
the wings of the natural and the front
plane of the ball, I pretty much one seamless area. I'll put some highlights on
the lit side of the wrinkles. So the pattern for
these wrinkles is basically bears or highlight, followed by a lighter half tone. And then at the very
bottom where the crease of the wrinkle is going to
be a sharp dark line. And I'll try to add some
abstract highlights along the edges of the drawing. We don't have to be
super precise here because we are going
to fade it out anyway. I'll draw these
white hatch lines as if the continuation of the dark hatch lines on the
shadow side of this fault. And I'll add a subtle outline
to contain that shape. And the area next to the cast shadow should be
pretty bright as well. I tried to design some
interesting patterns here. Now let's also
imagine that there's a second light source
coming from the left. And it's going to
cast a rim light along the edge of
this left side. Rim lights are really
great way to show off the form and also add a
dramatic effect to a drawing. Since I'm working digitally, I can draw the highlight
right over the dark shading. But if you're working with
traditional pencil and paper, you're going to have to
erase that shadow a little bit in order to make
room for the highlight. Alright, and you can see how just that little
bit of rim light really makes the nose
pop out a lot more. It's a great technique
that's used a lot in comic books and
illustrations. Next, I'll just go back over
the highlight areas and accentuate some of the lines
to make them brighter. Again, this just helps to add
some line weight variation to the lit side and make the drawing
look more interesting. And then I'll do the same thing with the darker hatched lines. I'll go along this bottom plane and just accentuate the edge. And you can see how it creates this really cool radiating
pattern for the wings. Let's darken the opening
of the National. Also darken the portion of the cast shadow that is
right under the nose. Let's emphasize the edge
of this bottom plane. Next, let's accentuate
that little division right in the middle of the tip. Let's emphasize the core shadow along the nasal labial fold. Next, let's darken the
eyebrow and i area. I'll make the eyebrow darker
is towards the center and gradually lighten my strokes as I get closer to the sides. Let's also darken the crease
lines of the wrinkles. Okay, now we can switch
to the eraser tool, lower the opacity and increase the size and fade out the edges. Now I think I'm actually going to lighten the hash lines and bass tone in the eyes to make them pop a
little bit more there, I think that looks a lot better. And then I'll just
clean up some of the edges around the eyes. The eraser soft and nap
a lot of the details. So we just wanted to put back in some hard edges so that it can contrast with the soft edges. Now I'll just go
around the drawing and do little bit of
refining here and there, just darkening certain
areas as I see fit. The brow ridge on the far side is looking
a little bit too big, so I'm going to bring
in a little bit. Erase the extra portion. Let's add a little bright highlight right at
the tip of the nose. And this portion of the eyebrows
looking a little thick. So how thin it out a little. Let's add the rim light back to this far
side of the face. Okay, and that's it. We're all done. Try drawing this
nose for yourself and then try designing
your own nose. It can be an orange or some other fantasy
creature that you like. You don't have to make it
as complex as this one. And if you're having trouble, feel free to use references
for your shading and design. I like to use pinterest.com
to find my references, but you can also go on
Instagram or Google. Alright, so have fun
with this exercise.
 Ethan Nguyen, Portrait Artist & Art Instructor