Transcripts
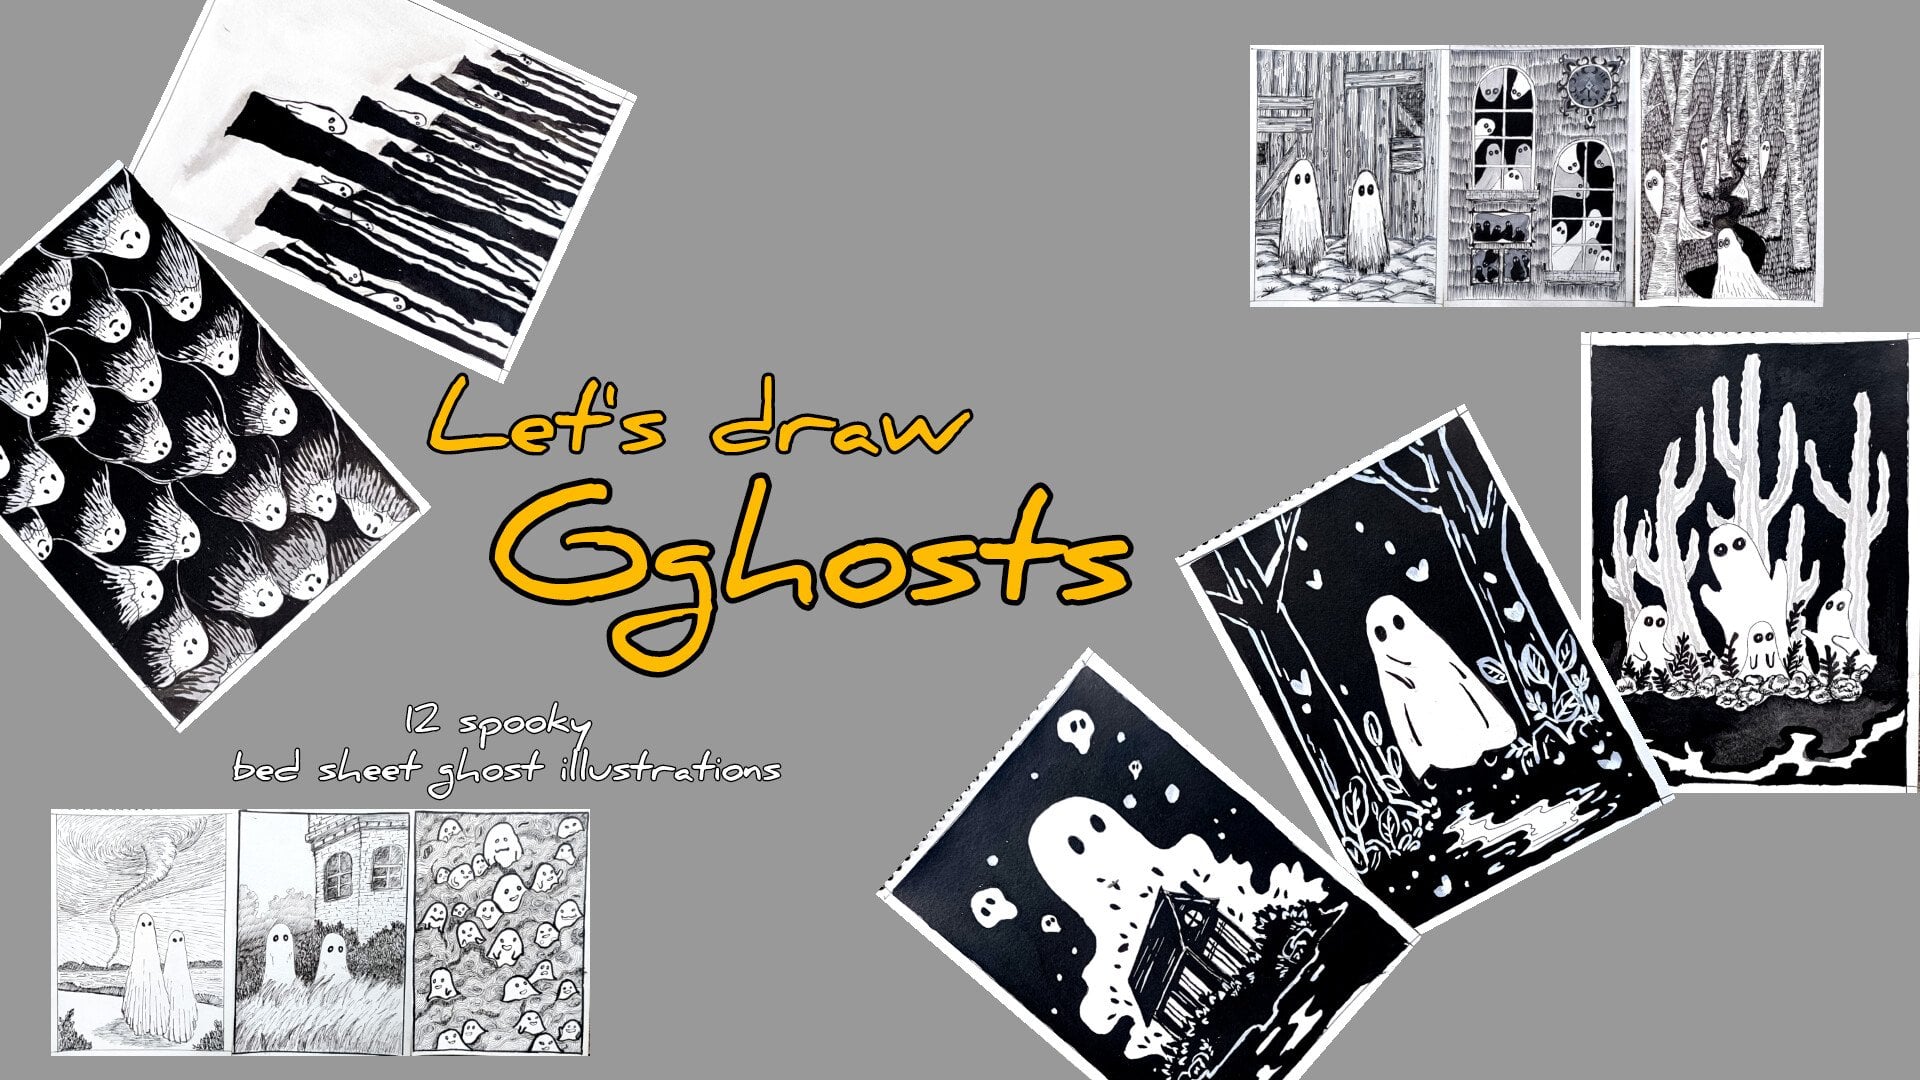
1. Welcome and Introduction : Hi, everyone, and welcome to my new class Haunted
Walking Houses, a dark fantasy
Ikllustration Adventure. In this class, we
are going to create three haunting imaginative
ink illustrations of strange walking houses and
dark fantasy creatures. The projects in this class
include house that crawls, the nest of the cursed house. And finally, we have
this final giant mechanical inspired
project Meca House. This class is
designed for anyone who loves dark fantasy art, creepy illustrations, storytelling through drawing
and expressive inkwork. We'll begin with
the fundamentals in which I'll be
showing you some of the techniques that
we'll be using and different kind of supplies that you can use
in your project. Then we'll be diving in
a little bit deeper with more techniques and different kind of
texture you can create. And then we have this in which I'll be breaking down different
sections of the project, how you can easily
create houses, creatures, and this kind of mechanical parts of the house. Hi, everyone. My name is shal
I'm an artist from India. Honestol sa I teach
various classes on oil, pastel, ink, illustration,
and watercolor. You can find more of my work
on my YouTube and Instagram. This class is designed
for anyone who loves dark fantasy art,
creepy illustration, storytelling through drawing
and expressive inkwor, whether you are a beginner
or an intermediate artist, you will be able to
follow along because I'll guide you through every
project step by step. I have included
multiple basic lesson with lots of examples so you can understand how
different marks and texture work together
in ink illustration. Then we'll dive deeper
into constructing the elements used
throughout the project. Also you how to break down
and sketch different parts. Most of the class
are in real time, so you can confrontbly
draw along with me. So if you enjoy
dark fantasy world, creepy creature
strand architecture, and expensive ink illustration, then this class is
definitely for you. Join me in this dark
fantasy adventure, and let's create
this terrifyingly beautiful walking
houses together.
2. Class Project : For your class project, you can complete all three
haunted walking houses illustration from this class. We have house that crawls
followed by the mecca house, and then we have this
mist of the cursed house. You can either draw
all the project as you complete challenge or choose your favorite one and create it
in your own style. Apart from the
final illustration, I would also highly
encourage you to upload your practice seeds
from the basic section. Thise practice seats
are a great way to improve your confidence with ink illustration and help you understand texture and
seeding much better. Once you finish upload your artwork in the
project gallery, I would absolutely love to see your haunted
working houses and your creative interpretation of the dark fantasy creatures. You can use fine
lines, brass paint, ink or even a simple ballpoint paint for all your project. Feel free to experiment and
add your own creepy details, texture or fantasy elements to make the illustration
more personal and unique.
3. List of Supplies : For this class, you
will need pencil and a reset to do the music
pencil sketching. You can use the ballpoint paint, gel paint or Sakura
micron fine liner to create all the illustrations. You don't need all
fancy supplies. With only this, you can
create most of the sections. Apart from this, I also
have lots of breast pain. I'll only be using
one or two of them. So these are from
Zikurata case and pentel. I also have this green
colored breastpin that I'll be using
for some section. If you want to make it a little
bit colored illustration, you can use colored
breast paints or the color fine liners. I also got this
sparkling breastpin. I won't be using it,
but if you want, you can include it
in your project. Two more breast pains from the Tombo white gel pen
will come in handy. Maskin tip to secure the paper. If you want to use ink or
watercolor, you can use it too. I've got this top
from Zikuratake. If you're going to use ink and watercolur
then you will need braspin and white
ink if you want to add additional highlights
or cover some section. In here, I'm using 300 DS and watercolor paper
to do the projects. You don't need all
those fancy supplies, a single ballpoint pen or fine liner along
with the breastpin. With only this, you can create all the illustrations
in this class.
4. Basics : Welcome to the basics.
In this lesson, we'll go through some of the most important
stretching techniques that we'll be using
throughout the class. Let's start with
the basic lines, starting with a
simple straight line. These lines may seem simple, but they help us
practice line control, hand presser,
consistency, and rhythm. Let's create a
varieties of the lines, vertical lines, horizontal
ones, diagonal ones. Then in here we
have broken lines. Now creating wavy lines
along with the broken lines. And a little bit of hatching. Hatching is a technique
in which we create shading and texture using
group of parallel lines. To make it a bit more darker, you'll have to increase the
number of the layering. Here's another example of hatching technique
using angle line. Every illustration inept
using simple lines. Pratic simple lines
helps improve your confidence,
accuracy, and smoothness. Try drawing slowly
first and then naturally increase your
speed to do the seeding. Now in here, let me show you a little bit detailed version of the sading using
the hatching lines. In here, let's create a gradient using the hatching technique. So we are going to
do the seeding using this hatching
technique and create a gradient from dark
to lighter region. In case of the hatching,
piecing matter, spacing refers to the
distance between lines. The wider the gaps, the
lighter the area will appear. The closer the lines, and darker the area will appear in here. I'm making this region
a little bit darker. So closer lines in here, as well as I'm also adding more additional layers of hatching lines to
make it darker. Here's another form of
seeding that you can use. So I'm using this kind of small hatching lines
to do the seeding, a little bit of different kind of textured look for the sading. Apart from it, the direction of the lines also affects the
form and the movement. For example, the vertical line will make something look taller. With horizontal lines, we can make surface feel
a little bit flat, and with curved lines, it
will help sew around forms. In here, you can also play
with the varied braser with the light braser you will get a little bit of
soft siding effect. And with a heavy presser, you will get a bit bolder and darker region for the sding. The things that you can do
with the sakura micron file and the same things can be
done with the breastbins. You'll have to exert a
little bit more control. I'm going to create
simple hatching lines. I'll have to apply
a little bit more creating simple straight lines like this to do the hatching. With the breastbins,
we can create a little bit more dynamic
forms of lines like this. To make it consistent,
you'll have to apply the same presser
and at the same angle. You can also do the
seeding like this. It will be a little bit
more dynamic and a little bit different from the
simple paints that we used. Create this kind of
textured seeding effect with the breast pain. You'll just have
to flick your arms to get this kind
of seeding effect, creating curved lines
with the breast pain. This kind of textured, this kind of textured
plus stru can be used to create f here or trees
or to create shadows. Now, creating a little
bit of curved lines. Here's another form
of hatching lines parallel curved lines. So we have got this kind
of parallel curved lines. One more example
with broken lines. In here, we have
got cross hatching. Crosshatching is created by allaying hatch lines on
different directions. The first example,
very simple one, vertical and hogontal one. Then this is the widely used
kind of hatching lines, vertical and angled
lines like this. Here's the third one. You don't have to use only two layers. You can do multiple ones. In here, I'm going to use three layers. This
is the third layer. A one mode. Both
are diagonal lines. Cross hatching can be
divided into two sections, simple cross hatching in which one layer crosses
over to the other. This creates a medium sadose then we have dense
cross hatching. More layers are added.
This create better depth, more dramatic contrast
and moody texture. Like the hatching
lines, you can also use this kind of broken lines
to do the cross hatching. Now, let me show
you how you can do the seeding using the
cross hatching technique. In here, we'll have to
use the second type of crosshatching,
dense cross hatching. Now to make it darker,
we are going to do a lot of overlapping of
the lines like this. Just start slowly and increase the number of the lines
to do the seeding. You've got the rough
idea how you can do the seeding using the hatching and cross hatching technique. You can also use this
kind of lines to do curved hatching and
curved cross hatching. Let me show you how you can do the same thing using
the bras pants. Simple line. Now, another state of line to do
the cross hatching. Here's another example
of crosshatching. Dense crosshatching. This kind of crosshatching is perfect
to create haunted houses, dark, forest and fantasy art. This creates a little bit
more contrasting effect, and this is comparatively more darker than
the hatching lines. This takes a little
bit more time, but the results are
more darker and more contrasting than
the hatching lines. I'll only be using
a little bit of cross hatching for
some of the sections. Mostly, I'll be using
the hatching lines. Now let me show you
some of the texture that I'll be creating
using the breast beans. So this kind of texture
for this project. We'll have to just
create this kind of simple rows and rows
of hatching lines, small hatching lines like this. This flicker arm like this to create this
kind of texture. You can increase the
length a little bit. You can also play
with the direction. You can also use this
to do a little bit of shading or the upper
region, add more lines. And as you progress, just
decrease the number of the lines and increase the
spacing in between it. As you can see in here, I'm
increasing the spacing in between the lines as well as decreasing the
number of the lines. You can get a little
bit of similar effect with a normal fine
liner like this. If you apply a little
bit more presser, you will get a bit
more darker lines. Here's with the breast
pin. Change the angle, apply light presser, and flick your arm to get this
kind of effect. Now with the breast pin, you can also get this kind
of rough texture. For some of the sections of the illustration,
I'll be using this. It will be a little bit
difficult to replicate with the normal ballpoint
pen or the fine liner. If you want, you can
also create this kind of rough texture for
some of the regions, and you can also increase that intensity to create a
gradient effect like this. That's all for the basics, and I'll be seeing in
the next section with a little bit more example and more techniques
that you can use.
5. More Techniques : Welcome to the second part of the demonstration video here, I'll be showing you some
of the other techniques that you can use in
your illustrations. I'll only be using a few of the techniques for
some of the section, starting with the broken lines. These are the lines
that are intentionally interrupted instead of
being completely smooth. As I saw in the earlier video, you can use it to do the
cross hatching hatching, as well as you can also
create curved lines. I'll be using this kind of broken lines for some
of the sections, especially to create the roof
or to create a little bit of rougher texture to do
a little bit of sading. You can also use the
breast paints to practice this kind
of broken lines. You can vary the length,
you can make it uneven. You can also play with the
spacing and directions. This kind of broken
lines will help create a bit more
rougher texture, and it also feels a little
bit more organic and natural. This will work especially
well for wood, stones, old houses, stream bark or to create
weather surfaces. You can also use it to create
rain texture or to create more rougher texture
for the ground valve or to create wooden texture. Let's expand the lines. Simple, small lines like this. Simple, small line like this. As you can see,
spacing matters a lot. The closer the lines are, the darker the region will appear. The farther apart they are,
the lighter it will appear. We use this kind of spacing in hatching and crosshatching. The concept is very simple. With the wide spacing,
we'll get lighter value. With the tighter spacing,
we'll get darker value. This is one of the easiest ways to create depth using only ink. Next, we have line weight. Line weight refers to the
thickness of the lines. With the fine liner
or the ballpoint pain you can increase
the line weight. You'll have to just overlay
more layers like this. With the breast pain, it
will be a bit easier. You'll just have to
apply more presser to get more thicker lines. I'll be using thin lines to
create delicate details, create distant object
or create softer form. And with the thick lines, I'll be using it to create shadows, foreground objects, and I'll also be using it
to create bold contrast. Then we have the
directional lines, simple lines like this. You can use this scattered line to create different
kind of rough texture. Curve lines like
this. You can use it to give a little
bit more form and the seeds to some
of the sections. Basically, I'll be using
curved hatching lines to give a little bit more form and
shapes to the objects. This kind of curved
shapes introduces flowing and organic line. Next, we have a
stippling. Stippling uses dot instead of the line. Stippling is another
shading technique entirely made up of dots. It works in a similar fashion. Few dots create lighter
area with more dots, you can create darker area. In here for this spherical sad, I'm going to do a
little bit of seeding. I'm going to make the
bottom left con bit darker. So I'll be adding more dots in here to make
this region darker. The closer the dots are, the darker the
region will become. With this dippling you can
create softer texture, organic surface, and it can also be used to create
atmospheric sading. The sdingeffect that you'll
get this dippling will be much more finer as compared to the hatching and
the cross hatching. But the main disadvantage is
that it takes a lot of time. For this simple spherical shape, I'm concerned that the light is falling from the
top right side, so the sados will be forming on the bottom left
side like this. You can also use this tippling technique to do the outlining. You can create softer
outlining with dots. You can create tighter
outlining with closed spacing. You don't have to create a small dots to do the stippling. You can also create large
and small dots like this. So that's all for the stippling. Next, we have got scribbling. This uses loose
overlapping lines. Random lines like this. This is very fast and very easy. As compared to all
the other techniques, this is very fast and very easy. This kind of chaotic scribbling
creates rougher texture. It can be used to
create messy shadows or to give it a little
bit of dramatic energy to your illustration. You don't have to use the curved lines to do the scribbling. You can also use this
kind of straight line. And you can also do the seeding using the scribbling like this. It is somewhat similar to the hatching and cross hatching. I won't be using
this scribbling, but if you want,
you can incorporate in some of the sections. Then we have some
small lines like this. You can create a little bit
of rougher texture with it. Scattered lines like this, you can organize it like this. You can also use this
kind of arrowhead like seem Then we have this kind of scattering
effect that you can create with the small lines. So you can use this kind of smaller lines to create
various kind of effects, simple scattered
lines like this. Next, we have scallops. Scallops are basically repeated curved patterns like this. You can create various
kinds of scallops. You don't have to stick with
only the curved shapes. You can also use this kind of angle line to create
the scallops. I'll be using it to
create the roofs and also put some of the sections to
do a little bit of designing. Feel free to experiment and create other kinds of scallops. You don't have to create
connected scallops. You can also create this
kind of unattached scallops. By changing the sap,
you will change the texture of the
scallops completely. Next, we have got contour lines. Contour lines follows
the seep of a pane. First in here, we have
got maybe contour lines. Here's another one,
circular cantur line. Then we have this
kind of angle line. Changing direction of
the contour lines. This helps object
feel a bit rounded, gives more dimension and also sows a little
bit of lowness. Generally, I'll be
using tu lines to follow the seeps of
some of the sections. Here's another kind of
seeding that you can use to give a little bit more texture
for some of the sections. I'll be using it
for some part of the roof and some
part of the ground. Grass like texture that you
can create for the crown. I'll be using this a little
bit for one of the project. Splick your arm to get
this kind of effect. And these are all
simple example. If you want to create more
sample and more texture and patterns, you can do that. Simple curved lines like this. Here's another one, creating
this kind of bird like see with a small V like C. And
that's all for this section. I'll be seeing with
the next section in which I'll be using
ink and watercolor.
6. Ink and Brush: Welcome to the final
part of the tutorials. In here, I've got a small brush, and I'll be using this
Ji kuratakase ink. Instead of it, if you want, you can also use the watercolor. You can use the ink
to create flat. By flat se, I mean,
spreading the color evenly. To make some of the section
darker, you can use it. And like the breast paints
and the fine liners, you can also use the brush to create the same kind of effect, hatching, cross
hatching, stippling, scribbling and all
the techniques. You'll have to be a little
bit more efficient with the brush to make this
process smoother. Otherwise, the lines will become a little bit muddier and
it bit hard to control. I won't be using the ink
and the brush to do it. But if you want to include watercolor or ink or
the brush to do it, you can do that in
the same manner. You can also create the same
kind of texture with it, similar to the breast pants. With it, you can create
very beautiful gradient. I'm just diluting this ink
by adding more water to it. And one more advantage
over the other supplies, you can use it to do
wet on wet technique. And here I use a bit
gray colored water so that it will be visible. And now using a bit
concentrated black, I will spray on its own. So if you want, you can use wet on wet technique to create very different kind
of texture and background for some of the
sections of your illustration. And if you're good
enough dust control, you can create all
the illustrations of all the projects only using
the ink and the watercolor. Feel free to experiment with more supplies and do more
examples and more practices, and I'll be seeing you
in the next section.
7. Projects Sketches: Welcome to the second
part. So for this part, we have got the
house that crawls, the nest of the urged house. And lastly, we have
got the Mecha House. So all these three
houses are on the move, so let's have fun with
this second part, and it's going to be very
interesting since for this, I'll only be using
the mirrors pains. So you will get a lot of practice with using
the breast pain only. And yeah, let's start with the demonstration of how are we creating a
different kind of houses and a different and
different creatures and the various elements that I'll be using for the
next three projects. Here I've already started switching out the guideline
for our first house. So this house is a little bit complex as compared to
the first 31 that we did. And instead of a
single building, we'll have three building
combined in a one. So it's going to be
a bit challenging and fun to create
this kind of house. And so let's create the roof
for this side of the house. So this is just a
rough demonstration. We'll be making changes and adjustment in our main project. And yeah, let's create the
roof for this portion. You can consider this as a cumulation of three different
houses combined in one. O. So this section is
a bit larger in here. So let's create a door in here. And for the front side of all the houses for the front side of all the
building for this house, the windows will be
a bit larger and only the windows will be visible and will be
colored with a black ink. And as I mentioned earlier, for all the project
in this section, I'll only be using
the breast pain. So here, I'm using this Zig kurataki
breast pain to go over the outlines and feel free to make
adjustment and changes. You don't have to follow
the strict guidelines that you created with a pencil. Here I'm applying
low pressure with the breast pain to
create this line. The main advantage
with this breast pin is you can create dynamic lines, the lines where it thickness. Let's continue with going over the outlines and make adjustment
wherever you see fit. And as you can
see, for the edges and the cornets of the houses, and as you can see for the edges and the cornets of the building, instead of a single line, I'm creating two or
three lines to give it more depth and more
dimension to the building. So this section is a
little bit curved, and so let's make
it a bit curve. The lower region of this section will be
covered with ink, so it will be
darker in the seat. And now let's add the windows. I'll be creating
bit larger windows. Simplified version
of the windows. If you want, you can divide the windows into
different panels. But here, I'll only be creating this small square seat
with the windows. And let's encircle this. Now, let's add the third
window for this welding. If you want, you
can experiment with different seats and
sizes for the windows. And if you prefer you don't
even have to add the windows. Instead of three buildings, you can only create
a single building. So the choice is yours, feel free to experiment. Let's create some pattern
taxie for the top. So just simple broken lines. So you can consider this to
be kind of card hatching. Or you can also consider
or you can also consider this as following the contour of the
heap of the roof. Let's add the
contour line for the third and the final
house, the small one. Moving on to adding the
windows for this front side. Instead of the three windows, you can add only one or two, or you can even create
a large door in here, too, along with the staircase. For the main project, instead of creating the
square safe windows, I created rectangular
safe windows, and not all the windows
are of the same size. Some of the windows will
be a little bit smaller. And apart from that, most of the things will remain the same. Let's move on to
the curved section. So this section will be a
bit darker than the sad. So the light is not
falling in here, so I'll be adding a bit of black in here to create
a bit of darker sad. If you prefer, you can even use the gray breast paint to create a little
bit of gradiation, but I'll only be using the black breast paint for all the three project
in this section. Let's set the final window. Let's encircle it with
the broken lines. We are almost done with a very simplified version of the house for our
fourth project. If you want, you can make
more adjustment to it. And now let's add a few
more lines to create a little bit of texture or
pattern for this building. Add more finer details wherever
you think it's required. I'm almost done with this. I'll be adding a little
bit more details for the lower section or for
the base of this house, a few more lines to create a little bit more
defined bees for it. So this section two will
be a bit darker in nature, so let's cover this section
with the black two. And yeah, we are done with
the base for this welding. Now, let's move on to creating the outline for our creature. So this creature has the body of a spider and the
head of a human. So the skull of a
human initially, I thought that I'll start
with the pencil sketch, then I gave up on that idea since the seat is
very easy to draw, so I am just directly starting
with the breastpin to create a se of simple
skull for the creature. This is the simpler version of the human skull for the
head of our creature. If you're not
comfortable with it, you can start with
the pencil sketch. Let's add the eye sockets, two hollow black eye holes for this skull and adding few more lines in
the upper section of the head to make it a
bit more realistic. Let's add large canine for
the teeth for this skull. This region let's make this
region a little bit darker. And yeah, this is just a simplified version of the skull that the
creature will be having. Now, let me show you the tough demonstration
for its body. Before doing that, let's
remove the pencil sketch. Ensure that the ink has
dried and then only erase. Otherwise, you will get
smrging all over your feet. I did the mystic
a lot many times, so please be aware and ensure
that the ink has dried and As I mentioned earlier, the creature will have
the body of a spider. But instead of the eight legs, I'll only be creating
the six legs since adding eight legs for
it will be a bit challenging. So here's a simplified verson. We tiny miniskle and let's create the legs the spider legs. For the legs of this creature, we will be only
creating three joints, and very simplified person, and the sets for the
leg is quite simple. The three legs on the other side will not be clearly visible. Only a small portion
of it will be. Only a small portion
of it will be visible. And now for the
remainder of its body, let's create this
kind of pattern, the same kind of pattern that we used to create the grass, just some jig jag lines, and you can conside
this to be some kind of scribbling that we are
doing using the breast pain. So that's how we'll
be creating the body, the legs, and the skull
for this creature. My initial plan for the
ground for this creature was that it's floating on the water and the
water is rising above, but I did not create it that. Instead of that, I choose to go with this kind of
texture for the land. So broken lines that is rising above or that is floating
towards this creature. So I'll be creating this kind of land or foreground for
the fourth project. Let's add some contour lines in here for the bees, and, yeah, we are done with the elements and the houses for
our fourth project. Let's create the body
for this larger skull. So grass like pattern or texture for the body
of this creature. If you have any suggestion
or name for the creatures, let me know in the
discussion section. Now, for the second project, we have got this mecca house. So a combination of
past and the future, the old house and
the modern robot. So for this one,
I'll be showing you how I'll be creating the house, the legs and the
arms of the robot, and some of the patterns that I'll be using
for our house. This house is somewhat similar
to the second project, the large house or the
large her that we created. But here, instead of
the simplified person, we'll be creating and
adding more details. Just follow along with me, and it's quite easy,
not that difficult. So this section of the roof
will be a bit slanted. And instead of the
single building, and instead of a
single building, here too we'll have two
or three buildings. So this is the second one, and the other two are behind it. Let's divide the houses
into different sections. There will be balcony
in the front, too, so let's create the
extended portion for the balcony in the front. So this will be the door, and let's create the windows. Let's add the base
for the house. So this section will be
a little bit different. So I'll be creating the kind of brick like pattern
for this here. And here we have got a
small cannon on the top. Uh, ventilation or you can
see a window on the top, too. So here I'm done
with the basic sap. Now I'm going in with
the brass pen to go about the outlines and
add the final details, the windows, the doors, and fine lines and brick
like pattern for the base. So let's continue with first, I'll be just creating the main outlines and then I'll be adding the
details later on, applying light prezzer with the brat paint to create
the dynamic lines. We're almost done with outlining
this side of the roof. Let's add details and make
it a bit more defined. Once again, here, too, I
am using broken lines, or you can say organic lines to create a bit of
texture and pattern. So for the top, I'll be creating this kind of fine lines to create this kind of pattern or you can say
design for the top. You can concede it that it is
covered with a hay on top. So yeah, let's add
more fine lines. And I'll be dividing
this section further on. For our main project, we'll be adding more finer lines and wearing the lens more. So let's add the fine lines for this last portion of
the top of this roof. And for the other side
or the other building, we'll be creating a
different kind of roof, simplified or simple
version of the roof, the roof that we created for the other two projects in the first and the second
in the first part. Let's add a little bit
of lines in here to create a bit darker set in here. Since this is covered
by this large building, then we have got a small
tower in the back. This will be a little
bit darker, too, since it's covered by the first building and the
second building. So some fine lines
or you can consider it a little bit of cross-hatching to create
this kind of scene. Fine lines in here to sew a
little bit more darkness. And now let's add the
tower on top of it. You have got this ring line structure on top of this tower. And now let's add
one more in here. And on top of this tower, we'll add a little bit
of design later on. But for now, let's add a little bit of black on the
sides to make it a bit more darker and to make it look more and to make it look
more three dimensional. Here I'm creating
the contour lines following the contour
of this circular tower. And the design I was mentioning
for the upper section, a straight line, a
rhomboid seep on the top, and two intersecting circles. Let's divide it
into two section, and this is the kind of
design or set you see. So this is the kind
of design I'll be adding on top of the tower. And let's continue with
the remaining section. So going over the
pencil outline. So this house will be a little bit different from
our main project, since I won't be adding
the hand on the sides. So instead of the robotic arm, I'll only be adding the
windows in that place. Let's add the windows,
small tiny windows. If you want to make them detail, you can make them
detail or you can add three or four panels window. The choice is yours, but
I'll be keeping it simple. Only this kind of
simple windows. I won't be even encircling them. But if you prefer,
you can do that, too. The fine lines to make it a
bit more green or textured. On all the sides of the house, I'll be adding this fine lines
to make it a bit more old or or you can say green like
texture or wooden texture. And as I was mentioning
for the base, I'll be creating the
same brick like pattern. So we are done with
this building. Now let's move on
to the main one. Let's divide this into
two different sections. So this is a two story building. I'll be adding the
windows in here, too. Now let's go over
the outline for the corner or the
edges of this house. So two or three lines to make it more bolder and
more definite. I'll be going over
the outline of the extended portion later on. But for now, let's do the
roof on the other side, a bit of straight line
and then it gets a little bit curved
for this section. Now, let's do the outline
for the other side. So two or three lines, and the extended portion or the balcony in here will be
a little bit challenging, so I'll add it later on for
now. Let's do the base. So let's do the base. This base will be a little bit lower than the one
that we did earlier. And now let's add this
line on the front, too. So this line divides the house into two different sections
two different floors. Adding this kind of small and fine lines for this section. Now let's move on to the side. So let's make this side a bit more bolder
and more defined, so adding a few
more lines in here. And now let's do
the upper section. So this will be so this is the cannon I
was talking about, small cannon on the first floor or the top floor in the front. Instead of this small cannon, you can create even big one, or instead of a single cannon, you can add multiple cannons. And also, you don't have
to even add the cannon. Instead of cannon, you can
create a large window. Now, here I'm creating a large window on
the upper section. So this window is a bit
defined and detail compared. So this window is a
little bit defined and detail, having two panels. Now let's create some
green light texture and pattern for the remaining
section of this upper part. Here I am going to add small windows, two
or three windows. Now let's make it a
bit darker now let's make it a bit darker since this region lies
behind the roof. Now, let's move on
to the other side. So here we have
got one more door. Instead of this door,
you can only create the windows or you can even create the staircase
or the stairs. Now, let's create the
fine lines to create some green line texture for the remaining
section of this side. We'll be doing the same
for the other side, too, but that side will be
a little bit challenging. So we'll be creating the
extended portion too. Here, let's create the brick
like pattern for the base. Fine lines to divide it
into different sections. And we have got only
two more lines, and then we will move
on to the front, the challenging side
for this house. Speed division two part.
So this is the first part, and I'll only be
creating this house, and for the second
part, we'll be doing all the remaining
elements for the second and the third project
of this second part. Let's do the brick like
pattern for this side, too. Now let's create the
extended portion. This region will
be a bit darker, not bit darker, but
completely darker. Let's create a door here, too. I'm using broken
lines since I'm more comfortable with creating
this kind of lines. I'm not creating the
doors more detailed. If you prefer you can make it detailed Moving on to
creating a single window, two panel window in
here, a bit detailed. And now let's create
these fine lines. So I'm just wearing the sit
and sizes of the lines. And lastly, let's create a best. This will be similar to the one. So the best will be
somewhat similar to the one that we did
on the upper house. I'm not going to make
it more detailed. Yeah, we are done
with this house. If you want, you can
add more fine lines, more details to it, but I'm satisfied with it,
how it turned out. And with these, we are
done with this video. I'll see you in
the next one where we'll be covering the
remaining elements.
8. More sketching : Welcome to the second
part. I created a robotic hand on my own, but I was not able to record it. So let's create another hand. So the hand will
be quite simple, simple circular and cylindrical
seep of where it lands. Here I am starting with
the basic pencil sketch. Since this will be a
little bit trickier to directly starting
with a bras pain to do, just follow along with me simple circular and cylindrical
seeps for the hand. The hands and the legs
will be divided into different portions to
make it a bit more easy. Free and you are free
to experiment with different seeps and the sizes of the cylindrical
and spherical seeps. And you don't have to even
use this kind of s sieves, the spherical and
cylindrical seeps I'm using. And with these, we are done
with the basic penciluskich. I'll be making some adjustments
to the penciluskich. Here I'm going with the
bras brine to go over it. Carefully going over
the pencil sketch and making adjustment for
some of the sections, I'll be making it a bit more darker as compared
to the other one. So to create a little bit of more depth and
dimension to this hand, and the remaining portion of the Rabatu I'll be
doing the same. Some of the section
will be a bit darker and others will
be a bit lighter. And also, I'll be using the
organic lines or organic. So I'm making things
a bit confusing. By organic lines, I
mean dynamic lines, lines of varied thickness. For any section that you are not confident
or comfortable with, you can just add more fine
lines or add more rectangle and circular seams to make it look more robotic or mechanized. Like here for this
elliptical sad, I decided to completely
cover this with the black to so that it's
hollow from the inside. So let's add the black
in here to create a little bit of three
dimensional seed that it's hollow
from the inside. And so this reason here I added a little bit more black to so that
it's a bit darker. Instead of this, you can
create broken hands or some parts of the hands or the links or the house missing. Now let's move to the hand. We are done with the elbow. As you can see, for
the first hand, the portion below the
elbow was a bit thicker. But here, instead of
creating it a bit thicker, I decided why not let's
make it a bit thinner. And as the hand extends, I made it thicker. So just completely opposite
from the first one, so feel free to change
the see sizes and experiment and see what feels comfortable with
your illustration. Now, let's add the finger. Fingers are very simple, long and elongated
cylindrical sieves. Here you can think that I'm creating the petals
of a flower in here, and then let's create another
set of petals in here. So very simple and easy
see for our fingers. Let's add some fine
lines in here to make it to make it
look more realistic. And yeah, we are done
with the hands for our mechanized house.
Now, let's do the link. Before doing the leg,
we'll have to create the base on which the
house will be resting. So this will be the
cylindrical sap on which the house
will be resting. And on top of the
cylindrical shape, too, I'll be adding somewhat of rectangular seep so that
the house is revolvable. Now let's continue
with sketching out the guidelines for the leg. This will be somewhat
different from the type of construction that we did
for the hands for the robot. Here we'll have somewhat
elongated seats and bit curvier and more
boulder for our leg. This is the knee or you can consider it as a
joint main joint. The leg for the
robit will not be much longer if you prefer you
can make it a bit larger, but I'll be making it, but I'll be keeping it small. So this is the
foot of the robot, and here we have put ball and
socket joint for its foot. Now, let's add more details to make the fit of the
robot a bit more stable. And yeah, this is the
basic simple seep that I'll be using to create
the leg of the robot. If you want, you can
make more adjustment, you can add wires or
other components to it. Here I'm going in
with a rust pin to go over the outlines. For some of the
sections, I'll be adding more lines to make it
more darker to add more depth and
dimension and make it more three or more realistic. For this section, let's
create a little bit of contour that the
ball is present or something is extending from this cylindrical that is connected to the remaining
portion of the ling. And now let's continue with
the remaining portion. So the hands the links and the remaining portion of
this house is quite simple. It looks, I mean, it looks
a bit challenging at first, but just following the
simple instruction or just following how
I'm sketching out, you can simply and easily create this hands and the remaining
portion of the house easily. Now, let's create the food. So food is a bit more
defined and more detailed. And we have also got a cannon
at the base of the foot. Let's do the base. So this is the cannon
that I am talking about. Small cannon at the
base of the foot. It will clear the debrint
is present on the ground. Let's add fine lines in here. This region will be a
bit darker and save. Let's continue with
the remaining section of the foot for this Robert. You'll have to consider
that the light is falling from the left
or the right side. And depending on the side
the light is falling from, you'll have to add more
shadows on the other side. So if the light is
falling from the right, then you'll have to add
more sados on the left, and vice versa, if the right
is falling from the left, then you'll have to add
sados on the right. And with these, we are done with the robotic hand
and robotic legs. If you prefer you can add more fine lines or
more details to it, but I'll be keeping
it simple as it is. Let's ease some of
the pencil marks, and then we will move on to the element for our third and the final project
for the second part. Insure that the ink
has dried and then on erase the pencil marks. Now, let's do the elements for our third and the final
project for this part, the nest of cursed house. So we have got ostrich like legs and a nest on top of which
the house rests upon. So let's create the hearts
a very simple combination of conical C for the top and somewhat curb rectangular s for
the remaining portion. Let's add the front in here, a bit of extended portion. I'll be dividing this
curve rectangular seat into three different sections. One will be consisting of
the door and the other two will be consisting
of the windows. For our main project, instead of the single heart we'll
be grating two or three. But for this one, you have got the rough idea how you can
at this kind of simple herd. And now let's do the outlining and add more details to it. Starting with going
over the outlines for the dividing sections. So you can consider this
to be the Oden planks or wooden beams that will divide this heart into
different sections. And for each different section, we'll be completely covering
it with black dots, not black dots,
but black strokes, not completely covering,
but partially covering it. Region some of the white of
the paper will be visible, but mostly it will be covered with mostly it will be
covered with black strokes. Now let's create the
front of the door. So this section will
be a bit darker. And yeah, let's extend this dividing now let's extend this dividing lines
for the base of this heart. The extended portion, let's do the outlining for the
extended portion too. We to make adjustment and play with a seep and
the sizes of the herd. You don't have to
completely stick with the outlines that you have
created with a pencil. And yeah, we are done
with the basic outlines. Now let's fill the upper section with the strokes that I
was mentioning earlier, partially covering
it with this kind of small strokes
with the brass pane. You can consider this to
be similar to that of the strokes that we used
to create the pine trees. And now let's create a door, a very simplified version
of the door, wooden door. Here I'll be creating
the wooden doors. Now let's divide it into
different sections. And now, all we have to do is to create two windows
on each side. And here, too, I'll be
creating brick like patterns. Here I just created a very simplified version
of the windows. For our main project,
we'll be making it a bit more
detailed and defined. There, I'll be creating
four paneled windows. And now let's create
the brick like pattern or the texture for the
remaining portion of this art. So this pattern will
be a little bit different as compared to all the others that we
have created so far. Instead of the single lines, here we are creating two lines. And now let's divide it
into different sections. And we are almost
done with this. And if you want, you can create different kind of pattern
or tation for this hurt. You don't have to stick
with the same kind of brick pattern that
I'm used in here. Now, let's add the same kind of brick pattern in here
for this front portion, the front extended portion. And with this, we are
done with this hurt. Now let's move on to creating the legs, ostrich like legs. But like legs, you can consider this very simplified
sips for the leg, and we'll be adding claws
for each separate finger. Instead of this bird like lake, you can create humanoid lakes or reptilian lakes
or animal lake. Feel free to experiment with different
kinds of the lakes. Now let me show you
a closer look of the leg that I'll be
creating for this house. So here's a closer view. The sep is very simple, and you can easily do it. If you're not confident, you can just start with a
basic simple pencil ski and then add the bras
pan on top of it. So these are the two
different kind of legs, not different kind of
link, the seam leg. One is smaller and one is big. And now let me show
you the other kind of brick pattern that I'll
be using for our heart. This is somewhat similar
to all the brick pattern, but instead of a single
lines that divides it, I'll be creating two lines. For the heart that
we created just now, we use two horizontal lines
for the brick pattern, but here I'm using two vertical lines for
the brick pattern. The choice is your, you can
use any of this kind of brick pattern or
you don't have to even use the brick
pattern for the heart. And with this, we are done with this section of the part two. I'll see you in
the next project.
9. The House that Crawls: Welcome to our first
project of this section, the house that crawls. This will be somewhat similar to what we practice in the
demonstration video. Let's start by drawing out
the guideline for the house, and then we will move on to sketching out the guidelines
for our creature. This time, the creature
is going to be a bit more defined
and a bit larger. Very simple sketch for our
house and the creature. If you want to make adjustment with the seeds in the sizes of the creature and the house,
feel free to do that. And as I mentioned in
the demonstration video, all the three projects
in this section will have more
than one building. A very simple seat
for our main hut, then alongside it and then alongside it
on the right side, we'll have a smaller
hut and beside it, a bit larger or you can say an elongated heart or
tower like structure. The whole video is in real time, so you can always
join along with me. For this entire section, I'll be using the Basten only. If you're not
comfortable with that, you can use the fine liner. You can use Roulette to create
straight lines if you are not comfortable with using
the pencil to create. So this will be the
curved section. Now, let's extend extend the
roof section for this hut. Here I decided to create
a larger chimney. So if you want, you
can stick with this. You don't have to
create another building behind these two houses, but I'll be coming back and adding the larger
building later on. For now, let's do the
outlines for the windows, doors, and a little bit of
sketches for our main feat. Instead of painting
this large chimney, you will have to make
it a bit smaller. And here I made a mistake. Show that side's bit larger. Yeah, this will be the curved
section for both the sides. I'll be adding three windows. The windows will be larger
and single panel windows. If you want, you
can make them a bit more decorated or detailed. For the side to we have
a large window and the door will be in here
near the curved section. And for this small hut, we'll have two small windows, and this will be the larger one. This curved section will be
a little bit darker in sets, so I'll be using setting. I'll come back to
this house later on. For now, let's do the creature. So somewhat circular sea for the head or the skull
of this creature. If you want to make adjustment,
we free to do that. You can make it a bit larger or instead of single skull, you
can create two or three. That will be really difying. This are just rough
guidelines for the legs. I'll be making adjustments while I'll be going in
with a breast pain. All these legs will
have three joints. The legs on the other side
will not be that much visible. These two legs will be visible, but the third one will
not be visible that much. Let's add one more
leg in between this So this was the leg I was talking about that won't be visible that much, and this middle leg
is not satisfactory, so I decided to make a
little bit of adjustment. So these are the six leaks
that this creature will have. And as I was talking about, let's extend this
person a little bit to add another building
behind this too. And for this two, I'll only
be creating the windows, two windows on one
side and one window on the other side that will be
partially hidden by the roof. On top of each roof, I'll be adding a
smaller chimney. And yeah, I am done
with the basic sketch. I'll be making
adjustments as I go. Now let's do the inking. So here I'm using the Zikurataki
bras and Zikurata ink. Here, I'll be creating some what of broken lines to create this kind of inty texture
for the whole painting, the chimney at the top. For most of the sections, I'll be creating some fine lines to give it a rustic look. And for the corners
and the edges, I'll be creating two or three lines to make
it a bit bolder and to create stinton
between separate buildings, moving on to the main house. Instead of creating this
kind of broken lines, you can create uniform
and straight lines. And apart from
this, if you want, you can use watercolors to to create this kind of lines instead of using
the brass panes. And you can also use
the watercolor and ink, a combination of both to make it a bit more colorful,
not colorful, but a bit monochromatic like
our first three projects, continue on with the third and the final small house
that we have in here. Adding the chimney on the top, let's create a small
chimney in here, a total of three chimney
for the three buildings. If you're using the breast pain, you will have to
be bit cases and ensure that the ink
has dried otherwise. There is a chance
that you will get smudges all over your beach. Let's create the
Base for this one. Two or three lines to make
it a bit more bolder. I'll be keeping the door simple. If you want, you can
make it a bit more detailed and add
pattern or designs. This is the extended portion
I was talking about. Let's fill this
entire section with the curb hatching lines, and I'll be doing a
setting later on. But for now, let's do
this and this section, completely filling
it with a black. Now, let's do the windows. For the entire section
of the windows, I'll be completely filling
it with the black, and then I'll be greeting. And then I'll be using
the broken lines to create the outlines for it. So using broken lines to do the outlining
for the windows, if you want, as I said earlier, you can create a bit more
detail and define windows. Also, instead of
completely filling the entire section of the
windows with the black, you can leave it as
it is the white. The insights will be
white and you can create silhouettes
of people or ghosts. And you are done with the
windows for the third building, moving on to the first one. Here Alv creating the windows. Here the windows will
be a bit larger. The one we created with
bit squarish in C, but here it will be a bit
rectangular, so a bit larger. The sides will be a
bit darker because of the shadows casted by the roof. And yeah, let's create the rectangular or you can see a bit larger windows,
three windows. If you want, you
can create doors to instead of a single
instead of this window, you can create a
window and a door. Here, the windows will
be a bit smaller, too small squares
for the windows, and this window will
be a bit larger, comparatively of
the same length, comparatively of
the same length as that of the three windows
that we have in here. And finally, let's encircle it. So surrounding it with
somewhat of broken lines. Let's surround our last window. For the smaller windows, too. If you want, you
can surround that, but I'll be leaving it as it is. Adding a little bit of black for the upper section of
this curved section, for the door, adding
down knobs and. And let's add a bit of
details for the roof. Some small and large fine
lines a little bit of hatching to create kind of
rustic look for the roof. If you want, you
can leave it as it is completely white or you
can also cover it with black, so entirely black roof. The lines are a bit larger, and as you can see, I'm
not creating street lines. These lines are a bit sickyO
you can say a bit curved. And for the last 22, I'll be doing the
same kind of line. Moving on to the
skull of the ghost. So this is somewhat
humanoid see skull. Add few lines here and
there to create a bit of rustic look for the skull
hollow eye sockets. Encircling this
circle seed to make it a bit more darker and airy. And for the tips, I'll be creating a bit large
and curve canines. Let's add a few more
log tiths in here for this humanoid skull
for this creature. If you want, you can even create horns on
top of his skull. And yeah, let's feel this region with the small strokes
that we practice to create the texture or to create the body
for this creature. Before doing the body,
let's do the legs, since it will become a bit confusing since it will
become a bit confusing if you do the body first and the This kind of organic
lines or dynamic lines, lines of varied thickness
and add some fine lines for the insights to
make it a bit more realistic or more grainy
or textured like pattern. The joints for each leg. Adding some fine lines and small strokes of
the brass to create for small here like projection and textures
alongside the leg. The last joint of this creature will be a bit larger and here, too, you can see, I'm creating small strops to create this
kind of rough texture. Let's do the second leg. As you can see, I'm not strictly following the outlines that
I created with a pencil, so feel free to make adjustment. And now, last, the longest
section of the link. If you want to make it
a bit more interesting, you can use a little
bit of red to colour some of the sections that
will be interesting. So you can make the legs
and the skull bit red. Also, the roof will be red. That will make it a bit more
haunting and terrifying. Moving on to creating
the legs on this side. The third leg on the other side, I'll be adding them later on. For now, let's do the section
that are more visible. So this front leg to create a distinction between the legs and the
rest of the body, I'll be leaving a little bit of space in between the body and the leg creating these kind of small strokes to create
the texture for the fur or you can see small hair
projections for the leg. And as I was mentioning, I left a little bit
of space in between the creature's body
and its long legs. So I did not have a
name for this creature. This is somewhat
similar to the spider. If you have any ideas or
suggestions for the name, let me know in the
discussion section. Let's create our
secondly for this side. The third and the
final legs that I'll be creating
for the both sides. I'll I'll try to make
it a bit larger. And for the lower
section of its body, I'll be trying to
create projections, some small projection to
sew some of the bones. Here, too, I'm living
a little bit of space. The lower section
of its spotty later on I'll trying to
create later on I'll be creating some
small projections to sew a bit of bones. Good. Let's move on to
the remaining section, creating a little bit
of small strokes to create the remaining
portion of its body. For the lower section,
as you can see, I'm making it a bit more darker. If you want, you can continue with the same kind
of texture and leave a little bit of space
in between the strokes. Finally, let's do our third and the final
leg for this side. As I said, I'll be making this lag a bit larger as compared
to the other two ones. Initially, I thought that
I'll be adding a staircase, since it will become a bit
challenging, but if you want, you can create hanging
ladder from the door. And we are almost done with this third and the final legs, making it a bit more broader. Let's add a little bit of mod strokes to make
its body a bit larger. Now, we'll have to create
one more leg in here. Only the two joints
of the legs are visible in here because
the leg is a bit larger and the other portion of the leg is covered
by the building, creating this kind
of pattern and texture for the leg
and it's extended. And we are done with the legs. Now for the ground, I'll be
creating the same kind of pattern or texture that we practice in the
demonstration video, this kind of broken and
somewhat curvy lines, not uniform lines, and I'll be trying to create
puddle like surface. First, let's cover
the entire section with this kind of broken lines, and then I'll be
trying to create the contour of water droplets. Wearing the length and
sizes of those lines. The sexon in the middle
will be a bit larger, and as we move away from it, I'll be decreasing the sizes. Extending the lower
sexon a little bit. If you want to
create uniform line, you can use pencil to
draw the horizontal line, and then from there, you can create this
kind of lines. This kind of mid curve
lines that encircles the legs and lower portions
of some of the lines. So the goal was to so that this creature is working on the water and because
of its presence, the water is rising
from the ground. Let's add few more lines wherever you think
it's required. For the rest of the region, in the foreground, if you want, you can cover it with the black or you can create
more puddles of water, somewhat of semicircular lines to cover the entire section. And I think we are
done with this. If you want, you can
add few more lines. Let's add the final details. I did not add the
lines in here for the upper section of this last building, adding fine lines. I'll be adding more lines throughout the entire
section of the building, some small lines of
varied length to give this building a kind of
rough and rustic texture. If you want, you
can create patterns like brick like
pattern or you can use scallops for the roof section or feel free to
experiment on your own. And we are almost
done with this. Let's add a few more final
details here and there. As I was mentioning, for the
lower section of its body, let's create some
small projections too, so the bones of its
page is visible. Some of the bones of
its picage is visible. In here, I decided to extend
its body a little bit. And here, we are
almost done with this. Wait for the ink to dry and then let's erase
the pencil marks. I hope you enjoyed this project. I had fun painting this one, and it turned out pretty well. If you want to add highlights or background for this project, you can do that, but I am satisfied with it,
how it turned out. I'll see you in the next
project, happy painting.
10. Mecha House : Welcome to the second
project of this section. So we have got the
wondering House of Iron. This is going to me yet
another interesting wn. Let's start with doing the
sketching for our house. Very simple sketch, the same we practice in the
demonstration video. Here I'm starting with the roof. And we'll be creating
exactly the same kind of house that we practice
in the demonstration video. Minor a small adjustment will be made wherever it's required. So here we have the
extended portion of the room that is a
little bit slanted. For the other side, too, let's make
it a bit slanted. So this is going to be
a two story building, and we'll have a
cannon in the front. So I'll be making
the cannon a bit larger in here as compared
to the demonstration video. And now let's create
the sides of the house. If you want, you can
make it a bit more long. That will be interesting too. With these, we are done with a basic see for our main house. Now, let's sketch out the guideline for
the adjoining house. Here I decided to make the
roof a little bit smaller. Moving onto the
towers at the back. Now let's sketch out
the cylindrical tower, two rings on the top, and on top of this, I'll be adding the pino. I'll be adding a
total of three finos, one on top of this tower and two on the top of the roof
of the main building. If you want to
change the seat and the sizes of the pin,
we free to do that. You can also do with
the remaining building, the welding that are lying
behind the main one. Now let's create the hand. In our demonstration video, instead of the hand,
I created windows. So in place of the window here, I'll be creating the hand. It will be quite similar
to the one we practice. Here, the sizes will
be a bit more under. So this will be the
hollered portion for the soldier of this robot. Now, let's create the forearm. Here, too, we have
got a cylindrical s. And for the elbow in here, let's create a small circular c, some kind of knob in here and let's extend it to create
the remaining section of its R. This video
is in real time, so you can follow along with me. There will be two part of
this video for this one. I'll be doing this sketching and then doing the
majority section of the front house and
a little bit of the arm and in the next video,
we'll be completing it. So for this video too, I'll only using the breast pin. If you want, you can
use the watercolor or the fine liner. I'll be adding the fingers
for the robot later on. For now, let's create
the best for this house. For the west, I'll be making a little bit of adjustment
in here, as you can see. I'll be creating a somewhat of cylindrical sat so
that is revolvable. So this is the revolving part, and it will be lying on top of another clindal that will act
as the hip for this robot. Let's create the arm
on the other side. Not all the portion of
the arm will be visible. It will be lying behind this. So only this section
of the soldier will be visible
few wires in here. Let's create the remaining
section for this arm. Joint is not visible in here. If you want, you can create
another perspective for the hand so that
the whole hand of this mega robot will be visible. And for the finger,
very simple one, consider this you are
creating four petals. And now another set
of four petals. This time the end this time the ends are a
little bit pointed. And in here, too, let's extend it to create the
palm of its hand. Instead of the hand, you
can also create cannon or some kind of weapon that
is attached to its arm. Or you can make it hold
a large bucket of water, creating the fingers
for it, quite simple, flower petals like projections. And let's create the
thumb for this one. I'm moving on to creating
the revolvable section. So in here, this will be the hip Yeah, I decided to create somewhat of ball and socket kind joint that connects
this hip section to the remaining
sexion of its leg. Let's create the same kind of sef in here for the other leg. I'll be keeping the
legs sot if you want, you can make it a bit larger. Let's connect it to
the cylindrical sea, the hip of the robot. Now let's do the remaining
saxon of its leg. A somewhat elongated
cylindrical sea. Beyond this, I'll be
creating somewhat of a combination of elliptical
and cylindrical seam. Feel free to make
adjustments or changes. You can create totally
different kind of leg for it. Or instead of a double leg,
you can create a single one. Now, moving on to
the lower section. Let's create the foot. So for the foot, if you want, you can make
a lot of changes to it. Here, I practiced as I showed you in the
demonstration video, I'll be creating small cannon
at the base of its foot. It's not clearly visible, but I created the
same kind of leg that we practice in the
demonstration video, as you can see it in here. Now, let's move on
to the other link. So the legs are quite large. Here's another kind of
lik that you can try. So this is somewhat
similar to the type of best that we have
in the Army tanks. I won't be using this but. I just wanted to
show you a different kind of leg that you can create. Later on, I'll be adding a
few wires that are coming out from the upper
section to the foot. Let's extend it a little bit to make it a bit
more stable in here, so you can create this kind
of leg to with the wheels. I'm showing you as an example that you can
do this kind of legs too. Feel free to make adjustment and then organisti with me and create
the kind of link that I'll be creating or that I created in the
demonstration video. Now let's add some finer
details, windows on the top. This window will be a
little bit detailed. So a four panel window in here. For this top floor, I'll be creating the
cannon in the middle. For the cons, I'll be using two or three lines to make it a bit bolder and more distinct. Let's divide the cannon and the windows into
two different sections. This line divides
the whole house into two different floors. Now, moving on to
the other side here, I'll be creating a single
door and a single window. For the upper section for the
upper section of the floor, I'll be creating two
smaller windows. In here, like factors in the demonstration
window, a small window, and a door, as well as
an extended portion, or you can say a
balcony in the middle. This will be the
extended portion here, I'll be creating fence. And here, I'll be
creating a wooden door. If you want, you can create
different kind of the doors. Here I'll be adding a little
bit of texture for this one. Moving on to the
second building, here, only two windows
will be visible, small windows on
the lower section. For the beach of
both the buildings, I'll be greeting
brick like pattern. And, we are done with our rough sketching for
this entire project. If you want, you can
make a little bit of adjustment and changes. To pinions that I was
talking about that I'll be adding for
the top of the roof. So this will be the
first if you want, you can make changes
and adjustment to the seeds and
the sizes of it. And yeah, we are done
with this. Let's ink it. Once again, here I'm
using zikurataki bur and let's ink this
whole section, starting with the upper section. So for the top, I'll be
creating this kind of pattern. So for the top, I'm
trying to create a kind of rustic and
old look that the top is covered with e and I'll be dividing the top
into different sections. And for each section, I'll be doing a little bit of seeding along
with the hatching. Going over the sides
of the roof here, as you can see, I'm creating
somewhat of broken lines. If you want, you can create the straight and uniform lines. This is the portion that
divides the whole roof. So we have got the upper roof, and this is the extended
and slanted roof. Dividing the upper section
into further parts. And here, let's do a
little bit of hatching. The upper section will be a bit darker and as we move away, it will become a bit lighter
lines of different length. For all the lines, I'll be doing the same kind of hatching. For all the lads, I'll be doing the hatching and a
little bit of seating. Also, if you want to divide
into further section. Let's make the finals a little bit more
defined and detailed. You don't have to create
the same kind of final I'm doing or you can create
the same kind of final. A three finals will
be somewhat similar. The kind of final that we
practice in the demonstration, we do a combination
of two circles and vertical and
horizontal lines. Moving on to the slanted
section of the roof, making it a bit bolder and more defined for the
engines and the sides. I'll be creating the
same kind of hatching. Let's feel the entire region
with small and large lines, a little bit of hatching
along with the sading. Moving to the top and let's create another penial in here. This one will be a bit larger. Moving on to the other side. For this side, I'll be
creating a little bit of sados the sado that is casted behind the upper
section of the roof. Creating dynamics line, and let's add a little bit
of depth and details to it by adding few lines,
few curvier lines. Moving on to the
inside. Going over the outlines for the windows. Are we using a little
bit of sading in here for the four panoi windows
that I'm creating in here. Making this region a little bit darker to sew a little bit of shadows that is casted by the
roof. The cannon in here. The upper section of the
inside is a bit darker. And now let's
encircle the circle receive and extend the cannon to the rest of the building. If you want, you can
create multiple cannons or you don't have to
even add the cannons. Instead of this cannon,
you can also create an extended portion in
here and a second door. Now, moving on to the
sides for the sides, creating two lines to make it a bit bolder and more distinct. Dividing the cannon and the upper window
into two different section with the dividing lines. Adding a few lines
below the cannon to make it a bit darker. So the shadows cast at by this. Now let's add few lines
here and there to make it a bit more
old and rustic. Creating the lines that divide the house into two
different floors. And here I am creating this
kind of small pattern. Two windows in here. Most of the section
of the windows are covered by
this slanted roof. And apart from this,
I'll be adding a lot of fine lines in here to sew the shadows casted by this extended
portion of the roof. Doing a little bit of siding
and hatching in here. This section will be
quite darker because of more shadows casted by
this section of the roof. Now extending the lines. We are done with the
upper section or the upper floor
of this building. Let's make the windows a
little bit more defined. So doing a little
bit of shading in the upper sections and dividing the window into four panels. Now let's do the
other buildings. So starting with the second one. For this two, I'll be
creating a little bit of cidos that is casted
by the roof of the front building and a
little bit of sading on the other side to make it
look a bit old and rustic. And below this two,
I'll be adding some blacks to create some cidos casted by the second roof. Moving on to the
tower behind it. So we have got a combination of a square and circular tower. No circular, but
cylindrical tower. Let's do the square one first, and then we will move on
to the cylindrical one. Adding fine lines in the
front and for the back, adding a little
bit of hatching to create a bit of dark
to sew the sados. Moving on to the
cylindrical tower here, following the contour, creating contour
lines and doing this somewhat of circular
hatching of varied length. The two rings on the tower. For this two, I'll be
doing a little bit of hatching for the
upper sections. Let's extend it a little bit
and create another ring. So this ring is a
little bit different. It's extended upward. Here, too, for one of
the sexton I'll be making it a bit darker and add some fine dots or fine lines to make it a bit more
rustic and old. Let's create the
finial at the top. This is the final
that we practice, a combination of vertical
and horizontal lines along with two circles and
a rhomoid sap at the top. Create two intersecting circles. And yeah, we are done with this. Let's set fine lines
for this roof. And here, let's create a
little bit of shadows. So a bit dark in here. Now moving on to the remaining section of the second building. So before doing this, we'll have to do the outlining
for the hand. And then we will proceed with
the remaining section and then we will proceed with the remaining section of
the second building. For the hands of the robot or the other elements and
the parts of the robot, I'll be making the lines
a bit more dynamic. So lines with varied thickness. Some of the section
will bit more thicker as compared
to the other ones. And for the larger begins, I'll be adding more
lines to make it look more rustic and more
vintage feel to the robot. Here I'm creating this kind of square and circular patterns
for the side of its soldier. The soldier will be a little
bit hollow from the inside. So for the inside of it, I'll be using hatching and
a lot of siding. So filling the insides with
these kind of lines to make it a bit darker and
using a lot of sailing. We are done with
the soldier a bit. Let's connect it to
the remaining section. Here, too, I'll be adding a lot of lines in the lower sections. And finally, connecting it
to the rest of the biding. Here, too, let's add few lines. And now for the all of
this second building, a lot of fine lines to make it look more textured and grainy. If you want, you
can do the tiling, or you can feel the entire all of this second building
with a brick like pattern. Moving back to the
hand and let's extend it and add
more details to it. Oh. Let's do the remaining
section of this wall. So you have got two
small windows in here. Completely filling
it with the black. If you want, you can create the borders and the
edges for the windows, but I'll be leaving it as it is, filling the rest of the
areas with these fine lines. For this video, I'll only be doing the inking
up to its elbow. And in the later video, I'll be adding the inking
for all the details for the remaining section of
this robot and the house. And here, too, I'm adding fine lines to create
a little bit of sado. Et's extend its
elbow a little bit, and later on, I'll be adding
the palms and the fingers. For this section, I'll be creating two somewhat
of hollow saves, two hollow saves that
I was mentioning. And here, let's do the contour lines that follow the seep of
this hollow sap. And with these we are done with this section of the video. I'll see you in the next video.
11. Inking : Let's continue from
where we left off. So we'll have to do its palm
and the remaining finger. For the palm to, I'll
be using a lot of lines to make it a bit
more rustic and old, and I'll be doing a little
bit of seeding too. And for the lower section of it, I'll be making it
a bit more darker. So a bit of dynamic
lines in here. Let's at the small
fine lines following the contour of the
seep of this palm. Now, let's add the fingers. So petal psych projection, four projection for
four different fingers. Moving back to the
building. So here, I'll be creating
the brick pattern for the entire section. If you want, you can create
different kind of pattern. You can do the scallops
or the tiling. Let's add a little
bit more detail to the palm of the hand. And with these, we are done with the second building
and this left hand. Making the edge a bit
bolder and more thicker. Let's continue with the
remaining section of the house, and then we will
move on to the legs. Here, I'll be reading
somewhat less detail or you can say simple door. If you want, you can
make it a bit detail. For most of the section
of this entire house, I'll be adding a
lot of fine lines. A small window in here, completely filling the entire
section with the black. And now let's surround it
with this broken line. Finally, filling
the entire section with the broken lines. The lines are of varied length. If you want, you can use
broken cross hashing to create different
kind of text for the entire section of the wall. And yeah, we are done
with this upper section. Let's move on to the other side. Here we have a bit defined
window, two panel window. You can add one more
window on the other side, defining the outline for it. And with the sweat with
a single window here, too, for the upper and
the lower sections, I'll be creating the fine lines
a little bit of hatching. Now, let's define the
edge of the building. So this is the side
of the building, making it a bit more, making it a bit more bolder
and more definite. Now we have got the door
and the extended portion for this floor of the building,
starting with the door. Here, I'll be
creating wooden door, a lot of wooden lines and
a lot of texture for here. So I'll be creating a lot
more longer lines in here. Let's create the
lines and later on, I'll be creating the
extended portion in the balcony with the fence. Moving on to creating
the extended portion. So this is the fence. Filling the remaining
secon with the fine lines. And this is continuing on
with the extended portion. The lower section of
this extended portion will be completely black. And yeah, we are done
with extended portion, the door and the balcony, filling the remaining sexon with the fine lines on
both the sides. Fill the entire section
with the black. You'll have to be a bit
cautious while adding it near the door near the
door and the fence. Let's create the second hang starting with the joint,
the solder joint. Since only the other side of the solder joint is
visible in here, so I'll not be making it more detailed or defined
simple saves, simple cylindrical
and circular save. Adding this kind of dots that we highlight
for the other side. I'll be adding the
remaining section of the hand later on. Before doing that, let's
create the brick pattern for the entire base
section of this house. If you want, you can do
the scallops in here, but I'll be sticking
with the same kind of brick pattern that we did
for the second building, starting with the
horizontal lines. Let's extend the horizontal
lines on this side too. And now let's create the brick pattern for the entire section. Creating this kind
of brick pattern is quite simple and easy. So that's why for
most of the section, I use this pattern. And with this,
we'll be done with a major section of the house. Not the major section, but the whole section of the house. And yeah, we are
done with a house. If you want, you can
add more details or finer adjustment
to the house, but I think I am satisfied
with how the house turned out. Let's continue with the
remaining section of the robot. This reason that lies behind the base of the
house will be a bit darker. So here I'm using the
hatching to create the upper sex and a bit darker and the lower
sex and a bit lighter. And this will be the revolving
portion of the house. Here for the upper section,
I'll be adding a lot of black to create
a bit of sados. There will be two
or three layers of this creating the second layer, and let's divide
into two sections to make it into three layers. And yeah, we are done
with this upper section. Let's continue with the
remaining section of the hand and the
rest of its body. So here I'm continuing with a cylindrical seed that
we have for its hip. So going over the outlines
for the upper section, I'll be doing a bit of
siding and hatching, curved hatching in here, and I'll be adding a lot of blacks for
the upper regions to make it a bit darker
to sow the shadows cast by the upper
section of the building. Here I'm doing the
contour hatching. And now let's make the upper. And now let's make the
upper regions a bit darker. Cree fine lines in here. Fine, horizontal lines. Three or four lines
will do their work. Continuing on with the rest
of the cylindrical sea. Here to levating fine lines, but comparative, but comparatively less as
compared to the upper section. Creating some fine lines
using broken hatching. And we are done with the front of the cylindrical portion. This will generally be
completely dark since it's covered by the hands and the upper section
of the house. So filling this entire
section with the black, you'll have to be a
bit careful while adding it or encircling
the fingers. I'll be extending this black to the rest of its hip joint, but later on, for now, let's do the remaining
section of its leg. So here we have got ball and
socket joint that connects the hip to the rest of its thigh and the
remaining part of its leg. Here, too, I'll be
doing a little bit of sading for the lower section. So we'll have to do lots of
sading lots of fine lines to make this look old and rustic
and give it a vintage like. Let's create the
section for its thigh. In here. As you can see, it's somewhat cylindrical seep. And here, too, I'll be creating a little
bit of plaque for the center of the seep to sew a bit of hollowness
for the side. This is the hollow
porton of its joint. More fine lines in here. Let's do the remaining
section of its thigh. A few more fine lines in here. So I'm doing it from left to right so as to avoid
smudging of the colors. So start from top to
bottom and left to right. Let's move on to its hand. As I mentioned earlier,
most of its hand the upper saxon hand is
behind the building, so I'll only be creating
small portion of it, but the forearm is
completely visible. He. I'll be using a lot of setting for the forearm and make it a bit darker for
some of the region. Now, let's continue the
remaining section of its hand. As I mentioned earlier,
you don't have to create the same kind of
hand that I'm using. You can create cannon or other weapons
attached to its hand or you can create or you can make it hold bucket
or any other thing. So this is the joint that connects to the
rest of the palm, and let's create the fingers
and the rest of its palm. This region will
be a bit darker. Let's create the finger. So four digits finger. And the remaining
section of the finger. Let's create the thumb for it. And now let's add fine ninth
for the remaining section. Following the
contour of the palm and adding the fine lines, so a little bit of hatching
for the upper section. Making the sexon a
bit darker inside. Now moving on to the other
side of the hip joint. Going over the
outline of this leg. Here, too, most of the
sexon is not visible. Here I'll be adding
two or three wires so that it's hollow
from the side, I'll be adding a little
bit more ink on the sides. I'm moving back to the leg. So let's make this
middle person, the knee of this Robot. This is another joint
that we have in here. Here on the other side, I
created a bit of hollow seam, so the inside is a bit hollow. Let's do the seam on
the other side, too. Here, too, if you want, you can add fine lines,
but on this side, I'll be leaving it as it is. Let's create the joint in here, somewhat of the cylindrical
and circular see that we have in
here for the joint. Here for the remaining
section of foot, I won't be following this
sketch that I created. Instead of that, I'll be
creating the same kind of leg, the foot that we practice
in the demonstration video. If you want, you can create
other kind of foot or you can stick with me and create the kind of food that
I'm creating in here. We have got a bit more broader and more defined
and detailed foot. And for the best of the foot, I'll be creating
two small cannons. Just follow along
with me and yeah, let's continue with the
remaining saxon of its foot. For the insides here,
I'll be creating some circular seep so the cannon present in
the bees of its foot. And for the insides of
this circular seep, I'll be adding black. A second circle
shape that we have gotten here is not a
part of the cannon, but it's the opening and
closing section of the cannon. Let's do the remaining
part of the foot. Now let's create the
base rectangular see for its base and extending it more extending a little bit farther.This is one
section of the foot, and I'll be extending
it a little bit more further to make it a bit more
detail and more balanced. This region as well
as the upper region will be completely in black, since it lies behind
the upper section of the foot and
contains the cannon. For the front senson
adding few fine lines, creating the remaining
portion of its leg. Now, I'll be adding
the fine lines and a few more details
here and there and extending the leg
a little bit more backward to make it
a bit more balanced. As you can see,
just by seeing it, it appears that the
leg is not balanced, so we'll have to make
it a bit more balanced. Here I'm using a darker
tone of the ink to create a clear distinction between
the two different section, the upper section and
the lower section of the foot and the cannon. Now, let's add a little
bit of details and defining the remaining section of the upper section
of the foot. I'll be adding a
few wires later on. Adding some fine lines, a little bit of hatching
on both the sides. Now, let's make this
a bit more balanced, encircling this extended
portion a little bit. And now let's create
more extension for the lower section of its foot to make it
a bit more balanced, extending it a little bit
in this triangular s, doing this on the both side, and this extended portion is completely covered
in the black. And yeah, we are done
with the lower foot. Now I'll be adding
the fine details. As I mentioned
earlier, this portion is going to be hollow, so feeling a little
bit of black, extending this portion too, since this lies behind the upper section of
the entire building, so it will be in shadows. Et reach the pencil
marks and letter, and after that, we'll be
adding the final touches, adding fum wires here and there, and adding more lines
wherever it's required or doing a little bit of seating
and hatching if required. Before erasing it,
ensure that the ink has dried and we also have to
create the base for this Robot. So I'll be creating
theme kind of line that we practiced in a demonstration
video and that we did in the last project. Instead of the simple
and bit caer lines, I'll be creating kind
of small buses in here. You will get what
I mean to say when I do this here as you can see, the ink was not
dried up in here. I got a little bit
of smudging here. I'm just completely covering the entire section with
the black and let's add a few fine lines
in here to create a little bit of sados cover
the mistake that I made. Yeah, I have somewhat completely covered the
mistakes that I did. Now, let's create a few
wires in here and there. Single wire that connects the knee to the
rest of the foot. Now, let's create the
grass in the front. So this kind of small strokes of the bras paint to keep this kind of texture and
pattern for the ground. If you want, you can leave it
as it is simple and plain, and I'll be adding
a few more strokes to it to make it look
like the grasses. Completely filling the
entire section with these lines and for some
of the larger lines, I'll be creating this
kind of texture or wency pattern to make it
resemble some of the grass. Yeah, let's do the entire
section with this. I'll be overlaying it on
top of the food, too. So if you don't want, you
don't have to load this. For some of the section, I'll be making this grasses
a bit taller. And we are almost
done with this. Add a few more
details in here to make it more defined and detail. We are done with the lower level or the ground for this project. At few more fine lines here and there we requie for
the foot to make a clear distinction
between the ground and the remaining
section of this robot. And with these, we are
done with this product. I hope you enjoyed this project. I had fun painting it. I'll
see you in the next project. Later on, I created
two more wires extending from its hip
to the thigh joints.
12. Nest Of The Cursed House : Welcome to the third
project of this section. So we have got the nest
of the cursed house. So we have got a nest,
which is running away, and let's start with
sketching out the guidelines. M basic simple saves for it. It will be somewhat similar to the one we practice in
the demonstration video. The only difference
is that instead of the one unit of the house
here we'll have 31. So two extended
portion on both sides. Here, as you can see, I
have already started with a cylindrical see for
the main building. On both sides, there
will be two small. On both side, there will be
two extended small huts. One will be with the roof, the other will be
open with the fence. Sketch out the guidelines
for the second one. Somewhat semi cylindrical
see on both sides. And for the main house, and for the main hut or the house, I'll be dividing
into four sections. Let's create the roof,
the upper section. So wooden beams
that divided into four wooden beams that divide into four
different sections, a total of five wooden
beams for this one, and for the second one,
I'll be creating three. Or you can see only
three will be visible. Extended portion on this side. I won't be adding any roof. If you want, you can do that,
but I'll be keeping it, but I'll be keeping it open and creating the
fence surrounding it. Extending the lines that I create extending the
lines that I created, the wooden beam or the beam
at the top of the roof, extending it to divide the rest of the house
into different sections. The middle section
will have the door, and the other two will
contain the windows. Create the rough outline for the legs. So about like legs. Feel free to make adjustment or instead of this
kind of bud legs, you can create human
legs or robotic legs, or you don't have to
even create the legs. Instead of that, you can create wines or any other things. The theme for this section
is houses on the move. So you can create
any other kind of appendages that helps
the house to move. And we are done with a very
simple basic pencil outlines. Now going in with the rust
mean to do the outlining. Let's go over the outline
of the wooden beams. So here, as you
can see, I'm using broken lines for the upper
section of the roof, I'll be creating small
strokes with breast pain to create a texture of
feather like texture, and for the lower section, the nest on which this
house rests upon, for that to, I'll create
feather like projections. So bought feeder. And
you can see that it's a house it's a nest of the
ostrich and it's running away. Haunting and terrifying
ostrich net, which has three house on top of it, and
it's running away. So following the contour of the conical shape of this roof and creating the wooden panels, following that, and creating the wooden panels,
keeping that in mind. Let's create the last one on the far on the far right side. If you want to make
it a bit more detail, you can divide it into
further sections. So you can add
vertical you can add horizontal wooden beams and dividing it into
different sections. Let's do the outline
for the roof. So this will be the boundary. The upper section
will be covered with a feather like projection, feather like breast
pain strokes. Here I'll be creating the
texture or pattern for the brick and the door and
the windows will be in here. Following the following
the guideline of the wooden beams
and creating this kind of beams that divide the rest of the house
into different sections. If you're not comfortable if you're not comfortable
with directly using it, you can use the ruler
to get straight lines. The side of the beam will
not be that much visible because of another extended
portion of the house. Let's go over the outline of it. For this side, only one
window will be visible. If you want, you can
create multiple ones, but I'll only be creating one windows on two extended
sides of the house. Do the extended side
on this side too. So here, first time starting with going over the outlines of the wooden beams that we
have created in here. So only two wooden beams
are visible on this side. Let's define the outline, the upper section of the roof. In here, as I mentioned, I'll be creating the fence
surrounding it. So if you want, you can create the
wooden beams in the same heart like formation. But here, as you can see, I'm creating small fence that encircles this portion of
the extended building. Now, let's create
the best for it, following the contour of the following the canto
the cylindrical seep of the main building
and trying to create the bees somewhat parallel to the seep of the main building. Let's create the piece
for the main one. At now, let's move on to the
second extended portion, extending the wooden mem. Only two mems are visible. Let's create the best for it, keeping the perspective
in the mind and Now, let's define the nest. So this is a rough
outline for the nest, and later on, I'll be
making it adjustment. If you want to make
it a bit larger or smaller, feel
free to do that. I'll be completely covering the entire section with
these kind of strokes. The regions near the houses
will be a bit darker. Creating the extended portion
in front of the door. So this is the extended
pavement that we have in front of the door
of the main house. Let's create a
little bit of text shut that encircles around the entire section of the house. This is just a rough demonstration to so how I'll be
creating the nest, as well as defining
the rough outline for the perimeter of this nest. Now let's go over the outline of the legs that
we have created. So we have got birds like
leg for this running house. Too, I'm using broken
lines to create this kind of lines to
give it a more raw look. For some of the section, especially the lower
part of the leg, I'll be trying to
create a little bit of appearance of the
furs or the hair. Let's do this region and then we'll move back to the
remaining portion of the leg. Completely filling this
entire section with this kind of brush strokes,
small brush strokes. So you can consider this kind of seeding and a combination
of small hatching. The lines are not in any
particular direction. I decided to do the
glove first and then I'll move back to the
rest of the nest. So going over the outline of I did not create any defined outline, simple stump like sep with
a pencil, but here LV. But here, as you can see,
I'm making adjustment and giving more depth and dimension to the
sip of the claws. We have got four
claws for this leg, and yeah, we are done with this. Later on, I'll be adding
a few more strokes to it to give it a
bit of hairy look. Let's create our second leg. This one is a little bit bent. This is the kind of hairy texture that I was
talking about. So you can then as
you can see the bended Pusan has some small
strokes that is coming out, and it gives a semblance
of hair like projections. Now continuing on with the clause that we have got in here. Let's create the last
one, the last claw. If you want to can create
the ground for this project, but I won't be doing this. I'll be keeping it simple. You can create the
texture or pattern for the grass or you can use a little bit of watercolor to create some kind of foreground. Now let's add some
fine strokes in here to create the
resemblance of some tiny, small hairs on the
leg of this bird. Adding a few more
fine lines here and there to make it
look more realistic. Small tiny lines
and small strokes. You can use a little bit of stippling to give
it more depth and dimension to the
legs and the claws. Fine lines following
the contour and the round shape of the
leg and the class. And I think we are done with it. If you want, you can
add a few more lines and add more details to it. But I think I am satisfied
with it, how it turned out. I decided to add
few more lines for the clause to make it
a little bit darker. And, yeah, we are done with the legs moving back
to the upper section. Now moving back to the extended portion
on the right side, creating two wooden
beams and dividing into three different sections that
are visible from this side, moving back to the nest, and let's feel this
entire section with this As I was mentioning, the regions near the house
will be a bit darker. So you can just do the outlining in here
and then later on, continue with the brush
and then later on continue with the
brush strokes to fill the rest of the regions. The small and large strokes, and yeah, let's continue with
the rest of the surface. I'll also be covering
some section of the ling when this
is small strokes. If you want to make it
a bit more interesting, you can even add a tail. So a little bit curve
and rounded tail. And apart from that, you can add some feeders
in the background or you can create hands that
will be also interesting. And here we are almost
done with this nest. Only a little bit of it, only a small portion
of it is left. So let's fill the
entire sexon with it. If you want to make
it a bit faster, you can use the
watercolor breast. But since I decided
for the whole sexon I'll only be using
the breastpin. That's why I'm sticking
with the breastpin. Insert that the
ink has dried and then lightly remove
the pencil marks. And here we are done with the lower section of
the nest and the leg. Let's do the main thing, the upper section, the roof, and the main house. For the door of
the middle house, I'll be creating
wooden door and I'll be dividing into three or
four different sections. The door will not that much
defined, but if you want, you can experiment with
different kind of doors. And let's start with the
upper section, the roof. So small strokes to create fether a pariens for the
entire section of the roof. So this kind of small strokes, this is somewhat similar to the kind of strokes that
we used for the nest. But here, this spicing
is a little bit much more farther and the
density is a bit low. The main difference
is the difference in the density and the size of the strokes for the nest and the upper
section of the roof. So I'll be filling
the entire section, four section for this one, two section for the other house. So slowly and gradually
filling the entire section, you will have to bit
causing you'll have to bit cautious while adding
it around the wooden beams. One thing you can do
to make this process a bit easier is to do the
outlining of the wooden beam, and then alongside it, you can add the strokes to
create the feather like a perians for the entire
section of the roof. For the upper section,
try to make it a bit darker and as for
the left side too. And with these, we are done with two sections of the main roof. Now, let's continue with
the remaining two ones. Also for the top of the roof, you can create even small
projection or small windows. Apart from this,
you can also create some silhouettes of the
birds and the crow. And apart from this, you can
create the silhouettes of the crows that are encircling
the top of this roof. And instead of the crows, you can also do the silhouettes of the bats that will
be interesting too. And with these, we end
with the third one. The whole videos in real time, so you can always
follow along with me. And this videos in two parts.
So this is the first part. And in the next part, we'll
be adding that details to the windows doors and creating and creating
the brick like pattern. Let's continue with the
remaining section of the roof. I'll be making this side
a little bit darker. I'm considering
that the light is falling from the right side. So the right side will
be a bit lighter and the left side will be
a bit darker inside. And with these, we
are almost done with the entire
section of the roof. Add a little bit of more strokes wherever you think it's
required or the density is low. Now moving on to the
roof on the left side. So we have got two
small sections in here and I'll be creating a little bit smaller strokes
to fill these two regions. Moving on to the last section, and let's completely fill this entire region with
these small strokes. And yeah, we are done with
the roof of both the houses. Add few more lines here and there to make it a
bit more darker. And as you can see, I'm making the outlines of the denim
a little bit more defined. Now let's do the rest
of the building. Here, let's start with the door. The middle portion
will have the door. And there will be this
extended small roof in here, and I'll be completely
filling it with the black. If you want, you can create a different kind
of pattern to it. Or instead of this
extended horizontal roof, you can create a bit
of lented roof and you can use scallops or different
kind of pattern for it, or you can also add the feather like projection that
we added for the roof. That will be interesting too. Here I have created the
outline for the door. And now let's add the
final details to it, dividing into different section, two parallel lines, and dividing the whole door
into different section. We have two panels door, and it's divided
into four section. And we are done with
our simple door. So let me show you the kind
of texture that I'll be creating for the rest of the house for the
rest of the building. So we'll have this kind of brick pattern a little
bit more defined. Instead of a single lines
here I'm adding two lines, and the horizontal
lines are broken lines. I'll be completely filling the entire section with
this kind of pattern. For this side, here, I'll be
creating a single window, a four panel window. For this side, too,
I'll be creating the same brick like pattern. But here, the lines
will be a bit smaller. And let's do the remaining
section of this window. Dividing into two
different panels. And now let's divide
into four panels. All the windows of
the houses will be similar four panel windows, and for the insides, I'll be completely filling
it with the black h. Let's create the upper
part for this one, and I'll only be doing
only this for this video, and in the next video or the
next part of this video, we'll be adding
the final details and completing the project. So I'll see you in
the next video.
13. Texture Creation : Welcome to the second part. Let's continue
where we left off. So we have to create
two more windows. We'll have to do the
upper section of the extended portion of the
house on the right side, as well as create the brick pattern for the entire section. Let's start with this
extended building. Simple lines, and now let's divide it into different
sections to create the resemblance to create the resemblance of
brick like pattern. And we are done with this site. If you want, you can add the window in here or you
can also add the doors. So the choice is yours. Let's do the remaining two sides
of this main building. Here I've already started with the outline section
for the two windows. I'll be adding I'll be adding single window
on both the sides, four panel windows, following the contour of the cylindrical
seep of this building. Let's create the brick
like pattern for the upper and the lower regions of this window and on the sides, too, and then later on, I'll be creating the
guidelines for the window. Brick like pattern for both
the sides of the windows. And let's create the same kind of pattern in here
for this side too. For this side, only a
little bit of it will be visible because
of the perspective. And now let's create
the outline for the remaining section of the
window, four panel windows. If you want, you can create
different kind of windows. For each building, you will
have different kind of the windows or you can just create the same kind
of window that I'm doing. So all the building will
have the same windows. I'll be adding the black
later on. For now. For now, let's create
the horizontal line following the contour
of the building, a little bit of broken lines. Moving onto the other side. Here too, I'll be creating the
same kind of broken lines, following the contour of the cylindrical
seat of this house. Moving on to the lower
section, doing the same. Let's do the same for
this extended portion. So here the lines will be a little bit less farther apart. So I'll be decreasing the
spacing in between the lines. Now for this region, you
can create the brick like pattern following the
contour of the main building, or you can completely cover it so that it's in
darker region or the sado cast it why the extended building is
making it look a bit darker. Moving on to the main building, and let's create the
pattern for the bricks. So a bit more defined pattern, two lines to create each
separate and different bricks. Now, let's feel the black for
the insides of the window. You happy with bit cases. Lack for the last
panel of the window. Now continuing on with creating the lines for the brick pattern. I decided to add a little
bit more lines in here. Now moving on to this section, doing the same two lines to create the pattern
for the bricks. Now, let's colour the window for this one, for panel windows. Instead of filling the entire
windows with the black, you can create the
silhouettes of the people or the ghosts. Let's feel the last panel. Carefully filling the black for the insides of the window, and we are done
with three windows. Let's continue with two lines to create the resemblance
of the brick. Now moving on to the extended portion, the extended building, here too, here too, I'm creating the brick pattern. Only the differences,
I'm just making it a bit smaller and decreasing the
spacing in between the lines. For the upper section,
you can leave it as it is in white or you can color it. I'll be completely covering
it with the black. For now, let's create
the window in here. This building will
have a single window. If you want, you can create more windows on the other side, but I'll be creating a
single window in here, the same as the other
extended portion of the building
on the left side, creating the brick pattern for the upper and the lower
side of the window. Let's create the
four panel windows. Small lines to divide it
into two different section. And now let's create
four different panels. Here you can see I'm following the contour of the
cylindrical sea. So one side is a bit larger, the other side is a bit smaller. And let's continue with
the rest of the building. So here too, I'll be creating
the brick like pattern. So starting with the
horizontal lines, small horizontal lines. And then let's do
the vertical lines. And with these, we
are almost done with a brick like pattern for
the entire building. Now for the upper section, the area surrounding the fence, I'll be completely
covering it with the black Carefully adding it in between the fence and Now
let's feel the top section, adding it carefully near
the extended portion, the extended beam of
the main building. And yeah, we are done
with this upper section. And you can leave it as sets or if you want to
mix a little bit of adjustment or add
a few more lines here and there, you can do that. Here I decided to create
the top for this. Let's make this sap a
little bit rounder in here. And the area near the
base of the houses, let's make it a bit more darker. For this reason, you
can leave it as it is, or you can completely
cover it with the black. Here I'm completely
covering it with black. And yeah, we are
almost done with this. Let's a few more final details
to the clause of this. Small broken lines.
And with this, we are done with this third and the final project
of this section. I hope you enjoyed this. I had a lot of fun
painting this, and this really turned
out quite well. Let's unmask our painting, and I'll see you in
the next section.
14. Class Conclusion and Thanks : Thank you so much for
joining me in this class and creating these haunted Wing
houses illustrations with me. I hope you enjoyed learning
the different ink techniques like hatching, crosshatching,
stippling, scribbling, seating and texture building, and then applying them
to the final project, house that crawls nest of the cursed house and
the mecca house. Don't forget to upload your final project and practice seats in the project gallery. I would love to see
your creations and your unique interpretation of this dark fantasy illustration. If you enjoyed this class, please consider leaving a
review and following me here on the Skillshare for more
classes on ink illustration, watercolor, oil pastel, and
other creative projects. Thank you once again
for joining me, and I hope to see you
in my next class until then keep creating and have
lots of fun with your art.
 Vishal Munshi