Transcripts
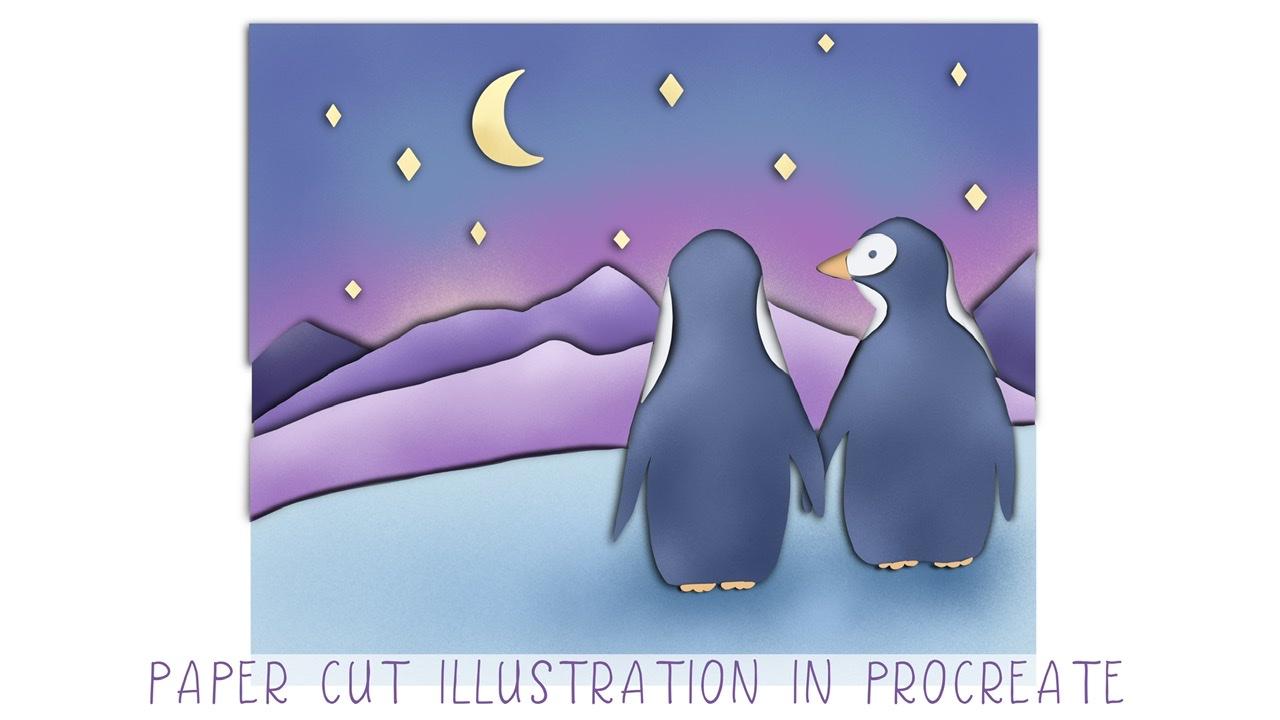
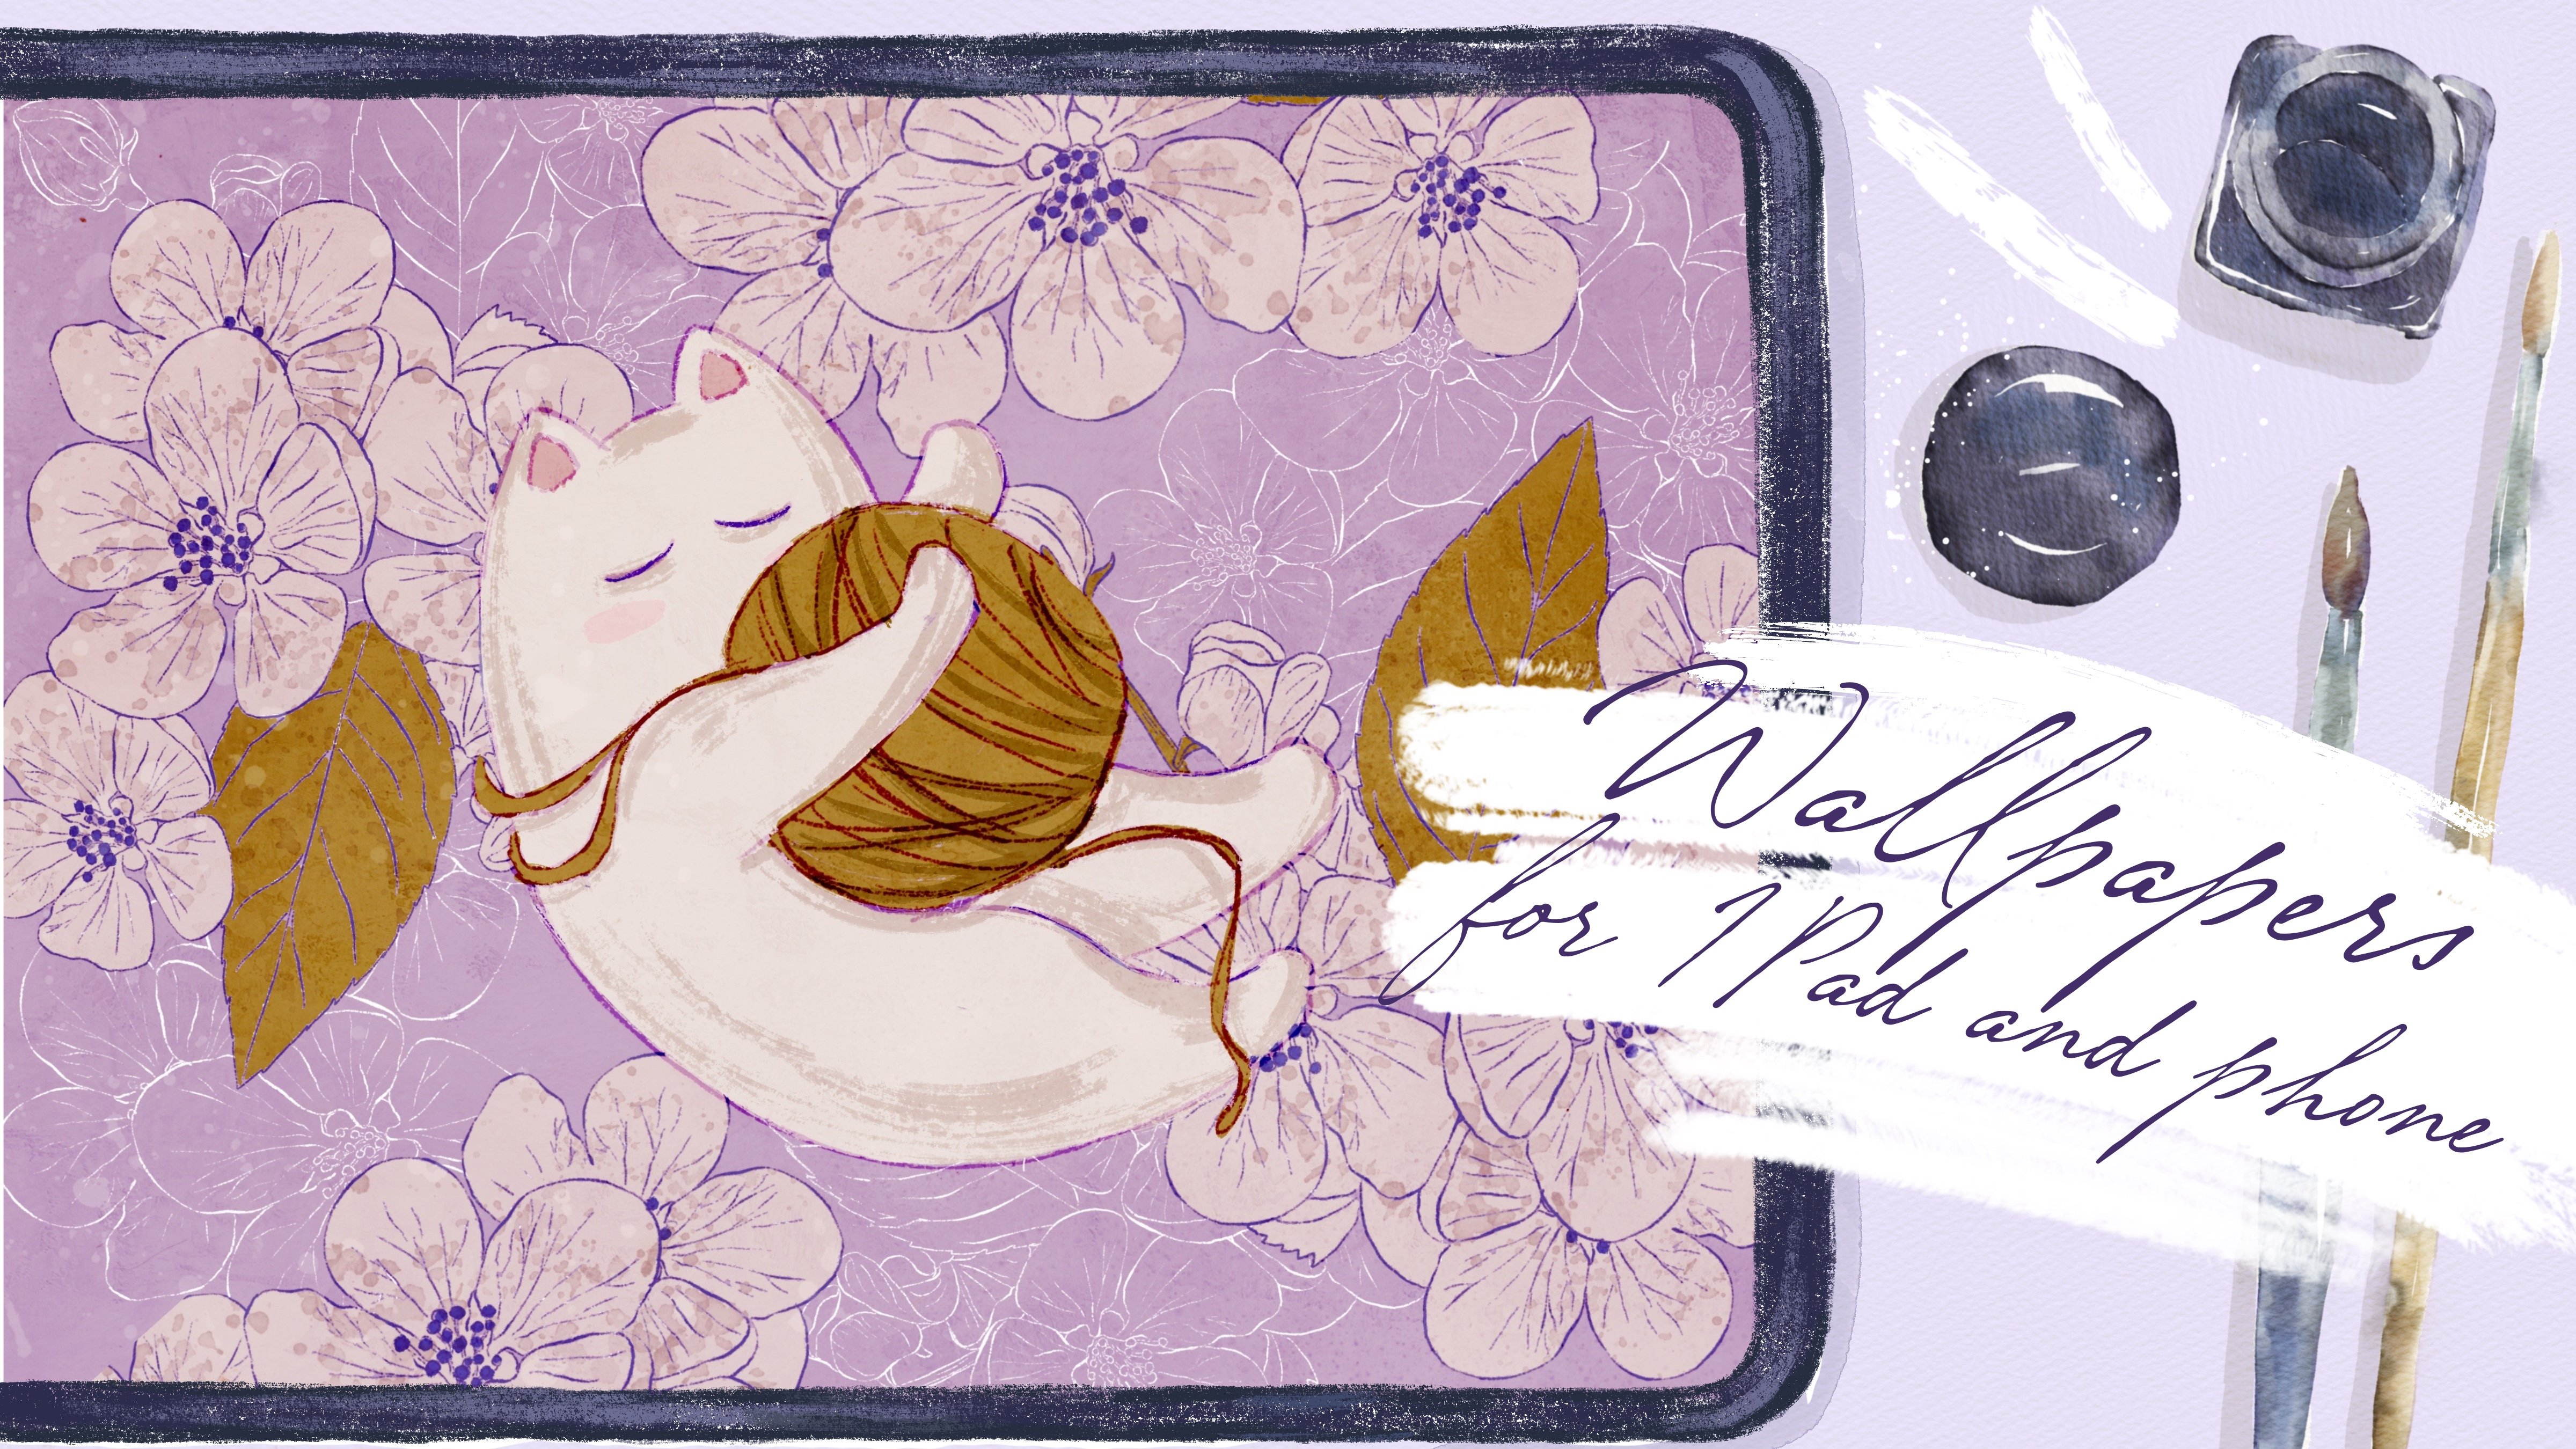
1. Introduction : Hi guys. Hello everyone. During today's class, I'm going to teach you how to create the paper cat illustration in a procreate. So for our today's class, you don't actually need any color paper or scissors or glue. The one thing that you need for today's class is just procreate. I put pencil or maybe some other, other styles. An iPad. So guys, I hope you are ready and let's get started. Guy, same freelance illustrator. Welcome back to my class and let's paint altogether cool paper cat illustrations. During our today's class, you'll try something new and creative. And in end of my class, you will have two pictures with paper cut effects. You can use the illustrations you create for posting on Instagram, added to your portfolio or sell it on Etsy gamma road and so on. Today I will teach you how to create a paper catalysts duration, what is compensation, and how to allocate elements on a canvas in a beautiful way. How to pay in picture froms or sketch. You can draw your own sketch or use mine. How to use default procreate brushes for painting. How to reach those paper cats effect. I will explain what is clipping mask, Gaussian Blur and selection tool. I will also show you different techniques of adding textures, shades, and highlights. I will show you my whole process from start to finish. And as a bonus, I will share with you my new color palette sketches that I created. I will also add files of my pictures that I drew. Feel free to use them for your own art projects. This class is great for everyone who wants to try new ways of painting. For beginners, Today's they can learn more about procreate and its functions. Also can be useful for intermediate level and for experienced artists. Probably here you can find an inspiration and new ways of creating paper catalyst ration without color paper, goo and Caesar's, your class project. We will be next band in illustrations that you like most obeying all of them using the tips that I gave you today. I will use procreate for this class, his iPad and Apple pencil. So if you have it or Somoza drawing pets or just regular color paper, goo and scissors. Please join our class and good luck.
2. Getting ready : Hi guys. Hello everyone. Welcome back to my class and I think we can start in during our today's class, we're going to play into a beautiful composition, still beautiful paintings in a paper cut style. And first one you're going to be in this lovely pen greens and xj, just amazing. And n is you might see things draw the special effects that I'm going to teach you. I, I created those paper cat effect. And the second picture is also pretty lovely. You're gonna create an pains us carry picture scare illustration of Red Hat girl who is going to enter a scary award. And also, as you might see, might help you to, and I will teach you how to create those beautiful paper cut illustration that might, that you just need to print and sets it and maybe you can put it somewhere on the wall or whatever you like. And for our today's class, you don't need any extra paper. You don't need some special brushes that so simple. So only one thing that you need is just iPad, Apple pencil, and just your imagination. For today's class, we're going to be and we're gonna use the spray paints medium nozzle, brash. And after we'll go and grab in Incan said pseudo pen brash and studio pen project also going to use as and the razor. And There's going to be pretty interesting. And I think if you're ready, we can go. Guys all once again, always a Freebase you might find in a projects and sources section. And you need to go there in, in the right corner you will have is a title, is the headline, the resources. And under this resources you have almost 3% you can download. So let's start.
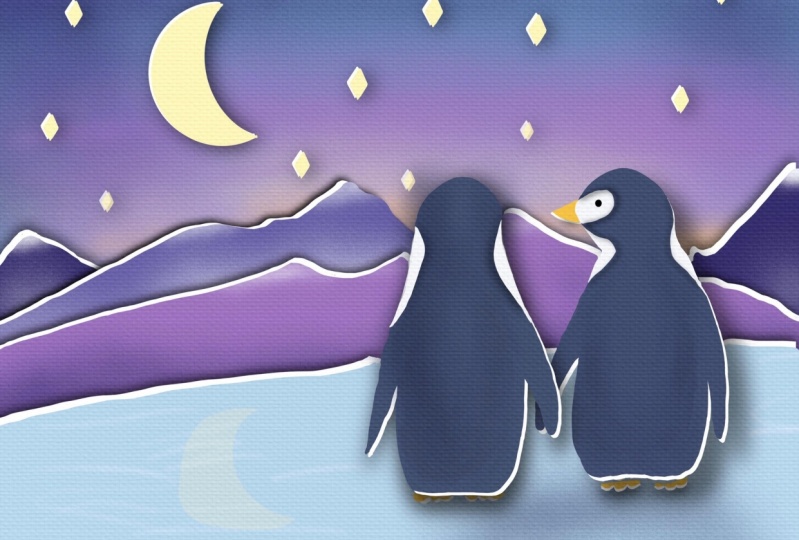
3. Penguin illustration pt. 1: And for our today's paintings, very important to pay and everything like layer by layer, layer by layer. It's very important. And I think we can start going froms at top to bottom. And I will start with the sky. And it's going to become the night. So guys. So for today's class, I'm going to use an gotta go and grabs this dark blue color. And as a brush, I will use studio paintbrush, say Swan. And why am I saying? If you want to use stood up and brush as an eraser, you just need to press it and hold. And after you have a student pen as an eraser as well, lighter color says you see loss of our paintings today, say field be in the pre to dark style because we're gonna paint night. So, so I decided to decorate surroundings of our iPad, also printed out to create those particular mood. So you've done with the first one. Now let's create a new layer that is underneath. And for each mound team, we're gonna go and grab different completely differentiates. Let's call it two wide purple. So either create a new layer and we'll go and grab darker blue color, darker purple color. Once again, I'm going to use and need to double checks it. Now I need to create one more layer. Let's just duplicate couple of Sam and I will go and grab a light purple color. So to save, you'll stay on ice because there's a band greens. Okay? Now, I'm gonna go and create a new layer on top of everything and I'm going to be, and how Penn Queens. Now he's able to have some wide spot summary here in hero. So light I think so. And this part is white. And here's a really good white because the rest is presented dark blue. And I think I'll pend Green's also we'll be on a separate layers. So I will just remove this part. I will pay ended late turned and Tory, once again via on the new layer. I'll pretend loudly now that's creating You'll there. And we need to go and grab light car. Now we need to create one more layer. And create, and let's create a new layer. And those same for the second pin, pin. Now, white color, create a new layer. Here and y here. The tin and lead to create a new layer. Now let's turn off sketches. Ok, I could go and create new layers, is on a top, Alex's Kai and I went to go and add a moon. This is beautiful. Now let's add stars. Copy and paste. And I am just copying port at around 34 here. Then one is here. Maybe one more in this part, k. And now let's merge together in one layer. Yep. So and I forgot about, I won him over to sub boys had to as a layer where we have blue color and we need to create a new layer. Yep, Andrew and I.
4. Penguin illustration pt. 2: And I think we are ready for its next step. That we need to duplicate all layers two times. Coal and after said, you go to the lower layer, go to Magic 1D, hue saturation and brightness. And let's just decreases the brightness and wood to 0. So now it's black. After you go to the selection tool and grab warp sets will help us to control the size. And it means it's some parts will be thicker, some parts will be thinner. You see, because of the lines. You can go and use pre form. It's all up to you. I like this part now let's move to another one. And I'm gonna go and go and grab three form. And that'll create some kind of composition here. Okay, This is beautiful and I need to move it in little bit. Access makes it, it might take some time. So that might help us to create those paper cut feeling. That's more to this guy. And erase some parts. Let's just go to lower layer. It's attrition brightness and turn brightness to minimum. List was a trees all layers. So you see we have two same layers to go to the lower layer, two, so lower layer, magic one, hue saturation brightness, and turn brightness to some minimum. Here, you sees it here. Same, He's a pen grants. Okay, now let's move it slightly. And let's start the dark color. Layers and green. Thank sees. Now i and place a small loan deans conic top Lexus and knocked a recording grep, dark color. And I'll just saying resist mount his foul. And same mountainous map. Let's place it on top here. And speaking about I speak on place it on a dump of everything because he had KVL color pen Queens. So in this way, what we're gonna do, I'm gonna go and try alliance, which will be on top of everything. And later I will show you a magic trick. What else you can do in our digital keeps us paper cut effect. Okay, and I just pay into line, he is now our next step easily. It's just blur it. And how do you make it? Let's start from zipping union from stars. And now it will go to a magic wand and have to go motion blur and move it to 10%. And now allover sub paucity to you, 8%. Well, that's just saying we say saline magic one motion blur. And after say longer, so capacity till 80%. But in this way, we need to erase. You see subparts are just overlapping ways our ice, because you need to have this clear edge. Now let's move to another layer. And the black one metric 1D motion blur, 10% here. And third, lovers out by city TO 80%. Same magic, one Gaussian blur. So once he runs again, you remember bands at layer by layer. But after, we just need to put all this layer on top of everything. So this is like reverse layering. But I can now ask Luke to opinions and speaking about sky, speaking about as this part and go Schindler. Number set by subtly how good you guys here is very important to keep all those black lines from two sides. It so what I'm gonna do, I'm gonna go and grab warp. Thanks is same as a feat. And that's it, guys, you see it now, this is such an amazing paper cut effect, especially because it's, it's not like quite a clear and same as here. And also case or what else we can do without painting in his criticism for the need to create a new layer that is on top of our sky and press clipping mask. Enough desire to kinda go and grab probably light purple color and go to spray paints and grab medium noise, brash. Enough to just increase the size of the brush. And just color it. After said, go to dark blue color at some dark shades here. And probably light color somebody here. It might help us to create a beautiful, just amazing look. And I think I want to go and add some shades. So in this way, I will go to the ice and create a new layer and press clipping mask as well. And I'm going to go in at some shades to this part. Create increased the size of the brush. And also same we can do with mountains. We also can add some shades and highlights and so on. So we're gonna go and move to each mountain and create a new layer and press clipping mask. Correct. Darker shade in half to create lighter color. Credit, even nearly white. Exit. Same reason. With another mountain. Create a new layer clipping mask. Okay? So the last one, you layer clipping mask planes something on a top like grow rapidly snow. And let's just same to stars or create a new layer. Click and mask. And it seems it's pretty nice now is just seem to Penn queens paint. Some shades, clipping mask increases size. Thanks it, and gaze here red and recreated how beautiful paper could come position.
5. Red-hat girl illustration pt.1: So let's note in as a priority in our next paint is pretty scary one. So I already created lots of trees and so swans. And it's a pretty lively and a girl who is entering pandering, pretty scary Board. And now you're going to create a beautiful composition. And I already have a girl and I will place it preform rival place. It's somewhere in the center. So it means she's entering the wood. And I'm gonna go and replicate our trees. Now, I'm gonna go and create a beautiful composition. Oh, I need to create a new layer that isn't any sub everything. And I'm gonna go and add a few layers. So once again, she's entering the wood. Something like said. Let's just erase as Alliance adopt overlapping sketch like set eraser. And this extremely scary. Now I'm gonna go and create a moon, full moon. And I think somewhere behind we might pay and also some kind of trees. Makes it live. Dan is our sketch now we can merge all of it together. And let's start coloring. And what we did before, we need to create new layers. And a lot of them. And now listed coloring layer by layer, we still have same browsers is Incan said Studio pen brash. And I think I want to go and start with the sky. And in this way I will just go and feel everything with just one color like that. And if you want, you can just erase some virus, does go to the selection tool, breast freehand, and tried to erase some parts. So now we can just erase this part. Ok, perfect. We have our girl and this is here. And now let's start with painting moon on top of everything. And feel it cranky. You've done this, this part. Now that's just same. Shape is find and select, copy and paste. Now you have a new layer. Ok. Now let's just more tolerant together. As often as Elon create a new layer, you remember said. And we'll plans this layer on a top ofs's kite. And because we have here lots of trees, it would be pretty complicated just to feel zen layer. So that means we need to paint everything like step-by-step, but it's fine. It can lower sat by CTF house kitchen layer in order to see our alliance. Keep in mind to repaint everything on one layer and not everything, just this forest hockey. I'll miss time. Aqi, Great. Now let's create a new layer. Once again here I am now going to go and pains as part of a lion. Creating new layer. Can I think we need to append a girl? May need to create a new layer, remembers AD. In the year. I think great shoes would be great as well. And changing color and yellow color. And now we're going to go in place as color underneath our red color, our address. Thank kn lantern. Yellow. Same hand. Raises part. Because her hand is OCO. Thanks. And I think I need to have this tree on Denise. I came even dynamism is part. Almost. Now I need to create a new layer, changes the color of our tree, Nitobi, it kept being tag. So wine with trees and last one create a new layer. And I'm gonna go and grab the darker color, darker shade tree you visit doctest one. Okay. This part, enemies is fun. And it can turn all of us kitchen layer hens. It's very beautiful analysis MOOC tools and x-bar in our next part, let's just start at in a paper cut ethic.
6. Red-hat girl illustration pt.2: So the next step is let's just replicate all our layers as VD to peace of pentagons. And now our next step, hue saturation, brightness and the air. And turn brightness to minimum enough to just smooth identity topic likes it. Same as that girl, hue saturation brightness. You can use warp. Thanks. He's attrition brightness. Brightness to minimal. Thanks it. Okay, pretty quick. Now my next step is let us go to stars off to set a lower layer till 107. And after turns out past data TO 50 to 80% of something. Now a girl has just same motion blur. Just tree is pretty huge and has a very huge shaped. So I'm going to go and do a 2%, 8 percent and no deal 77 is fine. Well, there's just same quotient lower. And after Logger set by city t, a 2%. Okay, free form. Here. Once again. Now our ground is only top of the trees. This is very important because in this way we can see this black line. Go motion blur is pretty good. 80%. Now saying visit trees. And that's pretty lovely. Bad guys, this is not the end. So let's just same motion blur. After blend into seven needed to create a new Layer. Press clipping mask. I choose a red color, even darker one. And after go to spray painting, grab medium noise. Okay, so now let's move to another part. Hands us prevailed because stars clipping mask. Go and grab a darker color. And let's go and grab another tree Prescott even masque increases size again. Because I was a lantern via might have so shades here. It key now one mol trees is fun. Create a layer brass clipping mask. See you. Some lights from cylinder. And it's just amazing. Now create new layer clipping mask. And I'd like to show shade here because it's very beautiful. Because she has shadow everywhere except this part. And this part you will get kinda pretty tell light because I was a lantern. And as you might see is it's so beautiful. Next, let's return. So there's once again, we have shade everywhere except the area where she has lender. So so I I amaz this area pre too bright and the rest is pretty dark. You might sit here. And now let's just start adding shades to, to the root behind clipping mask. And if you may like, you also can add some orange color, yellow color tones at top offset trees. And that saint. And once again, we can go and do the same with the sky. So clipping mask, maybe a little bit, a little bit of yellow color around stars. And I think now they can cause this piece finished. But it also had one more thing that we can do with our painting here. And move to white-collar, White Paper enough teachers go and drag it. And after a lot of herself, as it is slightly, in my next step is I go to the selection tool and press clips, depress, invert, three fingers down, cut and paste. Increase it by city. And none to n. Now we need to show the edges and into shows us this is paper can't illustration. And in this way what we're gonna do is I'll show you a way to second go to lower layer hue saturation, brightness, lover, so brightness till minimum, so it's 0. And after said, use a warp. And after, next, you go to motion blur. And now you might see we have our real authentic paper kinds illustration. So your lovers that prosity. And so this is end of alkalis. And I hope you enjoyed our today's tutorial and now you have lots of ideas how to create a paper called illustration. So guys, I look forward to see your artworks and let's see jazzy in new media.
 Inga Yoon, Digital illustrator and teacher