Transcripts
1. Introduction: Hello, welcome to my glass. And today, I'm going to show you how to make
this halloween design. How to make it from
scratch on Canva. And basically or
without any skills. One could do it by
following my course. So this one will be
the first variation and the second variation
on the same design. The will be this one with a little bit
different background and feel, different elements. Also. I'm going to
show you your new tips and tricks that
has been recently added to Canva and
how to use them. So stay with me till the end. And you will get all these
bonus information also
2. 1 Background photo, main photo: Welcome to the first class. And we will start
from simple thing as signing into our account. If you don't have to, you
can create your account. And I do here, I will just walk in and show you where
to go prove it. So if you're noon, so this is how it looks like. And you can start by
creating your fence. Of course, it
depends what kind of design you will need, what size. But usually if I'm
creating posters, I'm starting as one by one size. And later on you can just
change the size of your design. And so let's go to
Create a design. Here you can choose which most popular
designs, design sizes. That is, again, choose
your custom size or upload your uploaded photo, edited, or just import the file. So what I need, as I said, I'm
starting always from Instagram posts in square one. And then if I need different
sizes, I'm adjusting. So let's go to Instagram post, which is squared one by one. So you have your
window or here we have some templates on
the side of the same size templates that was
created from someone else. And you can get some
ideas from there. So basically what
we want to create, we will be grading it. As I showed you, this design and this one. So this one. Over here, you can
search for templates, certain elements, upload what you upload it from your
computer to the Canva. And backgrounds,
videos, audio files. This one, we don't
need that moment. So let's go over here
and look for Simon. Gary. I bought my typing, forest, scary sketching simply. Here you will have a lot
of options to choose. As you see from this one, It's graveyards and bunches. A lot of options
that you can choose. Just scroll down until you
find what you deserve. So this is the same one. Then we are adjusting
according to our background. As you see in this one. So horrible Color and this one is bluish. And size was different. So we're increasing the size and then adjusting the colors. This panel. And since I
want to go to Jewish here, you can select more blue tones. And when selecting process. And you can navigate on
also different colors. So basically it's
almost same color. Now, we're looking for woman, Luddy, woman. Over here. You can see these options
that are not very suitable. So let's look for a woman. So it looks more similar
to what we need. And you can see
there is a lot of ladies that could suit your
design, even this one. But since we're recreating
the same design, we just need to find our lady. As you can see, I'm trying different search. Find what I was looking for. Just didn't suit me. So you can see let's see photos like this is the
best ones to adjust it. That it's clear that there is a difference
from the background. But it's not what
needs simple NYC, these ones, but it's not what I'm looking
for at the moment. So It's keeps chain. Actually this photo
would suit or so. And write about that for female. What you can do with this, which will show
you this example. We have a photo. You can
select background, remover. And thinking, thinking, yes, sometimes it takes
a bit of time. So this is what you can get
using background remover. So then we can adjust it
according to our design. And this is the woman
that you would. But we're going with this woman. Let's just delete it and
we keep looking for it. So this is the woman that
I was using in the design. The noise popping out. So you get the picture
and as I said, you go on edit image, then you go on beggar
on to remover. The best is to choose pictures that with simple backgrounds. There is no much details in the Babylon's because that's when Evernote removal works the best and will leave
only one object, object in your photo. So we're applying this. This is our lady that we have. Don't want to totally leave it a bit. Some coordinates. Because what we're gonna do, we're gonna create this
light around here. So you have your lady. Then you are going on edit image and that is
option of shadows. If we cannot find it, just go over here and you will
see different options. So you select the
shadows and select glow. Option on your press
two times. Will go on. Adjustments of the shadows. This is not the color
that we're looking for. Since as you see
from this photo, the glow around here is
bluish, not the black. So we can simply
adjust our color. Rahm, existing
colors in this swan. Look actually one of the best, then we can increase our size. And that's why I
said that we need to keep space around the bottom
because then the global, one-fifth the size of your glow, you see two sharp. So we can adjust transparency. And when you're
adjusting the blur, it combines more and
more the background. But I'm not a fan of this
color that actually. So what we're gonna do, we can select the
photo that we have. And this one is a bit too dark, so you barely see, go a bit up and you're bluish. Color will be adjusted. This one we can adjust later on. It's basically now I'm just
dropping all the designs. And it takes a bit of time until all the seeds, savings is done. So now we can go and
search for our moon. Basically with them
3. 2 Prepare your text: So at this lesson, I'm going to show you, I would two Prepare your
text or this design. So basically we have this
background and Our Lady. And then when we will
going to place it 123455 lines of the text. And then in next lesson, I will show you how to create some a lemons is shining effect and how to
find the best text or so. So here on the
coordinate recital, you've seen that
is optional texts. So your best text. But as hitting and it
appears straight away on your design in the
middle of the same. And just at the beginning, just weird preparing our text. So first one was our halloween title about my typing mistakes. If you're doing, you can
go ahead with from here to place it another
Text and type it here. Or as I usually do, I just copy paste the existing
text and continue typing. The second design that we have, it's madness. We kept that one. Copy Paste. Other line twice, 13th of October of 22. So don't worry about the text at the moment. As you can see, it's going
to work on it later on. So our time based sorting, I will change this one into white-collar so it will be easier for you to see. It. Can select all items and changed Background
color same time. So I don't mind at the moment, big letters and small letters because later on we're
going to work on it. Just now. Main idea to
place all the text. So 08:00 P.M. and till late. Reduced size so
at least can fit. And best. Music, drinks or snacks
and skater wipes. Copy Paste again. Checking this music. Oldest texts for would
be visible for you. Or simply we can
reduce the size. Music, drinks and snacks. I think it was wipes. So here we have our text. And now let's go to other lesson where
I will show you how to adjust all this text together
4. 3 Enhance your text: So after we typed all our texts that it's
going to stay in our design. Let's go and adjust it. So the first one, I started with the small ones
down and leave them there. So this amazing font, it's called here. But Chairman cups sounds very tempting for we're design. So let's reduce them it, I'll increase the same size
so you can see it better. So we have our first, then just drag it down. B1 to make it in the middle. You just go on position. Mendel will place. If you're working with
Canva, you already know, but just in case middle
will place your text in the middle of the page. Your design pinch center. It will center it
from both sides. So we don't need in the middle, we just need
somewhere down here, but in the center. So you just press center
and it's lightened, aligned automatically
according to this beach. So this one we're having red
color and the same font. So again, we're going on the phones and our
butcher man caps. So sodium, we have our butcher main caps
and it was the Red Calvary. We're going on text color. And we're choosing grid, reducing the size a
bit and placing down. Then we are going on to other text and this
one will stay wide. And again, it was on
butcher kept reducing the size and till it
satisfies our eyes. So it's still quite
big since it's not main information that
it should be visible. And I'll show you another trick. We can select this design if you're selecting sorry, font. So if you are selecting 13 words, three points, or three
elements at the same time or even more elements
and the same time and you go on position. And then you can see that there is option of
center is not there. So it means that
they are already all should be in the center. But if you horizontally, you can see that they are different alignments
or just press it tidy. Just tidy up and everything
will go on street. But if you go again
on by single one, just need to double-check
him there on center. And also when you're
playing with the text, you're dragging the
text here and there. You can see the middle line. It's automatically
going to a bit weird. The text fits in the middle and you say see
I made a mistake here. So the other hooks that
we here, it's madness. This dropping. It's
the same point that we use for these designs. So our Chairman and Saudi
anyone to other one. So our chairman design. It's been bluish. So we go on our design color. And it will choose froms these lines Sorry, was bluish but
Video light bluish. So I selected this
one, midstream. Catch the scholar
of repressed neon. And you see that it's
getting less neon core. You're increasing sensitivity. Then we'll go more shiny knee and less visible
that certain color. And by playing with these
colors that you can hear, you can find same color or you don't need to
have it at the same. I'm just showing
actually cuticle to create that certain design. So this will work
for the moment. And now we're going to
start with our sorry. I'm just two quick and
I'm working with it. So we have our halloween. And you see this font, it's different forum,
other ones that we chose. This font name was it is so if you will
need for future. So this is, this is our and again, they made a mistake body, they just fixing it. So this is our design. And color that I
chose was shared. And different font. Hello. And as you can see, to use this light ray
letter H and let's letter N kept some blood
dripping somewhere here. And they are different size from other letters of the same line. So what I basically did, I selected the same
design as always Copy, Paste it in these two letters. And again, keep the same ones, not really the sizes. Copy pasted. This one, delete it from here, and this one delete
it from this size. So we have our H
and we kept our N. And here we are deleting
chest same letters. So we're halloween. To position it in the center. Then we have our and letter and these lines H and all other
ones on the top line. So I will show you how
to make it the best. So both letters over here, they are close to
the coordinate. And this, we need to increase
so it would fit properly. Our design. Then we select all these three elements
and middle part of halloween and age
going onto position. And by alloying elements,
we're relying on top. So they will be aligned like this and it's not
what we would like to see. So since they are aligning
according to their sites. In this case, I'm working with different thinking with
alignments to do it mentally. Flexible takes a
bit of more time. So we come here, the files, we show
rules and guidelines. Then you will see
all these numbers. What I'm doing in this case, you just need to perform
the top of roller. Drag it down the line and just leave it where you would like
to decline to state. Then now increase the size of Nine. And you see that
our line stays there. And you can move that line
from anywhere you like. So I'm deadline aligned
with your other words. And when you press on H letter, we can drag it up. But don't recommend to
dragging by hand because then all the other linings
from these parts will go off. I just press, press it
would lead with a mouse and then the keyboard
chest arrows up. And when you pressing
with the keyboard, it moves slowly and it moves
chest one-by-one pixel. So like that for you, it will be much
easier to adjust it and control it then
with the mouse. So we have our
designs over here. Let's settings. Then. What is missing from this
part is our three pinks, these bloody dripping, and
the color of the redness. It's not totally flat colors. We will adjust in the latest stage. We'll
leave it like that. So but still we need to repeat. So let's simply type in blood. Then. We can see it's
totally the same. Don't know, it's appearing. So it's totally
the same element. And you can drag it
from here to reduce it and place it on top of your letter. So years later is on top, then you need to send
it to your little bag. And your blood ripping
will be years. So you just need
to copy paste it. And what did, hey, the way here. So now as you can see, that is different colors of our and that's how I just did in the
previous design also. It's totally
different red color. Then our dripping. So what do we just
need to go again on our and our text color. We need to select pencil
and I'm dripping, so we need to select Color. And now you can see they're
matching perfectly. So this is the color that I
was using for other ones. Need to keep select
all your elements that appear in the red
color going in here. And if this is Alaska
water that we were using, so select that color
and you're here. And they're applied
also for other. So
5. 6 Adjusting elements: Let's continue with
our other elements. As you can see from here, we have these cute,
scary Tompkins. And then we need to find them
on also elements section. So these ones are elements
that I found it from. As I remember. So over here, Let's go to I'm cans. And as always, I'm
too fast of texting. So you can see here
it is optional. Also, it will be all the
graphics and videos. And you don't need videos, so I'm selecting graphics, but on but graphic. You can see that these pumpkins are looking, looking
too realistic. So what I'm doing, this, going on the photos
and searching for photos will look more realistic and shoot
our design more. For example, I will not search for totally,
completely the same. Now we have our
pumpkin and as always, I'm going background
remover to have it as a separate element,
not one picture. It takes a bit of time
till E a systems thinking. So we have our pumpkin
musket quite nicely. And sometimes I'll show
you a small trick. If there is some parts that
by removing background, it's removed and
you want to adjust it so or to remove it. We can these two options when
you can select the brush, this is the brush size and
the brush size will go small. And then when you brush
size on these options, can see you can draw it
and design, we'll go back. So this one we don't need. And if you're going back again, you need to start moving. And the same word, erase, brush, that you can erase the parts that you don't want them to stay
on your design. For example, this part, or some parents that was not detected while removing
the background. So I'm quiet Tokyo
with this moment. Let's make it smaller. And from here you can see
that they are quiet, dark. We can go again to adjustments. And we will play with darkness, with more dark and light. So by playing, again, we can make them into different Most of the moment. What other think I was adding? It was same. Shadows adjustment, but we'll use it glow work
to make it more dramatic. It takes him as a wave. Or you cannot even. So while you distort, again the same colors. Sometimes it's hard. The Canva. That's some Midland
men's getting back to their shape as you
can see it here. So I'm going back again
in the same colors. So let's try again
to some shadows. You can see from here it
called gloves and theater, just justing the same
color that wasn't before. You shove your glow behind. Pumpkin. Can fix the
colors later on. Chest creating by dragging. Use lines. You can see the glow difference. Bigger or smaller,
more blur to test. So as you can see, our colors and back to normal. So not to waste our time. We can choose. Instead of using adjustments and a lot adjustment can
go through the filters. And with the filters,
find something similar. We read, we did. So basically what we'll do, we'll make this video best. And just again, the color. I think it's the moments. Now we're just
place them around. Basting. Just making
with different sizes. And placing them around. Design can meet them if it's transparent. Motor drama place you'd want this one is
what keeps hearing. Consent him. They're quiet. They're almost done
with our Design. Go to other lesson I will
show you in the last. Adjustments. Should
6. 7 Final adjustments: Hello, that's complete. I would design this one. We don't need more. Just can move it. I really still not
yet with this lady. So we can go again, edit and make and the chest
can make sure bit different. You're more clear. Again, just played a bit. But the design with
the color to yellow, I think now she's quite dark. Mentioned with design, but would like to put
a bit more hello behind shirt, which was scored. Decrease the size. Blur. It. More dramatic. Much. Hello. Can click
the bit grayish. And again, our adjustments of the color adjustments
to drop down. We can just make it. So I have adjusted the color
is again back disappeared. It was putting more glow. And these Swan Lake and see how you referred to
look when you're design. So you can play around
and when you are satisfied and you
can put your design. So this guy, Good. Okay, now I think, and we can go. Now, I will show
you how to adjust to the other nodes
can to another lesson
7. 8 Second design variation: We have our design,
one design ready. And I promise you
that I will show how to recreate this design
into another one. Include this one. Basically it's almost
everything's same order here, but we have a bit on here
and different backgrounds. Let's go into that. Not to lose the same design. I'm always making a
coffee replicating page. What they look the
pitch to the same ones. And this lady, we
will not leave need anymore than we are
removing this background. And you see what slept. This. We have different fonts, different background
color, and the graveyard. So we going again elements
or you can go basically on the photo and look for graveyard. It is I would again. And the graveyard set as background as you see when you said
commuters who background, it's too big and
not visible at all. So we're removing from and placing picture. But before that you can
see that over here. Totally transparent
and not that is this. So we are Adjusting
Background Color. Lack says we have more and more here reach us
through removing this one. Sorry, the beds. At finding our moon. I'm deleting this. Moving a bit to worry here
and sending totally back. So what do you can just
totally in the backside. Just double check
the size of the end. So can become over here, drag it and place in the middle by positioning
and also you can do it. So we have that one yeah, which have three of bumpkins, so we don't need that much. And since we do a little
bit different bumpkins, we Room elite, other ones. This one is our pumpkin, make it in the center. And it's true
yellowish comparing to our pumpkins and
overall, our design. We're Adjusting
some more colors. Again. Make it more suitable. Make it more or less. Saturation. Can just playing with the columns. Since we're using a
bit different pumpkin. When he totally same colors. This one. Just again, duplicating them based a bit different directions. This one would send
me good diagram. The first Pumpkin
would be on the phone. With your mouse also And as you see, these lightnings here not matching very well
the team itself. So I'm just going to delete them and then leave
just only one. And that one, we will
adjust colors again. Make it not that bluish, but more into yellowish side. Not too yellow. So it's good match our
sky would be great. So again, placing
copy pasting them, placing bigger and smaller ones. Now we're design Live think, just playing with the
elements around it. And then, you know, totally bank backwards
hour that will be yeah. Just double-checking
previous one. This one. I'm going to be a
little bit again. It can go a bit on the hand, will look more dramatic. So I think it's this, this will be okay
without a lightings. And as you see in the
previous design or here, some wage which have some
more, That's the same, that's unchecked, existing, and reducing their size. One debit much. Always increase your
design to double-check. So going back can be very careful because you
will drag other elements. Also. We have this You bet here. Just leaving them here is that they had small and not to make it go work
Valtis who can induce a bit. And what you've seen
here and there was, which I did, suitable also
to our designs thick. And so we're going on
elements and looking for which which anyone can make it smaller. Make it a little bit.
Trends. Look like she was kicking with
the glow from the one. So this is our last
adjustment, send them quiet, happy design, but I
would change a bit of this picture color to it today. Take less bright, make
it more dramatic. And next lesson I will
show you how to adjust. What different font. Awesome. Thank you
8. 9 Final 2nd design adjustments: As you can see, now, we're going to adjust to different color and
different background, all these other lines. So let's go back again. And this this is different. The name of the font
was the name of the bond was yes. It's one that is different and that you see letters are small. So you go on the top
and press uppercase. When you press uppercase, can see that change
into the figure was all capital letters. We can press change
all these three also. Just press on each one
and select all of them. Again. **** my chest it again, all of them small. Just to hole up. Here to here. Now, we need to change our size. You can see in this
design it's much bigger. Increase our eyes. Again, positioning in
the proper way up. And as you can see here,
it's different color. Now we go on our ethics. I can select this neon color that it's not suitable for us. We go on to yellow. To yellow. We just press on
wartime mode here. And we'll go into EmpID. Me going again, back to advect. We just increase intensity and color. So these ones in mind design, it's matching with
the halloween. So how do I need to
change it again? Worry about that. So we chose This and this, and we're going again, don't need to stick anymore. Going to choose the same
as our babies sign. And just in case you want
to pop it a bit more up. Letters you can choose
sensitivity and delivered from ethics also
have ordered this. I would say that it's a bit
too dark or our design, we can go ahead and
set up this retinoid. Choose this one. When the same you can. I'd chest colors. I'll use a bit brighter
color, but it's slightly. And now you can see that our
and lemons matching anymore. So what do we need to do? Chris, our elements,
increase our Design size. Now, choose our elements
and the goal to image. We're changing by Adjusting
a bit, all right? And by playing with
it just in color that I can somewhat elements has the
option to select the colors that you want, but other ones, you
need to play with the code and copy paste. This one, you shoot me more and divide this part
usually leads to catch that. Design. Again. Elements, again. We are to other side
to match it properly. This one felt we have no our different colors,
different fonts. And you can lay, is you like I, reaching the
satisfaction that you desire until you're
completely happy. So this one, what? That's all for our designs. Let's go to our
last lesson where I will show you some
additional tricks and tips about the Canva
itself that you can implement into your
designs in the future ones
9. 10 #1 Find & replace text: So the first thing that I'm
going to show you today, it's quite new feature on Canva. And it works the
best if you have one example presentation
or a lot of pages similar to ones with the same word that
you want to replace. So you don't need to go through
all of them and changing. So first you need to
go on coronary artery here listed file and then
Find and replace text. So I already tested
here madness. And then showing how many
times during the coordinate, how many times it appears
on all your designs. So we have met me here and here. And I want to replace
it with that. If you press replace it, then it will change one on one. The first design that you have. If you press replace all, then it will change over
here. And over here. So it will be replaced in your 14 pages of presentation or as many
pages as you have. So this one is the main feature. If you're all we can
go to in London one
10. 11 #2 Draw with Canva: So the other trick that I'm going to share with you today, it's allowing to draw
freely on Canva. So one example, just a new page. Having new page,
then you need to go over here. The corner. Select More option. Best option. You can select from below they then for marker,
glowing pen highlighter. And you can adjust the size and transparency and the color
of what you are drawing. So let's, for example, select pinkish transparency
and recall with the glow pen. And you can throw it really. Thank you. Just
need to press Done. And you have your
transparent file that you can use on your designs
anywhere, do you like? Then after you can
edit your image, the different adjustments and
the shadows increase more glowing and just play with it. And since it's a newer feature, it's still not available
on the phone's app, only on the computer
11. 12 #3 New shapes features: So the next tip I
can go to show you, it's about rounded corners. Let's delete this sample. And it's called two elements. Select Shape. And it's totally new
feature of Canva created. Recently. You can go on top border and select
coordinate, rounding. When you move this to the right, you can take your
coronaries are going founder and you can see the
difference how it looks. Also, you can wait
for any other shape. This star, something like that. We're back again here. A corner rounding can
see how it's changing. All the sharp corners. Changing into rounder ones. Can play it like this. At the same time, you can change your shape. Over here. For example, you have existing
shaping your Porter. Just raise it. Shapes from here. Change right away on your, in your selected one. You're working with
rounded corners. The other feature we can change, that can lead it also
can change borders. So for example, you will
choose the border of thoughts. Can choose the border. Color. Change into white. You can see it better. And you can see this border is. And with the Border weight, you can make it bigger. Most completely from
entering the design or small and quiet to play with it. So, and one more feature. Canva established recently, that you place two
times on the shapes. You can add. Text inside your shape
was not available before. So now you have something new. Just play with your text. How you prefer. Change the font size. Everything like
putting them all text
12. 13 #4 Copy & paste style: The other feature that
I'm going to show you, it, Copy paste style. So for example, you
have these design. Then you press your selected
Design on the toolbar tab. That is a little roller style. You press paste style and you
select where to paste it. And the same style will be
applied to that option. Or if you have a photo, texts even can do this. So you just select the photo, then Copy style, and select
where to place it here. And that filter which is
applied to this photo, will be appeared
here on this photo to even you can do
it with the same. And even you can use the shortcut to do
with the same thing. So Netskope back from
applying this style sheet, the photo, It's totally
like it was before. So we just need to
press on this Design. On this photo. Then select a. So sorry, we need to
select the photo. Then throw out C and go on other design that we want to
place it and Tutorial out. And it will be applied the
same style as using the roller
13. 14 #5 Connecting lines: So another cool trick
that I want to show you also recently was
greater than Canva. So it's Connecting lines, connecting to shapes,
to photographs or any kind of elements. So just press on your keyboard, L and line will appear. You will have your line. So when you select the line corner and move
it closer to the shape, you see this dots
that are appearing. So it means that
you can connect to that certain drugs
than from other line. You can do the same and connect
the dots to other object. And when you move them, the line will be
moving together. Rahm Emanuel, where
you drag your object. The same you can do
with photographs. Purchase, L key,
and mindful appear. When you move to line. The same dots are
appearing. Again. Can connect with the one
photograph and with another one. Also the same when
you are moving, It's moving to get there and dragging the same
features, light or elements. So the graphics. For example, let's choose something from the same style. You have two elements. Delete this one. So probability
here for you to see. Again, we select our sin L and the line
feature will appear. And when you drag the
line closer, he's dots. Bit of weird. You can
connect the same with one. When you connect, your
just move it out. It's comfortable for you. To my chest it. And if you want to have
more features, our example, you can choose elements. Can to certain area. It's very comfortable drawing
Smith chart explanation, job again plus L. And you can drag and
connect with your designs. Now your line will appear. Just connect the dots. Everything that you
are moving together. You can adjust your line. Two different styles
you can adjust and make it knowledge it points. Nine with different colors. Of course, it's
quite comfortable. Let's go to the lessons
14. 15 #6 Create tables : So the other feature that also was created
recently gone along while I'm speaking on delete this one's E tables and
everyone was drawing them. They know that it was
so uncomfortable. Place all deadlines. And to create the table, to do, just go and
go on the search. When you press search, all these features appear. And here is feature tables
to press on the tables and all that kind of tables
over here to suppress it. Simply you dragging
from the quarternary, you can see that it's
moving according, just one window, totally
all applet for more. And you can squeeze.
As you like. If you go over here. To select weird right click. You can see all these features, my size column to
connect more row, column bright at all after. You can add as much as you
want and add to row before. So it will be added over on
the top where you select it. Then you can. And
the column before. You can see that increasing four lines with less,
it's already here. The plus here. You will let one more that side or on this side. And with these dots also, you can select where to place. Then you can merge the
cells also on one line. And go back and
select these two. And merge cells because
it's quite good feature. And this makes your life much
easier than it was before. The eNBs lines you
can drag it for. So here you have
different options to. Here you can select
the color changing. Then, or here you can
select the borders. For example, leave
it out, gardeners. Over here you can
tables spacings, dividing the cell
spacing, small, small, and so on. So it makes your
life much easier. Unmatched cells. And again, we've seen Go back at the same. You can change the
colors of each window. As you prepare one-by-one. Apply different effects. Even type inside each
amazing picture. Love it so much
15. 16 #7 Photo adjustment tricks: The last step that
I'm going to share or even few of them. Actually, it's related
with the photos. So Canva has a lot of new features that
related photo editing. And if you're working your product sample
on the thumbnails for some basic photo adjustments that you need in your design. It, it became quite great. One that I can show you. Excuse me, to go on
image, added image. And the adjustments that
you have over here. It's already going on. If you haven't been working with Canva, was here a long time. Just for you who doesn't know. You can adjust the
colors from here. And when you're
opening it image, that is pretty basic adjustments and two filters over here. But if you need a wider
selection of adjustments, you can go on to adjust
and it's already here. You can select the tint of
the I'm portal saturation. Basically create
your own filter. So the next thing that
I want to to show you, It's called face it, it just needs to
go on the back of editing Mitch Page or
just simply be to here. And you will find it to use it, and it will be automatically
applied to your fourth. On. The other thing that you can do, also, what is quite
new with Canva? It's Paint effects.
It's already here. So you can select any
different kinds of paint effect and apply to your photo that will
look like a painting. So this is how it looks like. Just want up examples. You can press it on it and then adjust sensitivity between
the photo and the filter. And you can just play around
with the different ones. So you can try any other one. We can just cancel this. And again, your can find
which one you prefer most. Like for example, this one. Again, you can go here
and unjust intensity. And to make your
photos more playful. This we're going to cancel now. The other option that
I wanted to show you, if you're working
with thumbnails, similar designs, you can
go on background remover. It takes a bit of time. You have your photo
without the background. And as I mentioned before, with some elements, we can erase it or restore
it some certain areas. What this looks great,
okay, I will apply. And next what you can do, group can apply shadows
to make it more dramatic. This one can apply for
any element. Also. So since the shadows
usually it's black, can go to here and
adjust the colors. And you will be able
to see the shadows. You can play with the offsets. Here you can choose from which side the
shadow should go on. In this case, we
can go back leg. And again, there is any
many different options. The best that I prefer. I'm usually using for my own thumbnails
is the glue option, which allows you to make actually very nice outline around your photo and
make it more dramatic. So as you see that is
white glow and the moment, we'll choose some
different colors, so look more playful. And you can digest these colors according to your
designs, of course. So we have a glow. And to create an outline. I'm old waste increasing
the same size. Then the reducing transparency
and reducing the blood. And here you have your outline. This, it's not so clear. You going totally, totally back with transparency. It won't be visible at all. So the best is to you to live transparency, pool and grid. If you go with the blur, you will get still
thinking, give it. You will get very clear
line around your design. So you will get very clear nine, and you can see this outline. Look great on your thumbnails. And you can apply
it for elements. Also
16. 17 #8 Video background remove: In this following lessons, I'm going to show you
the latest Canva updates and tips and tricks that will make your own
designing life much easier. So the first one
that I'm show you, it's as you move
Video background. So basically it's
working the same as as they remove
photo background. So what's not we can do, just need to upload your video or you can find it from here. Just from the videos. And select any kind of video. It shouldn't be
longer than 1 min. And just go on the
top your edit video. And you will find this
option background remover. So he pressed on it and sometimes it's
working quite fast. It takes a bit of time. And you can't beautifully deal with the
removed background. And you just need
to send the videos. Background, it's white and there is no other
elements in front to make it work better. For example, it's
really nice when you're creating your course or doing some different works. So now you can see that maybe this background over
here also as the video moving. And you can play with
the backgrounds. Like different photos, even
different backgrounds. Quite nice. Even the placing some elements that are moving like this one. And you just need to know that
since it's that the stage, it on the, that perfect. But it's still working quite
nicely with some different, some better quality
videos and with the bedrooms that
are not so messy. So we just to show you, I select my old video. I just selected
one of my videos. And this is just example
with looks like. And as you can see, you can remove the background, place it other elements and some other backgrounds
and other moving, moving elements around, and they leave with it. And then just to
double-check old video, the Cornell and look just
to check how it looks like. And you can see that background remove quite nicely and all
other elements is moving. These ones. You can
make also movable. And to create basically totally new Video chest with
your face or any video. So let's jump to other updates.
17. 18 #9 Pdf updates: So another exciting update
that Canva need Pdf updates. And basically before they
had also the same option, but now they made
it more accurate. So what you should do, you just go on the
main page and on the right side here you can see the cloud and you
press the Cloud upload. And you can select
certain PDF file. For example. This one. And it will be generated
as a new file. Has anyone design over here? Takes a bit of time until it's
uploading in the reading. So it takes a little bit
of time until Canva magic. So here we have our Pdf. When you press on the file. All these for text and pictures. We will be generated in the
way that it will be movable. So basically, still not all of them
properly working, but you can see that you
can adjust main items, backgrounds, and other elements that it's in your
designer, just the text. Again and make it
on your own way. They used to have before
beta version of PDF files. Files, they were not
so accurate sometimes, and this one looks
much, much better. They improved a lot with it. So here you can, you can do, you can
move each element, as I said, the word,
change the font. And again, I'll saving or here, we can download it
as VNG, as Pdf, again, as Video,
any, any you prefer. And even the elements which
are generated by uploading Pdf always can waste giving option to change the option to change the colors
of each element. But with this Pdf,
now, easy peasy, change the color of elements
which are in your PDF. And one more thing that it was not provided
but by Canva before. From one certain design, you can just simply
go on the grid. Select for example, this
design from other file. I'm just select under certain
design that you prefer, copied and simply paste it into other into
your Pdf design. Simply pressing, Copy Paste. This improved quite a lot. And it makes me a little life and video because I'm
much, much easier. So let's jump now to listen
18. 19 #10 Website builder: So the other new features
that I'm going to do this course is Canva website. And you can create
your own website. You just simply
losing you to Canva. And with the official launch of the pool of episodes,
episodes feature. We can now turn
our Pdf documents and our presentations into
simple responsive websites. And responsiveness,
it looks like it seems that three has
been improved recently. And we're getting
device previews now. So we previously had no
options with our own domains. But now, as you can see here, when you press, publish Website, you can find you can chase domain, publish to Canva domain,
purchased new domain, or use your existing domain. That's put an example. Like this. You can publish your site. Although the simple
Canva websites, they cannot represent
your brand well online, but I think it's new update this Destic board of an aid
of simple applications. And the biggest and the best point is that you
don't need any coding skills. This and you can preview. Here. You're design how it
will look on the phone, how it will be presented itself on one already here you can adjust the
pages as you just add. Also, that is a lot of templates and that's
ones that you can use and customize according
to your desired colors. Layouts. Simply work it out as. And of course, no
Website would give you a good overview of
your visitors if didn't provide you
with an analytics. So Canva took care of that too. So we are getting access
to Website insights, which can help you
track views, clicks, and engagements on your new page
19. 20 #11 Text to image feature: Also the new feature that can
just recently implemented. It's Text to image, app and Tips to image. And it's not text to speech
or any simpler combination. We already know and use before. But with this new future, with the Canva editorial, you can generate new ideas
just from your head, simply from your descriptions. So you just need to go on
the left side and find EPS. Over here. You can find option Text to
image and press over here. And for example, just type
anything that you can imagine. Let's say red rose in Gideon. And over here, down, you can choose your style. So it can be a lot of
photo or a drawing or 3D Painting, pattern or concept. So let's try concept. And let's see what it
will generate for us. And it takes a bit of time, bit, because it's basically AI generating from different
information from the Internet. But they have what they
can find and combining different pictures into one. It looks quite nice. As you can see. Can start again. You still have your
selection and more example. Let's do better. And to generate image again. And it really helps
with all your designs. Within few seconds. Sounds pretty cool. Share it, disappear, need sound. Create a pattern. You can have it here. Like this. You can play
with the different ones. Let's try this one to see
what they will provide. So since this feature
is it's brand new and steadily still very
much in a bit the stage, but just like so the Pdf, I do expect that
it will get much better where the time and
Canva will improve it. So basically these pictures
be totally unique. And you can create with your
wordings totally unique images that may surpass the need for a stock
image in the future. And also, it's also great way to stir
your own imagination and help you come Audrey new
ideas for your own designs. And I'm really curious where Canva will bring
this in the future. So now let's make something new. Again. I'm, For example, they're
giving you inspiration. So also like that I didn't go into by Pruitt city
with a depth of field. Longer and the description. The better you can create certain image. Let's see what it will
generate with the riding a bike Louis city
would the depth of field. You can see it's quiet, nice. One Find anyone. This picture is
because here generated by AI and not taking by any, any creators. So let's try with
a panda and photo. What it will look like. Because I'm just curious to see. It takes a bit of you can
see it looks really think. And even getting these ideas. That is different panda, panda. Even with these words. By describing here part of the magical forest
city in the future. I'm generate photo
where it's course. Besides Canva, there is sort of new features that are working with the
artificial intelligence. They can generate simple
pictures similar to these, but tried many of them. They're not so clear. Like Canva feature. It looks really good
quality and amazing. You know that it's not
doesn't belong to anyone. Use it as your own design. This is amazing. Feature. Quality's pretty amazing. I love to see where
Canva logo this. Okay, so let's go with more updates into
our next lessons.
20. Thank you: Thank you so much for
joining my course, and I hope you enjoyed it. And you got some
useful information. And don't forget to. Hello Me and you will get noticed when I will
upload new courses. And I'm going to speak more about these
thumbnails creations, also about each of
these design creations. And I will show you how to
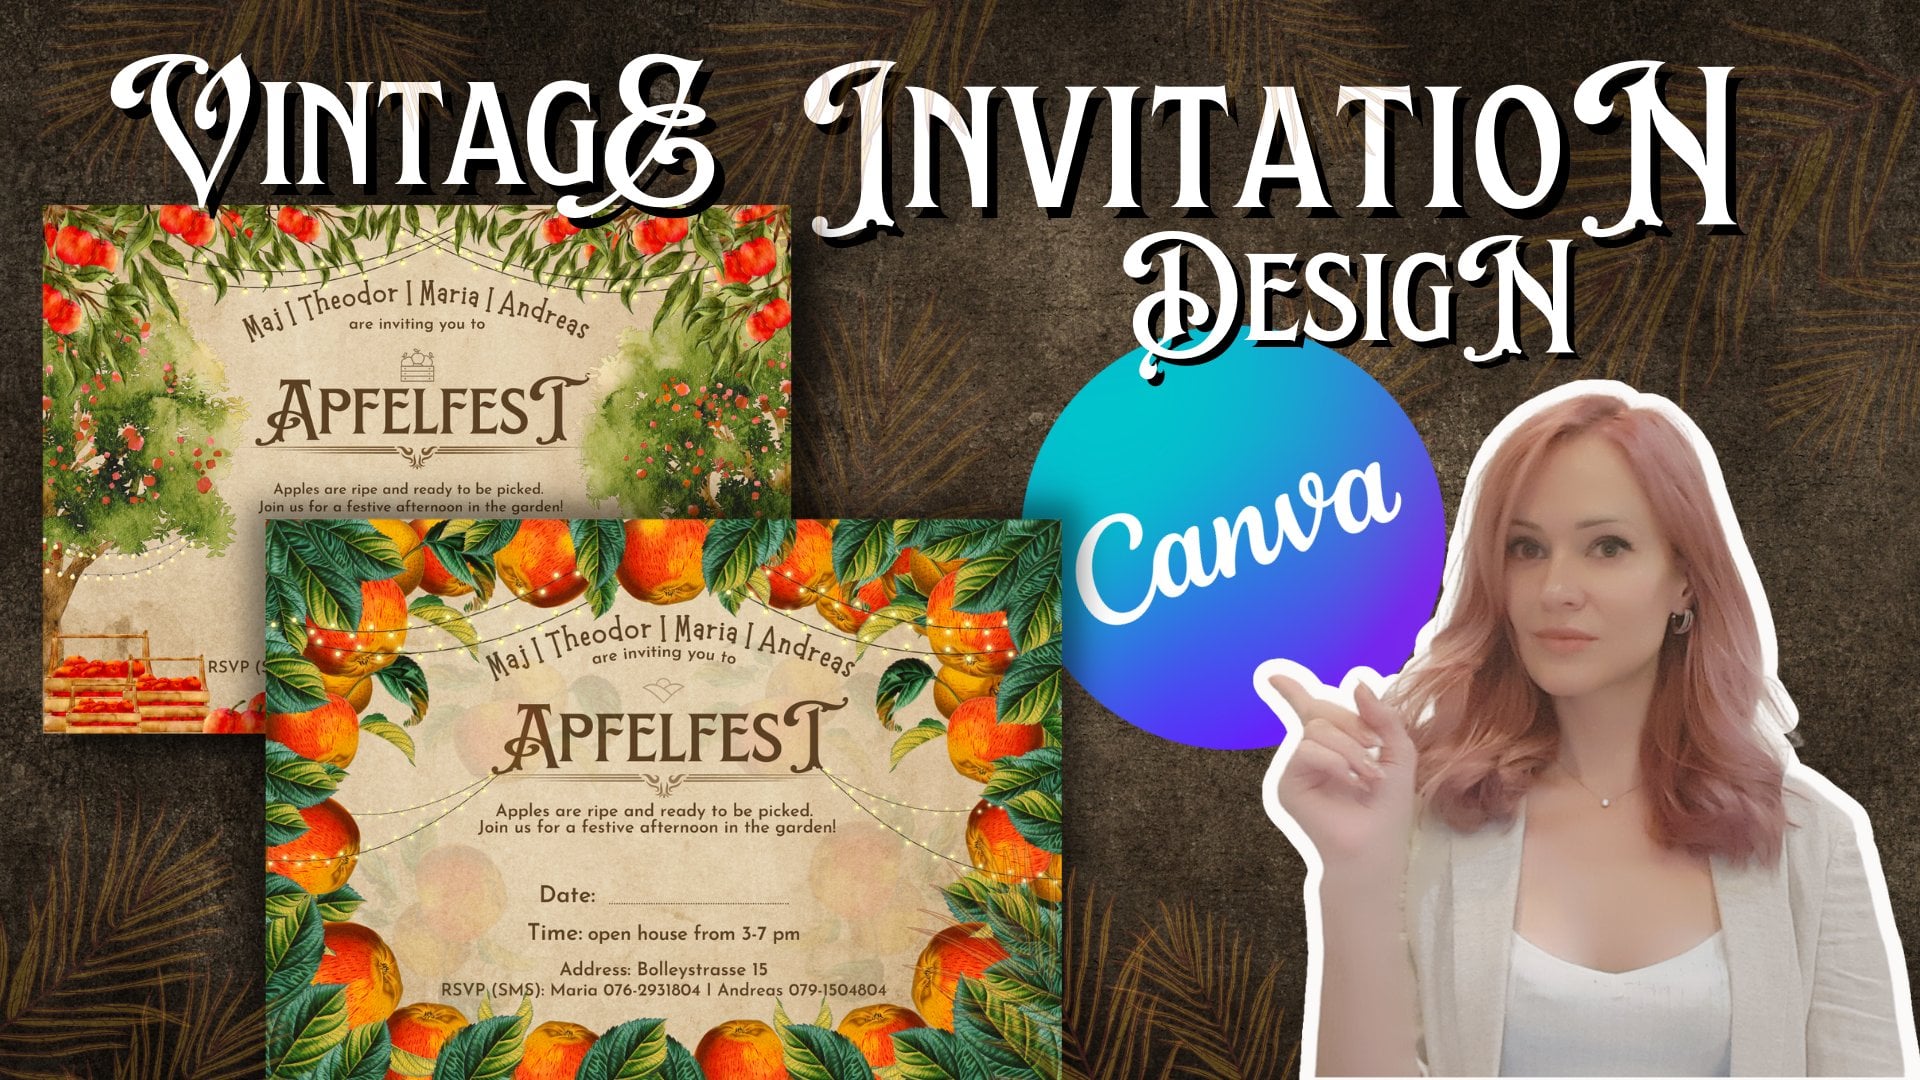
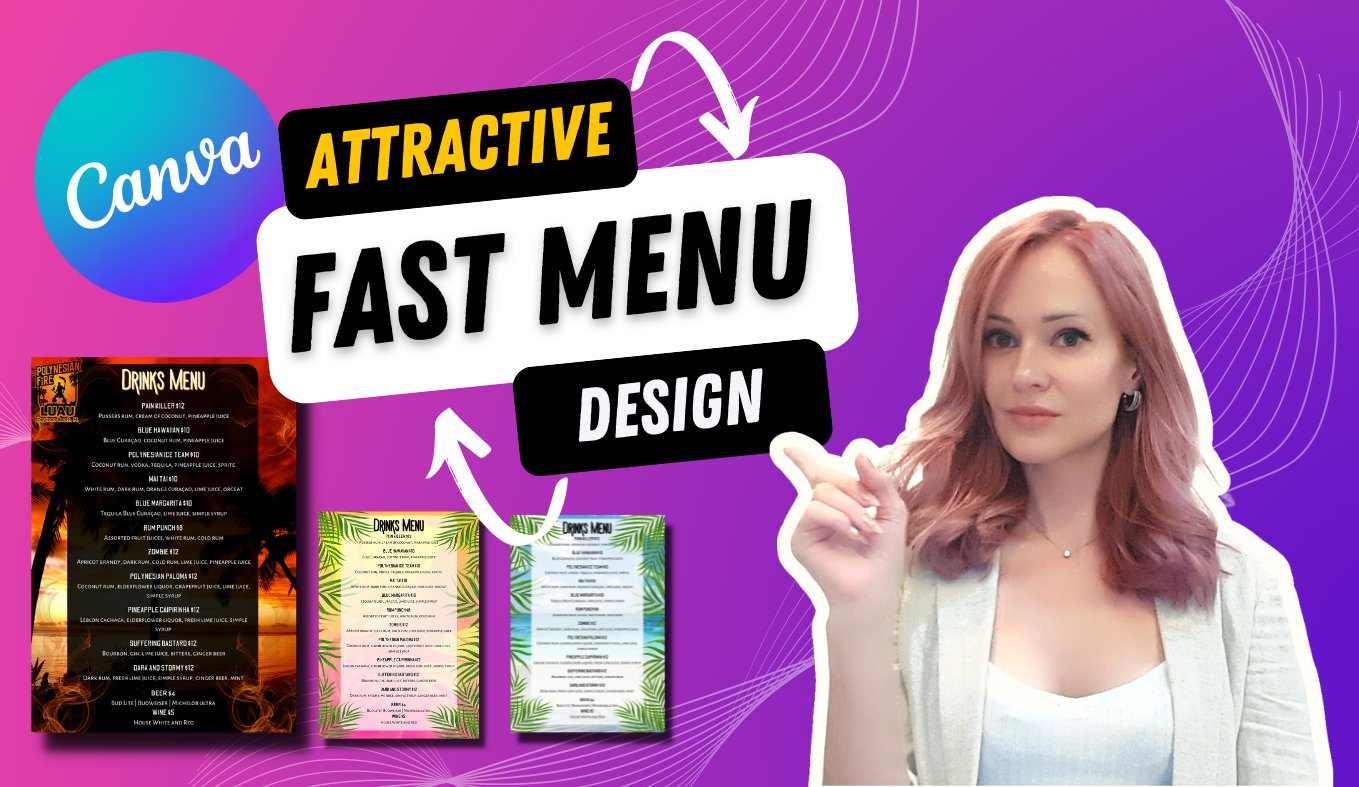
create them from the scratch. Any of these ones. Also, somewhat, this also be showing you in my lessons how to create engaging Menu designs for your
business or your clients. And using just one Canva. I will be showing you how to create discourage
the brand book. How to create different
fonts on Canva. Like these that you see
here to leave four ones. And how to arrange them, how to find them, and to use on your business pages like print on demand when your
t-shirts, and so on, so on. Also, I will include the
classes in my account where you can create wedding invitations, birthday invitations, and you kind of invitations like these ones actually
see already here. I will guide your course from
the beginning till the end. How to create a certain design. And if you have any
questions or desires, designs that you would
like to know about, that you would like to learn. Just let me know in
the comments below. And I will be happy to
create them for you. Thank you, and I hope I see
you in this next courses.
 Diemante, Hospitality Expert, Digital Designer