Transcripts
1. Introduction: Are you looking for a fun and easy Halloween
watercolor project? Hi, I'm Marisa, an artist and ills jitter
based in Colorado. I paint a lot of pet portraits
in watercolor and ink. Last year, I painted pets
in Halloween costumes. I thought it'd be fun to make
a Halloween theme class. We'll create
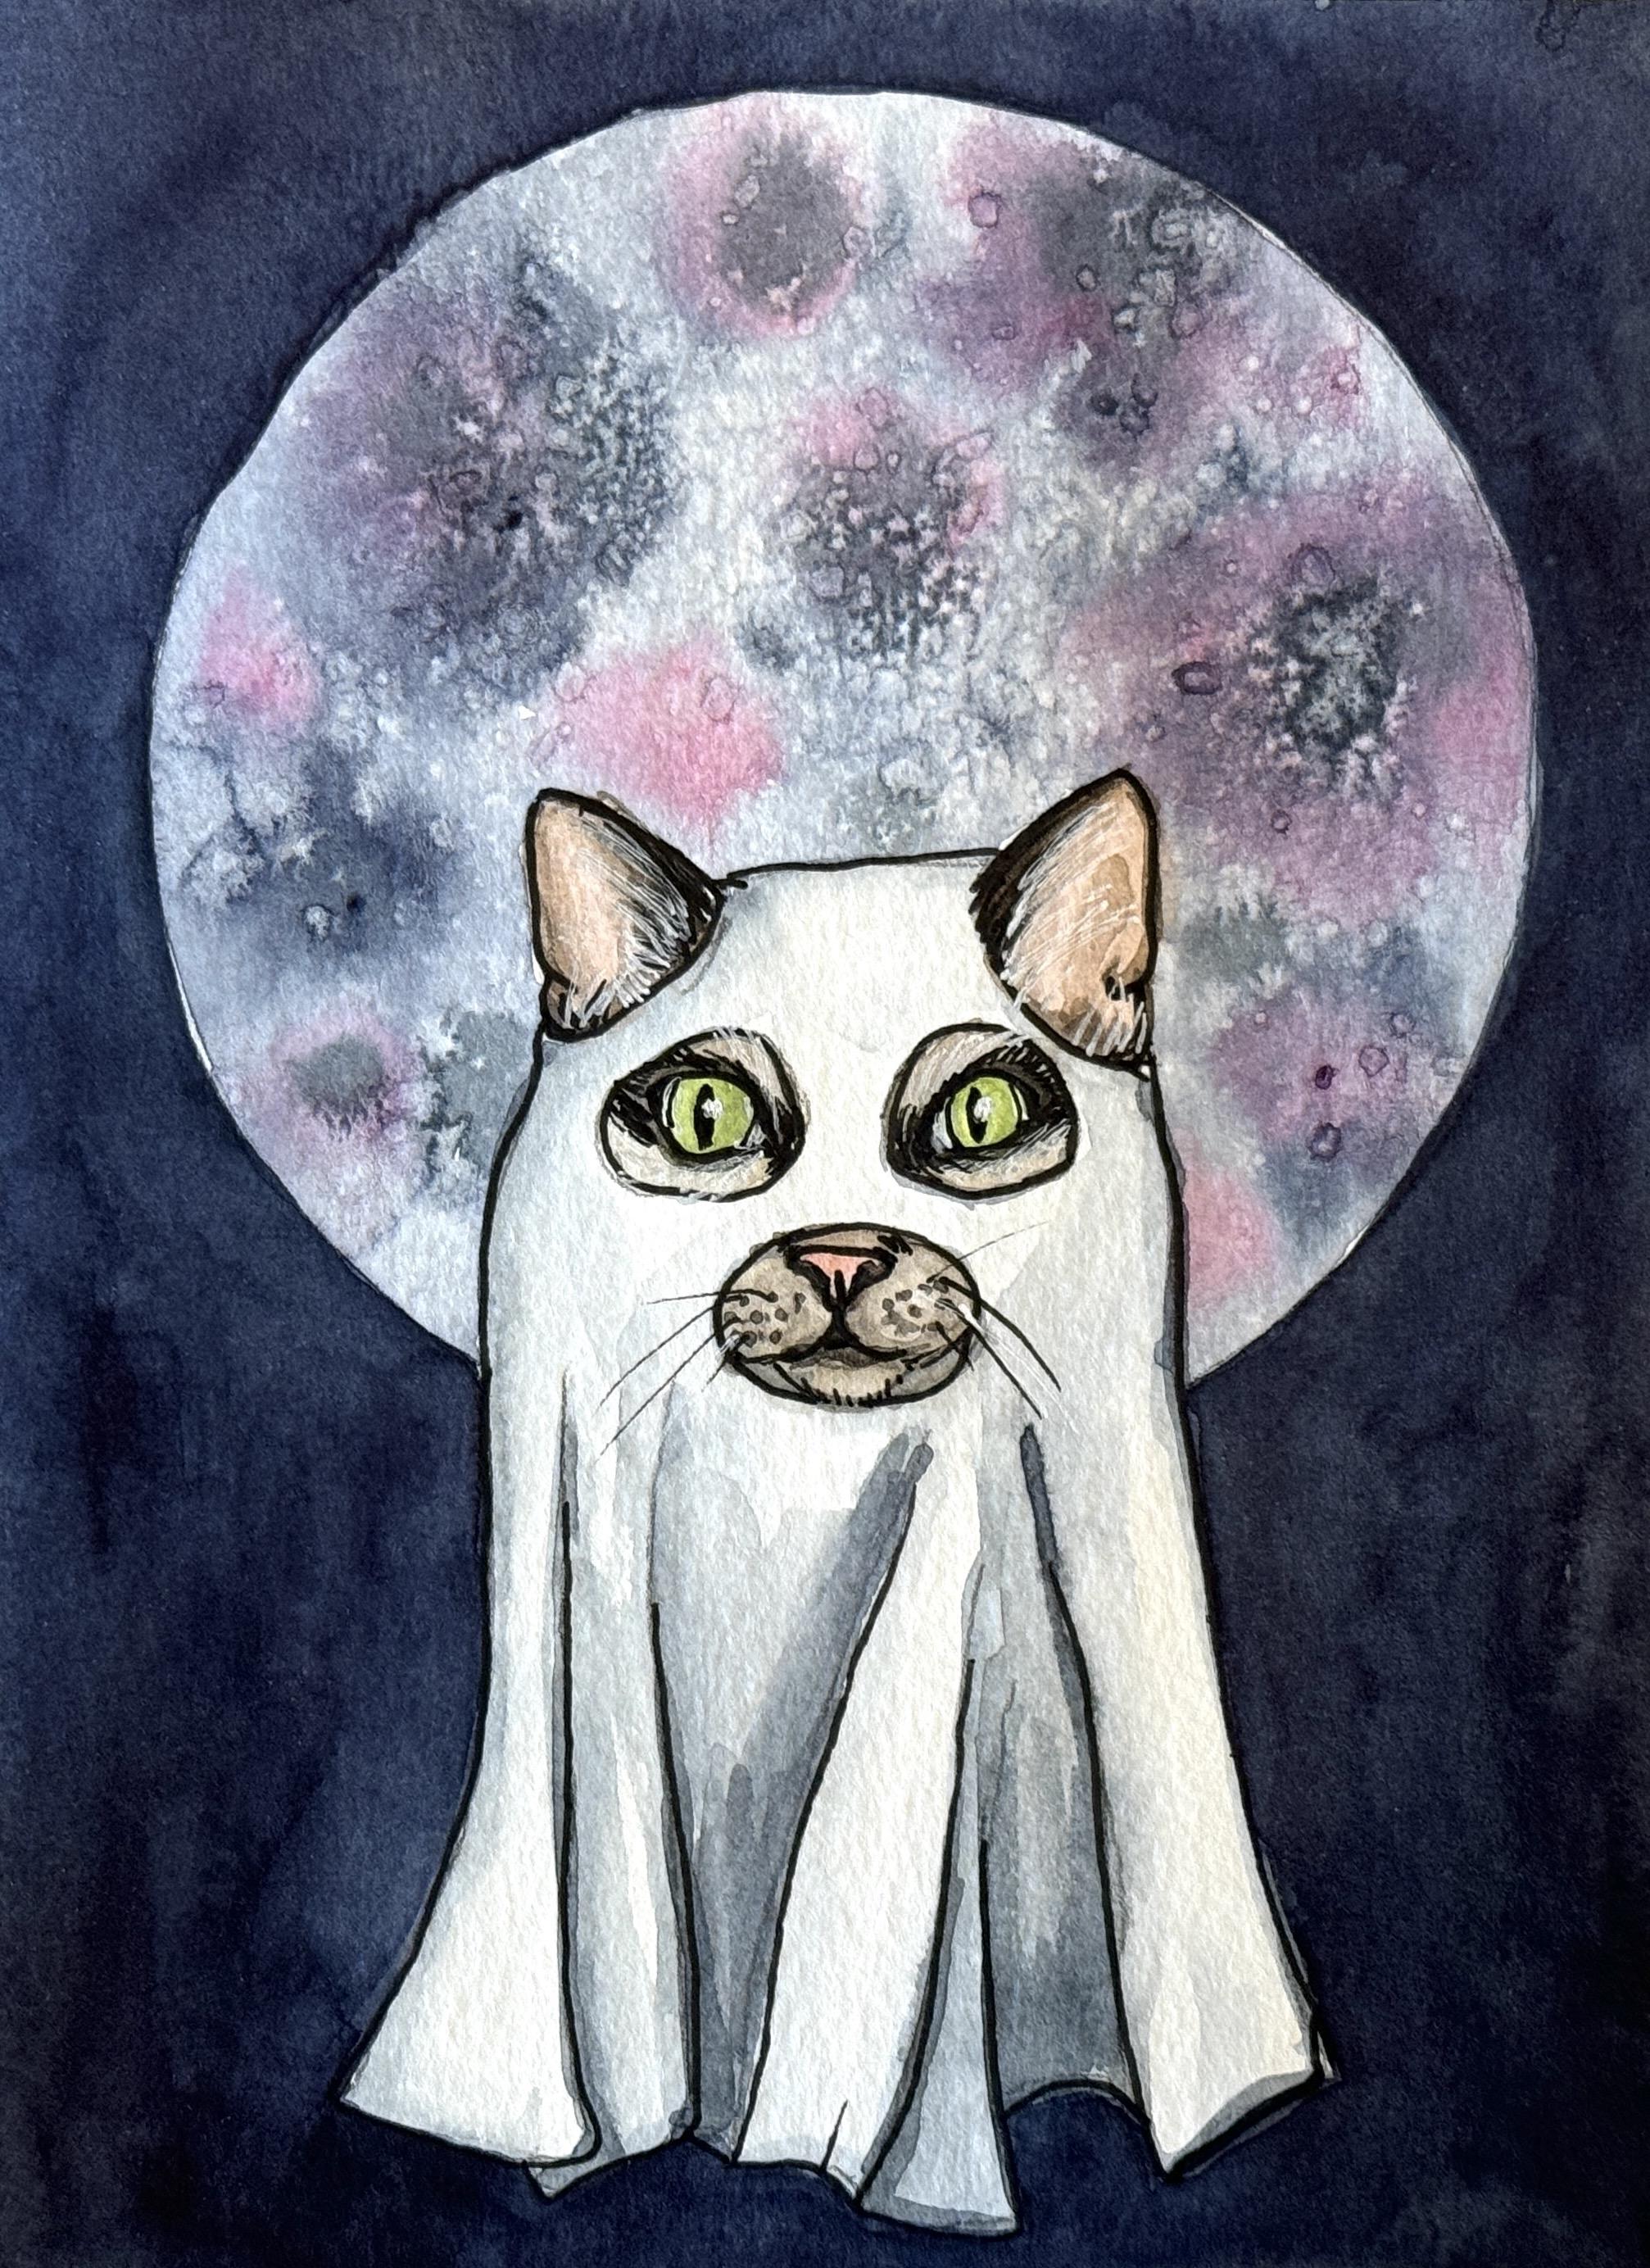
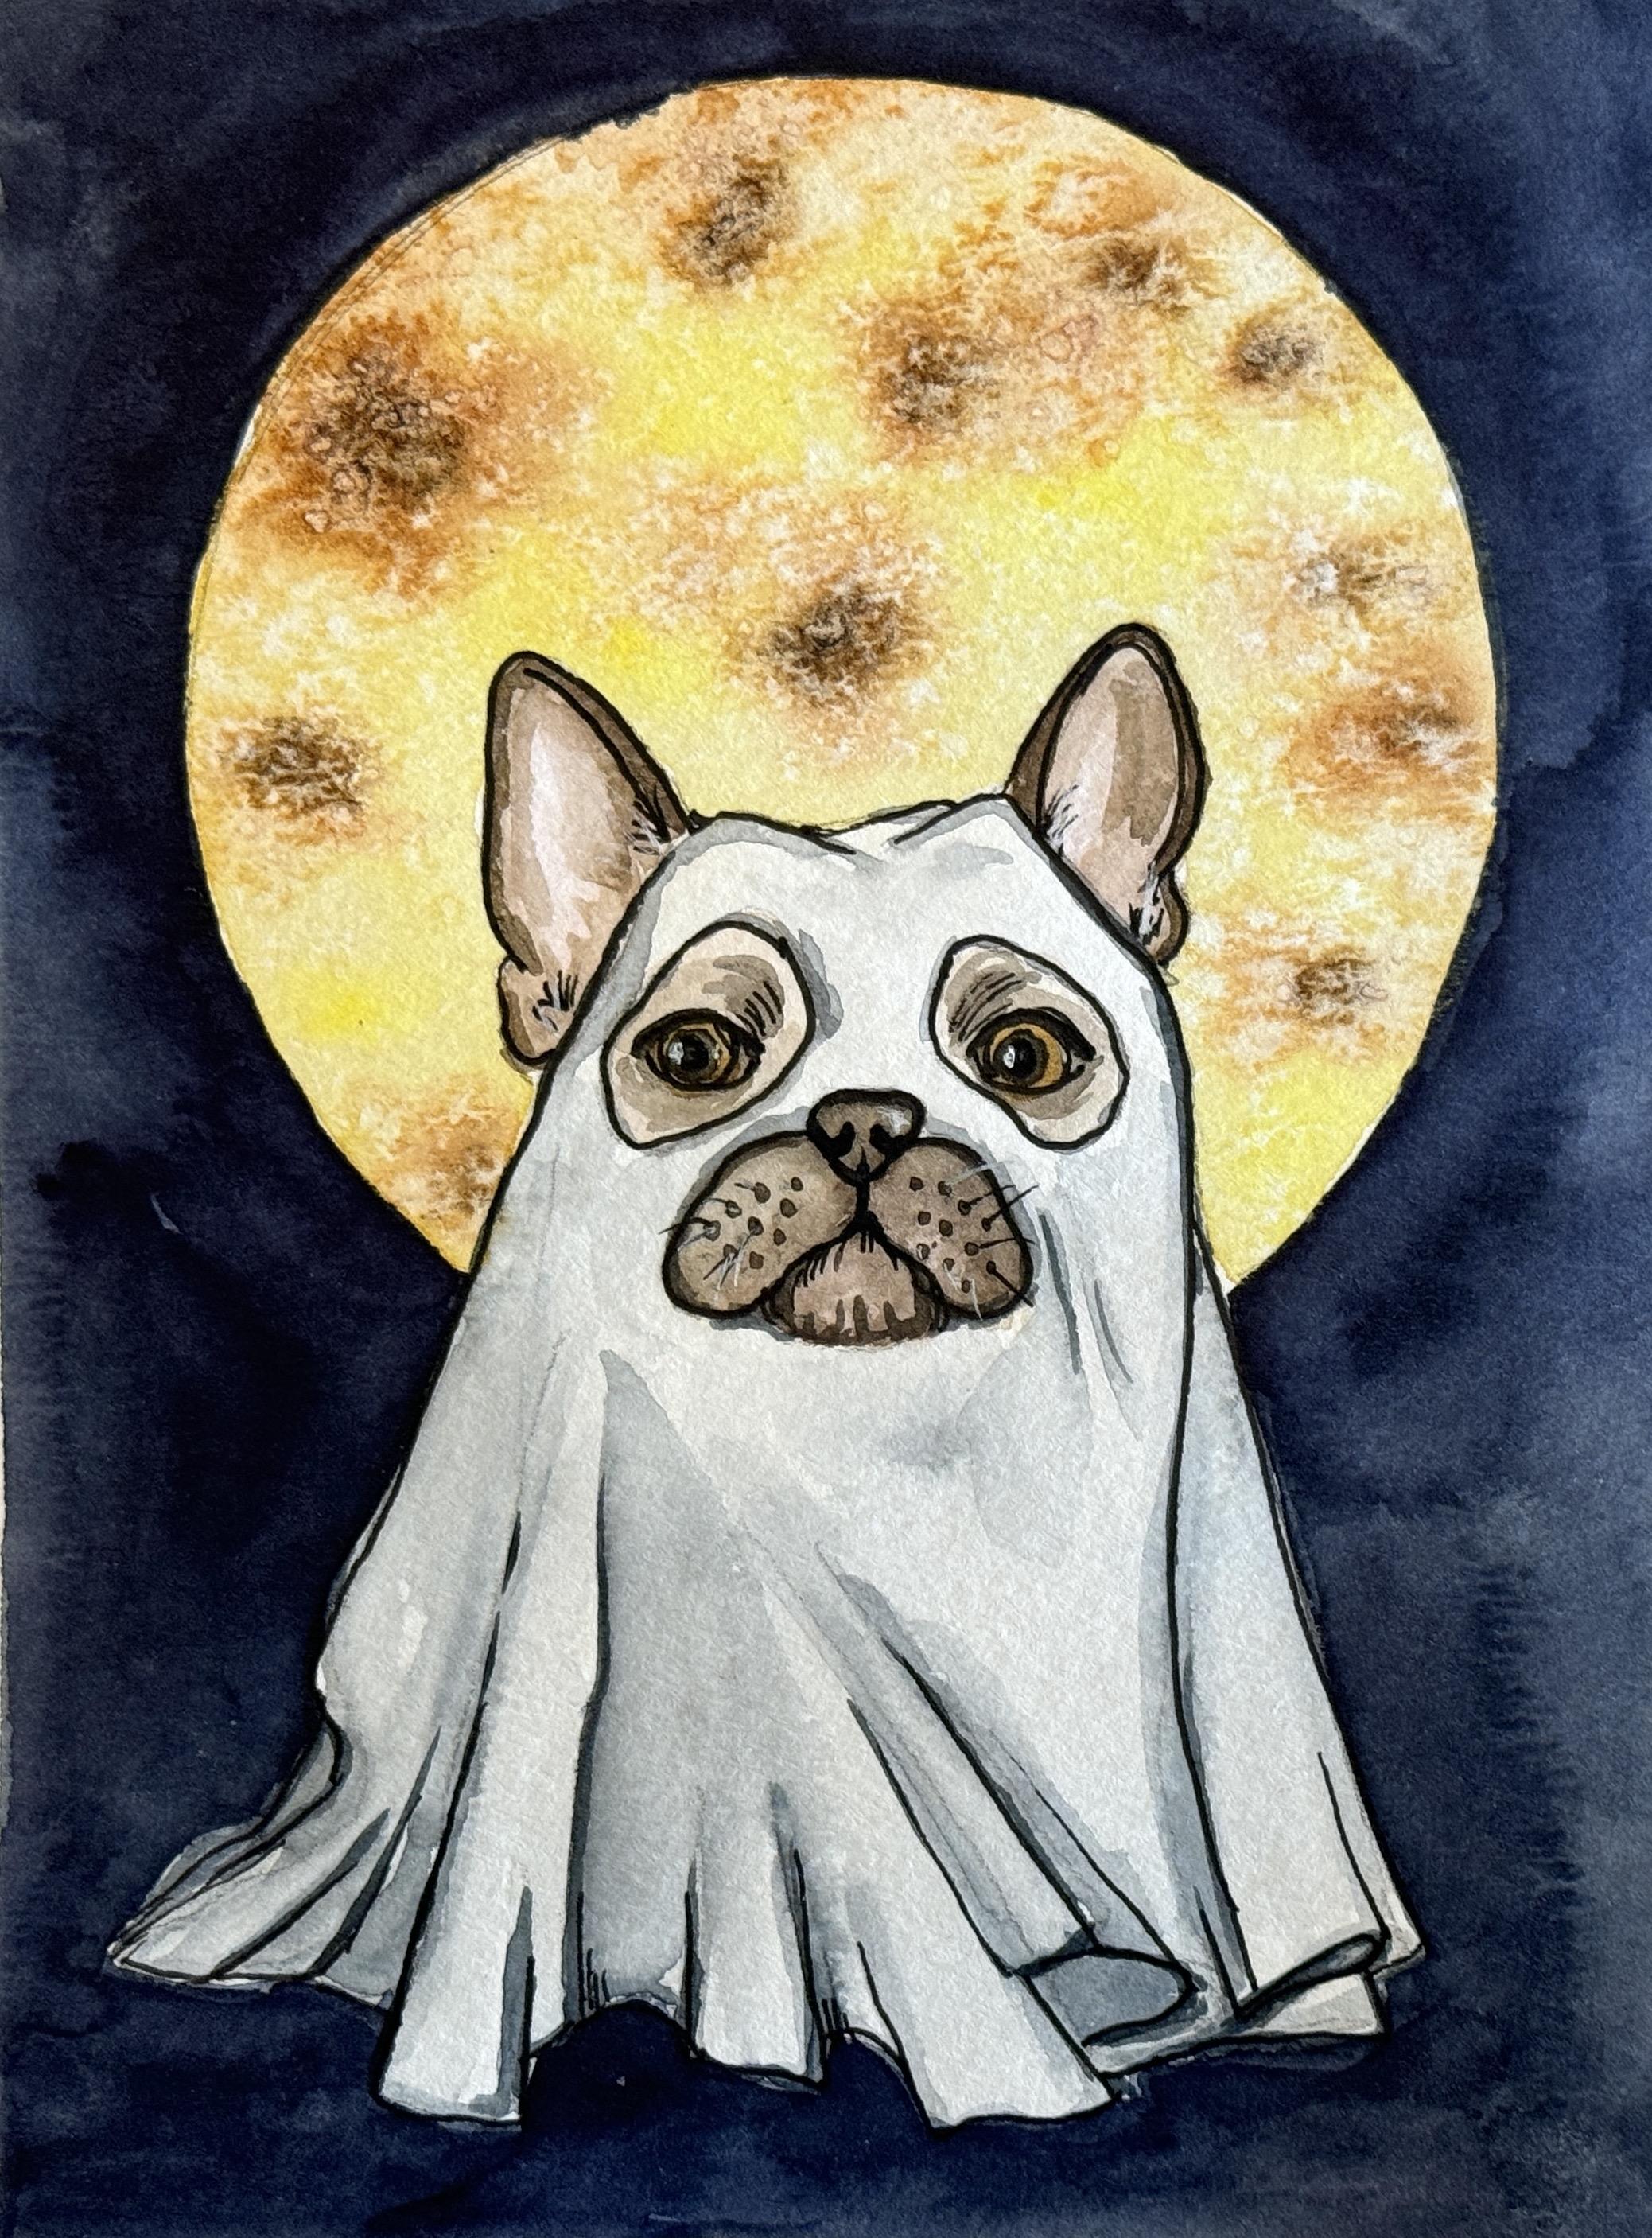
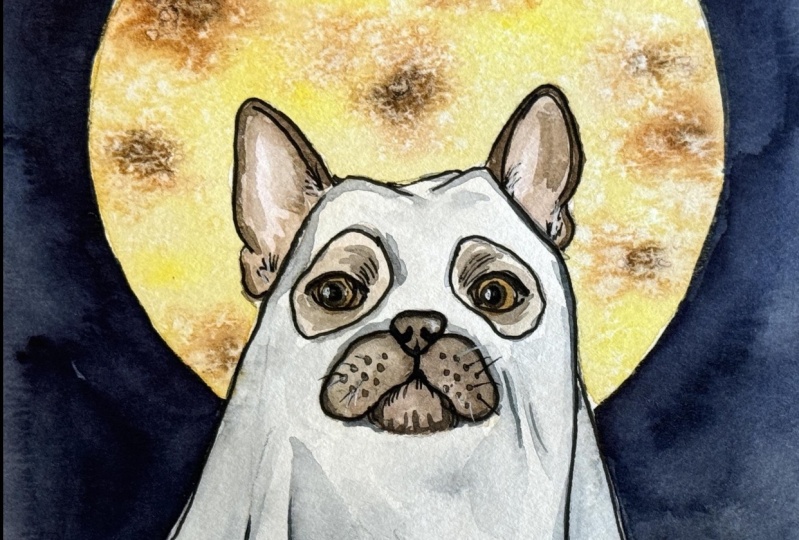
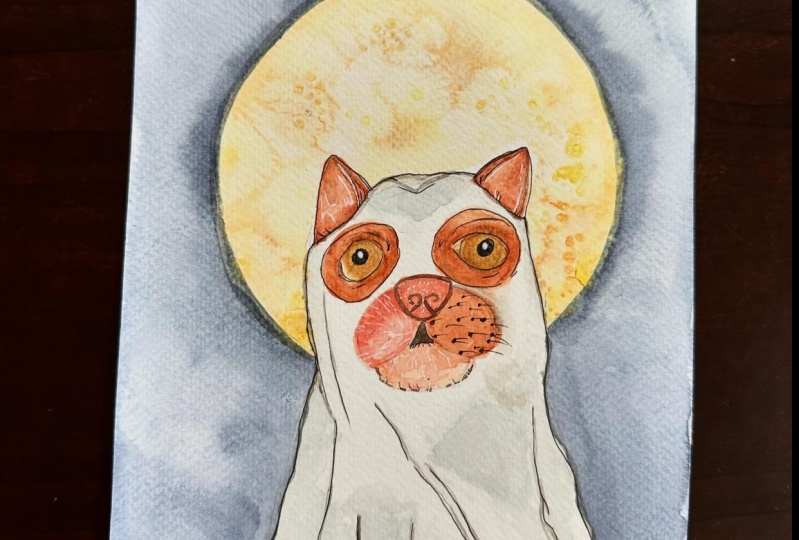
paintings of cat and dog ghost in front of
a big, bright moon. We'll paint our pet ghosts in watercolor and add
details using an ink pen. This class is for
any skill level. So join me in painting a
pet portrait for Halloween.
2. Ghost Pets: Supplies: For this project, you'll
need a pencil and eraser. I like using a
mechanical pencil. This one is a twist eras, but a regular pencil
is fine, too. We'll use a waterproof ink pen
to add details at the end. You could also use
a black gel pen. And I'll use a white gel pen to add highlights and whiskers. For brushes, you'll need a
medium brush like a size six or eight and a smaller brush
like a two for details. I'll be using the Simply
Simmons brand for this project. I like them because
they work well and they are very affordable. Brushes is by brand. And other brushes I like are escota, which is my favorite. It comes to a really nice point, and a Princeton or a
silver brush black velvet. You'll also need a
container for water. I like to use a big glass jar, so I don't need to change
the water that often. And finally, I
have a paper towel I use to remove excess water from my brush and for blotting areas of my painting
that get too wet. I'll be using both these
brands for this demo. This is the Strathmore
watercolor cold press paper, and it's 140 pounds. I'll also use the cancer
XL watercolor paper, also cold press and 140 pounds. Use whatever brand of
watercolor paper you'd like to. Although I would recommend
using a cold press, that's at least 140 pounds. So these are the
colors we'll be using. You can use pans or
watercolors from the tube. I use a variety of brands, including Daniel Smith,
Holbein, and Windsor Newton. These are the specific colors
I'm going to be using, but use the colors you already have that are close to these. I've created swatches
of the colors so you can see what
we'll be working with. We have Panes blue gray. You can use a black indigo. You can mix black with a
little ultramarine blue. Vandyke brown or
a similar brown, burnt sienna or a
yellow ochre, a yellow, such as lemon
yellow, quinacridone rose or a pinkish color. We'll also mix the
quinacridone rose with a little yellow to create this peachy color we'll
use for the ears and nose. Watercolor pans work great, too. I have a Jane Davenport set which I added my own colors too. I'm also a big fan
of GanzaiTambi. I'll extra use the lime green from this set
for the cat's eyes. And another set I
sometimes use are Bangora. Um, these are great. They're a little
bit more opaque. One more thing
we'll use is salt. I have a container with a mix
of sea salt and table salt. This will create an interesting
texture for the moon. So those are the
supplies we'll need. Let's start painting
our pet ghost. Oh.
3. Ghost Dog: The Drawing: I use the website Unsplash to find free images of
dogs in ghost costumes. You can also do an image search in Google or use Pinterest
for inspiration. I chose this cute French
bulldog for my project. When drawing the image,
look for the big shapes. We'll draw a big circle for the dog's face, then it's snout, and an oval for its nose, we'll draw more
ovals for its eyes, and then rounded
triangles for its ears. We'll find the basic shape for the sheet and add a
few lines for ripples. To start, I trimmed
my paper to six by 8 " and taped the borders
onto a piece of cardboard. You can use painter's tape, masking tape or washing tape. I do this so I can move the
painting around more easily. I'm using my roll of painter's
tape to outline the moon. To start the dog's drawing, I'll mark where I want the
top of the dog's head, and I'll roughly sketch
out the big shapes. I'll draw a large
circle for the face, and then another for its snout. And a small oval for its nose. And then I'll add the eyes. To finish its mouth, I'll add two more ovals. These are placeholder shapes. We'll add more details after
we sketch the overall shape. I'll draw rounded
triangles for its ears. I'm sketching the ear lobes. Oh And details for the eye and ear
holes in the sheet. We'll loosely sketch the sheet
and add some more ripples. I'll go back and darken some of the details of the
dog's face and ears. Now we're ready to paint.
4. Ghost Dog: Tracing the Drawing: I've added an outline of the ghost dog under
the resource tab. Print out the image
and this section, I'll show you how to transfer the image by tracing
using a light box, using carbon paper or by rubbing graphite to
the back of the image and then tracing
over the outline onto your watercolor paper. Here I'm using an LED light
box I got from Amazon. Turn it on to the
brightest setting. I'm using a piece
of watercolor paper I trimmed to six by 8 ". Center the watercolor paper over the outline and lightly
trace over it with a pencil. So if you don't
have a light box, you could tape the image
onto your window on a bright sunny day and trace your image
against the window. Another method is by using
carbon transfer paper. Make sure you have the correct
side down for tracing. I like to take the
watercolor paper down and place the
transfer paper over it. Then I'll place the reference outline over the carbon paper. I like using a ballpoint pen
to trace over the image. I press a little too hard
so the line is really dark. So I'd recommend using
a little less pressure. Another way is to
rub graphite from a pencil over the back
of the reference image. You could use a regular pencil, but if you have a
drawing pencil with a softer lead like a two B or higher, it will work better. Place the paper
on a hard surface and rub the pencil
all over the back. Turn the reference
image over with the graphite side down and place over your
watercolor paper. I'll use a ballpoint pen again here to trace
over the image. You may have to press
down a little harder. The lines turned
out lighter than the carbon paper, but
this will work well.
5. Ghost Dog: Part 1: So let's begin.
Have a scrap piece of watercolor paper handy
to test your colors. You'll need a paper towel or tissue to blot excess
water from your brush. We'll start by mixing a peachy pink for the
ears and mouth. Mix the cinacadone rows with a little yellow until you
get a mix you want. Test it on your scrap paper. That's a little too orange, so we'll add a little bit
more quinacidone rose. That's better. Now we'll dilute it so it's
a little lighter. I'll add a touch more
quinacrodone rose. This will be for the ears. So I'll blot the brush on
the paper towel to remove excess water and pick up some of the pink and
add it to the ears. I'll add more water and a
little yellow to get more of that peachy color and add it
all over our dog's mouth. Even its nose. We'll take a little bit of
this burnt sienna, make it really dilute. And while our paper
is still wet, we'll add the burnt sienna
to the edges of the ear. Then we'll rinse off our brush, and with just water, we'll blend the burnt sienna into the
rosy part of the ear. I'll rinse and dab my brush, and with a now drier brush, I'll pick up the excess water. We'll use the peachy
color around the eyes. We're working very lightly
for this first layer. We'll darken the
painting and add more details in the
following layers. Now, we'll add a little pink
to the bottom of the mouth. And then dab the area to move the excess paint
with a paper towel. The ears are looking a
little too pink to me, so I'll add clean water
to the middle part of the ears and dab it
with a dry paper towel. This will lift some of
the colour off the paper. So let that dry and we'll
work on the eyes next. Well, mix an amber color, so take the yellow and
mix it with burnt sienna. I'll carefully paint the whole
eye, including the pupil. We'll paint over that
with a darker color. Now we'll work on the nose. So mix the brown and add a little pains gray
to make it darker. Test it on your scrap paper. Now we'll paint the
first layer of the nose. We'll go back and
work on the ears. I'll add a little more
brown and water at down. I'll add a brown outline around the ears and the
middle bottom part. Then we'll do the same
to the other side to add a little more definition. We'll dab the excess
water off too. We'll add another layer of brown to the inner
part of the ear. Now back to the mouth. We'll add the dark
brown to the edges. We're working with really light layers to build up the colors. We'll add another darker
brown layer to the mouth and let that blend while the
paper is still slightly wet. We'll use a lighter brown to add more definition around the eyes.
6. Ghost Dog: Part 2: Your painting should be dry now. We lost a little bit of
that pink on his chin, so we'll add another layer. When that dries, we'll
work on the moon. We're going to use
salt to create an interesting texture to
mimic the craters of the moon. We'll want to make the area
of the moon really wet, so we'll go over it
with plain water. This will help the watercolor
to blend more easily. I'm going to speed up the video, but make sure the moon is
completely coated in water. I've mixed the yellow
with some water, and it's a little too bright, so we'll mix it with some burnt sienna and dilute it with water. We'll paint the moon
and apply the paint unevenly with more pigment
in some areas than others. We'll add some more burnt
sienna to our mix and loosely paint around the edges of the circle so that it'll
be brighter in the center. Taking more burnt sienna will
drop it around the moon. I'll take a little bit
of van **** brown and drop it in and let it spread. We'll drop some pure
yellow onto the moon and let it interact with the
paint that's already there. While it's still wet, we'll take some salt and sprinkle
it in the wet areas. These are big crystals of salt, so I'll grind it a little
bit with my fingers to create smaller crystals and drop it on top of the moon. You'll want to make
sure the moon is partially dry before moving on. I'll brush off any salt that
is over the dog's face. I'm going to switch
to my smaller brush. We'll mix more brown with some indigo to make
a nice darker brown. Outline the nose
with this color. Then dilute the brown a little bit and we'll
paint the muzzle. Rinse the brush and dab it on the paper towel to
remove excess water. I'll use the brush
to lift some of the color and blend the area. I'll add another layer
to the dog's nose. We'll add a few cute wrinkles
under the dog's chin. Well, makes the panes gray
and bunts in it to create a dark color and add the pupils to the eyes. I'll add another layer around
the outside of the ears. I'm adding a little water
to shade the inside of the ears. M
7. Ghost Dog: Part 3: We'll work on the
ghost costume now. I'll grab my bigger brush. Let's take the paints gray
and create a watery mix. We'll outline the sheet
and folds of the fabric. Clean the brush and run
it along the lines. We just painted to soften them. While it's still wet,
we can go in and add the shadows and let
it bleed a little bit. You can also take a clean brush, dab it onto the paper towel, and smooth out the shadowy area. There are still a few areas in the moon that
are a little wet. I'll gently remove
the loose salt by tapping the
board on the table. Be careful not to
disturb the white areas. While that's drying, I'll
work on the background. Grab your bigger brush and mix the indigo with
a lot of water. We'll use this to
paint around the moon. I'm turning my painting around to make it easier to paint. This is one of the
reasons I like to tape my paper down on a board. This will lighten a
lot when it dries, so we'll do at least two layers. Once the painting
is completely dry, we'll wipe off all the salt. You can see that it left
some pretty cool textures. The background dried
a lot lighter, so I'll add another
layer of indigo. While the background dries, we'll go back and add
more details to the dog. I'll grab my smaller brush. I'll use the brown and mix the indigo to create
a really dark color. And paint the nostrils and
the area under the nose. I'll outline his nose. Makes a little more brown
and outline his muzzle. Define the wrinkles in his chin. I'll add the dark spots
where the whiskers come out. The area I just painted
looks really dark, but it will lighten as it dries. I'll mix more of the dark color using the Van **** brown and indigo and use this to
outline the eyelids. I'll use a lighter brown and paint the area inside the eye. I'll also paint under the eye. And the bump above the eye. I want to bring back some of
the amber color to the eyes, so I'll mix burnt sienna and a little yellow and paint
outside the pupil. Now we'll take some
diluted indigo and lightly outline the
eyehles in the moth area. I'll add a little more
definition to the ghost fabric. Mm Now we'll add the final details. I'm going to use my
black Micron ink pen. I'll darken the pupils and eyelights and outline
the eyes lightly. I'll move on to the ears. And the nose. And the area around the mouth. I'll very lightly outline
the eyehles of this sheet. And the main folds, too. Finally, we'll use a white gel pen to
add highlights to the eyes. I'll add a couple lines
for fur around the ears. I'll add some whiskers with a black ink pen and finish
off with some white whiskers. So let's remove the tape
and see how it looks. I'm going to do a few touch ups. I noticed the top of the
moon looks a little wonky, and I'd like it to be rounder. So I'll take my tape roll and redraw the top
part of the circle. Now, we'll carefully paint the
background over this part. And now we're done. And
8. Ghost Cat: The Drawing: I cut a piece of Canson
XL watercolor paper to six by 8 " and
taped it to a board. We'll start with
the moon and use a roll of tape to draw circle. I actually didn't find
any good references for cats in ghost costumes. I guess they are less
tolerant to being dressed up in Halloween
costumes than dogs. So I improvised
using an image of a cat and another dog
in a ghost costume. To drawn the cat, we'll
find the big shapes, a big circle for the head, and a smaller circle
for the muzzle. I'll draw a triangle for the
nose. Then draw the mouth. The nose bridge flares
out a little bit. You won't see this
in the painting because it'll be
covered by the sheet, but I like to sketch out
the underlying structure. We'll add ovals for the eyes. Then rounded triangles
for the ears. We'll sketch out the eyehles. Loosely draw the go shape
and folds in the sheet. I'll add more details to the
eyes and add the pupils. Mm. We'll also add more details
to the nose and the nostrils. And we find the cat's mouth. We'll define the ears and
darken the final sketch. I'll add the sketch
as a reference under resources if you'd rather trace the image using one of the techniques defined
in the previous videos. Oh
9. Ghost Cat: Part 1: So we're going to
paint our ghost cat. I traced the drawing
I made earlier. A copy of this drawing
is available under the resources link if you
want to trace it. I added a bright
green to our colors. This is super bright,
so I'll add a touch of indigo to reduce the saturation
to make a duller green. This one is a lime green
pan from Gansai Tambi. You can also mix a bright yellow and blue to
get the same effect. I'll use my larger brush, and we'll start with mixing our green and diluting
it with water. I'll start with coloring the
eyes for the first layer. Next, we'll want to
make our pinkish color, so I'll use the Conacradon
rose and burnt sienna. I'll paint the nose. We'll move on to the ears. We'll want to make it
peachier so I'll add a little yellow and check the
color on our test sheet. I'll keep mixing until
I get the shade I want. I'll dab it onto
our paper towel to remove excess water
and fill in the ears. Now, before that dries, I'll add a little bit of brown to outline the inner
part of the ear. I'll run my brush
around the area I just painted to blend it
into the existing color. I'll clean my brush and
blend it a little more. I'll take a very watery brown and add it to
the cat's muzzle. I'll also paint around the
eye to give it some color. Now we're going to
work on the moon. What I like to do is wet the moon area with
just plain water. You want this really wet so the watercolor will
flow smoothly. To mimic the craters of the moon, I'm going to take
some of this indigo and drop the color all around the moon and then start
spreading it around. You want a lot of
variation in the color. Watercolors will dry a lot lighter than what it
initially looks like. If it's looking too dark, don't worry, I'll lighten up. It's okay if you go outside the line because we'll
be adding a background. While it's still wet, I'll drop a darker color around the moon. I'm going to drop some pink in those dark areas
just for fun. I'll keep dropping it
in other areas, too. The magic really
happens when you sprinkle salt over
the wet areas. The salt will soak up
some of the water, and when it dries, it'll leave a lot of interesting texture. I have a mixture of
two kinds of salt, sea salt and table salt. Use what you have in experiment. You're going to sprinkle
this all over the moon. I'm going to grind the
bigger chunks of salt with my fingers so it
creates smaller grains, which will create a
different texture. Make sure the painting
is completely dry before you try to
take off the salt. Otherwise, it'll smear and you'll lose the textured effect. Once the moon is fully dry,
I'll rub the salt off. You can see it created
a lot of texture.
10. Ghost Cat: Part 2: We'll use the pains gray
to outline our ghost. Do this fairly loosely. Going to clean my
brush off and dab the paper towel and lightly blend the lines before they dry. Soften the lines and
start bringing in some of that color into
the folds of the sheet. We'll go back into some of these areas to
create the shadows. Again, we'll clean
off our brush, dab the paper towel, and
blend and lighten the areas. So let that dry. Now we'll take the
smaller brush. I'm mixing the brown and indigo
to create a darker brown, and I'll outline the ears. I'll add a little bit
more water to dilute it and add a little more shadow. We'll do the same
to the other side. We'll clean the brush and dab it to blend the
shadows in the ear. I'm going to work
on the nose area, so I'll mix the
indigo and brown. Once I get the shade I want, I'll add the nostrils and
detail the nose and mouth. I'll create a lighter brown and outline the muzzle
to add definition. With the clear water,
I'll blend the color. I'm working in a
circular motion and slowly working inwards so
the outer edges are darker. The I want to make the ears darker, so I'll add more
of my darker paint around the outside of the ears. And a little bit to
the bottom of the ear. We'll also add this
brown around the eyes. I want to add more
definition around the eyes, so we'll work on
the green irises. I'll add a touch of indigo to make that less intense green. And I'll paint the
outer edges of the eye. Clean the brush and dab
it so it's almost dry and blend the area I just painted
to make it less intense. I'll add a bit more green and
bring back the dark edges. I'll dab around and then
blend it with a clean brush. Once that dries, we'll
make the pupil darker. Grab your bigger brush, and we're going
to mix the indigo with water and start
painting the background. I'm going to pick up and turn my board around as I
paint, so it's easier. I'm adding the paint
pretty unevenly. It will add to the atmosphere
and make it more spooky. This will dry a lot lighter, so I'll do two layers of indigo so I can get a
really dark colour.
11. Ghost Cat: Part3: Grab your smaller brush, and we'll add more
details to the cat. I'll add some more vandyke brown and indigo and test the color. Now I'll outline the eyes. We'll darken the nostrils a little bit more and the mouth. We'll add some dots
for the whisker areas. We'll darken the
outside of the ears. With the panes gray, I'll darken the shadowy
areas of the sheet. Then I'll blend and
soften with clean water. Dilute that dark color, and I'll outline the
eyehles of the sheet. We'll go around the mouth, too. Let's create a really dark dark using the indigo and brown mix. We'll paint a line for the
pupils and let that dry. Now we'll add another layer to the background using the indigo. You'll want the consistency
to be a little thicker. I want the background
to be even darker. So I'm gonna do one
more layer of indigo. Now I'm going to touch
up a few things. I want to work with the
folds of the sheet. I'll add a shadow where
the cheek should be. I'll dampen that
effect with water. I'll keep working with the
shadows for a little bit. Now I'll take my micron ink
pen and darken the eyes. We'll do the same for the other
side and outline the eye. We'll also add a little
bit of fur around the eye. Now, we'll outline
the eye holes. We'll go up to the
ears and outline them. I'll outline the nose and
accentuate the nostrils. And the top of the mouth. We'll work on the mouth area of the sheet and add a
few lines of fur. I'm going to outline
the sheet and folds. I'll add a few whiskers. Now we'll take our
white gel pen. Make sure the paint
is completely dry. We'll add some highlights. Sometimes these white
gel pens can be a little fnicky so you want to make sure that ink is
flowing properly. I'll sometimes use
a white acrylic pen or white guash for
the highlights. I'll add some white
fur to the kidsis. Oh. I'll add some white
whiskers now, too. I'm adding white highlights to the inner and outer
parts of the eye. And some short white
fur around the eyes. I'll go back and
darken the pupil again and add a little
bit more fur detail. We'll peel off the chape.
There's our ghost cat.
12. Final Thoughts: Thank you for
watching this class. I love finding new ways
to create pet portraits. Have fun and create
your own pet ghosts. I would love to see
your paintings, so please post them
under projects. If you have any
feedback or comments, please reach out
under discussions. Thanks again and happy painting.
 Marissa Marquez, Painter & Printmaker