Transcripts
1. Intro: Hey there!: In this class, we'll
take a simple journey into making your social
media post look super cool. Ready to make your post
stand out? Let's do it. Hi, my name is Brian. I'm a graphic designer
living in Montreal. And most of my work is
designing marketing materials, social media, post
and video editing. We use procreate
cool features to make special post
template fits your style. From picking nice
colors to adding fun. Each step is like adding your own touch to your
social media stuff. During this class, we'll
cover the basic of design. Show you some easy procreate
tricks and teach you simple ways to make your
creative process easier. By the end, you have your own post template ready
to wow your followers. Whether you've been
doing this for a while or just starting this
classes for you, let's have some fun
with digital design and bring your social
media ideas to light. I can wait to see you in class. Let's create some awesome
social media post. I'll see you there.
2. Project 1: Class Project: For this project, you
will create a couple of social media posts that resonates with what
you're passionate about. The main goal is to play with colors, textures, and patterns. Be relevant and mindful of all the elements
you're putting in. Also, to cut and clip
images and blend them together to create a
seamless and cohesive posts. You can create your own post or you can follow along with me. When posting your project, I would like to hear about
your process inspiration, anything you have in
mind while making it. It gives me a
better insight into your work and help you
better connect with you.
3. Getting to Know the Brand, Layout Planning and Getting Started: Hello guys and welcome.
And my name is Brian. I'll be teaching
you how to create whoso medipo template that you can use to your brand that you're working
or personal brand. You can create your own template here and I'm going to show you step by step our main objective or
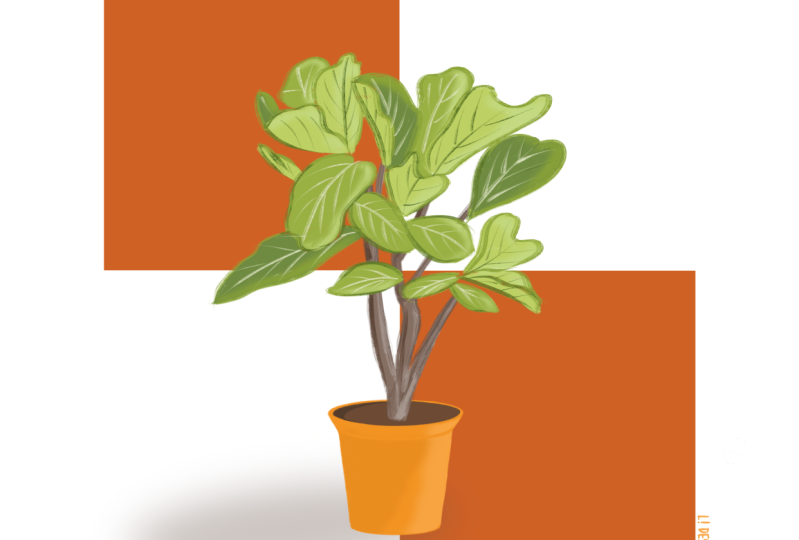
goal in this class. Design a social
media content for this company called
Plant House, basically. And ideally, we need a strong
and established branding before creating contents
like the logo funds, color, and other
assets that define your brand so your audience
will not be confused. So I'm going to be using these two funds right here
for this project right here. So it's going to be
Gill Sans and Rock By. So you can download it,
you can just Google it. A quick guide for this. We're going to be dealing
with plant stores. The store branding is
going to be like a boho, boho look or style. It's going to be a combination
of pattern, texture. And to tie up together, it's going to be the
color that we're working. Pretty much going to
be using just three of this one I'll be using
this probably this, this one right here, white tone. These are my main
colors that I'll be, the photo you'll be
using has pretty much the same tone of the
color, if that makes sense. A call to action, good
context to tie them together. I'm going to be using
a square layout, mostly 2,500 pixel by
2000 pixel in 150 DPI. I might be going even
300 if I wanted to have a crispy result or image
transporting it as a PNG. Because it's not really that compressed
compared to J Peg, because Jpeg is like
a very compressed. I'll be using this kind of
pattern all over the place. So they're just going to put
this like a shadow or some, but you'll see it how I render
it on the next few videos, we're probably going
to use this as well, this temp texture right
here to create texture because boo is like a texture and pattern,
that's a combination. That's why we're creating this brending right now
so we were not going to confuse along the way when we're create the
social media pose. The layout is just
going to be the guide. It's not going to make or
define the entire pose forever, but this is just like what
is trending at the moment, I'm going to be creating
four pose in a square. So kind of like this. So the first one that we're
going to make is going to be like a review or testimonial. I'm thinking kind of
organic shape right here with images
overlay behind it. The text in here, the name of the
person right here, texture along the way. So it gives you more like a
definition of boo thinking. We could divide it into
something like since we offer like delivery
for flowers or plants, we could incorporate
kind like a phone here, put an image on the phone, like someone who holds a plant, and then we deliver here
to action here as well. That we probably need to put the logo here just
for brand awareness since we're just starting, just going to put it L, it means logo,
going to be showing our product or the
plant products in here. We probably need to
get four windows here. This like a text and photo here. Probably photo and text or
call to action as well. Here, run awareness or
statement going to divide it into a half and we're
going to put a image here. We could probably put maybe another statement
here or codes, a little bit of fine
print and pretty much it, we just need to put
some awareness. We could put the
logo here as well. We can actually create
our color palette. Now since we're here,
create new palette plant. House or house plant. We could easily get
this color right here. So I'm going to
just point here and point there. This one here. And then just point
there as well. So it just gives you probably
we'll just put all of them, but the three colors here are the one that it's going
to be our main color. Oops, there you go. We have our new plant house, and it's all check right here. If I go to this, I can
clear this out and I have my color palette
established here. On the next video, we're
just going to start creating our template and
see you guys there. Thank you.
4. Product Template: Hello guys, thank
you for tuning in. And this is the second
part of the video where we actually create one of our
template that we establish. We have our front ready
color palette, our images. We establish the layout as
well here and the patterns. And we're going to create
a 2,500 by 2,500 The DPI, I'm going to just go 150 here so we have
more layers here. Just going to set the profile, make sure that it's on RGB so we have more colors
going to create. I'm going to make sure that I have a good alignment
to address that, I'm just going to go
to my canvas here. I'm going to turn
on my drawing guide and then edit drawing guide. You can just make sure that you have a good
alignment on each side. So you can just well establish
that just like this, I'm not sure if you can see it, but I'm just going to go
from the grid size here. You can go ahead and
do kind of like this here to make sure that I
have kind of a ruler here. So I don't have to worry if I went too far on all the sides. The first template
that I'm going to do is this one right here. So we're going to
show off our product. I'm going to make our
monoline brush here. I'm going to create
a square here. It's quite easy actually. Here in procreate, you could
just do this and you can do edit shape and you
just get to a line here. Since we have our
own like the grid, I'm just going to fill that in. Then I'm going to copy
this one right here. Duplicate. Actually,
you got to put it here and I just want to make sure that
I hit all the places. This one right here, I'm going to put it here. Just going to rename it so I know. I'm just
going to make sure. So this is up pick up. And just pick down. I know. Because it might
be confusing later on if you have a lot of
layers, you don't know. Since we have this we can actually put our
images right now. I could just add
some images here. We want to show off our
product or our plants here. I'm thinking I have all the
plants product in here. We could just choose one. I think I'm going to
go with a cactus here. For now, you can put the
layer of the cactus on top. You can just maximize it that fits into this grid right here. All we have to do is to
clip it. Clipping mass. And it's clip all
here and you can modify the plant to your
liking just like this. I think that's good enough. We can insert another photo, which is probably this one because they go have
the same color Vive. I'm just going to put
them right here and make sure that the layer is
just above the pick down. And I could just clip it. I can just modify it as
well, just like this. We could establish
our background to our color palette here, since we loaded up here
before we started. We can just have
it just like that. Probably we could turn
off or we could decrease the opacity of our guideline
here because it's too much. I want to make sure
that I still have that alignment here or the grid, so I can still know where
were not to put or not. I guess that's good
enough for me. And you can see it beginning
to resonate the boho feel. I'm going to just put a
little bit of text here. A placeholder since
we establish, I'm just going to put the
text on top of everything, I won't miss it up and it
just clip automatically. I'm just going to unclip it, make sure that I'm going
to change the font. I think I'm going to go for the first font that we
established, This one, Rocky. I'm going to go change
this up to become a plant. I'm going to make sure that I'm going to select it all and I'm going to hit this
alignment to the left. It's easier to manipulate and
I could just make this big. I'm not really happy
with the background, It doesn't give a good
contrast with the content. I'm going to change
the background. It's very easy because I
use the background here. I'm going to go with
the green and see if that makes a big difference. Now this is good the color, but I'm not really
because as you can see, the tone here is
white and green. So I want to make sure
that make it lighter. So I'm going to use one
of our color palette here just to brighten up a little bit because it's
too much color going on. Put something here as well, so I'm going to just put
another text here, Visit Us. It's like a call to action. Use the other font. I'm
going to use the Gil songs. And here it doesn't compete with our main
statement there. Could probably just put it
here or something like this. For brand awareness, I
will insert our logo here. Plant House could probably
just put it here on this side. Probably one more.
Let's celebrate. Add like emojis here and it just sets the tone as well
that you're free spirited. I want to make sure that it doesn't stand out pretty much, so I'm going to reduce the
opacity of Let's celebrate. It doesn't really stand out
pretty much because I want to have the eyes tarpire
goes like Z pattern. Yeah, I think this
is a good post for products and we're not really
really kind of selling, but we're putting all the
plants in a good place. But since this is a template, you can insert different images. You can just go insert photo. You can do a batch here. Since we can just
clip the image here, make sure that you pick up, you can just clip it and you
have a new image on there. We could put another one here. Just another example. We want to make sure
that it's below here. You can see you're going to have another plant here
just like this. You can pretty much
change the background to your branding and you can also change the
color of the text, just like that, pretty
much every month. You can change it or
switch it up a little bit. You can probably, you
can change this to here. You can even overlay
the text in there. Just to give you an
idea, Before we end, I probably want to introduce
some of the pattern here, just above the background. I'm going to create a new layer. I want to make sure that
it's above the background, so I'm going to
put pattern here. I'm just going to introduce
it before we end this. So we have it all here. I'm going to probably
use the star here. You can always create
your stamp here. There's probably a video on Creative Fabric 1233 classes on how to make
stamp appropriate. So you just want to click
one of them for the pattern. I'm going to use the
star or the flower. Let's try the flower,
how it does it go. So I'm going to click the plant
house color palette here. I'm just going to lighten
it up a little bit. It does not distract
as you can see. There's like a texture
going on here. It's just nice
touch that will set you apart from other posts. You can even make the
size bigger and all that. It does, it looks a
little bit more dynamic. As you can see, it
just sets the tone and a little bit more
defined branding. As you can see, since
we establish a pattern, it does give a,
maybe it's too much, but you can pretty much, since this is on another layer, you can always disable it, enable it, you can
add another layer. If you don't want
this, you can have the other pattern that we
established on the video. I guess this is going
to work as well. It just gives you a little bit of identity and strong branding. If you have this fine
detailed thought out. I'm going to see you on
the next video where we create another layout for our template. See
you guys there.
5. Review Template: Thank you guys for tuning in. And on this part of the video, we're just going
to go straight in. I'm going to create
a new canvas and we could actually use
this one right here, swipe to the left, and
then probably edit. And I'm going to just
rename it to Square, so we can always reuse it, so I'm just going to
put it right here. So the next one that
we're going to create, it's going to be kind
of like a review or testimonial to set
the background first, I'm thinking I'm going to go this lighter color right
here, like off white. And I'm going to use my
monoline brush here and I'm going to create a circle
right here, its shape. And I'm just going to
fill it up with green. It doesn't really matter at
this point because we're just going to use this for
clipping the image. I'm going to warp this here
On the transform tool, I'm going to use the warp here. And I'm just going
to create kind of like a boho organic shape. And I think this
is kind of good. I'm going to click
to you in the form so I can make it
smaller or bigger. But for now I'm going to
use it just like this, probably modify
quite a bit here. And I'm going to insert one of our photo here of someone
holding the plant. By the way guys, I'm using splash for the photo
I'm using or Pexels. It's the one that doesn't
look like stock photo. I'm going to clip
this one right here. So it clips into the shape
that we just created. And I'm probably going
to duplicate this one. And I just did duplicate the shape on
the layer one below it. I'm going to go transform. I'm going to alter
the orientation. You can even flip it and
reverse something like this. You can even make this
bigger, right here. I'm going to duplicate
this one as well. I'm going to color it to one of our color here. Probably this. I'm going to just
drop the color. Probably put it a
little bit there. I'm just experimenting here. I probably will
decrease the opacity just to give it an overlay look. We could put the logo
for brand awareness that the brand is Plant
House, something like that. It's just a little bit
texture right there. And by the way, we
can always turn on our drawing guide
here, added drawing, so we have just a helping hand with red alignment
and our margins. It still look
professional if we have that established in Sir text. I'm just going to
put it right here. I'm going to put
another like the name of the customer. All right. We can add a texture
on the background, on the layer one,
The first layer after the background going to create a new layer right here. Yeah, it gives you that
since it's on its own layer, I can decrease the opacity
to something like this. You can see the
texture right there. It's not that pronounced, but it gives a little bit
more organic feeling. Try to see if this
one works here. Yeah, it kind of looks good
probably here as well, but good thing about here. I could always insert a photo from another
person like this one here. Another customer who wants to
give a review to the store. So I could just clip
it and then change. Yeah, something
like this. We could always change the
background like this. I'll see you on the next video, which we're going to create the service that
the company offers, so that's a different layout. So I'll see you there.
6. Service Template: We're going to straight
up create a new canvas, so it's going to be a square. And we're going to establish
our background right now. And for this one,
I'm going to turn on our drawing guide here
and edit Drawing Guide, Just to give us kind
of a ruler here, I'm going to insert first
our first image here. It's going to be like a
phone somewhere here, here, not crossing the margin. What I'm going to do here, since I'm on the layer of the phone, I'm going to hit selection here. I'm going to go for automatic. And I'm just going to select
the screen. Just the screen. And then I'm going to go three
hands copy it, paste it. As you can see,
there's a new layer. I can just turn it on and then I could just
insert a photo. I like this guy right here. I'm going to make sure
that it fits on the phone. Just a test. And then
I could just clip it to the screen just like that. And I could modify
it just like this. I'm going to get the
monoline brush or like this. I'm going to drop a color there, so it just gives
it a color effect. I can modify the
shape with free form, probably I could put
it just like this. I'm going to insert a text here. I'm going to just edit
the text to we deliver, make sure that it has a good
contrast because I want to overlap the text on the screen so it's a
little bit more dynamic. Put the logo for
brand awareness. And I could always freely move, we deliver here, fix the
letting closer to each other. Add a more context here.
Like a handwriting. I don't know if
it's going to work, but I'm your plants, I think that's good. Has its own layer, so I can always manipulate where
it's going to go, a layer on top of everything. I'm going to use the
monoline brush just for a call to action
here, another text. For the call to action, I'm going to change the font to order something like that. We'll see if it's going to
fit free for order $50 up. I think that's good.
What we're going to do now is to add a texture. I will be using the texture
of this one right here. Markings going to get
at the base color. I'm going to make it a
little bit brighter and then I'm just going to put something. I don't really mind going
everywhere because I can always clip it to the layer
for if you clip it, it just going to be
limited to the main shape. You can always change
the image here, like what we did
before right here. Let's clip to the phone. I'm just going to decrease the opacity of the
texture that we created. It's not overwhelming. Just the problem right
here is the deliver. Not a good contrast. I could probably fix that. And I'm going to duplicate it. I think it's going to be okay for now since
it's just a picture. If we switch it to
this guy right here, it does solve the issue. I think we're good
with this one. We have another post. It's very customizable. We could change the
color of this one. You can just drop it just
like this right here. We could we have a post for
the service that we offer. Yeah, I'll see you
on the next one. Will we finalize and create the last template?
See you guys there.
7. Statement Template: So we're pretty much
done with the review. We're pretty much done
with the product, the service we just
did a while ago. And now it's going
to be the awareness or kind of a statement. So this is going to be
our last image here. It's going to go to my layers, change the background
with the green one. I'm going to move this
photo actually because it doesn't seem
like a half, half. Insert a text, Change it to one right here
and it still has a good contrast with the
background and domain image. Fix the letting of the text. So I'm going to just make it closer quite a
bit, just like this. And I'm going to put the
logo for brand awareness. And you could place
the logo pretty much everywhere or you can put
it here like a sticker. I'm going to add another text,
something just like this. Just to give it a follow up
on what we're standing on. The line brush,
something like this, and fill it with color. Quite a statement, But
you can always turn it off and you still
have a good layout. You can change the background
to something like this. You can always
change the picture, even put it just like this, but I can just clip it
on the image itself. You could start putting
some texture to it. I kind of love everything
that we did here. Just going to group
them together. So we have one folder for
everything for this project. I'm just going to
click the name here. And then when we get in, we have our whole template
here and we can start editing. So we'll start exporting on the next video and
we're going to put it into our Instagram account and see how it
looks in real life. All right, I'll see
you right there.
8. Exporting and Conclusion: Well guys, thank
you for tuning in. So I'm going to export all
our assets right here. So I'm going to start with this, I'm going to export it, share. And then I'm going
to go for PNG. I'm going to save
it on our image. So I'm going to do pretty much turn it off and
then we're going to do the same with
the other specimen. All right guys. So I was
able to export everything and posted in plan house
Instagram account. You can also use this photo on Facebook or any platform
of social media. They pretty much share
the same sizes and dimension over a rescript right here and some a highlight. I sandwich it with
like a normal pictures with a nice colors that goes
with the tone or the brand. But as you can see, it's
all sandwiched with social media post
strategy that we created. It doesn't look
like it's all like posted with all
this slab of green All look aesthetically
pleasing and goes with the brand identity
and guidelines. And you can see it has a
good contrast with white. Let's go back to the first one. It does look good and
the texture that we created gives it a little bit more of personality
and character, and uniqueness to the post
compared to if it's just like plain green background
product review, it's good. We still have those
textures that we put in this tiny fine details right here and it
still looks good. It goes with the
colors are amazing. The writing is just sharp, as easy to read
even in the phone. If I switches like this, this is kind of like the phone size. I can still read it from
even like five or 67, 10 " away, so that's good. Now one of our features that we offer the contrast
issue right there. Thank you so much guys, and
I hope you learn something. See you on the next video.
9. Project 2: Class project: For this project, you
will create a couple of social media posts that resonates with what
you're passionate about. The main goal is to play with colors, textures, and patterns. Be relevant and mindful of all the elements
you're putting in. Also, to cut and clip
images and blend them together to create a
seamless and cohesive posts. You can create your own post or you can follow along with me. You can download all the
materials on the project and resolve a step when
posting your project. I would like to hear about
your process inspiration, anything you have in
mind while making it. It gives me a
better insight into your artwork and help you
better connect with you.
10. Brief Description and Layout: What we're going to do today
is going to be template for Instagram post or social
media posts for Pet shop. Let's go for a
guideline of how are we going to start create our
own social media post. This is actually applicable for any type of
social media posts. You can utilize this technique. All you have to do is put
your friend guidelines, your fonts and colors. It's going to be a
social media template, or you need to have
a guideline when you are reading a post for a
company or for your brand, just to make sure that it's
consistent and so your viewer won't be confused of what you really are and
what you're trying to, you know, to put out there. And these are the guidelines
of what we're going to on guidelines is going to
be friendly and written, so I custom made a
fund for this project. Color tone is going to be a little bit of warm
and a bit of cold. So in between has a good
contrast with the elements. These are the funds created a custom fund for this project, but you can pretty much choose
any funds that you like. And these are the colors. Colors kind of warm to kind of cold tone. We need this to blend
in with, you know, animals are usually this
kind of color, usually dogs. And we're going to be using, so we're going to be
posting it on Facebook. It's going to be 2,500
pixels by 2,500 pixels. We're going to go
with 150 PPI or DPI. So we have a good result with
the quality of the image we're going to be
exporting as a PNG, but feel free to do it on Jpeg. It's just PNG is a little bit less compressed
compared to J peg. We're just going to
use PNG for this. These are the fine
details beside the font, the colors, and the
guidelines we have. The patterns that we can also
incorporate into the posts, We will get into these details. Moreover, they have
here textures. And it just gives it
more human touch spirit to just like a plain
colors with text. So the layout is going to be just the guidelines
on how we create it, so we have a consistent
and it's just going to be like guidelines
it's not going to set or it's going to
not going to be forever. We're going to start with
reviewing testimonial. So we can put like a text here and kind of photo
here and overlay. And on the background it's
going to be kind of like texture to give it kind
of visual interest. And for the service
since we offer like delivery for pets like
grooming and treats, we will put that
as well in here. So we're going to
put like a phone in here like an app for the store. And then we can put cult
actions here and some text, big text, short and sweet. So it's easier to digest. Photo here, text photo and like cult actions there of a
statement that we are who we are and this is what we do,
This is our mission. So kind of a little
bit of text in here, probably a little bit
of text to pack it up. And a little bit of
photo here of kind of a pet or someone who's holding their pet and
they're pretty happy.
11. Product Template: All right guys, this is the time where we
create our post. We established that
we're going to create a canvas of 2,500 pixels. If you're not on pixel mode,
you can just change it. Just here is 2,500
our DPI is 150. I think that's going to
be enough for screen, but if we're printing,
I think we have to go 300, but
we're not printing. Make sure that you're on RGP, so make sure that you
get all the colors. So we're going to
create and you get your own square post ready to fill up with
some good stuff. This is going to
be a photo here, here, and some statement here, and call to action. That's what we're
going to do exactly. But before that, we
have to establish our margins and guidelines. Actions here, if you
want to go drawing guide and edit drawing guide, you can establish a
good alignment here. If you go to grid size, make sure you're into the grid. You can go grid size like this. I'm going to increased capacity. So you can see you should
have a grid size here. You can go all the way until you don't have other lines here. It's just like a four sections. And you should have a
better chance to have all the objects in good places clear up
the layer right here. And I have a clear canvas
size with my ruler. Get your monoline brush. We're going to fill this up with shape so we can clip
our image after this. I will just hold my pencil here. It will give you
a, a straight line and we can edit the shape. If you want to be precise, we can do some minor
adjustment here and there. Okay, I guess that's good. And I'm going to fill
it up with color. You just have to drop
the colors right there. I will duplicate the
first layer here. And I'm just going
to position it here. I will just rename this one
because I'm going to clip some images and since I don't have any distinction
on what they are, I could probably put colors. But it's better to rename it. I'll put this one up. I'm going to put this down. When I clip the image, I know which one to go. I'm going to insert the photo right now and just put it here. I know that it's down.
So I'm going to clip it. So I'm going to clip it. It stays on that container. I'm going to insert
another photo of a nice cute cat right there. I will, just above
the player, clip it. Just like this. I can just
rearrange them just like this. I think it's cool. I could change the background easily with the color
palette that we set. I'm just going to go to my color here and I'm going to go here. I have my color
palette load in here. So I'm going to select
this set us default. And you should see it on the
layer of the background. So I can just go ahead and
pick that right there. So I can just go change
the color right here. We could change the image if it doesn't go
with the background. I think there's a
problem with the images. I think the images
are very busy. So I would like to change the images to something
less busy alternative. I could just bring it down and it should
clip automatically. Probably change
this one more time. Let's see if I have,
I think this is quite good since they have
the good color combination. Now, I could start
putting some text here to fill up like information
on the action. I could go insert text and I
could start become a parent. I think that's good. I could add a text here. I could just select all. I'm going to change it to the fund I created
for this course. I'm going to go with this one. This fund is a custom
fund that I created. There's another problem here. I'm going to make sure
that align to the left. It's easier to read. I guess it's cool to be here. I'm going to put some
text here as well here. I'm going to put like a
call to action visit us. I'm going to put
it something here. I'm going to put it here
for more information. Probably put the dog. I do, King, just to give
it a playful twist, I forgot to change the fonts. I'm just going to
select all of it. I'm going to go for Gill Sans, something here, just for
a variation of fonts. I think the good
enough for this, I could put this here
just at the bottom. And now I could
turn on again the, the drawing guide
just to make sure I don't go beyond the margin. It still looks good. I could put the snapping
here just to give it like a good alignment with the
square or the container. This one gives me a good
alignment and also to visit us, make sure that you can
see the alignments here. I'm not sure if it's visible, but I think it is
something like this and this one that
become our parents. It's not going to
be in the center, but I want to put it center. Something like that could
even make it bigger. It's a bolder statement. This visit, I could probably make it bigger,
something like this. Let's see if I could
think it's too low, so I'm going to just
put it somewhere here. I could turn off the drawing
guide to see how it looks. I think it's quite good. I have a good sense with
what's going on here. It's a minimal post. Now I could put another layer and I'll put it just below
the up layer here. I could start
putting the texture, a nice touch to it. So I could go here, texture, probably going to go tine, or this one right here
probably will color it. This one right here, you
should probably get, this looks like
like a denim also. You can do this one right here. I'm going to get this color. I'm going to make it
a little lighter. I'm going to go to disc
probably something like this. It doesn't overwhelm
the entire canvas. Something like this. A better personality here, vintage here. This is also a good texture. Think I prefer this one. I'm going to go to that
layer, I'm going to clear up. I think it's a little bit
more playful, this texture. Let's see, I could change this. It's on myrtle. If you go to Vintage, there's a little bit
more nicer texture here. We could just
decrease the opacity. It's not overwhelming,
but I think it's pretty bold and easy to read.
It's not distracting. It's a minimal design. We
put some texture here. The dogs are just the
main focus of this one. Yeah, this is pretty much done. I'll see you guys on Expedia.
12. Review Template: All right, let's go straight ahead and create a new canvas. So I have my history here. So the same canvas size, 2,500 by 2,500 So as we
establish on the layout, we will have something here like image of the dog
or with the owner, a background kind
of lighter tones. The texture that we establish. We're going to put some
testimonial here and also the name of the
customer or the dog, and we're just going to do
that as what we explained. We need to establish
our drawing guide. So I'm going to do the
same thing, layer. I'm going to delete
this one here. I'm going to create a circle. Make sure it's perfectly circle. I'm just going to top
a little bit here. And that's a perfect
circle and I'm going to pull it in with any colors. We're going to go for transform or arrow here, we're
going to go warp. And we could make it a nice shape here, some organic shape. And I think that's good enough. We can duplicate it to
give it the other tone. Make sure that you're a
uniform, so you have that. I'm going to turn
off the snapping because I don't need
it at the moment. I'm going to put the
first layer in front. Insert some of images here, just to put this one because it looks like it's very nice. I'm going to clip
it just like that. That should give us
some idea how it looks. Probably will make
the shape bigger here because they have or my
position it just like this. I'm going to delete
the first layer and I'm just going to copy
this layer right here. This is going to be, well, we're going to put, I'm going to get one of
the colors here. Probably the yellow, just to
give it like something warm, I'll get the background
probably this one or something. This one I think is good. I'm going to change the color of this one right
here with the blue. I'm going to just
put it, I think this is quite good. Probably. We're going to
duplicate this again. I'm going to color it with
warm tone, just like this. I'm going to put this below. I think that's too
much going on, probably just
decrease the opacity. Think it's too much. I'm going to remove one of
the image or the object here. I'm going to change the
background to this one. Yeah, I think this is quite
good for a good contrast. I'm going to add, I'll make sure that the text
color is this one or blue. We're going to take a
look at that first, but I am going to. Okay. I guess that's good. I will just change the text
to the handwritten font. I'm going to go this
one right here. I think it's pretty sharp. And I'm going to
add another text. I'm going to duplicate
this one right here. I'm going to put it here. I'm going to empty this one. Oops, Select all. I'm going to put
the name of Karen, but it's a little
smaller so it has a good hierarchy of
what's happening. I guess growing guide, see if it looks great. Yeah, it looks great, I think it's good. All we have to do
now is to insert a new layer and put
some interesting. We're going to go to
our brush library. We're going to go to Vintage
to get some texture. I will probably use
the blue color. Let's see if it's going to work. This is nice and I will decrease the pacity just to
make it less distracting. But still there, I
guess this is good. Still have all those texture and the testimonial and it's
the best time to turn on the magnetics and
the snapping to know where the, the center is. We have ourselves a nice layout for a product review
or testimonial. We still have a good
color combination here and warm texture, pretty much done with
the same template. So what we're going to
do with the template, we can easily change
the image here, since this is a customizable
as you can see. We can just clip the
image here and we can resize or we can move reorient the shape
that we just created. And we could even change the background color here
with something lighter. Since it's our color palette, we should never get
lost with all of this. We can change the color
of the text as well. This is very customizable
and easy to edit. Since we have its own layer, we can just go to their
layers and change it and we can export it on
here pretty easily.
13. Awareness Template: All right, so we're
done with our second to the last template here to just go straight to create our canvas 2,500
by 2,500 pixels. The layout that we're going
to use as like a picture here and there's like
a statement here, follow up with some fine print. But first we're going to get
to Ranch here to Canvas. We're going to turn on our drawing guide just to make sure that we're on point with everything that
we're going to put in. So I guess that's pretty good since we have our
guidelines right here. It just gives you where to put our image head into my
background color layer. And I'm going to go
probably get this one just to begin with because this
has the strongest contrast. I'm going to clear this layer because we don't
need it anymore, but I'm going to use it to create shape here
like a rectangle. So I'm just quickly
do this right here, I'm just going to hold it and it gives you this kind
of a straight line. And then I'm going
to fill this half with color and insert one
of our pictures here. We're going to clip it
just to see how it looks. We might modify the
shape a little bit, but let me turn off the drawing guide here
just to see how it looks. I think it's okay, but I think we're going
to push the image a little bit to the side just to be proportion
something like this. But I don't want to
cut the dog's ear. So what I'm going to do here, I'm going to modify the shape. I'm going to go free form
and I'm just going to make it a little bit bigger,
just like this. Just to give it a nice space with the dog here,
make sure uniform. I think this is a good scale for this dog and it has
a yellow contrast. I think that's pretty good. I'm going to insert
some text here. I'm going to add text. We'll be using our custom fund, probably going to
make it bigger. Here we are, our pets probably should select all in the
line to the left. I'm going to turn on our
drawing guide again. I'm going to go to the letting, because right now it's too much based in
between the words. Let's fix this with
the letting here. I think that's good
enough for me. We can always make it
bigger, just like this. But the problem is,
there's a contrast issue. I'm going to duplicate this one. Okay, I am going to add the other text right
here, select all. I'm going to color white just
to give it a good contrast. And I'm actually going to
overlay them like this, so it gives it a good contrast. I should probably do this in all decomposition that we made, so it has a little
bit more playfulness, put some texture. So what we're going to do here, I'm going to create a new layer and put it just above
the background color. Probably going to
use the myrtle. It's just going to
be right for this. Kind of decrease the
capacity right there. We can turn off our
drawing guide here. Let's see if it looks good. Yeah, it's going to look good. I think you could see
this once we posted it. Opacity quite a bit. Just like that. Put
some follow up text. That text right here. I will use the Gil
Song. I don't know. Let's make the world
a better place. World a better place. Okay, let's try that. A little smaller. Oh, that's too small
so I'm going to break. I think this is
quite a little bit easy to read once we post it.
14. Service Template: So we're going to create a
new canvas here to finish up. So pretty much the same, do with the background first. We're going to set the
background to blue. We're going to insert
photo of a smartphone. I'm going to put it on the side. I want to make sure that
I have a good alignment. So I'm going to put it again, something like this, and I
think that's good enough. And I'm going to clip some image on the
smartphone screen. So I'll just make
sure that I get the screen shape so
you can clip it. All we have to do is
to get the selection. We're going to go automatic. We'll just get the
screen size right here, I mean the screen itself
and going to go invert. And I will just
probably three fingers swipe down, cut and paste. And there you go,
there's a layer, put it on top so
it's easier for me. As you can see, we were
able to cut the layer here and all we have to
do is to put an image. I don't know if it's big. We'll try this. We're
going to clip it. It's quite big. I don't think it fits into probably this one. I think it's good. I think it's very playful. I'm going to draw a
yellow container here, so I'm going to
insert a new layer, put it just above the
background color. I'm going to get
a monoline brush, and I'm going to draw
something right here like a container. I
think that's good. And I'm going to color it
to this yellow right here. And I think it's
a good contrast. Resize it, we're going
to go free form and kind of just a
touch of like this. I think it's good but I
don't really like the image. It's too much happening. Probably will look for
something else, probably. This one clipping
mask, probably. Yeah, I think I like it. It sits with the color. It's less distracting. And I think it's kind of cute. Insert a text, So we're going
to use our custom font. Let's just move it right here so we can see what's happening. To make sure it's aligned to
the left. Put it back here. I'm going to just put,
we deliver some treats. We deliver treats. I
think it's better. We deliver treats. We're
going to duplicate this one. Same as what we did
on the last one. And I'm just going to go select all and get
this brown right here. We have a consistent
overlay one here. I'm going to change it to
something not yellow, probably. This one right here, white. It's a little bit more contrast. I will just put
another text here, but we're not going to
use the custom fund, we're going to use Gill
songs just for fun pairing. For delivery for. Okay, I guess that's good. And we're going to
make it smaller. This one right here, I think. I'm just going to
make it bigger. Just like this, it
fills up the space, it's a little bit
bigger and more pop, I'll just draw a rectangle here to highlight
this part right here. I'm going to make a call
to action rectangle here. Let's see if it's going to work. I just hold it like
that. I'm going to add it, shape it, rectangle. I think it's quite good. I probably color it
with this one here. The text layer, I'm going to
put it up just like that. I don't think it stands out. I probably will color
yellow something like this. The font going to
go back to this, I think this is quite good. All we have to do now
is to make a layer here and put a texture to it. So I'm going to go to
my recent brushes, Myrtle and probably
put white here. I'm just going to fill this up. I'm going to decrease
the capacity and it just gives it a
little bit of texture to it. It's not really the
most important thing to look at. We're good to go. We have our template here. I think they're all
cohesive to each other. They have a common theme, which is the colors, All the elements are
consistent to each other. On the next video,
we're going to go and group them together.
See you guys there.
15. Prepare to Export: All right guys. We have our four template here
which is very customizable. We can change all the fonts. I can change the picture
easily and clip it. So what I'm going to
do here, I'm going to select all of this here
and we can stack it. Just rename it. We can rename it to pet
shop, just like that. You can also rename
all the names here. So this is a service
awareness view product. So now we have the
template for the pet shop. So we can easily
just go here and not be distracted with
all this content. Can just go ahead and just go to each and every post here. And we can just change
all the content. We're just going to
export it right now. Since we're done, I'm
going to export it. Share. I'm going
to use PNG easily. Insert another photo. Okay, something like this. Clip it and it should be there. I think that's good. Share PNG. I'm pretty much going
to do all of this here. This one I'm going
to just save it. I'm going to put this one here. I'm going to just clip
it. It should be okay. We're going to make sure that
the kitten is big enough. Since we have a blue color, we're going to switch the
background to yellow. It has a nicer contrast
with each other. Probably going to change the overlay of this
one here as well. I'm just going to select all
of it and change it to blue. I will change the
texture as well. Probably select and I'm
going to fill it up. Fill color with blue. I'm going to increase
even the tone. And if I'm not really
happy with this, I could even hit the image here. I could adjust the color and saturation just to
give it a little pump, it even goes with the color, make sure that it looks natural. I'm going to just
disable the guide right there and I'm going to
just make this one bigger. I think we could reposition the shape right here
to fit the subject. I'm going to just
save it right now. We're going to export
this one as well. I think we're good to go. All right, so we're able
to export everything here. So I'll see you on
the next video where put them all together on
Instagram. See you there.
16. Show it on Social: Hello guys. Right now, I was able to export everything. Was able to post it
successfully on Instagram. Just to give you how
it looks in real life, I just put one of the
cutest ones here, like a logo or something. I put some description
here and I just kind of put like toys grooming
and supplements and treat. And I'm going to
start from here. So like where I said
on our layout plan, pill sandwiches
into something like user generated or some kind
of a real life picture. So it has a little bit more dynamic to post
like just all of this, you know, post like here. So it's nice to have like something that resonates
with the brand as well. So we start with this one
and as you can see we have a good texture with all the
things going on right there. I think the texture
makes it a little bit different and a little bit playful and a little
bit character to it. Compare if it's just like plain blue gives
us more like edge. And the custom font right
here gives it more into life. And it's a little bit more like handmade and not a
computer generated. And also this one right
here looks pretty good, It's just a placeholder. So and we still have the pattern or the
texture that we placed. And also this one, I
kind of like this one. Just the cat is very
kind of engaging. If you see this
one on your feet, you probably will stare it
for a couple of seconds. I still like how
the texture brings. Overall, I think it's a good way to start your
social media template. Again, the template
is very customizable. You can switch it
up, change the font, change the color, and
change the images. You can even lay it out, put some different
stuff out there. But this is just
like a guide for you to get started and I'll see
you guys on the next car.
17. Closing: Thank you: Hi again and thank you
so much for spending your time with me and
watching this class. I hope you enjoyed it and learn new things and
inspire you to create social media posts and apply these skills into
your future projects. As always, I'll be here waiting to see your beautiful project. If you have any
questions or something, feel free to ask anything and I'll see you
on the next one.
 Bryan C'ngan, Graphic | Web Designer