Transcripts
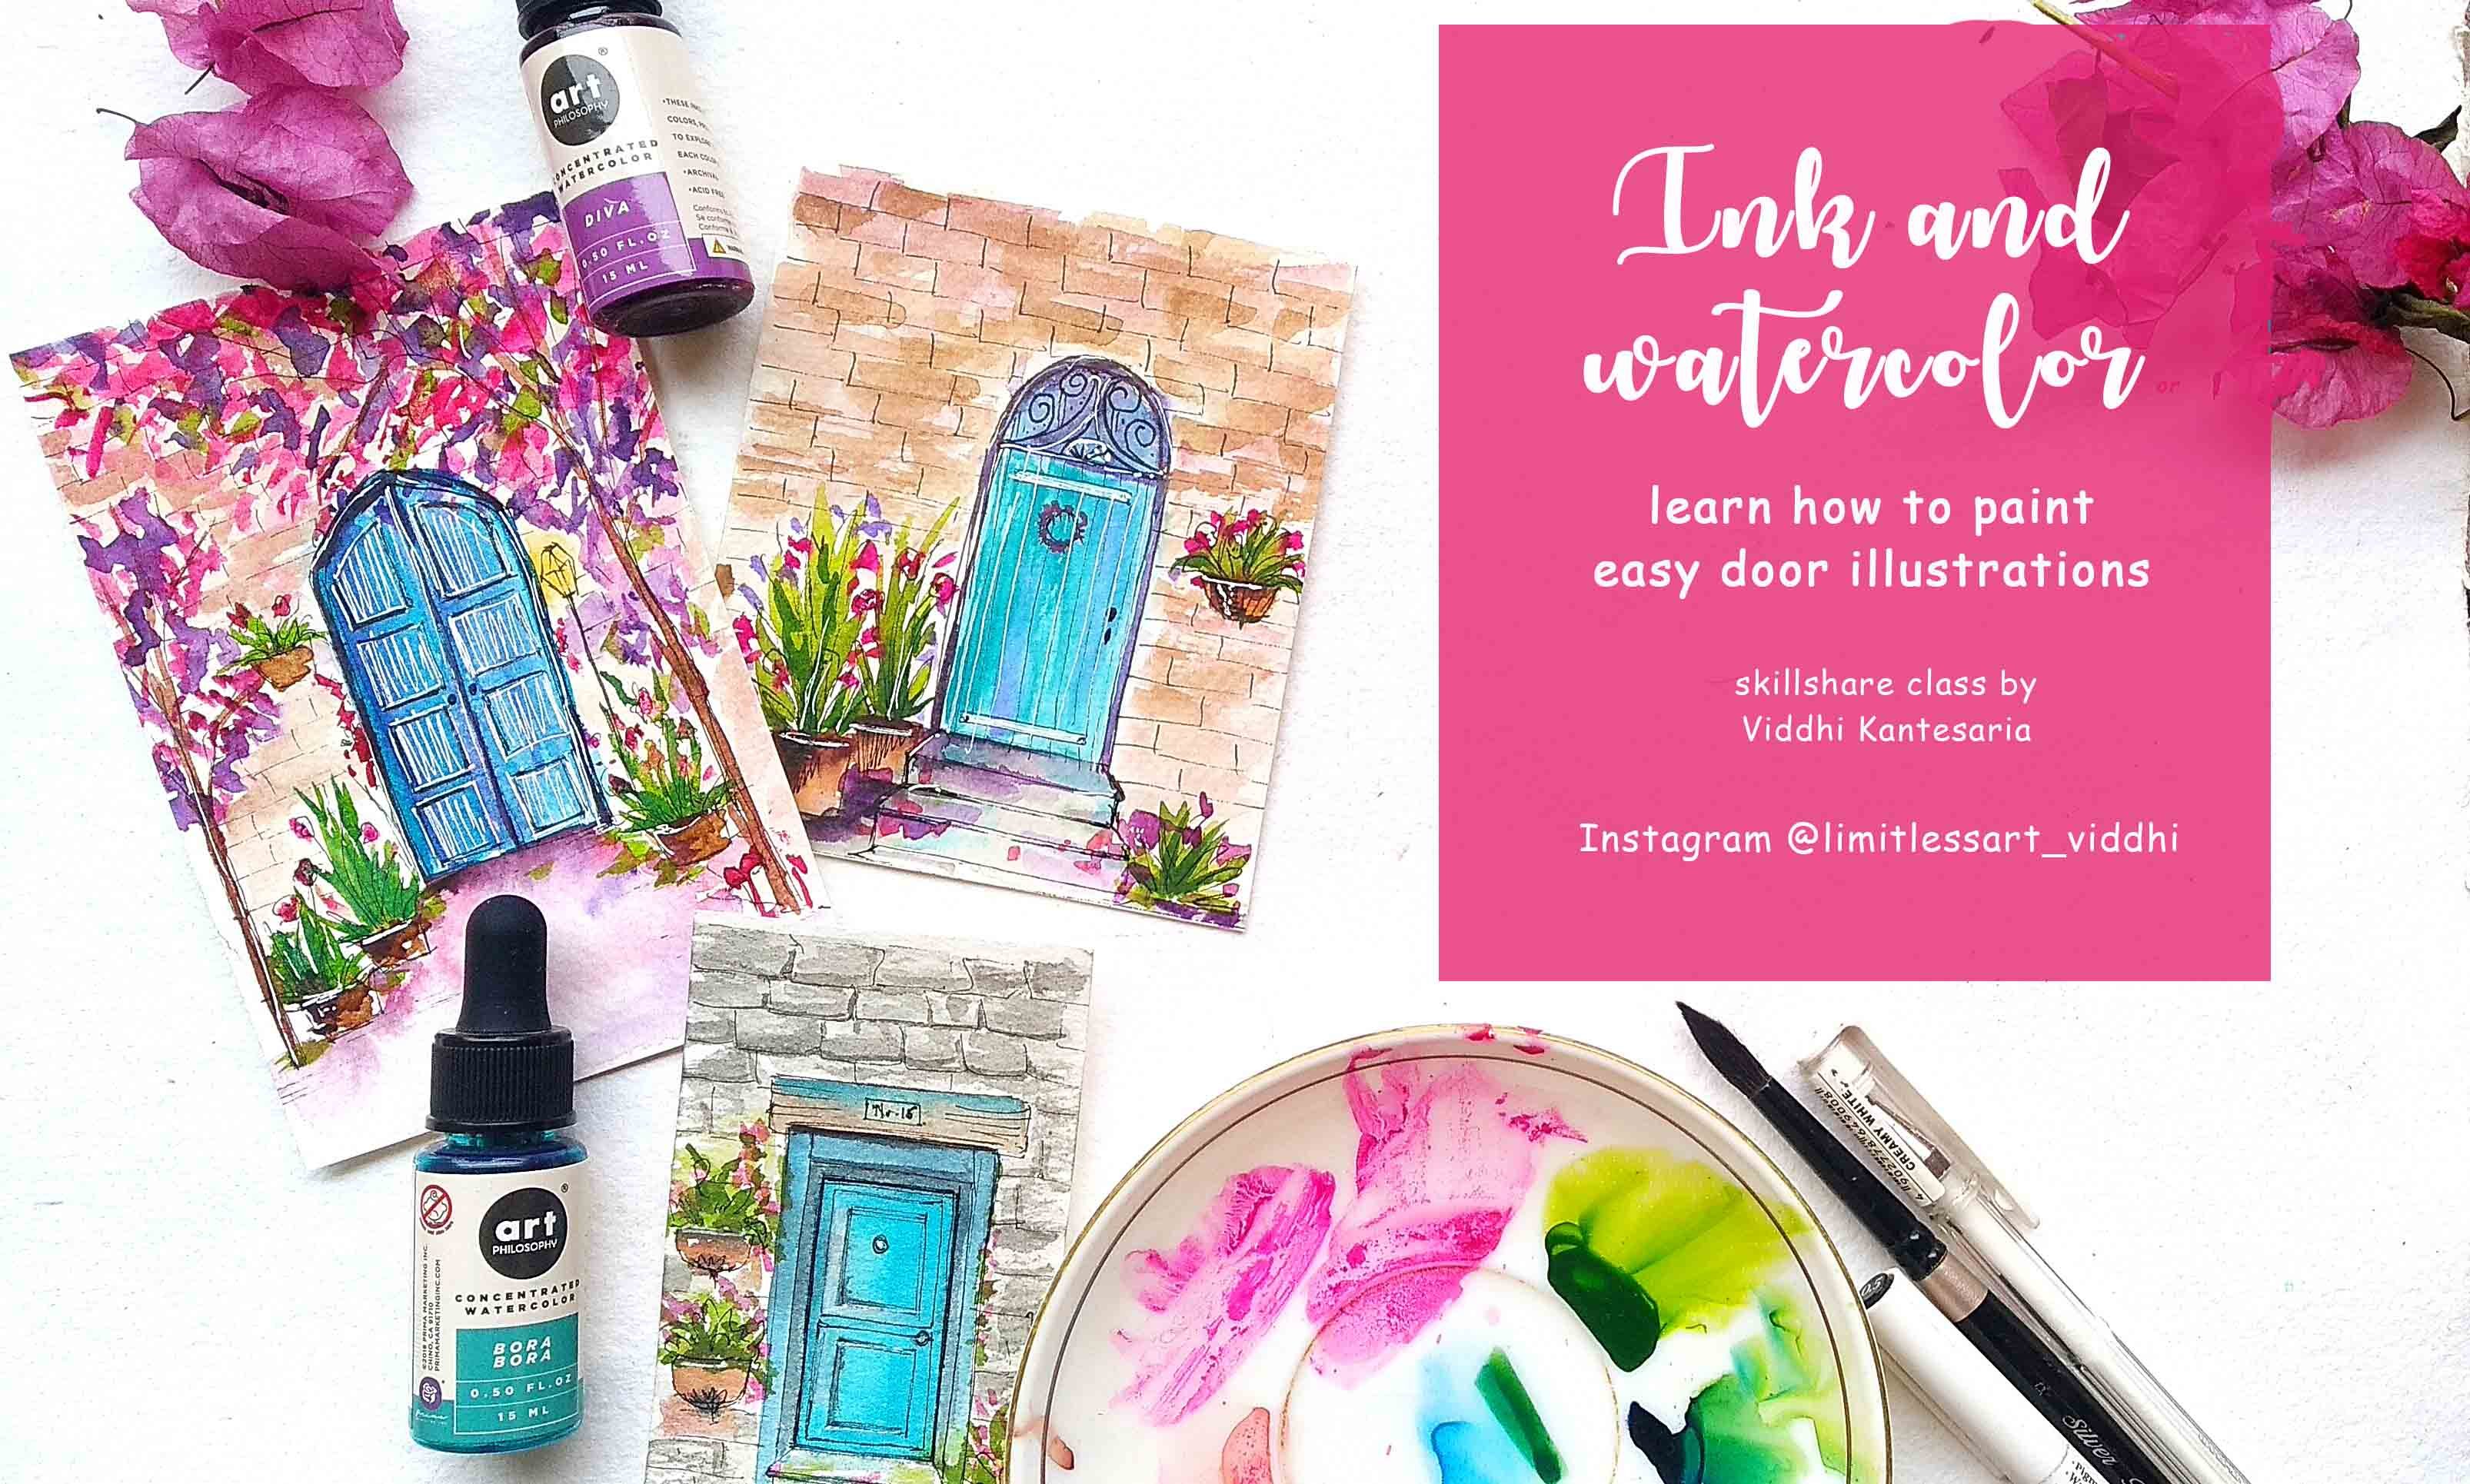
1. Introduction: Hi This movie, the Conde Syria. I'm an artist and founder off limitless art You can know about me and more about my work in my skill shaper fight. Have already thought a couple of watercolor and illustration classes on sculpture. And in this class, are we teaching you how to train with course? It's my new favorite. Media Men have been experimenting with this for a point of ill now, and in this clause I'll be sharing my skills with you. On working with Core, I'll be teaching you how to paint these four landscapes. Landscape that I'm going to teach is divided step by step to our nails and then elements and also teach you how to detain your landscapes. This class is for anyone who is beginning, tow experiment and faint with course. I hope that you're really excited to get started on painting these beautiful landscapes with me. Let's look into the materials required in the next lesson. I'll see you in the class for by
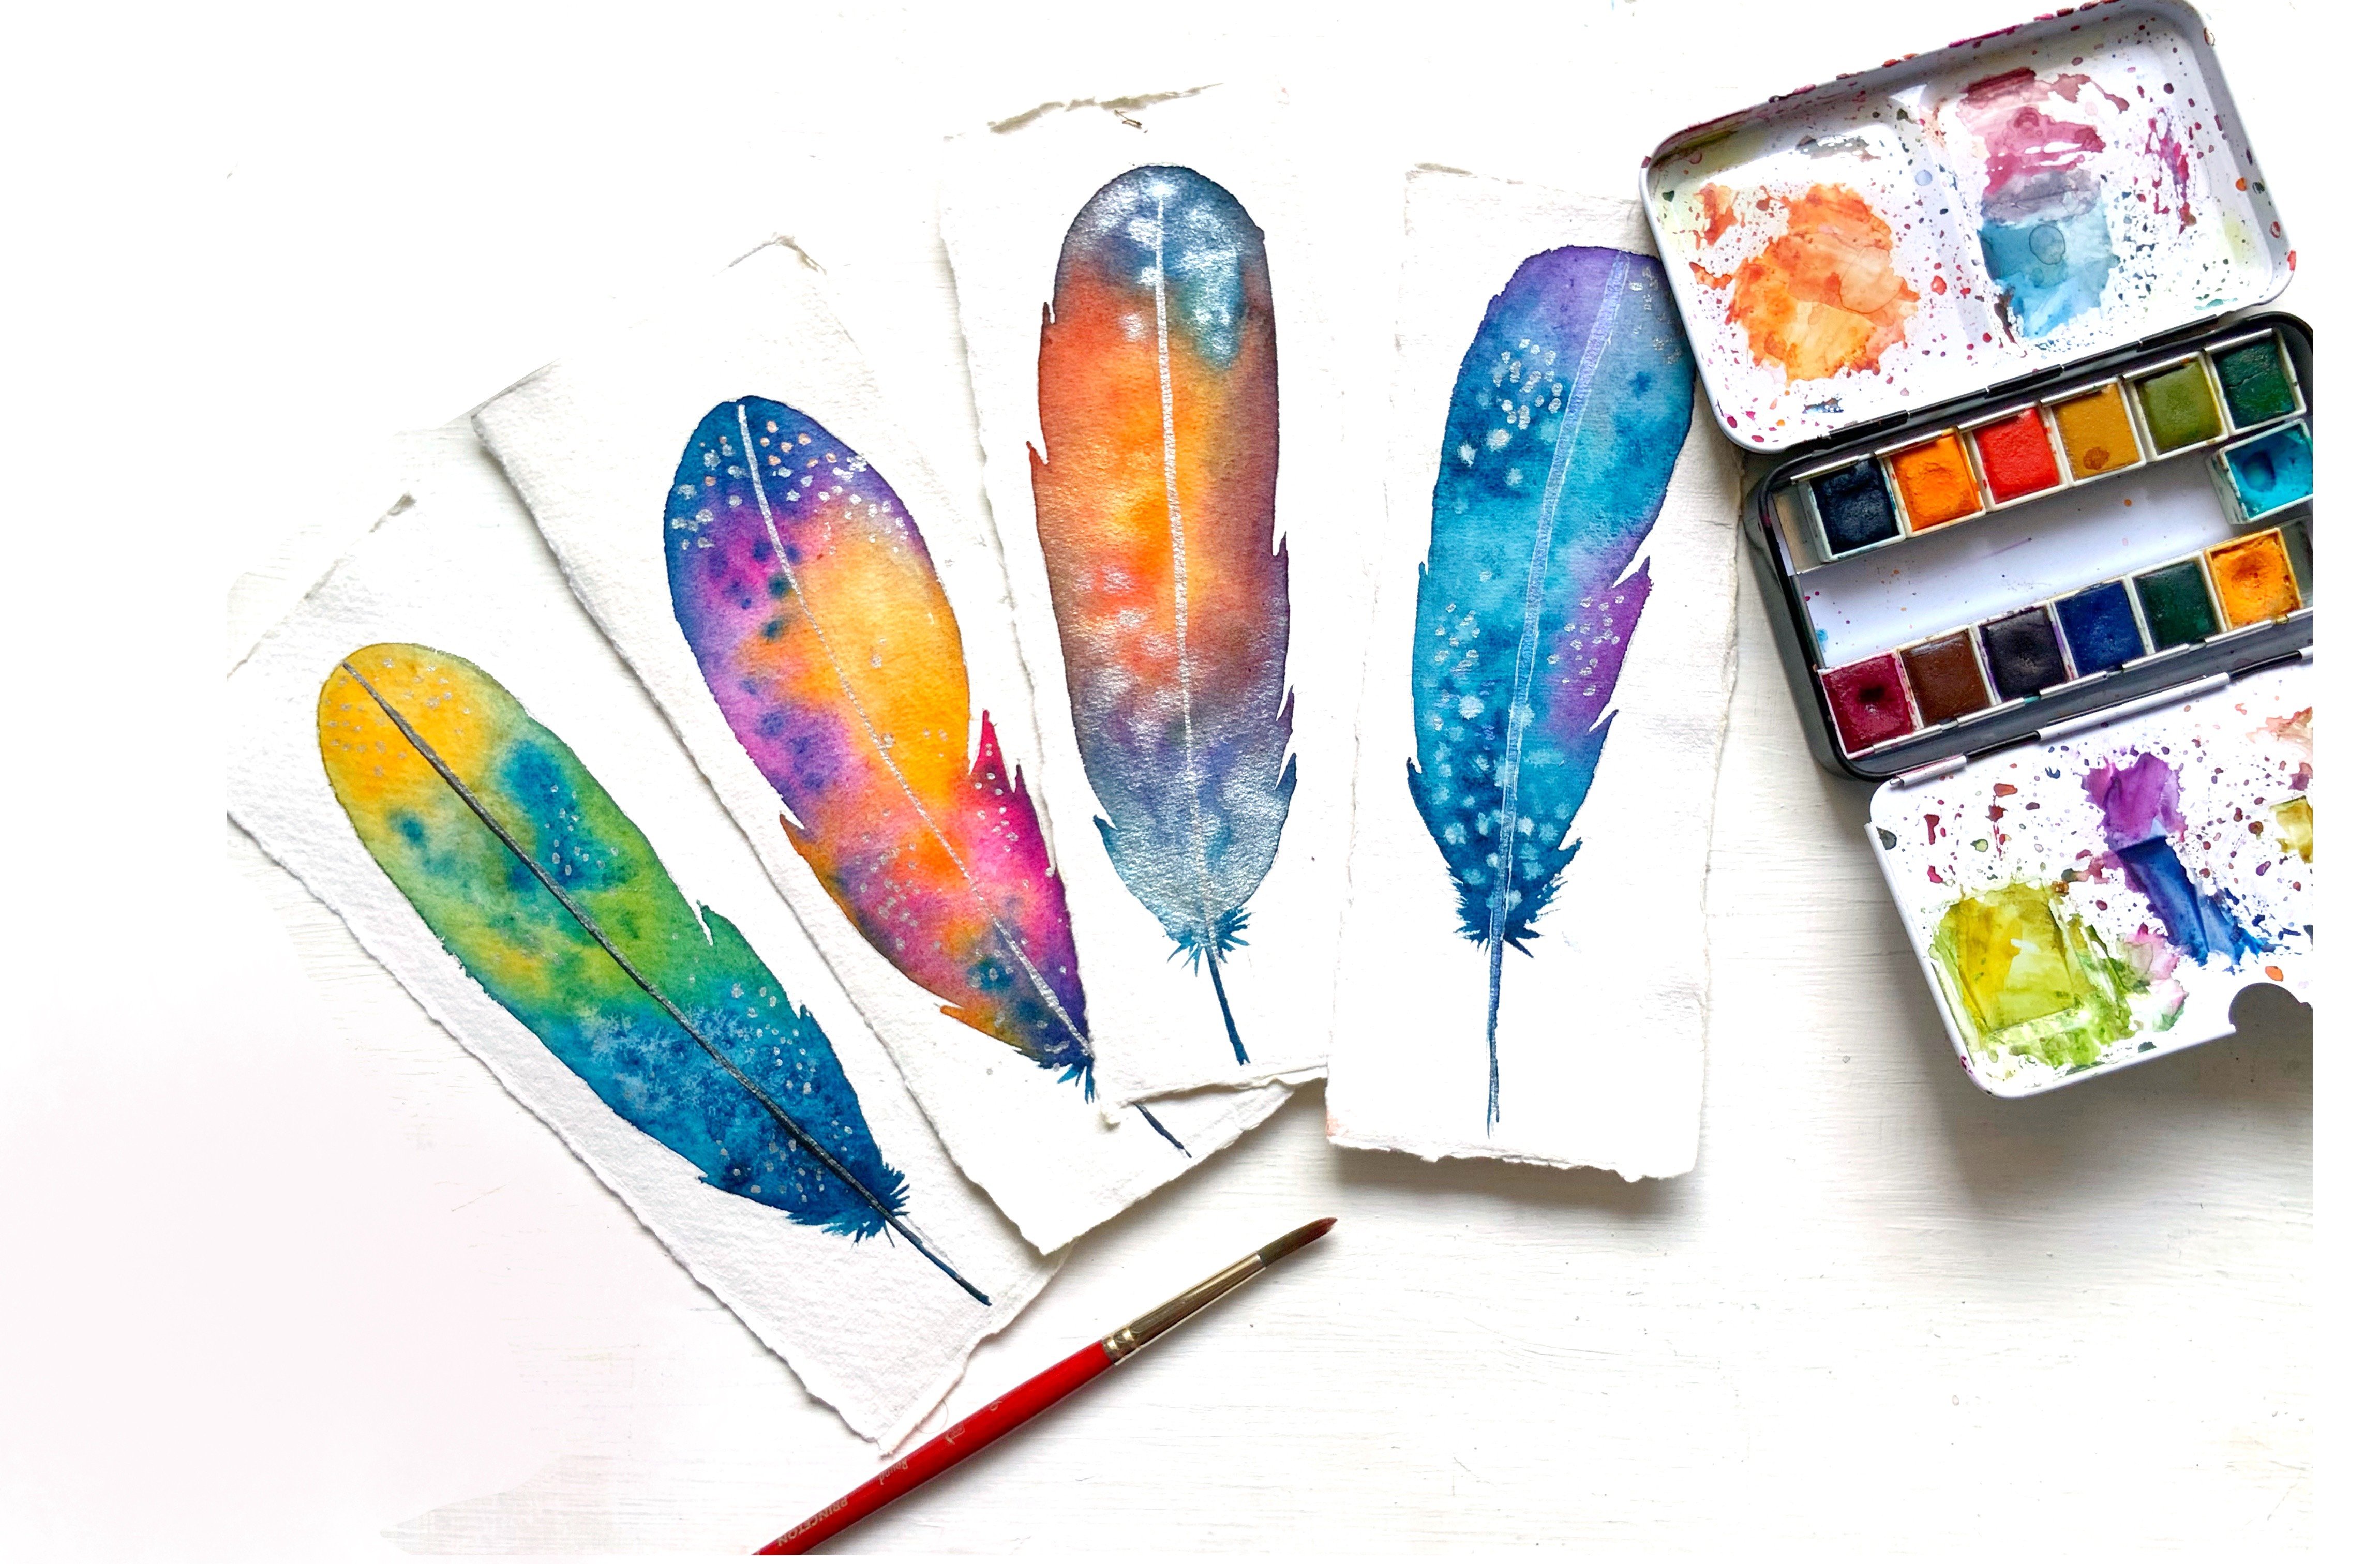
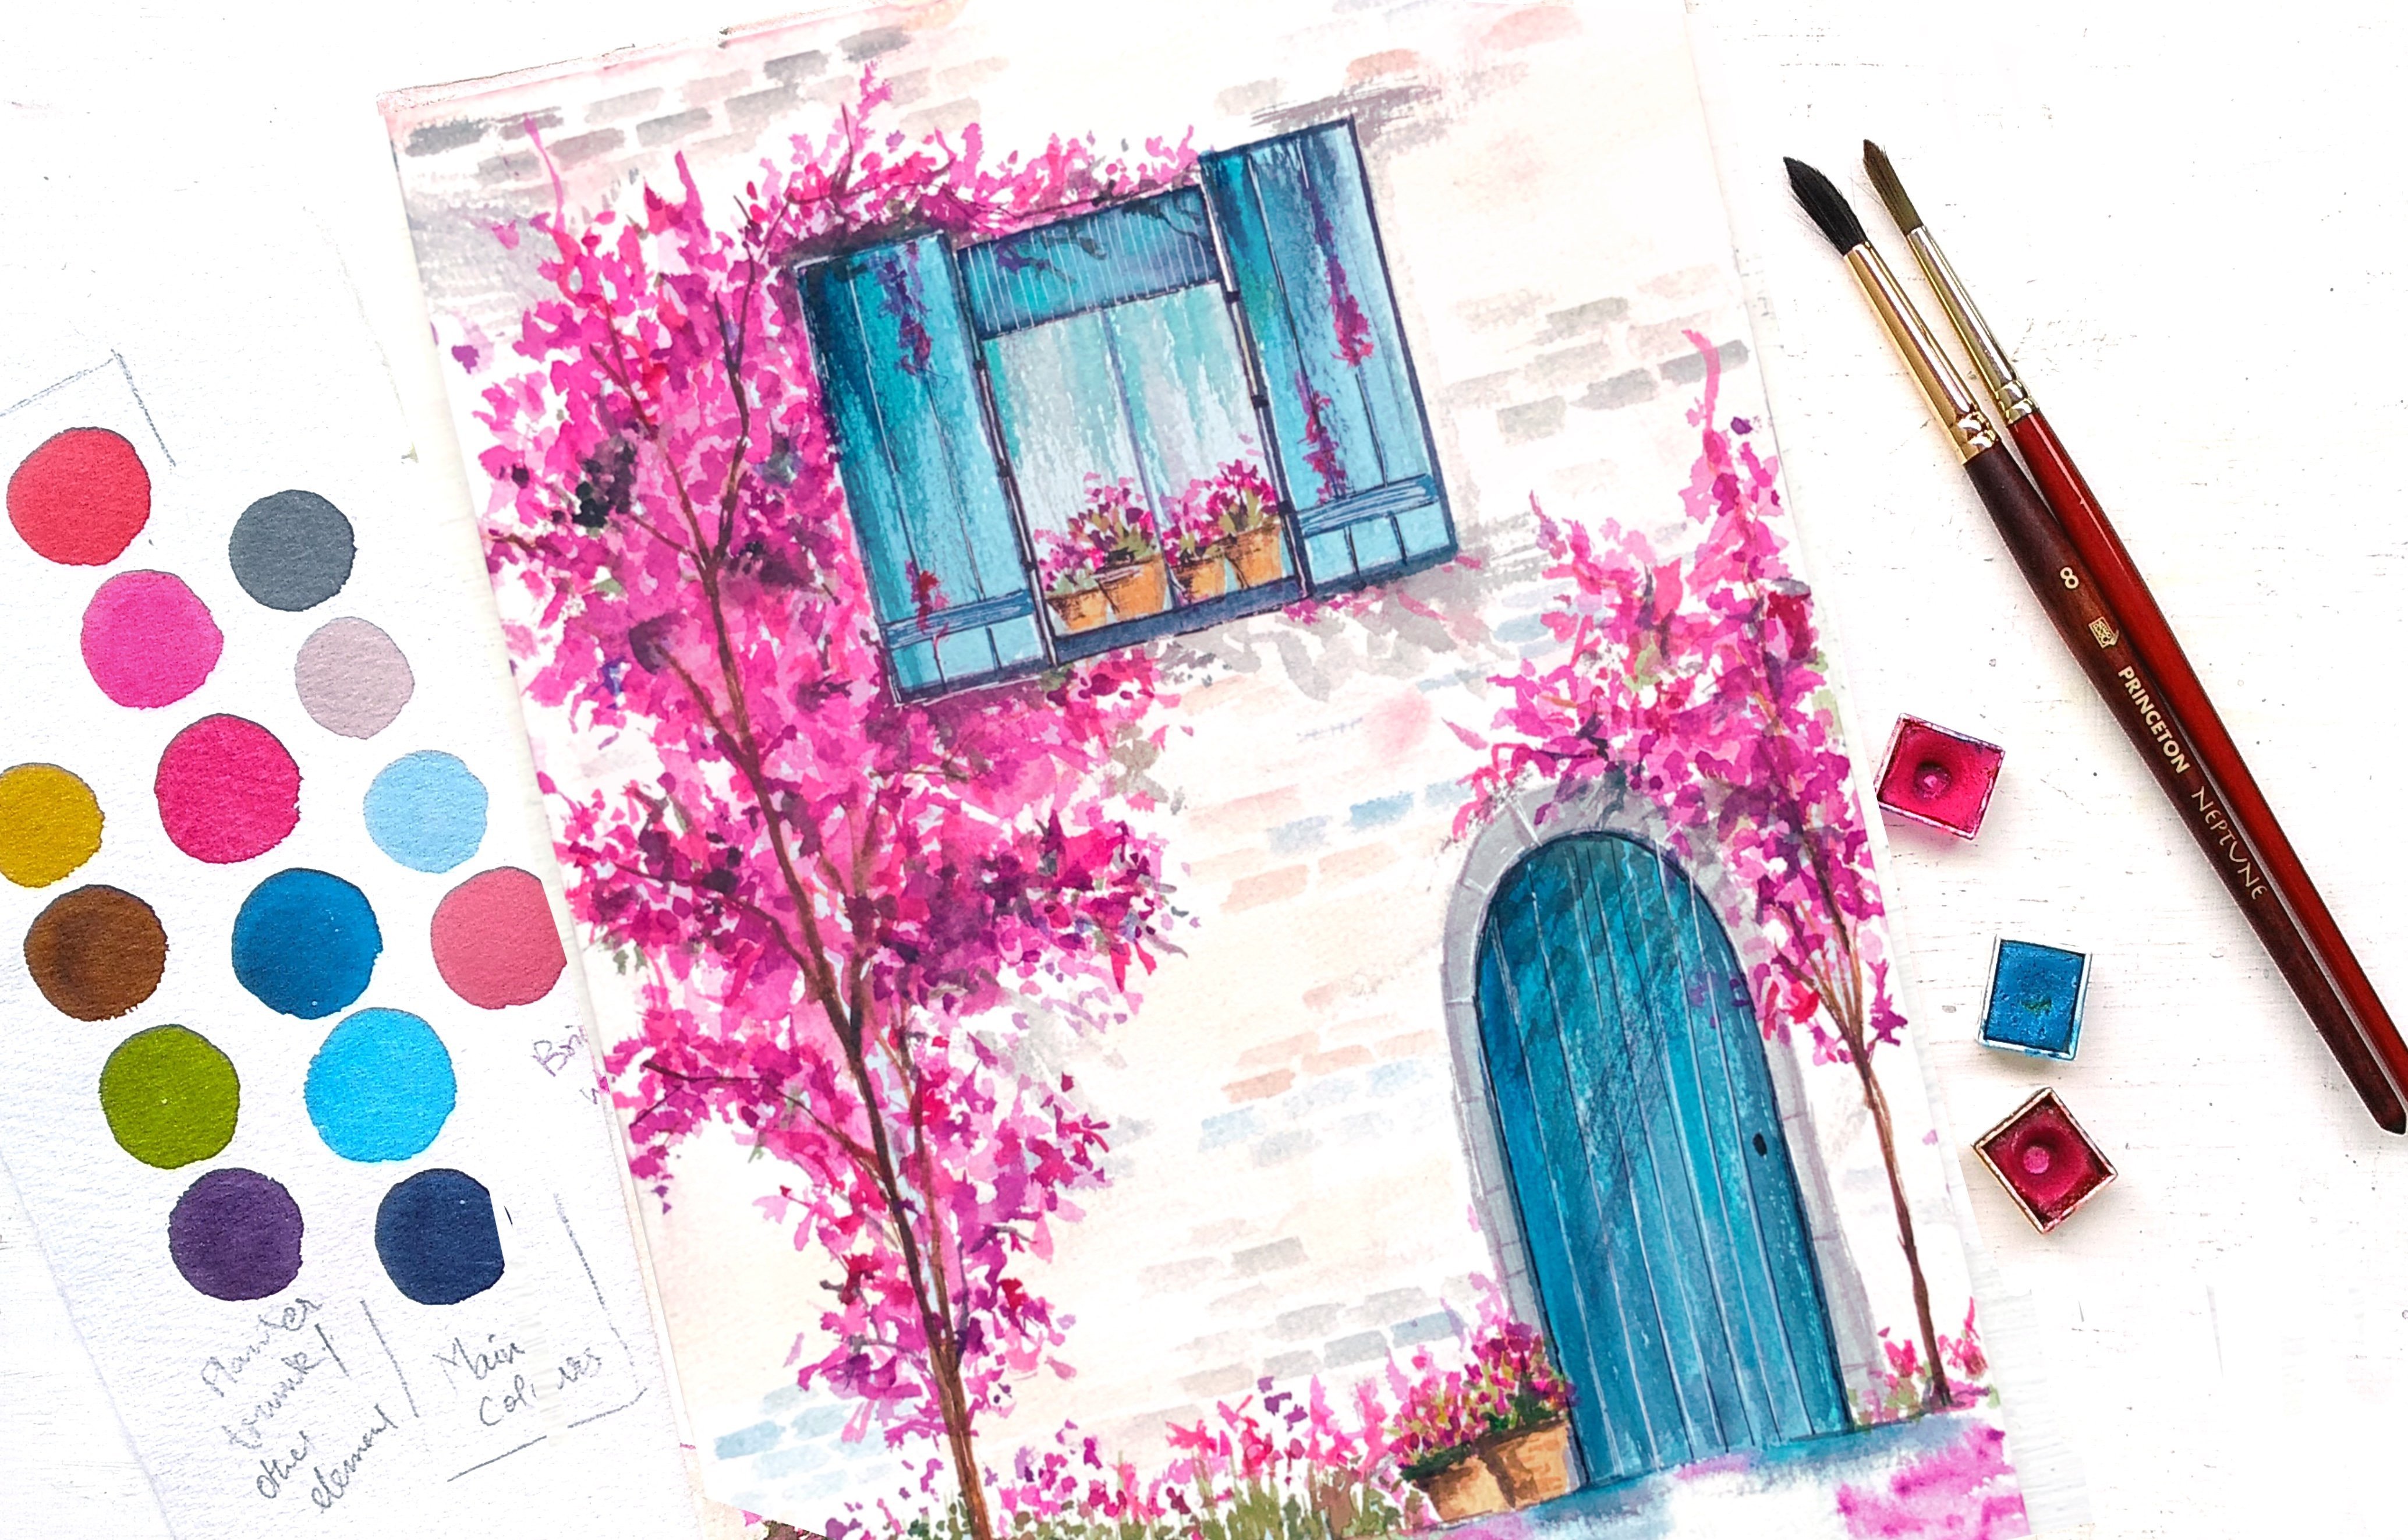
2. Materails required: it's looking to the materials that is required for the class. You will need some wash amusing once in Newton designers course, but you can completely use any brand that you have. Both artists are student great, but at this quality works great, and you will need only basic colors, like the green, blue, red, yellow and black and white Onley. Six. Carlos is recorded for the class. You can also use additional wash colors if you have, but six colors are more than enough. Next is the paper I'm going to use the shredder mark mission. Watercolor people, which is 300 GSM and cold press. And these are the basic quality off the people that I would recommend for the class. But you can absolutely have the same qualities in any brun. And also make sure that your paper isn't very grainy or like a butt off grained, because if you have like a smoother people, you can spread and thing with much. He's next is the brushes. You can be ink wash with normal watercolor brushes, so I'm using the size too six and eight for the class today. And these are the Princeton acquire light rushes you will also need off. Jump in. This is you nibbled signals helping, and this would be used for highlighting. You would need a masking tape to stretch your people, and also you would need a mixing palette, your amusing might ceramic dish and one ISS for mixing colors. And one is just to take the fresh pain. However, you can also use these plastic pallets. But I'm not a great fan off thes because I find mixing colors much easier on the ceramic palette. Rather, these plastic wells on the palate. But these pallets are definitely great when you want to paint larger wash pieces, and lastly you would need a container filled with water and that's it. You were ready to take the class.
3. Basic gouache techniques: If you are a complete new big Noto, this medium, I'm going to share certain techniques and the very basic things that you need to know about wash. So wash is something between watercolors and acrylics, and it has bought the properties off vertical and also acrylics. So talking about the watercolor properties off course wash can be alleviated easily, and it can also be watered down toe. Achieve transparency just like you would do and watercolors and talking about the A click properties off wash. It is very opaque, and it can will offer to work with Leo's. So that is the very basic about wash and, you know, if compared, all the three so that you can see the difference between all the three mediums. Watercolor is more transparent. Wash has mad finish, and it is opaque and looks very smooth. But as the acrylic is little shiny and it has some picture now, I'll share some techniques that you need to the mumbo while you're walking with course. If you want your paint to be very obey, you need to makes a Lord off pain with very less water, and that's how you achieve that capacity and if you wanted a little less or bake, you can just add, didn't move water so that your being clear is little opaque and not like the 1st 1 on the more water you keep, adding the pain becomes more transparent. So that's why we say that wash can be used like water. Colotto, the last one, or you that I think it is just like watercolor and also wash has a very quick drying time that can try up Freddie easily so you can see that it just less than a minute that I painted. And the painters almost started drying another property, about cautious that it can be alleviated. Which is good because you can always work and correct your mistakes in quash. But also bad because you need to be very careful that you don't at our spilled water accidentally on your painting, because that might draw in it. You can check the opacity off your pains by just doing this, adding lighter colors below, and then you can test with DACA local host on top and see how opaque are your pains? Another thing, which I really like a boat washes that you can mix colors ready easily. Unlike watercolors, you need a pilot or a surface to mix two colors and and go wash. It is not the same. You can just makes colors, even on the papers, just at two separate colors. And with the damn Paresh, you can get the third color so it is ready. Worse, it'll and easy that, and the last technique that I'm sharing is leering. This can be used for two different things. One to building Morelia's and one toe. Also cover mystics. So if you want to build a layer or covered mistake by having already Opie clear like this, you need to make a lot of pain with less water and completely covers the layer, which is in the behind. Another way that you can do is if you don't want it to be ready opaque, you can simply pay diluted paint in your brush and then move your brush couple of times over that layer, and that's it. Everything becomes just one layer, and another thing that you need to keep in mind while you're doing this is color mixing, so if you have a lighter color below, it's going toe makes with the new color that you are. So you need to be a little careful on this. So this is all the basic that you need to know about quash as the beginning of the other things and the techniques and everything else. You alone as you pain bread course.
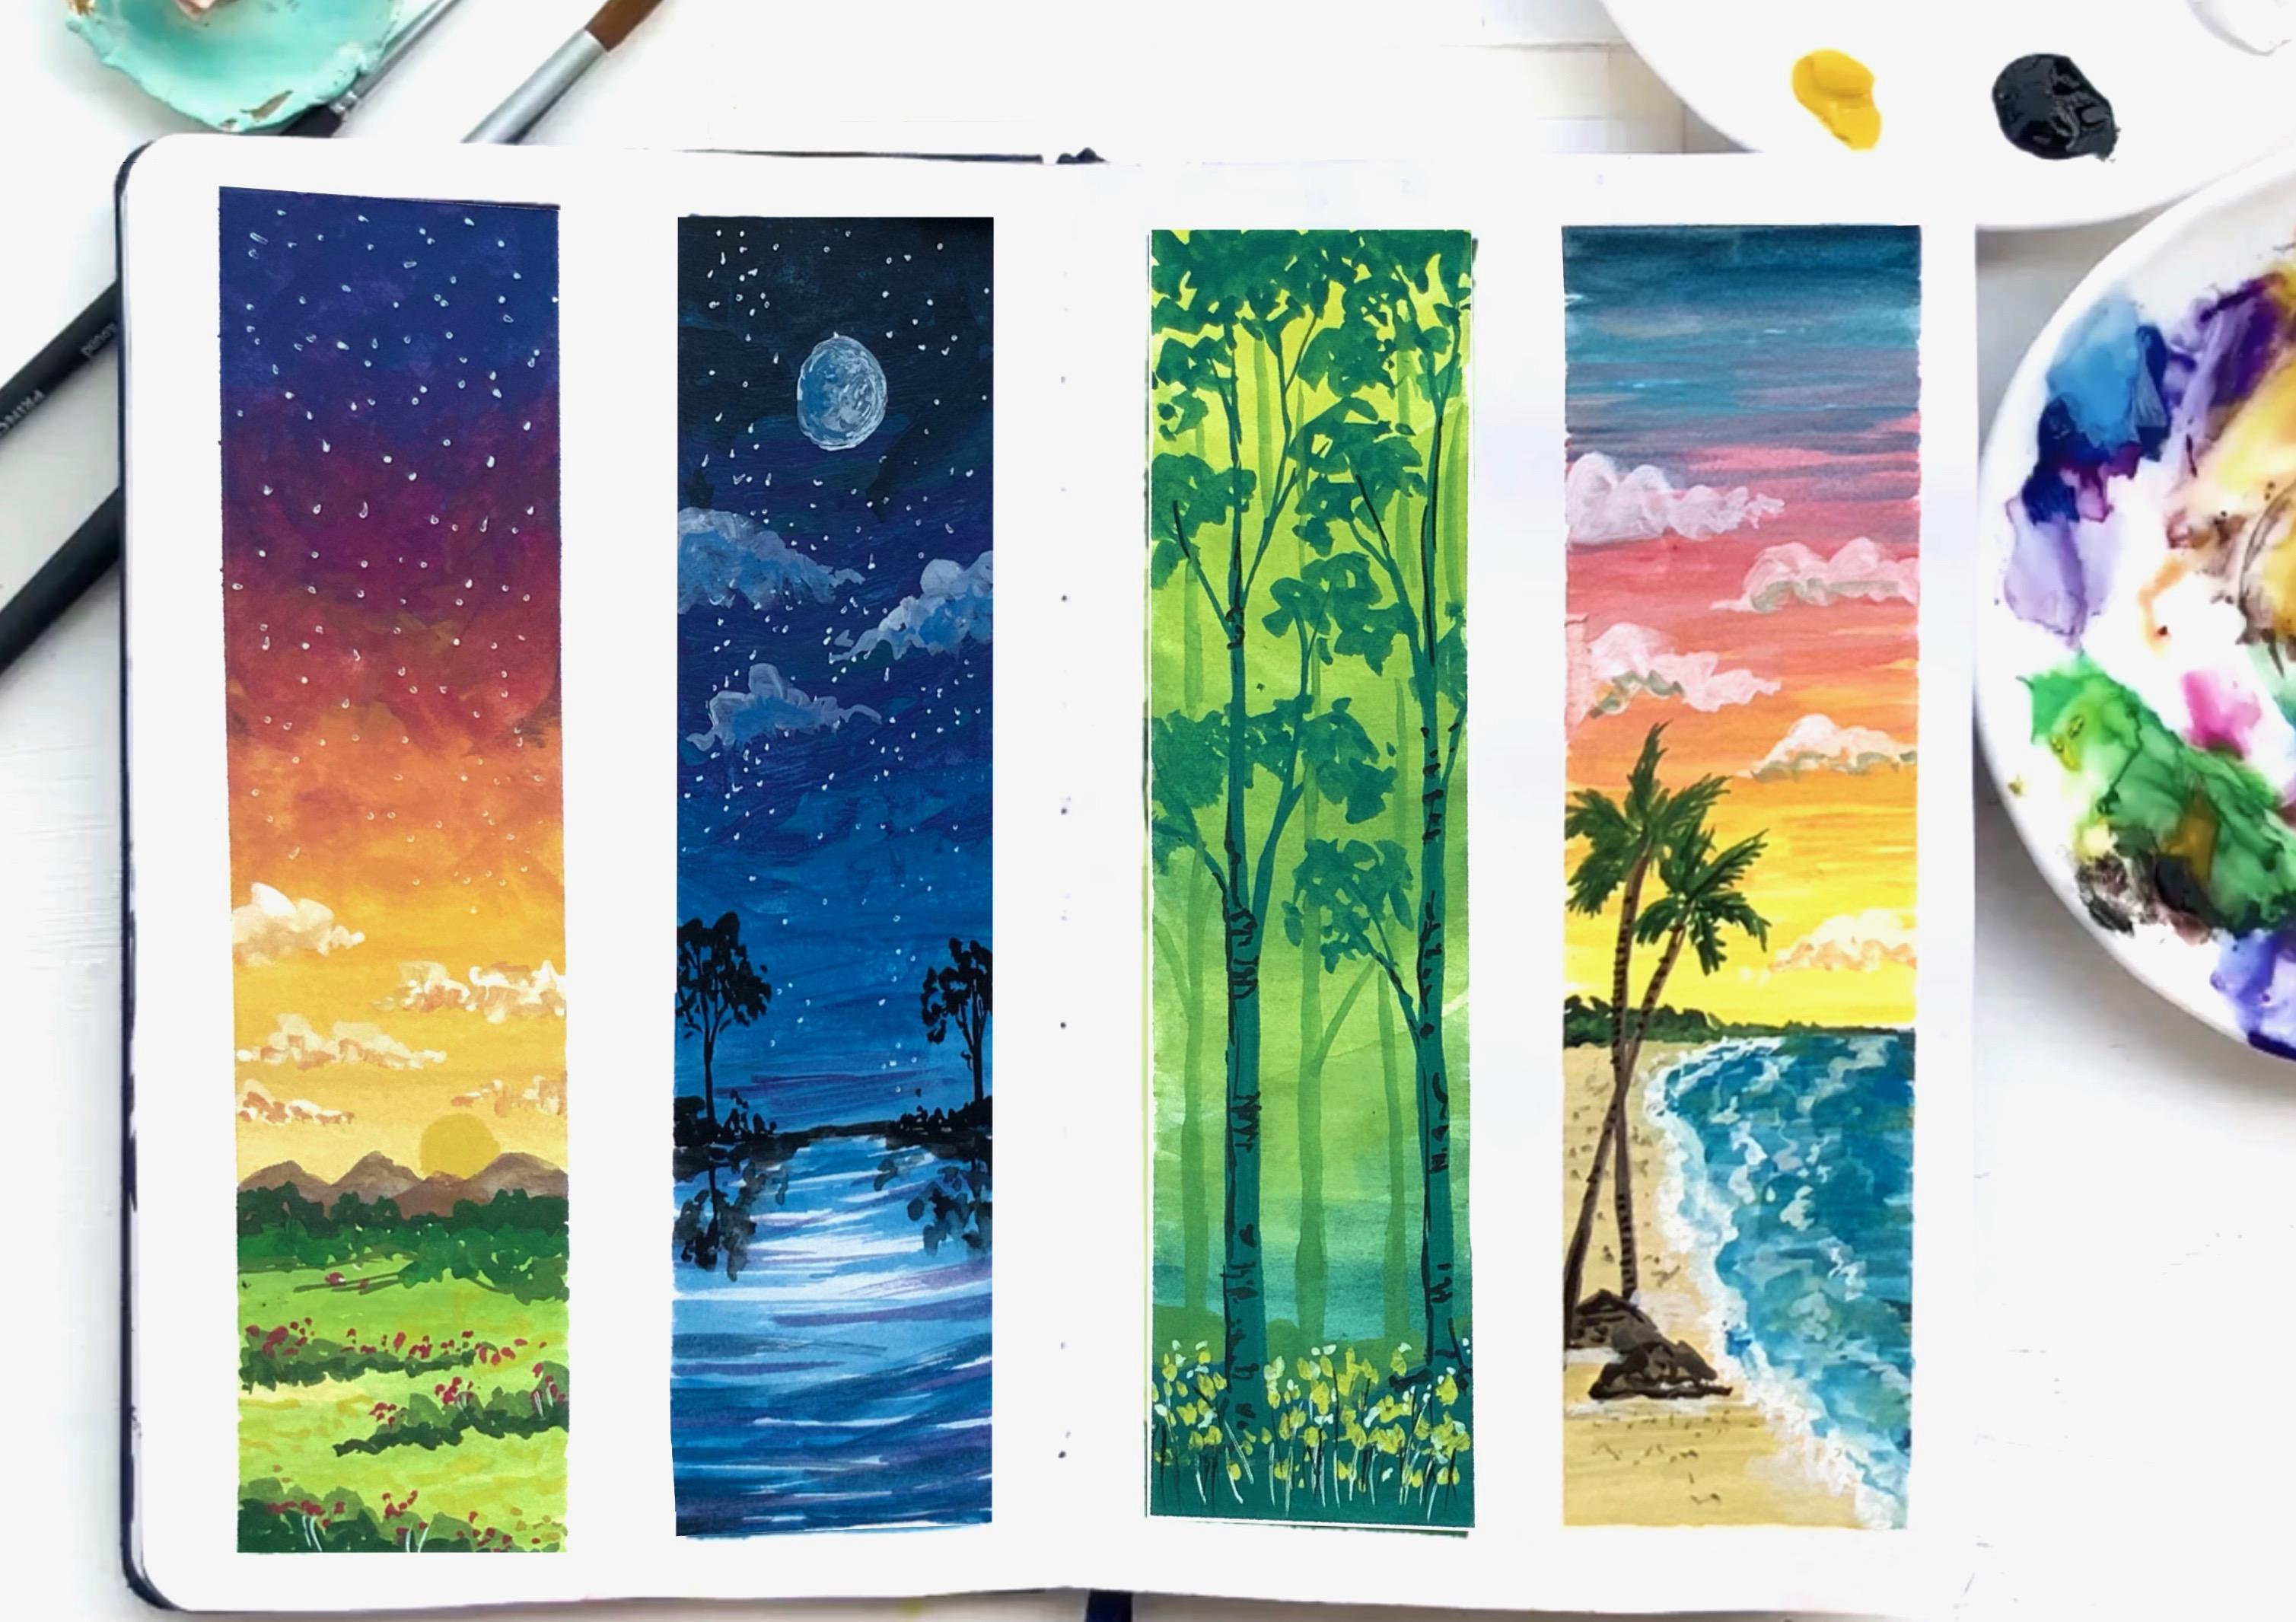
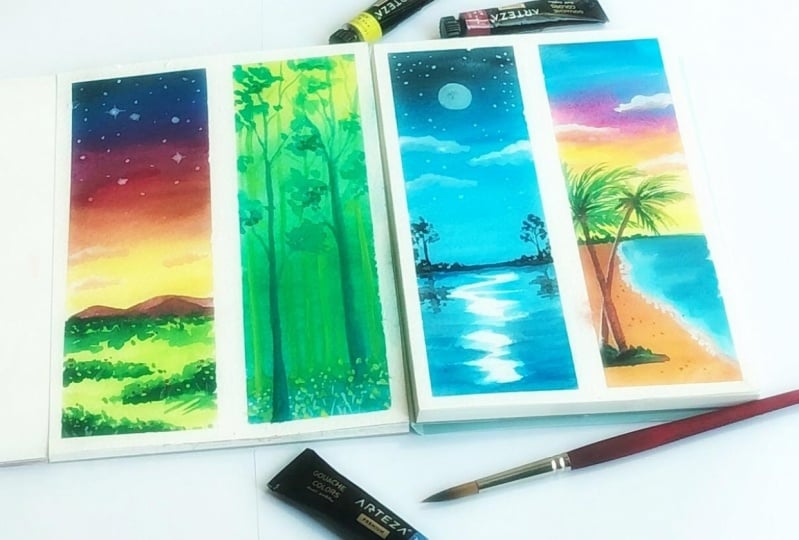
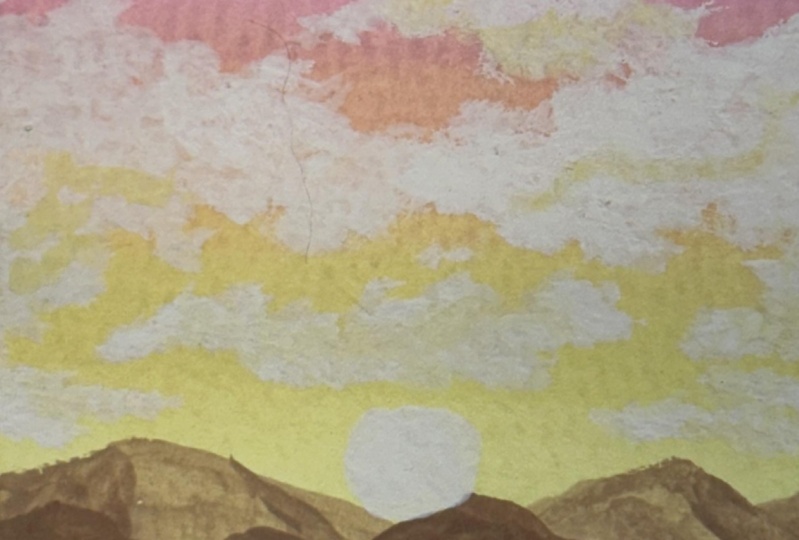
4. Sunset Landscape 1 - Part I: for the class projects will be studying four different types off landscape would before we get started with the 1st 1 I'm going to tell you certain things, like all the four class product that I'm going to teach today is in this bookmark format, which I personally feel it is ready easy for any big nurse toe. Start red quash because the sofa CDO to be painted is quite less and you can actually learn how to layer and how to handle the paint medium. But as always, I give you the freedom toe, choose the size that you want to paint, and now we will get started. The first class project here is the sunset landscape. It will have a beautiful sky and some grass and greenery at the bottom, and you can either have single people's like this or just take a piece of people and divided with the masking tape. And now we will get started. Unlike watercolors, Gorge doesn't required the paper to be awaited before you condemn, likely start with. So the first layer here that I'm painting is going to be Oh, wash. That is mixed with lower off water, mortal like the consistency off a watercolor, and I'm applying all the colors that my sky blue county as a beginner or probably being a watercolor artist. Cautious, little tricky, because we are used to use a lot off water and our paintings, so sometimes it becomes difficult to get the right consistency off the course. So what I always pray for these days is just to paint one lightly or like this that is the based Leo. And then in the next layer you, you can easily at the wash consistency that it's like moping and less water. Otherwise, sometimes what happens is when you try painting with more paint and less water, the either the pain doesn't flow smoothly or spread smoothly, and there might be little gaps or something. So I think this is the maybe one off the best ways to paint, and you can build layers by layers, which would give you the right opacity for the wash illustration. And now you can see how easy it is for me to add the second layer, which would be more a big. This is because I've added a similar color Leo in the first layer and while adding the 2nd 1 it becomes more easy and the opacity is increase. Similarly, I'm going to add all the colors in the sky with more pain and less water. And as you add the's layers off colors, what you can do is you can also blend them with the previous color Leo, so that put the colors look like blended well and doesn't look like a patch off to separate colors. Similarly, you can plan the orange and the yellow layer toe. You can carefully watch how I'm just pulling the colors from one layer to another in order to just blend them well can stop adding and blending colors ones. You're happy with the visit, and now I'm adding a little more off taco blue on the top to make it look more opaque and very take and just planning it. And also, um, adding a bit off Darko, bring magenta color and just blending with the previously or that I added. And that's it. I'm happy with how the sky looks now. Next, I would take a smaller brush and makes a brown colored toe paint mountains. The landscape that will hear them teaching will have two layers off mountains. Oneness light earlier, and one is the darker one. The mountains, which are behind will be in a light of brown shade, some just painting with brown, which has more water. And after this, the second layer off mountains will be in our negotiate off brown, and you can paint the mountains the second layer of mountains, alternatively, so that it doesn't overlap the first layer off the mountains, and that's it. In the second part, we would add the greenery for the bottom but and also add some details to the sky.
5. Sunset Landscape 1 - Part II: for the second half. Off the spin thing, we would be painting off very nice and allied green as the first layer. The entire portable part will be painted in light, clean and just one few parts. I'm adding a little pale yellow so that there is some creation and variation in the first layer, and I'm keeping the consistency off the paint. Little tickle, which will give you more capacity. Not like low the sky layer that we added at the forced. This one. I'm just directly adding, because the idea is little small and anybody's, we're going to clear with a different vegetation elements. So I think it would cover it up. - And after adding the base layer and mixing little dark, clean and, um, adding little bushes like this in trend off the mountain so it looks like that it's some vegetation and the A friend off the mountains and the adding two layers off these bushes, just like how we added for the mountains one or darko one and one with the lighter one. The darker one stays behind, and the one with a little light opening or moral like olive green comes ahead, and the Frank. And by doing this and just waiting with two different layers off greens with different bushes think it gives a little bit off perspective in the simple landscape painting that we're doing. Similarly, I'm going toe. Add small bushes like this in opposite directions, like one on the left and one on the right and towards the centre off both those side bushes . It is little 10 enoughto adding these bushes with a lighter shade of green next to what you do is suspect Oh, darker shade of green and just overly at the bottom part off the bush that it looks like it's those shadow or something, and it would bring in depth inside the painting and remember more details. And the more layers you add, the painting becomes more interesting. And I feel the light green Leo behind looks Freddie plane. So I'm just picking some yellow mustard e a local A. And I'm just randomly doing so. It looks like that's, um, dry grass kind off on to add a little more details and picking the right color direct pain . And I'm just adding thes small dots kind of thing, which looks like flus. I really enjoy adding such small deep eels in the painting because that is word, Oh makes the entire painting look very beautiful. And then I'm picking up a yellow Kahlo to paint the sun behind the mountains. And, as I mentioned earlier that I love adding details into the painting. So I'm just mixing little white, and I'm painting small clouds like this, just the white paint with less water and move pain so that it stays off bake. And again, the first layer for the clouds that I'm painting is going to be only pure fight. Later on, I will pick some off orange or yellow Kyllo to add highlights to the club, and you can observe how the clouds look beautiful by adding those orange highlight Leo. You can even try adding different colors off clouds or maybe orange one or something. But I like to be little septal yet, you know, show that the clouds is that's where and chose white and next time just picking my wife gel pin and adding the stars. Alternatively, you can also just or used wash, paint and splatter toe me. It looked like stars, but I think doing with the white gel pin. It's much easier and also simple because sometimes while splattering the pain with the paintbrush mine get a little messy. So with the white gel pin, it is the easiest we toe get worked on, and that's it. We are almost done with our for squash landscape. I'm adding a little more highlights on the floods. And there you go. If this was your first landscape study with wash, I'm very sure that you must be proud off. How you're painting has turned up, and I think you would be a little more confident to try the second landscape study, too.
6. Forest Landscape - Part I: Let's get started with the second landscape study in Wash. This one is going to be oh, forest painting and go wash. And this is my absolutely favorite off all the full landscapes that I'm teaching today. So, yeah, the first layer is going to be yellow, one you can absorb in the painting that I have done before. It is like radiation off off colors from yellow to light green and little acquire green at the bottom. So similarly, just to get the right colors are adding little more water and just painting like the watercolor consistency. You can even try to add different colors like you can meet a little green on, like you know, are bright blue at the bottom. You can completely choose the colors in this idea, like and, uh, just added in the water color consistency so that you get the colors right and one student applying the first layer for the next layer. What you do is make SMU pain with very less water and just laid it over the force layer that we added. Remember, this doesn't have to be perfect, because there's just the background that we're doing and when you add the elements on top off this. All this will get covered up so it doesn't have to be perfect. Just play around, experiment and remember to have fun while you add these layers and once you're done and happy with this 11 to dry before we add in details in the next lesson.
7. Forest Landscape - Part II: Ah, first layer that the painter is dried and now we would be adding layers off please, in this lesson. So the first layer off tree is going to be a little darker, one which should be in the foreground. So I'm mixing a green, which is really similar to the bottom most of green or the color, which is in the force leader that we beamed in. And for this layer, you would need to make a lot of pain with less water so that the opacity is more and we would be painting little bushes like this in the friend with the same green, um, adding a little more blue on the top toe. Bring him little contrast, and after you're done adding the bushes, the next is to draw the trunk off the tree. So what you would do is just draw it ready loosely. Oh, if you're not comfortable doing with a bigger brush like this, you can take a smaller brush and draw 10 lines first, and then you can take a larger brush and just take in the trunks and the branches painting the branches really lose, and I'm not going into more off details because I wanted to be very simple and look neat, because the idea we're painting is little smaller. So if you try to add like too much off details, it might become Tocantins states. So I'm just keeping at minimal. And after painting the first tree on the left side, I would add another tree on the right side. And for this one, the branches that are being thing will be little alternative or opposite to the first tree so that they don't collide with each other, and you can add in the least but and fill up the space. And once you've done painting the branches and the trunk, you can add the A bunch off leaves on the top with the same color and maybe with the same consistency off the paint and water does. So that is bold and it looks like it's in the program. You can closely watch home a loving my brush to dance and create these beautiful and random strokes. It doesn't have to be perfect. It a tall you can just pain thes very randomly. I'll be repeating the same for all the tip off the branches, and I'll cover up the first layer off the trees. - And once you don't painting the first layer off trees now, we would add second layer of trees with a little light agreed. So before we add the trees, we would also add small bushes like these in the background, just like how we did for the 1st 1 Just few. Little Bush is like this. And then from there we would begin painting the trunk. So the second year off the tree, we wouldn't be honoring much rebuild. We'll just show the trunk and maybe a couple of branches after adding the second layer off trees. Now it's time to add in some detail, so I'll be adding little yellow flaws in the foreground. Oops, I think, though, player, the first layer that we added is still read. That happens because when you have more off paint and less water, the drying time is little more so. Meanwhile, when this tries, we would add some details. The trees. I'm just picking a black color and allowed some details on the tree like this. So this is basically like adding little texture and shadow to the tree so that the painting looks little more detailed and interesting. You can pick a smaller brush to do those details, but the bigger size off brush that I'm booking has a very good tape. So I'm comfortable and doing those details with the same bigger brush a lot. The details for the 2nd 3 also and I'm only adding details for the trees that are in the focal, not which are in the background, so that the emphasizes only on the force to trees and after detailing the tree a lover to try, and in the next lesson we would be adding some details and flows and finished is painting.
8. Forest Landscape - Part III: now I think the bottom Muslim is completely tried and we're ready to add in some yellow flowers. I'm picking more off paint and very less water for this yellow close so that our flaws will stand out from the Darko background that we have some things. When you add the's a light Okaloosa and Dakhil layers, it might look that the pain is not standing out because it is still right. But when it gets tried completely, the yellow color will be little more big than it looks like you. This is what I've observed while I was practicing with wash, but once, like probably sometimes what you condone was, if you feel it is still lighter and not as desired as you wanted, you can always add second layer off yellow pain. I will go ahead and add little memorial off loss. You can add as many as yellow flaws you want, maybe less or more, but make sure that you don't overdo it and to make the flowers pop out and bring in little more contrast. What I'm doing is with wide question adding tiny little flus, but not as much as the yellow flowers. Just a couple off here and there so that it looks small, beautiful. And once you don't adding, you can take your wife gel pin and add the's 10 lines, which would look like stems off flower with the white jump. And you can also do with White Wash word again. Why? Gel pen is easy, and I prefer to do with that, and I'll add some mood stems like thes Greg the black color. Also, once you feel satisfied, you can stop adding more details, and that's it. There you go. After that, carefully removed the masking tape and you would have two beautiful landscape studies painted. In course, I'm sure you must be very happy and proud off painting these two. Now let's move on to the third and the fourth Landscape Study.
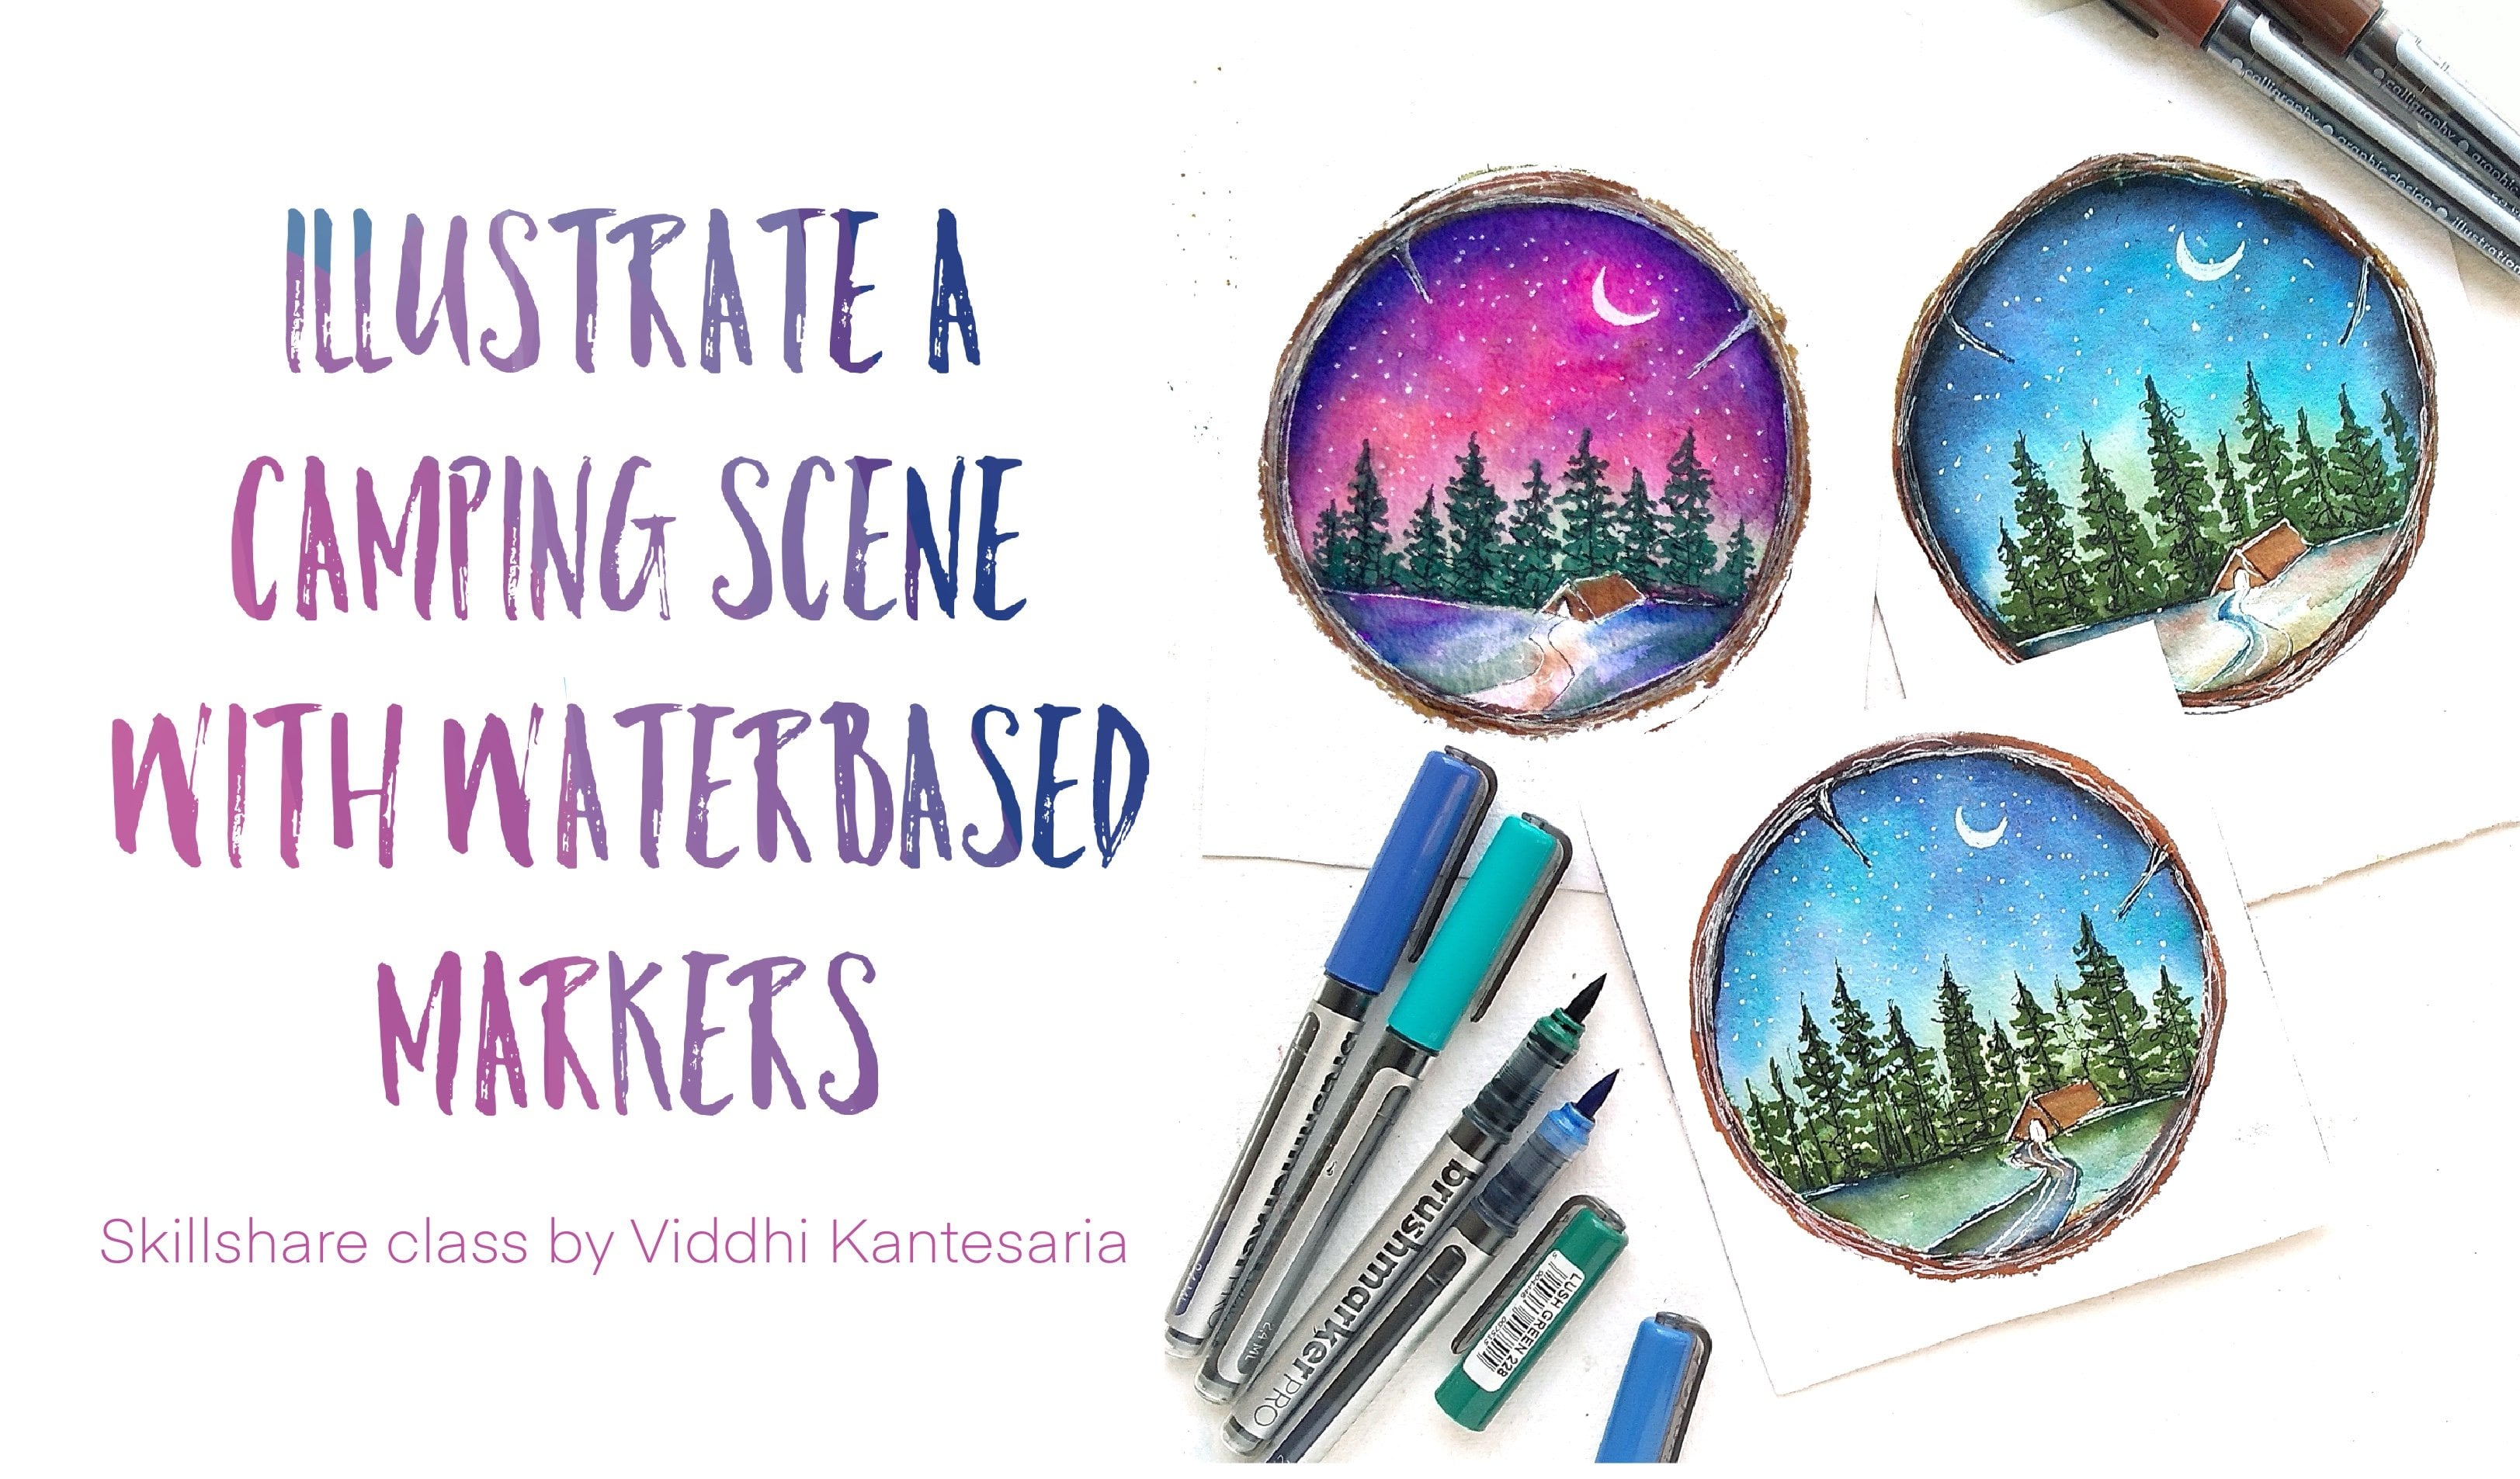
9. Landscape 3 and 4: softer, finishing the 1st 2 landscapes, we would move on to the third and the 4th 1 But before that I just tell you what we're going to study and also tell you that you have the option off choosing your very own landscape something that you want to be. But if you don't have any inspiration or references to paint the third and the 4th 1 you can follow along with me. I'll be teaching you our night sky landscape at this with water and some reflection, and other one will be something like this, with beach or ocean kind off. And for the third and the fourth landscape there, I'll be teaching you. I'm obviously going to make little mistakes in the beginning and at the end off the wash painting, so that you can observe and see how mistakes can be corrected with this medium. And that is one thing that I really like about this medium, that any mistakes can be covered. So let's get started on the 3rd 1
10. Night landscape - Part I : So let's get started on the third landscape study and, as I mentioned earlier that I'm going to make mistakes purposefully so that you understand how it can be covered off. Gosh, and you can keep revising and keep changing the painting as many as times you want in course, and you don't have to necessarily follow what I'm doing because it's just for your understanding. You can follow along with me and pain once I start beginning with the proper painting and after adding forced few layers are begin to pain cloud. And at this moment I feel that the painting isn't coming out as I wanted. So what I'll be doing A cell makes taco color off blue and then overlapped Fred the layers below. And that's how all the layers and the mistakes that you've done in the previous you'll use is covered with a new layer off pain. And it's like you beginning to pain from all over again. And now if you want to begin painting and catch up with those second layer that I'm doing, what you need to do is pain the force layer with wash mixed with more water, just like how we did for the previous two landscape studies. And after you're done with the Step one, you can catch up with me and start adding the second Leo Richards with more paint and less water, so it will give you the right opacity that you want. I'm painting the sky little lighter towards the end, and I'm painting the horizontal line as black hello and to add a little more color, what him doing as a mixing little pople and adding in between the dark blue and the light blue Leo to make the sky look little more vibrant because I didn't like colorful landscapes . And now we will paint the water body for which again, I've just added one layer with a very light blue and watercolor consistency. And now I'm adding the water reflection kind off. So it's like the reflection off the moon is falling on the water body. So madding strokes want from the right and left side just randomly and leaving gaps in those center, um, adding a little bit off violet also, so it matches the color off the sky that we have in our pain thing. By now, I think our sky would have dried and we can add the moon in the sky, for which I'm just diluting the white pain with very less water and more off pain. And I'm just painting a circle in the center off doping thing. Further details and elements will be added in the second part off this landscape weed.
11. Night landscape - Part II: We would add some elements like trees and bushes now, so I'm adding small bushes like this on either side, off the painting just very tiny and small. You can use a smaller brush if you want to. After this, I'll be painting one tree on each side off the painting. I'll be doing a normal tree, which is a little short and has little leaves. But you can completely choose to paint any type of tree that he won't pine trees or any other tree that you were comfortable with. - And now we will paint the reflection off the trees in the world of which what I'm doing is just with the black pain and painting and also being a small part off the tree like there's just the trunk and branches, after which Waterloo is, I'll take little water and just creditable so it will look like a reflection. I'll be repeating the same thing on the other side also, and I think that the sky looks little plane. So to make a little more interesting, I'm going to add a little more colors on the lower part off the sky for this layer that I'm painting. Um using more water so that it is very transparent and doesn't cover up the entire sky. So I think now this looks much better and next step is one off. My favorite in painting such landscapes is adding the stars with the white help in. So I'm adding a couple of stars to the sky. - If you happy with your landscape, you can stop adding more details. But as you know that, I like adding little more details because it makes the painting look interesting. So I'm adding these white clouds on either side off the sky and a little more color to the clouds by adding this blue color on the bottom off the clouds. And I think that I really like how the entire landscape looks just by adding all the tiny tiny de deals and that's it. You're done. Radio on night landscape
12. Beach landscape - Part I : the fourth landscape that we'll be painting today is a beach landscape. Initially, I had a different picture in mind when I stopped the class. But as I said to fill in the class, I thought, Let's try something new and different from imagination. So I've just drawn the beach shoreline and just a hold his own life and for the sky I'm repeating the same step that we did for all the three landscape before. So you can just follow along with me and pain after they are finished painting the sky, we would paint. So what? I worry? No. For which I am picking a light blue collar. Have mixed little fight with the blue so that it is more okay and I'm painting the entire water body with the same cologne. You and for those son a mixing a little mustard yellow are like Dodi local. Oh, and again I'm just like, you know, purposely painting with wrong color so that you understand and see how the mistakes can be covered and corrected in wash. That is one reason we have been doing these mistakes purposefully while painting, because there are times when you begin painting and then you are become too judgmental and see that with this look good or not. So if you're painting with George about waste, felt that, like just paint whatever you feel like, because even if you don't like it and then you can always re correct and change the entire painting. So just go ahead and experiment with all the ideas that you get in. I think you can also try making mistakes purposefully and then learn how to correct them. Because I think that's one way off learning and art medium because the movements takes you me, the more you learn and that's it. In the next lesson, I'm going to show how to make a little corrections and added more gills and
13. Beach landscape - Part II: for the second half. Off this landscape, we would add in some simple beach elements like the 1st 1 that I'm going to paint is all the stain pushes or vegetation at the holes online, and the next one that I'll add, is to coconut trees in the side like this. After drawing the trunk off the coconut tree, we will also pain the magnet leaves after painting the coconut trees. I kind of feel that the color off the sand is not going well, but the color off the landscapes are mixing a peach color and just being thing. Or would it again? And this is purposefully done because I want making mistakes and then correcting it as a part off this class so that one can learn how toe paint with caution and also understand the biggest property. And at one page off using this medium, and now we will add little more colors to the water, like just adding a shade off darker blue from one side off the painting and the next D deal that we will add is this vital details like this, which would make it look like a wave hitting the shore. You can do with a smaller brush off Tobago brush but bigger brush. You can spread more off paint, and this is for the first layer, because to make the white look more opaque, you would need to add a couple off layers with a bigger brush. You can add the first layer and then for the second layer. When you add, you can pick out in a brush to add in very fine details like these. - And now I'm adding some yellow to the water so that it looks like the reflection off the sky in the water at some orange and little light pink, too. And the next element that I'm adding is thes drugs in friend off the coconut tree so that it looks little more interesting. Otherwise, it was looking plane, and I'm redoing the trunk off the coconut tree because it was covered when I added the sand layer and with the same brown. Um, adding these small details like mortal like dot what looks like those footprints on the beach sand. I mean, it doesn't have to be exactly the same, but you can imagine and make a little abstract and be creative to bring a little more contrast and depth in the painting. I'm just adding thes shadows with black color. And after this something, we are almost done with the landscape, except for adding a little more details on the waves with white color and then paint some white clouds, too, because I think the sky looks little empty so we can make it interesting by adding these clothes and you have you have finished four different landscape studies in Guangzhou and you can carefully be.
14. Beach landscape - Part III: so in the food landscape that we painted. Do you feel that, though yellowed reflection off the sky on water isn't actually create? Well, that was again done on purpose. So my main objective to make such mistakes while painting is only because I wanted you toe also low on how to make corrections. I can simply go ahead and teach you the right painting without any mistakes. But But I didn't want to do that for the third and the fourth once, because I want you to learn also how to make corrections, which will be helpful for for the landscape studies or anything that you paint with wash. So for covering off the yellow layer on the water first. What I did is I added a little wide course, and then now I'm adding little more lighter blue. So it's basically I'm just adding different shades off blue in the water, and you see how the your local is almost covered up and I'll add some vital details, which would make it look like waves. We're almost done on and along with learning how to paint with course, you have also learned how to correct mistakes even after you're finished, the entire being
 Viddhi Saschit, Author|Artist|Surface Pattern Designer