Transcripts
1. Introduction: Have you been looking for a
beginner's guide to gouache? Are you intrigued by the medium but found it challenging
to learn on your own? Then you're in the right place. Welcome to Gouache Basics, Exploring Illustration
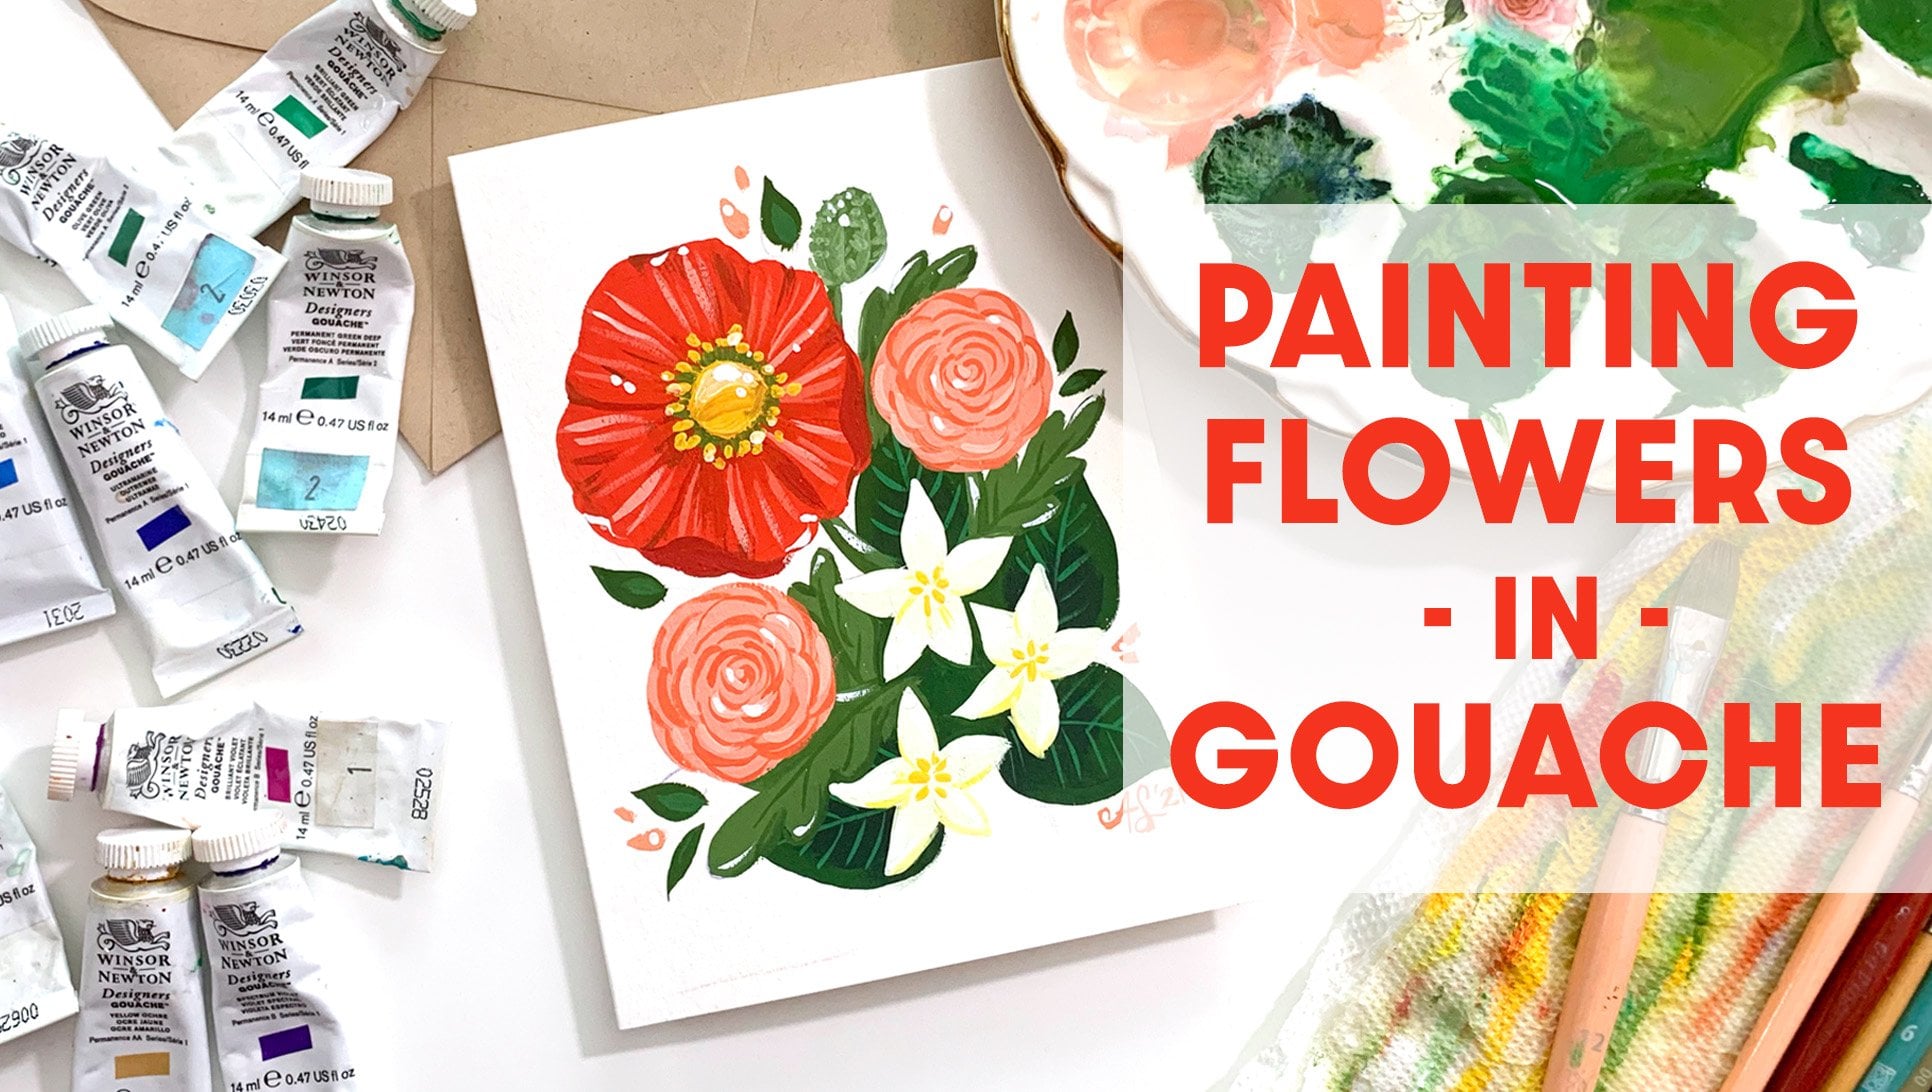
and Painting Techniques. I'm Ann Shen and I'm an illustrator and author
based in Los Angeles. I've been working in the
industry for over 10 years, and I've worked with
clients like Disney, Adobe, Facebook, Papyrus, and Jeni's Splendid Ice Creams. My paintings have
been exhibited at Disney's WonderGround Gallery, Gallery Nucleus,
Giant Robot and more. I've also written and illustrated
four bestselling books, Bad Girls Throughout
History, Legendary Ladies, Nevertheless, She Wore It,
and Revolutionary Women. Many of those books I
painted in gouache. I'm excited to share my
love of painting with you. I believe we're all
inherently creative beings and we need to express
ourselves in some way. So I created this class
to help you learn about painting with my
favorite medium gouache. What is gouache? Gouache is an opaque watercolor
medium used for painting. The benefits of
gouache is that it has a unique matte,
velvet-like finish. That makes it easy for reproducing via scanning
or photographs. Because of this, it was
really popular with mid-century concept artists and advertising illustrators, like some of my favorites,
Mary Blair and Eyvind Earle. Learning how to use
gouache is tricky but extremely rewarding once
you get the hang of it. I created this
class of five fun, easy meditative exercises
that will build on each other to help you get a handle on
your gouache techniques. Then we'll take those
techniques and create a lovely skyscape
painting at the end. My hope with this class is
that you'll come away with the necessary skills and confidence to be mastering
gouache in no time. Join me in the next
class to get started.
2. Class Orientation: I wanted to create
a Beginner's Guide to Gouache class to help you get better results in your paintings in a fun and rewarding way. Each exercise is designed to be a beautiful project on its own. So the projects for
today's class will be five fun and easy exercises. We'll be doing tea to butter,
brush stroke patterns, organic shapes,
gradients, and skyscapes. We'll be doing the exercises in a sketchbook to explore
these different techniques, and then build on
each one to expand your skills and expertise
with the medium. The final class project
will be skyscape painting. Skies are a popular motif
for art and a good place to practice the techniques
you'll need for any paintings going forward. Even better, you can take your own reference easily
for this just about side. In the next lesson,
I'm going to cover all the materials you need for
this class. Join me there.
3. Materials Overview: In this lesson,
I'm going to cover all the materials that
you'll need for this class. First step is paint. I will be using Winsor & Newton designer
gouache in this class. I highly recommend
getting a set of designer gouache so that you can get the best results
from your painting, and you'll be happy
with the results. A few of my favorite brands are Winsor & Newton,
Holbein, and Turner. The colors I have in my kit
today are designer gouache, permanent white, and then a
cool and warm of each hue. I've Turquoise blue, and Ultramarine blue, Olive
green and Brilliant green, Flame red and Permanent
Alizarin Crimson, Spectrum violet, and Brilliant violet,
Primary yellow, Brilliant yellow,
and Burnt umber. Side note, there's
also a type of paint that's similar to gouache
called acrylagouache, that has a matte finish, but it has an acrylic plastic
body like acrylic paints, and that works differently, and we're not going to
cover that in this class. Alternatively, jelly gouache has also become really popular, and it's a fun student
great set to play with, but the pigments
are not as rich, and the quality of the
paint is not as high, and so it'll be thicker, and get a little chunkier
so it might be a little harder to get results
that you're happy with. Just know that when
you're playing with it, and don't get discouraged, because gouache is really fun. Next, you'll need brushes. I have a 6 round,
a 4 round, a 2 round, and a double 0
or nail art brush, and then I have two flat
6 and a half brushes, and angled brush that's a quarter-inch. That's all you really
need for today's class. But if you have more brushes
you wanted to play with, feel free to add
them to the mix. Next, palettes. There are all sorts of
palettes you can use, you could just use
whatever you have on hand. Anything from a ceramic plate, to your cheap plastic well ones you can
get art stores, to an enamel palette or even vintage egg plates that I like to pick up at thrift shops. A non-porous palette is better, because it'll be easier to re-wet your paint,
and mix on it. Next, you'll also
need artist's tape, a spray bottle
filled with water, a pencil with 2H
or harder lead, because that makes
it less smudgy when you're painting over it. I like to use my
Tuffstick eraser, because it gets into
little tiny spots easily, a ruler, paper towels and
something to hold water. Then finally, we're going
to talk about paper. For gouache, you want to use some type of watercolor paper, or illustration board, because those are
designed to work with water mediums, which means, it'll absorb the water but
leave the pigment on top. Watercolor paper comes
in two different types, cold press or hot press. Cold press has more
texture on it, and hot press is smooth. It's just a matter
of preference, and my personal
preference is hot press. For the purpose
of today's class, we're going to do a bunch
of sketchbook exercises. I'm going to use this Strathmore
mixed media sketchbook. Now that we have
all our materials, we're ready to get started. Join me in the next lesson to
learn all about the paints.
4. Tea to Butter: In this lesson, I'm going
to teach you the tea to butter method of determining
your paint consistency. Getting the consistency right is half the battle with gouache. My hope with this lesson is that it'll help you learn what
you need to work with. The tea to butter method
was first introduced by Joseph Zbukvic in his book, "Mastering Atmosphere
& Mood in Watercolor". Now there are five consistencies that we're going to
mix with gouache, and we're going to use paint straight from the
tube right here. I'm going to use burnt umber. Then I'm going to label
the consistencies in the sketchbook. We're going to have tea, coffee, milk, heavy cream, and butter. I'm going to take one of my number 6 and 1/2 flat brushes, and wet the brush. We're going to get these
consistencies by adding water slowly to the paint
straight from the tube. I'm going to just
take a little bit of the paint and put it over here, and then add one
more drop of water. You see it's pretty much
like consistency of tea. Maybe one more
drop. There we go. Then we're going
to swatch it here. As you can see, it's light. Now I'm going to take this, I'm going to add a little
bit more medium to it. It's thickening up. That is our coffee medium. Then we're going to add
even more medium to this. By medium, I'm talking
about the paint. I'm going to add a drop more. This is like the
consistency of milk. You can see it's even darker. It's getting more opaque, the thicker the medium is. I'm going to clean all that off and then I'm going to go here, back to our paint
straight from the tube, we're just going to add
a touch of water to it to get to this heavy
cream consistency. That is the nice flat consistency
we like to paint with for gouache to get most of our flat opaque color so you won't see what's
behind it coming through. But it's not so thick that you get a bunch of
texture you don't want. Painting with gouache
is all about learning precise control with it and
handling the paint that way. I'm going to swatch the
heavy cream again right here because you want to
do it a couple times, now it's getting dry, so
you understand the feel. You get the feel for
it in your brush. Then finally, butter is usually just straight
from the tube. I'm going to do some
straight from the tube here. I'm going to take
this paintbrush that I don't dip in water first now. And then I'm just going to... It's really opaque
but it's thick. That's why you're getting
that dry brush effect. That's what we use butter consistency for
most of the time, doing a light dry brush on
top for shading or blending. She's thick. I'd recommend practicing with this tea to butter consistency
for a whole page. We're just doing
the tea just to get a good feel and handle for these paint
consistencies on your brush. The more you do it, the more you're going to get
comfortable with it. Got that coffee consistency. See how there's more pigment
in the coffee consistency. It literally looks like
coffee in this color. I love that. Then
for the milk one, we're going to go
a little thicker. Then I get that heavy cream, I'm going to need a little
bit more pigment again, so I'm going to add more
paint to my palette. Add it into this well that
had heavy cream last time. I'll press my paintbrush down
to check the consistency of the paint too because sometimes there's not enough
paint in there. The heavy cream. Yes, opaque AF. You're going to want
to use the tea and coffee consistencies
when you want to do a wash or something with a more watercolor
effect with gouache, and that's why it's so
great and versatile. You can use it like a
watercolor or you can use it like an acrylic paint or an oil paint in
terms of being able to go opaque or transparent. But most of the time when
I'm painting with gouache, I want it to be opaque
and so I'm using heavy cream as the
ideal consistency for a painting where I'm painting
more with an opaque paint from back to front, etc. Butter. I'd recommend that you do a whole page
of exercises just like this to practice your
consistency swatches. Once you feel
comfortable with that, we're going to move on to the next lesson
where we're going to get to know our
brushes. Meet me there.
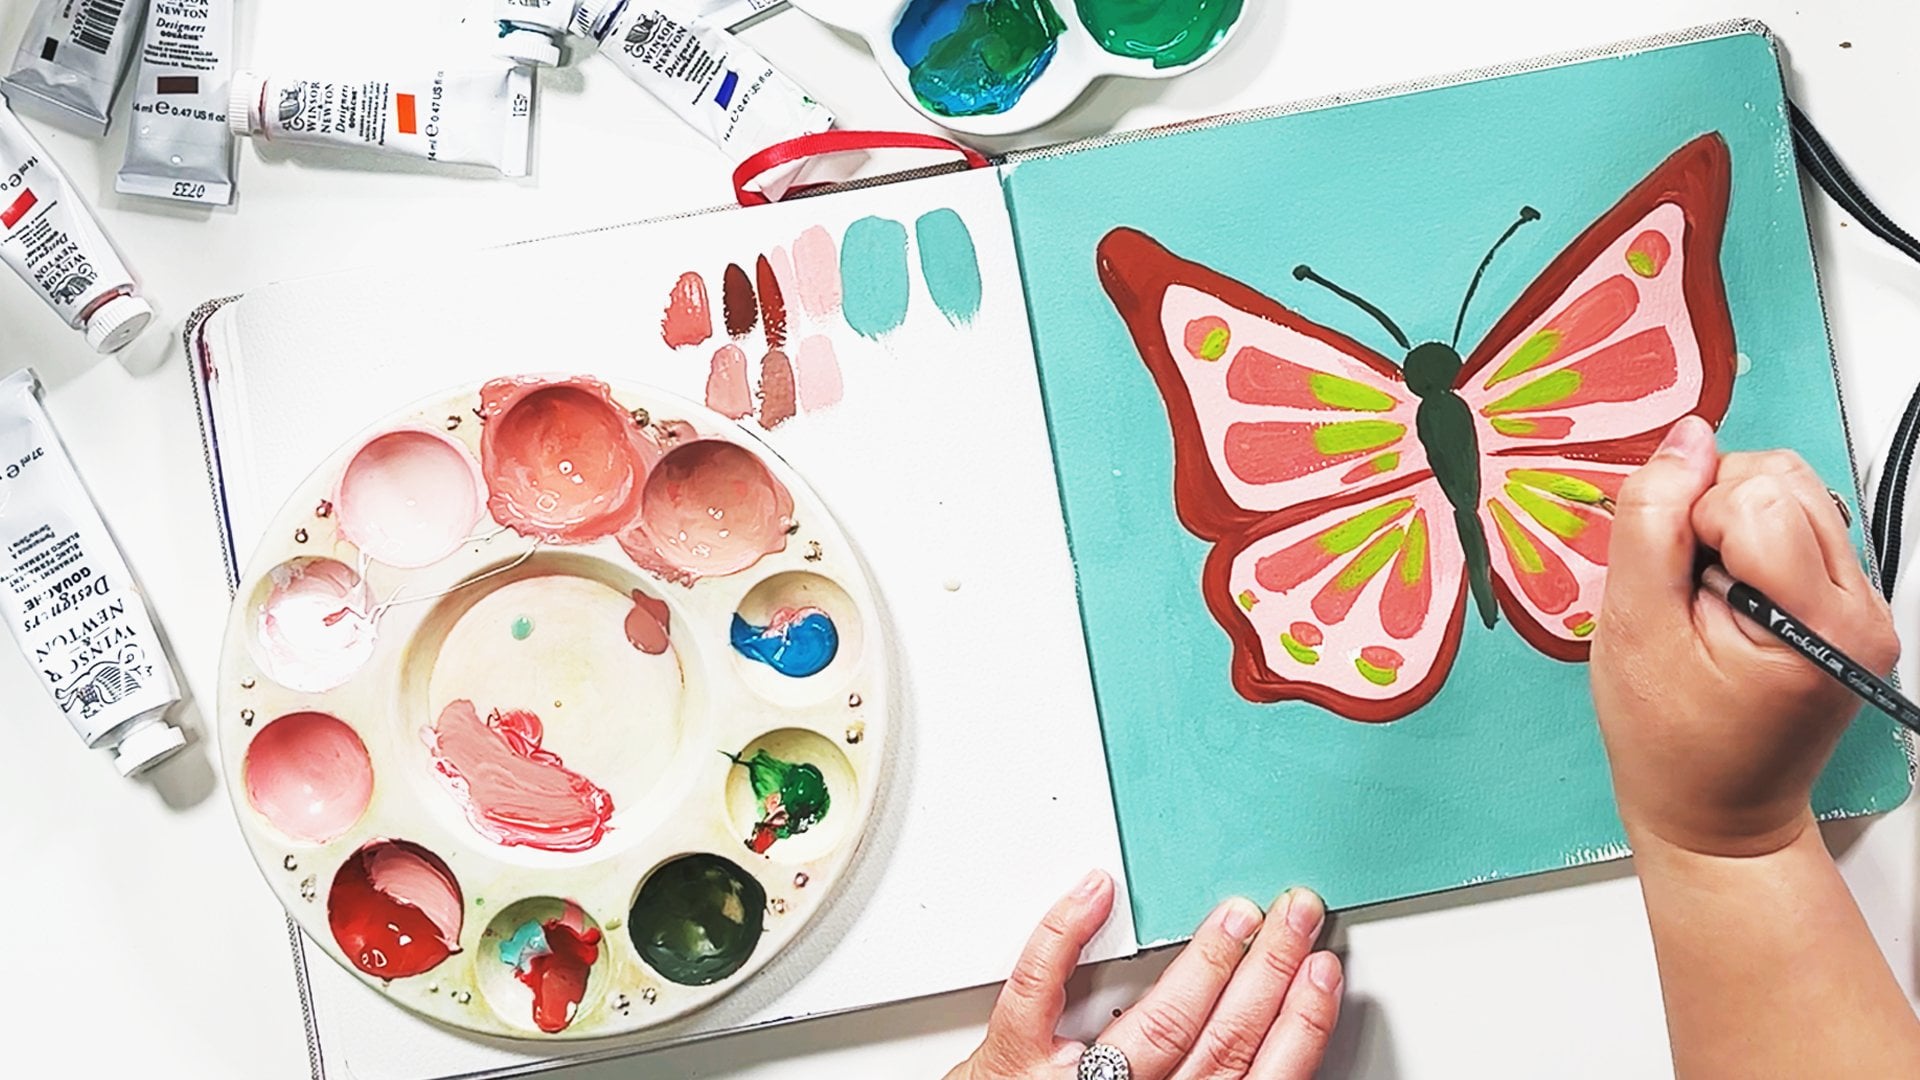
5. Brush Strokes: In this lesson, I'm going to go over the different types of brushes I typically use when painting and how to use them. We'll also go over paint
consistency and mixing colors. I'm going to teach
you a meditative brush exercise that you can do easily in your
sketchbook to get comfortable with your
brushes and with the paint. Using our four brushes, we're going to explore all the different widths and sides that we can use on the brush to
get all sorts of effects. We'll practice making thin, thick and varied line
widths with our brushes. Well also practice with
different angles and pressures to get a variety
of different effects. We're going to start with
the round 4 brush. I'm going to squeeze out
some flame red for this. Then I'm also going
to squeeze out some permanent white so that
we can mix a pink. When you're mixing colors, you want to add the brighter
color to the white. Because that will tint it
really fast as you saw here. Versus if you add
white to the red, you're going to add
a lot more white because it'll just be
swallowed up by that red. I've mixed the paint with my brush and I can tell
it's a little thick, so I'm trying to get that
heavy cream consistency. I add a drop of water by dipping
my brush into the water. Then what we're going to
do is just take our paint, and we're going to make even, short strokes to get comfortable with how much paint you want to have loaded on
your brush to get that flat, thin layer onto your paper so that it's a smooth and
seamless as possible. Doing this over and over, you're trying to
get the same stroke and so you can see
how different it is. You want to try getting a same even stroke
for the entire row, and this is helping you
practice your brush control. Again, it's a fun, meditative practice to me, you are truly present, feeling the brush and
then paint in your hand. Now I'm going to
mix a lighter pink. Just for fun, we're
going to mix it up. Another note to notice
about gouache is that it dries darker typically
for most colors. As you can see here,
it's already drying darker than it was
when it was wet here. Just something important to note when you're
painting with gouache. Now I've mixed a
lighter batch of pink. I'm going to go back in and
now I'm going to practice the thinnest strokes just
using the tip of the brush. I'm going to do that same
thing where I'm trying to make a uniform row across
the sketchbook. See how with more practice
even my third row is a little bit more
uniform than my first row? That's the point
of this exercise. Now, just for fun, I'm going to introduce a
new color into this mix. I'm going to do a little purple. I'm using the spectrum violet. You can use whatever
color you want. This is just for fun, so play
with your favorite colors. I'm going to take some of
this light pink I mixed, add more of the white to it and just to drop that purple
because it's a very strong hue. I want to add it
literally drop by drop. I'm going to add
another drop into it. See how quickly
that color changes. Add one more drop. We got like a light lovely
lavender. One more drop. I want more saturation
in the color. Now for this one, I'm going
to see how thick I can get, how wide that brushstroke can be when I just flattened
it out completely. Don't be afraid to move
the sketch book so that it's more comfortable
for your hand to pull down. I'll often move my
canvas around when I'm painting so that it's the most natural for my
arm to move instead of... It's more natural and easier
and smoother if you pulled down than when you're
painting away from you. You can see the paint
is getting too dry now. I'll just add a drop of water. Now we're at maybe a milk
or coffee consistency because I just don't
have enough paint. That's also another
cautionary tale, to mix enough paint. Now, what you're going
to do is go through all your different brushes
and practice the same thing. Now I'm taking my
six-and-a-half flat brush, making sure it's
cleaned off completely. With a flat brush, you get the nice wide
flat angle there. But you can also turn
it on its side and use it as a very thin line. We're going to just go back to this pink, that spattered all
over the sketchbook, which is totally okay because that's what
sketchbook is for, it's a nice, fun workplace. I'm going to do this. I could tell the paint
consistency is a little watery, so it's not as smooth and flat
and seamless as I'd like. That's, again, why
we're practicing this because now I know, I'm going to want to add a
little bit more white in here. I want more pink to
make some more paint. Although, I'd always
advise that you make some more paint than less paint
because as you'll see now, it's really hard to perfectly color match
exactly what you mixed up. Because the color does
change a bit when it dries. That's why it's a fun
sketchbook exercise to do with your leftover paint. Now I'm going to add
more weight into this light pink and
I drop more water. Try and get that heavy
cream consistency as close as I can get. Then do thin lines. To get the thin
line, you'll notice that I'm holding the paintbrush straight up and down instead of slanted like
I normally would. But you could also try
slanted that gives you a different brush stroke. This is all about exploring the different types of brush
strokes here you can get. I'm going to go back to flat because
I think that would just make a pretty
pattern at the bottom, and also so I can practice
with this paint consistency. You can see towards the end, it was started to get very
dry brushy because it was not that heavy
cream consistency. Now you can practice this with your double zero
brush or fill brush, your angled brushes and see
all types of brush strokes that you can get from
it and also practice your paint mixing and
pick consistency. We're practicing
these brushstrokes because we want to get as flat and seamless as
possible with our paint. One of the main issues I see
with gouache beginners is using paint that's too thick and it starts to build
up and get gunky. Having control over what you're painting is
the main goal here. Once you're comfortable
with this exercise, we're going to move on to the next one where
we're painting larger shapes intentionally.
Meet me there.
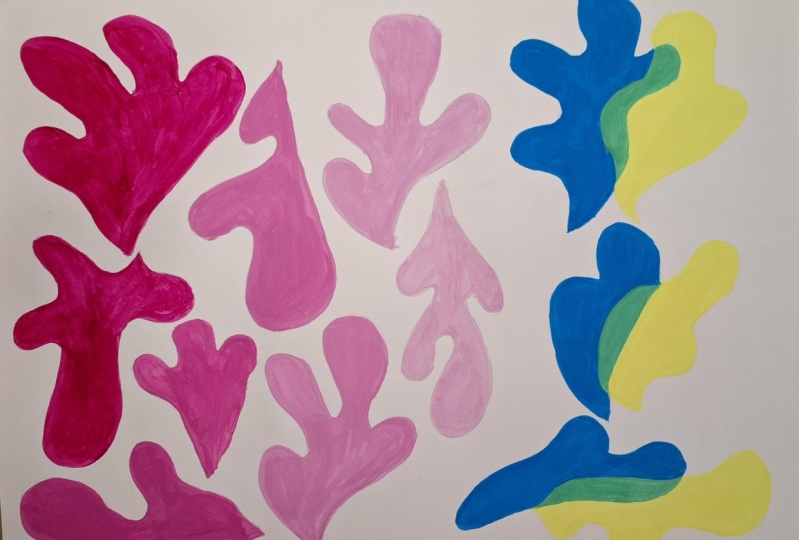
6. Layering: In this class, we'll take the
last two techniques that we learned and apply it to
painting organic flat shapes, inspired by Henri
Matisse's paper cutouts. In designing this exercise, we're also going to
learn about layering and composition for planning
a painting for success. If you're not familiar
with Henri Matisse, I'd highly encourage
you to learn more about this amazing artist
who was a leader in the Fauvism movement. He's known as one of the greatest colors
of the 20th century. I was inspired by his colored
paper cutouts that he initially used to help him quickly conceptualize
his paintings, and then later in life
became his medium of choice. He called it drawing
with scissors. We're going to start by
drawing organic leaf-like shapes and a full spread
in the sketchbook. I'm trying to draw as
light as possible to give myself a visual guide. I'm trying to keep the space between
everything pretty even. Negative space is the area
around an object or shape. By designing a layout
that focuses on keeping the positive and negative shapes
in equal volume, feeling like it could contain
the same amount of space even though it's organic, can help you see
the relationship between objects and the
space they occupy. Now I'm going to
take some colors straight out of the tube. This is the turquoise blue. I'm going to take my
number 4 round brush. I'm adding some water to it to get that heavy
cream we love. I'm just going to start
painting in some shapes. It's a little thick still.
I can tell once I put the brush down, and from my exercises I
did in the last lessons. Now to smooth ridges
in the paint, you could go over them
until they're blended out. I'm adding more water to
the paint because I can feel it getting a little
thicker as it slowly dries. I also start in the
top left corner because I'm right-handed, and as I'm moving
across the page, I don't want to put my hand on something I already painted, and so I'm trying to start from the farthest of where
I would rest my hand. But again, you can always rotate your sketchbook or your painting canvas
to whatever you need. We're going to paint this
whole spread as one exercise. Remember, you're trying
to get the paint as smooth and seamless as possible. I'm going to add some
white to the palette. Just for fun, I'm going
to create some lighter turquoise blue so
that I could do a gradation across
the entire canvas. Well, I love this
color, so pretty. You can see once again
that the paint is drying darker than
when it's wet. When you're working on a
painting and you want to see what color it's going to dry as, I would just do a
little swatch on a side scratch piece of paper. Once this is dry, you're going to go back
with your eraser and erase all the little
extra pencil marks. The second part of this lesson
is that we're going to do overlapping shapes
so that we can practice how we organize
painting a painting. With gouache, we
typically want to paint back to front
and large to small. While painting large
areas we want to just paint what's going to be that
color and leave the rest. We're going to draw
some overlapping organic shapes like this. Then we're going to go in with one color. You'll
see what I mean. I'm going to go in with
this turquoise blue again, and with gouache painting, you want to just paint the flat, large areas that are
going to be that color. You'll see this part will be
underneath this visually. But we're not actually
going to paint the turquoise blue
under there because there's a really high chance of reactivating the
paint underneath. It'll just start picking
up the color underneath, which is not what you want, and the paint will get clunky. We're going in with
that flat, opaque, medium, a heavy
cream consistency. But just to the edge
of what I want. Of what is going to be
this turquoise blue color. I'm going to paint all
the large sections that are this color. Now, I'm going to go
in with a new color. Let's do a flame red. I'm taking a different
number 4 round brush. Adding some water to this flame red to get it to that
heavy cream consistency. You can also use your
spritz bottle to do that. You can also use it
to keep your paints wet without adding
too much water to it. I accidentally touch that wet
paint but it's no big deal. That's why practicing in your new sketchbook
is a good idea. So you remember to be
conscientious of things like that when you're
painting the real deals. So I'm painting just, again, the largest area that needs
to be in this flame red. Then for the color in-between, I'm actually going to use
this brilliant violet. Again straight from the tube. I'm actually going to take
this number 4 round brush. It's very thick as you can see. I added a big drop of
water and add another one. Now we got the heavy
cream consistency. Now some colors are
more transparent than other colors straight
from the tube, and you can see this
brilliant violet is actually a little
more transparent. You can see the turquoise
blue coming through. That's just the nature
of the pigment. It just might mean you need an extra layer or you can
add a little white to it. Actually, I'm going to
add a little white to it so that it has a little bit more
opaqueness to its body. Now we need to wait
for that whole thing to dry before you
paint over otherwise, it's going to pick up
the paint underneath. I'm going to move
on to this one. I'm painting a second
coat now that it's dry. You can see how it's not picking up the paint underneath anymore. Now there we go. We have
some fun organic shapes where we practice
painting next to each other and organizing our paint composition
by planning ahead. I'd highly encourage you to do this exercise and
the first one over and over again to
get comfortable with painting shapes
and your brush control. This in itself makes
lovely abstract paintings. Now that you've
mastered flat color, we're going to move on
to blending and gradients in the next lesson.
See you there.
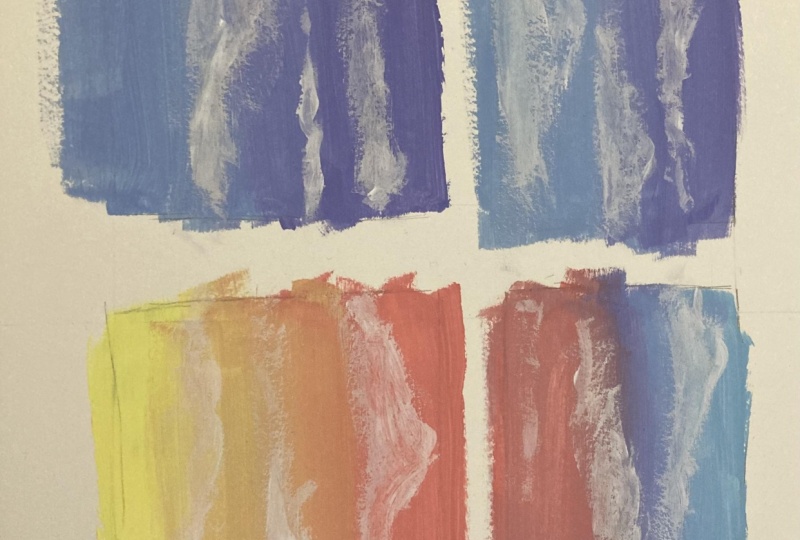
7. Blending and Gradients: In this lesson, we're going to learn all about blending colors together smoothly to create
transitions and gradients. Here I'll start with
two colors and blend them together seamlessly
in a gradient. We'll start by drawing four rectangles in your sketchbook. Take your ruler. I'm doing it about, giving it a
one inch border around each one, approximately. Now that we've drawn
our rectangles, we're going to tape it off with artist's tape or washi tape, whatever you have on hand. Now, artist's tape
is a low tack tape so that it peels cleanly
off of your paper, but I always like to tap it on my shirt a couple of times to make it a little less tacky. But then when I'm taping
up against the line, I always want to score with my fingernail to make sure it's super clean and straight. We tape off the edges to create
clean, straight borders. Now that we're done
taping it off, we're going to take two of
the same type of brushes. These are both flat brushes. Number 6s, make sure they're
clean and I'm going to take this ultramarine
blue, just a touch of it because it's a
pretty dark color. That turquoise blue and white. I'm going to mix up
a light blue color here with some turquoise in it. Actually, I'm going
to add more white. There we go. Add a drop of water in there so that
it's heavy cream. I'm going to take this
ultramarine blue. I'm actually going
to add some of this cobalt turquoise blue Or actually turquoise blue to it. One of the keys to painting smooth gradients
is having two brushes, each loaded with its own color. We're painting,
this is called wet on wet. Actually it's a
little more. This is still the consistency
of heavy cream. We're painting wet on wet, and that's what allows for a very smooth seamless gradient. You just go back-and-forth
into that color. Now you want to be
careful not to come back down to the lightest color because this has already
picked up some of that dark blue. I wiped it off. Got new light blue on there, and now I want to
bring the dark blue back in a little bit more. I'll blend that back in. You want to work
quickly because you want it to be wet when
you're working on it. Making sure all the
corners are painted in. Now I got more of the dark blue when I
went into the top, but as it's blending here
now more seamlessly, I have a whole different
color on my brush. I always want to make sure to
keep it clean by dabbing it off on my paper towel. Now we're going to practice
that three more times. You can use different
colors if you like. I'm just going to
use the same ones. Now I'm going to try making
more of the dark blue. Actually I need more
paint, I can tell. So experiment with achieving different
gradient styles. Right now I'm going to have less light blue
and more dark blue until you get really
smooth gradients. Really satisfying exercise. I'm going to add a different color
into this gradient party, which means
I'll add a third brush. Since I'm painting
just a flat sky, I'm still going to
use a flat brush. So you pick your brush based
on what the best brush for the project or the
shape that you're using is. Big flat areas can be filled in with
either a flat or a filbert. I'm loading each brush up with the color that I want. You want that heavy
cream consistency, you could see that was
a little too dry which won't create a seamless a
gradient as you'd like. We're going to add
a little more of the Alizarin and
we're going to do a pink gradient. Yeah, we're going to
do a pink gradient. [NOISE] Then we're
going to do yellow. I want to do pink to yellow
gradient. I added some more white into this yellow because
the yellow is also a little more transparent
of a paint pigment, and so I like to add more
white to make it more opaque. White is the base of all these colors and they
just add the pigment of the hue into it and so I'm just thickening up the base
when I add more white to it. It does lighten the color. So if you don't want that, you want to make sure to then make it thicker just
by adding less water to it. You just keep smoothing back and forth in that
beautiful gradient. Say you want to bring it down more. Just make sure to
wipe off your brush, take paint straight from the palette, and
just blend it down. This is a really fun
soothing exercise as well. You can practice
this some more and make four more gradients. Now the key to this is painting
wet-on-wet paint because once it's dry it'll be pretty difficult to get a
smooth of a transition. Even if you're painting
smaller areas and you want that smooth blend
transition gradient, you want to use
wet-on-wet paint. You can also add
some blending with some dry brushing
and I'm going to show you that in
the next lesson.
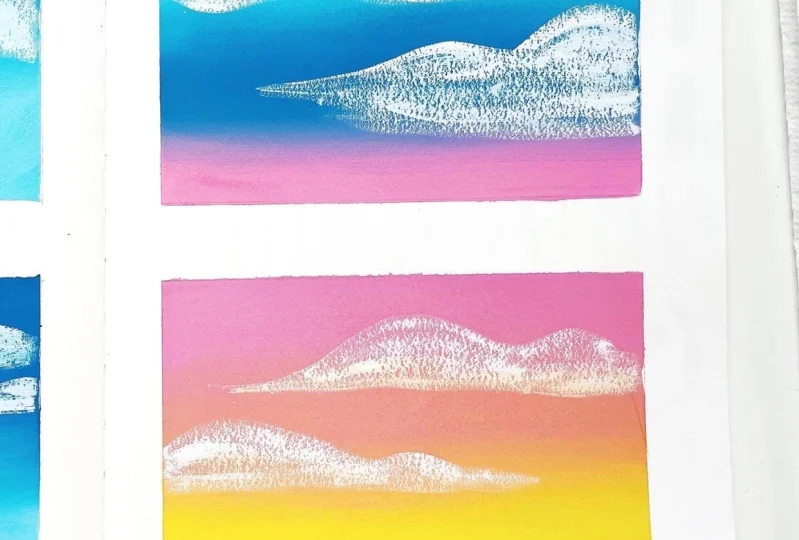
8. Dry Brushing Clouds: In this lesson, I'm
going to go over one of my favorite techniques
for painting with gouache, dry brushing. Dry brushing involves dabbing
some paint on a brush, swiping it off, and then using that dry brush effect to
create a textured effect. Usually I'd use it
for highlights, shadows, or anything that
could use that texture. This technique can be
used to add highlights, shadows, and any type of
detail to a painting. Experiment with different
brushes and levels of dryness to get different
types of desired effects. Now we're going to start
with paint pretty much straight out of the tube and
that butter consistency. We're going to take
a clean brush. We're going to dive into it. Then we're going to dab off
on our paper towel there. Then we're going to do
the same thing that we did with our
brushstroke techniques. We're going to practice
our dry brush strokes with this round brush. The neat thing about
dry brush also is that you can
build up on it. I always like to go light and then go over it
a couple of times. We're going to try
it with a couple of different brush shapes here, just so you can understand the different effects. I'm going to do this curly pattern. You would use this to
create some shadows maybe, or maybe some highlights
if it's a lighter color. Just to finish it off, one
more row for practice. Now a dry brush is something
you would generally use as something you can paint over something that's
already painted. It won't lift up the paint from underneath because
it's not that wet. I'm going to use this dry
brush technique to do our final exercise,
which is clouds. I'm going to take my white
paint, put it over here. I didn't add any water to it, it's pretty much straight
out of the tube and it is that butter consistency that
I want to be working with. However, it's a lot of paint. What I'm going to do is wipe
some off on my paper towel. Then I'm just going to
lightly block in my clouds. Defining the bottom of
the cloud a little bit more by going over the dry
brush a couple of times. Then not even adding more
paint to my paintbrush to do the dry brushing on the top
of the clouds where it starts to be lighter and
diffuse into the sky. I'm going to do a
little more paint, swipe some off on
my paper towel, and do the same thing here. Just lightly dragging across the surface and then
building it up so you have a little bit more control over how transparent you
want the clouds to be. I'm going to come back and build up some more areas where I want the clouds to be
puffier or thicker. There's one cloud exercise. I'm going to do it
across all of these just to really practice my
dry brush control. Then we're just going to paint
our happy little clouds. When you're outside next time, observe what the
clouds look like to you because there are so many
different types of clouds. I'm doing one that's
like a little bit thicker and trailing
and thinner. This is one of the easiest types of paintings you can
get reference for, because you could
just step outside and take a picture of your sky. I'm going to add a little
bit more white paint. When you're painting
with dry brushing too, I'd also recommend you have like a scratch piece of paper or
a sketchbook nearby where you can test out and swatch the dry brush to see
how thick the paint is. Dry brush is pretty
forgiving in terms of the effect you have
when you test it out is pretty much you'll be able to get a
couple of strokes that are similar out of it, with what
paint is loaded on the brush. My favorite thing about
dry brush is that you can really build it up as much as you want, which gives you a little
bit more leeway in control. But then you also have this beautiful
texture that happens. There's just like
unpredictable and one of the beautiful
natures of painting. Happy surprises. Now, say you want to make
this a little bit more tinted with a little bit of yellow on the bottom
of these clouds. We'll mix a really light
yellow and just come in dry brushing and
see how that just blends in really
easily, visually. Isn't that neat?
And there you have it, four beautiful cloud
scape paintings. Now once you wait till it's dry, you can peel off the tape. I like to peel directly in
the opposite direction so it comes off really clean. Or pull straight up
at a 90-degree angle. Again, so it's really
clean and it's less likely to tear the paper. This part is
oddly satisfying too. There you have it, four beautiful
gouache skyscapes. Meet me in the last
video to wrap things up.
9. Final Notes: Congratulations! You made it to the end. I hope you're proud of yourself
because I'm very proud of you for making it through
this entire journey with me. Thank you all for joining
me in this class to learn about the versatile and
beautiful medium of gouache. You can take the techniques you learned in this
class and apply it further in more of my classes about painting with gouache. I hope this class has provided you with
the skills necessary to explore your
artistic expressions and create beautiful, stunning pieces of work. In this class, you'll
learn about the Tea to Butter Method
of consistency, brush control, painting
flat, seamless, abstract shapes, painting
beautiful seamless gradients, dry brushing, and a step-by-step on how to create a
beautiful cloud skyscraper. And hopefully, how to
pronounce "gouache". Please share your paintings with us in the project gallery. I love to see your process
every step of the way. Remember to keep practicing, seeking feedback, and exploring
the world around you. Congratulations on
completing this class and I hope to see you soon. Goodbye!
Mary Ann, what do
you think of my paintings? [CHICKEN NOISES]
You like them?
[MORE CHICKEN NOISES]
 Ann Shen, Illustrator & Author