Transcripts
1. Introduction: What is a gesture anyway, and why is it so important
in figure drawing? How do you even begin to
find gesture in a pose? If you've ever attempted
to draw an action pose, but it ended up
looking really stiff. That's because it didn't
start off with gesture. In this series of lessons, you will learn how
to see sketch and apply gesture as the first
step in any figure drawing. My goal is to show you
all night techniques and tips on how to master
the art of gesture. I'm your instructor for Lu, I'm a figurative artist and
founder of wind Canvas. I've been studying and drawing
figures for over 20 years, learning from master artists and practicing from live models. I'm passionate about
teaching because I love helping my students
achieve their goals, like getting into the art
school of their dreams. And I believe figure
drawing is one of the fundamental milestones
and learning art. Because when you're able to confidently draw a
figure out of your head, you can draw
practically anything. The next set of lessons we'll go through the methods
of finding and sketching gesture lines and
look at a variety of ways gestures can be interpreted from scribbles, two silhouettes. I will guide you step-by-step
and draw along with you in a series of timed poses. There will be two additional
time to practices at the end for you to try
out independently. And by the end, you will have drawn over
50 gestural figures. And don't worry, these are super quick 12 minutes sketches. If you've never tried gesture
drawing or speed drawing, you are in for a treat. It is exhilarating
and a lot of fun. Even if you're a beginner, I'm excited to see what
you create at the end, so please show your artwork
with our community. See you in class.
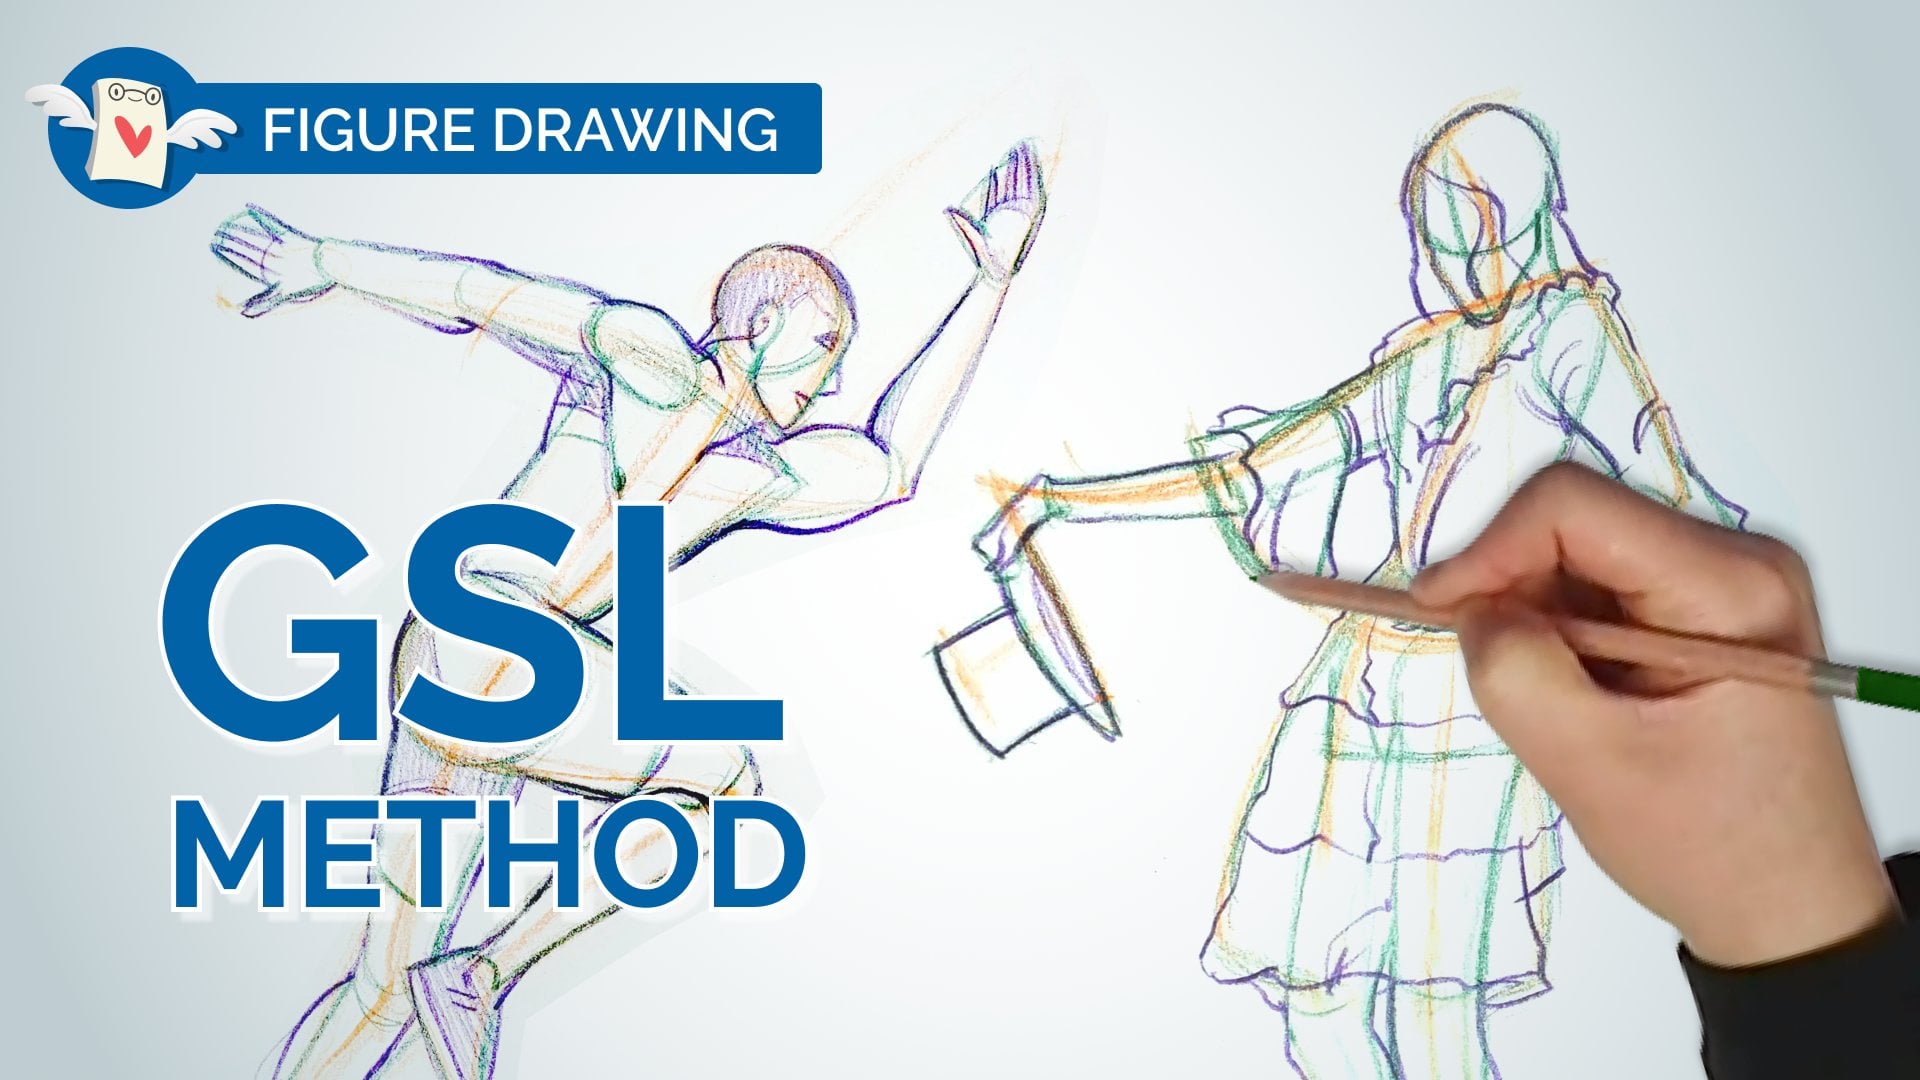
2. What is Gesture Drawing?: Let's talk a little
bit about gesture. The one thing that
we want to avoid doing today don't draw all of the bumps that you see in the gesture phase is not
the place for these bumps. A lot of times what people
will do is they will start a drawing and then they'll put all these details
in there prematurely. And that actually does
not serve you well, it actually backfires because you notice the
figure on the right. The figure on the right
is, has very smooth, almost like very gentle
curves and corners that are, that are illustrating
the flow and the action of the figure
and not the detail. Okay, so please, please
keep this in mind. No bumps. This is just an example of how animators
will draw gestures. As an animator,
you're really focused on how the body is
telling a story, like what the body is doing
is less relevant than what type of emotion is
this body expressing? And how is that
crucial to the story? So you can kind of
see there's not many details and a lot of the gestures are
quite exaggerated. For example, if you
look at this part here, you can kind of see this
circle here is probably the knee of the model and then this part here is the foot. But why did this person
draw the knee as a circle instead
of a bumpy knee? While it's probably describing
one part of the cylinder. Just take a note of how simple your drawings can actually
be in this stage, where we're just looking
for simplicity and we're looking for a very basic, either shape or curve or
a combination of both. So some gestures
really lend itself well to being
contained in a shape. If you look at this one, or if you look at this one, these actions are
more shape-based. So that means that if you come across a pose and
you feel like Okay, if I draw a triangle and I put this person inside
that triangle, that's going to help
me contain the shape. Then do it that way, because
not every single pose is going to require the
same type of gesture. Some gestures are very
long and straight, such as this diagonal. And some gestures are curved like illustrating the
curve of the spine. And then some gestures lends
itself nicely to shapes. These are some demos by
an artist named Alex Wu. He's an animator for Pixar. And you can kind of
see these gestures are all shaped based
gestures as an animator, if you're thinking
about a body as just a shape and how that
shape is moving and shifting. It's really important
to be able to separate the person that you're animating or the
character from the background. Animators will always
think in silhouette. And today we're gonna be
practicing silhouette drawing. So these are some examples
of silhouette drawings. So you might use a sharpie or a colored pencil and just draw a solid shape and then
lines on top of it. I wanted to show
you different types of lines that you could use. This artist is working
in a very geometric way, kind of finding
this triangle shape at this loose triangle shape, and then sort of using straight lines to carve out all of the
different elements. So if this is a
style that you like, try it out, see if
that works for you. All it is is shapes, some gentle shading, and
then some lines on top. These are some of my gestures. When I do gestures, I like to work with curves, especially when I'm drawing like a dancer or like a female. So here you can see my gesture. So my first line,
if you look at it, you can actually see it and
you can see that the gesture doesn't always match my shapes. Sometimes like here, it's really describing the front
of the ribcage, whereas this line is describing
the back of the ribcage. So sometimes your gestures
might inform your drawing, but they may not be as accurate as you intend,
but that's okay. As long as you have the
gesture to work with, you can modify it so
that it works for you. These are some of the
two minutes silhouette. So you can see the two
minutes silhouettes are all shape base. I do want you to notice that these shapes overlap each other. They're not outlines, they're actually
overlapping shapes. This is a different
style of gestures. This is kind of what the
scribble gestures look like. It's just a very messy drawing, but you can still see that
the lines described the form. So if you're interested in
trying scribbled gestures, please try it out
today you should be trying out all
different ways of drawing. These are some more
of my gestures. I think these are one minutes
and some more gestures. These are also
silhouette drawings. The drawings at the bottom here are using negative shapes. We're gonna be using
positive shapes and negative shapes and combining them to get
the perfect silhouette.
3. One Minute Gestures - Guided Drawing Lesson: Today what we're gonna do is we're gonna be doing
a lot of gestures. This is just an example
of some of my gestures. These are one minute drawings. We are going to draw
as fast as we can. You only have one minute. So you are drawing
very intuitively. You got to trust yourself. And we're going to be
just loosening up. These gestures are
just exercises. Once we have the gestures in, then we're going to work on building shapes and proportions. If you are very comfortable
drawing with a pen, then I would suggest using a colored pencil
because then you can kind of overlap your drawings and they
don't look really messy. Like I kind of did some in purple and then I
did some are red. And even though
they're overlapping, you still see them
as separate figures because there are
different colors. Plus, it looks really
good in your sketch book. If you're still learning
and not super comfortable, then you can use pencil. You can also draw digitally. And then we're gonna work
on drawing silhouettes. Silhouettes are the
key to drawing things accurately and also the
key to drawing proportion. And silhouettes are very easy because instead of
thinking about, okay, I'm gonna draw a figure, I'm going to draw the outline. Don't focus on the
outline at ball. We're going to focus on squares, triangles, rectangles, circles, very basic geometric shapes that make up these very
realistic silhouettes. Let's start with some
one-minute gestures. If you guys are not
familiar with gestures, it's like one line, okay, So if you can only draw one
line to describe oppose, what would that one
line look like? We're just going
to think of that. They are not drawing the figure, we are only drawing the action. So when you are drying, these just kind of look
for curves in the body. So typically when
somebody is standing, they have like an
S-curve in their body. Then I'll draw the
shoulders and the hips. And then I start
to draw the arms. I tried to keep
things very fluid. Try to keep it like
kind of fluid. If somebody was saying, Oh, you're just
drawing stick people, you would say Yeah, you're right, except
they're not rigid. Stick people, their
fluid stick people. You can see I'm really drawing the action
and then starting to build up some
of those shapes. When you have a
figure like this. And it's really not clear
where their body is. Try to imagine what
their body looks like and then also start
to draw the shapes. In Tennessee, her dresses like a cone-shaped, they swim around. I'm gonna draw her shoulders. What's really important
are the angles, the shapes, the action. Sometimes gestures
are more shape-based. And other times gestures
are more linear based. If somebody is spread out, they're probably
more linear based. And in here she's wearing
a big fluffy dress, so it's more shape-based. Think about that as you
draw these figures. This girl here you
can see her head is sticking out a little bit. Look for that
S-curve on standing figures to give them
lots of movement. I'm going to draw her shoulders, her hips, which
are very obvious. If you look at her dress, you can kind of draw all
the horizontal shapes. Look for the bottom
of her feet and draw the gestures of the
bottom of her feet. Kind of where her foot. It's how it anchors. Really try to exaggerate the
pose as much as you can. You can reference my drawing. If you're lost at all. Feel free to reference mine. For this one. There's a very straight
angle here with the gun, so I put that in first. And then I'll put in
the rest of my shapes. The rest of the popes. Sometimes you can find
really cool alignments like I can align her gun
with her foot here, makes a triangle shape. This whole time I'm
looking for shapes. I'm really looking for how to interpret
those shapes. After. You'll notice that I
put the head in last. The reason why I put the
head and last is because I can nail the proportions a lot easier if I've
worked big to small. So some people like to draw the headfirst and
sometimes I do that too, but I tend to make the
heads too big when I draw them too early. Really going to exaggerate
that curve of her pose. Pay attention to where her
arm and her leg relate. Sometimes I'll draw an angle to double-check my figures
and see if it relates. In this case, you wanted
to make sure that both of her feet are on the same plane. You can also draw an arc of her arms so that you can a check that they
are the same length. Then if you see a
bend in the torso, try to put that bend in almost
like a like a pillow case, how it's bending on one side. Here we have another
bulky figures. So this one you might
want to draw the head first because it's
like a helmet, which is very obvious. And then you can kind
of ask yourself, okay, how many heads can
I fit in this body? And then use that to help you with the other
parts of the gesture. So this one is very
much shape-based. It's almost like a
square shape here. I'm looking at the negative
shape in between the legs. Then I'm going to the arms. Gun. Kind of like the
tilt of the helmet. Remember work big to
small and do not outline. Try to draw a stick figure that represents the figure except
it's a dynamic stick figure. It's also okay if your gestures
are a little bit messy. You really want to pay attention to make sure that you get those shapes right and
the relationships right? You always want to be
relating the arm to the leg. Here I'm gonna draw a kind
of like a secondary shape. We're not really
worried about outlines. We're not worried
about in anatomy. What we're really
looking for is action. Here. Her action is very
obvious to me in a VAE, kind of like a long v gesture. Her head is a little bit higher. If I draw the shape of her head. And then you can also put in her torso
here as just shapes. Shape for her dress. Look at the negative space that is created
in-between her hands, between her arms, I should say. We're gonna keep going. We're gonna do two more. This figure here,
you can see she's standing straight up and down. But if we want her
to be more dynamic, Let's change the angle
of her shoulders, an angle of her hips, which are usually the
opposite of her shoulders. Just just to give a little
bit of a tilt in the torso, little bit of
compression on one side. I always say like try to draw the gesture of the
feet as well because the feet will inform the pose how the
weight is distributed. If he can also draw the
angle of her, her face. That's also in the last one. This guy has a really big
head for some reason because, because he's leaning
forward a little bit, he does have an awkward pose. We're kind of looking
down at him. Again. You'll notice that
sometimes I'll draw the arms as just a curved line. Because that curved
line will really emphasize the gesture
of everything. One thing I could probably draw his leg as
one curve as well. Okay. Alright guys. So we're going to pause
there that was ten.
4. Two Minute Gesture - Guided Drawing Lesson: Let's move on to two
minute drawings. We're going to focus
more on shape. So we're going to draw the gesture and
then we're going to add on to the gesture with shapes with two minutes. If you want to use different colors for the
two minutes, that's fine. Or if you want to use
your pencil again, for example, for the two
minutes, don't brush. Think about how you want to
communicate your gesture. Try to keep I know you
guys are drawing shapes. But again, like instead
of outlining that arm, try to draw the arm
as B1 fluid line. Here, I'm drawing it
as one fluid line. Over here. There's more of a
bend like that. Then think about
how her torso is kind of going back into space. She's got her weight
on one leg here. She's looking down. Let's draw the shape
of her head like this. Then she's holding something. So let's draw the gesture
of what she's holding. This is what you would
want to do in one minute. If you can capture that in
one minute, That's good. Innocent gesture. That's enough information
for you to add more detail. I've got 30 seconds left. In the thirty-seconds, what
I want to do is I want to communicate which direction
her head is facing, so it's facing down. Draw that and then I can
start to draw in her arm. Now I'm going to
draw in the shape of her arm long that gesture, the shape of her hand. Number to see if you
can find that S-curve, that nice S curve in her spine. Kinda see that her body
is tilted a little bit. You can see that her hips and her shoulders mark where you think the hips and her
shoulders are up long. Her gesture, because that way it's going to be very clear. You've already figured out where her, her proportions are. And then I'm gonna focus on drawing the shape of her dress. Kinda see her but
comes out here. Then her address is pretty
geometric. Overall. Her arm makes a triangle shape that you can draw in the shape of her torso and
then her neck and her head. If I drew her head last, I have better control
of the size of it. Once you have that
arm shape drawn in, then you can divide it up
into secondary shapes. But you never just want to
draw her arm like this, like you don't want it. You don't want to do that. You always want to draw them as individual shapes
added together. Let's see what we have
for the next one. Okay? This one, it's
like a Cat Woman pose. So you can really see that
exaggeration here in the body. So try to exaggerate that
curve as much as you can. Sometimes it's like a fairly
complex gesture like that. Once I draw the shoulder
in and the hips in, everything will make more sense. Then I'm gonna draw her arms. Her arms you can almost
draw as one fluid shape. Fluid. It like that. Then you can kind of
draw the torso as like one side is very elongated and the other
side is compressed. This ad her head on last. And then once you
have the arms in, you can always draw
them on afterwards. Like you can always turn
them into the shapes. Follow that gesture. If you spend too much
time trying to draw the outlines of the
arms and the legs. Then it's very hard
to draw these poses from imagination because
you really want, you can imagine a stick
figure very easily. But it's very hard
to imagine all of those different
shapes of the limbs. Instead of thinking about them as just like
a cylinder shape, I'm going to give her a
little cat ears here. Okay? Alright, so for this woman, if you want to draw her gesture kind
of straight up and down and then maybe like kind of
like a shape for her legs. Flat at the bottom. They fit into this
triangular shape here. Her body is fairly square. This is a very
shape-based gesture. I draw her arms in like this. Notice how long
her, the neck is. In a very simple way of
drying or deconstructing. This form is just very, very simple shapes like that. Then you can kind of add in some more details
and you can draw the contours of her towel. Whatever it is she's wearing. Patient. Then if you can see
a little bit of her foot, you can just draw kind of like the underside of the
foot in one of that, one of those gestures in. And then if you have more time, you can put some more details
around your gesture lines. I hope like after
seeing my process, I hope it helps you. When you're drawing these
things on your own. I hope it helps you
kind of think about how to make it easier for yourself. Okay, cool. We got
an upside down one. So one of the things I might do first is I might
draw the angle of where I think his two legs
are and then turn that into a shape like a fan shape. Then in-between that fan, There's the smaller fan, which are his shorts. And then from there
I can kind of get his spine shape and then continue that
down to his hands. I can draw in his head. So you can see,
usually start with the biggest shapes first. Also draw like a
secondary curves. Kind of find where
his legs bend. They're all together. Again, you want to work your
shapes around your gesture. And what we're really trying
to do is we're trying to capture the pose and
capture the proportions. Everything else is just
icing on the cake. Like I made his legs
a little too short. So whenever you have a pose like this and it's very vertical, don't try and your gesture to vertical because it's going
to look really, really stiff. So try to put a little bit of a curve in that
gesture if you can. Even if you have
to exaggerate it, it just makes your figures
look a lot more dynamic. Here I've kind of captured
her walking pose. And then I'm going to try to draw her top of her shoulder. It's like the bottom
of her coat here. And then her body is
one big long shape. You can draw it in
as one simple shape. Maybe mark where you are, the hands are in
relation to each other. Sometimes I draw
horizontal line like right across so that I
can match them up. She's looking straight at you. Even though her body is
tilted off to the side. I think that's
important because it captures it was really well. I hope you guys are
feeling that that two minutes feels like a lot of time compared to one minute. I noticed that her her feet
are on different planes, so I drew it angle
that aligns both feet. Okay, so for this one, try to see that S-curve and the way you'll really see
it as like ask yourself, where is the weight
of this person? Is which, which leg is
carrying the most weight? And you'll be able to spot
that S curve a lot faster. Kinda see her
body's very square. So I'm going to use some
square-shaped to capture that. Her hips are very tilted. Even if you just kinda drew
the shape of her hips as like a simplified
form like that. It does kind of capture
her pose very well. Sometimes I'll draw
just the shape of the hand just to get
an idea of how big it is because your hand is roughly
the size of your faves. Once I have the hand in
this hand is a Fist. Her hand was opened. It would be about the
size of her face. Sometimes if you
have some extra time and you just want to capture some more of the
essence of the pose. You can put in some
folds of the clothing. You know, I just
kinda suggest some of the folds to further
emphasize the pose. And kind of like the stretching and compressing certain areas. I started randomly with her
shoulders here because that's the most tilt that I see. When I draw gestures. It's very intuitive
like generally I'll draw the spine first. Kind of build on and draw
the shoulders and the hips. But like the process for
me is very intuitive. It's different
every single time. It depends on the pose that
you're trying to capture. It's not always
the same process. I think gestures, even
though they seem easy. And you can capture in a minute. A lot of the times we forget
about drawing gestures, especially when
we have more time with our figure drawings. When you have like an
hour to draw a figure, what we tend to do is we tend
to default to outlining. What happens when
you do that is you lose the entire
integrity of the pose. And even though
your figure looks pretty similar to
the photograph, it looks kind of stiff. And it's really hard to kind of go back to it if you didn't
start with a good gesture. Just cleaning up
my smudges here. I think I can fit this last
girl in here in the corner. It's true that this one's interesting
because if you look at one side of her pose,
it's very straight. In this case, like I
would kind of mark or her hand is for her legs, are that triangle shape that's in the negative
space in her legs. You don't even need to
draw exactly what she's holding or any of those details. You just want to kind of draw in lines that represent
those ankles. Just the very basic shapes. That if I colored
in these figures, they would look very
much like silhouettes, very much like
accurate silhouettes. This is gonna be the last one. I hope that it's easy compared to the
first because it's a little bit more time.
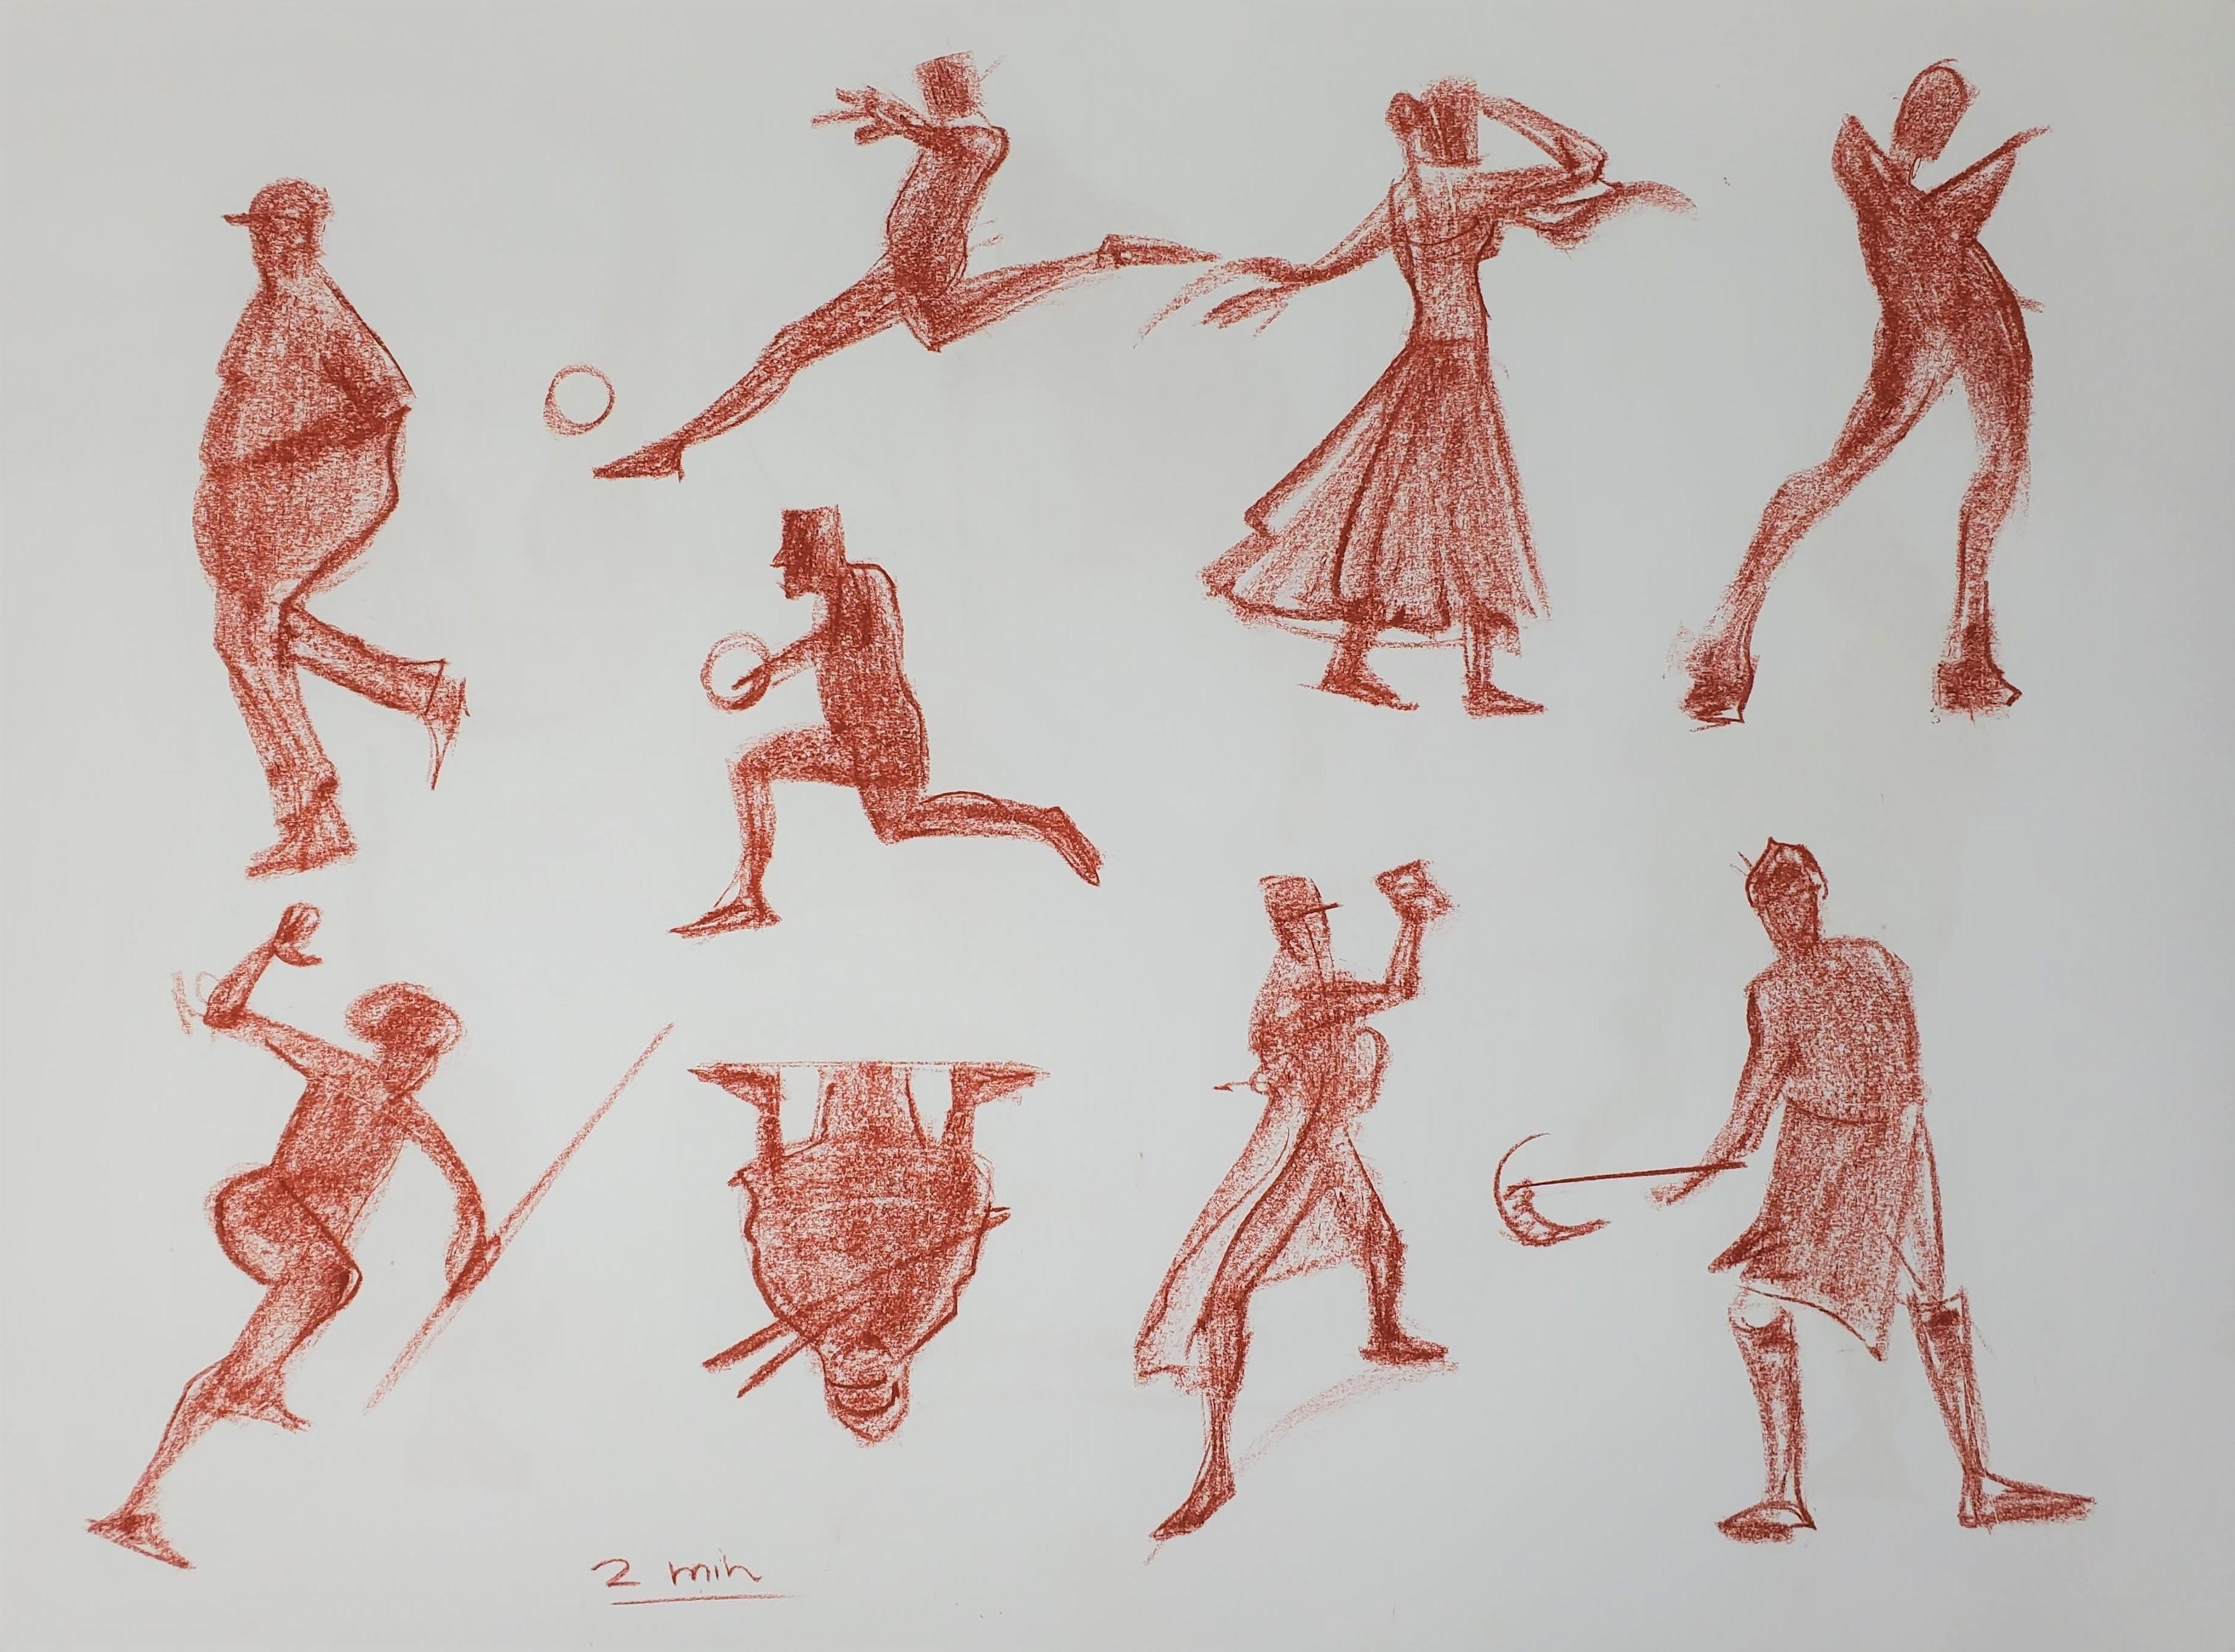
5. Two Minute Silhouettes - Guided Drawing Lesson: This guy has a very
interesting silhouette, right? He's like very round. So for this guy, he's very straight up and down, but I would draw like
a very gentle curve, a curve like this. He has a lot of mass. He's kind of like a pear shape. I'm going to draw like a pear-shaped or like
a teardrop shape and then try to have one of
his legs drawn out first. I'm just going to imagine
what his foot is doing here. That is. And then his other leg comes out behind it is important
to draw different types, like different types of bodies. Because not everybody
looks the same. Even though we all have
the same skeleton. Bodies can be very,
very different. So for him, his head is like he doesn't
really have a neck. Then here because you
can't really see his arm. I'm gonna put his arm in and make it just a
little bit darker. And then try to
fix his silhouette for this one because the
ball is part of the story, you can put it in. The ball is there. And then his leg comes
out straight like this. I'm trying to figure
out what his story is first and the legs and how
it connects to the ball. And then put in the hand. Then that very
straight body shape. It's almost like you
have to draw what you see when you squint. And it's always better
to make legs a little bit too long then a
little bit too short. Sometimes people have
very square heads and you can just draw
that with one stroke. If you're using chalk. Then if you have time, once you're done your shape, you can add some line around it. Now I'm going to make his legs, his feet a little bit bigger. So try not to cut
off his feet here, try to make it up. You can see his face
is very square, so I'm just going to
draw it as a square. I want to try to simplify
the shapes much as possible, but also capture the motion. You can do that by adding
little bit more of a gesture, more of a curve on your gesture. So you notice that the head and the body is skewed like this. His neck is sticking out. Holding the ball here. Try to make both of the
legs the same length. I made his ankles
too thick here too. But I'm gonna try to make his thighs a little bit
thicker to compensate for. You can see like my shapes
are still really simple. They're slightly exaggerated. You can slightly exaggerate
your fingers if you need to. Starting with the
gesture at the top. So come down this way, draw in that triangle shape. Makes sure that
the triangle shape the same length as her torso. If it helps to
outline those shapes, you can do that first
before filling them in. Then if you're
drawing flowy fabric, you can kind of try
it with just like a twist of the chalk
is that works for you. I always like to run
the chalk up and down to capture that drapery. Just the folds in that drapery. When you can't see hips, you have to make sure
that they make sense. Imagine them behind that dress. Then add-on her head last and maybe like
a little bun shape. Okay, so for this one, I'm gonna make a conscious
effort to make sure that she is not going to fall over. So I drew this one curve here, but I want to make sure that I figured out where
the top of her body and I'm looking down at her were her other leg
goes out like this. Exaggerate that pose. Drive his torso shape. Then the shape of the legs. Sometimes you can block in
the shape loosely with chalk or with your drawing
tool and then go back in and add
those lines later. What you want to
do is you want to exaggerate the pose as
much as you can and just make sure that
your proportions are your central focus. This one's a little
bit tougher because there's just so much
going on under the Cape. So just draw him
without the cape. Try to draw his pose
without that cape, you can see his
silhouette a lot better. You might want to
focus your eyes a little bit so that you just see his silhouette and you don't see too
much of the detail. It's his hair shape is very interesting. So make sure that
I captured that. Makes sure that the hand
is the size of the face. Take some time, did
put on some lines that might help with
that silhouette. After you're done. The shape, the sounds like a bat like
he's completely upside down. It's very symmetrical. Sometimes it's fun to draw
references upside-down. This case I'm just going to draw a shield shaped like this. Then his head is very similar
to that shield shape. Then draw in the
lines for his feet. So then draw into
triangles like this. Kind of connect
them and just keep those ankles really,
really thin. You can add a little
bit of detail in line. I might give him a couple
of weapons or something so that it makes a silhouette a
little bit more interesting. If you have problems
with proportion, focus on those silhouettes. This guy again, let's
just focus on his body. Try to imagine what his body
is doing behind his clothes. I know it's a little
bit hard here, but I try to draw
in his gesture, find the alignment of his foot and his other
foot is back here. He's gotten a twist
in his torso. I am drawing his clothes, but I'm gonna try to make
it a little bit less dark. Draw any visual cue or visual clue that's
going to help you identify what he's doing or
the pose or the storyline. Especially if you're
going into illustration. This is why you draw figures, is because you'll
need to learn how to draw them in different
poses in a convincing away while exaggerating the pose and telling a story with
very minimal strokes. This one's nice and easy. Nice, lean. Try shoulder line. Like the gentle curve
Is arm here this way. And then figuring out where these shapes
go, how they relate. If you're simplifying
like male faces, you can just kind
of draw a sketch in there because a lot of
male faces are very, very squared in with even if you just have
the legs like this. Once you know how to draw legs, you can fill them in after and it'll still look
pretty believable. Usually the top of the calf is a little bit thicker than
the bottom of the thigh. This is true for hands
as well as feet. That's it for our
silhouette practice.
 Winged Canvas, Classes for Art Nerds