Transcripts
1. Introduction: Hi there creative.
My name is Shannon. I'm an artist and a teacher
here on Skillshare. And if you've taken
any of my classes, you know that I'm all
about making bold, vibrant art that
anyone can create, whether it is with brush pens, watercolors or even on the iPad. In this class, I'll
show you how to create Galaxy lettering
in Procreate, using simple tricks
and techniques to blend color add a drop shadow, create a glitter outline. And finish your piece with a starry background so that
by the end of this class, you'll have your
own vibrant piece to share as your class project. This class is beginner
friendly and perfect for anyone who enjoys digital
art or lettering. You can hand that
to your own word, use a sketch provided, or even try these techniques
on a font Iprocriate. As for the supplies,
all you need is an iPad along with his compatible Apple
Pencil, the Procreate app, as well as the brushes and resources from the project
section of this class. This is a fun and
relaxing project that you can create
in one sitting. So if you're ready to make some lettering that's
out of this world, grab your supplies and I'll
see you in the next lesson.
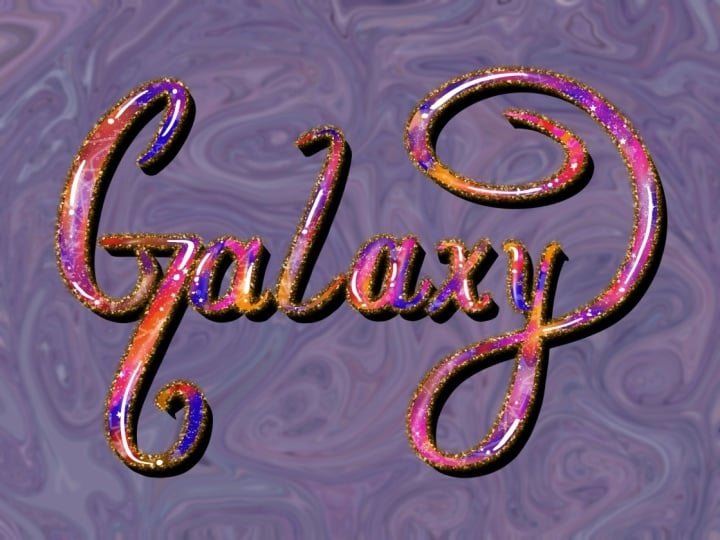
2. Galaxy lettering in Procreate: To get started, you're
going to create a canvas of your desired size. Then use the six B Pencil from the Procreate
Library to write out the word that you want
to add this effect to. Or you can import the sketch that I shared
in the class resources. So once you're finished
with your sketch, you can lower the opacity of that layer and create
a new layer above. Then use the brush pen to
write out the word in black. And I want my word to be very large and it's going to
take up most of the canvas. I find that just to
make things easier, you can zoom out a bit, and it is a lot easier to
write a larger word this way. Of course, one of the beauties
of Procreate is that you can use the selection tool
to move around things, or you can double tap on the
screen to undo a mistake. And if needed, you
can completely erase everything and start over until you get your
letter in how you like. If you're using a font, you can skip this step and simply type out
the word in black. Now, before we move
on to the next step, I would suggest that you
rename your layers as you go. This will just make things
a lot more easier to follow as we start to add
shadows and outlines. So the first layer
is the sketch layer. Then the next layer is going to be the base
lettering layer. And then I'm going to
create a new layer on top and I'm going to clip
it to that base lettering, and it is going to
be called colors. Then use the monoline
brush to add any colors that you want to
use in your galaxy lettering. I'm going to use blue, purple, pink and white, and I have added the exact color palette
in the resources section. So again, if you want
to use exactly that, you can download
them from in there. There is no specific way
to add these colors. You're just trying to
color the entire word, and you don't want
any black spaces, and I'm adding them
very randomly. A The next step is to blend these
colors together. So you're going to select the
smudge brush and then use the watercolor brush from the painting brush set in
the Procreate Library. Then just lightly blend
the colors together. You're not really
trying to create anything too smooth
or realistic. You want there to
be a little bit of just texture and
color transition. A Once you're happy with your color, it is now time to work
on the shadowing. You can do this by duplicating the base lettering layer and I'm going to rename the one
at the bottom to shadow. Then duplicate that layer again and the one that is the
bottommost shadow layer, you're going to select
it and then pull it away from the lettering in the direction that you
want your shadow to be. Then you're going to head
to the layers panel and pinch those two shadow layers
together to merge them. This is the first part of
our drop shadow effect. The next step is to fill in
the white spaces in between these two shadow layers by either dragging and
dropping color from the color circle in the upper
right corner or you can use the selection
tool by selecting automatic selection
and then color fill and tapping in the white areas. You may find that some
spaces are not connected, and I'm going to show you how to deal with that in a minute. But first, if you take a look at the
end of this letter S, you will see that
there is some black, so I missed some spots. So to fix this, I'm
going to go back to the color layer and then just add some more color to any areas that are black that
I may have missed. Then if needed, just slightly smudge them into the
rest of the colors. The third way to
fill in any parts of the shadows that
cannot be filled with either the color drop or the selection tool method is to just color in the
shadow manually. Switch back to the
monoline brush and then just use it to fill in the shadow and also any areas where the shadow is not connected to the letter, you're going to draw a line
following the shape of the letter until it
connects to the shadow. A And then once you think you're ready, you're going to look
at the shadow layer on its own just to see if
you've missed anything. So to do this,
you're going to hide the layer with the
base lettering. This will help you to see
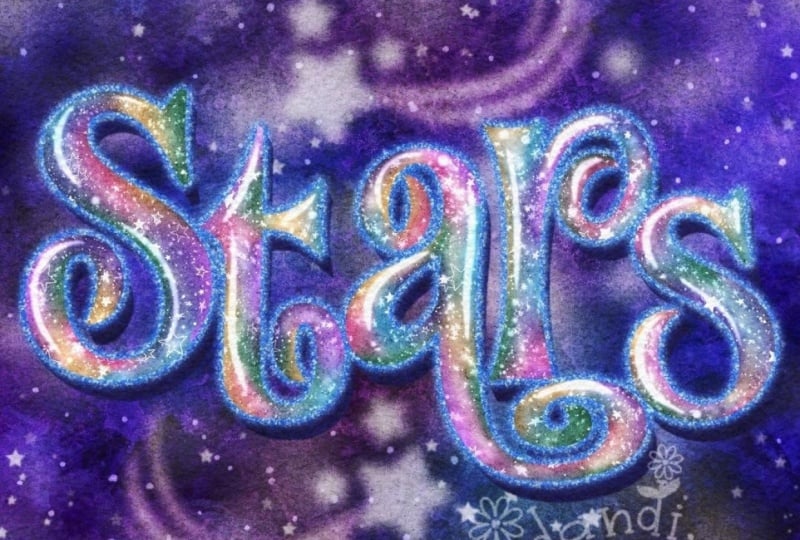
any areas that you missed. I Create a new layer above your color layer, and you're going to create
a clipping mass and use the starry night brush and white to add some stars
across your letters. Feel free to play around
with the size of the brush and also the opacity to have some stars be lighter or darker. And you can also use
the star spray brush to add a few more finer stars to certain parts of the letters. Once you finish
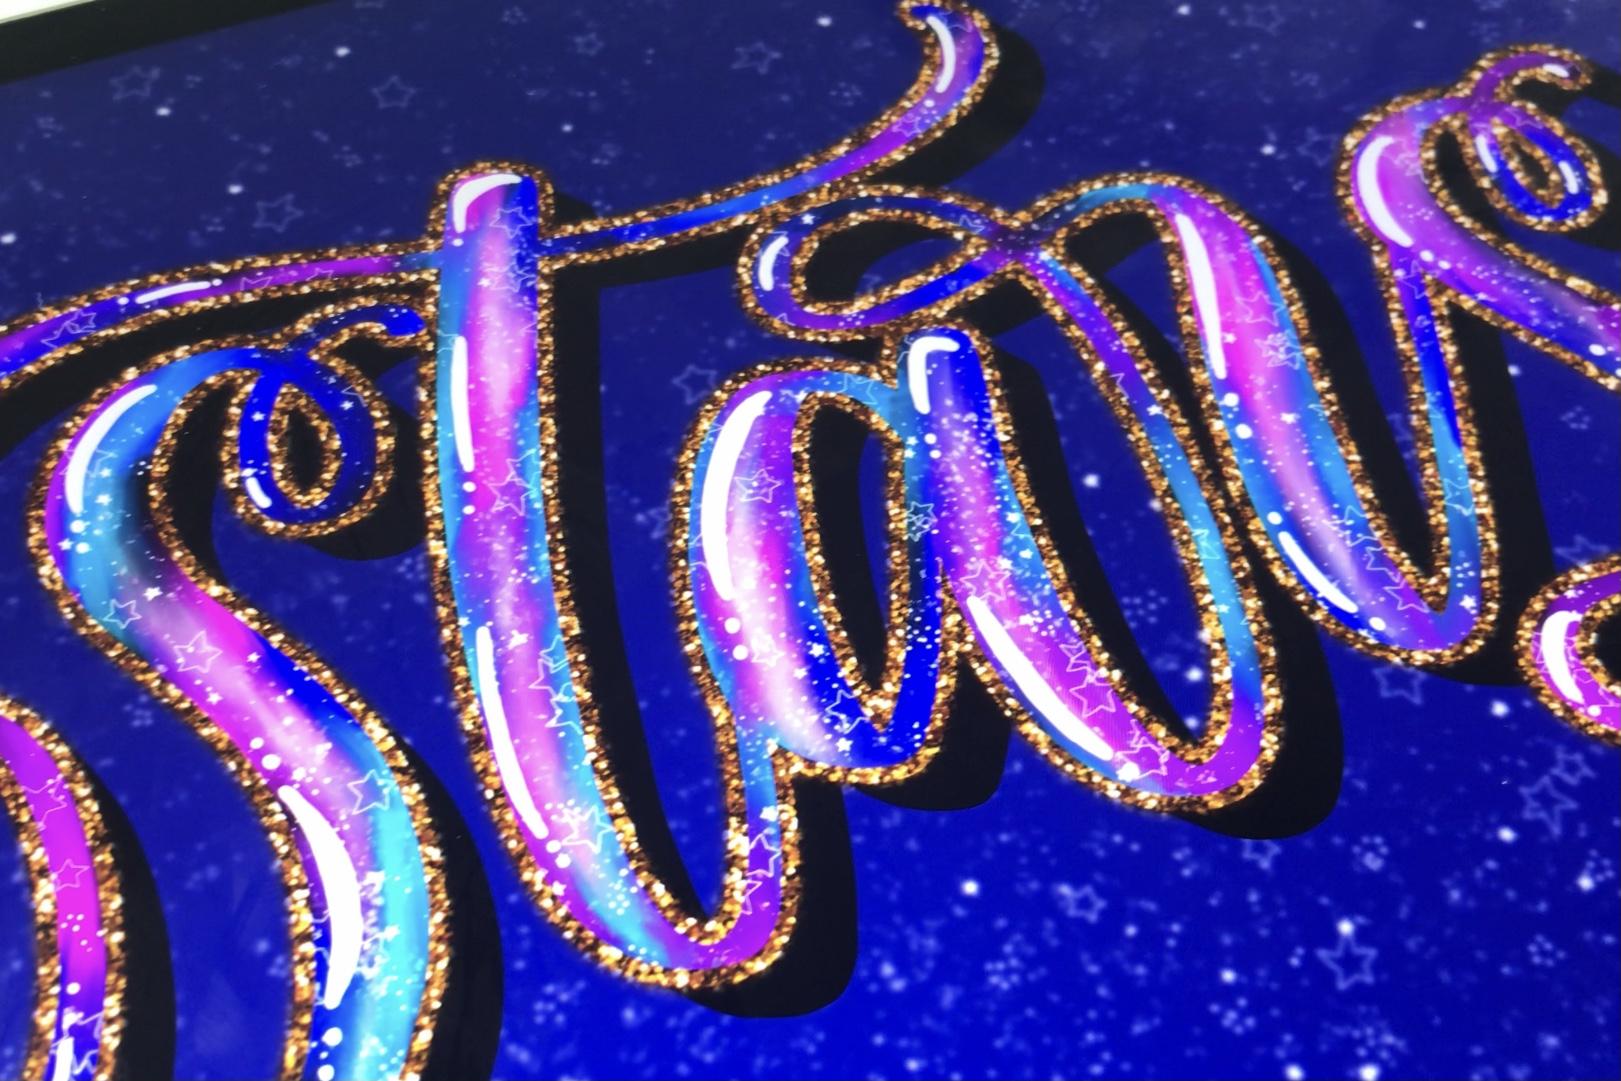
adding your stars, it is now time to
add the outline. And to do this, you're
going to duplicate the base latering layer again
and the one underneath, you're going to
rename it to outline. Then you're going to tap
on the layer thumbnail and tap invert so that the outline
goes from black to white. Then you're going to go
to adjustments and do a gaussian blur and you're
going to blur until you start to see some of
the white showing up over the shadow and behind your lettering and to
make it even bolder, you're going to duplicate
that outline a few times until you get it to the size and the boldness that you want. Once you're comfortable
with your outline, you can then merge all of
the outline layers together. And another tip is to
change the color of your background so
that you can see how the outline looks
around the entire word. So now we're going to add
some life to this outline. And to do this, I'm using a gold glitter texture from a free stock photo
site called Unsplash. And I have the Unsplash
app on my iPad already. So I've just opened
it next to Procreate, and then I'm going to drag the glitter texture
into Procreate, then clip it to
the outline there. If you have the glitter texture downloaded onto your iPad, simply import it as you would any other image and clip
it to your outline layer. Then to finish the lettering, I'm going to add some
highlights using the monoline brush and white on a new layer
above the stars. I'm adding this highlight in the upper left corner
of each letter. This is the opposite of
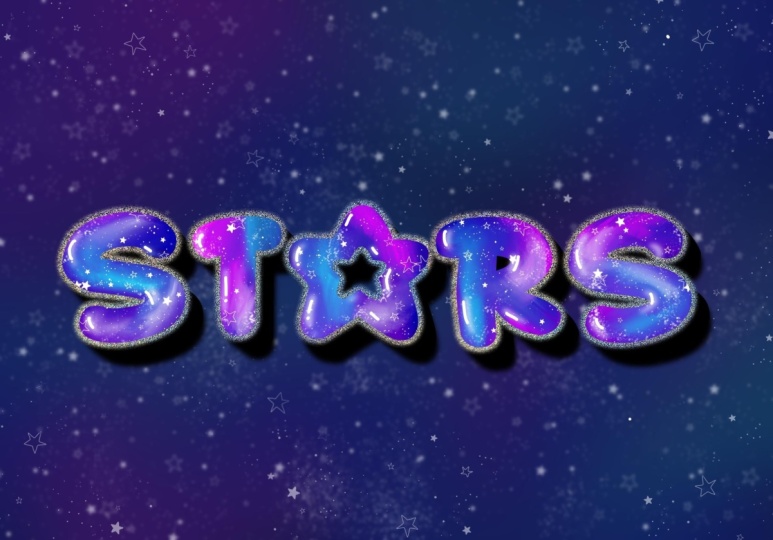
wherever your shadows are. The final thing we're
going to do is add a background and some stars
behind the lettering. This will help to create
even more depth in addition to the highlights and the shadows that
we've already added. So I just went for
a darker blue, and I'm using the same brushes that I use to add the stars inside the letters and creating a new layer above the background
and adding those stars. You can add a Gaim blur
to take away some of the sharpness of the stars and also to make them
appear further away.
3. Wrap up: And that is it for
your galaxy lettering. I would love to see your
project simply head to the projects and
resources section of the class and upload
what you've created. Feel free to follow me on my Skillshare page
so that you'll be notified of any new classes
that I have coming up, and be sure to leave a review, sharing your thoughts
on the class so that others can
know what to expect. Thank you so much for joining me today and I'll see you
in the next class.
 Shannon Layne, Lettering, Procreate & Art