Transcripts
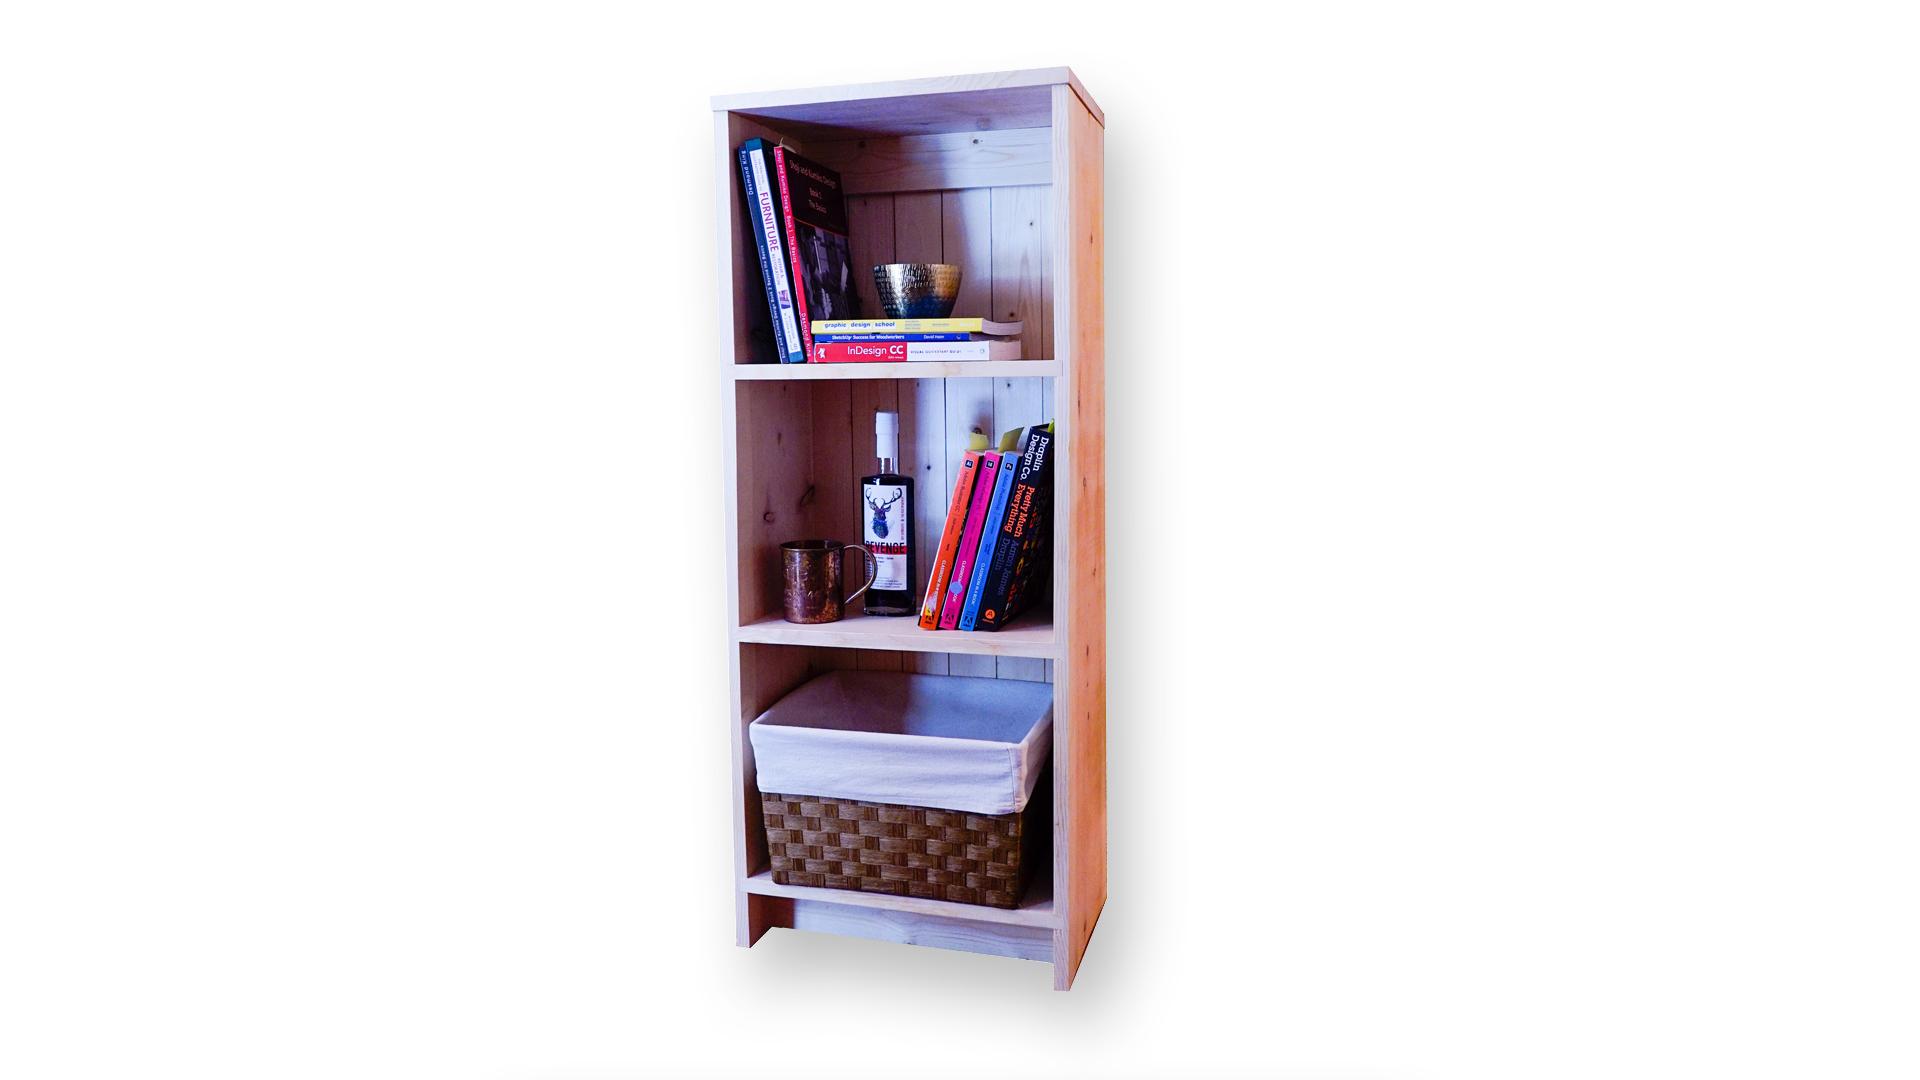
1. Introduction to the Shiplap Bookcase: A skill share. I'm austin Waldo with the Austin School refer Richard. I made this bookcase and you can make it to I've been working in some form or fashion for most of my life. I'll use that experience to walk you through this simple but fun furniture making project step-by-step. In this course, I'll show you everything that you need to know to make this same bookcase. This course is great for beginning woodworkers, has it only uses a few tools in the wood is easily accessible. This project may be simple, but it's packed full of great furniture making tips, many of which I use in my own custom furniture. You can expect to learn about buying dimensional lumber, machine safety, cutting basic gyri, creating a ship lap, and using fasteners. This project revolves around the table sauce. You definitely need one to complete the bookcase project. You will also need a writ blade, dado blade, a miter saw, a few clamps and screws, a drill and drill bits. After completing this course, you will walk away with the knowledge and competence to make your own ship lab bookcase that will look great. How's your favorite books? And last three years to come along with a six part video series, you're going to get a set of measured drawings and written instructions to help guide you through the project step-by-step. Alright, let's jump on in and make a ship lapped bookcase.
2. Section 1 - Project Introduction: So let's jump right in and start by talking about the plans. Along with the videos and the written instructions, you're gonna get a set of plans, the measured drawings. Within the plans, you're going to have a list of parts so that's lettering them so you understand which ones are which. As you go through the plans, each page is going to show either the dimensions of the piece as a whole or an individual part. Those are also lettered and correspond with the cut list. So you'll want to familiarize yourself with these plans before you ever get started. Take a moment, look at them. Get a good idea of how the Joiner he's going to work. And we'll definitely be getting into more detail as we go along through each part individually. But you're going to want to start by familiarizing yourself with the plans. Start by looking at the dimensions page. You want to make sure that this bookcase is actually going to fit where you want it to fit within your house. There's a page, it's all about the sides. This is one of the more complicated parts. It's going to involve some datas and some rabbits, which we'll get into in a little bit more detail towards the end of the project. The top shelf TO kick and Naylor are all very, very simple. And then the ship lab, that's also going to be a little bit complicated. But we've kept it simple to where they are all identical. So you're essentially making six of the same piece. On the last page is the cutlass and then some areas for your notes. So this cutlass is essentially what you want to take to the tool that you're about to cut the piece on so that you always have your measurements within arm's length. So you can rip that off, take it with you, or you can fold it over and take your whole plans with you. So familiarize yourself with the plans and familiarize yourself with the cutlass before you get started. To complete the bookcase, you're going to need a table saw, either a rip blade or a combination blade, as well as a dado blade. You will need a miter saw. You'll need at least six clamps, wood glue. You're going to need some screws. One and a quarter and one inch will do. You're going to need a drill and drill bits. I used a 764 spit and a one-quarter bit on my bookcase. You're going to need a quarter-inch Dell or some sort of would to plug your holes. You're going to need a way to sand your bookcase. So an orbital sander, or if you want to do it by hand sandpaper will do. There are a couple optional tools. Having a flush trim saw is very handy, and having a pocket hole jig is going to be handy as well. And that's really it. That's all you're going to need. The tools or simple for this bookcase. Let's talk a little bit about the materials. So for this project, we're going to be using dimensional pine. It's going to be available at most big box stores. Some lumber yards will also carry it. Generally, if you're buying lumber from a big-box store, it's gotta be a little bit more expensive, but it's already going to be milled for you. So in this project we're not actually going to be doing any Million. When you buy dimensional lumber, lumber that's already cut to the dimensions. It's going to be a nominal width and length and thickness, meaning it's not really what they say it is. So this is a one by four, which is actually 33 eighths by three-quarters. This is advertised as a one by 12. And it's, you know, well 113 sixteenths. So keep that in mind that when you buy dimensional lumber, It's not what it's advertised. There's a lot of rough cutting, a lot of shrinkage that happens with dimensional lumber from big-box stores. You have to design within those dimensions so that it still works out for what you're making. That is one reason that people don't buy from big box stores and they buy a rough SON lumber is they mill it themselves. So they always get flat boards at the right dimension. I hand picked these. They're relatively flat, the relatively straight. But sometimes when you're buying from a big-box store, they're going to be a little wonky. So keep that in mind when you pick the boards out, you want to check them for how straight they are. Are they cupped, are they bowed? Pick out the straightest ones you can. To complete our bookcase, we're going to need 31 by four by eight pieces of pine and 21 by 12 by eight pieces of pine. So there's not a lot of material that is needed for this bookcase. And the parks are very simple as well. So that'll really help us keep things organized. It doesn't make the cost all that high. So we've talked a little bit about the plans, the tools we're going to need, the cut lists, the materials the table saw. Now it's time to get started. This is the fun part. Let's cut some material.
3. Section 2 - Table Saw Basics: Let's talk about some table saw basics. This is a table saw and so it's called a hybrid saw. So it's kind of in-between. A high-end cabinet table saw, a professional one, and a smaller mobile contractor saw right in the middle. This will work fine. Most likely, any table saw that you have in your home shop is going to work fine. You will need a few accessories that we'll discuss here in a minute. But let's talk about what a table saw is, what it does, and how to be safe on it. So a table saw is essentially made up of a base, some sort of top, a fence that rides on rails that should be parallel with each other, and then a motor that spins a blade. So the main purpose of a table saw is to rip long pieces of wood. You have two types of cuts that you can do, a rip and a crosscut. So generally, the table saw is the best tool for ripping would cross-cutting can actually be very dangerous on this unless you add a few extra accessories. One of those accessories is something like a miter gauge. So this rides in this groove here to help you safely cross-cut. Another fixture that can help you safely cross-cut wood is cross-cut sled. So here's an example of one. They can get very fancy, very big. Lots of holders were not going to be using this. We're going to keep it simple with a miter gauge, but this is also a very handy way to keep the table saw operation nice and safe. So the fence on the table saw moves in and out across the table. When it gets to a narrow point between the blade, it's not very safe to run your fingers over this area. There's not much room for your fingers to be safe. So you'll use something like a push stick, some sort of push block to help you do that operation safely. When it comes to table saw blades, there's lots of different kinds. They have different teeth. They're indifferent increments around the blade. We're not gonna get into that much detail. Most of what we're going to use would be a combination blade or a blade, and then also the dado blade. Let's talk about the data blade a little bit. So this is a dado stack or a dado blade. It is made up of a series of blades that get put together to make a much, much wider blade. The combination blade that's in here right now is about an eighth inch wide. This one goes up to seven eighths, so almost one inch wide. That blade can help you make grooves or called datas are rabbits in your wood for joining. We'll get a little bit more into the setup and how to use this blade in a minute. But let's talk a little bit about table saw safety. For a lot of people that table salt can be very intimidating. I don't want to say that you should be afraid of it, but I would rather say you should respect it. It can be a little scary at first and it can hurt you. But if you do things properly, if you're not distracted, if you're not doing anything unsafe, then the table saw can be a very safe and very versatile tool within your workshop. So to understand how to be safe, I think it actually helps to understand how the table saw works. So we talked a little bit about the base. There's a motor inside that spinning a blade. The blade is spinning towards you. So the operator is here. The blade is spinning this direction. So if it was to throw a piece of wood, which is called kickback, it's going to throw it this way. It's going to throw it directly at the operator. So you might think, well, that just means you should stand completely out of the way. And generally speaking, that's what you want to try to do. You don't want to stand directly behind the blade. But what ends up happening is people will sacrifice safe footing and good posture to be completely out of the way. That is problematic for a number of reasons. Because if you end up reaching over the blade, that's not safe either. If you slip because you're leaning, that's not safe. So you want to be up close against the rail out of the way of the blade as much as you can, but still have good footing. You can safely operate the machine. So keep that in mind that you generally don't want to stand directly behind the blade, but you also wanna make sure you're in a good, strong, safe postured position to be able to push the wood all the way through. Table saws are all going to have a fence that rides on two parallel rails. If this is not parallel to the blade and perpendicular to the rails, that can also cause issues. You don't want it to pinch at the back of the blade that can throw it. Most table saws are going to have something called Arriving knife. That is to help the would not pinch after it's been cut. If it pinches on the back of the blade that can also throw it. When you are using something like a dado stack, we will remove this thriving knife. So we'll be using the dado stack later. We'll set that up. We'll remove this at the side. If we do recipient again, we're going to put that back in. When you do move the fence closer, you're not going to leave yourself with much room here to move your fingers passed safely. So you're going to want to use something like a push stick or some sort of push block to help you move the would pass the blade in a safe way. Your momentum should always be towards the back and against the fence. You don't want it coming off the fence that's going to give you a wavy cut. It also can climb over the blade and get thrown. So you want to try to push the wood in a slight diagonal. So you're keeping pressure up against the fence while moving past the blade safely. Also, when it comes to safety, you should always be wearing your PPE, your safety glasses, your ear protection, a dust mask, and you should have some sort of dust collection with your tool as well. Keep herself distraction free. Make sure what you're doing is very safe. And you'll be able to use this tool for a long time and it'll be very, very valuable and versatile to you.
4. Section 3 - Cutting Your Parts: Start by getting the one by four boards and cutting them to 43 inches. You will need 643 inch boards. Once you're done with that, lightly write SL on the ingrain that stands for ship lap. Next, grab one of your one by 12 boards and cross-cut two of them at 43 inches. Don't forget to label them as well. To remaining one by 12, Ford will be making the top the shelves and we'll be using a cutoff to make the Naylor and the toe kick. Go ahead and cut your top at 18 inches, three shelves at 17 inches, you should have a cut-off, a leftover piece of wood that is about 27 inches long. This is going to become our Naylor and our TO kick cross-cut the entire cutoff at 16.5 inches and set it aside, will be ripping that later. We are ready to rip or boards to their final width lend table saw now, the first cut will be on our ship flat boards. Go ahead and raise a blade to be slightly higher than the board you're about to cut. So that's three-quarter inches, maybe a 16th above that. Set your fence to cut three inches wide and rip all the ship blackboards. Go ahead and set those to the side. They're done for now. Don't move your fence quite yet. It's already set correctly for the next part. Grab that cutoff that we cross-cut earlier, can rip to boards at three inches. These are your toe kick and your Naylor boards. These are two different parts, but they're exactly the same in terms of their measurements, so they're interchangeable. We will move on now to the sides. Move the fence and rip your side boards to 11 inches and set them to the side. The shelves are next. They need to be ripped at ten and a quarter inches. There's not Nin joiner E on the shelves, so these are completely done. Well, we've cut everything to the final width and the final length. We did so on the chop saw and the table saw. And now they are their final dimensions. And we're ready for the fun part which is cutting the joint R3. One thing that I might note now that you've probably already noticed that top says it needs to be 12 inches wide. Well, it's a nominal boards, so it's only 11.5 or something like that. So just leave it in the width that it is from the store. If you have something that is wider, 12 inches is going to look really nice to have that little overhang, but we're just gonna leave it as is and not worry about it. These are my parts. The one top, the three shelves, blow TO kick and mailer, two sides, and the six individual ship flat pieces. So these are now ready to either be set aside or for the joint R0. So the parts that are completely done are essentially the top and the shelves. The Naylor and the toe kick, the ship flat pieces in the sides are going to get some additional joint three. We're gonna do so on the table saw with that dado blade that we've been talking about.
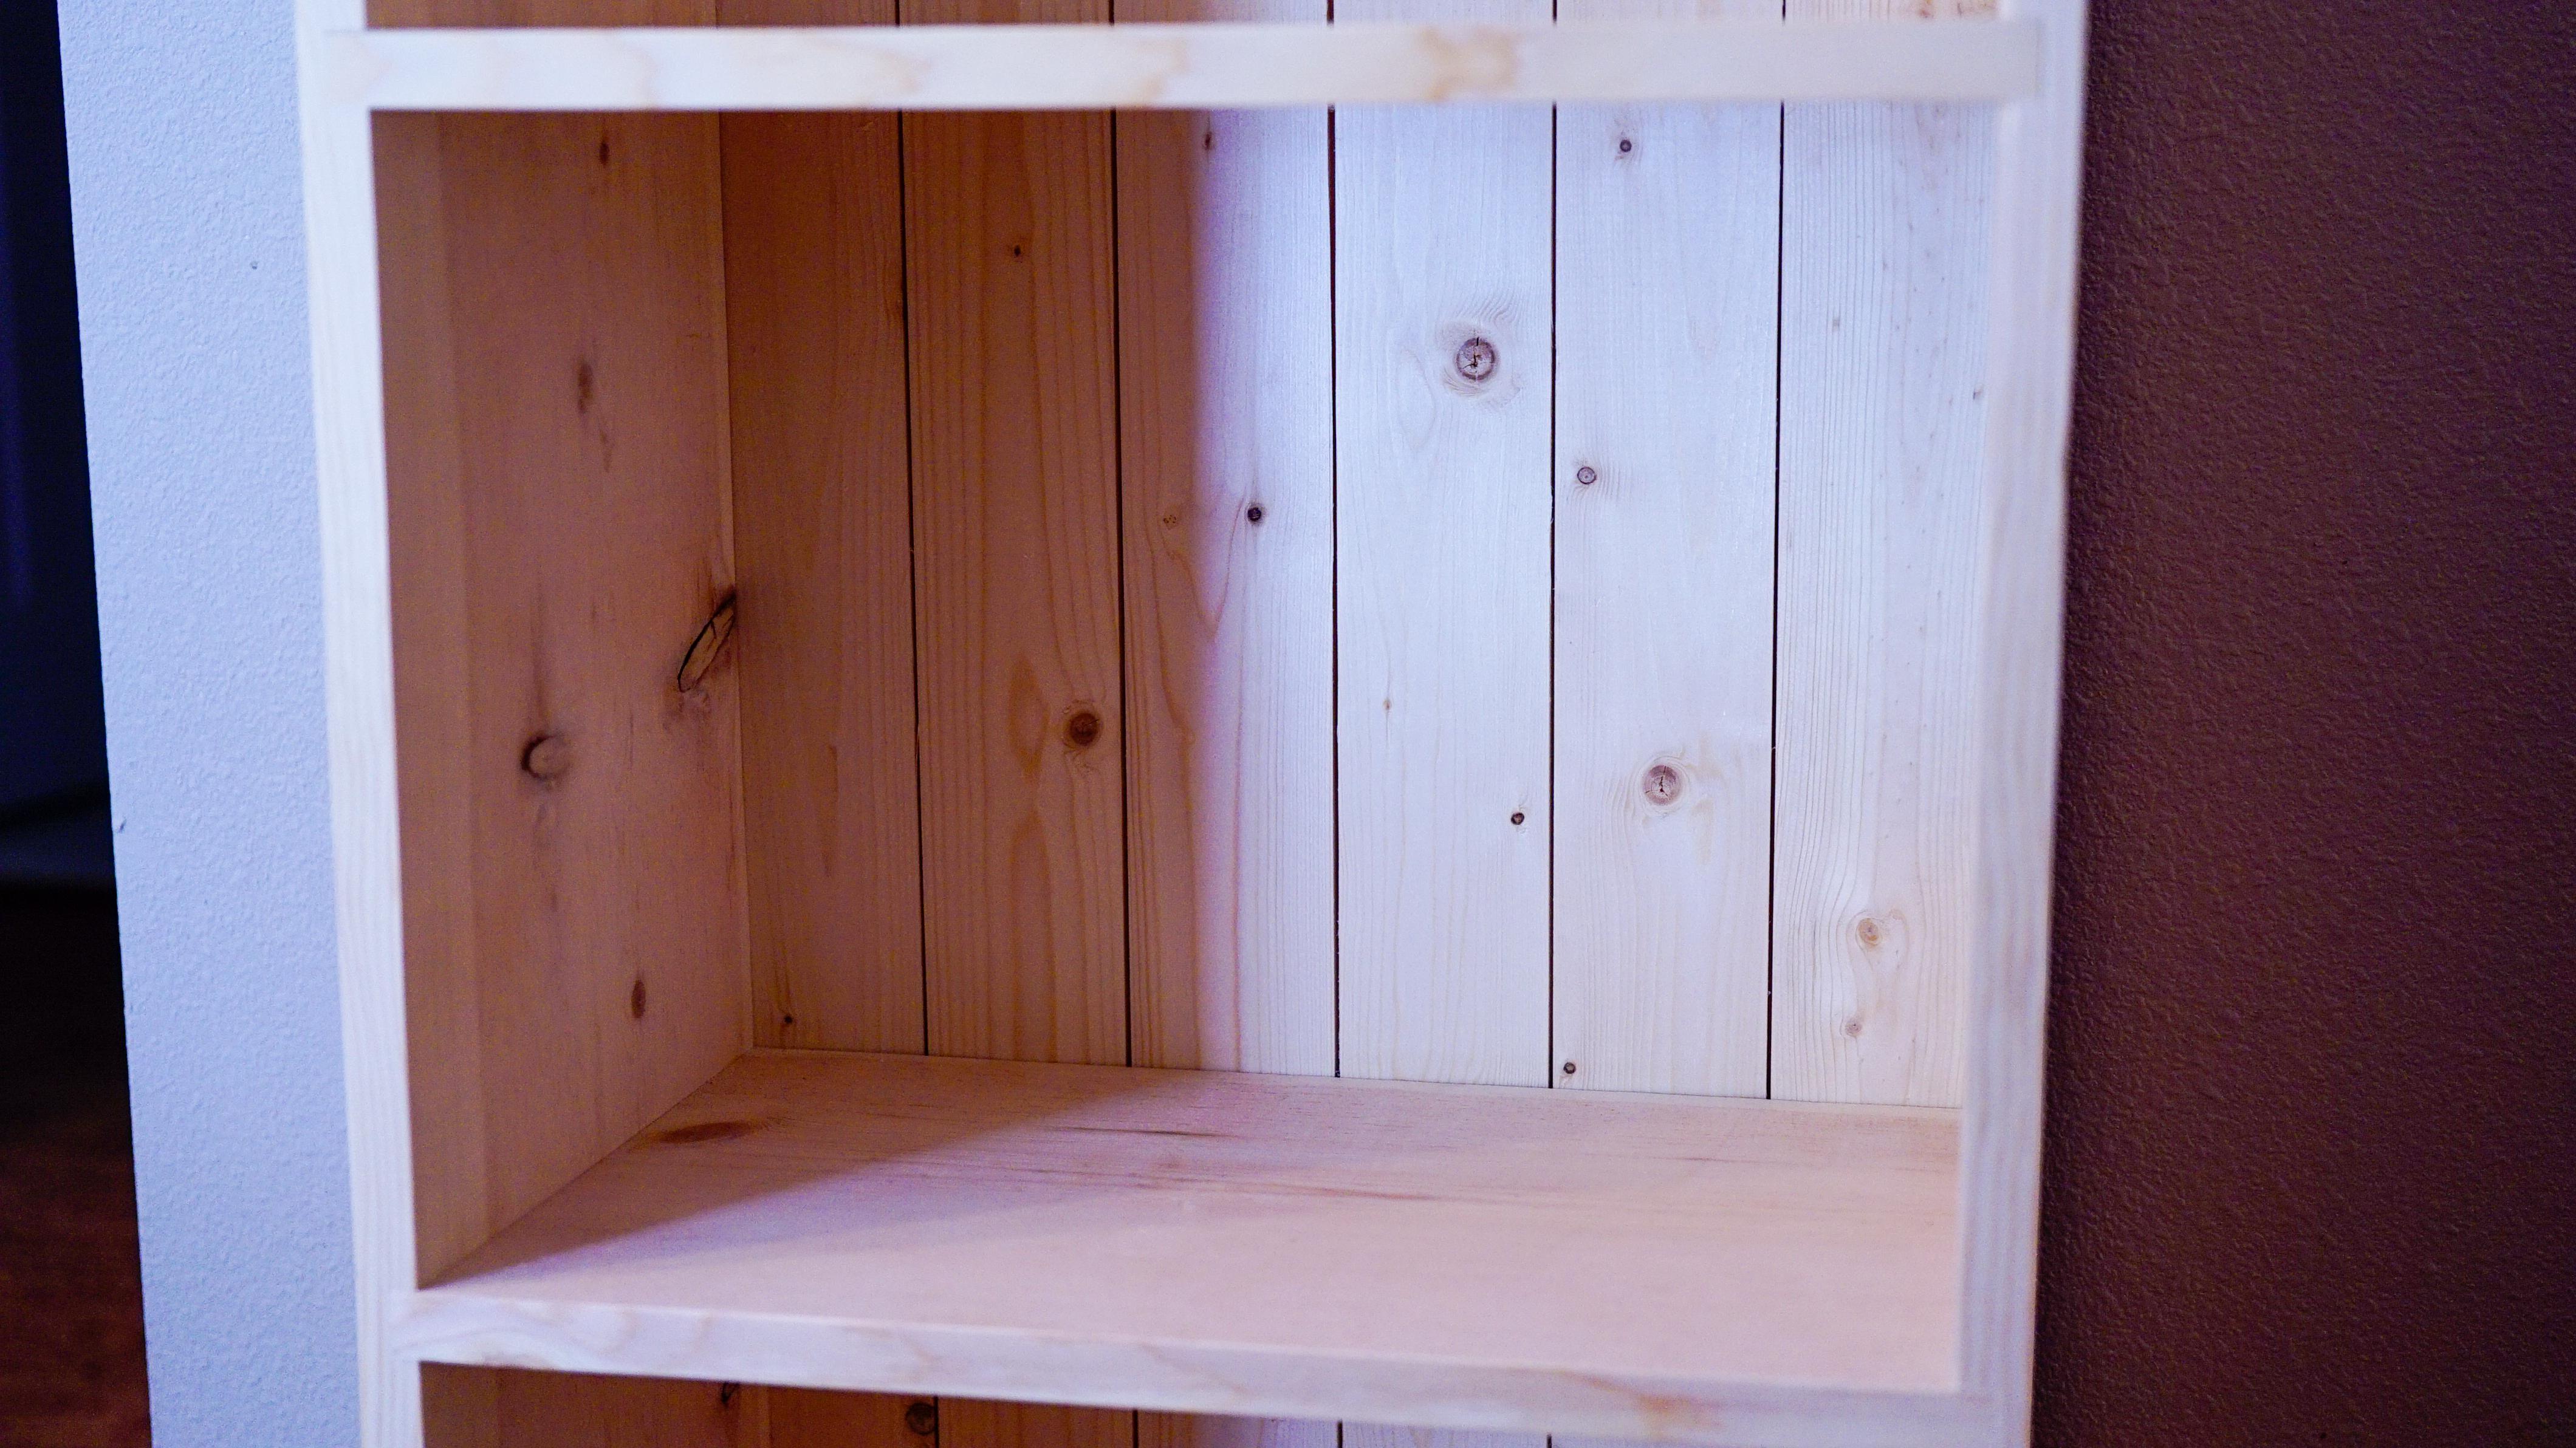
5. Section 4 - The Bookcase Sides: We're ready now to start on the sides of our bookcase. This is where we're going to want to decide on some design or aesthetic decisions. So top, bottom, outside, inside, things like that. This pine is relatively uniform. I am seeing a few more, not on one particular side, so I'm gonna go ahead and mark them for inside, top and bottom. And then we'll be able to start laying out our joint R3. Now that we have our parts marked, you're going to want to take a close look at the plans to really understand what's happening with the joint. So essentially, the back of our bookcase sides is going to how's the back of the bookcase which is going to be the ship lab. So we have to cut that joint R3 and then we have the joint R0 for the top shelf, not the top, the top shelf, middle shelf, and the bottom. We also have to cut that. So if you look close at the plans, you're going to see 123 horizontal grooves, then vertical grooves on the back. The horizontal grooves are going to be the same for the sides, but the vertical grooves are going to be different. That's because of the ship lap. They're going to have different types of joints on opposing faces. And as they go across the back of the book case, we have to have the joiners to receive that type of joint. So the left side and the right side will be different. That's why it's important that even though we've marked our board's top, bottom in and out, we also need to look at what's the left side, what's the right side? They're going to have different joint hurry. We need to keep mystery. So left and right, we know that the horizontal grooves called the dado, those are going to be the same for both of these, so we can make that and then we can move on to the different joints. It's going to be three quarters of an inch wide or whatever the thickness of your material is, that may not be three-quarters you're going to want to measure for that and then set your dado stack accordingly. I'm ready to set up my dado stack. I've unplugged my machine. I'm going to raise the blade all the way up, unscrew it, take-off that blade, and then switch to the data. I'm removing the arriving knife. We won't need it for the data stack. Make sure you don't drop anything down into your table. Saw, it's very annoying. They get everything back out. Grab your dado stack. Start by taking a look at your chert. Figure out what is the width that you're aiming for and what you're going to need to get that width. For this particular brand, I'm gonna need two blades, three shippers, and two of the 16th inch spacers. So these are the blades. There is a left and a right one. Usually it's indicated by the decals. Makes sure that T3 pointing towards you. These are the spacers. And none of those look like a 16th of an inch, so there's probably are not the right ones. So the shippers are kind of a part of a blade. You wanna make sure that you space them so that they're not going to hit the other teeth. Looks like we got some thicker spacers here. Okay. 16th of an inch to those. Recommend loosely tightening the nut. So pushes all the blades together. The thing kind of give it a full turn around, make sure nothing's really going to hit the actual teeth. That looks pretty good. Then you can tighten it down. So we're gonna lower this all the way back down. I'm going to use a bigger throat plate. This is the original plate and this is a wider throat plate that's made for a dado blade. That's the one I'll be using. Now our blade setup and ready to make some grooves. At this point, I'd recommend actually using a piece of scrap wood, making a groove, testing it with another piece of scrap wood to see how it fits. So that's actually what I'm going to start with. Ready to cut some grooves. But I want to test everything first. I want to make sure we get our height correct. Which for the sides and the horizontal data's we're shooting for half an inch that's held deeply, want to go. So you can get a small six-inch ruler. You can get a small tape however you want to do it. And we want to measure to see that this half an inch. Once you have the groove, you can then also measure that and you can sneak up on it and get as close to half an inch incrementally. So right now it's looking like it's pretty close to half an inch, maybe a little high, over down a little bit. You want to find the apex of your blade sinner. Once you have about half an inch, lock it down. So I'm going to cut a groove with my miter gauge across the width of one board. And then I'll check the thickness with the other board. Just to practice, you can make a little mark. That's what we're going to aim for. And we'll line it up, pull it back. And then we're going to plug in the machine, the dust collection, and it will make a cut. So there's my groove, according to the chart, it's three-quarters of an inch. Okay, so that's actually a little loose. We want to be able to pick up the other board. So what's this probably means is as the thickness of these one by 4s is not actually three-quarters of an inch. So if we want to try some of the other material, C, that's better. So one thing that is very problematic about buying goods from big-box stores is not super consistent. So this would be a good thickness for this, but the one by 4s, not so much. So since it's a little loose, I would take out one of those 1 16th inch spacers and add back in one of the thinner ones. And you'll kind of want to play around with that until your parks start fitting perfectly. And what you're really looking for is you easily with hand pressure can place the board into the groove and you're able to pick up the joint. Now picking up on the sides is much heavier. You probably don't need to be that tight. Just use your best judgment. You don't really want a whole lot of negative space there. You want to be able to easily get the Borodin relatively easily, take it back out. Ready to layout the actual data group on our sides. Now, we're going to be measuring from the bottom towards the top, which is what our plans indicate. My machines unplugged, so I don't have to worry about that. I've got my fence locked in. That's just to help me align boards. I'm going to lay them out together. I have the inside faces down. I have the outside face up on both of these and the bottom is to my right. So I'm going to be measuring from the bottom upwards and making a little mark. So I'm going to line up each board as I go and it'll take a bit of time. But otherwise you have to get into a little bit more of a tricky setup with a crosscut sled or a fence with a spacer. So we're going to keep things simple. You just can use the same miter gauge. It's gonna take you a little bit to get through all the grooves. But it's an effective way to do it. It should work just fine. So the first marked for both of these is going to be from the bottom up at three inches. So that will be the bottom of that dado grew. So get a sharp pencil and tape measure and measure up three inches. The next one is going to be 16 in five-sixteenths. Now, these measurements really don't matter. If you have a basket that you want to go in here or a Tall book, you can make the distance really whatever you want. I would keep the three inches. That's a pretty standard small TO kick for bookshelf or a cabinet or something like that. But otherwise the distance can be 2020. You're just gonna get different sizes between the shelf. So it's really up to you what you want these to be. So I'm gonna stick with the plans. Next one is 16 and five-sixteenths, and the next one according to the plans as 29 and eleven-sixteenths. You may want to carry these marks down to the bottom. Something like an engineer's square gets a little bit difficult. If you have a combination square that has some adjustability, makes it much, much easier to do so because you can change the leaf right about there. Now I can use my pencil and make sure my marks are lined up in nice and straight and visible. Quick tip, if you have a little checkmark and you want to make a line, instead of trying to move your ruler to line, put your pencil on the little tick mark. Then you move your ruler over and you know you're going to be perfect every time. Alright, I've got my lines that indicate the bottom of the dado. So that will be the right side of this since we have our bottoms facing this way. So now all there is to cut it. You're going to want to make sure that your board does not tip from the front to the back. You're going to want to have a miter gauge. It's nice and square. Sometimes you'll see a long board attached to them like a sacrificial fence that gives you a better straight edge. A crosscut sled works great for this. We're now ready to cut some rabbits on the back side of our bookcase sides. What is the difference between a dado and a rabbit? One of the sides is open, so a dado is a groove through the interior of a board. A rabbit is the same thing, a groove but on the outside, so one of those sides is open. So the rabbit that goes on the back side of our boards, I've indicated the backs of mine with a triangle here. It's a little bit complicated because there's actually two of them. And this is because the ship lap has its own rabbit that we want to be able to fit into these groups. So the left and the right side are going to be different. So pick one and look at the plans and start with that. I'm going to start with the right side. I know my back is here. You could even write back on it if you want. Both of the grooves are three-eighths wide. So you're going to want to go ahead and change your dado stack from that three-quarters to three-eighths. So 3Hz, three-eighths, Same with the right side. Three-eighths, three dates. So the right side is going to look like a stair tread. It starting off shallow and a little bit deeper. So the farthest point on the outside is going to be a half inch deep. And then you come in a little bit that three-eighths and it's a quarter-inch deep. So there's a quarter-inch difference between the 2.511 fourth. Okay. So we know we want to rabbits that are three-eighths inch wide. The first is half an inch deep, the second is a quarter inch deep. Now, the left side is different. We're on the backside here and it essentially has those flipped a quarter-inch and then it goes a little bit further in and that is half inch. So it almost have an L shape as opposed to a stair tread shape. So it's a bit tricky to keep these straight, but it's not that difficult to cut those. The way I'm going to cut those is with the dado blade. But i want for some of these cuts to have the blade right up against the fence. I don't want to cut into my fence. So I'm going to be using what's called a sacrificial fence. So a sacrificial fence, all it is is a piece of wood. For mine. I'm going to use some of these micro jig clamps to clamp it to my actual fence so that the clamps or other way, if I cut a little bit into the fence, it's not a big deal. Or back over at the table saw, but we've changed our data to be three-eighths wide. We're ready to start cutting the grooves on our right side. I've indicated the inside face, the top, the bottom, and the back of our sides. This being the right side. I'm starting with a half inch deep and then a quarter inch deep, three-eighths rabbit. So this will give us that stair tread. I have my sacrificial fence attached to my regular fence. So all I need to do is adjust this way to make sure we get it. The perfect three-eighths distance away. The first cut, there is no distance between the fence and the blade. We wanted just kissing it. So that's why we're using that sacrificial fence. So let's go ahead and set that up. All right, so it's set to just kissing it where it moves, but you can hear it scraping Just a little bit. That's perfect. So now we know the distance between the fence and the outside of the blade should be exactly three-eighths of an inch. So we want to figure out our height for the first cut. That's going to be 1.5 of an inch. So take out your ruler or your tape measure and figuring out how to get to half an inch. Now, what you could do if you have a very flat board is you could actually measure out increments on your sacrificial fence. As you move it up and down, you would be able to move it to those lines. Now if you're actually cutting some off your board, then you may end up cutting your marks off for that is a good way to do it. What I'm actually going to do to make sure I get my measurements correct is use a piece of scrap wood, measure a quarter inch and half inch on here and get it just perfect. And then I can use that to line up my blade. So I'm gonna use mellow six inch ruler and a nice sharp pencil and measure out a quarter inch and a half inch. Once you're set to the right height, double-check all your measurements. Take a look at the plans. Make sure you cut the right face. You have the right side against the fence. Otherwise, it's pretty straightforward. Now, you're not going to be able to see the blade at all. So you're going to want to make sure that your hands are in the proper place before you ever start cutting. So the danger zone is really going to be right here up against the fence. So don't push on the back of the board here. You want to have your hand over here to give me your forward motion, and then you want some downward pressure. That's where a push block will be perfect. One thing you might have noticed is the left side of the board is actually not touching table saw top. That's because this pine board has warped a little bit and it has quite a bit of a cup. If your board is like that as well, make sure that you are putting all the pressure on the portion of the board that is being cut, the part above the blade. Ready to cut our second groove, we have our first one cut. Now we're ready for the one quarter inch deep three-eighths cut. So how we get that as we obviously lower the blade, but we need to move the fence a little bit. So we need it to be moved three-eighths from where it was. So what you can do is measure from the outside tooth to the fence. Three-eighths plus three eighths is three-quarters. Once you have that set and the height set, it's the same process, super simple. We're now ready for our left side. So it's just the opposite, a quarter-inch deep cut and then a half inch deep cut. So we already have the blade height set to a quarter inch, which is good, but we need to move the fence back, so move it so that it's just touching. And then you'll be ready for your first cut. After that, it's the same process. Moves the fence over three-eighths and move the blade up to half an inch. We're just about done here with the sides. After you complete them, just leave the data stack and the table saw as the sides are done, we've cut our rabbits are datas are other rabbits. They look a bit funky right now might be confusing, but it's all gonna make sense here in a minute when we start making the ship lab. So set your sides to the side, grab the one by 3s that we cut earlier, and let's make some ship lab.
6. Section 5 - Let's Make Shiplap: Well this is the really fun and cool part. The time for the ship lap has come. This is weighs Your than you think it might be. It's essentially one measurement. The three-eighths by one-quarter inch rabbit. We already have that blade setup. All we have to do is raise it to the one-quarter inch depth. Who want to set our fence right to the edge of that. And then we cut one side and then you'll flip it to cut the adjacent corner. So what that does is kinda gives you an S-shape. Every single one of these six boards is going to be the same. Once that's done, the ship lap is done. It's just that easy and it's gonna give you a really, really cool effect, especially in put the gap between it. So head back over the table saw and let's get to it. So I did not take my own advice and leave the table saw and the dado stack as is. So you'll see me here raising the blade. I'm going to reset the fence. Since I'm cutting the rabbit on the face of the board, I need the cut to come over one quarter of an inch and cut three-eighths of an inch deep. So check your plans, make sure you have the right measurements. Do a test board, make sure everything looks good. And then it's really easy. Cut the adjacent, the diagonal corners. Cut one, flip it, cut the other side, that board's done. All of them are exactly the same. And just like that, we're done with the ship lab. If you did it correctly, you should have a groove on adjacent corners forming kind of an S-shape. And when you lay them down flat in the same orientation, all aboard should fit neatly underneath each other. If they're hitting each other, you probably need to take a hair more of a deeper cut that way you have a little bit of space there, but they're going to fit perfectly. So once you have, you can start laying them out and seeing how everything looks, picking the fronts. I've even gone ahead and kind of put my shelves into my size to see what that looks like. Put the ship flap in the back of it and done a full dry fit. Everything is looking good. And at this point we're ready to start sanding, cleaning up things a little bit before we go into the glue up. So the dimensional lumber from a big-box store is probably going to have some stickers. Hopefully you already removed all the staples from it, but get it cleaned up, get it looking good. Don't sand any of the corners yet. We'll do that after glue up. But if there are pencil marks on the inside of your bookcase, it's much easier to sand those off why it's still flat. And then after you glue it up, it's much more difficult. So go ahead and get everything cleaned up and they're gonna move into the glue up phase, which is gonna be a lot of fun. You'll really start to see the piece come together.
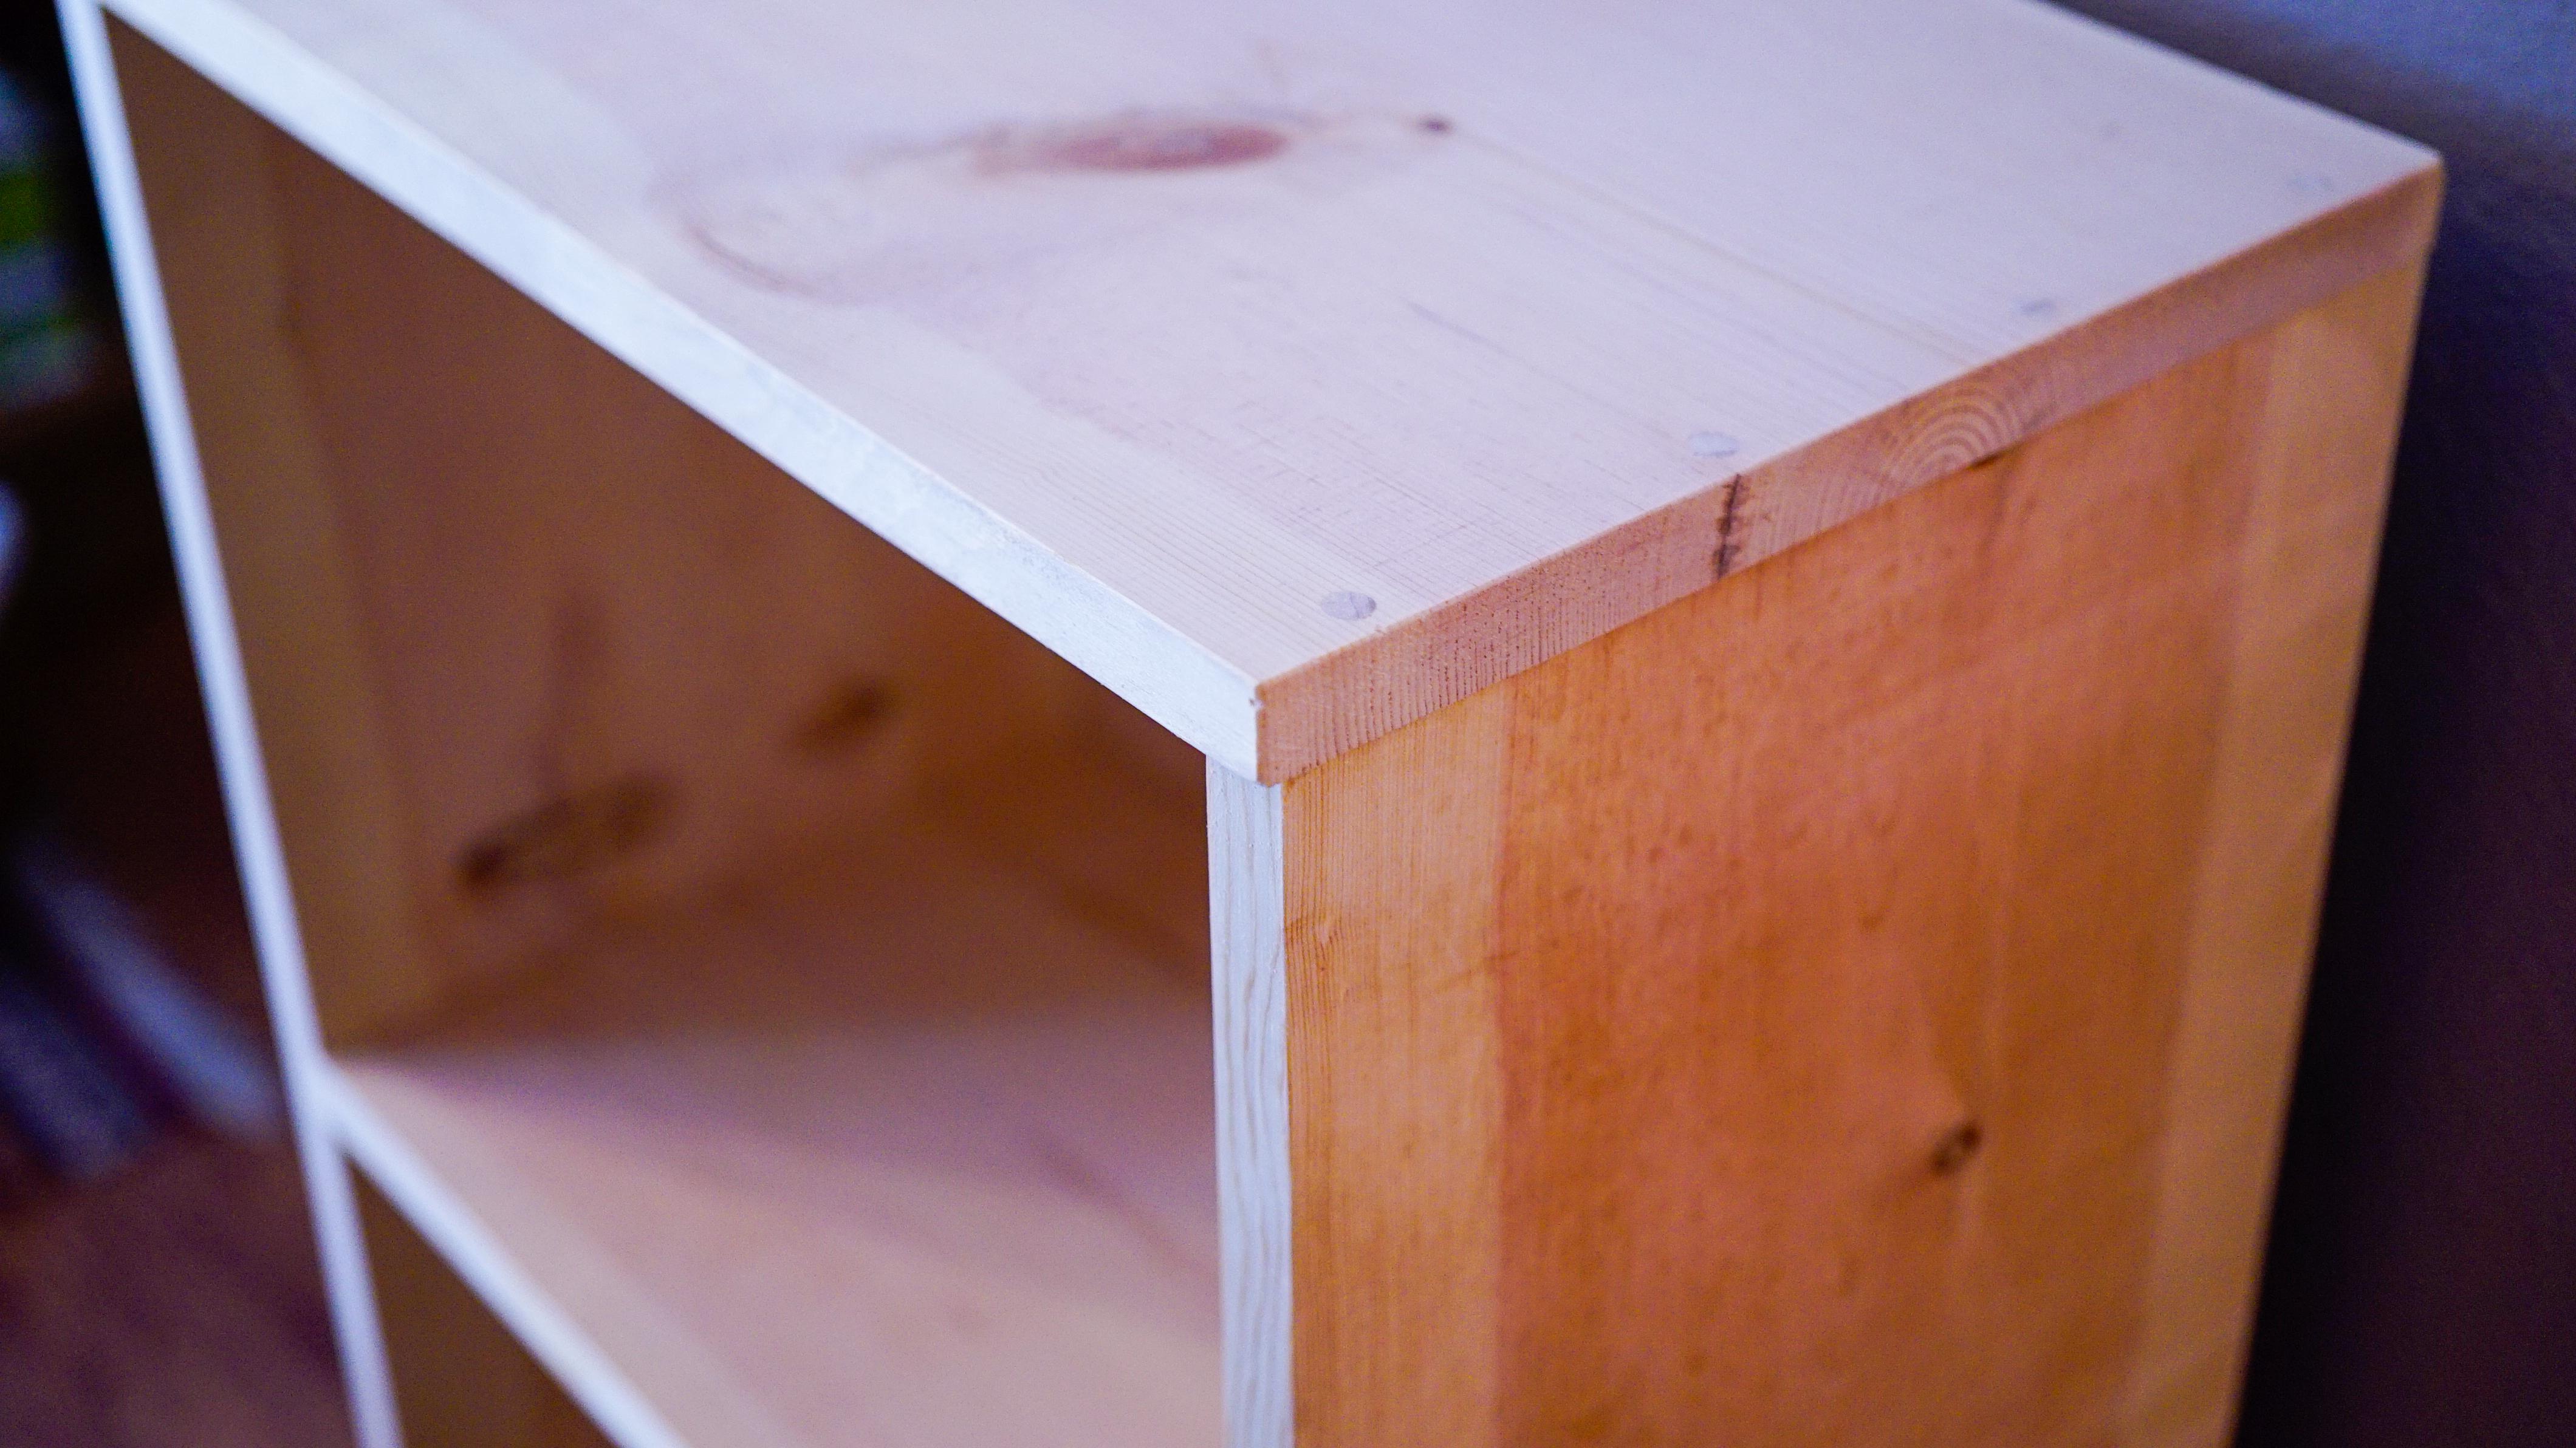
7. Section 6 - Assembly & Final Touches: Well done sanding the inside parts of bookcase. The parts that are gonna be hard to reach once it's assembled. The outside, I'm not going to worry about that tells completely done. The edges not going to worry about that tells completely done. So we're now at the point where we're ready to glue up. I've got a few things that are gonna help me do. So got my glue, got a paper towel, a cup with a toothbrush to help get the glue out of the corners after yellow squeeze out. And below me I have my clamps ready to go. A type of wood glue is going to work fine on this. We're going to focus on the shelves and the sides right now. Just in these horizontal grooves is where we want to focus the glue on. Be careful to avoid glue and the back grooves. We don't want to have too much clean up that we're going to have to do. And once we clamp this down, we're going to focus on getting its square. We're going to make sure it's looking good. The faces are lining up where we want them. And then we're gonna put some screws in the side with some counter sung holes. And then we'll move on to the next glue up and assembly part. So with that, I'm a pole at the clamps. Get the board setup, have everything oriented the way I want it, and then we'll go from there. Once you get pretty good amount of glue in there, then we're going to spread it around with our finger. Like I said, stay away from the back groove. Stay away from the faces. They're gonna show, although we still have plenty of time to clean up any glue that gets out. Looking pretty good first one needs a little bit more. So we've got three clamps on the bottom. We're going to put clamps on the top once we get the first stage in here. Alright, so the first one's always the most difficult one. I got a lot going on. Hopefully you got your clamps spaced out there right distance. So you don't want to be in a huge hairy, but you also do need to be paying attention to your timing. You'll have about ten minutes depending on temperature and humidity. Alright, once you get everything lined up, go ahead and tighten down the clamps lightly. So tighten everything down. Make sure everything's flush, looking good. Then we want to clean up the glue, squeeze out, and double-check that this thing is square. So you want to set your square in each corner. You can measure from corner to corner. Do what you need to do to make sure it's looking good. Okay. So got a couple water toothbrush. You just take it to the corners, get that squeeze out. Makes it a lot easier to do it now while it's wet. All right, that's the first stage of our glue up. To give my bookcase a little bit more strength. I'm wanting to mechanical fasteners, so I'm going to be using screws. These are one and a quarter inch long. I'm gonna pre drill hole, then put a quarter-inch, very, very short hole, put it in my screw, and then cap it with a piece of wood to cover up the screw hole. So this is really going to give it a nice look because you will still see the woods circles. You're going to want to take some time to measure out where your screw holes are going to be. You know where the shelf is going to be. You can line that up, make a consistent distance on all of them. You should be able to do this pretty quickly. Start by pre drilling. I'm using a 764th inch bit. And then you're going to want to counter sink just a little bit, maybe a quarter inch in width, that quarter-inch bit or whatever the Dow sizes. And then you want to go ahead and put in your screw. And you're still going to want to keep the clamps on for at least a couple hours before you take them off. If you can go overnight, that's the best-case scenario. You do have a little bit of mechanical fastener with the screw, but I would recommend going overnight. Spent a few hours. So I go ahead and take these clamps off, inspect the bookcase, make sure everything looks good, nice and square. And then we'll move on to the next part of the glue up process. Everything is looking good so far on the bookcase, we're now ready to attach the Naylor up at the top and the kick plate or the toe kick down here at the bottom of the bookcase. There's a couple different ways we could attach that. You could do the exact same drill and screw method for either one of these. You could also use some sort of join R3, like a loose tenon. You could also use something as a, like a pocket hole J, which is what I'm going to use. So this is completely optional. You don't have to have this to do the project. It is convenient, but you can definitely do everything with the drill and screw method that we just did. I've gone ahead and finish the installation of the toe kick in the Naylor, I've now moved my bookcase down to a better working height so we can address the top. The top is going to go in the same way the shelves did. We're going to drill, counter sink, screw it in, and then plug the holes with wooden dowels. And then it should look great and will be ready for the next step. Examined your top board, make sure you don't have any imperfections. I've got a little bit chip out. I don't want that to be the back. That looks pretty good. Make sure you line it up with the backside so there'll be an overhang and the front. And I hadn't overhang on my sides here. Just an aesthetic choice. Once you have it where you want it, go ahead and clamp it down just to hold it in place while you're squaring. This top portion is gonna be pretty visible. So I'm going to measure out where my screw holes are gonna go, just they look consistent. Let's say every three inches, starting from one inch. So that means my marks are at 14710. That looks good. It's finally time to install the ship lab. This is the part where our hard work really is going to show. Hopefully everything lines up. Hopefully it looks good. I think it will. There's a couple of things that we're going to want to keep in mind when we install these this pine being solid wood is going to expand and contract. We want to give it room to do so across its width so that it's not going to break our joints or have any issues of warping down the road. So what we wanna do is pre drill a hole right in the center, at the top and the bottom in each one of these. And we want them to line up with the top Naylor and the bottom shelf. And then each one of these slats is going to be attached only in the center points. We're going to give a little space and we'll attach the next one, screwed in the middle, a little space and so on. So we want to start by measuring and figuring out where is the center point of our shelf that is at 3.5. So figuring out the bottom of your slats, measure up 3.5. Drill a hole. Same thing up here. Where is the center point of the Naylor? We could say anywhere between one and a quarter, two and a quarter is going to work fine. So go ahead and pre drill your slats and then we'll get them screwed in here in a second. I have all my ship lab pre drill. So the next step is installation. You're going to need something about 1 eighth of an inch thick to space out your ship lab. I'm just using a six inch ruler. You can use a saw blade, whatever you have handy, you're going to want to line it up at the top and the bottom, screw one in, go to the next one, so on, so on. So when you're looking at the back, you're going to want to start with the right side. So I'm looking at the back of the bookcase right now, my right, this is the dado, the L shape. That's the side you want to start with. It, it'll get a little tricky if you don't. This way you have the open joint that you can just place the last piece of ship lap on, screw it in and it's super easy. So I'm going to start with the first one, all the way into the groove. Space out the next one, go on, so on, so on CLIA Look, I wouldn't screw them him quite yet, give them a testfile, see how it looks, and then attach them all. When you're scurrying through the ship lapped to the bottom shelf. The size of the screw doesn't necessarily matter for the Naylor, you don't want to pop out the side. So I'm using one and screws here. One of the quarter on the bottom. Oh, Wow, I really love how this has come out. That's looking great. The gaps on the ship lap is off a little bit, but that's part of the aesthetic. I think this looks great. I'm loving how everything looks. Or just in. We're now ready just to do some final touches. We're going to glue in some plugs over these screws on the sides and the top are gonna do a little light sanding all the edges, the outside, clean it up. And then this would be ready to either put paint on or finish or whatever you would like to put on it. Ready to plug the screw holes. And for that you're going to need wood glue and a flush trim saw if you're cutting them flush. There are kind of screw hole covers, different types of wood Dow's that you can use. You can use long one cut off. It's really up to you. You just need a piece of wood that can be glued in there and cut flat and then we'll sand over it and you'll never know there is a screw there. So a flush trim saw is really going to be anything where the teeth are not set out farther than the thickness of the blade. You can get your flush trim saw right it right along your side and it won't cut into the side. It's only gonna cut what's in front of it. So try not to bend the saw too much, keep it flat. Keep one hand on your sides here. And you should be able to cut through that Dow pretty easily. Just like that. Well, there you have it. A simple ship lap bookcase. It looks wonderful. You know, all there is is a little bit of sand and little bit of touch up here in there. Just sand it until you think it looks good. Sand the pegs flush. Take your time with the sanding, work your way up through the grids. Don't rush it. Just knocked down some of the edges, some of the faces, and then you're good to go. Well, I hope you enjoyed this project. I know I did really excited that we got through this together and we've got a great bookcase that we can use for books and knick-knacks and all kinds of fun things. Make sure to check out the rest of our courses and thanks so much for watching.
 Austin School Of Furniture, Woodworking & Furniture Making Education