Transcripts
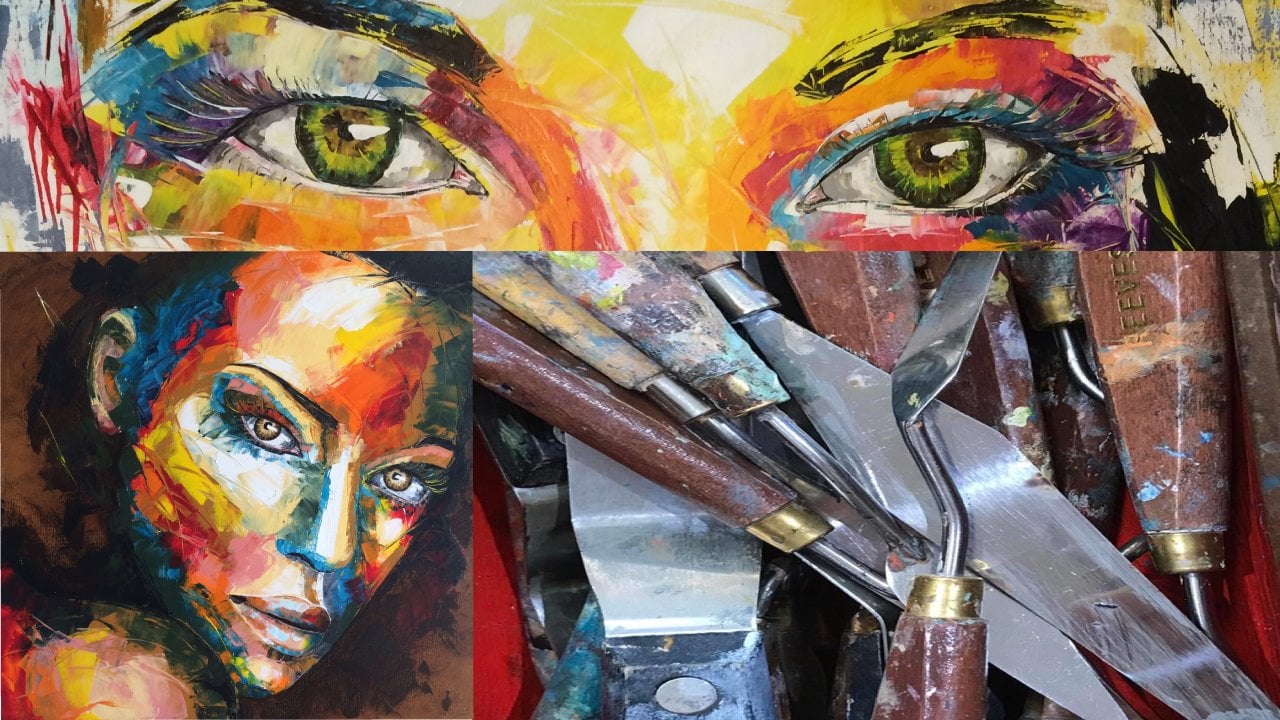
1. Intro: [MUSIC] Hi, my name is Charlene. I'm an artist living in Holland, making portrait with
the palette knives. In this class, I'm
going to teach you how to work with
the palette knives, and show you some principles
and some solutions. In each lesson we're going
to cover one technique, and we're going to make
a little practice with it so we can fill a booklet. When I was at teenager, my art history
teacher let us make a little booklet from different styles, from
different movements. For example, like pointillism, cubism, or Art Nouveau, or from sales from
artists like Van Gogh or Rayburn and I never
forgot the booklet, but more important, I
never forgot the lessons, because I made it. With my energy, I make
this little practices. That's what we're going
to do in this lesson. This class will make you feel very comfortable in working with the palette knives so you
need no experience at all. For students can
be, for example, artists who want to add the palette knives
in their tool belt, or just students'
beginners jumping in. I've been working
as an artist with the palette knives over
more than ten years now. I had the chance to paint a
lot of commissioned work, like for the gaming company, PUBG, and I had a chance to hand over our prime minister
his portraits. I participated in
several TV shows, including the Dutch version
of painting the stars. My work has been shown
and sold internationally and as part of the collection of several international
art collectors. Here, in my [FOREIGN]
I teach students weekly how to integrate the
knives into their work. Am really excited to tell you my technique and the basics of the palette knife painting. We're going to cover
the basic techniques. For example, how
to hold a knife or how much pressure
you have to put on a painting in the
effect it will give. I will give you tons
of insights how to find solution for
official writing an object. For this class, you
will need a set of palette knives and some
colors of acrylic paint. Some papers to work on, a mixing palette
and a paper towel. I will go more into the details about the materials later on, so don't worry if you don't know which knives
to use just yet. By the end of this class, you will have a library full
of technique and solutions, which is useful with working
with a palette knife. Whenever in your future work you will run into a problem, you will remember this booklet, because you made it, made with your energy
for you, by you. You will be comfortable
enough working with the palette knives to start
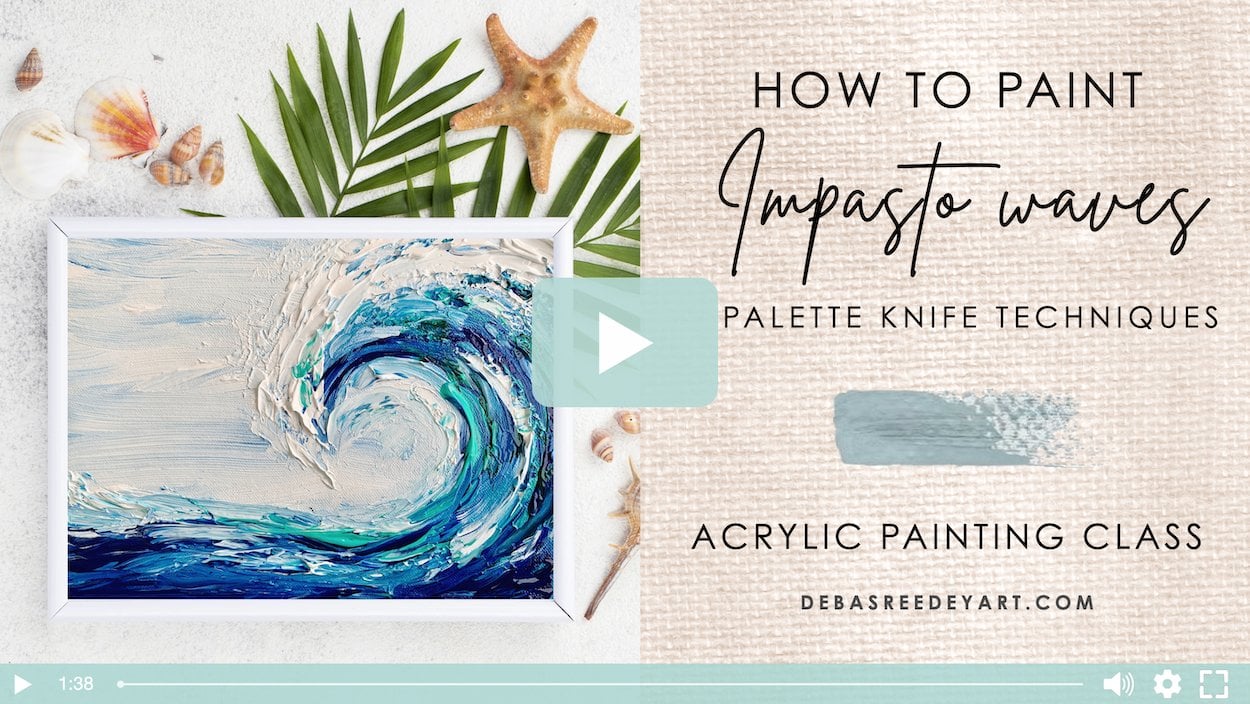
the painting of your goal, or to follow my other class, making a portrait
with palette knives, which you can also find
here on Skillshare. I hope to see you in class. [MUSIC]
2. Class Project: In this class,
we're going to make our palette knife
painting simple booklets. Each lesson, I will
explain one technique, and together we're going to make a small exercise to give
content to your booklet. So don't throw away
anything used yet. Practice as much as you want, and we'll see what you will
put in the booklet later. We are going to
practice how to hold a knife, for example, how much pressure
you have to put on the painting and the
effect this will have; how to mix the colors; and how to stay in
charge of it before everything turns out
in one big mess; how we can make real fine lines; and we'll look into
a lot of solutions. [MUSIC]. Don't forget to upload
your practices because then I can comment on them
for you if you would like it. [MUSIC]. The most important thing, relax and enjoy while making
these little exercises, because you will remember. [MUSIC].
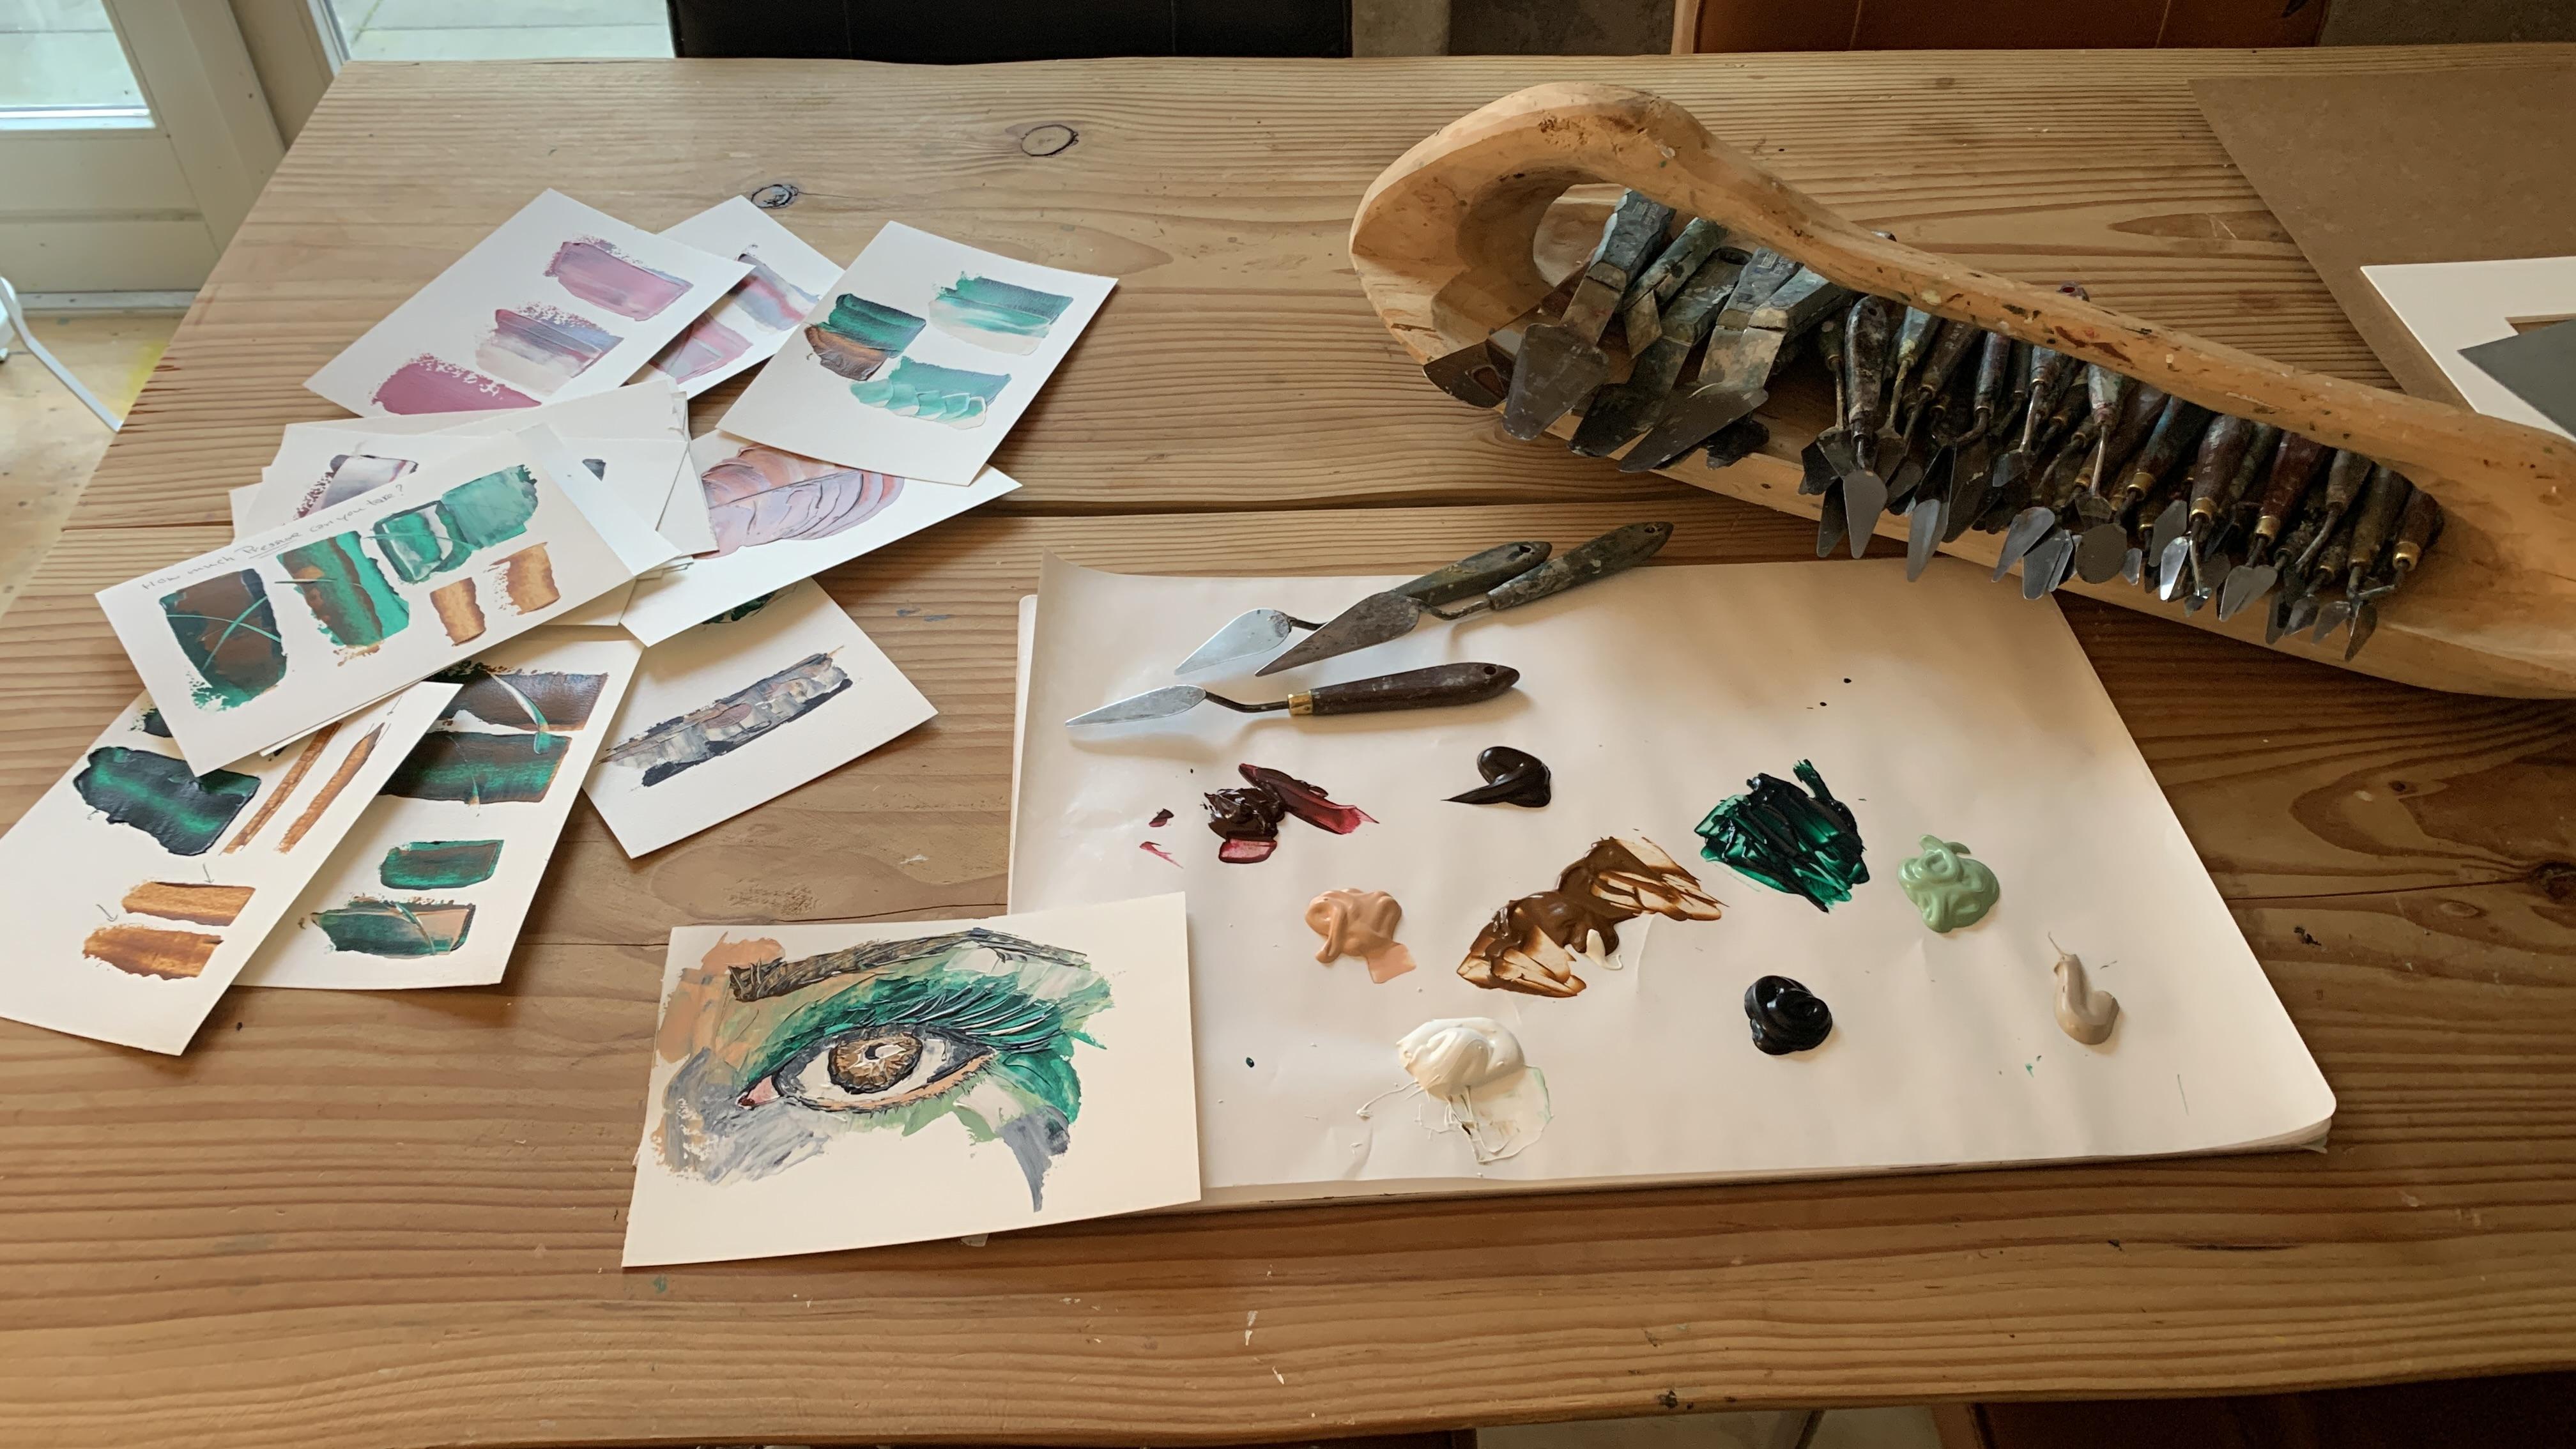
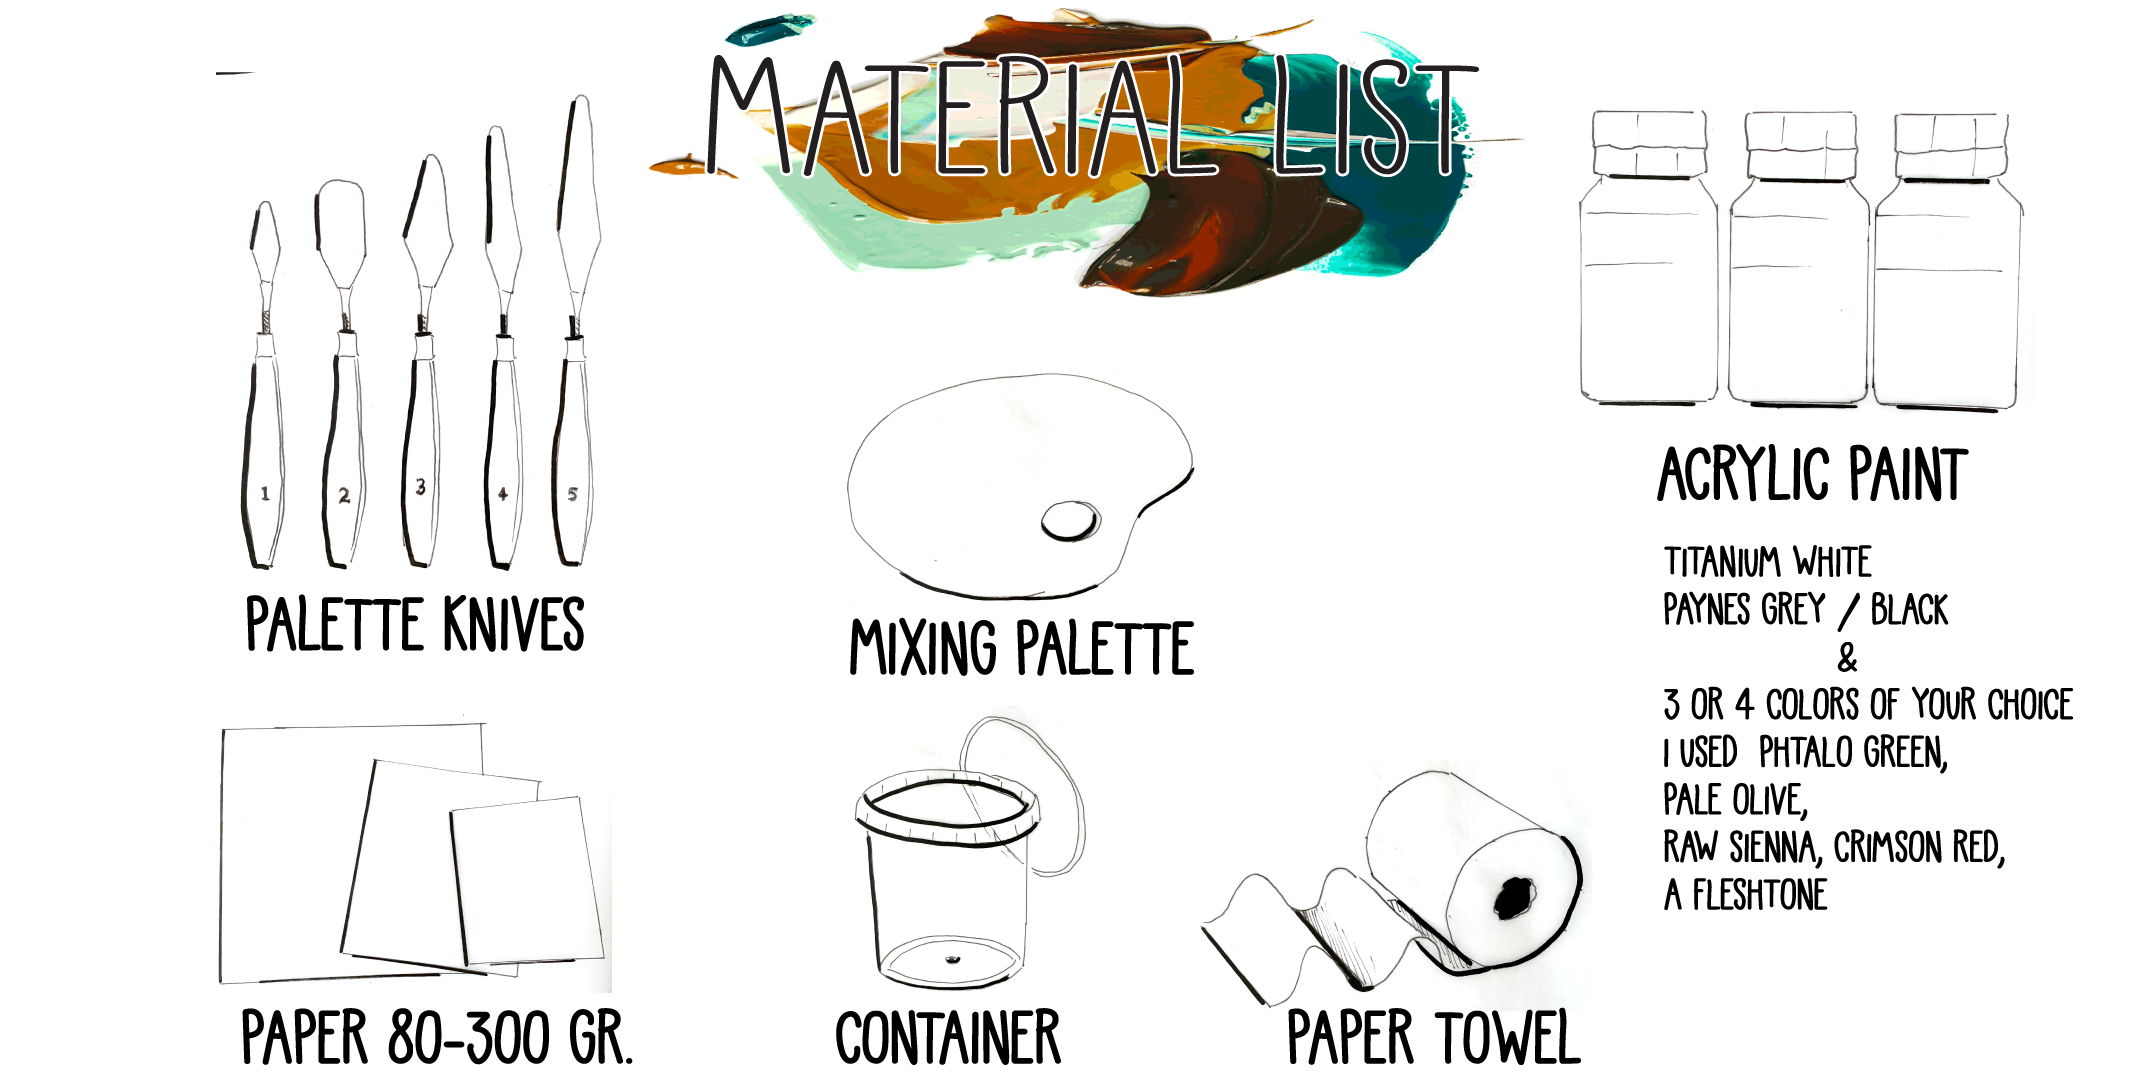
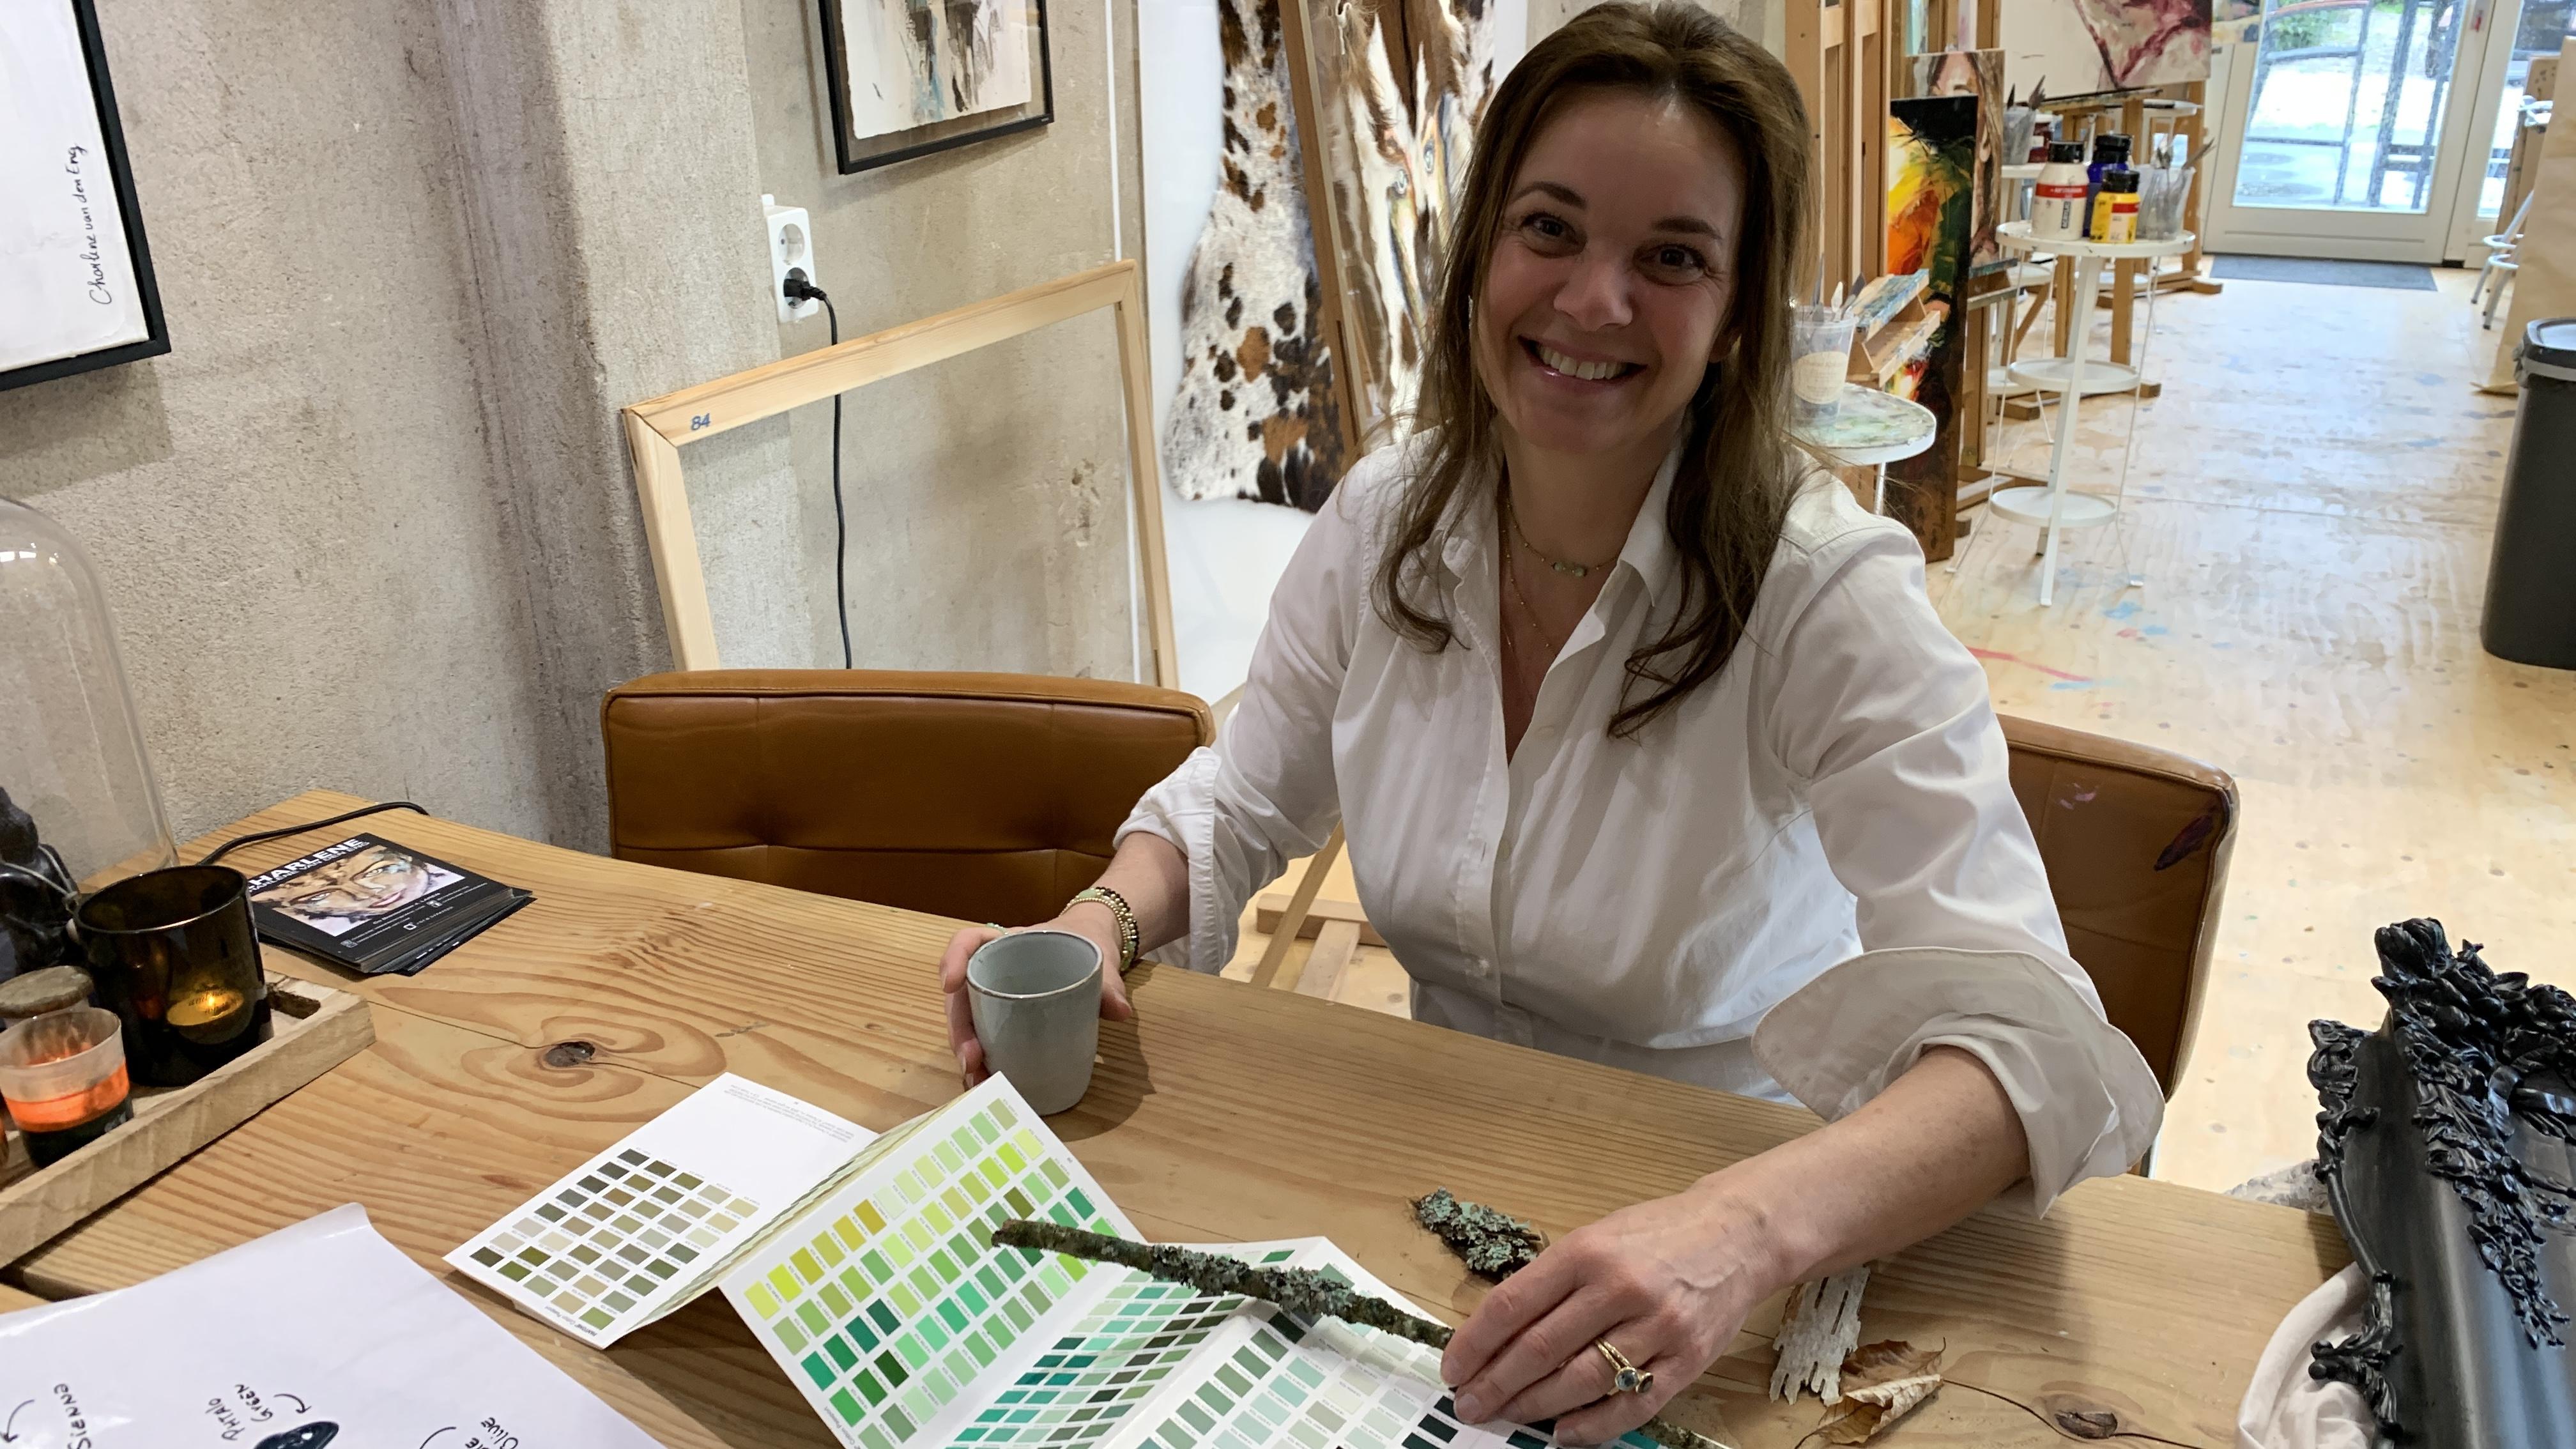
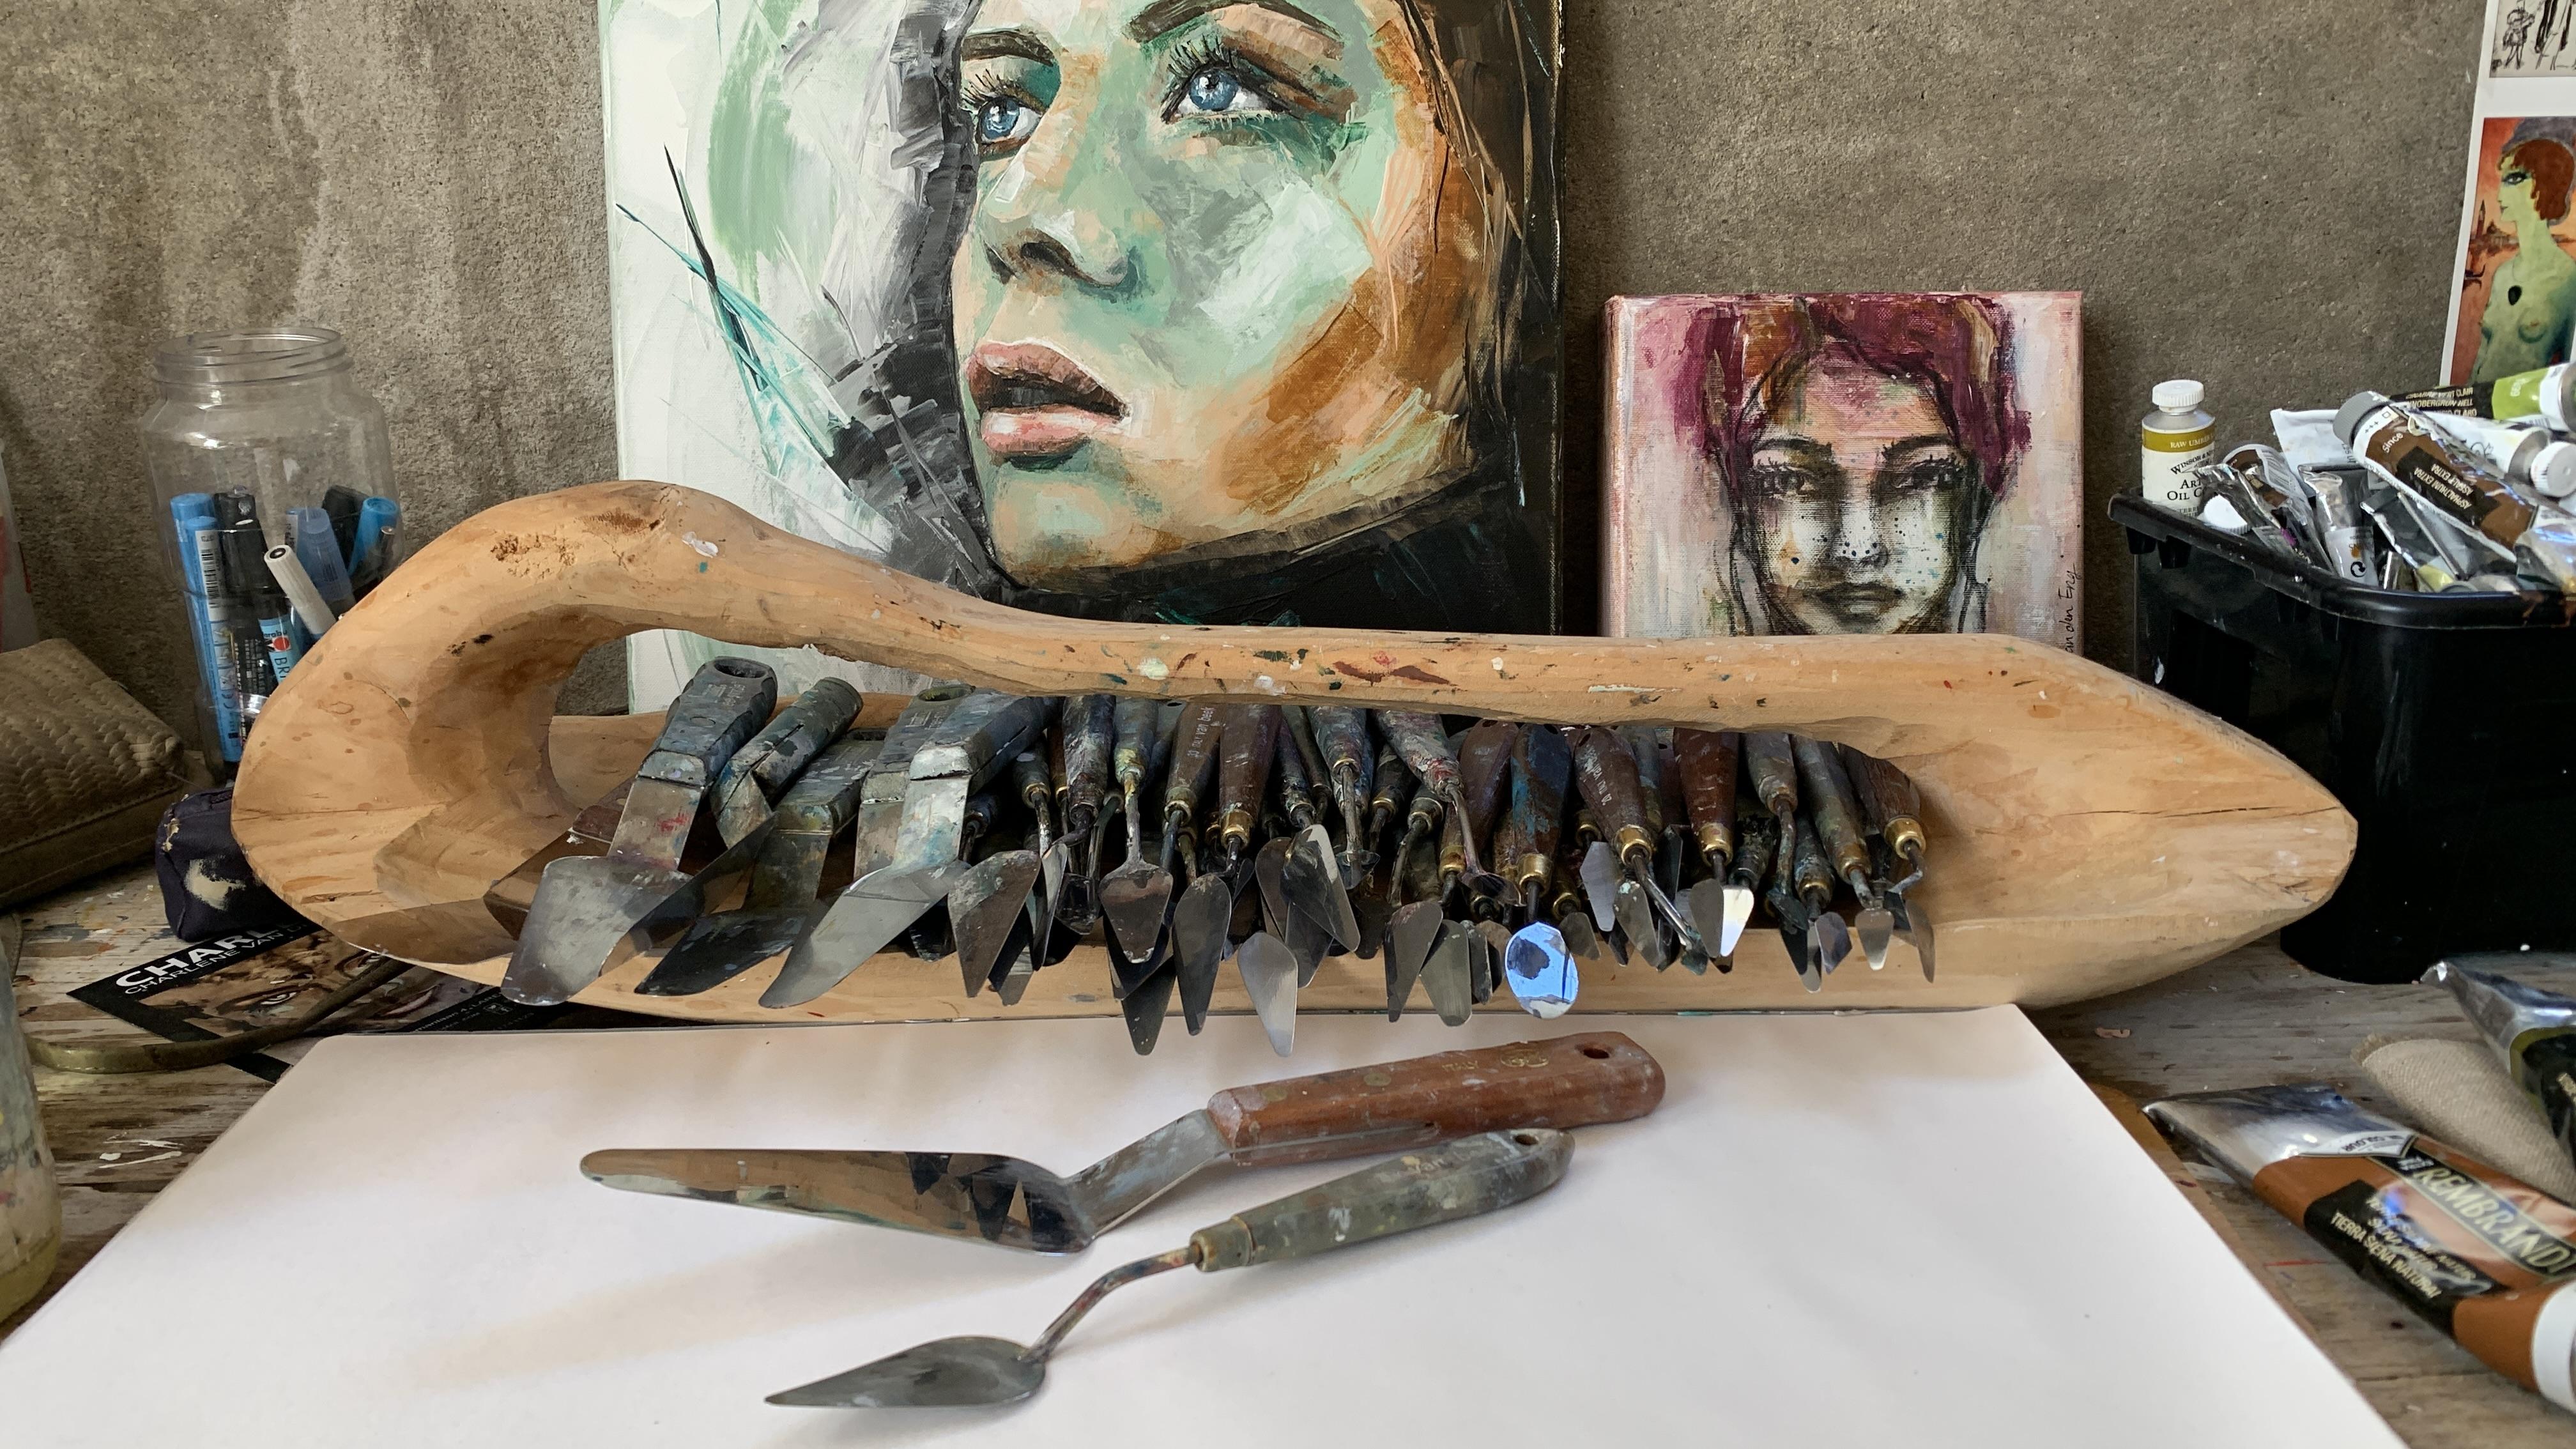
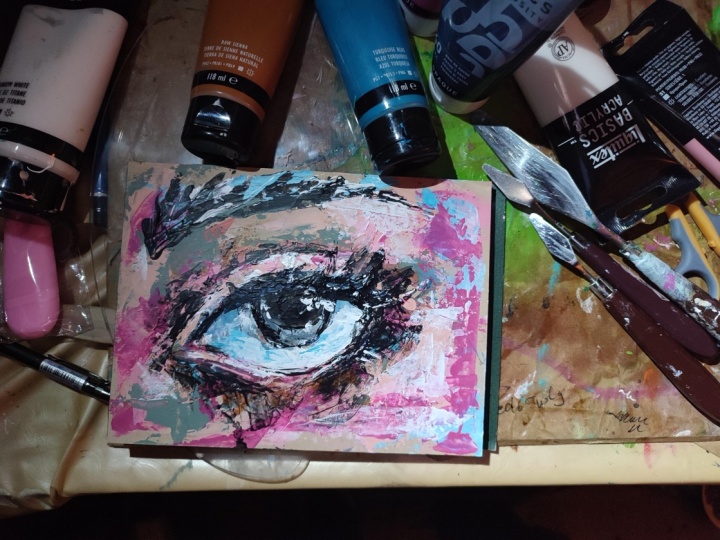
3. Materials: [MUSIC] In this lesson, I want
to show you which materials we're going
to need for this class. We start with the pallet knives. Palette knives, we have in many different sizes and shapes, and we're going to need
a few for this class. But a palette knife is a
really simple and cheap tool. Mostly they come in packages
with a few of them in. You can already a have
package around 10 maybe $15. If you don't have a few knives, I suggest that you buy a
package with different shapes in it and sizes because
you're going to need them. [NOISE] That's the first thing. [NOISE] Next to this, you're going to need some mixing palettes to put your paint on. You can use the plastic
ones or the wooden ones. It doesn't matter as long
as it is a flat surface. Not to mixing palettes
with a [inaudible] in it. I prefer to use a
tear-off palette. This is really easy. It's just papers. Easy to clean, you just throw it away
when you're finished. [NOISE] Next to that, we need some papers and because we're going
to make little booklets, I suggest that we
work on A5 size. It doesn't matter. It
really doesn't matter. You can use printing
paper or sketching paper. You fold in little pieces, you cut in little pieces. This is a little
bit heavier paper, it's around 300 grams, but also anything between
the 80 or 300 grams will do. When I'm going to
make a booklet, I want to have the surface flat, so a little bit heavier
paper as I suggested, but anything will do. Next to that, we're going
to need some paint. With red, blue, and yellow, black and white, you can mix all the
colors you want, but you will need some
mixing experience for that. I suggest for this class
you just pick a few of your favorite colors and I will show you
which are mine. In my work, I also
work a lot with the phthalo green, with pale olive. I love to work with raw sienna, the crimson red, a flesh tint, because I
make a lot of portraits, so we need the flesh tone, titanium white, and
a Payne's gray. Next to that, you will need
a simple container with some water and paper towels
to clean off your knife. That's it. If you have
gathered all your materials, I will see you in
the next lesson. You can find a
complete material list in our project and
research page. [MUSIC]
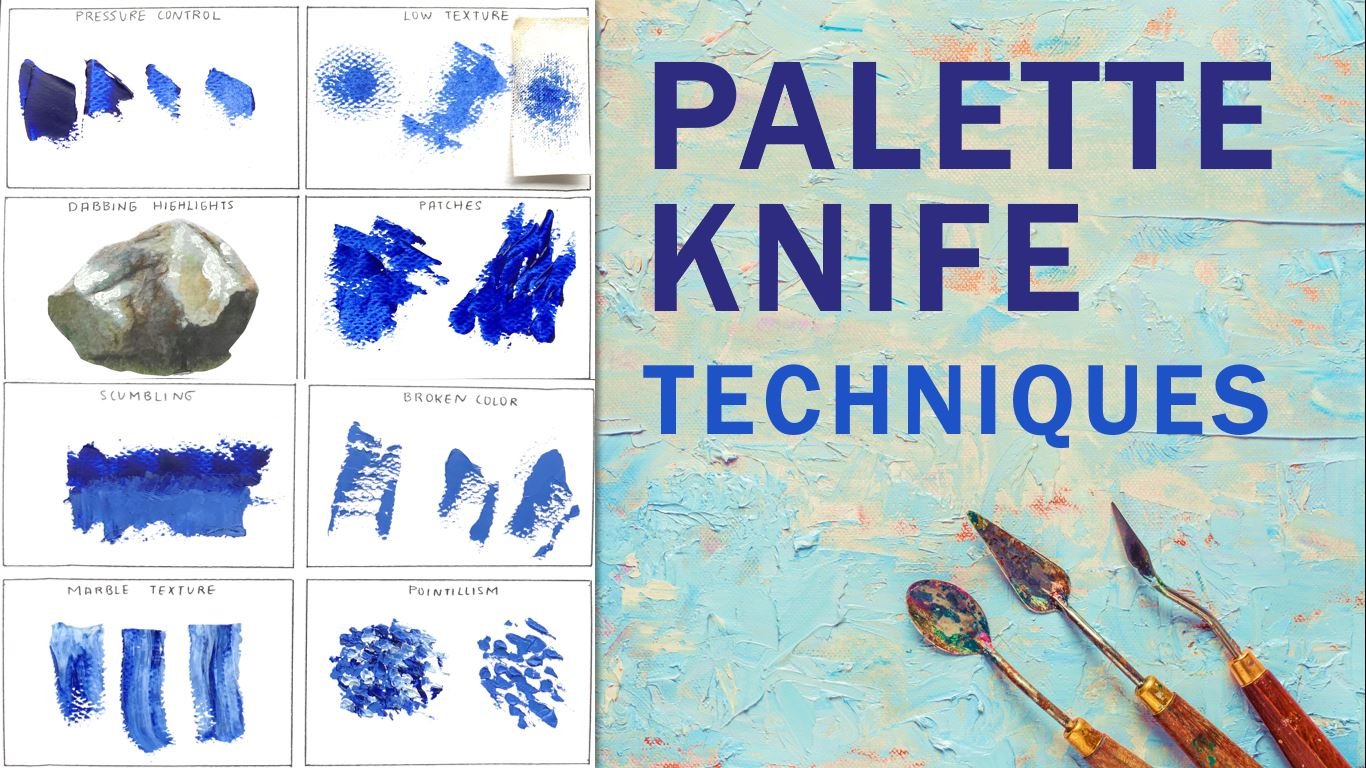
4. How Much Pressure Can You Handle?: [MUSIC] Today's topic will
be about pressure. How much pressure
can you handle? I'm not speaking about stress
pressure but fun pressure. Because the amount of
pressure you put with the palette knives on your
paper to ensure painting. [MUSIC] I'm going to take a
little paint and I want to tell you
something about paint because how much paint you
use is also important. Because working with
palette knives, I'm sorry about that guys
but you use a lot of paint. That's part of the fun and part of the
effect you will have. Because with palette knives
you want to see the volume. You want to see the strokes and the texture so we
use a lot of paint. If you come from a
background of watercolor, this will be something
new but you will get used to it and it is great fun. [MUSIC] When you put
the paint on it, it's important that you use the full length of
the palette knife. I do it like this. From the tip till the
end of the knife. It's really important that
you use the full length because we're not going to paint with the tip of
the palette knife. We're not going to write it but we're going to
use the full length. We're going to make strokes and I will show
you how it works. Don't use too little paint. You just put it on the
paper like this and stroke it down
gently, no pressure. You see the paint will be
nice and thick on your paper. I will do it again
and I will show you what the effect will
be with more pressure, so put it on the paper again and stroke it down
with a bit more pressure. You see the difference already? If you use more pressure the paint will be more
transparent than the other one. This is really simple
but the fun part comes in when you use an
extra color, a second color. For example, and again, I use the full length
of the palette knife. Place this on top of this one, gently stroke it down. The colors will not mix. They're just on
top of each other. You make layers. I'm going to show the
same with more pressure. You see, I clean my
knife in-between. This is also very important. Always clean your
knife otherwise you'll get one big
mess with paint. I used to make one big
mess out of it before I started working with
my paper towels. Paint with the full
length of your knife, put it down and add a
little bit more pressure. You see the difference? With no pressure,
the paint layers will be on top of each other. With more pressure,
the paint layers will be more transparent
and will mix a little bit. If you want to use
this technique to mix your colors it's
important that you don't let the first layers of paint dry because this is a
wet-on-wet technique. If the layers has dry
the colors will not mix. The nice thing about
little pressure is that you can cut through
different paints. For example like this. You see them there, green layer will come to the
surface and you will see it. This is also my
favorite technique which I use in lots
of my portraits. You can try this with
multiple knives. Use the smaller ones, see what happens there. Try to use more
paint, less paint. Try to use more
pressure, less pressure. Just try to get comfortable
with the knives. Remember there are no
mistakes because we're not working on the outcome on the actual painting
for this moment. [MUSIC] We're just making some nice small experiences so there's no pressure at all. Remember to have fun, enjoy, and relax because these
small experiments are great mindful
practice as well. Just relax and enjoy this
moment you give yourself. In our portrait
and research page, you can find this lesson
for your reference. I will see you in
the next lesson. [MUSIC]
5. You Are in Charge!: [MUSIC] This lesson is about
Are You In Charge? I mean with that are you
in charge in the way you mix the color
with palette knives? As you can see I have here our little experiment
of the previous lesson. I'm going to keep it, don't throw away anything just yet. Because we want to make the
booklet and save everything. Experiment as much as you want, take a lot of papers, and try all the knives
that are different sizes. But don't throw anything away just yet, we can do it later. For now, I take a new paper, and I'm going to show you the
way you can mix the colors. I start with mixing
directly on your painting. We take some color, beautiful green and some red, and we make a stroke,
just like that. If we want to have a
more lighter color, for example, pink, I can add direct a different
color on top of it. I'm going to use now two
palette knives, one with pink, one with white, and
I'm going to mix it in your painting like that. You can see you're already get some transparent mixing colors. I'll do it one more time. You put a layer of paint and we want to mix
it with white. I clean my palette knife
again because otherwise, I'm not in charge of my colors. I take more clean white, put it on top of the paint, and mix it, but this time I'm going to make
multiple strokes. The outcome that you
get is really beautiful because you will see the
stripes in the paint. If you want it even
more light you just add more white color and keep on stroking till you're satisfied with the
color you get. I will show you the difference. Now, when you mix on
your mixing palettes. For example, I take some red, and with the same knife
this time I'm going to take a little bit of white
color and mix it to the red. [MUSIC] The more you stroke, the more your colors will mix. That's why when you want to
have a solid color which is a little bit lighter than
the color you want to use, then you mix it directly
on your mixing palette. I'll show you the difference. You see, this is with one
stroke transparent mixing, this is with multiple strokes that you make a lighter color, and this is what you get when you mix it on
your mixing palette. You see, this is
one solid color. Here you see the stripes, which I personally
love very much, and the transparent mixing. Just go ahead and try, and try all your
favorite colors. Maybe you want to
use a third color. See what happens then. Be playful, relax, and have fun, and I see you in
the next lesson. Don't forget to upload your practice in our
Project and Resource page. There you will also find this
lesson for your reference. [MUSIC]
6. Be Refined: [MUSIC] Hey, in this lesson I will show you how to work
with really fine lines. How refined find you? [MUSIC] I want to show you
how you can do it. Because in the previous lessons, I show you how you can make the big strokes or the bold spots and
how we mix the color. In this lesson, I will teach you how you can make
really thin lines. For example, if you want to make some eyelashes or you want to give a highlight
on something. There are also
different techniques. You can work in a wet under layer or in
a dry under layer, and you will notice a
difference. I will show you now. For example, if you want
to make a fine line, a thin line, we're not going to use the flat surface
of the pallet knife. We're going to use the
thin edge of the knife. We do that by placing the edge
of the knife on the paper. If you have a dry piece of canvas and you want
to add a stroke, you just put your knife down
and gently stroke down. As we can see here, the paint will dry really
quick on a dry surface. You can make multiple
strokes of course, or you can do some stamping, that is also a good trick. But there's also
a different way. That is the wet
and wet technique. That means that you're going
to work on a wet surface. For example, you have a surface, looks like this, and you want to make the
fine lines in it, you will see that now you can make your line in one stroke. Even more refined [NOISE]
than the previous one. I will show you one more time. This is the stroke you get when you work
on a dry surface, and this is the stroke you get when you work
on a wet surface. On the dry surface, it dries up really quick
and in the wet surface, you get a real smooth
lines. Remember that. For example, when you
want to make eyelashes, as we did in my previous class, we painted a portrait. At a certain moment, you'll come to the eyelashes and this is the technique
you want to use then. [MUSIC] Again here, try to use multiple knives. Just relax and have fun. Make big strokes but big
long lines with big knives. Small lines. Just get a hang of it. Also try some cutting
[NOISE] because it's a really nice effect if
you get through the paint. Enjoy it and I see you
in the next lesson. It would be nice
if you would like to share and upload your tryout in our portrait
and research page so I can give comments on that. [MUSIC]
7. Structure Your Chaos: [MUSIC] Structure your chaos is the
title of the lesson today. Because sometimes you have to find solutions for
little problems you run into when you're painting and I run into
a lot of problems. I find my solutions and here are a few tips
I can give you. For example, if you want to
fill in a little surface. For example, if you have
a small surface between two lines and you
want to fill it in, and you don't want to
go over the lines. Now what I see a lot
of times in my classes that students take
that palette knife, the smallest they can find, and just make strokes. Well, you never going to fill in your surface right
between the lines. You will always cross
the line somewhere. The way I going to
do this is with little bits and pieces
with little strokes, we're not going to move
outside the lines. You see. Now you have to
paint and be free for that, turn your paper or your painting whatever and do the other side. Now you filled your lines perfectly in-between
lines and you see. Get rid palette knife, you get all those little that insight. Well, I don't know
about you guys. I like the structure
because that's why we use two palette
knives in the first place. We see the volume and the
structure of the paint. The next thing I
want to show you is how you can fix
irregular edges. For example, a surface like this with
a messy irregular edge. But maybe you want to make a straight line and you
don't want to dust. Then you'd take enough
paint on your knife, the full length of the pellets, and you put a little
bit more pressure on the tip of the palette knife. You see now you have more smooth line
without the messy edge. Just practice this a little bit. See if you can manage to make the lines without the dots, and see if you are
in charge with it. Because here you have those little dots and
here is a straight line. Now you have experiments. It's a little bit with
making the straight lines. I'm going to show you how
you make a little curve in it and I'm going
to take a new paper. Maybe you want to use the
backside of note one. Why not? Because why do I
want to throw away the papers and in
the booklet is nice. I'm going to use an old one. Take lot of paints, full length of your palette, and you can make, for example, curvy lines. You see, you get a
perfect line readout that's there on the side. But we want to work with that one where you want to get
rid of the irregular edge, you simply add an extra color, or the same for that
matter on top of it. We're going to make the curves, add a little bit more pressure on the tip of your
palette knife, and make the perfect curves. That's how you
structure your chaos. Now I want to tell you a
little bit about direction. Because the way you
use your paints and a structure can put emphasis on what you want to show and object your painting. For example, if you want to give the suggestion for
painting a leaf and it's hanging down you can do it perfectly with palette knives and I
will show you now. I will use a big knife and I also we'll use a little bit mixed color to
make it more interesting. You put on your knife and strike gently in the direction you want to move wings of the leaf. The second one you
place half on top of the first one and
stroke down gently. Use not enough paint, because you want to see the
structure of the paint doing its work not only the colors
but also the structure. [MUSIC] When you mix
a little bit more, then you get more
emphasis not only by the structure but
also by the color. Now we're going to
make the other side. Give yourself the
freedom to turn the page or to turn your
painting completely. It doesn't matter as long
as you're comfortable. Put your knife down and
stroke in the direction. You will see the structure
of the paint doing its work. If you would like, you can
amplify this effect with some small lines with
the edge of your knife, and gently stroke. Now you can try. You can try with different
sizes of knives. You can try whatever
object you want to paint and see how the structure of the
paint will work for you. I will see you in
the next lesson. You can find my practice
in our Project and Resources page and I hope
you will share yours too. [MUSIC]
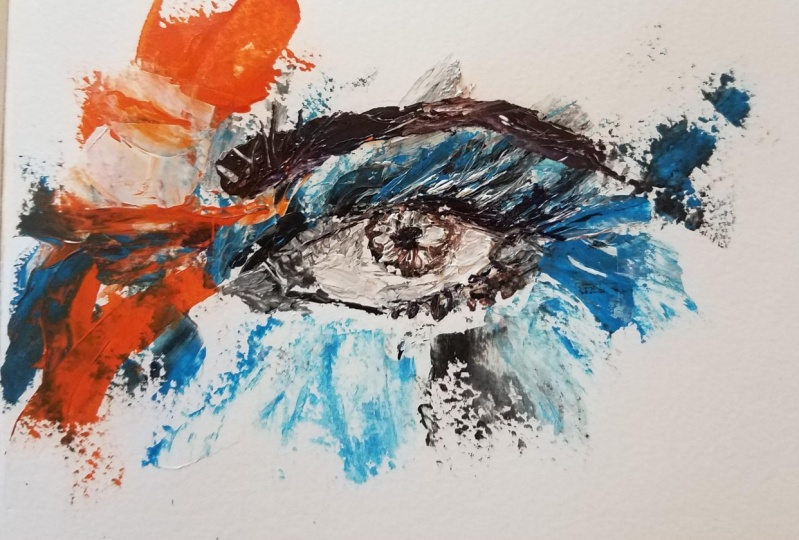
8. Find Your Way: [MUSIC] In this lesson, I want to talk with you about overlaps and finding your
way in finding solutions. [MUSIC] For example, the overlaps between the
background and the face are smaller details
like in the iris. The upper lip go into the face. You get all kinds of overlaps. You have to find your
way in those things. First, I want to show you
some little exercises about the overlaps. For example, when you
have, one stroke here. You can make an overlap really
easy and really simple. Just go half on top of it. We've seen those strokes before. You will mix a little bit and then smoothly go over
to the other color. Which you also can do is be
a little bit more playful. This is your surface. For example, you can
add little dots, or what I use a lot or what
you also see in my painting, in the portrait, is that we go and cut
through the paints. For example, this
is your surface, and this is your background. You can now make some
cuts so you can mix it. It's really subtle. I hope you can see it. These are three
different ways to make a overlap between
one surface to the other. But what if you
have a round shape? It works the same. Especially, use as an example because
I use it a lot to of my portraits for
painting the eyes. For example, this is the pupil. Making round shapes also requires that you're
doing your wrist. You put on a knife
and turn gently, and then the other side. Clean your knife.
[inaudible] in-between. Sometimes I forget to save it. It's really important that
you keep cleaning knives. How you want to make
the overlap between the pupil and the eye, the iris? Just put some paint on
a small knife and place your tip against the
corner and go around. We learned in the
previous lessons how you can make
this clean strokes. Put a little bit
higher pressure on the tip of your palette knife. Finding solutions is also all about giving
yourself the freedom to turn or to turn your wrist, to turn your hands, to make more friends. It doesn't matter. There
are no rules for this. Just find the solution,
just find your way. This is how you can do it. I just want to
make a little eye. We're going to practice
with this painting eye later on in this class. This is maybe already a
good exercise with it. I also find my inspiration in nature and just make pictures
of beautiful details. This is also a great way to practice your palette
knife painting. What, for example, if you want
to paint a bark of a tree? This is about finding solutions and getting comfortable
with the palette knives. Because in your future work, you'll see you'll remember
these little practices. For example, make little strokes for the tree, maybe till here. Maybe some brown color. This right. I use one knife and mix the
colors a little bit together. But now you see you
already have an example. Maybe a bark of a tree. Enjoy and be creative,
find solutions. I'll see you in the next
lesson where we go to mix image of our little
exercise together. I have [inaudible]
. See you there. [MUSIC]
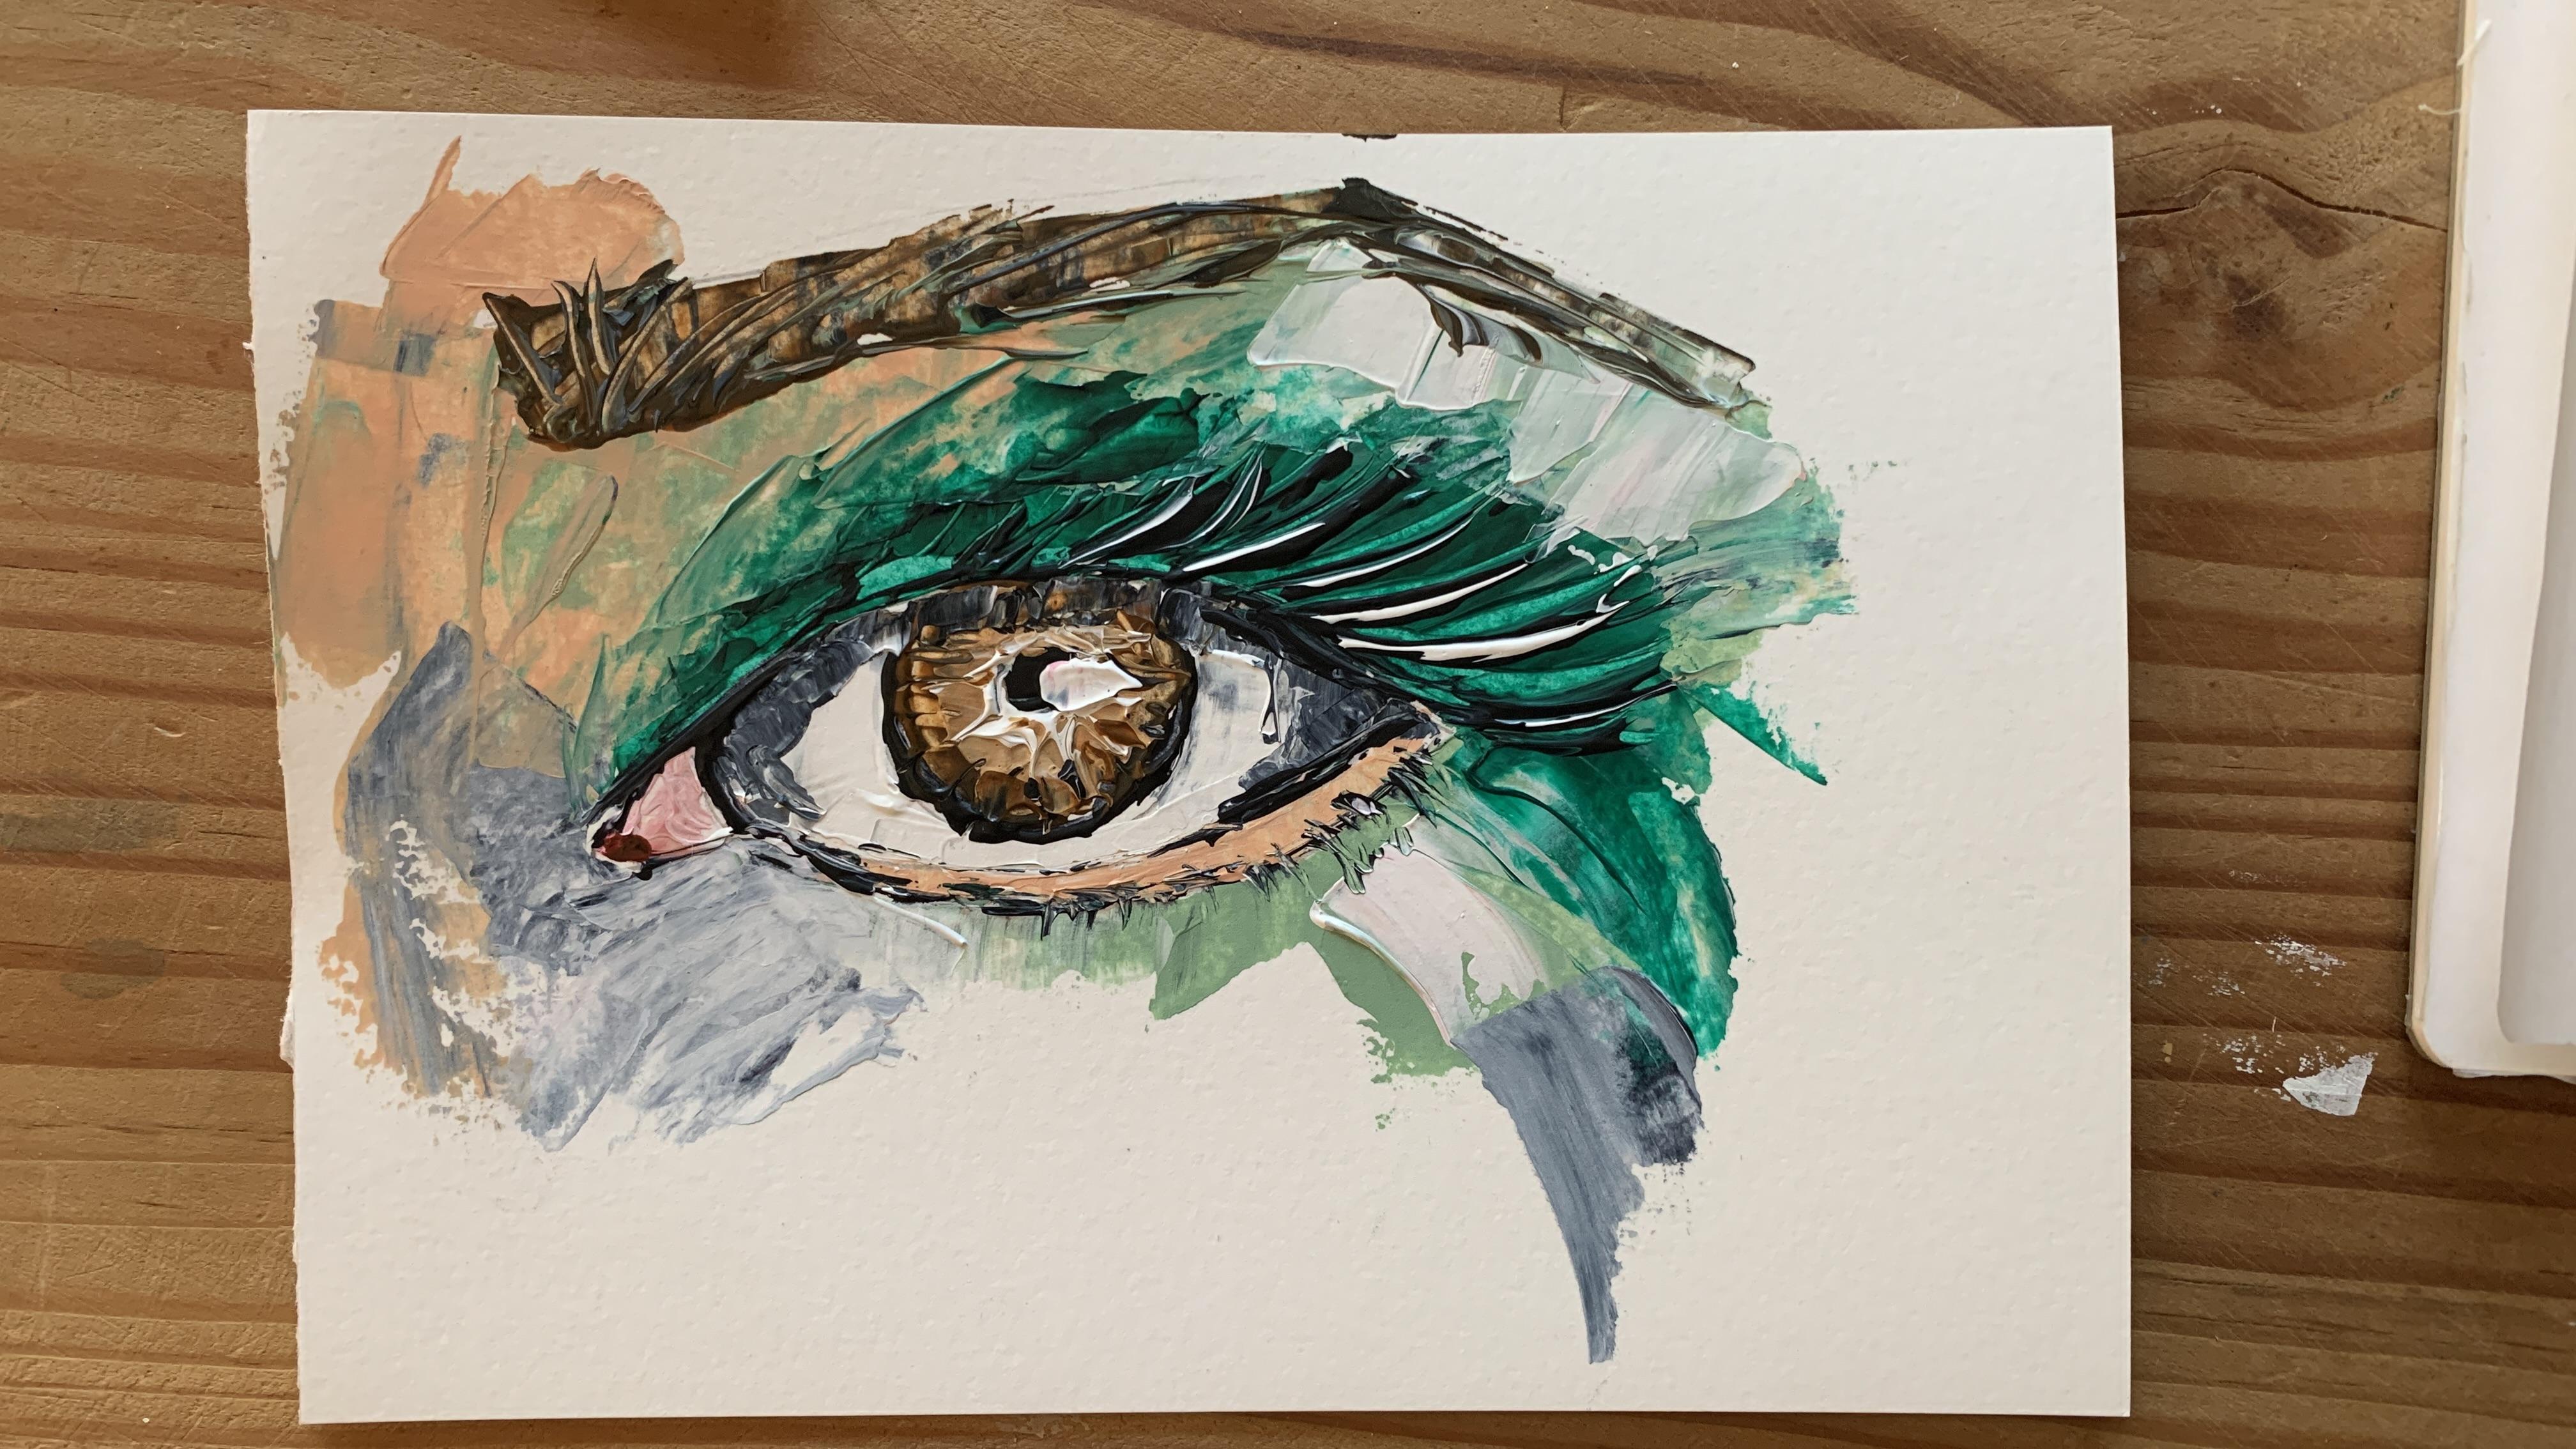
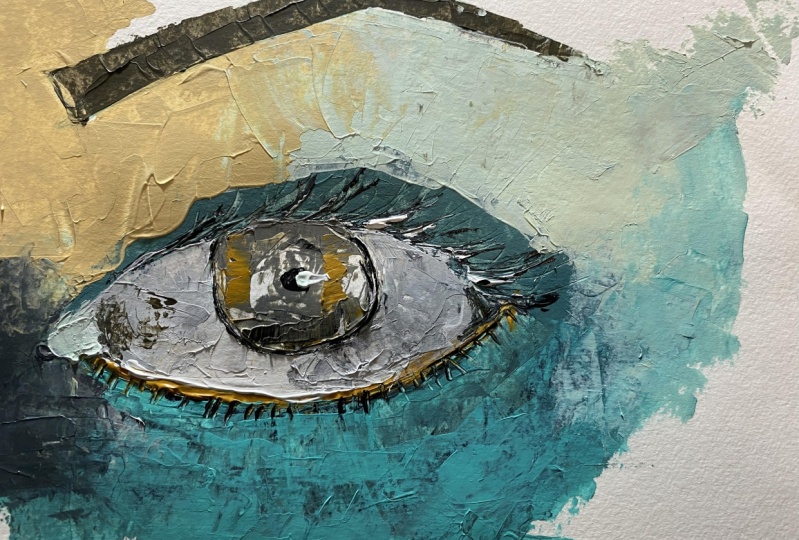
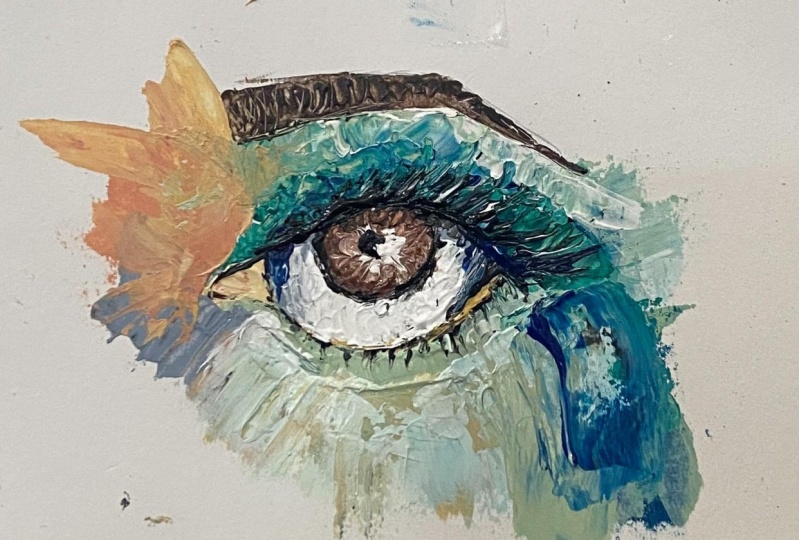
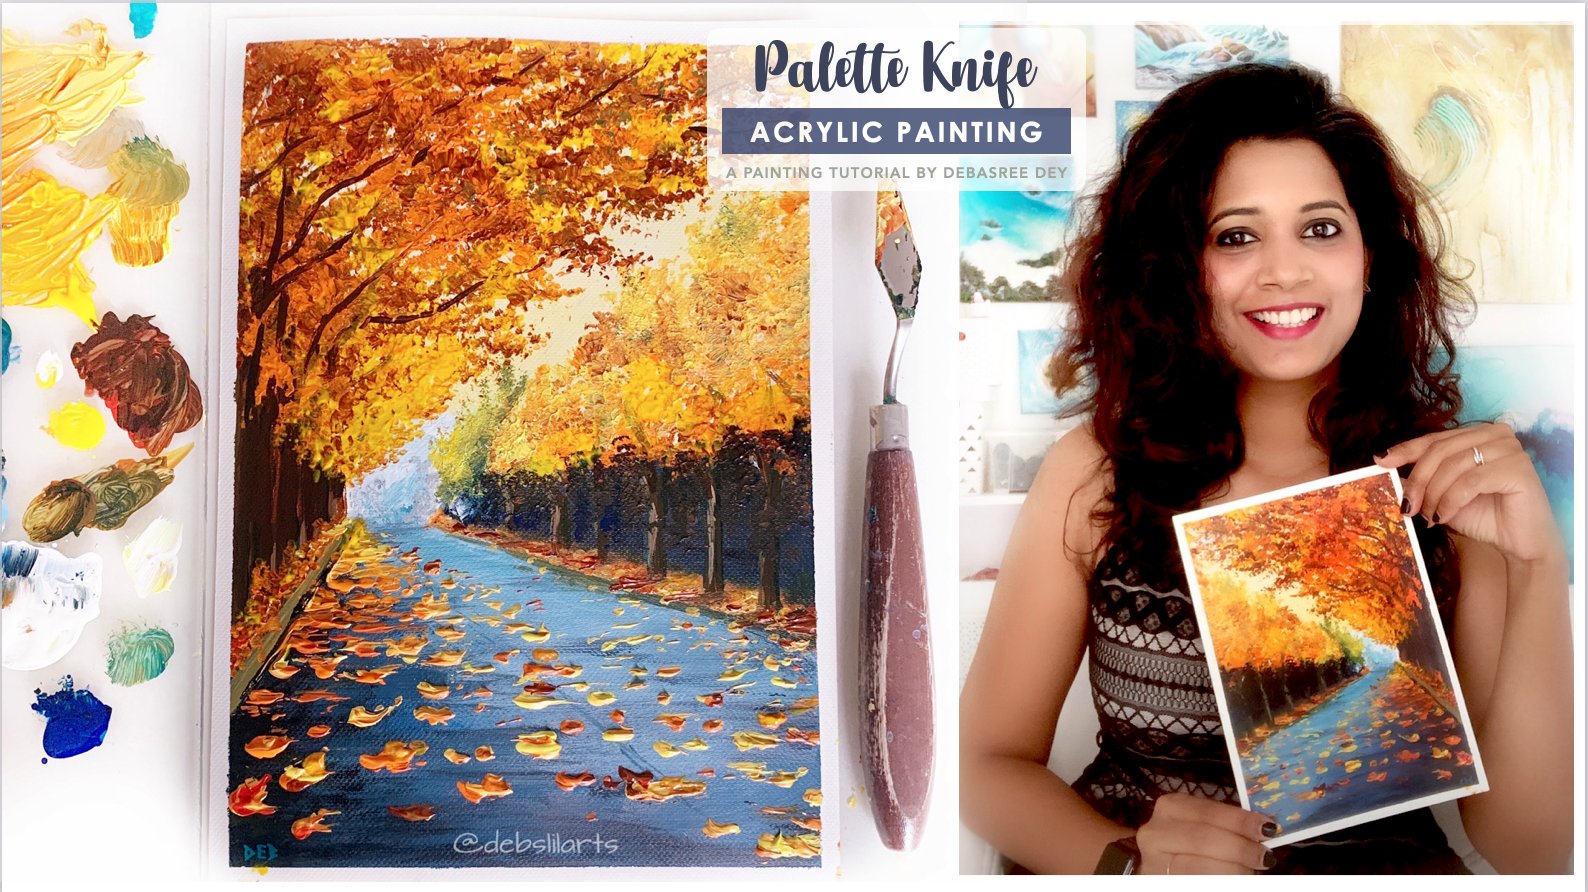
9. Mix & Combine: In this lesson we going mix and combine all the techniques and
all the little practices we make in previous
lessons and we're going to make a little
painting of eye. I work a lot in my work with painting
portraits so I estimate, and I paint already
a lot of eyes. I will show you the
way I use it and the solutions I found with
working with pellet knives. First, I'm going to draw an
eye real quick, real easy. You can do it with me and the eyebrow. Well, something like this. I just going to
start and I try to explain a little bit what
I'm doing while I'm working. You can follow me along. Just hit the pause
button if you want to stop or just finish watching and try to
do it later yourself. Enjoy. The first thing I
always do when I make an eye, I start with the little surface to water line from
the eye to fill it. As we practice to fill
surfaces between the lines, I make little steps with
my knife like this. Then I make a small line. Now it's still wet because wet-on-wet is the
best way to work. Because wet-on-wet is the
best way to work, now, I already go to
the underlayer of the face because I want
to make the eyelashes and here I put some paint
and then this eye where I can put eyelashes in. Make it a little
bit interesting. Find your solutions in your colors and now we're
going to make the eyelashes. Again, I use black make little stripes with the
tip of your knife this way for the lashes. If you want to make
them more visible use the second color and the lashes never make
too much, just a few. Now, we're going to
put the emphasis on the top of the eyelids. It's a little bit darker. I'm in control now
because I don't want to waste the white
of the eyeball. I use the side of my knife, put it down, and strike
up where I want it. I continue with it later. Now it's still wet. Now I want to put again
the eyelashes in it. Use enough paint that
it won't dry too quick so we can really
work with eyelashes. Sides of the knife, black. Now I can make the
eyelashes with a side of my knife real smooth. Make them smaller then go
to the tip of the eye, the inside of the eye. Emphasis on them, we
add a white color. Now we will continue
with the eye whites, which is mainly great because a large part of the eyeball
is another white but gray, especially where the shadow from the upper eyelids will
be and in the corners. Start with the gray,
the shadow part. Now with white, we paint the eyeball, with the tip of
the palette knife, to the edge of the iris, so we're not connected
across that line and every time I clean the
knife with the tissue, feel free to turn page. This one is again
one straight line because it will
cover the eye white, so it will be on top of it. Now we go and make the
iris and the pupil. I'm going to start
with the black pupil. I'm going to start
with the outline. Use the side of
your knife and turn your wrist so you make a clean stroke against
the white of the eye white. Feel what's most
comfortable for you. Try to stay in control, so don't rush it. Remember it is a palette knife, so it don't has to be perfect. It's nice when there's
a little bit sturdy. Let's call it that way. Continue with the inside. I'll make little strokes now. The iris will turn lighter from the
outside to the inside. Now we can use a little
brighter color, lighter color, mix it a little bit
on the palette, and make little strokes. Now it's a white
shape around pupil. You can also make, if you like, you can get red paint
to make it more alive. I looked up a few
eyebrow of the iris, it's a little bit more dark. Now we have to make
a little corner, real big but also a little
bit dark in corner. Everything is stable like that. So now we need some
shades under the eye. Above the eye will be more light directly
under the eyebrow, so I put a light color
under the eyebrow. White, why not? Be careful that you don't
touch the eyelashes. Now I'm going to
make the eyebrow. Be in control. Little bits and pieces of the paint exactly
where you want it. I'll cut through the paints. You can give direction. I need more emphasis on the corner of the eye. A little bit more shadows. Maybe you want to do
something a little bit more. As a finishing touch, we're going to use a light
in the eye with one dot. Use enough paint and place it. Place it half in the
pupil and half in the iris. Like that. There you go. You just
finished your first eye. It's really quick, a really easy task. Don't be too precise because the palette knife has to work with structure
of the paint. I hope you enjoy and the
next lesson I will see you, where we're going
to make a booklet out of all of our practices. Don't forget to upload your
painting in our portrait and research page
because there I can give you some feedback and I
would love to see your work.
10. It's a Wrap!: [MUSIC] It's a wrap. This is our last lesson. Together we're going
to make the booklets. I have to tell you this
is also not my fields. In our project and
research page, I will give some really good
teachers here on Skillshare who can help you a lot better
than I can on this topic. But I want to do it
together with you anyway. Because the importance
and the value of a book, the way you put your
love and energy in something you keep and cherish is so great that I
want to do it anyway with you. The first thing we need for that is our practices which we made. We need something to make
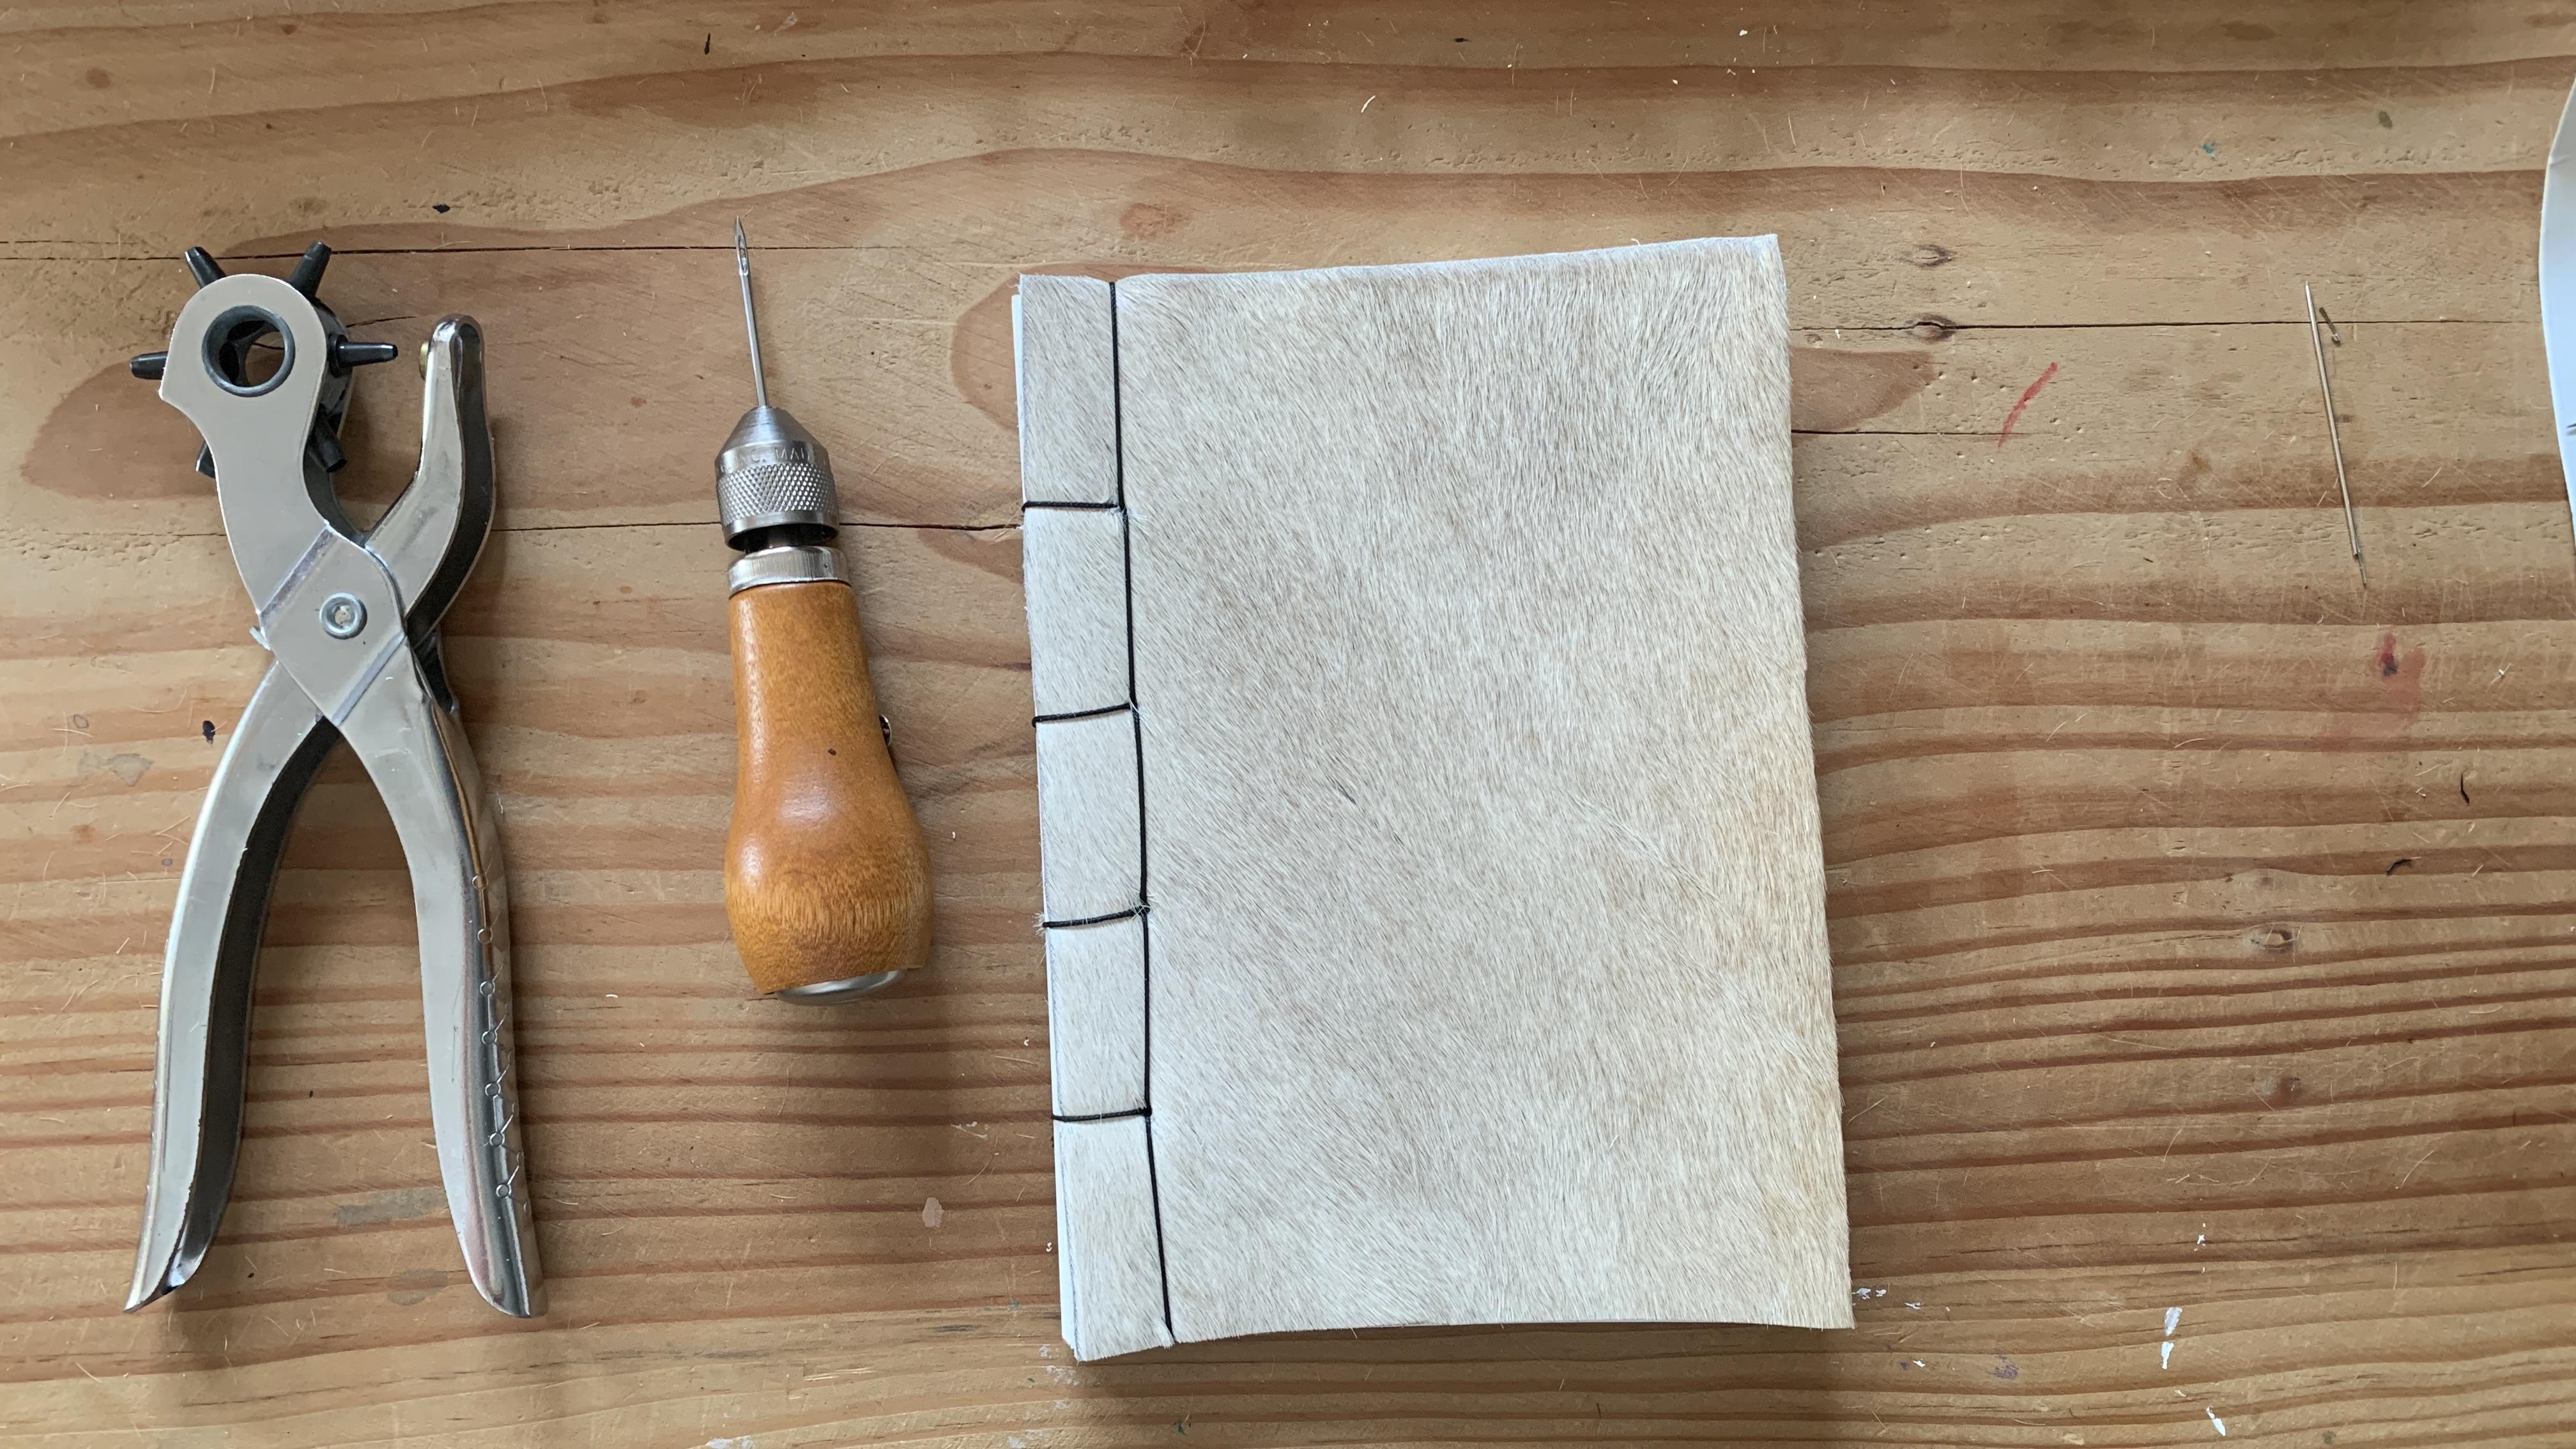
holes in the papers. This is a leather needle
for binding leather. Or you can use a thing
to make holes in belts or drill with a machine. You will need a big
needle, a pencil, and a ruler, some threads to bind the book, and something to make the cover. I cuts little
pieces of cow skin, which I use a lot
also in my work, as you can see at the back. I love to give the
animal a second life. I'm not want to waste things. Well, you can use
anything for that. Whatever you like, maybe
some piece of cardboard, even pizza box, whatever or maybe you are just like
me and save everything, you can use even an
old pants of jeans to cut the covers and it will be exactly
the same size as your practices you made. The first thing we
have to do is we have to make sure that we know where we're going
to drill the holes. We're going to make some lines and we measure the points where
we want to have the hole. You take the front-page. You measure, first
you make a line where our folding point will be. You make a line at 1.5 cm. Some a little bit
more than one inch, then you will make four points where we're
going to make the holes. [MUSIC] Now I have my four points
where we're going to make the holes and I
prepared my covers also a little bit where I want to make the
holes exactly at the same spots because this
material is quite thick. So I don't think I
can set the holes to all the layers of paper
including this skin. I prepare a little bit already that all the holes
will be on the same place. You can do that too if you
have a heavy material. When we have done that, we're going to take our
completes stash of notes and practices we made and we're going to stick
them all together. Maybe you want to cut
them in the same shape, or maybe you want to hold
them with some clips. Because if you're going
to punch the holes, you want to have them exactly
on top of each other. Like this. I take plastic thing, so I don't drill my table. [NOISE] There we go. When this is not working
because your sticker is too big or the papers are too
thick or it's not working, then you have to draw the lines on each paper
and stamp down one-by-one. Now I'm going to make
holes on my covers. For that I'm going to use
this [inaudible] thing. This is really easy.
You just punch it. Now we have to
measure our threads. The thread we need, the length we need is five times the size of the
length we want to bind. I'm going to take a thread
and I measure 1, 2, 3, 4, 5 times, a little bit more and we
are going to take a needle. I'm going to use this one. I place my thread through the needle and put the
covers on top of my stash of notes and put some clips on it to make sure that the holes
are on top of each other. We start with the second
hole on the back. Like that, all the way through and leave a
little tail, like this. You can hold it at the back
with your finger. Go around. With this Japanese stitching, you always start with binding the vertical lines
and then you go to the horizontal lines. Vertical, horizontal
and so we continue. [MUSIC] This was our last binding. Now we have to put
a needle back to the backside of the booklet, so we cannot knot at here. We have to go one more
time through that hole. But first you go
underneath this thread, and go down again. When you've done that you can then knot at other
back, real firmly. Don't get loose. Here we have a whole booklets. [MUSIC] You can see the results of what you've
made in the booklets. To keep as a reference. I hope you enjoyed and I would love to see results you made and make a picture and upload it in our
project and research page. We can all see
each other's work. I will see you in
our final lesson.
11. Final Thoughts: [MUSIC] I hope you enjoyed
this class about basic principles of the
palette knife technique. Together we looked into
some of the techniques, how to make strokes
or fine lines, or how to mix the colors, and we came up with
a lot of solutions. We made the booklets for
your future reference. I hope you are now comfortable enough to
start the painting of your goal or maybe you would like to follow
another class, which you can find
here on Skillshare, which I made and it's about making a portrait
with appellate nice. I hope to see you there. If you want to see more
about me or my work, you can take a look at my
website or the Instagram page, which you can also
find the link. I hope to see you later. [MUSIC]
 Charlene Van den Eng, Artist Palette Knife painting