Transcripts
1. Prologue: Don't you just love
the smell of books? Hi, I'm Tonya a
graphic designer, and I'm currently living
here in Australia. A few years back,
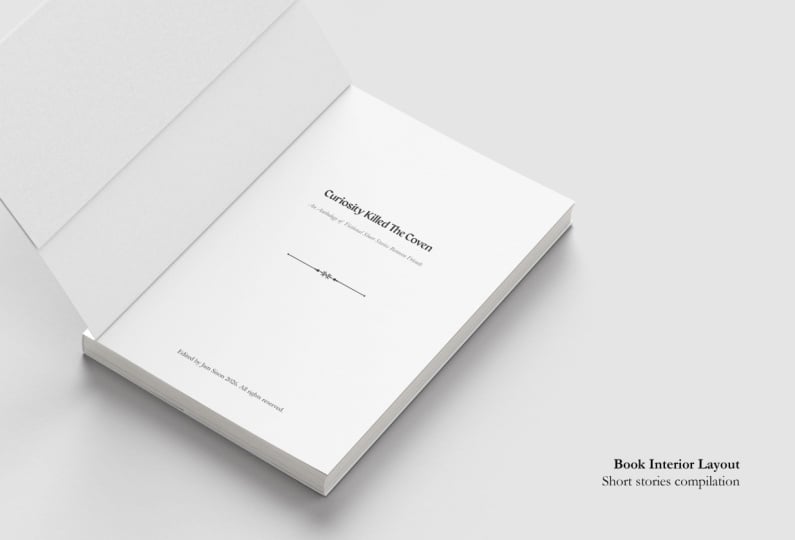
I used to work for a self publishing company where I created the internal
layouts of books. I also did the front covers and got them ready to print
on Amazon and smash word. Today I'll be teaching you how to create
your very own layout. We'll take a deep dive into some theory like the
anatomy of a book. We'll go down a
rabbit hole trying to find that perfect font
to suit our novel. We'll learn how to find
inspiration for your book, how to manuscript
formatted in design, and eventually
save it for print. You'll really start to find a great appreciation for
words on a piece of paper. Let's not waste any more
time and let's get started.
2. Project Overview: For this project, you're
going to be laying out five chapters
of a manuscript. There's already a
file located down below in the project
and Resources folder here on Skillshare for you to download or you can use your
own manuscript if you like. At the end of this course, I'd like you to take
some screenshots of the chapters that
you've created, just so that I can see
the style of it and how it fits in with
your novels theme. You can also take some
screenshots of the front matter. If you may have some
decorative pieces on it. If you get stuck or
have any questions, feel free to go to the
discussion tab down below, and add a comment. I
hope you have fun.
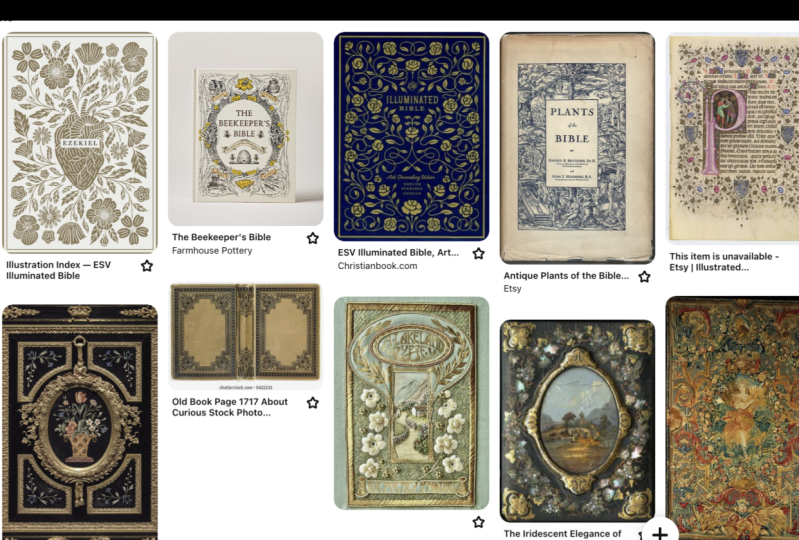
3. Chapter 1: Finding Inspiration: This chapter is all
about imagination. We'll look up neat ideas on Pinterest or whichever
site you prefer, and find something we can take inspiration from For
our layout design, we can even get inspiration
from actual books. Keeping our focus on
how the chapters look, where the page numbers are, and how the first
few pages look. Once we've got in our inspo, it's handy to keep
these images in, or better yet,
create a mood board. There are plenty of free
programs that you can use to either put together
a collage or a moodboard, or you can make
your own on design. I did here, so grab your inspo
and add it all together. I'd love to see your mood board and what inspired your design.
4. Chapter 2: Basic Book Anatomy: This chapter is all about the theory and
terminology of a book. Before we get into the details, let's start with a few basics
like the spread of a book. This is both the right and
left hand page of a book. They are recto and verso pages, recto being the right
page and so the left. Then we have fly leaves. These are blank pages
found throughout the book, usually at the start
of the novel and just before titles or chapters. A book consists out
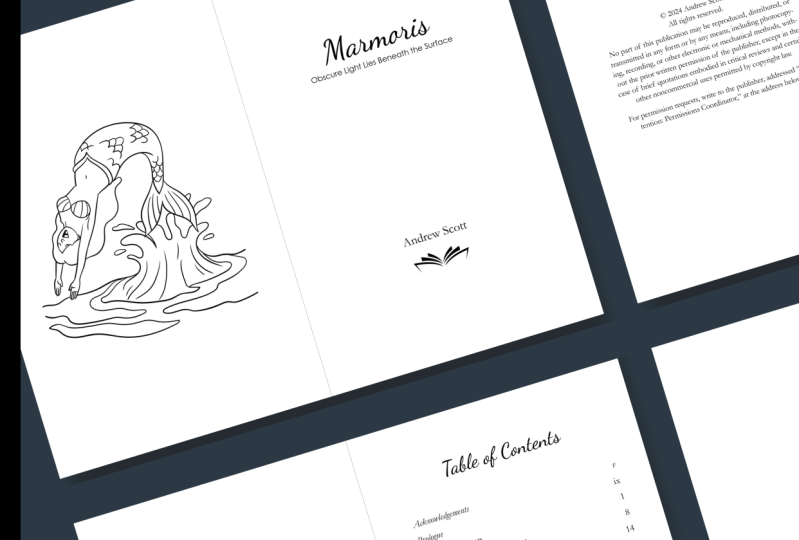
of front matter, the body, and the end matter. The front matter consists of
a blank page or fly leaf, usually at the very
start of the book, a half title on the recto. This is just the
title of the book. A front which is a
decorative image on the To page opposite the
full title page, or in this case the author
added a front is piece on the spread a few page after the full title page
with the book title, author name and publisher details the copyright
page on the verso. Then any front matter like
acknowledgments or dedication, the front pages usually do
not show the page numbers. The table of
contents comes next, but usually fictional
novels don't have this. Then the prologue
starts as a chapter, which we'll get into now,
the body of the book. This consists of
different chapters which could have a
heading and foot. Headers always
display author names on left and book title on right or book name on left and chapter heading or section
marker on the right. Footers usually
display page numbers, but some authors like to place the page numbers on the
header or vice versa. Section markers and page numbers do not appear on fly leaves. Only page numbers
are displayed at the start of a title
page. No headers. Chapter one will always start on the reto page and be numbered as number one Chapters have
paragraph dividers, either indents or paragraph
breaks most people use in dents as this saves paper and lessens the amount
of pages in a book. Paragraph breaks
have a line between each paragraph and
have no indents. Drop caps are found at the
start of each chapter, at the start of the
first paragraph. This author's book
does not have though. Then we have what we
call widows and orphans. A widow occurs when
the last line of a paragraph ends at the
start of the next page. And orphans are a single word that sit at the bottom
of the paragraph. Similar to front matter, we have the end matter. All end matter titles start on the recto page and continue
with page numbers. If the section has
more than two pages, it usually has an epilogue
or about the author section. The last thing to keep
in mind is that a book always ends with
an odd blank page. If you have ten pages, you would need to add
one more fly leaf. That's it, was probably
a lot to take in, but now we're onto the fun part where we design our
layout of the book.
5. Chapter 3: Set Up - Manuscript: Okay, let's get started. First of all, we need
to make sure that our Word document is saved correctly before we
imported into design. If you've used a
different software to write your manuscript in, I would suggest just copy and pasting it onto Microsoft Word. Or if you don't have
Microsoft Word, you can always use
the free version, which is Google Sheets. In my case, the author
provided me with a Word document just to be sure the file format displays
correctly on end design. I will open it on Google Sheets. Since I'm not able to
edit it within Microsoft, what we need to do is upload the supplied file
onto a Google Drive. We'll click on, then
we'll add a new file. We'll just go to the location of it and upload the manuscript. There we go, It's uploaded, then we click on the
More Actions icon. Over here we go, open with and click
on Google Docs. Okay, from here
we want to change the font into standard
web save font. Sometimes some fonts
can make in design, glitch out and not
format properly. We'll select all the
texts by pressing control or command A. On Mac we'll either
select Aerial or Calibri. We'll also change the
font to 12 point size. That's about it. Now we can
download the manuscript and save it as a docx file. It's really difficult to
say that extension name. We'll click on it and then
we'll save it as vinyl. Your book name manuscript
to a suitable location. Just a reminder, it's
supported at this stage the book be proof read and any changes to the
writing be done. If any errors are picked
up once we start with in design layout,
that's still fine. But any major writing errors like removing entire paragraphs will affect the layout
significantly and cause for a lot of
unnecessary work. Okay, and on to the next video.
6. Set Up - Book Size: We now need to open in
design and create a file. But before we do, there's a file located in the project
file, tab on Skillshare. Down below, we can download the mini cheat
guide to Layout Design, which is what I've opened here. It's sometimes difficult to know exactly how many pages
your book will be, especially when authors use different styles and sizes
in their manuscripts. Luckily, we have just set up and save the doc X
file to help us. There's a calculation I found
online which could help. Let's start with using
the default size, which is 129 by 198 millimeters, with a 12 point
size for the fund, you basically just take your entire word count
and you divide it by 300. That will determine the amount of pages your book will be. To see the word count
on your Google Docs, you'll need to select
all of the text again by pressing command
A or control A. Then going up here to the tools. Clicking on Word Count here we can see the
amount of words. We'll take this amount
and divide it by 300 to get the approximate
number of pages for the book. Once you have in design, we'll click on File, Scroll down to New Document. We'll select the
millimeter units. You can select
whichever you prefer, but for the purposes
of this video, I'll be working
with millimeters. Then for the width,
we'll add 129. And the height 198. We'll keep facing pages
on the margins we want. We'll just put all of them
to 20, we'll unlock it. The inside margin will set 218. And the outside 215. We'll press create.
7. Set up - Workspace: The next step is to make
it easier for yourself, because we work smart and
not hard like everyone says. And set up a
workspace that makes it easy to locate what
you're looking for. We have to now set up our document and can start
arranging our workspace. Let's first make sure we
start off on the same foot, and select the Window tab. Go to Workspace and
select Essential Classic. Well then just
repeat the process. We'll click on Reset
Essentials Classic, just in case you've already made any other changes
to this workspace. Now I'd like to just remove
the CC Library option here. I'll right click it
and press close. Then I want to add some styles. I'll click on Window here again. And I'll scroll down to Styles
and add Character styles. I'll then just hover over this little box where it
says Character Styles. And I'll click and drag it
to the bar here at the side. I'll do the same with
paragraph styles. Then the style pack, I'll just right click and close. Then the next thing I
want to add is Effects. I'll just click on
Window again and click on Effects and move
this to the side. This is useful
when you want like a drop shadow or some
effect on your headings. Then I'd also like to add a
line which is by the window. Again, at object and layout, just thinking where it
is and the pressing the Align button and
putting it at the side. Then we can also add
glyphs which you can the type down over here. We'll just add that as well. Okay, to save the workspace, we'll just click on
Window Over Workspace and select New Workspace. You can call it
whatever you like, but I'll just call it book loud. Then you just press, okay, I've already
created this workspace. I'll just replace
it by pressing, okay, there you have it.
8. Chapter 4: Format - Manuscript: For this chapter, we'll refer
to the ABC's of formatting. In the mini cheat guide
to Layout Design, it's useful to keep
the sheet handy, especially when
formatting the layout. Our first step before
we do anything else, is to decide on
the body copy font before we start to
format the book. Are we looking for
something more fancy and think a
seraph would work, or do we want to
be more modern and keep it simple
with a San Seraph? Comic sans is always a no. Any script font is also
not really recommended, as we want the viewer
to be comfortable reading and make it as
legible to them as possible. A font family with different
weightings of great options. The ones we mainly use
are Garment Cambria, Grand Design, New Sera, Calibri, and Century Gothic. Once you've decided
on which fund will fit your book best, we can now upload or
manuscript onto design. We can do this by
either going to File and clicking Place and
searching for the file. Or how I'll do it is I'll go to the folder and I'll
just click and drag it out onto design. Just minimize this then, while pressing Shift,
or holding Shift, clicking here by the
corner of the margin, we'll place the
entire manuscript. If you click on Pages, you'll see here that it has
placed all of the pages. Okay, We want to now
format the fund. We'll just double click
inside of the text box and press control or
command a to select all of the text using the cheat
sheet or the font sizing. We'll just use that
as a guide for me. I will be using Gard. I'll the font. It's important not to type
out the font just because we want to select the entire family and not
just a single weighting. I'll just backspace that. I'll scroll down to the font until I find it. There we go. And I'll just click on that. Okay, now we'll state
the size according to the cheat sheet, the leading. It will also change
the color to black, because sometimes the author changes some of these colors. I will set the
language preference. In my case, I'll
just do English UK. Then we'll set the
justification as well. If you don't see it over here, it may be at the bottom here by the paragraph
formatting controls. We'll just select
the justification. Then we'll set the
left indent to zero. The first indent to 55. Yes. Then here at space after, we'll also just make this zero. The left dent just basically says that a new paragraph
starts with an indent. Sometimes authors will
use a paragraph break, but this adds on more pages. They usually use the indent to save on the amount of pages. Okay, the next thing
we want to do, sometimes the author ends a sentence with two ******
as you can see over here. We want to just get rid of that. I'll just select the text again. And press control or command F here at the top
where it says query. We'll click and select multiple
space to single space, and we'll click Change. As you can see, there were quite a few of these. Just to be sure, I'll
just change it all again. It seems that we've
sorted that out. Then another thing that
they sometimes do is use a double paragraph
breaks To change this, we'll type in double paragraphs and set that to one paragraph. We'll just click on Change. All there doesn't seem
to be any of those, we'll just click done. Next is we need to set
the hyphenation for that. We click on this little box
over here on the right. Go to hyphenation. This we also set according
to the cheat sheet. We press okay. The last
thing we want to do is click on Type I already
have it turned on, but here it will say show hidden characters and
you'll just click on that. What this does,
it just shows you all the paragraph breaks as
well as any of the spacing. Here we can see there's a space just before
the chapter number. Remember to save your document
and save it regularly. I'll just go save as I
really have a folder here. I'll just save that.
There we have it.
9. Format - Parent Pages: We now need to think about
what and where we would prefer the page numbering and section headings
to be placed. We can add it at the bottom or the top all the way around. If for instance you only
want page numbering, we can remove 5 millimeters
from the margin at the top. To do this, we can go to
File Document Set up, and adjust the
margins accordingly. And press Okay. What we want to do now is open the parent page by
double clicking on it. I'm going to add page
numbers and section headers. I'll click on the type tool and I'll drag the text
box at the bottom. There we go. I'll just put in any number. For now, end design is
glitching out of it. I'll change the
font accordingly. I'll just use command again. I'll leave it at 12. And then I wanted to align
away from the spine. I also wanted to be
centered in the textbox. To do this, you can either
press control or command B. Or click on Object and
select Text Frame Options. And align it to the center. And press, okay, just for a
little bit of decoration, I want to add a line here. To do this, I'll double
click and select the type. I'll go to Paragraph Styles, just add a paragraph style and double click it To open it, I'll go to Paragraph Rules. I'll turn on the rules. You can click on Preview here to see what it looks
like in real time. I want the waiting to
be a little bit th, I don't want it to
extend over the text. I will put the left
and end to 12. The right in ending is zero. And I'll just offset
a little bit so that it's in the
middle. And press Okay. Okay. Then what I want to
do is I'm going to select the text and press the
right mouse button. Go to insert special
characters markers and select current page number. Okay, Now I just want to
copy it to the next page. To do this I'll just select the text box and
hold Alt and Shift. Click and drag it
to the right side. Let me just zoom in a little because design is
not working nicely. Okay, then this one, I just need to change the rule a little bit. I'll just select the text again and create another
paragraph style. I'll double click on that. Then I'll just need to
change the left and then to zero and the right
to 12 and press Okay. Okay. That's it for
the page numbers. You can decorate this
however you want. You can put the page
numbers in the middle if you like or wherever you prefer, just see those text
boxes in the middle. That one is okay. Then I want to add a
section header as well. I'll just press the type tool again and create
the text box here. Just want to line that
properly for this side. Usually on the left hand side, the author's name is located
or the title of the book. I'd like to put the
title of the book here. For this, I'm going to go
with the different font. Just to contrast
it a little bit, I'll go with a Sera
Century Gothic, just do the regular one. I'll also decrease
the font size a bit here so that it doesn't
overpower the body copy. I'll then center align it. Just center it again in the text frame object
text frame options. Center and press. Great. Now I just need
to copy it again, holding down Alt and shift clicking and dragging
to the right hand page. Then for this side I'm going
to add a section marker. I'll select the
text right click, Insert special character
markers and select this is basically going to show which
chapter we are on. Okay? And that is the a parent page. We also need to create
another parent page. We'll pick on Pages and right click and click on
Duplicate Page Bread. You can now see a parent
has been created for this. I'm just going to delete the
section headers at the top. You'll see why further
on in the course. Okay, just a little tip. Sometimes it's the
easiest to add the author's name on
the left hand side of the page and the book title
on the right hand side. The section markers can
get a little bit tricky just because you need to add the section
markers manually. If any content of
the pages change, you'll need to change all
of these parent pages. You'll also need to change all of the
sections on each page. Just keep that in mind, but
we'll get to that shortly.
10. Chapter 5: Design - Styles: It's now time for the fun part. This is where we
design our chapters. First of all, I'd
suggest going to find some inspiration if
you haven't already, going through real life
examples like getting some of those old books out of the closet or out
of the bookshelf. Not sure why you'll
have books in the closet going through them, seeing how they've
been laid out. Even. I'd suggest that you
design your first chapter. Get that before you continue
onto any of the following.
11. Design - Chapter Number Paragraph Styles: It's now time to style our
chapter numbers and headings. I've saved an
inspirational image and I'll keep it
handy to refer to. We need it, this is
the inspiration piece. It's really great to
have two screens working on a layout just
to sometimes keep the manuscript open on the other screen or in this
case the inspiration image. Okay, let me open that again. First things first, let's just
go back to the manuscript. Let's start off by finding
the first chapter. In this case, a prologue
is not really a chapter. We'll help out the
author by removing this, looking for the
following chapter. There we go. This will now
be chapter one instead of two because we've got the
show, special characters on. We can see that here is a space at the start
of the chapter. I'm just going to remove that. Then what we want to do, what I have in mind is keeping the chapter number and the
chapter heading separate. I'm just going to
remove that and press Enter to put the chapter
heading on a new line. Then it's time to format the chapter number
into a paragraph style. This is entirely up to you
how you'd like to design it, but I am going to just remove the dent as we created this
at the start of the video. I'm going to c align it. I'm going to contrast the
type with the body copy. I want to keep it
at Century Gothic. I'll also make it a little bit smaller and change it
from bold to regular. Then I want to add a space after so that the chapter heading isn't so
close to the chapter number, I'm going to put to
about 18 points. Okay, then what we want to do, we want this to
start on a new page. For this, we'll
press Control Alt, or I think it's
Command Alt on a Mac, we're going to just
select hereby start paragraph to say our
next page and press, okay, this is now started
on the next page. Something to keep in mind is that you can either write
down the numerical number, you can write up
the number in full. But generally they use numerical numbers Just because if you've got a lot of chapters, let's say 356 chapters, it may sometimes
freak out the layout because it now is going to
need two lines or more. Keeping it simple and just adding a number usually
helps in this case. I also want this chapter
to be all upper case. To do this quickly, I'm just going to select
all of the text and go to Type Change Case, and click on Upper case. That's it for the
chapter number styles. It's not, we didn't save it yet. To save this paragraph style, you can select it
or you can just click on it and go
to paragraph styles. We'll click here below
to create a new style. You'll see it created
the style below here. We're going to click on that, double click it to
change the name. And we'll just call the
H or chapter number. There we go.
12. Design - Chapter Heading Paragraph Styles: Okay, now we're
onto the headings. For the headings, I would like a different fund
to the body copy, but something still similar. What I usually do is
I look for funds on websites like 1001 free funds. I select a fund I think
will work nicely. There's just a lot of ads here. Just remember when you're
looking for these funds, be sure to look for funds that are free to use for
commercial use. As we can see here today
is featured Free Fund. All of these would
be free to use, but sometimes you'll see
it says for personal use, we need to find a font that
says free for commercial use. In this case I saved, I'm just thinking what
the name of it was. Emperor, I think it
was called Imperator. Just going to search that to
show you how I did iterator. It is completely free. This is what you
usually want to look for when downloading a fund. I'm just going to
click download. We just want to save it to
the appropriate folder. Save, then it will
save us a zip file. We just need to
open that folder. We can double click on it and then choose the pond that
you'd like to install. Double click and press install. It sometimes work
differently on a Mac. Unfortunately, I can't remember how to install fonts there, but I'm pretty sure it's
similar to Windows. Once you've installed
that, it will also be located in your end design file for the heading. Let's get started
with the design. I'll just have a quick
look at the inspiration. It's quite below, and the body copy is also
a little bit lower. Okay, let's first
remove that indent. I'm going to search
for my front. There we go. I'm going to
change the size of it. Let's go with 23. I want that sensor
aligned as well. Then for the space after I
will add a, say, about 26. Let's just see what
that looks like. Just be aware that the
font at the bottom here should align with the font
on the right hand page. Because sometimes it can look like this and it's
not really aligned. Just keep that in mind. When adding some
space after here, we can see that there's a page or paragraph break at the start, The chapter which we need to remove as well as another space, we'll remove that as well. As we go along, we'll just
have a thorough look at all of these chapters
to see if we find any of those types of faults. Okay, then we just need to save the paragraph style again. I'll select it. Go to paragraph
styles pre, add, new. See it created a
style over here. We'll double click on
that and name it to H, H, D for chapter heading. Just something useful
to note is if you select the paragraph style you just created and you write, click it and say edit. You maybe change the
formatting to 24, 25 or even if you
just do it from here, you'll see that it
has a little plus, once again because it changed from that initial paragraph
style that you saved. Then we can write, click it, we can just say redefined style. If we click redefined style, it means that every single
chapter that we now select this chapter heading for will revert to this new
style that we created. Just something we
need to keep in mind.
13. Design - Drop Cap Character Styles: Okay, next on our
list is creating a drop cap for the first
paragraph of the chapter. To do this, we'll
just click into the text box and remove
that first dent once again. Then here at the paragraph
formatting controls, there's a little box here which says drop
cap number of lines and drop cap one or more
characters for the lines. This is basically just to say you want it on two
or three lines or if you'd like to make it two or one character or three, in my case, I'll just
stick with two lines. Then I'd also like the first letter to be a
different font to the body copy. I'll select the drop cap. Go to the font settings
and select Operator. I'll also then create a
character style for this. I'll go to Character
Styles, Create a new one. Double click it and
just name this to Drop cap and press Okay. Then I need to create a paragraph style for
this first paragraph. I'll just click out of that selected drop cap and
click on Paragraph Styles. I'll add a new one,
double click on it. We'll call this one
Drop cap as well. Then we'll click on Basic
Character Formats and make sure that this is a garment as
the body copy we have. Then if you scroll down, you'll see that there are
drop caps and nested styles. Here we just need to select the character style
that we created, which is drop cap and press. Okay, there we have
it for the drop caps.
14. Design - Front & End Matter Paragraph Styles: For the front and matter, we'll follow the same rules
as we have just now when creating the chapter
headings, paragraph styles. Let's just look for some
of the front and matter. We've got the
prologue over here. I'll just select that
and remove the indent. Once again, I'll change the fund to fund that
I'd like it to be. I'm just going to go
with imperator again. Instead of having
a number heading now I'm just going to have
a normal chapter heading. Basically just a heading because it's not
really a chapter. I'll change the size. I think we'll just use 23 again. Then I'm going to add
some space after. But first I want to
add a Keep Options by pressing control Alt
and starting this one on the next odd page as almost all of the
end and front matter goes on the reg,
we'll press okay. I also want it to
be center lined. Then I want a bit of space after we'll go to the paragraph formatting sections and
then just add some space, maybe about 20 or no,
that's not going to work. Let's go, let's just see
what it looks down here. That looks about right.
I'll leave it at 23. Then we just need to save
the paragraph styles. We'll just select a text again, by paragraph styles,
we'll create a new one. We'll double click on that. Sometimes the
dialogue box pops up, sometimes you can
just enter the name. In this case the box popped up. So I'm just going to call
this front and praise. Okay, then we just want to do the same for the back matter. I think there was
just one back section here which was epilogue. Once again, the author has a chapter name for this
which I'll just remove. I'm not going to worry about all of these faults just yet. As the next thing that I'll do is change all
of the chapter headings, the paragraph styles
that we've created. And from there, we'll look
at the book in more detail. Epilogue is in all caps,
which is not what I want. I'll just select that again. Go to type Change case, and I'll just say Title Case. I'll remove the indent
center, Align it. I'll change the
font to imperator. I'll change the size to 23. I'll add the space
after which I think was 23 in the last one. Okay. Has just remove. Yeah, that's about right. I'm not sure why it's gone pink, but I just selected the
waiting and it's gone now. Then we'll, we'll create
another paragraph style, double click and say,
and we'll press. Okay, that's it for the
front and character styles.
15. Design - Completing the Rest of the Chapters: We'll now use all our
paragraph styles we created and complete
the remaining chapters. Let's also have a look through any other faults in the layout. Let's scroll back onto the top. I've just noticed that there is an acknowledgment as well, which I forgot to create a
paragraph style for this. We'll click and go to Paragraph Styles and
click on Front Matter. I'm not sure why
it's doing this, but it's not behaving correctly. I have tried doing
other things to make this work as well and
it is just not working. What I'm going to do is
I'm just going to copy this and paste it below all
of this other information. Then what I'll do is I'm going to select this whole paragraph, right click on it and just
say clear all overrides. Let's rather not do that. Let's undo that. We'll select this part of the
paragraph and just make it into regular for
the acknowledgment. I'm just going to create a whole new front
matter paragraph style. That's the only way I can
think of getting through it. I'm just going to go to type and change the
case to title case. I'll also use the
front I installed operator, make that 23. I'll remove the indent
and put it in the middle. I'm going to add a little
bit of space after then. For the body copy, I'd like this to be in
the middle centered. I'm just going to
remove that indent again and then center it, but I want a bit more
space on the side. I'm going to go to the
paragraph formatting controls, Then I'm going to add a bit
of a left in dent as well as a right in dent until
I feel it looks okay. Yeah, I'm sure that looks fine. Then I'm just going to
select acknowledgements. I'm going to add a
new paragraph style. Just call this Front matter
top. Let's just say that. Then from here we can even go
to the key options and just say on next odd page
and press okay. Okay, that's working
much better then what I'd like to do is I'm
just going to remove this extra paragraph space. Then I want this to be
centered with the text box. But before I do that, I first want to complete
the entire layout, and then I'll center
the text box. Because sometimes when we add more content or
takeaway content here, it's going to have maybe this part centered on the page instead of
the acknowledgments. Let's rather just leave that
until right at the end. Okay, let's just move on with the next character
styles and paragraph styles. The prologue. We need a
drop cap. There we go. There's a drop cap. Here is a extra paragraph break here. The chapter starts
on the so page, which some authors
make an exception for this and leave it on this page to space some
pages for the book. But a lot of people will
add a blank page here so that it starts
on the reto side. It's entirely up to you, but it just saves space. If it is on the verso page, this chapter is all done. You can see here that
the author made a bit of mistakes adding some ****** just between these
sentences. This is usually. Solved. When the proof reader
goes through the book, it's not necessarily that you
need to do these changes, but if it is quite obvious, then you can do it if you like or if it's your
book, naturally. Okay, that seems fine. Here's chapter three,
We'll just remove that. We'll press Enter and
select the chapter number, heading, and the
chapter heading. I've just realized now that
this title is not correct. Some thing that I use is
called a title case converter, which you can find on Google. It basically changes your title into the correct title case, which would be a small
letter for the of and a of. I'll just correct that. Then here we need to
add the drop cap. Just remove this extra spacing. Equips, Here we go. Here's another spacing. There is something, I'm not sure what is going
on here as well, but basically this
sometimes happens when the author uses a different
font on the word document. It sometimes freaks out a little bit what I'm going to do. I'm just going to select
this whole paragraph, I'm going to write click
and say overrides. Then I'll just change this back into the original body copy. I'm just going to look for P. Change it accordingly.
There we go. See sorted it out. Just remove that extra space. Remove this extra space as well. Press select the number
and the heading. Remove this paragraph
break at the drop cap. The title seems to be fine, but you can just check that
in the title case converter. Remove this, remove that one. Here we go with some
more strange dots. Just select the paragraph, clear the overrides,
and change it back. Where are you? Let me go. There we are. Remove these spacings.
Chapter number, chapter heading,
remove the drop cap, and the title is fine. Remove this. Okay, I can't scroll down anymore. But if you look closely,
there's a plus here. I'm just going to hold
Shift and click on that. Sorry, I'm just going to add
page and then press Shift. Click. Click on that. Hold Shift and click, then it will place the
remaining pages here. We need to remove this. The epilogue is looking funny. I don't know why
it's the matter, it's not on the next page. Let us go get keep
options on next odd page. Okay, something
went wrong there. Then just the drop
cap for the end. I'm just going to
change this up and remove the end period. And then add it to the center. And add another line. That's it seems like
it's all of it, but you can go through
as many times as you like just to make sure
you've got most of the folds corrected and also the title case that the chapter numbers are
the correct numbers. Maybe that is what
I need to look at. Let's see, chapter one, chapter three, that's
supposed to be chapter two. This is also not correct. I think I made it up case. Let's maybe select
this and just go to paragraph styles and say
apply chapter number. Let's just see if
we need to go to, maybe just open this and see
if we can get the case here. I'm not sure if you can. No, it doesn't seem
like it. Okay. So I'll need to keep
that in mind as well. So, I'll just need to change
the case to upper case. This will be number three. I'll need to change
that as well. This will be four upper case and that's it. Okay, I'm sure
that's fine for now. Let's get onto the next video.
16. Chapter 6: Flyleaves: We'll now add fly leaves, pages or pages with
some info to the book. We'll start by adding a few blank pages to the
start of the book. Let's scroll onto the top. We'll click on Pages, then at page one. All right. Click
select, Insert Pages. Insert. We're going
to say before page on E. And just press okay. Okay. It has added
this page over here. This is basically going
to be a half title page. For this page, we can
add a text box with the title of our book, Morris. I'm just going to leave it here for now and then design
it a little bit later. Then what we need is
another two blank pages, or rather this page
here, never mind. We'll add two more blank pages. This will be for the front
piece and the full title. This will be for the
title of the book, the author name and
the publisher logo. Then after these two pages, we'll add another two pages. This will be for
the acknowledgments which will be on the retie, another two pages for
table of contents, where the
acknowledgments are on. The versa would be
the copyright page and the copyright page is usually always on
this side of the page. Okay, and then we'll just need to go
through the layout once again to make sure
everything is correct. Since here is a bit
of extra information, I'm just going to remove that. I am going to delete
this textbox here. Just press the delete, and then this page is correct. Here, let me just have a look. It's a half title page. The front piece. The full title. Then it's the copyright. And then the acknowledgment. The acknowledgments will
be at this page over here. We'll just drag that there. Then it's going to be
the table of contents. We can remove these two pages, or just one of them. Then the prologue starts at
the recto side over here. Then as we scroll down, sometimes you get things
like widows and orphans. Widows, orphans are one word
that is on just one line. In this case over here, it's not too big of an issue. But some authors would rewrite their paragraph
a little bit so that there's a tiny bit more words filling this line sometimes. In this case, this is
a widow, for instance. Where a line has one
or two words in it or a full sentence and starts at
the start of the new page. This is not ideal. Sometimes people will just change the layout a little bit. For that what
they'll usually do, they maybe add this line
to the next line rather. Let's add a bit
more space after. And as you can
see, we now do not have a lot of widows starting at the
new page. We'll leave it. Let's just scroll through to
see if there's any others. I am going to leave my
chapters for now because I'm going to move them down as I want to add a little
flourish at the top. I won't be looking
at those right now. Let's just go to the
back matter matter to see if they have
any widows or orphans. And no, it doesn't seem like it. That's fine. Just a note, the book always needs
to end on an odd page. You'll usually just have one
page at the end of the book, a blank page. That is. Okay. Let's get on to design. I'm just going to select or
keep this at Garmon font. As the Garmon font, I'll increase the size. Just add it to the center, Just a little bit off center. There we go. That's fine. Then I'll just copy and
paste it on the title page. Let me just grab the
full title here. This would be great if
you had a second screen. You don't need to open
all of these tabs. I'll just copy that. Maybe just add a new text box.
Paste that in. Then for this one, I'll give it a bit more
of a decorative feel. Use the imperator font, maybe the Gothic font
for this century Gothic. Keep it at the center. Then I want to change
the case to title case. This would be a capital letter,
will be a small letter. Just be sure to use the title converter that
you can find on Google. I'll add that below the
name, the title of the book. Just move that a bit down. Then I also need to
add the author's name. I'll add in this font here. Let's just grab
the author's name. Well, I don't think the
author's name was in this. I'm just going to give the
name for now, Andrew Scott. I'll increase that
a little bit then. The publisher's logo will
usually be at the bottom here. I've just downloaded a free little icon that
represents publisher. And I'll add that over there. Then for the frontispiece, I'd like to have a bit
of a decorative page. I've just gone on to Pixabay, which is a stock image site. You can basically find whatever free images you'd
like to add to the page. For this one, I just download it like a mermaid type of page, as this book is about
mermaids and sirens. I'll just add that
onto the front page. The front for the front piece, I've placed the image, but it isn't cropping correctly, so I'm just going
to right click and say fitting full frame, full
content proportionally. Then I'll just move this
down to the edge over here. Okay. Then we need to
add the copyright page. I'm not sure I have a
copyright page here. No, I actually don't
have a copyright page. But let's just call this
copyright page for now. I'm sure you can find a few examples on Google that you can
use to paste on here. Copyright. Let's just
say that for now. Then this will usually be
centered in the middle. We'll go to Object
Text Frame Options, and click on Center
and press Okay. Then the acknowledgments
we can do the same for as. I'd like this to
be in the center. Then the table of
contents will be here. But we're going to generate
this in the next lesson. Let's just keep that in mind. I'm just going to add a
little box here to say TOC, which is table of contents, just to remind myself that
that needs to go there.
17. Chapter 7: Flourishes: Okay, what I'd like to
do next is add a bit of a flourish just before
the chapter number. What I'm going to do is I'm going to click
on the text box. And drop down the
box a little bit, just making sure it's in line with this text on
the right hand page. It needs to be a
bit about there. Then I'm going to grab an image that I
downloaded from Pixabay. I'll just add it to the
side. Click and drag. I'm looking for this
shell over here. I'm just going to crop this image box and then add it at the top here. I'd like for it to be centered, so just make sure the crop is more or less in the
center of the image. Then I'm just going to press Shift to see what it looks like. It needs to be a bit
more to the left. Just do that again. I think I'm going to turn
this upside down. Yeah, I think that's better. Okay, so what I will
need to do now, I'm going to drag out a ruler
from the top over here. If you can't see the ruler, you go to Windows and click
on Ruler or sorry, view. It will say Show
Rulers over here. We're going to click
and drag this to where we need to drag
the chapters down to. I'm going to copy this, I'm going to paste it onto my parent page to
give me a guide. So I'm just going to go control V. Then now we can
see that it is showcasing on all of the pages for the
front and end matter. I might even have
it to that as well. Let's rather just leave
that one and just do it to the chapter headings to give it a bit of a
different feeling. I'm just going to
copy this image, pressing control C.
Then what I want to do, I want to anchor it to the text. There's a little
white text box here, a little blue box here, which you drag and
put on the text. To anchor it, it moves
along with the text box. Basically, this
helps you maybe add a bit more text to your book and it goes
to the following page. That won't stay on this page, but rather it will follow
the chapter to the next. But you just need to
keep in mind that this text box will
stay like this. So you're going to have to
go through the entire layout again and change your
chapters to this position. This is why we leave this till the end until we know
we've got all of the faults corrected so that it doesn't take too
much time to correct. Okay, we've copied
that little icon before we anchored it, and then we're just going
to drag this one down. We're going to go to object in place and then just drag it to the middle of this page. The anchor, the blue box anchor. Let's just make
sure everything is still correct as we go on. This seems fine. See then the
chapter three P in place. Again, anchor it. All of these seem fine as well. Move down and edit. Paste in place. Anchor that. Just realize this
chapter upper case, I'm just going to change
that to upper case, just making sure that the
previous that one was at least. You can make little
notes to yourself as you go along just to make sure that you've
corrected all of the faults. It just really helps
to have something on paper so that you
don't have to try and remember everything
that you need to change. Okay, that's chapter four. The epilogue is fine as is then. Here we can see that hasn't
placed all of the pages, so we'll just add
another blank page. Click on the red hold shift
and click on the margin. Okay, Remember we need
to end with an odd page, so we'll just add another page. Okay, I think that
is good to go. Yeah. Onto the next video.
18. Chapter 8: Table of Contents - Paragraph Styles: What we'll do next is get the paragraph styles ready
for the table of contents. This is so that we don't
manually have to type out all the chapters and
pat locations of them. For the book, novels like these don't usually
get a table of contents. But I'd like to show
you how to create one just in case you're
looking to add a TOC. What we need to do is let's go down to the table
of contents page. And let's use this text box
we placed here a bit earlier. We want to basically create paragraph styles for
the table of contents. We want to design what we envision the
TOC would look like. I'm just going to
put some random text here at the bottom
just like that. I'm just really
going to need three. The first one is going to be for the heading of the
table of contents. For this, I'm just going to
use the font that I installed and put that to 23 maybe. Let's type out table of contents just to see if it will fit within
the first line. Yeah, that seems to fit. I keep it at 23 point size. I'll just add a bit of space after to where the table
of contents starts. Then we'll save this
as a paragraph style. We'll just call the C, H, D heading and press Okay. Then for the rest
of it I am going to just change this to the
body fund which is armond. I'll leave it at 12, but I'd like for it
to be a little bit, not so close together. I'll just increase. This must be 15.57 This just needs to have
a bit of space after. Let's just extend this text box. Maybe about that
much would be fine. Or a little bit less. Two, good. What we want to do is we want to
save this as well. Okay. Let's make this the
front and end matter. The front and end matter
usually is written in italics. We'll just make that italic. And then we'll add
this in and say TOC back and say, okay. Then the next one
we want to do is just the normal
chapter headings for this one because we've
already changed it to garment and 12 points the
same as the body copy. We just need to add the space after which is going to be two. We'll then create a
power of style for that. Then we'll call it table
of contents headings. Then from here we want to add to represent what chapter
we're referring to, we'll go to bullets
and numbering. We'll select numbers. The format is basically going
to stay the same for this. It's a little bit too wide. Usually this is going to be ten and minus ten. Yeah, we'll leave it as that. We'll press, okay, now we've got the parallel styles
for a table of content that we're going to
generate in the next video.
19. Table of Contents - Autogenerate: Okay, next up, we're going to generate the
table of contents. We can now just delete
this extra text box that we created because we've already saved the
paragraph styles. We just need to remember,
it needs to be on the recto page to generate
the table of contents. We'll go to Layout and
click Table of Contents. Here we can change the style
that we created there. The style that we created. Toc heading. Toc title. Yeah, title. This is what it is
going to be called. We had it as of content. Then this is the great part. All the paragraph styles we
saved in chapter heading, for example, this is the one
that we want to be using. We'll then generate all of the different
chapter headings and save paragraph we
save for the tablets. We need to look for
the chapter heading, paragraph style
that we created at the start of this
course and add it. Then we're going to
change that style to the table of content
chapter headings. For this, we're just
going to place y here. This just allows the numbers
to be right aligned. Then we are going to
include the front matter. Remember at the start we had a little problem with
the acknowledgments. We just need to
add that as well. Then both of these just need to reflect the paragraph
style we created forward, which is TOC back and end Y. And the same for this one, C back and end. We can just make that one. Then I think there was
end that we created. Here we go. End matter. This is also going
to need to be here. We'll just say back. End on. We can now press okay. We'll just say yes for this. Then we'll place it on the page. Now we've got all of our
chapters front and end matter generated automatically,
which is great. It's very useful to just
update the table of contents once you are completely
done with the layout, just in case any of the
pages have changed. This will then just update
the pages automatically. You can do this just by going to layout and update the
table of contents. I just see a little fault here. I think I added a bit
more space after. Let's add a bit more space, Maybe 20, we'll just write. Click on this and say
Read a Fine style. The next time you update
the table of contents, it will go to this style.
20. Chapter 9: Sections & Parent Page Placement: Okay. Now we basically have to
place the sections on the correct page
numbers and we need to place the parent pages on
the correct pages as well. We'll basically run through the whole layout as we go along just to make sure we've
got everything correct. Again, it's always very useful to go through your
layout as much as you can. Okay, The first page, we are going to add none. This page that has
nothing on it, since this doesn't really
get any numbering. The same goes for
these two pages, we'll just drag this out. The same goes for this
one on the right, but for the acknowledgments, we want this to not be a number, but rather a numerical. Not a numerical, what is
called a Roman numeral. There we go, Roman numeral. We'll click on this
page and click on it, and we'll go to numbering
and section options. We'll then select Style and go to the Roman numerals and press. Okay, here we can see
the Roman numeral. I actually think this
doesn't get a page number. We can still format it to
have that and just make this page have no style to it. It will still reflect on the
table of contents though. Okay. The same goes
for these pages. We'll add none to them. We'll add none to this page then for any chapter headings, these pages usually don't
have a header at the top, but rather just the page
number at the bottom. We'll use a parent that we
created and we'll drag that. We do need to add a section. We are going to
click on this page, right Click on it, and then go to numbering and
section options. Okay. For this page section, we need to type in
prologue, pro logue. I think that's how you say it. My brain's gone all weird. Okay. As I'm aware, the front matter gets Roman
numerals added to them. We'll just click on Numbering
and section options again. And just replace the star with the Roman numerals
and press. Okay. Okay. That's it for that one. All of these are
going to be fine. As you can see the numbering and naming that I did change
the section at the top here, but as you can see, if we go further along, it still has prologue. That means that we
need to do this for each chapter number. Here I see a fault.
The first chapter always needs to
start on the Recto. I'll just add a page to this. After this page over here, we'll just click Create Page. That added a new page here. This one needs to
have none applied. There we go. Then
the first chapter needs the parent
page, we'll add that. Then we'll click right click to numbering and
section options. We will go to Siren or
the name of the chapter, then we need to start this
chapter at the number one. We'll just click on
that little button there and press Okay, I see it hasn't changed
this numbering. Let me just see what
is happening here. Here we go. Start page numbering
at one and press Okay. We'll just press Okay. Just make sure everything
is still fine. Prologue is still here. The Roman numerals are
still there as well. This is correct. Okay, Let's find chapter two. All of this looks fine. All of those look fine. Then we have chapter
two and A on the same place that we left it with our guide. That's great. As I've mentioned before, sometimes authors will leave
the second chapter and the chapters following on the verso page just
to save some paper. But you can add another page, blank page here if you like. I'm just going to
leave it from now. Here we are going to add
a parent to this page. Then we also need
to add the section. I'm just going to copy the heading just so
that it's easier. Click on the page, right click, Number and Section options. I'll paste the marker
over here and press Okay. And this will continue with the page numbering
we sat at The start. Here you can see is the section. Okay, That all looks
good. Chapter three. Chapter three, you need to make a parent and we need to
create a section for it, then chapter four and change the section.
That is still fine. Then the epilogue. The epilogue won't necessarily
get Roman numerals now. It's mainly just the front
matter that gets it here. We are going to add parent also. Just name the section in. Yeah, we are going to
need to have it there. We add the section here. It has been added
and we'll just make sure that it ends
on an odd page. Somehow it ends on an even page. Let's just delete this page. Okay. There's just a blank
textbox that will delete. The last page is
also a blank page. We'll just apply
none to this one. Okay, then once you're
finished with all of that, it's just very helpful
to go through the layout again again and again
just to be super sure. But if you follow steps, I'm pretty sure you'll be fine. Now, we can just update the
table of contents because we had to add a blank page
to the first chapter. This will obviously change
the page numbering. I'm just going to go edit. If you look closely to the first chapter numbers as
well as the front chapter, you'll see it should change. We'll just say yes. Okay, there we go. It has been fixed.
21. Chapter 10: Saving for Print: Finally done with the layout. And we can now save it. To save it, we go
to file export. You save it to your
preferred location. Then we're going to change
a few of the settings, which you can just pause
the video to type in. These are all of the settings. There we go, for
general compression, the marks and bleeds. Once you've changed
all of these settings, you can go to save preset and give a name to this preset
which I've just called, Final Print and press. Okay. Next time you
do any more books, you can just click on this
preset to save you some time, press export your document. This can be uploaded onto Amazon to print your
physical books.
22. Chapter 11: Project: We're finally done
with the course. Great stuff. Now it's your turn to upload
your project file. You can do this by taking screenshots of the chapters
that you've created so that I can see
how you've designed them and how it
relates to your theme. Or you can even add
a little link to a PDF of your fully completed
layout if you'd like. Thank you so much for
participating in this course. Ready, appreciate it. I hope you had a lot of fun. Get out there and happy writing, can't wait to see your projects.
 Tonya, Graphic Designer