Transcripts
1. Introduction : today. It's close. I'm gonna teach you how to be floral bouquet in a very loose and simple style. This class is structured for all skill levels. So even if you're completely new beginner, you can still take this class and paint off Laurel. Okay. With you were combinations and how to paint different types of floods and a very simple and a little style that would be enough off practice lessons off village. We would begin painting off Lauren book a step by step baby would. And as you go along with me, I'm also gonna share a lot of composition and finish your floral bouquet in a very loose priest time. It's gonna be a lot of fun. So by the end of the class, you would have to pass projects, all beaten, one bit different types of floods and one with just one type of, but should be good exercise for you to be there for the cookies. I'm so happy and excited that you have decided to join my class and paint off Laurel. Okay with I will see you in the class. Bye bye.
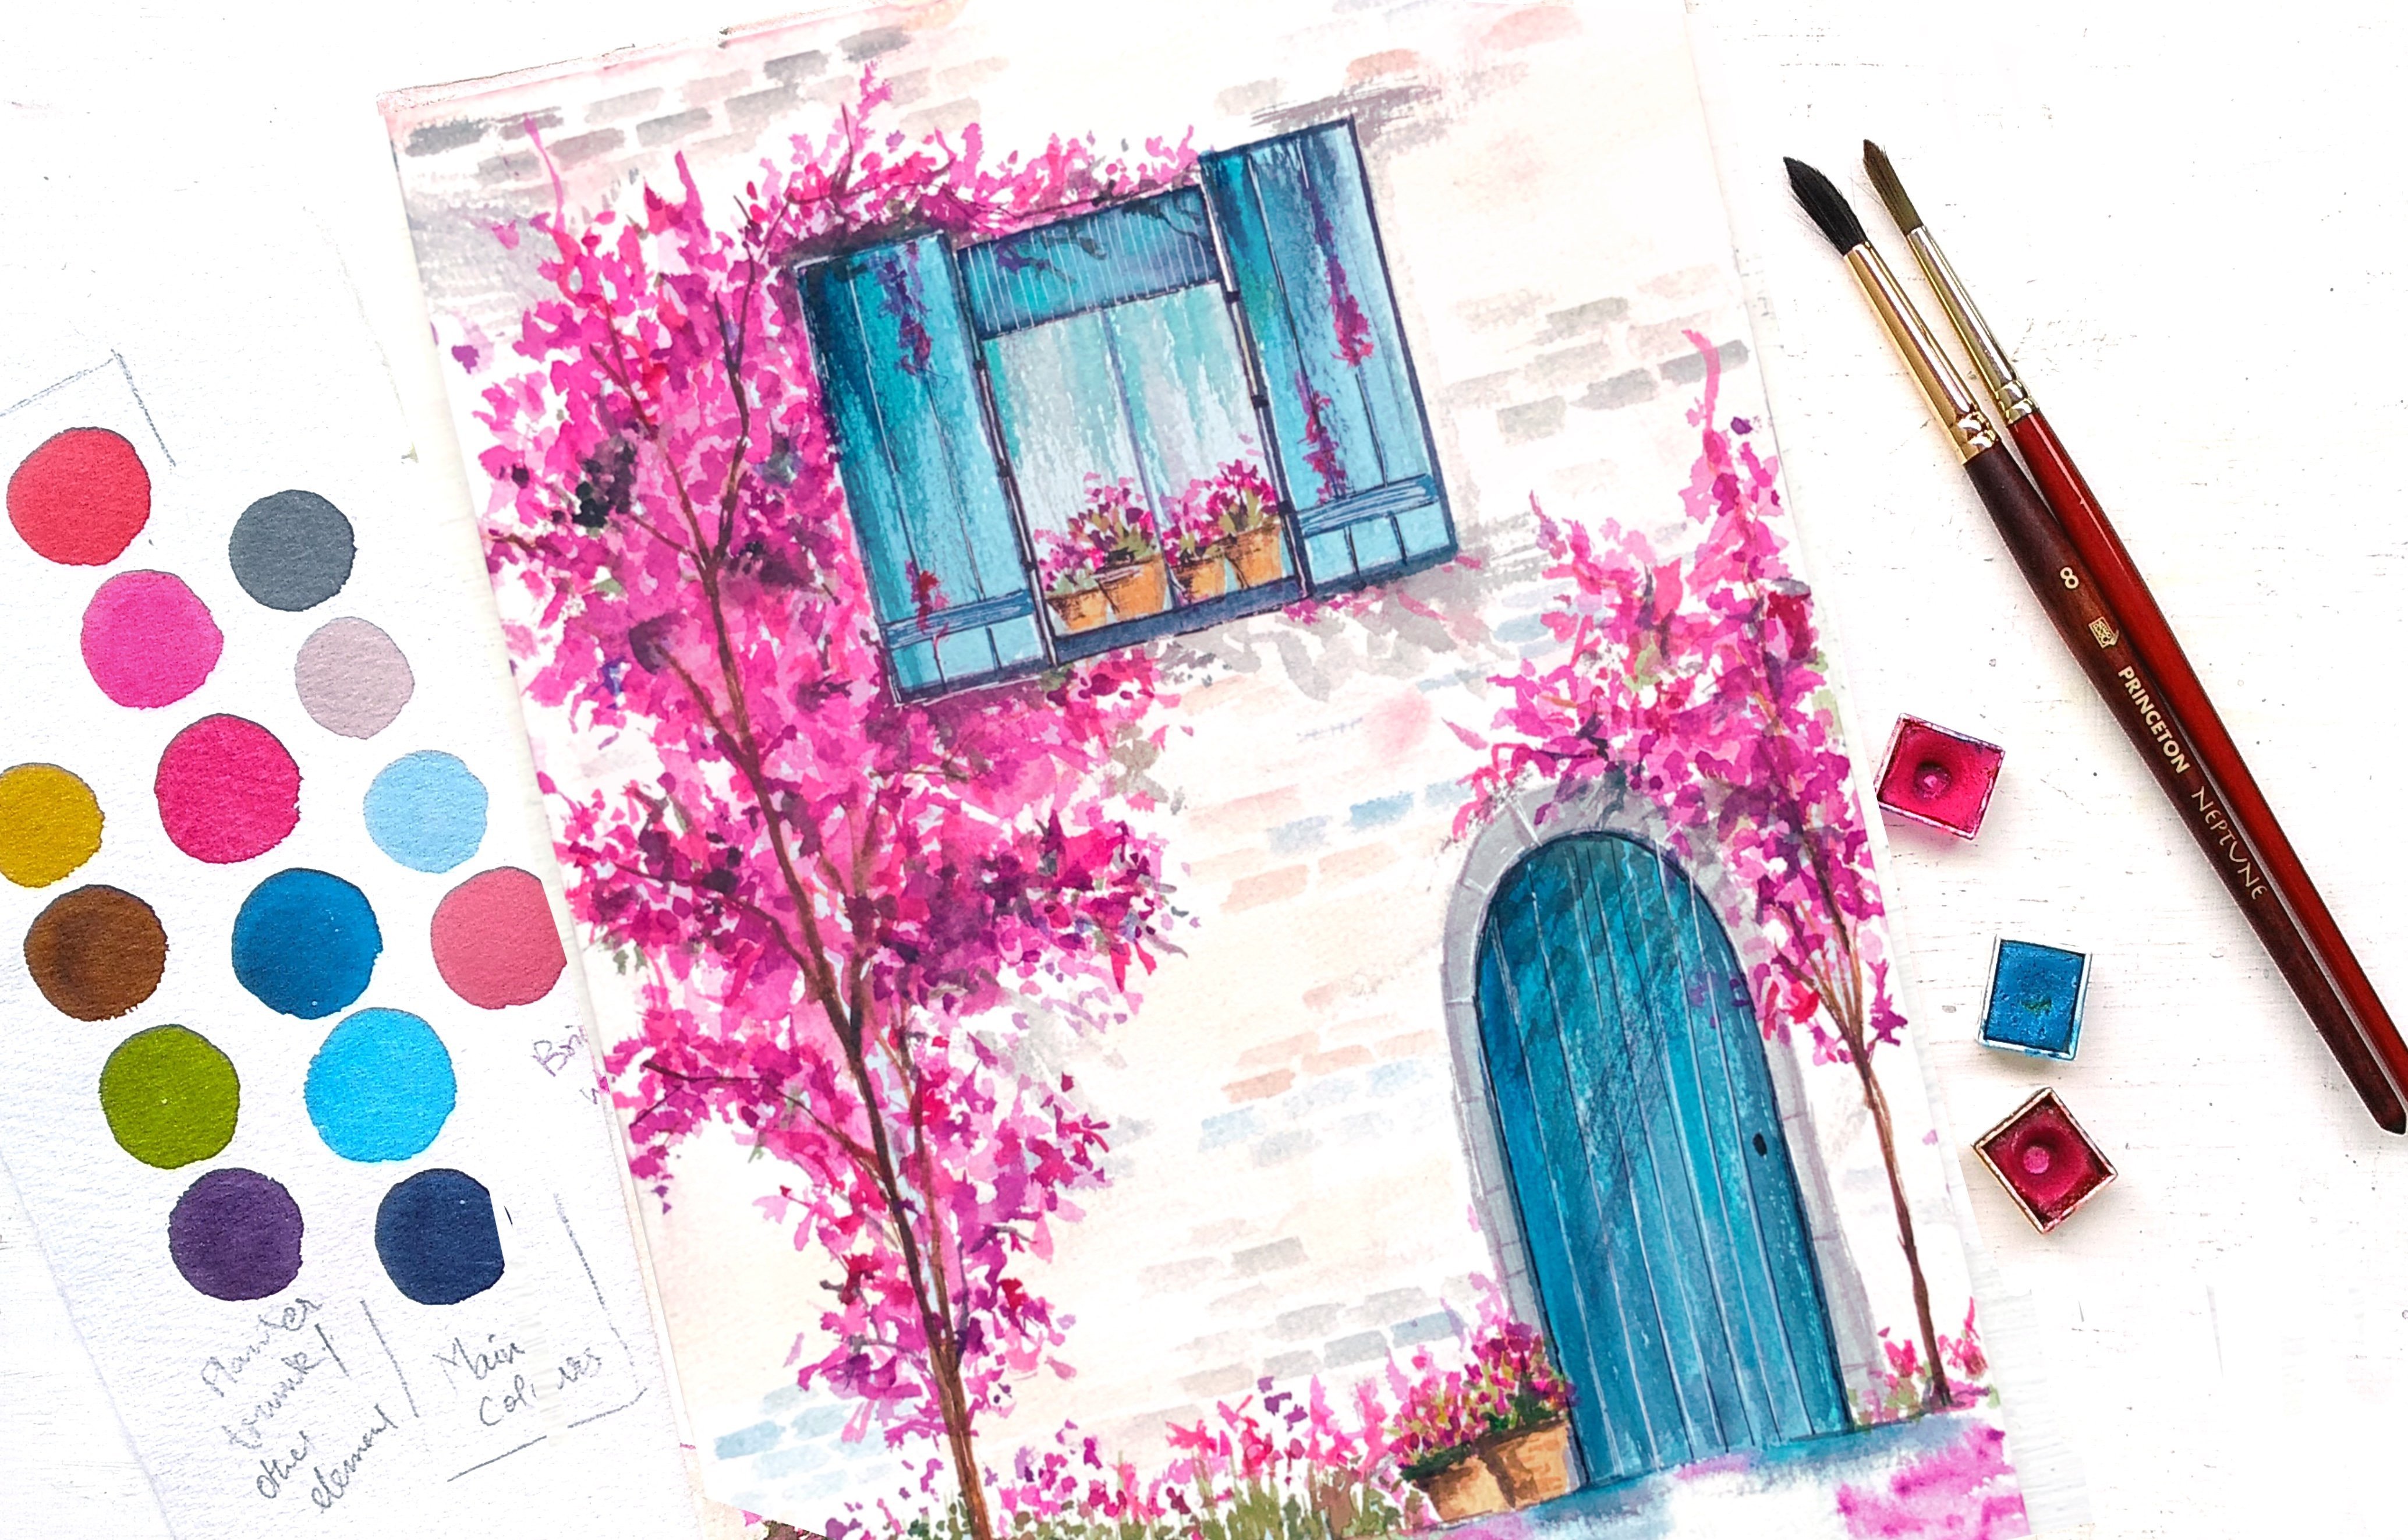
2. Materials required : Let's talk about the materials required for today's class. The materials are very simple. First, what you need is a watercolor people, which is often about 300 GSM and cold pressed and has a lovely tech show pay you can paint and get beautiful resonance with. This is my car. These people sketchbook where I mostly illustrate. Next, you would need a set off watercolor pains. Here. I'm using my prima classic palette purchase off basic 12 colors. You don't necessarily need to have the same pains that I have. Any watercolor being that you have is good enough for the class. Next is the brushes for brushes you would need to wrong brushes. One is offsides Ford and abundance off sized. Well, I'm gonna pain mostly with the size 12 brush and maybe used the smaller brush for something tailing. You mean use any surround brush that you are very comfortable with. You can also have additional mixing palette to make small colors, and the next you need to have the common things, like a jar off water and then people troubles. And that's a This is the only materials required, and you were good to take the class
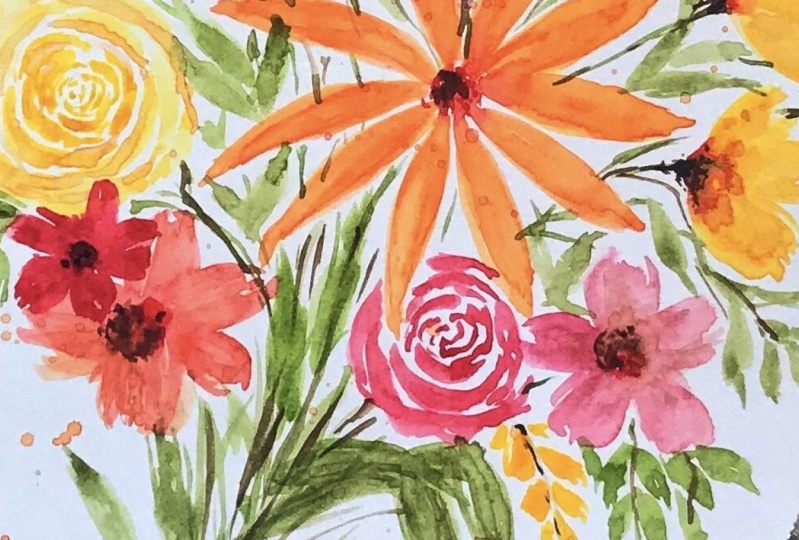
3. Practice lesson - flowers: In this lesson, we will practice some basic flaws and some brushstrokes, which will help you more confident and painting the final class project. I'm using my size 12 brush and for the colors. For this lesson, you can feel free to choose any colors that you warned. I'm mixing some colors, which is similar to the final last project. This is the first brushstroke that I'll be jingle, which is ready comment but equally important to pain flus. So this is a simple brush stroke, which is pointed at the top and the bottom, and at the center it is small, vital. I'm going to show a close up off the stroke, and you can watch me carefully how easy it is to do this first. What you need to do is being 10 line like this force and then give pressure on the brush and then gently lift it up at the end. So this way you would get pointed on the top and bottom and a wider part in the center. I'm going to repeat the same again. Also, this video is little slow down so that you can watch carefully and understand the brush stroke so it's 10 line, apply pressure and then lift it up gently at the edge and that's it. It's as simple as that. You mean want to practice this brushstroke until you get it right? Because once you get it tried, painting flaws is super easy. After practicing now, we would learn how to paint a flood with the same brush stroke. First. What I'm doing is painting an over shaped like this, but so many dots. This would act as a guideline for US toe pain petals on all the sites, a mixing of very nice yellow orange culo, which would look beautiful for this plot. But you can always feel free to be with any color that your life I'm repeating the same brush stroke in all the directions to paint this flood. I would like to give a small tip on painting such petals in all directions. What I generally like to do as I pain battles in the opposite direction, like one at the top and one at the bottom. So you know how many more battles toe and it becomes much easier to pain. After you're done painting the petals, you can add a taco and a contrasting color in the center of your, um, adding red color, which is a good contrast to the battles. If you want to bring in more contrast in your petals, you can just simply add another color in the petals. This is just a additional thing only if you want. I personally want to bring in more contrast. You can add orders. You can completely leave it as it is. The second floor that we gonna paint is a very simple love with five buttons. This is again created with a simple brush stroke, which would give you around beckons like this. Watch carefully. How are moving my brush to create these petals? And once you're done painting all the petals and what you can do is just put it at the center from all the petals. And then if there is any excess color, you can just drop it and put it on. Your people talk and then apply a taco contrasting color in the center. Likewise, the first flood that we painted is also dried up at the center, and now we'll add the second layoff for it. I'm picking brown. Hello. I gently award using black color because I feel it makes it look very bold. And I would always want something more subtle and very light. Or so. That's the reason why I don't use black alot. And after painting little brown in the centre, would you can do with you can slightly wash off or just to read it washed and pushed the brown pigment towards the battle. This would give a better look to the entire floor. The third type of flour, which I'm gonna teach is one. From this floral close off my non skilled chef, I'll be repeating the same Floro year in keys. If you just want to device, it's a five petal flower again, but it is painted in a more loose type. Carefully see how I'm just leaving the brushstrokes ready, loose and not even trying toe make it very perfect. Next after pending would into is probably lift off some color from the center so that when you add color in the center, it would spread in a controllable manner, because if it is to read, it's gonna spread almost the entire floor. The next type of flood that I'm gonna teach is very similar to the forced one, but it's not gonna have petals, which would be 10 at both the ends and fighter at the center. So it just like giving equal pressure toe the entire battle. INGE's making a little pointed at the door. You can see how just a little variation in the brush stroke and change the entire look off the flood. The 1st 1 and the 4th 1 are very similar in the shape purchased with little difference in the brush stroke. It looks completely different. So which means by reading every brush stroke in little different way, you can create so many different types off for us. The next flood that we're going alone and practice is this loose style watercolor rose. There's so many ways to paint this type of rose and your I'm gonna share my way off painting it. What it normally started start being doing with these concentrate strokes, which are basically semi circle and then towards the outer side, off the rose. What I do is I slightly given a little bit off pressure and then move my brush all around and to finish the rules. What I do is pick lighter pigment and then just give this feed look and that's it. You get a very loose style watercolor does. And in case, if you want to add in more colors and bring in more contest, you can just drop colors like this when it is still, I'm gonna show a close up off painting rose a couple of times so that you understand how to paint this rose easily. Definitely painting perfect roses need some practice, but it's not difficult. I'm gonna show you painting roses in a closer angle with two different brushes. One is with the larger brush, and the next one is with a smaller brush and you will see the difference in the strokes that you can. The 1st 1 I'm doing with the larger brush and you see how concentrate semi circles or comas I'm making to paint the rose and then later on, as you move outward, you can just give a little bit off pressure and then me biggers brushstrokes for the next yourself because smaller brush and with this you would see that you get Morley perfect brushstrokes and you can actually differently. So if you want the petals off roses or the layers to be shown very much. Probably you can go with our smaller brush or larger, which one is comfortable and suits your style. I like personally doing with both. It depends upon the type off painting, which imbuing if it's very lose, I choose to do with a bigger brush. And if I need to do something like a kind off detail floral bouquet or something, I would do it with a smaller brush. You may want to practice shows is a couple of times because for me initially, even when I painted my first rose, it was so bad. So don't be discouraged if your roses are not coming. Well, I'm sure it would look much better when you practice the rules at the 10th time. Yeah, and that's it. This is the practice flower lessen the next one
4. Practice lesson - leaves : in this video lesson, I'm gonna teach you how to paint leaves and pillows and a very loose start in my previous floor claws thought how to paint leaves and fellas ready perfectly. But this one is just going to be different and how to move your brush to get the Louis strokes. So let's get started. But before we get started on painting the fellows and leaves, I'm gonna show you how to paint. Lose Florence off these flowers. Probably. You can just add on top off your floral bouquet with, like you paint a bunch of flowers and then you cannot. So this is basically 1/2 floor like some petals, and then you just add a stem at the bottom and just connected with your floor bookie just painted very roughly like this, and just drop in a dark okelo and then just paint a 10 stem, which would connect with your bookie, and that's it. Now let's want to painting. Lose Phylis. The loose filler strokes that I'm going to show you is very simple and easy, and it totally doesn't have to be perfect. It all use. You can see how, like loosely just painting the filo. I'm going to repeat it again for you. And you can absolve. Have a painting, a paint one on the right side and then on the left side. And I keep repeating it on before stroke, which I put is but a lot of pressure. And as I moved towards the top, I just give a little pressure and just create these tiny, expressive Phyllis. And then once you're done, you can just add a stem stopped toe it like this one more time I will beat in case if you want abs. Oh, how it ISS So it was very simple to paint and it doesn't have to be very perfect again because the style would be a following. And practicing is very loose states. Next is the loose leaves, and this is also gonna be in a very loose style. I'm gonna teach you some basic brushstrokes again, which is very similar to the ones that we painted for pedal. But I'm going to show you what difference that makes why you hold your brush. So I said, leave stroke is very similar to what we painted for the pedal and hear what difference it makes is how you hold your brush. I'm holding my brush closer to the Bristol's, and then you can see how I'm getting the protect. If I hold it a little more behind, you can see the loose stroke off the lead. If I can get, you can see the entire shape off the levers different from the forced to appear. So if you hold your brush more behind, you would get more loser strokes. And it would be like a completely different style that you pain. I believe that you get with holding your brush behind this very expressive. And it would make so much sense when you paint in a loose floral bouquet practicing some more leaves in defence, size and shape holding my brush behind and you can see how every leave damn painting is different. So this is what would make your bouquet look unique in the end. And I'm gonna show you how to pain down leaves like this. So just oh, just draw the stem and this quickly pull your brushed on and you get that lose least role for the dam would be just gonna beat it again. Yeah, just ready. Simple. I love painting leaves in this style, rather changes the regular style where you have to brush strokes toe, create a leave. So this one is very fun and easy, and you can practice as many as time you born. And the next one that I'm gonna show you is a small Lee branch where you might want to add next to your fellows or flies or somebody little and your bookie. So just draw some rough stems like this, and just paint leaves in a very loose tight on both the sides like this. So it is very similar to the fellows that we've beamed it, but this would make it look like, oh, branches off leave because off the color and also because of so many strokes, you can also explore an experiment by painting different leaf branches like this. And just for your reference, I'm going to show you how I paint a perfectly so that you understand the difference between painting leaves, you know, you know, probably, and then painting leaves in a very loose tight. So this is what it looks like when you paint a probably leave and, like probably, I thought this in my previous class. But this class is totally different. And it's all about painting in a loose die so you can practice as many as times you want again into your satisfied and ready to paint the final class project. And now a practice lessons for to these class is done. And I'm sure that you're confident. Do pain the final class project.
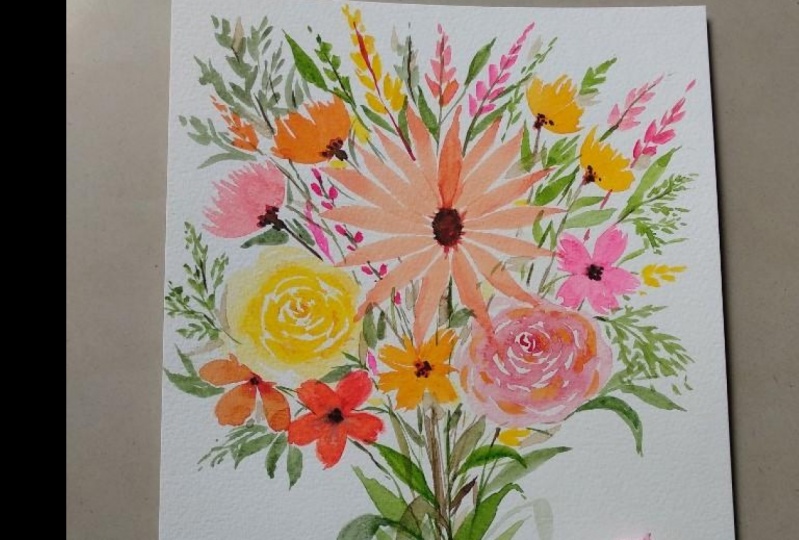
5. Bouquet 1 - part I : in this lesson gonna teach you and guide you how to paint the floral bouquet. Step by step, we'll be painting the one which is on the left side and has so many flus, and you can keep the practice lessons besides you in case if you want to reform them any time. So let's get started without first class project, and before we begin painting the flowers, you can swatch the colors that you would want to be in the floral bouquet. Vit. I have a piece of people here and bonus towards the Colosio. The book, A virgin planning, is off warm colors, which is more off yellow, orange and reds, but you can also feel free to mix hours. Watch any color combinations that you want to paint your class project with since its spring, and I think these colors would look gorgeous for the season. So I'm just swatting these colors, making a lot of shades with mixing red, orange, pink and yellow. If you have taken my previous classes on skill share, you would know how important is having a color palette and the color combination. Before you begin painting with anything, I feel it is ready. Important because it would help you understand and move the colors that you want to paint with, which would listen in your painting, looking more attractive and beautiful. So here I have a bunch off Carlos, which are mixed with the focal, owes you like the yellow, yellow, orange and red, orange and pink. All these warm colors would just make my painting look very beautiful and perfect for spring. So after picking the colors for the flowers now, we would pick some shades off green for leaves and just watch it. Here. You can pick any green shades that you want, but I particularly like these olive green on the submarine colors, which would Coe Bell but the above Carlos that we have chosen for our floor. So if you have chosen a cool tone like more of blues and all, probably you can go with body in green, which is a good combination for the cool colors. And after picking green shades, you can just pick one brown color, but we would use for us stems and stalks. And now that we have done with picking the colors, he would move on to painting the class project. I'm keeping the practice flaws as reference and the besides, and as they paint along with you, I'm also going share Lord of Composition Tips. So let's get started. I will share a small tip on composition and how to get started on a blanket in my person workshops. I've seen that so many people find it difficult on very to start and war to start. And what should I be? So it is different in every subject. So in this subject, we're painting floral bouquet where you can start. The word is painting the bigger elements force that is like painting big plus for us. So in the centre, off the page of just started with painting a bigger flowers It is the first flood that we learned in the practice. Listen, so now we're finished painting the first flower Enough little book and also the biggest flop. There's the only biggest flood that we will have and all other flaws that we're gonna add is going to be medium size and small ones. So the next one, what will be adding is rose and I'm gonna add oh, yellow rose so that it would be in contrast two wore orange flower. You can paint the rules as we practiced in one off the previous lessons. No next after the rules, we would be a simple pedal floor. Picking orange pink shade for it against sword would be in contrast with those surrounding plus, and also the color balance would be maintained. It is very important to have a balance off colors in your painting because that would make your painting low, complete and very attractive. Imagine if you have one side off the painting with more off yellow and one side with more off orange and drink. So even though if you painted good flaws and the composition is great, But if your colors are in balanced well, I don't think it would look very attractive. So that is why it is important. And now you can see that I'm adding a yellow loose flower on the top toe. Have color balance with the yellow rose that we have painted and next time picking up in color, and I will be in a simple five petaled flood just below the yellow and orange flowers. Just try to keep your strokes loose and just play around with your brush and while it is still But I'm just dropping a darker color in the center of the floods like this since that it is not very much visible with the pink flower gonna add a little bit off brown in the centre and likewise, I would had brown toe other floods also to bring in some contracts. You can observe that by adding every flower. Ah, Florence. Okay, is getting compost slowly. You can add more floods in the top and at the bottom. After you're done painting some flaws, we would start adding this them now see how loosely I'm holding my brush from behind and painting thes long and very random stocks for every flower after having some green stems gonna pain some stems with the brown color old You see how news and crooked the stems from painting. It's not those perfect straight lines for corpulent, which is like very is random and lose, and it still makes lot of sense after being the stem. It's time to add some loose fillers on the top off the bookie. Finally pain few fellows on the job. I'm also gonna balance with different colors as I've bean and That's it. We're almost there and got the first part off the book it in the next lesson, we would be in the rest, half the bookie and focus on completing it.
6. Bouquet 1 - part II: welcome back. And in this lesson I'm going to show how to finished this floral bouquet By adding leaves and more delegates. I'm painting the leaves that we did in the practice lesson in a very loose stuff. Just painting leaves on both the sides initially and then I would fill in the gaps in between the flies just simple green stroke which wouldn't even look like please. But it would make a lot of sense. I think painting leaves in this loose floral style OK is the best part because you really don't have to worry about painting perfect leaves also just ready random and however you want, you can see how in painting I'm gonna just I lose strokes like this Where what I think I should in between floods and stem and as you paint more leaves, you can slightly baby with different shades of green to bring in more contrast in the leaves, you can keep adding these leaves all around the floods and once you like, done halfway, adding what you can do it, you can pick brown color and slightly dark in the stem so that it it will highlight and bring in more contrast, you can add a little more highlights with this brown color and that's it. You were done once. If you feel happy about it, this is just a additional thing in case if you want to do, I'm gonna show you off. Book A with some paints plateaus, which would look very different on the bookie. You can see on some gonna add the same. Do this okay or so. If you're happy with your painting, you can leave it as it is. It is not required toe. Add this, but I'm just adding fuel so that it will look more expressive. What I did is I just I didn't move water to the pain. And I'm just tapping my brush from the bottom. This placko and that's it. We're done with Ford's class project, and I'm very sure that you would be happy with your class project. I'm so happy and proud off what you painted. They along with me in the next lesson, I would have a quick second project for you
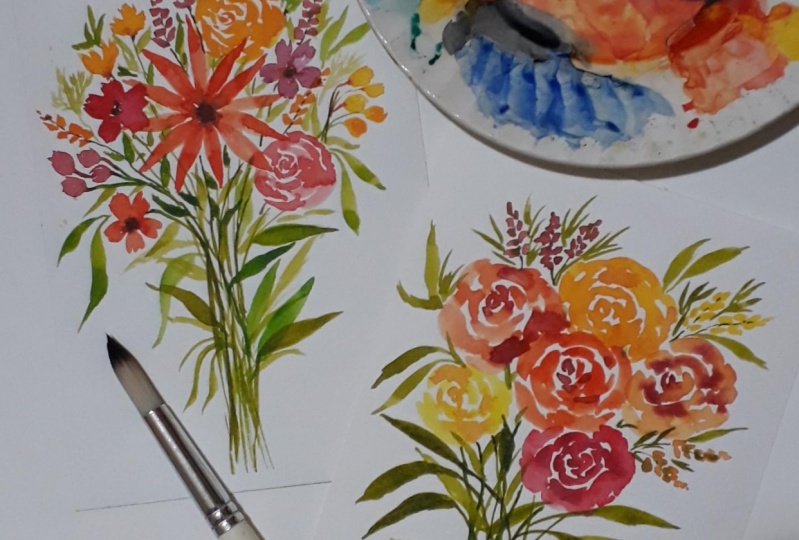
7. Bouquet 2 - part I: in this class project, you would learn how to compose a floral. Okay, with just one type of flower, I have very specifically added this as a second class project for today's lesson because it is very easy to paint a flub. Okay, with so many different types of flowers than you can just fill and compose and it becomes easy to be. But there are times when you want to paint flab, okay, with just one flower. Or maybe you have to do a custom piece with just one. So this exercise will help you in composing such bookies. So here would have taken is the first flood that we learned in the practice lesson, which is basically like a son flood. But you can feel free to choose any flood that you want for the second class project even arose, or just a simple five petaled flies. So the tips that I'm going to share is regardless off the shape, all the type of flood that you paint with. So if you're painting off bouquet with just one type of flower, what you need to do is put a big flower in the center with a very pride color, and in the sides you can slowly start adding smaller floods off the same time. You can have some similar contrast or a good color combination with the surrounding flus. You can see how this yellow orange flower is in contrast with the red orange flower. So similar way I'm gonna add the same type of flower on either side off the scent off life . But I'm gonna really little bit inside so that it weeks some difference. And it's not very monotonous. - And I'm adding the last flood and you can see that the flaws is almost composed. And then we would be adding the stems and the leaves for those floral bouquet. Let's do that in the next lesson.
8. Bouquet 2 - part II : Let's add the stalks and leaves for this bookie and finished a second class project in with this Listen. So I just picked a green color and I'm adding these stems and connecting the floods just already randomly and loosely. And then once you have done, you can just say brown color and just start adding little highlights. You can also add some to the floods at the center and next add these leaves in different shades of greens and different directions. Remember to have fun and enjoy as you paint, because that is the most important thing. Why you be at these green leaves very similar to the first okay that we painted on also what we learned in the practice lesson toe ad. Small leave branches like this just ready than the I don't even have to make it perfect. I know I repeatedly keep telling it, but it's so much fun and you actually enjoy painting when you just speeded in a loose tile and not worry about the perfect strokes, you can clearly observe from the way and painting and the strokes that I'm doing with my brush, that how much fun it is to bend and Dave, you almost done with the second class project. Oh, and the last. And the most fun part is to add those plateaus. I'm just diluting paint and then just splattering all over the bookie to make it more expressive. And that's it. You have two beautiful class projects done by the end of the class. I hope you really enjoy painting bookies and this loose study.
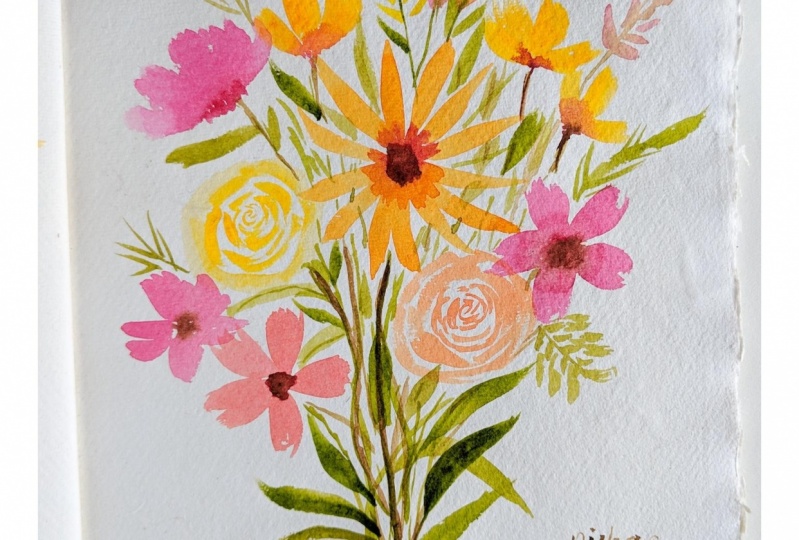
9. Conclusion : so All right, here we are with two beautiful class products. I'm so proud and happy What you have painted along with me today I really hope you enjoyed painting with me. You can also practice painting, mobile, case it different types off laws and also keep exploring with different techniques like this one over here, which is a simple bouquet with, oh, background and the behind. So you can feel free to be creative and explode with so many different ideas and take niks and remember to have fun by painting because that is the most important thing. Also, if you really like my class, I would appreciate if you could leave a class review and you can shire plants, projects with me on instagram and also find many inspirations for watercolor paintings. Thank you so much for joining again. And I will see you in my next class and happy painting
 Viddhi Saschit, Author|Artist|Surface Pattern Designer