Transcripts
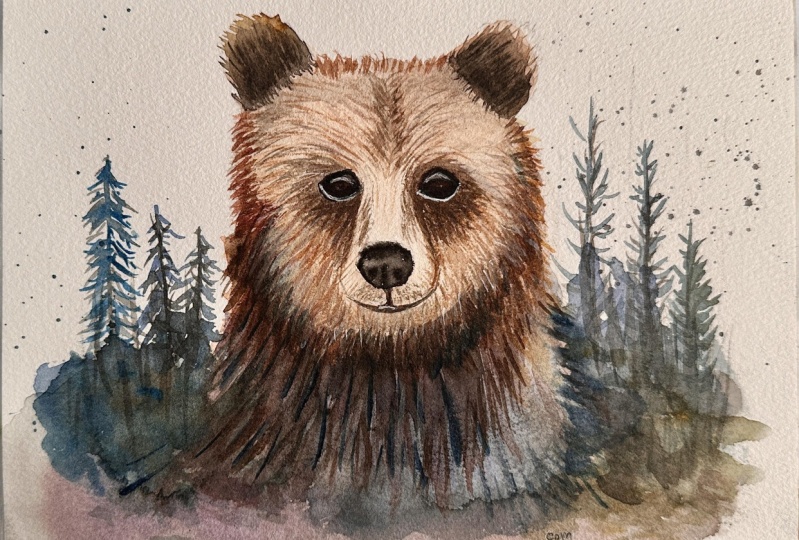
1. Welcome To The Class!: Welcome art lovers. Have you ever wanted to capture the spirit of the wild in
your watercolor paintings? We'll look no further because this might be the
perfect class for you. I'm Will Elliston and
I'm thrilled to be your guide on this artistic
adventure together. We'll explore the beauty
of watercolors and unlock the secrets to creating a stunning painting
of a brown bear. From fur texture to
the soulful eyes. You'll learn the
techniques needed to capture the essence of a brown bear in its
natural habitat. I've been a professional
artist for many years, exploring lots of
different subjects, from wildlife and portraits to city scapes and
countryside scenes. I've always been entranced by the possibilities of watercolor, but when I started,
I had no idea where to begin or
how to improve. I didn't know what
supplies I needed, how to create the
effects I wanted, or which colors to mix. Now I've taken part in many
worldwide exhibitions, been featured in magazines, and been lucky enough
to win awards from well respected
organizations such as the International
Watercolor Society, the Masters of
Watercolor Alliance, Windsor and Newton, and the SAA. Watercolor can be overwhelming
for those starting out. Which is why my goal is
to help you feel relaxed and enjoy this medium in
a step by step manner. Today, I'll be guiding you
through a complete painting, demonstrating a variety
of techniques and explaining how I use all
my supplies and materials. Whether you're just starting out or already have
some experience, you'll be able to follow along at your own
pace and improve your watercolor skills if this class is too challenging
or too easy for you. I have a variety of classes available at different
skill levels. I'd like to start off with a
free, expressive approach, with no fear of
making mistakes as we create exciting textures
for the underlayer. As the painting progresses, we'll add more details to bring it to life and
make it stand out. I strive to simplify
complex subjects into easier shapes that
encourage playfulness. Throughout this class, I'll be sharing plenty of
tips and tricks. I'll show you how to turn
mistakes into opportunities, taking the stress out of
painting in order to have fun. I'll also provide you with
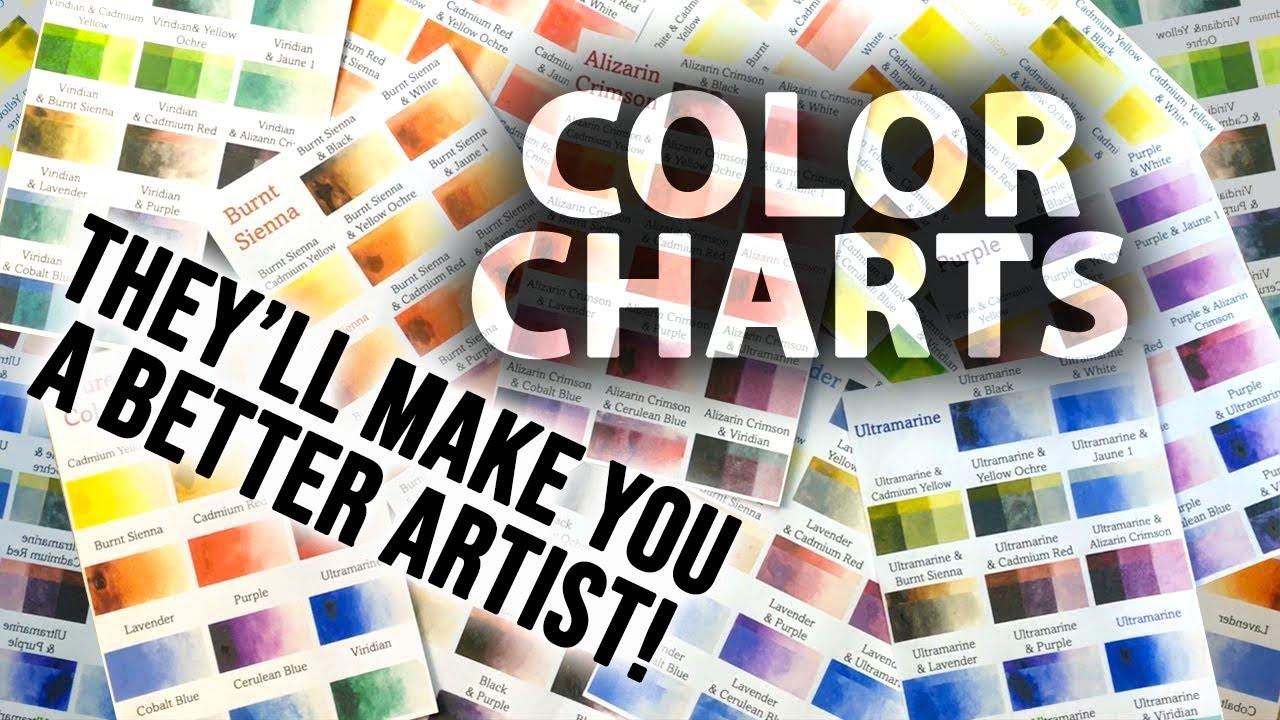
my watercolor mixing chart, which are an invaluable tool when it comes to choosing
and mixing colors. If you have any questions, you can post them in
the discussion thread. Down below, I'll be sure to read and respond to
ever think he post. Don't forget to follow
me on Skillshare by clicking the follow
button at the top. This means you'll be the
first to know when I launch a new class
or post giveaways. You can also follow me on Instagram at Will Elliston
to see my latest works. Are you ready to create
your own masterpiece? I'll join this class
and let's paint a brown bear together using
the magic of watercolor.
2. Your Project: I'd just like to say, thank you so much for
choosing this class. I'm very happy that you're here, joining me today with this
painting. Why a bear? You might ask, while there's
something truly magical about capturing the essence of this magnificent
creature on paper, Bears with their
distinctive features and captivating presence
offer a unique challenge and opportunity for
artistic expression. From the rich browns of their fur to the soulful
gaze in their eyes. Painting bears allows us to delve into the
intricacies of light, shadow, and texture. It's
more than a subject. It's an invitation
to explore the wild within and express it through
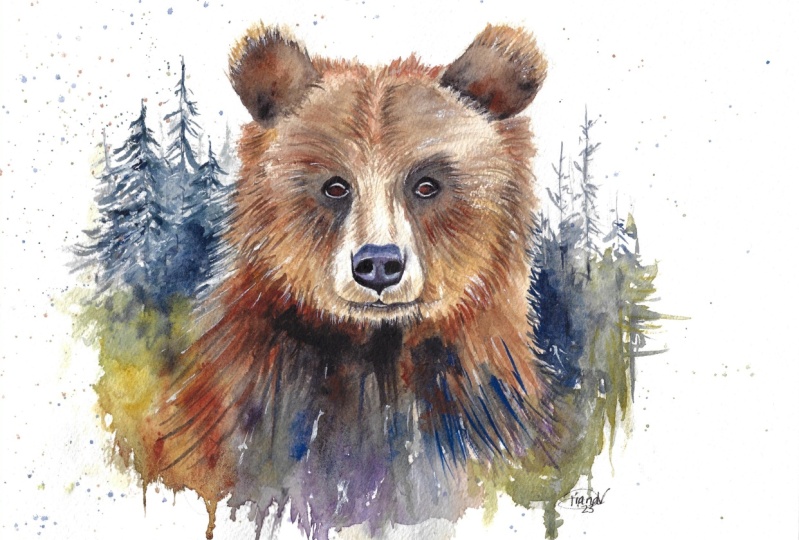
the strokes of watercolor. In the resource section, I've added a high
resolution image of my finished painting
to help guide you. You're welcome to
follow my painting exactly or experiment with your own composition
as we're going to be focusing on the painting
aspect of watercolor, I've provided templates
you can use to help transfer or trace the
sketch before you paint. It's fine to trace when using it as a guide for
learning how to paint. It's important to
have the underdrawing correct so that you can relax and have fun learning the
watercolor medium itself. Whichever direction
you take this class, it would be great
to see your result and the paintings you
create through it. I love giving my
students feedback, so please take a photo
afterwards and share it in the Student Project Gallery under the Project
and Resource tab. I'm always intrigued to
see how many students have different approaches and how they progress with each class. I'd love to hear
about your process and what you learned
along the way, or if you had any difficulties. I strongly recommend
that you take a look at each other's work in the
Student project gallery. It's so inspiring to see
each other's work and extremely comforting to get the support of your
fellow students, so don't forget to like and
comment on each other's work.
3. Materials & Supplies: Before we get started
with the painting, let's go over the materials
and supplies I use. Having the right materials can greatly impact the
outcome of your artwork. I'll go over all the supplies I use for
this class and beyond. They're very useful to have at your disposal and we'll make it easier for you
to follow along. Let's start with the
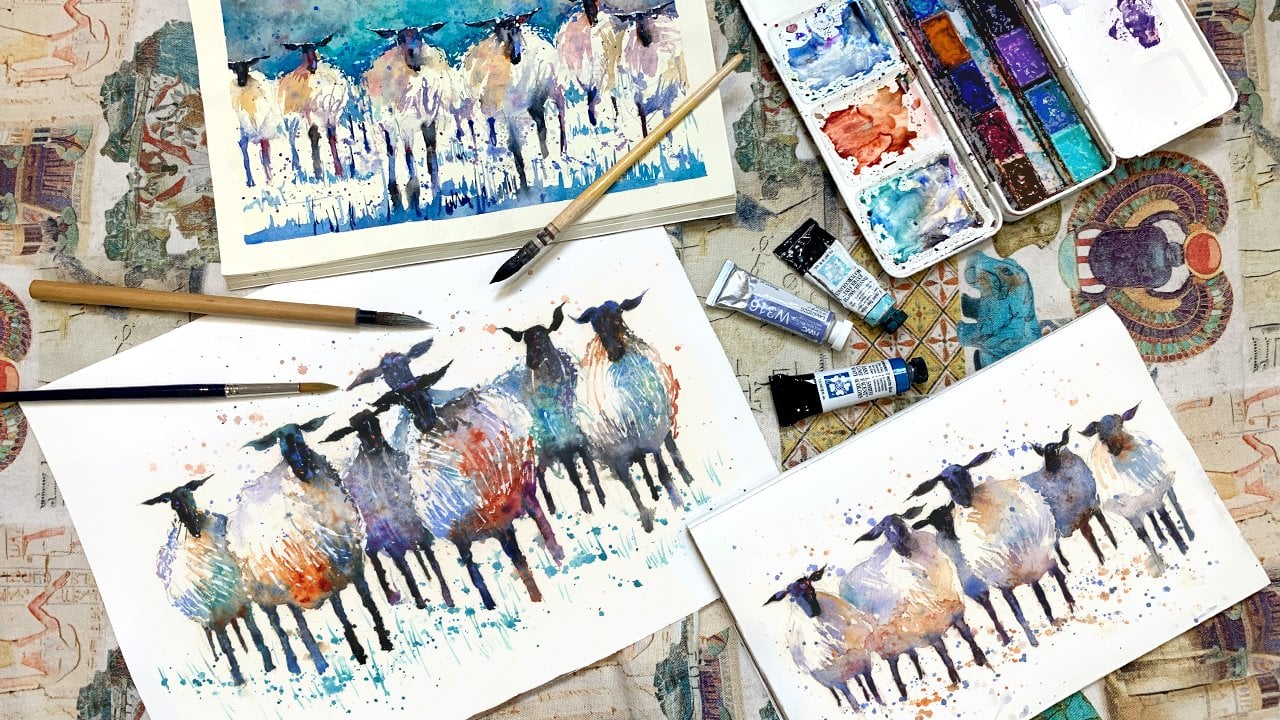
paints themselves. Like most of the materials
we'll be using today, it's a lot to do
with preference. I have 12 stable colors in my palette that I
fill up from tubes. They are cadmium
yellow yellow ochre, burnt sienna, cadmium
red, Alizarin, crimson, ultramarine blue,
cobalt blue, sill, blue, lavender,
purple, di, black. And at the end of the painting, I often use white gas
for tiny highlights. I don't use any
particular brand. These colors you can
get from any brand, although I personally
use Daniel Smith, Windsor, and Newton
for Holbein paints. Let's move on to brushes. The brush I use the most is
a synthetic round brush, like this Escoda Perl brush
or this Van Gogh brush. They're very versatile because
not only can you use them for detailed work
with their fine tip, but as they can hold
a lot of water, they are good for
washes as well. They're also quite affordable, so I have quite a few
in different sizes. Next are the mop brushes. Mop brushes are good for
broad brush strokes, filling in large areas and creating smooth
transitions or washes. They also have a nice tip that can be used for smaller details, but for really small details, highlights, or anything
that needs more precision. I use a synthetic
size zero brush. All brands have them and
they're super cheap. Another useful brush to have is a Chinese calligraphy brush. They tend to have long bristles
and a very pointy tip. They're perfect for
adding texture or creating dynamic lines
in your paintings. You can even fan them
out like this to achieve fur or feather
textures as well. And that's it for
brushes onto paper. The better quality
of your paper, the easier it will be to paint cheap paper crinkles easily
and is very unforgiving, not allowing you to
rework mistakes. It's harder to create
appealing effects and apply useful techniques
like rubbing away pigment. Good quality paper, however, such as cotton based paper, not only allows you to rework
mistakes multiple times. But because the pigment
reacts much better on it, the chances of
mistakes are a lot lower and you'll be more likely to create
better paintings. I use arches paper because that's what's available
in my local art shop. A water spray is
absolutely essential. By using this, it
gives you more time to paint the areas you
want before it dries. It also allows you to
reactivate the paint. You want to add a smooth
line or remove some paint. I also have an old
rag or T shirt which I used to clean my brush. Cleaning off the paint
before dipping it in the water will make the
water last a lot longer. It's always useful to have a tissue at hand
whilst painting, to lift off excess paint. Also, you never know when an unwanted splash or drip might occur that needs
wiping away quickly. I also have a water dropper
to keep the paints wet. When you paint, it's
important to have them a similar consistency to what
they're like in the tubes. This way it's easier to
pick up sufficient pigment. A hair dryer is useful
to have for speeding up the drying time and controlling the
dampness of the paper. Lastly, masking tape.
And this of course, is just to hold the
paper down still onto the surface to stop it sliding
around whilst painting. Also, if you plan on
painting to the edge, we'll allow you to create a
very crisp, clean border. That's everything you
need to paint along. I encourage you to experiment and find out what
works best for you. Now let's get ready to
start the painting.
4. Blocking Out The Drawing: I'm going to help you
with the drawing for those of you that aren't
using the template. The template, of course,
saves a lot of time and it makes sure your drawing is absolutely accurate
so that you can paint from the best
possible starting point. About the same time you need
to practice your drawing in order for your painting
to be good in general. Whether you want to practice
drawing this painting or in different situations, I definitely suggest you
practice drawing in general. But if you're going
to draw this, always start off with
the main shapes. I'm starting off the
head of the bear, here it is, basically a circle. Starts off that way.
At least then add a few more circles for the ears and then we
can just refine them. I'm drawing very light, breaking it down the
middle, like that. Let's see a perfect circle, but that's the closest
shape to break it down to. Then we create a more sophisticated
form out of that circle. The good thing about this
painting is quite symmetrical, so we can put a line down the
middle and just basically copy the mirror image each side I'm drawing quite heavily so that you can
see the pencil lines. Usually, I wouldn't
draw this heavily. And after I've stopped
the recording, I'll take my time to make sure everything's perfect and I'll
lighten the lines a bit. With your drawing, you
don't need to draw is dark, the nose is about there. There's some lines going up there for the eyes that
are around about here. There's a mouth here. We
start off with big shapes. As always, whatever
you're drawing, it's the same principles
you need to start off with the most basic elements
and work your way down to the detailed areas,
the smaller shapes. Then we'll do some
abstract textures here with the paint later. Bringing it all
the way down here. I think I'm doing the drawing without taping
on for the time being. Just so I can move it around, but you can tape it
on to begin with. That's how you block out
the rough, basic shapes. Now I'm going to take my time
going back and forth with the rubber to clean out
some of these lines and add more definite,
definite textures. And that takes book time.
So I'll do that off camera. I'll see you when
we're ready to paint.
5. Loosening Up: Now that we have the drawing
all settled and ready, now we can move on to
the painting stage. I'm going to use
this calligraphy brush just for a change, just to mix it up, but
you don't have to. You can use whatever brush
you're comfortable with. This is the coda
brush I usually use, which is perfectly fine. You can use whatever
size you want. I'm going to experiment
with a larger brush, with a smaller tip. This principle is the same. We're going to start off
with a light background just to get the pigment flowing. A nice easy start, without much stress at all. I'm mixing yellow Oka here
and a bit of burnt sienna. I'm just using this time just
to relax, getting the flow. I'm not being so strict
about what I'm doing. What I'm choosing, maybe
I'll dabble a little black. Just trying to
have a bit of fun. There's no right or wrong. And I'm trying to
loosen up my mind and have a playful attitude because sometimes
before a painting, it can be a bit overwhelming. Stressful. I just
take a bit of time to free myself up by dabbing a few colors and reminding myself what's exciting
about water color, the light background
of the bare fur. I'm going to use a
mix of yellow, ocher, burnt sienna, black, and
maybe a bit of that, a lizard and crimson. But it's just a very light
under layer to begin with. In fact, if you want to be
even safer, pre wet the paper. So I'll just clean my
brush after mixing that. And I'm just going to wet the area that I'm
planning to paint. Nice, easy start. Then I can just drop pigment
in there like that. Then you can see how much
you need to add and how much you can move around and take away because there's
only a light layer. So I'm just going to move
that around roughly, maybe adding a few strands
of hair at the moment. I'm not stressing too
much about the details. This is just the playful stage. Maybe that section
can be a bit redder. Once I've done the initial bit of adding that pigment,
I just leave it alone. I only go back to it if it does need some correction
or attention. At the moment. I'm not
being that specific, I'm just trying to get an exciting underlay
without that many details. I'm a light bit there. Also I'm using a
larger brush because I find when I use a smaller brush, I get too close with
my hand and I blocked the camera for me personally
using a large brush, it's easier for
you to watch what I'm doing directly on the paper. If I'm painting it personally, maybe I would use a smaller
brush and go smaller. I have a tissue at hand to dry areas like the nose because I don't actually want to have that brown on the nose. It's the only area
we're reserving. I dry it completely and
then us go back a bit more, A bit more precision. Okay. For the underlay, the very light under lay. I'm quite happy of that. Oh, maybe I'll add a
bit more down here, a bit darker just for
a bit of excitement. It's always good to experiment with different supplies
and materials. You can follow me directly using the
exact same materials, but at the same time,
by exploring your own, like I am today,
venturing into a new, you can learn more about your own personal
preferences and styles. Now I am going to use the
hair dryer to dry it quickly.
6. The Left Ear: Now it's completely dry, it's time to go back
and I'm going to do a similar thing as before just because it's an
easier way to do it. I'm just going to pre wet the areas that I
plan on painting. You don't have to
do it this way, but by going in
with water first, without any pigment,
it's like a safety line. You're not committing
to anything. I've white to that area.
Now let's mix a call. I'm going to go
straight to black using very thick pigment, then taking a bit of that
burnt sienna into that black. So it's not a gray, it's going to be a dark brown. Now, I can just drop
that pigment in there. Now you can connect the
strands with the rest of the water to create a fur
like kind of texture. As I'm doing that, I'm thinking it needs a bit more vibrancy. It's a bit too black. I'm making these
judgments while I'm painting and I'm thinking at a bit more burnt
sena into that. A bit more water and just
drop it in there like that. And then connect it with
those bits of the top, then making the same color but with a much thicker pigment, dropping it in to
the wet liquid. And then the very corner
almost having that black, pure black pigment there. We've basically got our
full tonal range already. We've got our
lightest lights on, the underlay to the
darkest we'll go. That's a good way of working out in our
minds the tonal range. And we can balance everything compared on how far
we've already painted our tones and taking a bit of the burnt CNN, just adding a fur like
texture at the top. Briefly connect with
those strands there. Ok.
7. The Right Ear: Okay. That's one ear done. Let's do the other
ear. Similar process, Let me just you could
do it that way. Blasting it with water first
and then adding the pigment. Or you can go in
with thick pigment first and then move
it out with water. I'm showing you two
different ways to do the two different
approaches to water color. In general, with any painting, you can either blast it with
water and then add pigment. Or you can add thick pigment first and then add
the water afterwards. You can experiment with both. Remember, these are meant to
be classes to learn from, not just creating
a pretty picture. You should be willing to make a few mistakes just to see
the possibilities are. You don't have to be hard on
yourself if mistakes happen. You should actually be proud of yourself if
you make mistakes, because it means
you risk something using the tip of my brush
just to create that fur. Then I'm interacting
with that pigment. I'm bringing it out, connecting it to those points. So those are two different
approaches to paint the ears.
8. The Fur Under-Layer: Now I'm taking a bit
of a yellow Oka. Mixing it with the
Alizarin crimson and going outside of the air. Now, tip of the brush again. In the middle bit here. It's again, it's a
bit like a mirror. On this side they go outwards, and on the other side
they go the other way. Now I go back and
mess it up a bit. On purpose, creating
a bit of interest. We want to imply that the not
paint every single strand. So to do that, we have to abstract, make it a bit more abstract
and destroy a few details a bit more yellow way,
go into that mix. That's a nice thing about this
brush, I'm just learning. You can fan it out
by stubbing it and then it creates that
nice kind of effect, but that's too strong pigment. So let's lighten it
up by going over it. So as you can see that it is
fans out from the center. I'm liking this brush a lot, actually saving a
lot of time because each brush stroke does
about ten different hairs, I guess hair lines. I'd say we're still technically
doing the underlayer because we're going to go over the eyes with
a dark epigment. We're going to go underneath
with a dark epigment too. Now I'm going to go
back with pure water. Again, stubbing out the brush, a bit of a highlight here. As long as you get
the general feeling of direction of the fur, then you can be quite abstract.
9. Midtones: Bit more yellow Oca. I'm basically mixing yellow Oca and burnt sienna throughout
the whole thing and then using to either add more vibrancy or take
the vibrancy away, I'm leaving the
nose or the snout. I'm not going over the snout at the moment, painting around it. Now, the part of the
snout that we will paint is at the bottom where
the shading is a bit darker. And we can go over the edge as long as we can still
see the pencil lines, we can go over the
edge. In this section, when you look at
subjects to paint, you've got to focus
primarily on their tones, their lightness to darkness. Then that's how you work out the order of what
you're going to paint it. The order of how you're
going to paint it. I'm going to make the case the shadow in
the middle by all is now as we get a bit darker, our brush traits can
be a bit thicker. Now, there's a bit here where
the head meets the neck, so I'm just making this bit a bit darker, Adam water. I feel like I was
getting a bit too fiddly and it loses its magic
if it's too fiddly, so. Have a few spats. But it a bit darker down here. I want it to be a
bit more exciting. Adding a few dark splats
here with a wet background, just so that it blends and
has a soft kind of mark. Same cam we have size, I'll soften the edge on this side by having water merge into it. Earth. I think for most of the painting I'll try and stick with the same brush. If you do plan on
getting the brush, you can see all the techniques
that I'm using with it.
10. The Eyes: Now to paint the eyes or
the area around the eyes. I'm going to go with
this nice brands. Not red, actually,
brown, burnt sienna. But it has so much
vibrancy to it. Make sure you get the drawing absolutely correct
with these eyes. Once you get the drawing
correct, Much easier to paint. In fact, it's
impossible to paint well if the drawing isn't well, that's nice and wet and vibrant. While it's like that, I'm
going to inject, so to speak, some darker pigment just at the bottom and then
at the top as well. We'll come back with
the highlights later. Oh, it looks like
he's got a bit of a concerned face or a
curious face rather. Now that's done, I'm
going to dry it. Like of many things, there's different ways you can paint it. I decided to paint the
darkness of the eyes first, and then I'm going to paint
the outside of the eyes now. But if you want to
do, you could paint the outside first and
then the dark bits later. I'm going to pre wet the rough area where
I'm planning to paint. Because sometimes it's
difficult to cover all the area very quickly and you can be
left with harsh lines. Add a bit of purple into there. I shouldn't purple
a bit of blue. It allows you more time
when the whole area is wet. I don't be concerned at
the moment that it looks quite evil having glowing eyes, we'll sort that out naturally
when we had the highlights. And also the mouth too. Well, we'll add a mouth that almost looks
like it's smiling. Anything a bit more brown, My brush was too full. Then you can dry it. Again, gonna soften some of the edges. Now, I'm gonna take my
gach in a small brush. I have to change
you a small brush for this one because it's quite arguably the most detailed
part of the painting. The same on the other side. I'm just going to
make it slightly darker underneath the eye here.
11. Using Thick Pigment: I is gonna add some
abstract lines here, a bit darker here. The eyes are arguably the difficult but also
the most important part of painting an animal or even a human being because
they have so much to say. The eyes, I'm going to
move back to my big brush, going to be very bold now and just a few dabs of
pure black pigment. I'm going to let that dry and come back to
that a bit later. Going to soften this edge by
wetting it and scrubbing it, and then using a tissue
to just pull back up.
12. Starting The Background: I'm going to start
painting the background. I'm going to use the
complimentary color of brown, which is blue, cobalt blue, and serilian blue. Maybe we can use a tad
of green because of course trees are green. It's almost like
a dark turquoise. Of course, I can't play
painted that blue. I'm going to add a
bit of black in there to tone it down.
That's too much black. I'm going to have to add a lot more color
there into that. Okay. Making sure I've got
a nice point on my brush. I'm not trying to
overboard it with details. If there's too much detail, it'll take away the attention. The mind and brain should associate it with
being pine trees. Anyway, so you don't
need to make it So convincing the mind will do its own magic in
the viewer's eyes. Free flicks it, something like that. Maybe go back over that bit.
13. Negative Painting: I'm going to actually
use this dark blue to create negatively paint
the fur on the other side. Quite a powerful effect
if I do say so myself. What other colors should we use? Of course, let's see,
yellow, cadmium, yellow. I'm just going to put that
in quite powerfully there. Move that up there. Okay, getting it to mix. I can't really describe
what I'm doing here, just kind of being abstract in a subtle
but appealing way. Hope we move down,
we can go back to this burnt sienna color. Some help on that. Just plotting in lots of different colors just to
create an interesting texture. Now I'll take a bit more
of that. Dark blue. This drop is in here, a bit more brown this side. We'll tidy it up after
we've done the chaos, after we've done the
expressive parts.
14. Right Side Trees: And of course we'll do the same on the other side and
connect it in the middle. It's so first of all I do a straight line and then I do little arrows
pointing out of it. Price point at the
top of the tree, doing the same thing
on the sideway, creating the fur by
painting negatively. That's so great, I think, oh, that makes
more of that dark, bluish, turquoise bit of black. There we go, are you?
15. Connecting The Sides: Adding really thick water
or large amounts of water, rather and then letting it create interesting
shapes organically. Hopefully, you can still see the pencil lines
on your painting. That's why being good
at drawing really helps because even if
you lose the lines, you have a better judgment
of where to paint. It's going to do, while I'm
in my adventurous mode mood, I'm just going to do a few
splats at the top here. Holding my brush at
angle and lightly tap time to dry it out.
Again, one thing to mention, while drying out, make sure there's not
big pools of water because if you use the hair
dryer, it might run off. You might have to wait a bit before you can
use the hair dryer. Adding splats of water
while it's drying. I'd like to do a bit
of effect that when some parts of dried and
other parts haven't, I just go over my tissue
and just pick up some bits.
16. Fur Texture: Now I'm going to go in and add a few fur textures just to create a bit of sense out of the chaos
that we just did. Just doing a few fur lines in the right direction, She does. Do you see how on the
left hand side we've got these dark first strokes on
top of a light background, but on the right hand side
we have light first strokes. That's a way to create
a dynamic painting because you can
contrast the two sides. We're using negative
painting to create on the right hand side
and dark strokes on top the left side. And those are little things
you can just work out before you start the painting just
to create a level of interest defining that jaw line. You don't have to
be worried about using very thick
pigment at this stage. It's important to have
that contrast of tone. And using thick dark pigment
here really helps create that interest and contrast
the bold feeling. That bold sensation brings a motion and makes a
painting more exciting. One of the more difficult
things about water color that beginners or
students have to work with is that the colors look darker
when they're wet than when they're different
pigments that amount. Even though we've still got
the nose and the mouth to do and a few more
of the fur details. We're at the part
of the painting now where we're bringing it all together and in
the final stages, tying all the bits and trying to figure out how we're
going to bring it to an end. Because we know by this stage whether it's a
success or a failure, and we've got all the
main elements down there, tonally and compositionally, we can't carry on
forever adding details. We've got to think about
how we can just finish the painting within our best ability
without overdoing it. Split
17. Nose & Mouth: Now we've just got to do
the nose and the mouth. So starting with
the fur around it, I'm just going to
go a bit darker. And going back to
the small brush, I'm gonna paint
the darkest parts pure black so we know those bits of the darkest. So we're just going to match everything to those dark parts. Go for a kind of a bluey, well not that much blue. Let me get rid of some of
that blue, purply blue pain in the mouse
while we're waiting for parts of the nose to dry, now that the paint
on the nose has started to dry, I
can go back to that. Again, without it
running everywhere. We're taking advantage of using layers to create more depth. Sometimes it doesn't have
to be completely dry. Having moist paint or
paper allows smooth edges. We're using a bit of wet
on wet technique as well. Now I'm going to
take the tape off, have a final review, and let's check out
everything we've done. One final thing I'm going to do, just go back with
this white quash. Just do a few various highlights just in places that need
that bit extra definition. But we don't need
to do too much. In fact, I think we
can call that done.
18. Final Thoughts: Welcome back and
congratulations. As we reached the
end of this class, I wanted to share some
final thoughts and reflections on this water
colored journey we've taken. Together, we explore the
importance of learing, allowing the richness of
the fur to come alive. On the paper, I demonstrated how to capture
the play of light and shadow, creating depth and dimension. Now it's time to take the
leap and paint on your own. Your painting doesn't
have to be perfect. When it comes to learning, just embrace the spontaneity
of the process. Let your creativity flow and enjoy every brush soap.
That's all that matters. Remember, watercolor painting is not just about technical skills, but also about expressing your creativity and
personal style. I encourage you to continue
exploring, experimenting, and pushing your
boundaries to create your own unique
watercolor masterpieces. As we come to the
end of this class, I hope you feel
more confident and comfortable with your
watercolor painting abilities. Practice is key when it comes
to improving your skills. So keep on painting
and experimenting. I want to express my gratitude for each and every one of you. Your passion for
watercolor painting is so inspiring and I'm honored
to be your teacher. If you would like feedback on your painting, I'd
love to give it. So please share your painting in the Student Projects
Gallery down below. And I'll be sure to
respond if you prefer, you can share it on Instagram, tagging me at Will Elliston
as I would love to see it. Skillshare also love seeing
in my student's work, so tag them as well at Skillshare after putting
so much effort into it, why not share your creation? If you have any questions
or comments about today's class or want any specific advice
related to watercolor, please reach out to me in the discussion section
and you can also let me know about any
subject wildlife will scene you'd like
me to do a class on. If you found this class useful, I'd really appreciate
getting your feedback on it. Reading your reviews
fills my heart with joy and helps me create the best
experience for my students. Lastly, please click
the follow button up top so you can follow
me on Skillshare. This means that you'll be
the first to know when I launch a new class
or post giveaways, until next time, keep
your brushes moving. And may your spirit be as wild and as beautiful as
the brown Bear itself. Farewell and see you next time.
 Will Elliston, Award-Winning Watercolour Artist