Transcripts
1. Introduction: When I started my
Flores Watercolors your knees six years ago, I was captivated
by the elegance of process and eagerly wanted
to learn how to paint them. The delicate petals,
vibrant colors, and the graceful
strokes used to paint them were simply irresistible. However, despite countless attempts and
dedicated practice, my Africa failed to capture
the beauty of roses. And to be honest, it was an incredibly
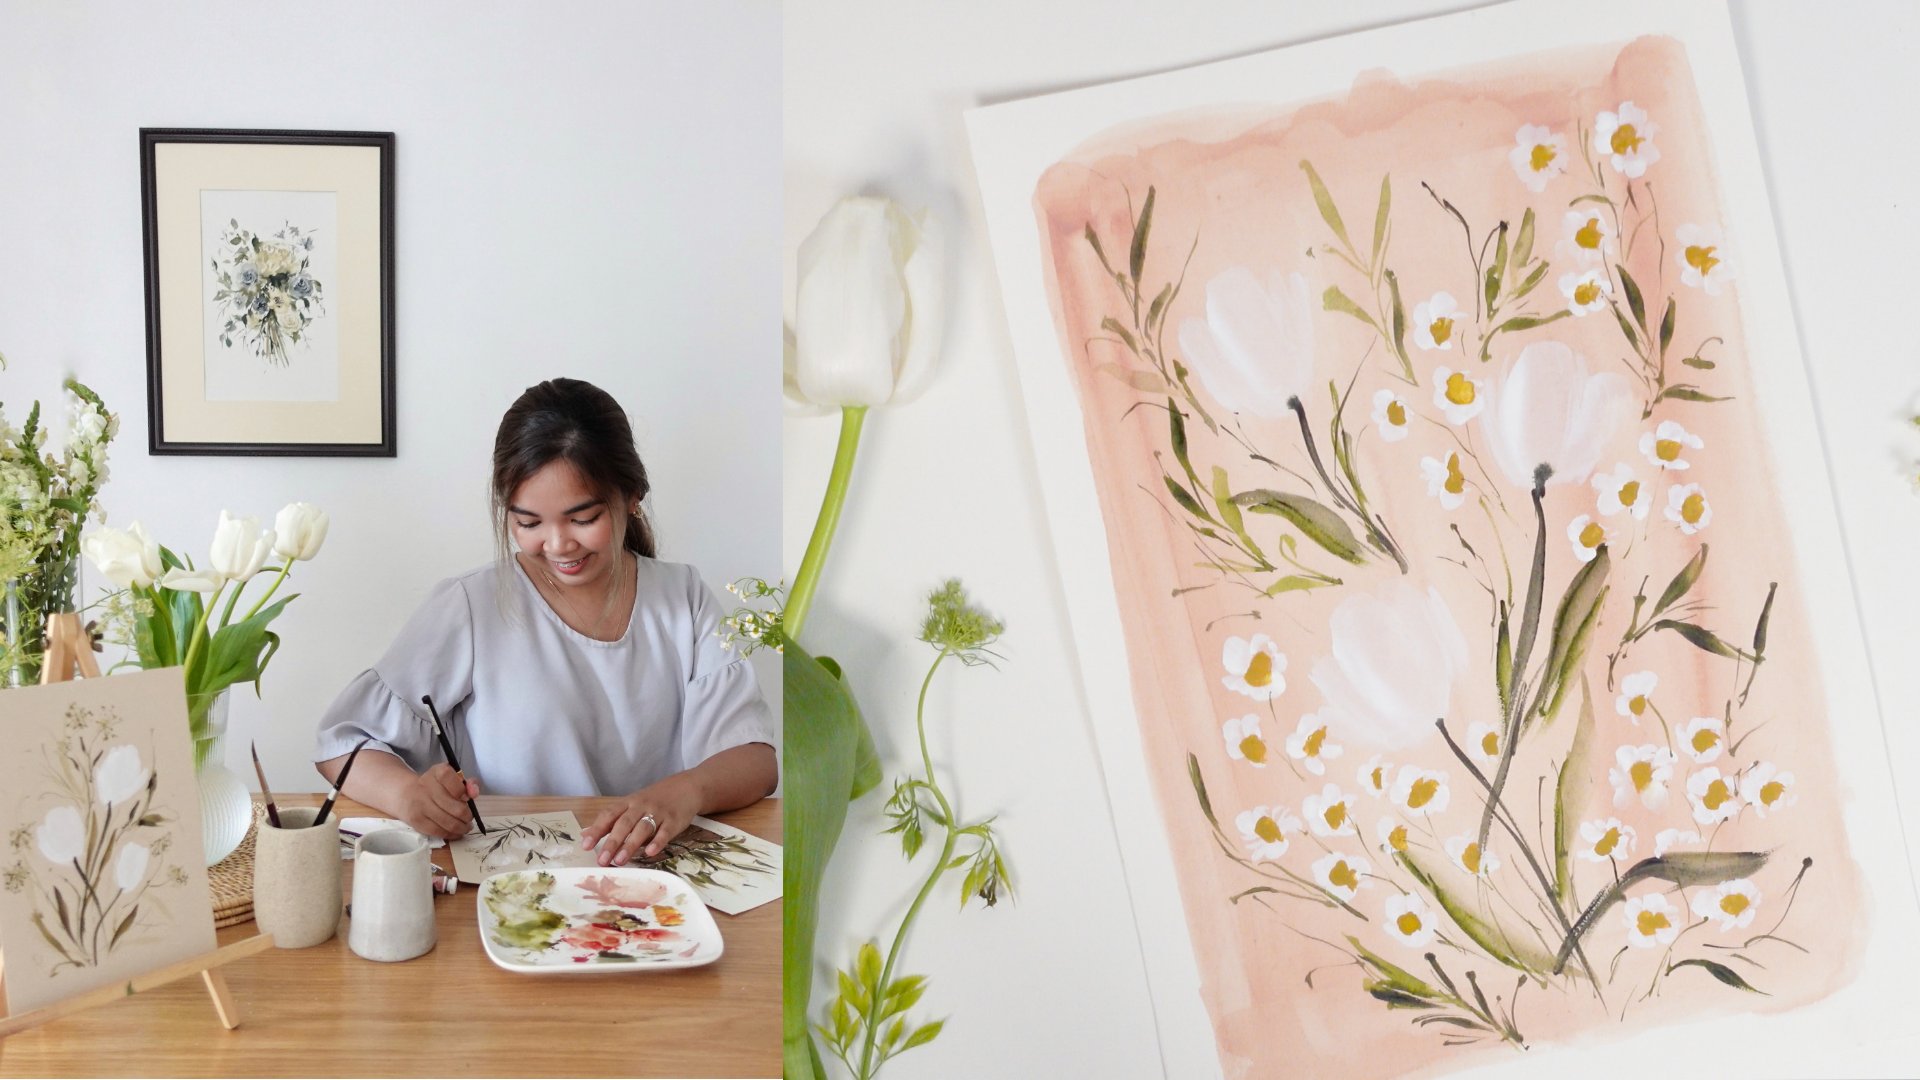
frustrating experience. Hello there, My name
is Jenny Flores. I'm a Creative Coach
and artist and a Skillshare top teacher
from the Philippines. Over the past six years, I have had the privilege of teaching thousands of students, both in-person and online. My artistic works primarily revolve around
botanical subjects, such as bouquets, reads, and various floral arrangements. Like many of you,
I understand it. Frustration when it
comes to trying to paint process in a
loose painting style. More often than not, they end up looking
like cabbages loves or something
completely unidentifiable. I've been there too. That's the reason
why I have developed Simple step-by-step
techniques to help you learn how to paint those stunning
roses you've always wanted. Plus, we'll be using vintage
shades of color to add a romantic and visually
pleasing to your paintings. This class we will explore six different demo compositions. Will begin with easy to follow artworks that gradually
build your knowledge, boost your confidence,
and enhance your patients when
painting roses. After that, we'll dive into
more intricate compositions that will teach
you how to combine multiple flowers
in a single Art. Finally, we'll tackle
complex arrangements that include Roses
of different shapes, sizes, and angles in a
well-balanced Rose watercolor. Painting, roses in a loose
style is truly challenging. At times, even frustrating. However, it is also
undeniable that mastering this particular flower
is truly rewarding. Once you've learned the
techniques of painting roses, you'll find that painting other flowers become
considerably easier. This class is designed
to be beginner friendly. So whether you're a
frustrated artist or someone who has never
held a brush before, you're most welcome to join
us in this artistic journey. What are you waiting
for? Pick up your brush and
let's get started.
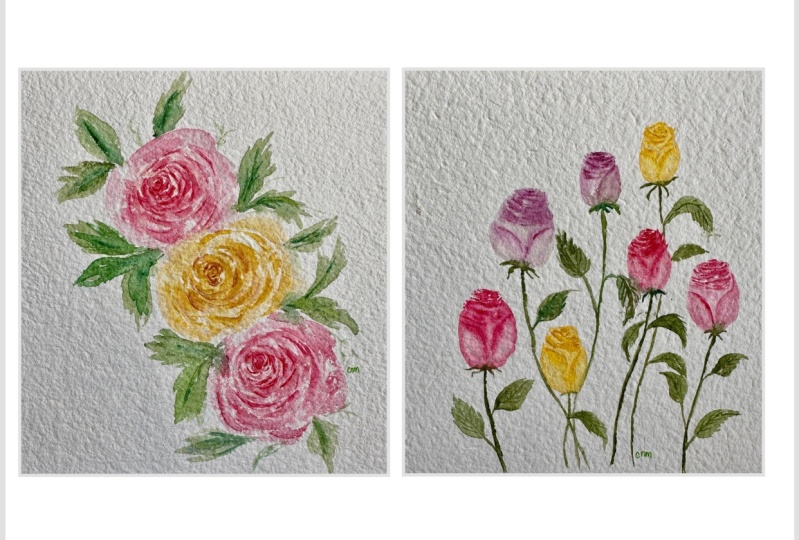
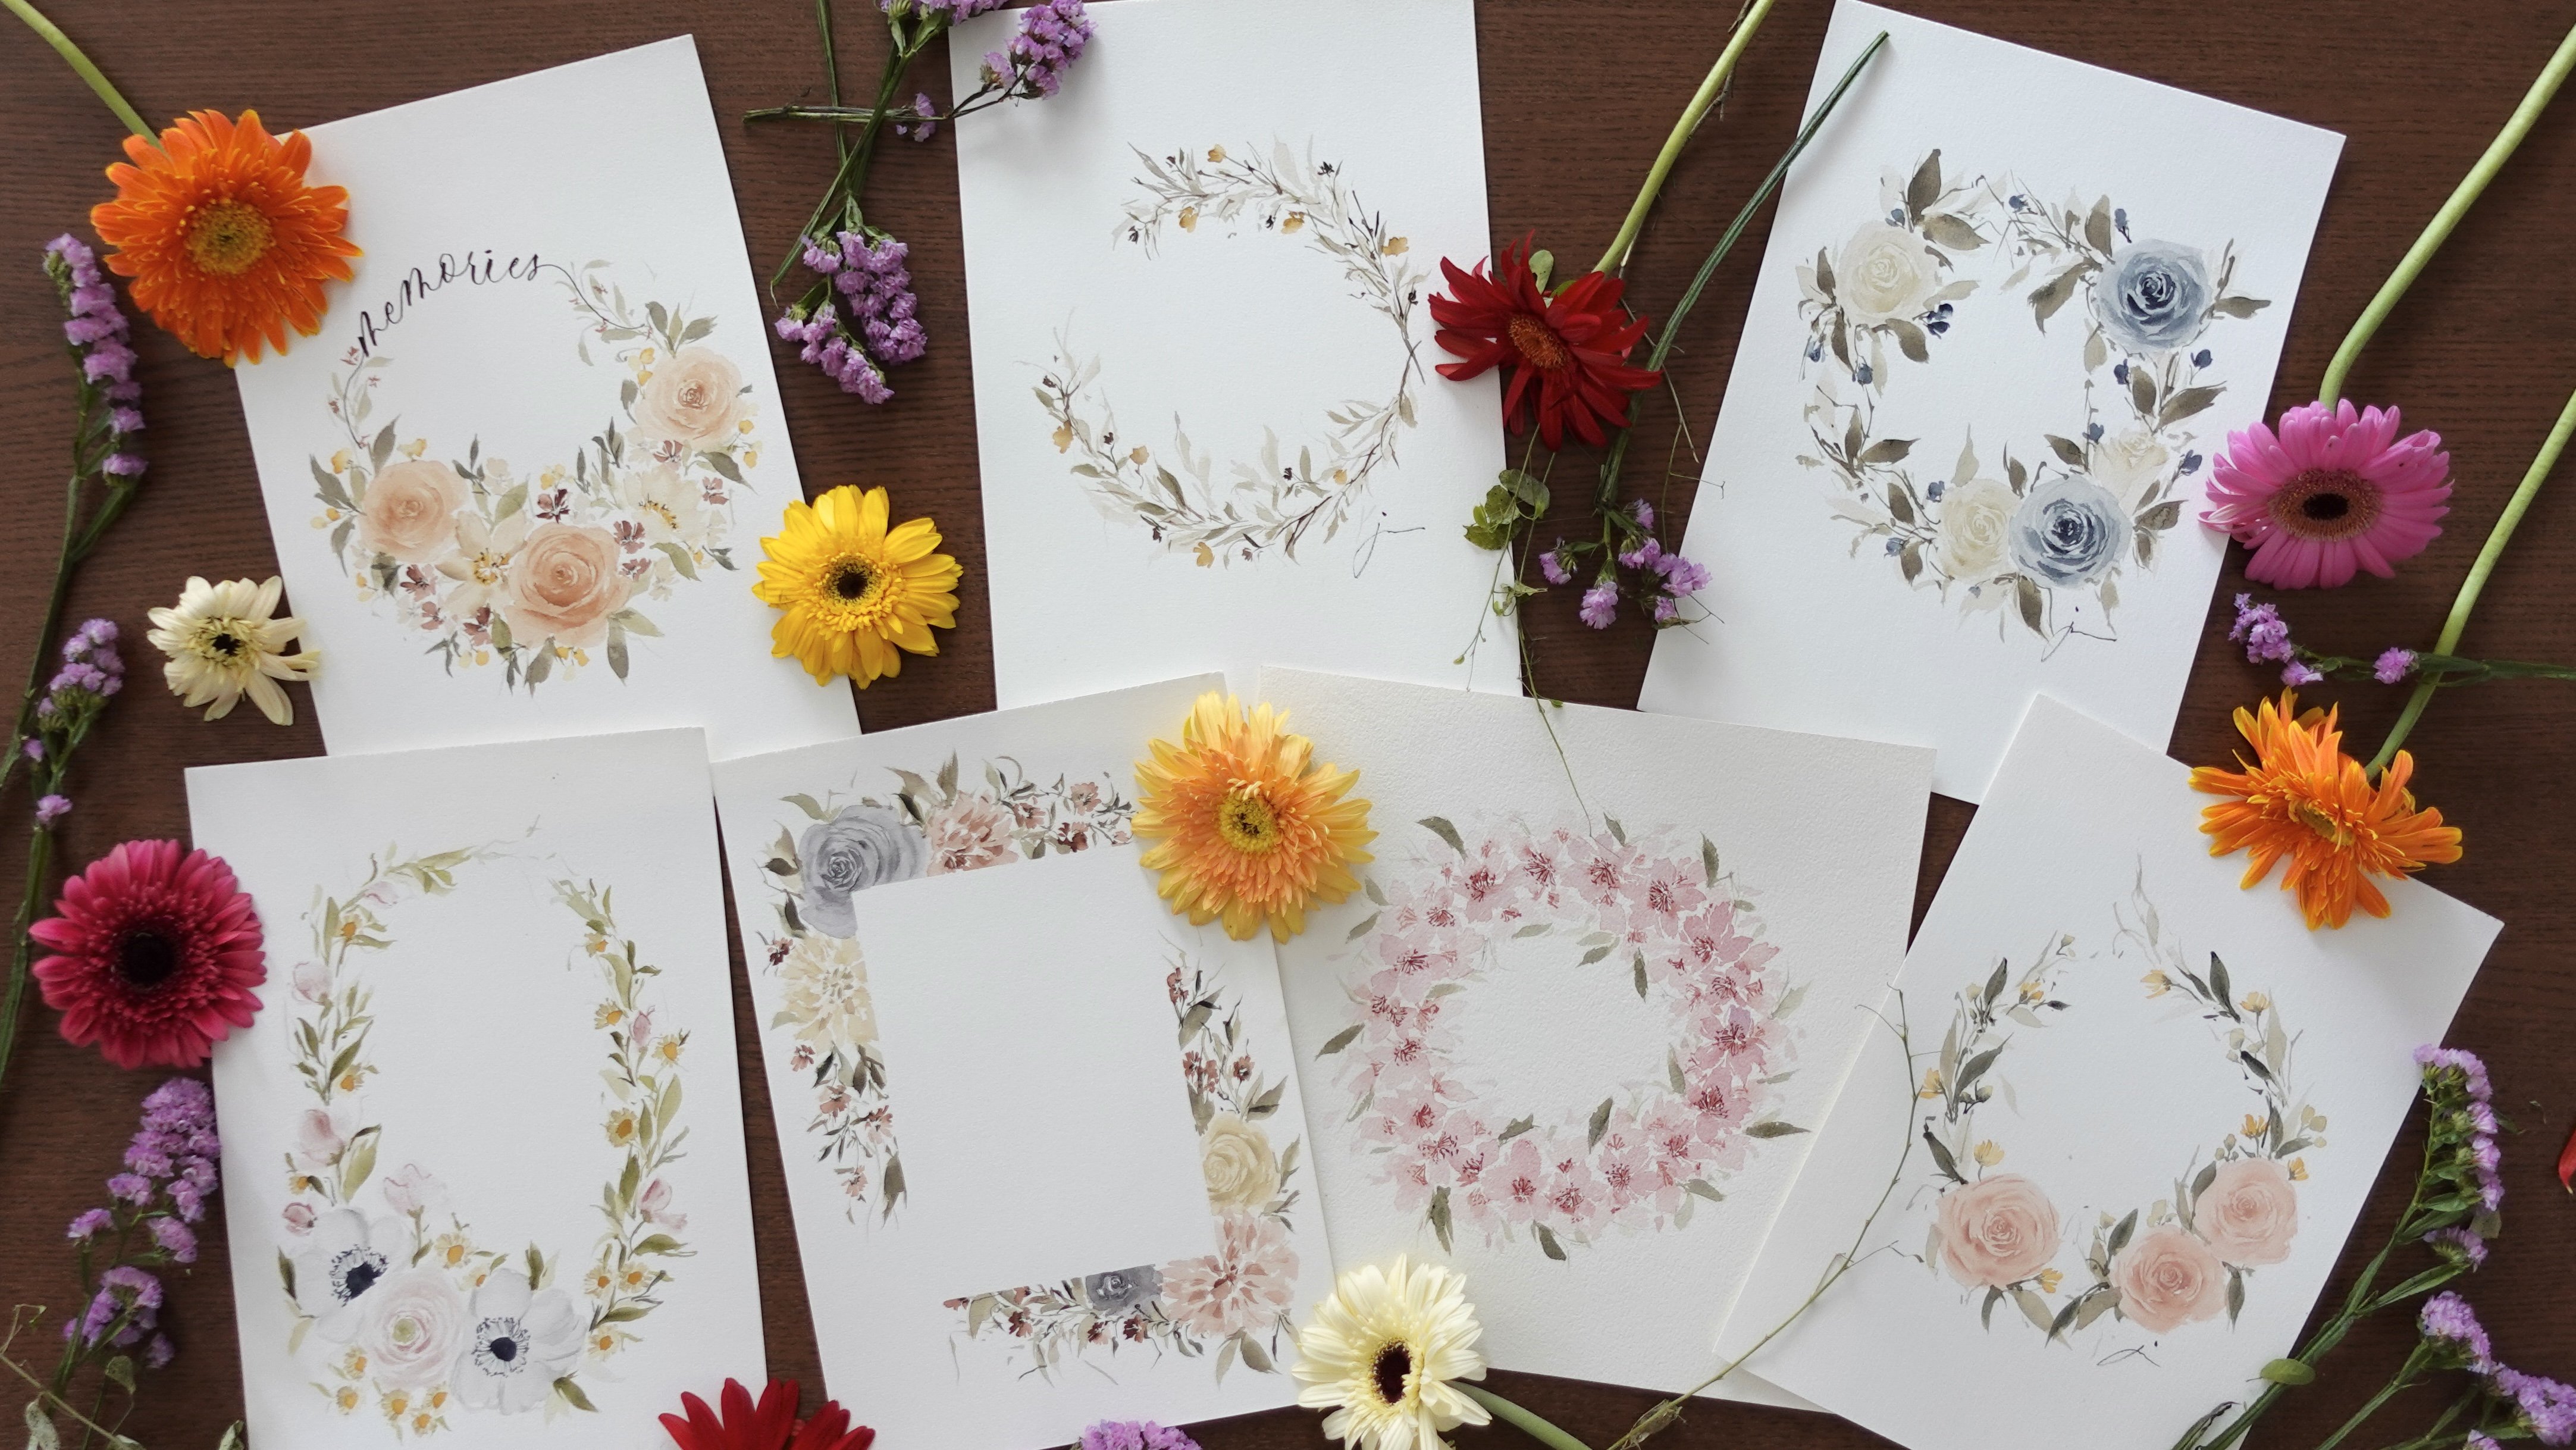
2. Class Project Overview: Just like many of you, I know how frustrating it can be to paint roses in a loose style. They often ended up looking like cabbage gloves or
something unrecognizable. Believe me, I've been there too. That's why I've created
Simple Steps to help you learn how to paint
those Beautiful Roses you've always wanted. On our first lesson, we will
paint a simple rose flower from a Top View surrounded
by a couple of leaves. We will focus on understanding
the flower shape using the right strokes and achieving the right color consistency. Moving onto the second lesson, we will learn how to create Simple Composition and combine multiple flowers in one artwork. Get ready for the third
lesson, because in here, we are going to uncover the secrets of creating
a beautiful rose wreath. Here we will explore
painting a Half Wreath. Discover how to Art fully mixed two different types of
roses in a single frame. The fourth project is all
about painting a Full Wreath. This is a lesson you don't
want to miss because we, we'll dive into proper subject placement and learning how to achieve a balanced arrangement
by adding fillers. For our fifth lesson, we will have a bit
of a break and learn a simple way to paint
arrows inside view. As we reached the sixth
and final lesson, we will take on the challenge of painting a full
bouquet of flowers. This is a benchmark difficult, but don't be afraid because
by following along with me, you'll surely grass the
different rows angles we've learned on the
previous lessons. You have two options
for taking the lessons. You can either watch
one lesson free day or go at your own pace, whatever works for you, as long as you give your full attention to the
topics that we will discuss. Once you have
completed the lessons, you can upload your project in the project and
resource section. This is where I can provide
you some feedback and a place where you and your classmates
can support each other. Please note that
the Skillshare's review and project
upload features are only available on the web, not on the app. I'm incredibly excited and passionate to share
these topics with you. So let's dive in
and get started.
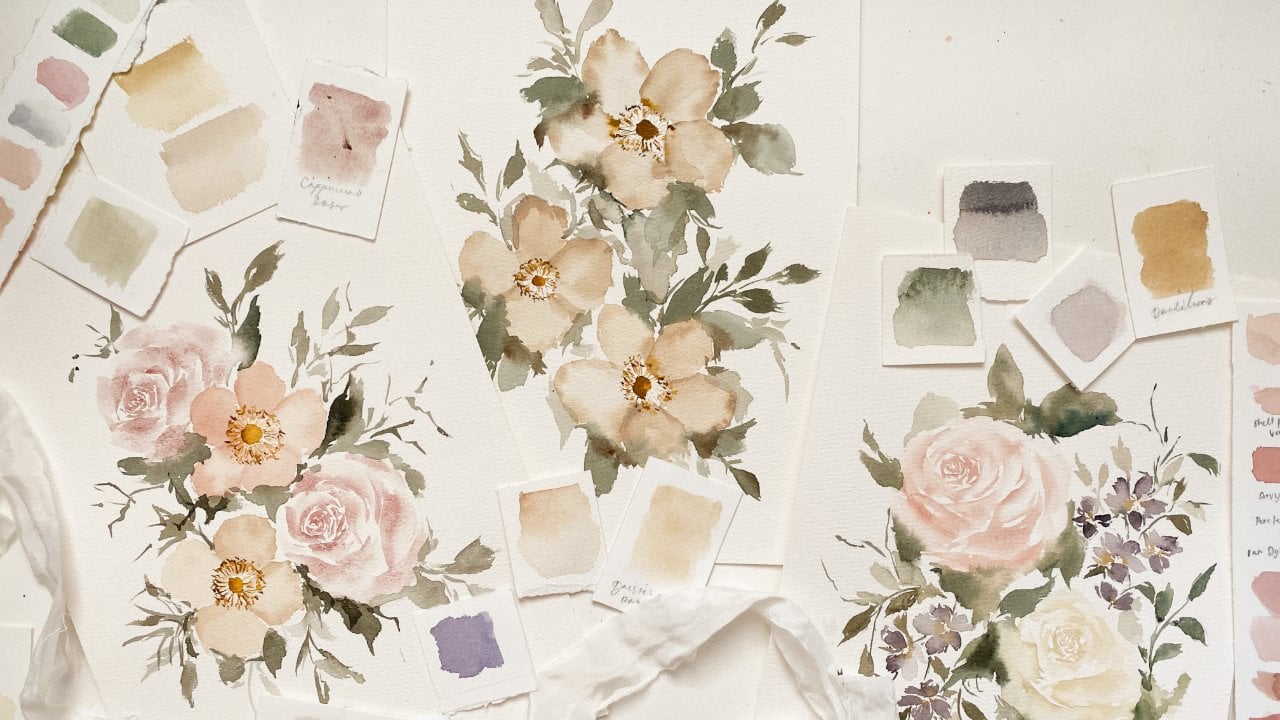
3. Supplies: This section, I will
walk you through the different supplies that we will be using for this class. Let's begin with colors. We will have six
project for this class. So that means we will
have a lot of colors to make all our projects lovely
and pleasing to look at. Before I forget if you
want to alter some of the color combinations for the
paintings that we will do. It feel free to do
so for this class, I will specifically use
the following colors. Petersburg, ocher,
hematite, thin, brown ocher, maroon, raw, umber, shadow, green, undersea green Catholic more to
green earth and indigo. I will be using a couple of
brushes from Silver Brush limited in different
sizes for our projects. And while I'll be using
different brushes in this class, you are not required to have them all to complete
our project. Okay, So for the brushes, I'll use silver black velvet, round in size 246.8. For the paper, I will use the bowel Academy watercolor
paper in different sizes. Painting using watercolor, it is important to have some
tissue paper nearby, as well as a cup of
water so you can clean your brush easily
when changing colors. Last is a mixing palette. I use a ceramic palette
because it's easier to clean. But a plastic palette we'll do. Now that you know the
supplies that we will use. Let's go and start painting
4. Painting a Top View Rose: For our first lesson, we're going to study
the basic structure of a rose and Top-View. We will learn to write strokes, the perfect watercolor ratio for each layer and the right timing and adding your next move. This is a very important
part of the class, so I hope you'll take
time to watch this one. By the end of this lesson, we will be painting this
simple Rose artwork surrounded by a
couple of leaves. I'm sure you're excited
to paint, so let's begin. When painting a rose, you need a concentrated mixture of the color of your choice. I chose this color called cap with Martin from them
scale. But let's run. This is the shaded I will use
for the center of my Rose. I'm using a size two
round brush for my core. And we're just going to
create small C strokes. Will also combine
a little bit of thin curvy lines to make sure there's a lot of detail
in the center of a rose. As you notice, the
strokes that we are creating are
getting bigger as we go further away from the first stroke that
we initially created. Continue creating
until you've reached the desired size of your
core or the center. Once you stop creating the core, get a clean wet brush and soften the edge of the last strokes
that you have created. The next strokes
we're going to use a less concentrated
mixture of the same color. Less concentrated
but still pigmented. Here I'm creating
bigger C strokes and longer thin strokes, and I'm using a size six
round brush for this one. I switched to a bigger
brush because it's easier to create bigger
petals with this one. Now, on my third brush, which is a size
eight round brush, I'm going to create
even bigger strokes. And this time I'm
going to combine another stroke called N stroke. It's Lexi strokes, but a
little bit more curvy. So basically what we're doing here is just
a combination of C strokes and strokes
and thin strokes. Before we proceed in
adding the details, let's have a recap. First. First step in
painting a rose is to create the core or the
center of the rows. We're gonna do that way, creating small C strokes in combination of
thin strokes using a small brush and a concentrated mixture of
the color of your choice. The next part, we're going to create a medium-size strokes. And here we are using a less concentrated but
still pigmented strokes. And here we're going
to create C strokes, thin strokes, and end strokes. Our layers now dry. Now let's add the
details to our rules. Freezing either concentrated
mixture of your color. Then on the color up the petals, we're adding more
concentrated mixture and we're going to add C
strokes again like this. Using a clean, wet brush. We're going to soften the
strokes that we have initially created to create
that hombre effect. This will create a
very soft look on the shadows that we
have initially created. The finished off, let's
add the leaves in painting the leaves
just makes undersea green and a little bit of Van **** brown using a
size eight round brush. I'm just going to drag my brush to create
a leaf-like shape. One more leaf here, one more at the top. You can place your leaf
anywhere you want, since this is just a practice. But later on I'm gonna teach you the perfect and safe spaces where you can
please your leaves. As my final detail, I'm going to add thin
strokes in my leaves. This is just an extra detail
and totally not necessary. That's it. That's how we
paint a Top View Rose. So you can re-watch this video if you want
to practice more. But if you're already
and you're ready to go, we can now start painting our first composition in the next video,
I'll see you there.
5. Painting a Simple Composition: Now that we're done learning how to paint fruit in Top-View, it's time to learn how
to combine a couple of these Roses in
one composition. This lesson, I'm going to
share with you some tips on where to place the next flower and where to add the leaves. Let's go and start the lesson. For this project, we will be using the same type of paper, which is 100% cotton, cold press, watercolor paper. We are also going to
use the same brushes, which are round brushes
and size it six into. To start the painting process, we need to plan the
positioning of our flowers. I decided to add one
rose in the upper left of my composition and
another one in the center. And the last one will
be at the lower right. Let's begin our first Rose. As we have studied, we are going to paint the
center of the rules for is I'm using a size
two round brush here. And for the color, I have the caplet mortem from
White Nights navs guy, but I just created the
combination of C strokes, thin and thin strokes to create the top petals
effect on my flower. Then for the next layer, I use a lighter shade of the same color and I
switch to a bigger brush, which is size six, and still creating
C strokes here. And as you can see, the strokes that I'm
creating are generally lighter compared to the ones that are used for the
center of my Rose. I'm also including something
rounded strokes in-between to create an effect that I have a few dark petals in-between. Now I switch to a bigger brush, which is size eight, to make it easier for me
to create bigger petals. Same procedure will be done. Great see strokes
and combine a little curvy and strokes in some areas. Now I'm back to the
size two and this time I'll be adding
depth to my rose by getting a more concentrated
mixture of gap with more dome and adding some thin strokes
in the color of my petals. Another reminder is to make sure to not overdo this part of painting so your Loose will
still look soft and natural. If you're not yet sure if it's already the right time to
add depth to your Rose. Here's the formula. Either the first
layer is 100% dry already or it's a little cold. Any of the two, as
long as it's not completely wet to avoid
bleeding of the color. Alright, we are done
with their first Rose. It's now time to move
on to our second rose. In here. I am using
the color raw umber. And let's start painting. We'll begin by doing the
center of the rose again. So smalls the strokes, then slowly add pressure as you go further
away from the center. I'm switching my size, my brush to size six, and let's create bigger strokes. What I personally love
about Painting roses is that as you create
them more often, you get to discover
better ways to paint them wherever you learn today, I'm sure it won't stop here. That's just the beginning of your wonderful
journey with roses. It's so much easier
for me to paint roses or any round flowers
when I turned my papers. So I think it is good if you'll try this
technique as well. So I am adding more
petals to make sure that this yellow Rose will be
close to the pink one. This is one of the best ways
to avoid awkward spacing. Because if there's a big space between your first Rose
and the second rose, it will be hard for you
to fill in that space. So make sure to just
make the to rose too close together or add a lot
of petals to your second row. So the two of them will connect. Time to add depth to
or yellow ruse using a concentrated mixture of raw umber and my size
two round brush. Let's add a few strokes to
the color of my petals. You may also soften
your strokes by brushing it with a
wet, clean brush Add strokes with make
sure to make it bigger. S your petals getting
bigger as well. I'm done with the yellow rose and I'm going to let
it dry for awhile. Now, going back to
our first flower, I notice that the depth I
created became lighter. We just By the way, normal
with Watercolor acids, rice, I decided to create another layer of
depth to my flower. I'm just doing the
same method here. Concentrated of
Catholic more tone than softening the strokes
with a clean, wet brush. Let's start with after droves. I'll be you sync up with
mortal again for you this, as you can see, there's a
nice combination of colors. Light pink, raw umber, and then light pink again, this is one way of creating
a well-balanced composition, especially when it comes
to color combination. If you're not yet
sure on how you can combine different colors
when painting roses. You can refer to
our last session, last project of this class, which is the class
project number six, where I will be to how to choose the perfect color combination
for Your Composition. I hope you're having a
great time painting now. If you're feeling
like you're Rose, doesn't look like a
rose at the moment. It's okay. Don't feel
discouraged over time. When you kept on
doing the C strokes. You'll develop muscle
memory and creating software strokes will
be easier for you. Just keep painting
and keep creating. I'm using size eight now. And as you notice, my car is too small and I
will be correcting that. So if you also made
a mistake like this, just wait, because L22, how to correct this mistake? Make sure to make your
third rose too close to your first show so there
won't be any awkward space. Alright, As you notice, again, the center of my
Rose is too small. Now we're going to
correct this by adding more darker strokes
in the center. So it's as if we are re-creating
the center of our Rose. Okay, So as you notice, I added a little bit
more so that it will be balance on the
size of my Rose. It's now time to add depth
to the rest of the petals. So I'm using size eight
round brush. Again. We are almost done with
our main subject is a little bit more details
for our last flower here. And now we are done and it's
time to add the leaves. I use a very light mixture of undersea green
from Daniel Smith. For the first few leaves
that we will create, I decided to add the
big light leaves on the important areas phrase. That is, those
areas with to roses in-between and some of the
outer part of the Composition. I use a lighter shade of color. So when I add the details later, they will still be visible. Let's add also here. And some smaller
leaves in this areas. Using a mixture of shadow
green and undersea green, I will add smaller
leaves to create a little bit of bleeding on the leaves that we have
initially created. If you're not familiar with
the bleeding technique, you can do it by adding another stroke bedside and initial stroke
that is still wet. I'm using size eight round
brush here to create a combination of thin
lines and small leaves. Yes, a size eight round brush, which is considered a big
brush for Vague leaves, but I'm able to create small
details like small leaves because the brush that I am using is a very nice
pointed tip brush. So with less pressure, I can still get smaller
brush and finer strokes. Let's finish our composition
by adding more darker leaves to adapt to the
overall painting. I hope you're painting is
looking nice there because I am very proud and happy of what my painting looks
like at the moment. Can add a lot of
extra details here. So random lines. This is my favorite part
when painting flowers, I feel like it adds a lot of dramatic effect
and a Composition. And I also love using
a team mixture, which is a very light
mixture of color for this type of effects
so that it won't overdo or it won't overshadow the main
subject of the painting. And that is it for our
Simple Composition. Let's go to the next topic, which is Painting, reads
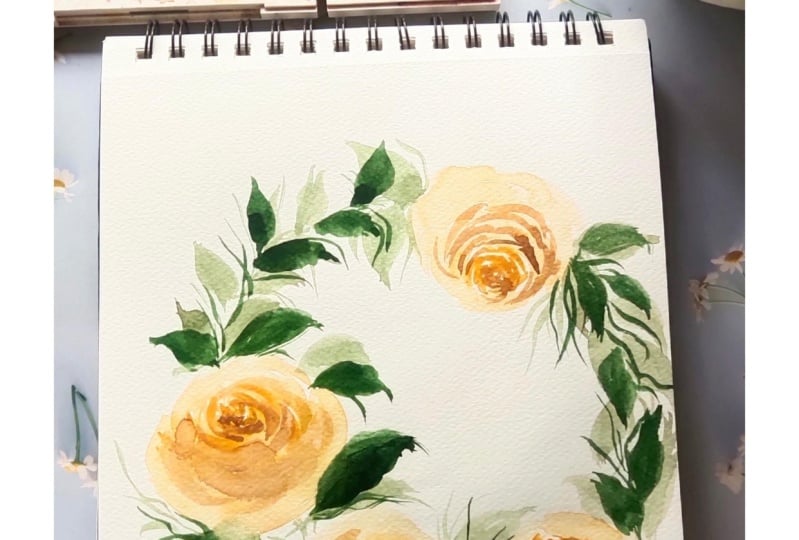
6. Painting a Half Wreath: Reads are one of
the best artwork that you can paint with roses. This round shape Garland, usually filled with
flowers and foliage, as something that is so irresistible to paint
using Watercolor. For the next two lessons, we will learn how to paint a well-balanced
read composition. I'll guide you with a step-by-step
process from planning, choosing colors, and of
course, the actual painting. Let's start with
the Half Wreath. For this project, we will start with our main
subject, which is the Rose, followed by the general
shape of the wreath, then the secondary subjects, which are the rose buds. And then we will finish
it by adding the details. For our main subject, I'll use the color maroon
from left Skype Elektra. And we will start with the
center of the rows first. So I'll be creating the core using a concentrated
mixture of my color. Then I'm going to switch
my brush to a size six round brush to
create a bigger petal. As usual, this is just a
combination of C strokes, thin curved strokes
and N strokes. Just play with these strokes, but be careful not to overdo it. And at the same
time, be carefree. Be mindful of the source
that you're creating. Make your strokes
loose yet control the size of your flowers so
that it won't look imbalance. I'm going to switch to a
bigger brush this time. And it's going to be size eight. So I can create bigger petals. While my layer is still cold, meaning not too wet
yet not too dry. I'll add a bit of
depth to my rose by creating strokes in the
color of my petals. Just a little. I don't want to overdo this as I'll add more details
later on anyway. While waiting for my
initial layer to dry, I'm now going to add the leaves. I just mix undersea green
and Van **** brown. And here I'm just dragging my brush to create
a leaf-like image. When creating a leave, I don't really do it
in a clean way. I just dumped my brush
or painted loosely, because in this
style of painting, as long as you made
something green, it will always be
perceived as a leave. So you don't really need to
define your stroke that much. Now it's time to make
the general shape of our Wreath using a very, very light mixture of green. I'll paint some
leaves and follow the pencil guide that
I initially created. I'm going to leave some
space for the rose buds, which we're going to
paint after this. Now it's time to paint the
rose buds using raw umber. I'm going to paint
the rose bud here. This is very easy. Just paint the top part using a slanted thin stroke and then drag your brush
to paint the buddy. I left a bit of whitespace to
represent some Highlights. We're going to repeat it
on this side this time. As you can see, we are done with the general shape of
our wreath already. However, it looks
flat and lifeless. And that's where the
details will come in. For my first, the did I make some more concentrated mixture, green and brown to create
the darker tone leaf. I made this to
create an illusion that some leaves are
at the back part, which is represented by the
lightest shade of green. And some are in the middle, which is represented
by these greens. And also somewhere in front, which I will paint on a darker
shade of green later on. Just adding leaves
on different areas. As you can see, there's
a nice bleeding of green on my petal. This is a nice effect that you can also add the new recreation. I'm not literally painting
over my initial layer. I just want some
areas to be covered, but also I want some
areas to be visible still Finishing off here. Now on my darkest shade of green and mix more green to
create this shape. And same thing, I'm spreading this color all over my
composition to create depth. Adding more greens here. Be carefree guys because the
more you control your hand, the more it won't look natural. Okay, now let's add the
details for a rose bud, I'm going to use a very
concentrated mixture of raw umber and just
add the details here. Simple, right? So I'm going to add another
one on this rose bud. Very subtle detail because this is just a
secondary subject. Now to our main event, the rose, I'm mixing a
concentrated mixture of maroon and using a small brush, which is number two round brush, we're going to redefine
our core forest. With that means is we're
gonna create another set of core as if we're going to put it on top of the
first one that initially, we initially created, because one we initially created
is a bit lighter. Now, as you can see, Watercolor, when it dries up, it gets a little bit lighter. So it's very important to add another layer every time if you want to
redefine something, adding C strokes here. So now I'm going to soften these strokes using
a clean wet brush. As you can see, the heart
edges are gone now. So continue adding details until you've added depth
on all the areas. We're just painting
one big rose here, so this one is very easy. Also guys do not overdo your
depth added on some areas, but not on all areas. Because if you're Rose might
look like a run-on colors. If you did a lot of depth. We aren't done. And we have a very
beautiful rose here. I'm very excited to see
what you have created. So please upload your project or the project and resource
section so I can see it and then I can give feedback to thank you so much and I'll
see you on our next topic.
7. Painting a Full Wreath: Okay, we're done with
their half wreath. Now it's time to create a Full Wreath Composition
similar to the half one, creating a full wreath requires
proper planning, right? Color combination,
and a good timing when it comes to layering. In this lesson, we will paint this beautiful Rose
full wreath that you can use to add some
quotes or message inside. Let's beginner lesson by knowing the colors
that you will use. For our Full Wreath. I will use raw, umber, brown, ocher, green, earth
and shadow green. For the brushes. I'll use the same round brushes
in size to 6.8. And then for the paper, I'll use again the
bow hang seven by 10 " cold press
watercolor paper. As I've mentioned, into
Half Wreath lecture, it is very important to
create a guide when painting a Wreath to help us know
where to place our elements. It sets or boundary.
When painting. I used a small bowl as my
guide and just lightly mark my paper with a pencil
and create a full circle. After drawing my guide, I erase it a little
with a kneaded eraser. The mark won't be very visible later when
I paint over it. It's time to paint
our first Rose, as you have seen in
our Overview photo, I will be placing three roses in the
lower part over wreath. And to do that, I will
be painting the middle rose as the first
flower on our 3D. It's easier to balance
the distance of the elements when we start with the main subjects
of decomposition. And when you have
multiple subjects, just like what we are going
to have in our Wreath. It is always good to choose to paint the
one in the middle first. Let's add bigger strokes here. Remember to add pressure and the brush when creating
bigger strokes. Be creating really big rose for this composition since
we have limited space. So I'm going to
close my rose here. Let's go and add some depth to our flower using a concentrated
mixture of raw umber. I'll be adding a few strokes
in-between my petals. Now softening the
edge of each stroke by brushing it with
a clean wet brush. And voila, we are done
with their first flower. Let's start with the next one. And this time I'll use the color brown ocher from Magellan. This color is also
similar to raw umber, but It's more on the golden brown shade
rather than yellow tone. If you notice, I'm going further rusty color
palette on this one. This is actually a
safe color combination when painting a Composition. Get to colors similar to each
other and play with them. Throw off some greens, and you have a well
colored artwork. Adding some big petals. I place my second Rose
close to my first one, so I won't need to make
extra big battles. Remember, we have limited space here since we're painting
a lot of Flowers. Time to add depth. As per usual, I'll
be adding depth to my rose by getting a more
concentrated mixture of brown ocher and adding some thin strokes and the
color of some of the petals, softening the edge of the
strokes using clean water. Then with R2 roses, two more to go. Let's start the core of a rose using our size
two round brush. By the way, I'm using brown
ocher again for this one. Just paint small C strokes. At this point a, notice that the strokes I made for the petals were too big. The jump from the core to the big battles was
so fast that they're wearing any medium-size
petals as a transition. But that's okay. Later on, I'll show
you the way on how we can correct roses like this. Let's add depth to a rose. It's still wet. So let's go back to our
free views roses first. Since our first two roses
or dried-up already, I notice a slight feeding on the depth that I
initially created. I will now re-establish
that depth by adding concentrated mixture of colors
on the color of my petals. I'm gonna do the same
for my raw umber Rose. Now it's time to go back
and fix our third Rose. Since it's completely dry, I will repaint the
center of my rose with a concentrated mixture
of brown ocher. Then to create an illusion
of smaller petals, which I wasn't able to create since I quickly transition
from tiny core two big petals. So what we're gonna do
is we will add that in the middle of the
petals instead of adding it in the color. This is an unusual process and some of you might
be scared to do it, but you need to
trust the process. I'll stop here for now and add darker layer wants this
one dries up already. Now let's proceed in adding
our first few leaves. I'm using a lighter mixture of green earth for the first
layer of our leaves. And I'm just adding it
in the essential areas, the spaces between the Roses and the end part of the petals. This is a safe space to add
leaves, especially in 3D. It's time to create
our last Rose. I'll be adding it here in the upper right
side of the wreath. And I'm just starting it
with the core as usual. I want this one to appear as
if it's a little bit angles. I'll be placing more petals
in one side of the Rose. I'll also be adding
the depth and one-side only to
really show the angle. Alright, we're done
with our subjects. Let's add the big leaves here. And another one here. One more here. Okay, So more. Okay, Now we will connect the upper and the
lower portion of a read using a size two round brush and allied
mixture of green earth. Let's add some small
leaves going down and up, making sure that the leaves
will meet at some point. There is no need to let
them meet in the middle, just anywhere as
long as they meet. I also want you to do this
as natural as possible. And thin curvy strokes make the leaves scurvy
and not so straight, and make sure that they
don't look too stiff. I'm gonna do the process again, but this time I am using
more concentrated mixture, been this part of our project. I really want you to take
control over your brush. Let your creative instincts
tell you where to place the leaves and also be
careful you and adding them. There is no right or
wrong in this process. Just be careful not to
overdo it and when in doubt, pause and check if your
Composition still look balance. Our wreath looks almost done, but at the same time, to blend, it needs depth to
make it look more attractive. So I'm adding leaves
with a darker tone. And I'm going to use
a mixture of shadow, green, and green earth for this. It's okay to add it over
your initial leaves. Watercolor is a
translucent medium, so even if you
overlap your strokes, it will still be visible. Just adding a few
finishing details here and some more here. Okay, F feel like
we are almost done. I just need to go back to my subjects and we
established the debt. Let's do it here first. This is completely dry already, so it's really nice to add details in this rose this time. Now, initially damage rose. Let's add that because it
really needs a lot of that. As you can see, the look of
this Rose really improve. So if you initially
made a mistake with your stroke,
just be patient. You can still work around that once the layer dries up already. View Details. And I'm just going to add a
darker shade of green here to add contrast. Where else? We're done. So I hope you're
wreath. Looks nice too. Please upload it in the project
gallery so I can see it. See you in our next topic.
8. Painting a Side View Rose: We are done with a single
Rose, Simple Composition, and right now it's time
to have a break on Top-View roses and learn how to paint it from a different
angle this time. In this lesson,
we will learn how to paint a rose in a side-view. We will learn the right strokes, Perfect water in color ratio for each layer and the right timing on adding your next stroke. This lesson is just as
important as the top you want. So make sure to carefully listen to the tips
that I'll give you. For this lesson. I decided to use this
beautiful shade of purple called hematite dent
and Freddie Green, I use my favorite
and they see green. To start, you need a size two round brush and a well
pigmented mixture of color. Not too concentrated and
not too light as well, then creates land
strokes like this. It's a combination of thin and thick strokes
with slight pressure. After that Kate, bigger strokes using size six round brush. I create about two strokes, one on each side. Now the most important
part, the buddy, we are just shaping the
body of a rose here. Very easy, but you
need to make sure that the size that
you create will be just right for the top part of the Roses you
initially created. Don't make it too vague. Don't make it too small. So now on depth, just like the Top-View Rose, who you will add
depth on the color. However, on this, we will
also add depth on this part. This will create an illusion of the final battle or the last battle of
your Side-View Rose. Now I'm just going
to add a little bit more layers on here. And then let's add the
leaves and the stem. Now just a basic leaf
stroke like this. And one imperfect
stroke for the stem. I'm passing to create
an illusion of thorn. And adding a bit of dark
stroke for this stem. As an extra need there. Going back to the main flower, I'm going to re-establish
the depth of my rose because it's not
that visible anymore. Adding some shadows here. And also here again,
reestablishing everything. I love how my Rose turned out, and now that we
know how to paint a rose in both top
and side-view. Let's move on to
our next lesson and paint a full Rose Bouquet
9. Painting a Bouquet Composition: Alright, we've
come along way and we are about the finished
this class already. In this lesson, we will paint
a more complex composition. Here we will learn
how to actually plan out a full Rose
Bouquet painting. I'll share with you some tips on where to source inspiration, choosing the appropriate colors, and the signing of composition
that will look appealing to the eye when planning
a Bouquet Composition, there are tons of places you
can get inspiration from. It can be from an actual
arrangement, from a photo, or from different
paintings that you'd like to combine and create
your own version of. My favorite among those
is of course, photos. I always look at Pinterest
for inspiration. I love searching for bushy composition with different
colors of roses in it. I also loved those with
flourishing eats around it. It just makes the composition look more feminine
when doing this, I don't really copy
everything that I see from the photo and just take the
general composition and add my own touch to it. I also use my own color
palettes so that I can add my personal
touch to my painting. For our project, we
will be painting this beautiful composition
and planning this and made sure to choose a
beautiful color combination. And I did that by using,
again, pinterest. I pick one color for
it, which is blue. And then from there,
I searched on the platform what colors
are best paired with it. During my search, I found a lot of beautiful color combinations, but I made sure to pick what resonates my emotion during
the time of painting. Alright, I'm sure you've been itching to paint
our final project. So let's begin. I'll please, or
first Rose here and I'll be using Petersburg
or girl for this one. You see a size two round brush and just
creating a combination of C strokes and thin lines to create dark petals
effect on a flowers. Of course, this
is the usual step that we have learned
from our past lecture. So again, make sure to
apply what we have learned because in this
part of our lesson we are going to
combine everything. The Top-View Rose, Side-View Rose correcting mistakes
and everything. So I hope that in
the past lecture, you were able to build your
confidence in creating roses. Switch to size eight and make it easier for me to
create bigger beta's. Same preceding
year will be done. Create C strokes and combine a little curvy and
strokes and some areas. I'm closing my rose here
since it's enough already. Now I'm gonna go back
to size to the stem. I'll be adding depth
to my rose by getting a more concentrated mixture
of Petersburg ocher. Adding some thin
strokes in the color of my petals, like the usual. Make sure not to
overdo this part. So you Rose will still
look natural and soft. Also a gentle reminder
to always make sure that your base layer is not overly wet before
you add your depth. We're done with our first Rose. Now time to add the next one. Our second rules will be
in color, brown ocher. I want this one to look
a little bit angles. I'll be painting a core in a little bit closer
area to my first rose to lessen the big battles
that I need to create. Alpha goes on adding
bigger petals in this area to make it
look angled even more. Now let's add shadows. I'll be adding more shadows
on the left side of the rows to create
dimension to our flower. Asks you notice the
shadows really added a beautiful effect
on our flower. And it's not just
through to this Rose, it's true to all the Roses
that you will create. So make sure to practice
adding beautiful shadows and learning when to stop
because when you overdo it, It's also not that good. Okay. I'll just
soften the rest of the shadow with a clean brush so the effect will look soft And we're done with
the second Rose. Hope your roses are
looking good out there. So let's now proceed
with the third one. This time, I'm
going to use blue. I'll be using color
indigo for this Rose. And I'll start with a car adding thin strokes to make sure that the
core is very detail. Now adding bigger petals
using size six round brush, pressing LL to make my strokes
a little bit more big. Let's add the
biggest setup petals you seeing our size
eight round brush. I'm going to finish my
Rose and this size, I'm going to close it here. My Rose is still less. I'm going to wait for it
to dry fruits. For now. Let's add a few leaves to
maximize our weighting them. I'm going to add a one here. Of course, this is
a safe place to add leaves because it's
between two Roses. And then one more here. You guys don't need to copy everything that
I'm doing here. Feel free to add your
own creative Dutch, especially now that I'm sure you're more confident in
painting your composition. Alright, I think the base of the blue rose is dry already. So let's go add some details and that I'm going to re-establish
the core a little bit. Going to soften the, This folks that we have graded and adding some shadows. I really loved this
colors so much. And it's really beautiful, especially when you're
adding shadows. Just a few more strokes. And we're almost
done with this one. Okay, Finally, we are done with their three Top-View
roses for you. Let's fill in our composition
by adding some leaves. In this part of our
painting process, we're adding big leaves. Avoid adding smaller leaves
as your base because it will just be covered when we paint more elements later on. Just going to add darker leaves. This time. This will give a nice contrast
to our composition. It's now time to decide where
to add our Side-View roses. I decided to draw a rough rough I decided
to dry and rough sketch on some areas where I
will put my Side-View roses. So in creating this, no need to add a lot of details. Just capture the general
shape and size of the flower that you are going to paint and you're good to go. My second Side-View
Rose will be here. Just set it up close
to the first one. Please be mindful of the angle, makes sure it won't look
stiff when you paint euro. So the last one will be in the
opposite direction, which is in the lower-left
part of my composition. Okay, I'm just going to
erase the sketch a bit so it won't be very visible later
when they've paint over it. Now that we know where the rest of the main
subjects will be placed, I can now start filling
in the blank spaces with a medium and large size leaves. Okay, I'll be placing
another one here. Probably in this area. As you notice, I'm using different water and
colors for my leaves, somewhere darker and
somewhere like we do this. So we can create an effect and illusion that
some leaves are at the back part of the Composition
and some are in front. It's time to paint
this side-view rose. So I'm going to start
with the top part, which is done by
using a small brush. And I'm going to add
a medium-size battle between the top part
and the whole buddy. I'm just going to
create the body now and fill it in with some strokes. Just like what we
have studied earlier. One cutie leaf here. And then I'm going
to precede with my second side-view rose. This time I'm going to
use brown ocher for this one to add a little bit
of contrast in this area. Again, we'll start with a
small detail at the top part. Then we are going to
move on to a bigger bet. They'll effect using my
size eight round brush. Also here in this part, and they use a lighter
mix of brown ocher, comparing it to
the upper portion which is more concentrated. I'm going to maximize the
cold state of my first Rose. I'm going to add a bit of leaves here to create a
bleeding effect. I love this effect on my
painting because it slowly it, that blue and dreamy
feel on my painting. So I always add a little bit of bleeding on some
areas of my painting. I hope you're
maximizing the state of your stroke as well and adding a little bit of
bleeding every now and then. Now I'm adding depth to my rose. So I'm using a concentrated
mixture of indigo here. And softening the
edge is useful. We will not have
hard edge strokes. Last battle effect. Okay, don't forget this part. Now on my brown rose, again, I'm using a concentrated
mixture of brown ocher. I'm going to soften this one. And my last row
name, last petal. I mean, I think that the last battle effect is the most important effect when you're painting a
Side View Rose. Because without it, your Rose will look very dull and flat. So it is very important if the core is the most important
part in Top-View Rose. Here inside View Rose, it's the last battle I'm just adding extra strokes here to soften and to create more effect and petals
look on my Side-View Rose. Don't forget your third rows. So here I'm using
Petersburg ocher. And just like what we did on the first to
Side-View Rose roses, we will start on
the top part using a concentrated mixture
of Petersburg ocher. Then I switched to my size
six and create bigger petals. And of course the body. I'm going to connect this
Rose, the main Bouquet, am going to maximize the cold state and add a little bit of
leading to this rose. It's so nice. I really love this color because it creates that soft white via on your painting and
it's so dreamy and feminine. So I hope you get this color. And if you are using
Daniel Smith watercolors, there's a counterpart
of this color and line and it's
called buff titanium. So the ones that I'm using right now is called
Petersburg ocher, which is from that
Skype Elektra. But if you're using
Daniel Smith, go get the buff titanium color. Okay, So we're just
literally going to fill in our Bouquet now and in this part and
really want you to add your own personal touch
on your composition. Let your creative
juices flow and details and the areas where you
think there's a lot of space and when in doubt, use T mixture or a very light mixture of the
country that you're using. Because it's easier to Greg, it's easier to cover off when
you're using light mixture. Or you can also sketch
it first using a light, sketch a pencil, and then erase a little bit so that
before you paint over it, It's not that visible anymore. Of course it's not my painting
without this little twigs. So I'm adding little twigs. On some areas of my painting. I'm using a darker
mixture of green, shadow green mixed with a
little bit of green earth. I feel like my
painting lacks depth, so I'll be adding darker leaves on some areas
just to create depth. Now I'm going to add
details on this Rose, especially the
last petal effect. So I'm using how
concentrated mixture of Petersburg ocher. Sometimes we really need to
go back and forth to see if the details that you've
added are already enough. Because when we add
lighter details, there are chances that it gets even lighter
when it dries up. But that's okay. I'll patients is also
important in painting. So you have to
really have a lot of patients when you
decide to paint. So yeah, go back-and-forth and see if all the
details are enough. If all the details look good. And before you put
down your brush, step back and look
at your composition. If it's balanced already. If it's not, then
add more details. If you think it's
already good, then stop. Don't overdo the process because sometimes you may ruin your
painting at the end, part. Over time, you'll
develop that sense of judgment on your painting and
you will know when to stop, where to add details, when to add darker details, when to make it lighter, wanted to make it shorter, went to make it bigger. And you will develop that sense of intuition
over time as you practice. So again, make sure to
paint once in awhile, paint roses once in awhile because you will forget
it if you don't. And again, congratulations
for finishing the lessons. I have one more video for you and the final Thoughts section, and I hope you listen to it. Thank you so much and
I'll see you there.
10. Final Thoughts: We made it. Thank you so
much for joining me in a big round of
applause for finishing all over six artwork lessons. I really hope you
found this class helpful and learn a
bunch of new things. And most importantly, I hope it reignited your
love for roses. They deserve a second
chance, don't they? Now here's the exciting part. I want you to keep
practicing and apply all the techniques
that you've learned today to your future artworks. Trust me, you'll see an
amazing progress when you do. Please don't forget to take
some photos of your paintings and upload them to the
project section of our class. I can't wait to see
what's upgraded. So let's show up
those master thesis. If we had a great
time in this class, which I hope you, this is, be super grateful if you could leave a positive review
in the review section. Your feedback means the
world to me as your teacher. Tell me what you love, what's your favorite lesson and any suggestions for making
things even better. I value your opinion, so please leave a review. By the way, Let's take
connect it and make sure to hit the follow button
here on Skillshare. So you'll be the
first to know about my upcoming classes and
exciting giveaways. And speaking up,
staying connected, let's hang out on instagram
to follow me on instagram at jenny Flores Art for
all the latest updates on my new works,
workshops and events. And please share
your projects on Instagram and Instagram stories and tag me at jenny Flores Art and Skillshare's
Instagram accounts. At Skillshare, I will surely share your work
with my community. What else did they mentioned
were having a giveaway. Head over to the
discussion sections. You get all the details. Okay? All right. I really hope you
had a wonderful time taking this class and
learn a lot of things. Thank you so much for joining me on this
creative journey. It's been an enjoyable time on my part and I can't wait to
see you in my next class. We'll then take care, keep creating and remember, practice makes
progress. Bye for now
 Jenny Flores Art, Top Teacher | Watercolor & Gouache