Transcripts
1. Introduction: Do you sometimes find yourself marveling at the magic and wonder that is animation? Hand-drawn, frame-by-frame animation drawings come to life. Do you then think, damn, that's cool? I wish I knew how to do this. Well, that's exactly what got me into animation. Hello and welcome to an intuitive approach to animating in Procreate. My name is Vera and I am an artist-illustrator, and animator from Germany. Most of my work is centered around illustrating for games and publishing. I'm in the business of creating worlds, that I'm really into fantasy character design and storytelling. What I love most about animation is that I can use my work to connect with people by telling their stories and letting them into mine. Today I want to share this passion with you. In this class, I will teach you some super-duper basic first steps that you can take to start making your own animations. We're going to boil down animation to its core, timing, and rhythm. Basically, all frame-by-frame animation is a drawing spread out through space and time to create the illusion of movement. Think of a flip book. Each drawing goes on a page and the illusion is activated by flipping through it. How we experience this illusion is influenced by timing. Then there's rhythm. Consider leaves blowing in the wind, they follow a certain pattern or flow. We want to emulate this natural kind of rhythm to make our animations feel more believable and immersive. Sound's really complicated? Well, it doesn't have to be. In this class, we are bypassing the bouncing balls, the walk cycles, all these tiresome beginner animator exercises that just suck the fun out of it. Everything that intimidated and left me absolutely petrified when I first got started. We'll keep it simple, fun, and intuitive. Together we will move from dot to line to mass. The dot will get you to familiarize with animating in Procreate and working with frames. The line then will get you started with rhythm and motion. Finally, the mass, well, it teaches you how to approach mass and how to deal with objects that have weight. For your final project, you'll use what you learned to add either smoke or water to one of your illustrations. This class is perfect for artists who want to start with animation that can't quite find a point to begin at. No matter if you're a hobbyist or a professional, if you can hold a pencil and you want to get your drawings moving, this class is for you. No prior experiences are needed. All you need is an iPad, pencil, and the Procreate app. By the end of it, you not only feel confident to tackle your own animated projects, but you'll also have a series of exercises you can use to spice up your illustrations or transform them into works of art in themselves. Are you ready to get started? Come on. Let's step into the realm of magic together and have some fun with animated dots, lines, and masses.
2. Class Project: Class Project. This class is designed to help you take your first steps into animation. The result of that is what I'm hoping to see in your class project. Throughout the lessons, I will give you a handful of small animation assignments, which will take each 10 minutes max, and will build up on what the former exercises taught. This way, you will get familiar with the technique and take small steps into the topic. As you tag along and share your animation exercises in the class project, you can clearly see your progress and receive feedback. I'm a big believer in learning by doing. That's why I would like to urge you to actually work through all the work assignments. This is the only way to actually break the initial inhibition and see how much fun it is. Here is what we will create together on Procreate 5 on the iPad. A cooking dot. This will be our first use of animation in this course and lay the foundation for all that follows. Moving dots. By creating this animation, you will get a better understanding of what exactly timing is and how emotion can change when you place the drawings differently. Building up on the former assignment, it will then show you how to apply the learned steps to a thing that slightly more complex than a dot, a line. The focus will be on exploring how to give movement a mood. From moving lines, we continue to moving shapes, and creating a sense of mass. While most of the exercises are rather abstract, I will end with some optional assignments in which I will show you how to use the acquired skills for water, smoke, and the flag. Let's charge up the iPads and get Procreate installed if you haven't yet. Once you've downloaded all the resources materials I have attached for you, we can actually jump in and get started.
3. Setting up Procreate: Setting up in Procreate. In this class, I will focus on Procreate on the iPad as a tool. I choose it because it's just super simple to use. It is just easier to enjoy the process when the tool is so focused on the essentials. I love that I can just take it anywhere. You will need the iPad, the pencil, and Procreate. This is what it looks like when you start it. On the top right, you can tap on the "Plus" to choose or create a new Canvas. Either pick one of the prerequisites or create your own. I'm going with a square format because I like squares. You too? Awesome. You don't like squares? Okay. Choose whatever you like. It really doesn't matter. All that matters now is that you have a Canvas open. You can zoom in and out with two fingers like so. On the top right are Brushes, Smudge tools, Erasers, Layers, and the Color Picker. Here, you can adjust the size of your brush and the opacity. We want to animate something. In order to do that, activate the Animation Assist by tapping that wrench on the top left and then tap "Canvas" and enable "Animation Assist". The little bar down here appears. If you like, you can tap on "Settings" down there and see what you got there, but you don't really need that for now. I will tell you more about it when you actually need it. All you have to do now is pick any brush tool. I'm going with Calligraphy Chalk, and your favorite color, mine is red. I will tell you more in the next lesson about what the hell frames are and how we will use them. Let's move on.
4. What are Frames?: What are frames? Think of frames like sheets of paper that each holds a drawing, and the drawing is a little bit different on each new sheet. It's like a flip book, just digital in this case. The frames represent a moment in time and they create the illusion of movement when they are played back in rapid speed. Our eyes and brain will perceive anything that plays with more than around 10 frames in a second as a fluid motion. If it's less than 10 frames, our brain usually is able to distinguish single pictures, and the illusion won't work as well. In Procreate, the frames are equivalent to the layers of your artwork. The same is true for animation in Photoshop, but it is a bit more complicated. If you would like to tag along in Photoshop, you should check out the lesson setting up in my class about lip syncing real quick. It is linked in the description. I'm focusing on Procreate and you can use the file I have attached in the resources to practice with. Procreate allows you to manage, rearrange, or select the frames, either by tapping on the "Layers" button up on the right, or directly in the Animation Assist bar at the bottom. Hold down and drag to move a layer to another place in the layer order. You can see that it changes down in the Animation Assist Part 2. Unchecking a layer here in the Layer menu will remove the frame from the Animation Assist. You can also touch the frames directly in the Assist bar at the bottom. Hold down and drag will move the frames to a new place. When you tap a frame here, you get this little menu popping up, which lets you delete or duplicate this frame. But you can also change the duration for it, which will function like a copy of this sheet of paper or frame that will remain right after its original for the amount of frames you choose. Now you can also go to "Settings" here at the bottom right. Pay attention to the slider for the frames per second. Take a moment to change the number to something else, and hit "Play" to see how it changes. Check "Loop" for an eternal playback that is looping through your frames over and over again. Check "Ping-Pong" to watch them forwards, and then backwards, and then forwards again, and so on, or check one shot for a single play through. You can also scrub through the drawings back and forth by touching down on the Animation Assist bar and going left and right. You can see that the frames are all very similar. There is no real motion from point A to point B happening. Instead, I have drawn the same position over and over again. This look is what I will refer to as cooking, an animation with a sense of motion but without real movement. Why don't you try this yourself? This will take 10 minutes max. Open a new file in Procreate, enable "Animation Assist", and then draw a dot. Now tap, "Add Frame" or the plus in the Layer menu to create a new empty layer to draw on. Now, just draw the same dot. To see where the dot is on the former frame, set Onion skin frames to one in the Settings menu. This will let you see through your frames. Play with the opacity and blend or color mode settings to see what works best for you. Carry on until you've got a bunch of frames to play back and see how you like it. Well done. You officially took your first step into animation. By the way, did you know that you can change the background color in the Layers menu? If white is too boring for you, you can add a little bit more color to your file by tapping the "Background" color layer, and picking a different hue that you like. Frames are the layers or single pictures that create the illusion of movement when played back at rapid speed. In the next lesson, we will talk about timing.
5. Why is Timing Important?: Why is timing important? Just to be clear, we're not talking about being in the right place at the right time timing. Or wait, that is actually what this is about, because when we're talking about timing in animation, we also have to talk about spacing. Timing refers to the fact that your drawings are spread out over time and space to create the illusion of movement when played back as an animation. Timing is at the core of this all. By the way, it's totally okay if you can't quite grasp what that means right no. It took me personally quite some time until I managed to wrap my head around it, and it's been one of my biggest frustrations when it comes to animation. Try to look at it like this. A feather will fall slower than a ball of metal. The timing of when we let go off each and when they hit the ground will differ greatly. Now, tying this into the whole frames business. Something that moves fast will use fewer frames than something that moves slowly. This means that the spacing, so the distance in placement between the drawings and each frame will be greater for a fast-moving object and thus smaller for a slow moving one. Timing is the speed at which things happen. Animation is nothing else than drawings spread out through time and space. If this is still a bit confusing, don't worry. The concept of timing and spacing will become a bit clearer throughout the next lessons. Let's move on. In the next lesson I will talk about how to start moving things around.
6. Using Frames: Moving Dots: Using frames, moving dots. If you've gotten a dot cooking in the lesson about frames, you should already have a file prepared. You can just stay in there and populate the canvas a little more or you create a brand new file in the size of your choosing, enable the Animation Assist, and get started. This is what I will do. Let's do this together. First create a handful of new frames. This can be anything between five and 10, whatever you feel like. Use the brush you picked to draw on each frame you have a dot in a different place, just wherever. Really spread them out over your canvas and don't overthink it. This is just for fun. If you'd like this to loop nicely, duplicate the first frame by tapping it in the animation bar and hitting Duplicate in the bubble that pops up. Move that frame to the last position by holding down and then dragging it there. When you hit Play now, you already have an animation, technically. It probably looks very random and just like flickering dots all over the place. To smooth things out a bit, first go and enable the onion skin settings to help you with this. I like to use it set to one so I don't get too distracted by ghostly dots everywhere. By adding a frame between each one of your drawings, you can now connect the two places your dot is in with a middle position. Just put the new dot somewhere between the first and the second one on this new frame. This can be the dead middle or it could favor one or the other dot in closeness. It can also be a bit off course if you want. Think of a slight curve, if you put it too far off from this, it will not help the transition. Add a frame between each one of your frames you already drew on. It might be smart to put the empty frames first and then fill in the dots so you keep an overview of which gaps you already filled and which not, but I am not smart today. It also doesn't really matter for this. The exercise is just for fun and to get you into it. Once you have filled in the middle positions, play it back another time. It already looks a bit better now, doesn't it? More like a movement, still very random, but that's okay. Now, what you could do is fill in more transitioning poses and connect your moving dot further to smooth things out. Play a bit with the flame rate settings and see how it changes. I had poses where I felt like the gap was too big between the transitioning pose to the next dot. Instead of pulling just another dot there, I decided to smear this dot out across the frame, because why not? This can give a funky little kick, especially in this case, because exactly big spacing, fast movement. It imitates a bit of a motion blur. If you would like to put in more in-between frames into your moving dot animation, here are a few tips that you can keep in mind. For an organic movement, cushion the drawings at the beginning and end of the motion. This is how it can look like. More frames make for a slower movement so your dot will speed up and slow down. Where the motion starts and ends, you ask. Well, that is for you to decide. I use the dots that I put down first as beginning and ending points. Now we're going to the next step. Are you ready? Change your color if you like, I just do it for a better overview. I want you to add another dot that is moving throughout the same amount of time, but with a different timing. Does that make sense? You could draw this new dot on the same exact layer if you wanted, but I will show you how you can have a bit more flexibility. Open the Layers tab and hit the Plus symbol or tab Add Frame. A new frame appears in the animation bar. A new layer appears above the frame you have selected. We don't want this to be a new frame though, so what to do. Easy, select the empty layer and the layer below your first frame by slightly tapping the first one and then the additional one by swiping from left to right on it in the layers panel. They should both be highlighted like this now. On the very top, two new words appeared. Tap the right one, Group, and the two layers become a group. When you look closely, you can see that they have been consolidated into one frame in your animation bar. This will allow you to easily edit the blue dot without having to worry about the red one. Now duplicate the first blue dot by swiping on its layer from right to left. This will open the menu options: Lock, Duplicate, and Delete. Tap the Duplicate button and then drag the new layer to someplace. It doesn't really matter where, but make sure to have at least two frames between the group and the duplicated dot. This will ensure that we can move it back and forth from and to this very position. I would like you to create a loop that will play at least twice while the red dot is jumping around. Don't worry, first things first. Let the blue dot jump away a little or move around however you feel like it. I have it go there and back really quickly. To add a bit of elasticity to the motion, I am dragging the dot out a bit on the middle position and it's overshooting its goal a tiny bit too. Once you're happy with how your new dot is moving, duplicate each one of the new layers inside the group frames. Swipe right to left and duplicate, done. Now select these duplicates and move them ahead, so up in the layer order. Now drop them there. In order to have these simultaneously to your first dot, we want them to be in the same frame. We need to group them as we did just before, but of course, you should rearrange the layers first. Tap a layer to make sure that it's the only one selected and then hold down and drag it. If you went with different colors, this should be easy. You only need to have a layer of each color, select both, and then group, perfect. When you hit Play now, the new dot should do the same movement twice. Now, for the rest of the frames, you can just have the dot cooking or have it move into another direction or you let it shrink and disappear. I have attached my file for you. Feel free to go through and look at these options a bit closer. Otherwise, congratulations. I hope you're feeling a bit more confident now in your ability to move things around and more comfortable in the overall use of Procreate. If you like, take a few more moments to add another dot or two and populate that canvas a little more. Then it is time to move onto the next lesson, where we'll talk about moving lines with rhythm and emotion.
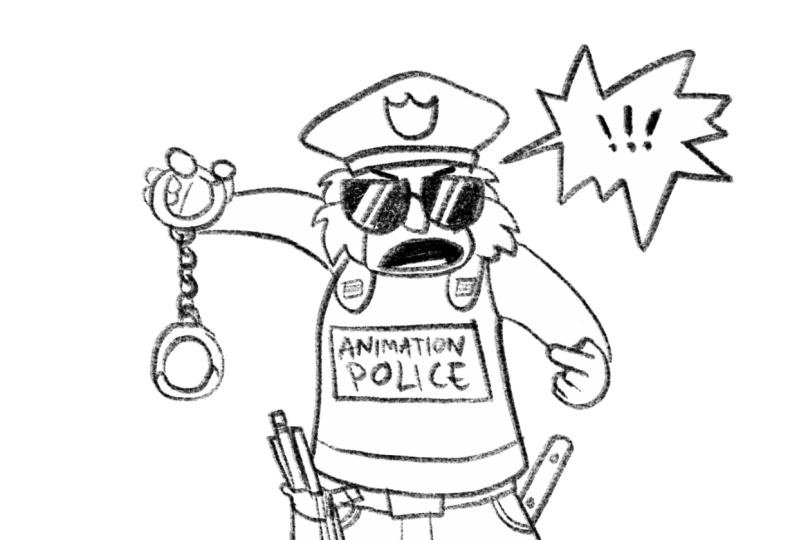
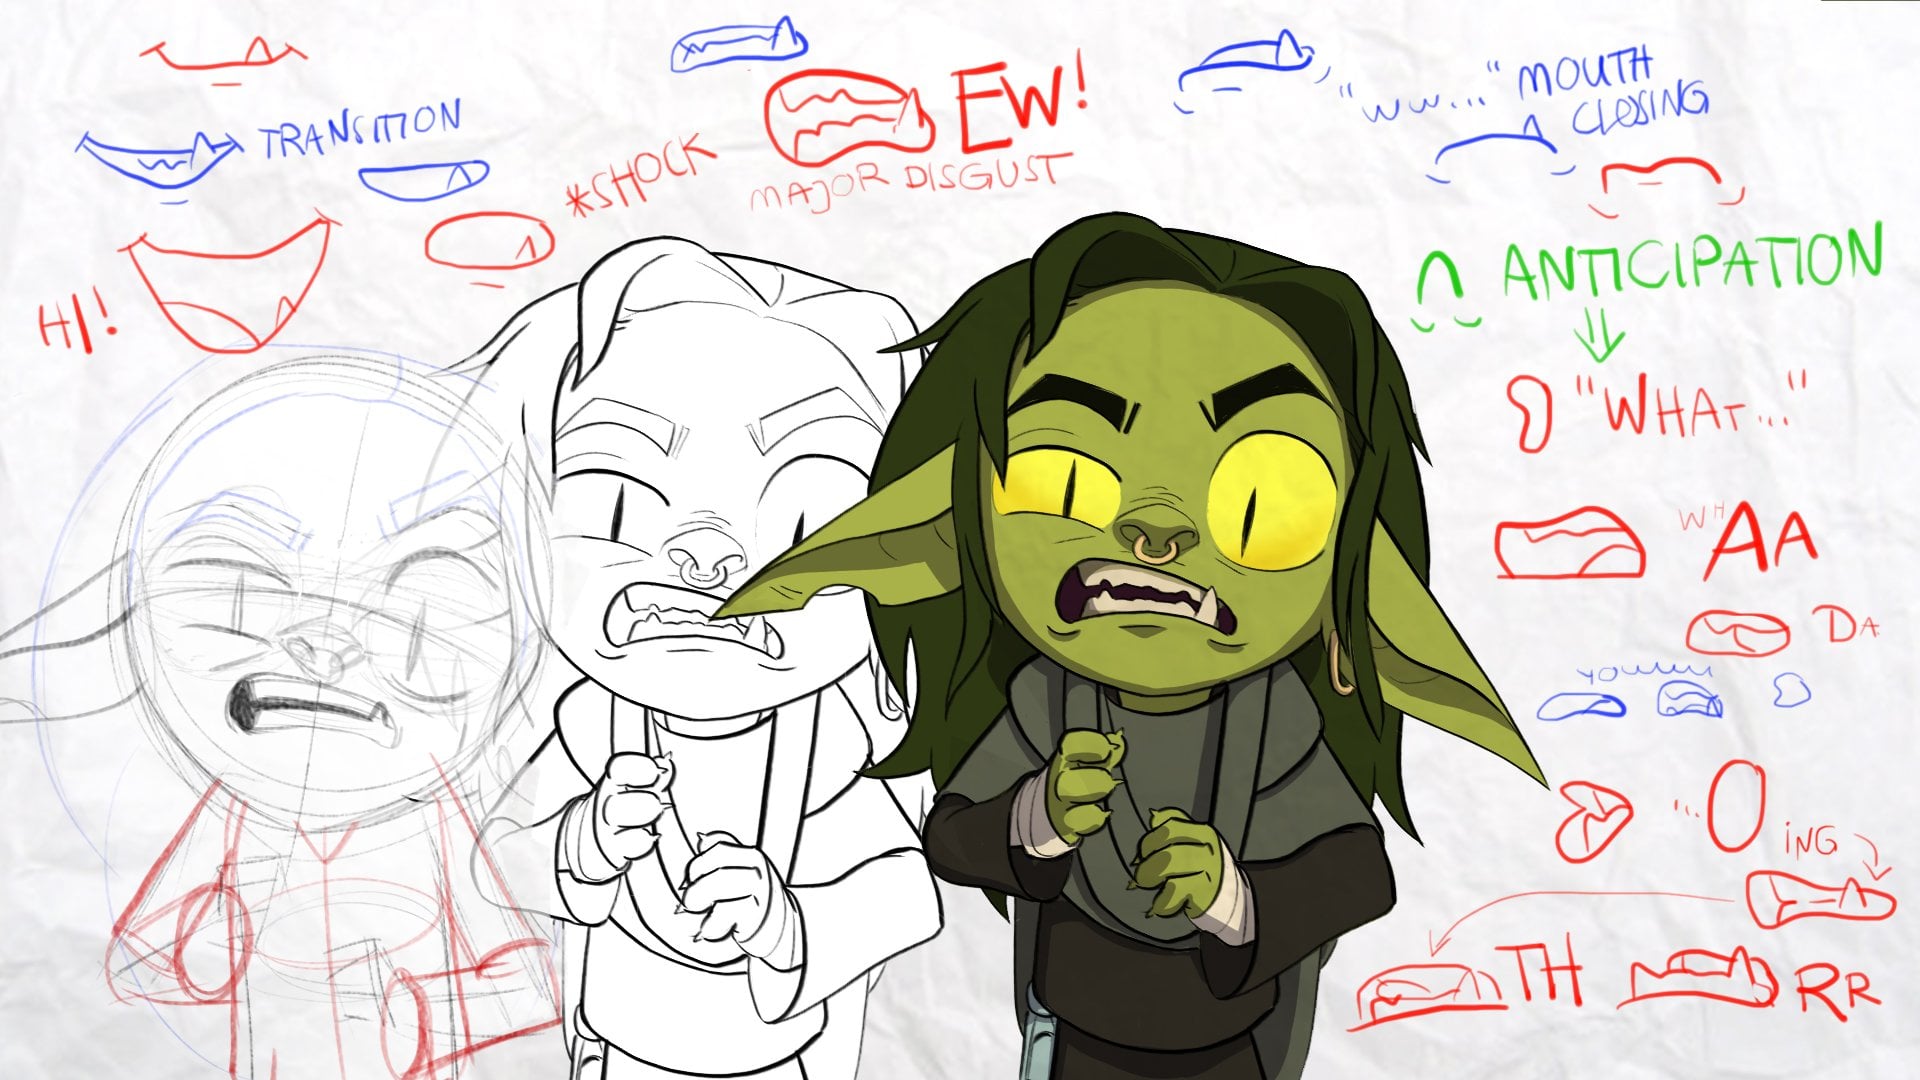
7. Rhythm and Emotion: Moving Lines: Rhythm and emotion, moving lines. One of the things about animation that I thought was an ultimate truth for a very long time was that it always had to imitate life perfectly. That the main key to mastering animation was to observe and study life. But while these are very important things to get into, I think it is more important, especially when you're starting out, to understand what it is that you feel works or feel is right and to project that onto your lines. After all, animation only has to feel right when we're looking at it because we are not even able to see everything anyway. There is no right or wrong. There's only feels right and feels wrong. In this lesson, I would like you to embrace this. We will animate lines. While the approach to animating dots was a rather structured one, I would like to put the emphasis on a more creative chaos approach for this one. While a dot is a pretty compact shape to work with, a line has some other properties. It can shrink or grow in length or in thickness. It can be straight or curved or a combination. When it moves it can wobble or be stiff. Keep these things in mind for the following exercise. Maybe you will discover more things about lines that I have not considered. Don't overthink it as before. Feel free to stay in your existing file or create a new one. If you want to tag along in an existing file, consider using the grouping layers into frames method to work in a non-destructive manner. My overall approach to this animation is to have a couple of lines in here that all behave differently. You can, of course, use the exact same approach and ways of moving as I do. I would like to encourage you though, to think of ways your line could behave differently. Maybe you can come up with some super fun ideas too. All right, let's start this, a cooking line. Sure. That's a simple start, and it gives me a couple of frames to warm up with. Now we'll go ahead and add another line. My second line should behave differently. I will have a snake off in some direction. Notice how I'm using the onion skin to see where my line was before. I keep following its path as it was but moving it a little bit each frame. I'm trying to add just as much in the front as I'm cutting off at the end to keep the length consistent. That cooking line there only had a few frames, but no problem, I will just add more frames and go ahead with my snaky line. I would like it to return to its first position eventually though. I will tap this first frame and hit "Duplicate". You go at the end, buddy. Here we go. Now snaky, snaky. It doesn't matter if the thickness changes and I think it's also okay if the line is not super consistent and breaks here and there. To have it return to its first position, I have to let it snake around until I can let it slip back into this position somehow. That works. Now I have to think what to do with red for the rest of the frames. I think it's very slow and lazy. Maybe it does a little curve. The amount it moves every frame is smaller than for the blue line. Just moves a lot less in the same amount of frames. That's enough, but I don't have many frames left, so I will let it drift back up to the original position like this. Lazy. That's okay. Just go with what you feel like is the right call. Relax, breathe. Chill, man. This is fun, not your life's purpose or something. This is already pretty neat. I will add another line. Three is always a good number, don't you think? Yellow will be the weird one, the quick one. Maybe it does this backing up a bit, and then it shoots off-screen. There it is again. It's super fast. But wait, what is that? Red getting a new way, emergency brake. Reverse. Yellow snake away or no. Now blue is getting in the way. Great. Okay, I don't care. Crossing and off-screen yellow goes again. See, this is the amount of fun you can be having. Or you have less fun, your call. Just saying it's better to enjoy yourself. The result is certainly not perfect, but I hope that you could loosen up and learn something with this exercise. Now for another exercise, I would like to show you how you can approach applying emotions to your moving lines. Also, please always remember, these are not the ultimate and only ways to do it. I just show you how I do this, and maybe it works for you too. I will show you lines that are happy, sad, and angry. Consider that not only the movement from point A to point B can convey a mood, but especially how it moves. The thickness and consistency. Also, feel free to break rules if you feel comfortable. This might be about lines right now, but there is no animation police who will come to arrest you if you use dots or shapes. First, I will list a couple of associations I have for each emotion. I'm trying to think in a visually applicable sense. Tag along with me and see if you have the same associations or if you would disagree with me. Write them out, we will use them to create our emotional lines. What I'm thinking, happy, I associate calm but upbeat, smooth and clean and joyful. I associate sadness with slow, sluggish, apathy, stopping, sinking, inconsistency, and softness. Terms coming to mind for angry are aggressive, impactful, angular, volatile, strong, impulsive. Each of these emotions put into movement will convey a different rhythm. Rhythm doesn't have to concern music. It basically just means movement marked by the regulated succession of strong and weak elements or of opposite or different conditions. Thank you, Wikipedia. If it helps you with this exercise, put on some music that puts you into the right mental state. In a new file, animate a happy line, a sad line, and an angry line. Here are a few reminders of what to keep in mind. If you want something to slowly speed up, let the changes per frame be increasingly more. The more drawings you have from A to B, the slower the movement will be. The same goes for slowing down. Let the changes in each frame happen in progressively smaller steps towards the end of the motion. For a more controlled result, plan ahead and place your main poses first and then animate from position to position. For more free and intuitive results, just animate straight ahead from start to end. Group layers to have them all on the same frame. Most importantly, have fun and don't overthink it. Each line has their own rhythm that is conveying the emotion. In animation terms, we can look at the timing and spacing of each of four lines. Putting the onion skin all the way up is a good way of seeing the rhythm we created. It can be easy to spot areas where it does not work quite as well as intended. That usually shows up as a drawing that breaks the rhythm by sticking out or being placed too close or too far away. Or it just feels out of place. No worries if you have one of these. You can jump to the frame and fix it if you want. Or you just leave that correctly outside of B. Well done. You have taken another big step towards being an animation pro. The following lesson is about adding mass. Let's move on.
8. Adding Mass: Lava Lamp: Adding mass lava lamp. For this lesson we will take this step into theoretical three-dimensional space. This might sound a bit intimidating now, but don't worry. In animations actually just a small step from a line to a shape that seems to have mass and volume. It's just an illusion after all. Mass is the amount of matter or substance that makes up an object. Since we can't measure a shape's weight or size on our screen, we have to rely on other things to convey its mass. Generally speaking, things that are soft or light will move with more ease while things that are hard or heavy will give more resistance. Keep this in mind. In a new file emulate the following. Remember the first lesson about the cooking animation, apply it this time to a closed line. Basically, draw a bunch of circles over a couple of frames. Fill each with color either by hand or by grabbing the color from the top-right and dragging it into the shape. Do not let go yet, hold down and slide left or right until you have the right amount of filling. Do not aim to be too thorough or clean with this. The sloppiness will just act to the sense of motion. We get this weird blob of color that somehow seems alive, doesn't it? Reminds me of flubber if you still know what that is. I really like the texture my brush adds when I paint in the area, I'm going with that. But you could, of course, use the other fill method if you like or you do something completely different like add some shading that creates the illusion that the blob is lighted from one side. Whatever you choose is fine. Let us move along to the next step. In this exercise, I would like you to pay attention to the consistency of the mass. That means that the blob should not shrink or grow too much while we stretch it out and squash it together. This takes some time to master. I still struggle with it, so don't stress about it too much. It helps a bit if you define the most extreme states of a blob first and then go back to fill in the frames to transition between these. As I said, don't stress over it, just be mindful and try to keep the blob as consistent as you can. Once you're ready, take it another step further. If you want you can aim for consistency here as well, but I am personally aiming for maximum juiciness and a satisfactory result. What I want you to do is split the blob up, drag it out until the middle part gets thinner and thinner until it pops apart. Imagine a lava lamp where the wax or whatever it is heats up until it starts to wobble up and down igniting and splitting over and over again. There can be as many or as few shapes moving as you like. Keep in mind to not have them move too fast. Add a bit more frames if a movement should feel a bit rushed. When a shape splits you could have these little rebels of movement going over the surface. It basically is a bulk in the outline that is shrinking when moving away from the place of splitting, if that makes sense. If that feels a bit more than you would like to do it's also absolutely fine to stick to a single blob that's floating around and changing shape. Just have fun with this and get a feeling for shapes moving through space. If you haven't downloaded and use any of the resources up until now consider using the lava lamp procreate file I have attached for this or create your own. If you want to make your own create your lava lamp on a different layer first. One part that will be the outlines of the lamp as well as the color for the metal parts and the top and bottom so everything that should be at front and the other part is the background color as well as the color of the inside of lamp which is visible through the glass. Group the parts that belong together. Now, when you activate the animation assist you can see these groups as two frames. When you tap the first one you should be able to activate a slider that says background and on the second the slider should say foreground. Once activated the groups will stay visible throughout the whole animation one in the background, one in the foreground, and you can add frames in between them. Your blobs can now move freely on these and it will look just like a lava lamp. Awesome. Let me summarize what we went over in this lesson. A cooking shape gives the illusion of mass easily. When filling the shape a textured brush can add to the motion with little effort. A straight up filled shape will feel more solid. When squashing and stretching a shape try to keep its mass consistent throughout. Painting the extreme poses first can help with that. A shape that splits feels more juicy and soft when their parts move accordingly. Imagine the tension releasing from a point all movement will lead away from this point. The less they move, the more solid and hard the shape will appear. When a motion feels too fast add more frames, when it feels too slow take frames out. The following lesson will be a bonus exercise to apply your knowledge to a less abstract theme. Smoke and water.
9. Fluidity: Smoke and Water: Fluidity, smoke, and water. By now you have a solid understanding of frames, timing and spacing, rhythm and mass. You have all the tools on hands to tackle this challenge. But this assignment is completely optional. If you want, just lean back, relax and watch the lesson. To put the things I taught you to action. I have prepared two files for you, one with a candle and one with a glass. I always loved FX Animation. So everything that is not a character or an object; smoke, water, fire, explosions, magic. These things always add so much to an animation. It was only recently that I realized that they are a lot more approachable than any character animation or a bouncing ball. The advantage of FX Animation is that we generally have a good gut feeling about how they should look like because they're usually just over pretty fast and we don't get the opportunity to observe them. The pressure to create something that has consistent mass is a lot smaller. These animations work right in a straight-ahead approach. So just starting at the beginning and drawing it frame by frame till the end, instead of planning and jumping back and forth. Let me demonstrate what I mean. A burning candle is nothing else than a background drawing of a candle and a flame shape that is cooking. It can also dance around a bit. Just remember that it is attached to the wick. Imagine a wind coming or somebody blows on the flame. It leans away and shrinks and dies. A soft tiny plume of smoke emerges from the wick. Now, unless the wind carries on, it will snake up again after a moment, curl around a bit, gets thinner and thinner until it's gone. That's it. That's all the magic. This literally took me three minutes to animate. For that small amount of effort, it looks pretty cool, doesn't it? The second example is a little more tricky. To stay hydrated. I will put some water into this Ikea glass that everybody has. The water stream starts slow but quickly speeds up to hit the bottom of a glass, water splashing, and droplets flying, while there is a continuous line of water flowing varying in thickness, the mass inside the glass begins to grow. It is rather turbulent in the beginning, little waves are moving from side to side. They break on the walls of the glass and sometimes there's another droplet flying. Once the water stream breaks off, the mass should remain rather consistent. A last drop is falling into the water, which is slowly coming to a rest. This exercise was also straightforward and it took me about 10 minutes. It's okay to take your time though. This is not a competition. I just want you to get a rough idea about how long such an animation can take when you are feeling comfortable in your skills. If you've decided to watch the class and not tackle the exercise yet, now would be a great time to pause or go back to the start and watch it again, and tackle it yourself, I am 100 percent sure that you are absolutely capable of this. I would just love to see a lot of candles and glasses in the class projects. The following and last lesson will give you a few pointers at how you can apply your newly acquired animation skills. Before I will be wrapping up this course.
10. Other Applications: What's Next?: Other applications. What's next? You now have all the tools in hand to try yourself at some different applications to your newly acquired animation skills. While experimenting, please keep the following things in mind. It is easier to animate a rough shape than something that has clean lines. Don't bite off more than you can chew. It is good to be ambitious, but it's easy to get frustrated. Take small steps towards your goal. That being said, you want to try yourself at something a bit more complex, this time, a flag in the wind. I will show you a simple trick that you can use for anything that is doing a flowy movement, like hair or a cloak or something like that. Open a new canvas and activate the Animation Assist. First, draw a flagpole. It can also just be aligned and set this one to background by tapping the frame in the animation bar and activating the slider. This will be our fixed point to which the flag will be attached. In a new frame, draw a flag. It should look like it's in motion. Make the top and bottom in this sort line. The movement is from left to right, the wind direction, if you will. Now, the trick is to pay attention to the waves moving through the cloth. To keep track of that draw a circle where the dent in your lines are like so. This does not have to be neat and tidy, it's just a guide. I have the circles on a separate layer that is grouped with the flag layer as we move along. This animation can work well if you go straight ahead, but I like to approach it with a little more planning. I will think about what the inverted extreme position of this would look like. Basically, I have two circles at the top and one at the bottom. The opposite would have one on top and two at the bottom. The wind in my head is nice and steady from the direction. There's no moving around or up and down, which means the circle can simply line up like this. This way I already have two positions that I only need to connect now. It's important to remember that this is a continuous movement from left to right. You can either go straight ahead and move the circles a bit to the right and each frame or you construct the middle position by finding yes, captain obvious, the middle between the circles in the first and the last frame. Once you have the circles, you can draw the flap wrapping nicely around the shapes of the circles. Remember to keep the distance between the circles consistent if you keep drawing them for the following frames. Activate the color blend mode for the secondary frames, in the onion skin settings. This will make it a little bit less confusing to locate all the waves. Instead of constructing the circle help for each frame, you can also just draw the middle position between the former and latter frames by finding the transition between them. This will work great after you've created a framework with a couple of constructed positions. I didn't color in my frames to make them feel more solid. Here here are a flag in the wind. The circle trick can also be applied to the aforementioned things like a cloak that is flying behind somebody who's hashing through the night or long hair, blowing in the breeze. You might have to adjust the technique a little bit though, or try a couple of things that actually that's just animation in general. In the course, we have stayed away from things that are affected by gravity, mostly, to keep the exercises a bit more abstract and approachable. One of the classical first exercises I did as a student was a bouncing ball. You are definitely set up for that too now, the only important thing I have not really covered in the lessons is gravity and how it affects masses in motion. Generally speaking, it makes things strive towards the ground. If you would like to animate a bouncing ball, go ahead, knock yourself out. Keep in mind the timing and spacing and the gravity thing. Maybe you can figure out the correlation. You can also make other rather and complicated animations like a head-turning, a swing or a pendulum, a simple little fish swimming, soap bubbles, or a leaf falling. Or you add animated elements to an illustration to give it a bit more extra swag. I would like to encourage you to just try some things, are go back to the exercises in the former lessons to get more comfortable and I'm looking forward to seeing what you'll come up with. Don't be shy to post your work in the project gallery. I know posting videos there is a little bit more complicated, so if you don't have a YouTube or Vimeo account to share with, don't worry, you can also upload GIFs. To export an animation as a gift with Procreate, tap the wrench and go to Share. When you look at the bottom where it says Share Layers, you can find Animated GIF. When you tap it, it will show you a preview of how your GIF will look like with a frame rate you worked in. You can change the frames per second right here if you want. Dithering is probably enabled. This just means it will reduce the amount of colors in favor of the file size, so you can check or uncheck if you want. But you don't really need to change any of the settings and can just hit "Export". Tada. Now you're all set. Remember that I have a couple of Procreate files attached for you. Feel free to use them, to study them, to change them, however, you feel like. Awesome. Now, let me wrap this course up and send you off.
11. Conclusion: Great job. I'm really proud of you. Thank you for taking this journey with me. Together, we took first steps into animation and procreate. You now know a little bit more about frames, timing and spacing, rhythm and emotion, mass, and how to get things moving. If there's one thing I hope you take away from this class, it's that animation isn't that intimidating after all, and that you have found a point of entry that you can get started at without getting completely overwhelmed. Add your exercises and own animations into the project's gallery. This way, we will all see your growth and I will be able to provide feedback if you want that. I would also like to encourage you to upload work in progress and unfinished things. In case there are any open questions or something is not clear to you, please don't hesitate to reach out to me, I'm always happy to help. I hope you enjoyed this class. Please consider to leave an honest review for potential students so they know what they might be getting into. Thank you and until next time. Bye.
 Vera Rehaag, Freelance Artist