Transcripts
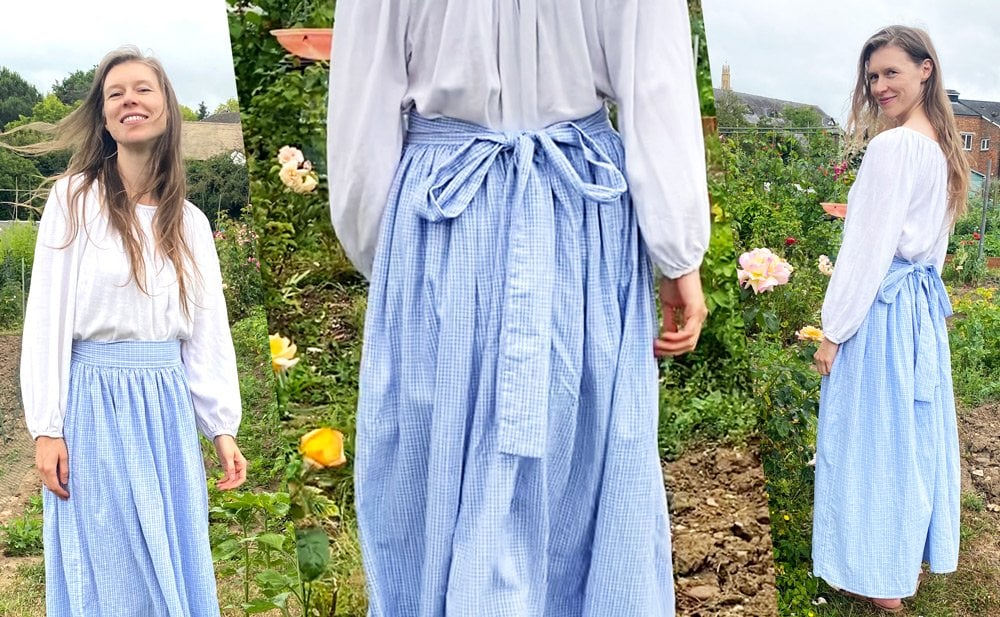
1. Intro: In this class you are going
to learn how to hand. So this beautiful pair
of wide leg trousers. And when I say Hansen, I mean, truly hand sewn just
your two hands, a needle and some thread. You will learn how
to measure yourself, how to choose, prepare
and cut your fabric, and all the hand sewing
techniques required to complete this
gorgeous garment. It's easy to make because
you only need to cut out rectangles and it's completely
constructed by hand. So no need for heavy, expensive, or hard to use machinery, just a needle, a thread on it. I wanted to work. My name is Laura lamb and I'm a folk singer and seamstress. I started designing and
making clothes and toys when my baby was born and it's
become a huge passion of mine. This class is suitable for total beginners or those
with a little more experienced who'd like to learn my hand sewing and folk
sewing techniques. Learning how to hand
so connected with your ancestors and how we
use to make our clothing. It's slow and meditative. Having a daily
sewing practice can infuse your life with a slower pace and a
mindful approach. This class is the perfect
antidote to fast fashion, which encourages
you to buy, buy, buy an always leaves
you wanting more. When you spend hours
making a garment. It makes you really
appreciate the art of clothing production
and you will make something that you
will treasure forever. When you've learned
the technique of how to make these trousers, you can make them any size from a baby to an adult with
class sizes included. And there's a bonus lesson
where you will learn how to add these pretty pleats to the front of your trousers. This class is the perfect
foundation to learn hand sewing for me as
it's part of a series of sewing classes on Skillshare
where you can learn how to make other garments
and toys from me. If you are looking to
bring more stillness, satisfaction and patients
in your life through the art of sewing than
this class is for you. I'll see you in class.
2. What You Will Need: Welcome to this class. In this lesson, we are
going to go over everything that you need to
complete this class, how to approach learning
the skill of sewing, five top tips, and how to
make the most of this class. Let's get stuck in. First, let's talk
about everything that we need to complete this class, you will need fabric. I recommend watching the
lesson on measuring and choosing fabric before
buying your fabric. In that lesson, I'll go into
the specifics of what you need and help you choose the right fabric
for the project. Needles, they come
in different sizes. You need to find the one that's right for you
through trial and error. You can get sets of needles like this which will have
lots of different sizes. Thread, a good quality thread and cotton makes
your work much smoother. One, tape measure for measuring
yourself and your fabric. Fabric marker, Taylor's
chalk or iron off pen. I personally love a
heat erasable pen that you can iron your marks off when you're finished sewing. Scissors. Fabric scissors
needs to be sharp. And the golden rule
is to only use your fabric scissors
to cut fabric. Calculator to do
some basic maths for working out your
Rectangle sizes. You'll need elastic
for the stretch waste. Choose elastic the width. You'd like your belt to be a thimble to protect
your fingers while she's sewing a notebook to handwrite your measurements
and draw your cutting plan. I like handwriting and drawing
in a physical notebook, but you can also use a
notebook app on your device. One more thing that
you might like to get is one of these on pickers. However practiced
we are in sewing, however much we check
and double-check. We still sometimes make
mistakes and these on pickers make it much less painful
to unpick your work. It's very easy to unpick. So you might like to get
one of them working bag. You might like to put
all your sewing things together in a
little working bag. I have this small canvas bag which holds all my
sewing equipment. And then I put the garment
I'm working on in this bag so I can easily pick up and
put down my projects. And now a little
bit about approach, you will need time, space and a good attitude. First of all, we
need to set aside time to work on our project. This is crucial without
spending any time on it. It's not going to get anywhere. You want to find the
right time that's appropriate for the right
part of the project. So at the beginning
when we are measuring ourselves and doing
our calculations, it requires a bit
more concentration. So you want to pick a
time of day when you find that your at your fresher. So for me, that's first
thing in the morning. After I've had my breakfast, I had a coffee fuel zingy,
unable to concentrate. Then other parts of the
project, the sewing, That's a more relaxing, restorative activity
that you might like to schedule
in the evenings. It's something I like to do. Instead of watching Netflix. I will listen to a podcast or an audio book whilst I hand. So we need space. We don't need loads of space
because we're hand sewing. We don't need a desk
or loads of equipment, but it's nice to make the
space nice for yourselves. So it could be
lighting a candle, it could be making yourself
a nice herbal tea, making yourself cozy
for your sewing. And finally, but
very importantly, we need a good attitude learning a new skill that can be
frustrating at times, we need to maintain a friendly and kind attitude as we work through this project. How you do anything is
how you do everything. So make your motto,
elegant efficiency. Approach your project
with a growth mindset that you're going to
learn something learning time so is a totally
different approach to working because it
takes a really long time. So I normally work on my
garments little and often. So it will take around a
month to make something about 30 days as opposed to the 30 s it takes to
impulse buy a garment. It's inevitable that
it will transform your approach to clothing
and to consumption. This class is retraining
yourself to be slow and to be patient when you dedicate and devote yourself to
a garment like this, it will bring you so much
joy when you wear it. When you wear
something you've made, it just makes you shine
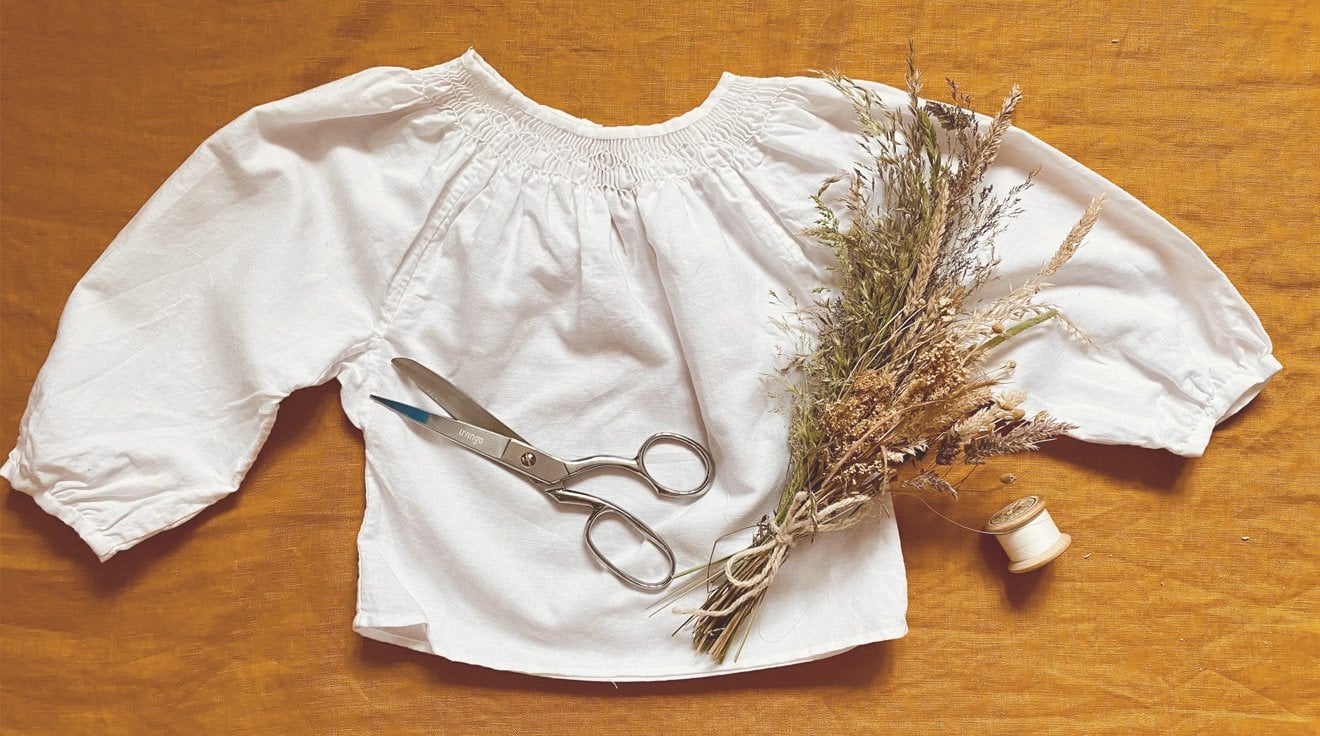
and it feels amazing. I made this top and
when I wear it, I feel so happy and so
myself, five top tips. Number one, the
kind and patient. When you learn a new skill, it's fiddly trying
to get your hands or holding it right in it
feeling right, It's fiddly. So just be really patient. And if you find yourself
getting really frustrated, just put your project down for a night and come back to it the following day when
you're feeling fresh. Number two, don't cut
your thread too long. So we're gonna be working with a cotton and
thread like this. And you don't want to work with the two
long piece of thread. It can be tempting because then you don't
have to keep rejoining. But the recommended amount
is if you hold this wine, that backup, if you
hold your thread, your chest, reach your arm
out to the full length once. And then half. So one arm and a half, that is the longest you
want it to be because otherwise when you
pull your thread, you can pull it. So that's a very, very good tip. Don't be tempted
because you think, Oh, if I just cut it
really long and I won't have to keep rejoining it, but it's just part of
it with hand sewing, find your own way. So when you first start handling the fabric
might feel awkward. You just need to take
your time to find a way that it feels good
to hold it for you. It might be that you want to use pins to pin your garment
together as you work. I personally don't
use pins because I have a baby in the house and
I just know I will drop one. It gives me too much stress. So I just hold my
garment as I work, I occasionally use the
other needle I'm not using. So if I'm I've got my small needle and my big needle or sometimes
use my gathering needle almost as a pin just to hold a section of it because
I don't want to put loads of pins and lose track of how many there are
and just find one on the carpet and be extremely
stressed out by that. But you might like to use pins. You might prefer to do basting, which is when you, so your two pieces of
fabric together with a very loose and long
running stitch so that the fabric is loosely held
together whilst you work on your more neat stitches to actually fix the
garment together. So we can do pins, we can do basting. And then the third
one is just finding a grip so you might
want to rotate the way you hold the garment so that it feels
unnatural way to hold it. And this will take
time and every time you change the direction
of what you're working, you might want to change the way you're
holding the garment. Just take your time
with this and you'll figure out a way that
feels good to you. Number four, think big and
think small at the same time. I think this is a great
metaphor for life because when we're sewing
a big project like this is quite a big vision to hold all these
different steps. And then what you can do is set really small goals as you go along so that you
slowly make progress. So you might say tomorrow, I'm just going to measure myself and write down my
measurements tomorrow. I'm just going to slow
down the side seams. And when we keep making
these teeny tiny goals, and then a month later, you have a beautiful government. Number five, this one is very important measure
twice and cut once. This is a famous
saying for a reason. Once you've cut your
fabric, it's too late. So just take your time before you cut to measure,
measure again, check it so that you don't
make mistakes that are very, very hard to fix. A few more final notes
before we get stuck in, I'm a folk seamstress and
this is folks sewing. The techniques I use are
self-taught or made up. So the terms I use may sometimes be made
up or incorrect from the more official
technical world of sewing a rose by any other
name still smells sweet. Yeah, so just don't get
stressed out if I'm calling a stitch something
different to what you've heard it before. Who cares? Just do the thing that
I'm doing on the video. Hand sewing is a
great activity to approach with mindfulness
and intention. You can do this to take
a moment before you get sowing to think about how do I want to be in the world? I'm finding ankle word that
you ponder as you so e.g. my word is elegant. So if I'm going to so elegantly, how am I going to sit? How am I going to
approach any problems or frustration or something where it doesn't go quite my way. How can I be elegant
in my sewing? And then I can carry that through and forward
into my life. I've made two
documents for you to use to help you with this class. We've got the cheat
sheet and tips, which just runs through all the steps that you
need to make the garment. And you can use that for your
goals setting because it explains each little micro step to get your garment finished. There's also the tips
typed up in there. And then we've also
got the measuring and calculations document, which has all the
calculations written in it. And it also walks you through step-by-step how I
measured and calculated, just popping in with one
more additional thought. It's worth watching
this whole class through from start to finish. So you understand how
the whole process works. And then once you
understand it all, then start working on your garment and start working
through and following it with the documents that you can download from the
resources section. Now we've got everything
that we need. Let's head into the next lesson where we will start measuring.
3. Measure and Calculate with Body: In this video, we will
take our measurements using our body and then work out what Rectangle
sizes we need to cut by making some
simple calculations. This part of the
garment making does require a little
more concentration. So choose to do this activity at a time of day when you
have a bit more energy. Let's have some coffee
and go remember the golden rule to measure
twice and cut once. You might like to. If you're completely
new to this, you like to measure
yourself once, do all the calculations, sleep on it, and do it
again on another day and see if you get the same results because it's a new
skill to learn. And sometimes when
you first start something it can be
a bit confusing. So just give it a go more than once to be really sure
of your measurements. I recommend downloading the measurements and
calculations document now so you can follow
along with this as you watch the video and use it
as a guide as you measure yourself and calculate the rectangles that
you will need to cut. So let's get stuck in. These are the measurements
we need to take. We need our waste. The length of our trousers, which is the measurement
from our waste heart ankle, our widest hip,
I'll top of thigh, and the width of our elastic. So make sure you're ready
to measure yourself. And also that you've got your
elastic there to measure. I've labeled each one
of these a, B, C, D, E, just when we use them
later for our calculations. So first of all, our waste, you can measure yourself
clothed or in your underwear. Because I like to make my
clothes loose fitting. I'm pretty happy to
measure it in my clothes. So here I am measuring my waist. So just going around the
smallest part of my waist, I like to make sure that my waist is really
comfortable and not tight. So just make sure you relax your belly when you
measure your waist. Then on to the length
from waste to ankles. So I get the smallest number on the tape measure and I
drop that right down. And then the number that's on my waist where there's
little arrow is showing. That is the number I'm taking. That is the length of my
trousers and then my widest hip, which is the widest part of me. Again because I don't want
my things to be tight. I'd like to measure that
as loose as possible. And then the most important one, the one we're actually
going to use for our calculations
today is our Phi. Measuring our phi,
again, not tight, just how thick or Pfizer. Then onto our elastic, measuring the width
of our elastic. So by the end of this,
you will have this filled into your measurement
of your waste. The length of the trousers, your widest hip, the
top of your thigh, and your elastic width. These, this image here
shows what we're going for. We want to work out what measurement these two identical pieces
fabric going to cut. What's the width? What's the length? So the first one is the width. So we go back to our
measurements and we take d, which is the top of the thigh. And we add 11 cm for white trousers or 35
cm for super wide. So just as a demonstration here, this indigo pair of trousers or the wide design and
this gang and check pair, they are the super wide. Make a decision
how wide you want your trousers and
add accordingly. You might even like to pick
something between those two for some medium
wide trousers. And then we want to
work out the length, which is pretty simple. We just take B measurement we took from our
waste to ankles, which is 100 cm and we add
to the seam allowance. And if you'd like to add a
turnip to your trousers, then you will need 9 cm. So rather than two, you wouldn't need nine. So we've got an extra
7 cm for the turnip. So now we know the two
pieces of fabric we need to cut the width. I've put the two examples here, so it will be 68
cm if it's wide, or 92 cm of its super wide and
the length will be 102 cm. You might be thinking,
Hang on, Laura. What about the belt?
We don't measure or Belt until we've constructed our trousers together is just
the easiest way to do it. Also an extra note, if you are maternity plus or plus size or making trials for a little one
with a round tummy. You might like to double-check about belt calculation in
advance so you know it will fit around your waist
because you might need to make your trousers a bit
wider to accommodate tummies. So if you are maternity plus
size or making for babies, you might like to
go for the super wide just so that you definitely got enough
space for your tummy. If you're worried about this, go to the crotch class
and complete that. And once you've got your
crotch measurement, you can go download
the measurement, measurements and
calculations document well, you'll find a bit of info on both sides and wet belt
size and waist size. Another extra note,
if you're making trousers for babies or children, you might not want to add as much width as you
would for an adult. So for an adult, we're
adding somewhere 11-35 cm. It might be a bit less
for a child or a baby. What you can do is you can
get your thigh measurement, add on the width you want
to add and just create a loop and hold that
around your leg, around the baby or child's leg. And you'll get an idea of how
wide the trousers will be. In the next class,
we are going to measure and calculate
using trousers. You might like to
work out the size of your trousers you're
going to make by using both techniques. That's something I do. I personally like to measure my body and measure my
trousers and look at those two measurements
and calculations alongside each other and they should be pretty much the same. So you might like
to try that too. It's a really good way
of double-checking. I'll see you in the
next lesson. Bye.
4. Measure and Calculate with Trousers: In this video, we
are going to use a favorite pair of
trousers to measure. And then we are going to do
some simple calculations to work out what size
rectangles we need to cut. As with the other
measuring video, this video does require a
bit more concentration. So choose a time of day
when you're feeling fresh. Make sure you've downloaded
the measurement and calculation document
to follow along. And remember the golden rule to measure twice and cut once. So really be confident
on your results. Let's get stuck in. So these are the measurements
we're going to take. We're going to take the
front of length, width. And that's from the same to
the scene of the front of the trousers than the
length from waste to ankle. And then finally the
width of the elastic. So you'll see me measuring here. I've got a pair of Bobby's
read corduroy trousers. And what I'm going to
do is I'm going to measure and I've got my
elastic here as well. What I'm going to do is
I'm going to measure from the outer seem
to the inosine. So that line you see
running down the outside of the trousers to the line you
see running on the inside. I've noticed that these trousers tape it in a bit at the end. So I'm going to try and get
the widest measurement. So I'm going up here to
where the thigh would be. So that's the first measurement. And then after that we're
going to do the length. So we're going to do this by
going from under the belt. So skip the belt and just
go from the belt all the way to the bottom of the
trousers to the ankle. That's that. Then finally the elastic. So I've got a bit of a
slimmer elastic for Bobby. Measure the width
of the elastic. Once we've done all
that measuring, we should have these
three figures. A front leg width, which for this is 16 cm, then the length which is 41 cm, and then the width
of the elastic, which is 2 cm. Then what we're going to do
from these measurements, we're going to work out the two identical pieces of fabric that we need
to cut like this. The first thing we're going
to work out is the width. So working through
this very slowly, as I said at the
beginning of the video, do download the measurements and calculations document to
support you with this. So what we're going to do a, which is the width
from scene to scene. We're going to
multiply it by two. Then we're going to add a two
centimeter seam allowance, and then we're going to
add some extra width. In this example for these
Indigo trousers I'm making for Bobby a, measured at 16. So I'm going to
multiply that by two, add a two centimeter
me to seam allowance. And I decided on 2
cm for extra width. Just a note, I regret
this and wish I'd add a bit more width because
Bobby is two years old, he's growing very quickly. And it's almost like by the time I made these trials as
you've grown out of them. So do consider how much
extra width you want to add, especially if you're making it for children who are growing. So then the final calculation
was 16 by two plus the two centimeter
allowance plus the two centimeter extra
width for the trousers. So my final result was 36 cm. What you might like to do once you've got this width figure, you might like to get
a piece of tape like this and measure out the, the 36th centimeters and
then test it around. For this example,
I'm doing my leg but test it around
your baby's leg to see whether this is actually a good fit with the trousers are going
to be loose enough. Now for the length,
which is much simpler, we simply add 2 cm for
the seam allowance. If you'd like a turnip, you add 9 cm instead. So a further 7 cm to
create the turnip. Once that's done, you will have your measurements for your
two pieces like this. So for This example
with Bobby's, the trousers are 36 cm wide. You might want to
add more to make the trousers super
wide and add plates. I recommend going back to
the video about measuring your body to learn a bit more about the super wide trousers. And then the length is 43 cm, just for a normal hem, or 50 cm with a turnip. So that's it. We are all measured up and
we've made our calculations. In the next video,
we will work out our crotch notch and
make a template.
5. Crotch Notch: This style of folks sewing, we use our initiative
and our imagination to make loose fitting clothing. So we don't have
to be as specific and super detailed and super
neat as a tailor would be. Because these trials
is a loose fitting. We can't go too wrong. As with the previous
two measuring and calculations videos, this one does require
concentration. Again, it's the last one
that's really thinky. And then we're gonna
get into the sewing. So just make sure
you do this bit. On a time of day when
you're feeling fresh, it might take a little
bit of trial and error to find the crotch
notch size for you. But then once you've got it, It's just an amazing thing to have worked out
because then you can just use it as a template to make lots of pairs of trousers. As I've done, the
notch that we cut out is what makes our trousers follow
the shape of our body. The two pieces meet in the
center and form the crotch. In this class, we will work out what are
the dimensions of our crotch notch and then make our own cardboard templates to use for cutting or trousers. Go to the measurements
and calculations document and see this all typed
up and follow along. The two things we
want to decide are the length and the
depth of our crotch. Let's go. First of all, let's start with the length. You can work this out
the same way we did in the previous lessons by other measuring yourself
or your trousers. So in this first video, I'm using my body
as a measurement. And I'm going from my belt down to the lowest point
of where my crutches. And if you notice I'm not
going around my body. I'm measuring from the front
and drawing a line across. So that is how you do
it, measuring your body. And then here I am
measuring with trousers. So I'm going from the waist
and then I'm with my finger marking a line of where
that lowest point is and measuring a
straight line down. So the two figures
we have for myself, from waste to crotch is 28 cm
and foot Bobby, it's 17 cm. Then once you figure that out, you need to do a little
micro calculation of adding 2 cm for the seams. So e.g. with mine, I'm going to add 2 cm to 28, so I'll get 30 cm. And for Bobby's, we're adding
2 cm to 17 So we get 19 cm. Just a little note, when I made my trousers, I was so concentrating on making this video for you that I actually forgot to add the 2 cm. So when I cut
Bobby's, they were, I use the 17 cm
for the template. Which means if you do that, if you don't add
that to centimeters, it will need your
trousers set a bit lower, more on your hips
than on your waist. So do make sure you add that to centimeters with the crotch. It's always best to be cautious and make it too small first, then you can paste your
trousers together, which is when you just roughly sew them together
or hold them together and just hold it up against
your body and see how it see how it looks and if it's right and then
you can always cut more, but once you've cut out across, you can't add more in. That's the, you don't want
to do it that way round. What you can do to
double-check if this is if you've got
it right as well, is once you've made your
cardboard templates, you can measure around them
like this and measure, put the two templates
together and measure around the curve and then do
a little calculation. So for mine, when I measured
around the templates, I got 67 cm. And then what I need
to do is measure around my body like this. So I go from the front of my belly button all the way around and under
and to the back. And for that I got 70 cm. Then we need to do a
calculation for the seams. So we add 4 cm to the
template figure to the a. So 4 cm on top of 67 is 71 cm. And then once you've
done that calculation, a should be bigger than b. So e.g. with mine a
is 71 cm and B is 70. That is good. If it's the other way
round and b is bigger than your trousers won't
fit around your bottom. You've not made enough
space for the crotch. So use that as a little
technique to double-check. Then. Let's move
on to the depth. The simple rule is that the front notch is a couple of centimeters smaller
than the back. So here's mine and Bowlby's
notches next to each other. My trouser notch is 8 cm at the front and 10 cm at the back. And Bobby's notch is 2.5 cm at the front and
4 cm at the back. So how do you work out your depth from seeing
the depth we've used is a bit of guesswork rarely because these
trousers or loose fitting, you can't go too wrong. If you're making a
garment for an adult, I would recommend using
my eight centimeter and ten centimeter depth and that should work for you just fine. You might like to add
a bit more depth. If you are maternity
or plus size, you'll just need to
experiment a bit. I also, like I said, with the length, just better to cut the notches
smaller than you think. Hold your garment together,
based it together, check it and then adjust. Because you can't stick
fabric back onto the crotch, but you can take more off. Then. Now we know what the depth
is and what the length is. We need to draw our
crotch notches out. The simple shape to follow is that the front notch
is a straight line and then it curves at the end and the back notch is
one smooth curve. Here I am drawing
Bobby's notches. So this is the front
measuring the 2.5 cm here. And then on to the back. And measuring the 4 cm. Then the length, 17
should have been 19, should have been 19
divided 17. There we go. Measuring my two 17 cm because I didn't
follow my own rule of measuring twice and
cutting once next time. So now I know for next time
it will be 19 cm long. That one the front is the 2.5 and then the
back is the four. And then the difference, you'll see in the shape is
coming up with the front one. We just want a
really small curve at the front, like this. Just a little curve
at the front. And then at the back, it's one smooth curves. So starting at the top, we just create a smooth curve going all the way from
the top to the bottom. And that's just because
the front of your body is more flat and the back is
going around your bottom. So then once you've
drawn them out, then you can cut them
out as templates and use them to draw around
them with your fabric. So there's my front one. For Bobby's trousers. There's my back. So those two are now ready
to draw around on my fabric. And then looking at my, let's look at my notches again. So I personally have a very long mid section and I used to always
get in trouble at school for my midriff showing because high street clothes
never fit me properly. So just want to note that because
if you're going to copy my depths of my notches, I'd say that's probably
going to work for you. But my length is very long. So just make sure you use your own measurements by
measuring your trousers, measuring your body and
measuring around herself. So that is that. And also when you're thinking about this making your crutches, you are measuring from where you want your
trousers to set. So I like my trousers to sit
really high on my waist. But if you want yours
to sit a bit more low, then measure from
that point where you imagine your belt is going
to be measured from there. So that's our crotch,
not just figured out, that was probably the trickiest
lesson in this class. Now we can move on to actually getting stuck into
fabric and to sewing. I'll see you in the next lesson.
6. Choose Fabric: Welcome back. In this lesson, we are
going to choose our fabric. We will need a woven fabric because we're working
with straight lines. It's much easier to work
with a woven fabric. You can tell if a
fabric is woven, if you look at it
really close up, it will look like a grid. Here's some screenshots of some fabrics that I've looked at online where you
can see the grid. And then I'm also going
to hold up a few of the fabrics I used
for the project and see how you can close up, see that it's a woven fabric. When you are choosing
your fabric in a, in a physical shop or online, if you aren't sure if
it's woven or not, just go and speak to somebody, go and ask for some help. You can make sure you
get the right fabric. So that's one definitely,
definitely need woven. And then there's five
other things that we need to consider and
pay attention to. And they are the
composition, the width, the weight, the ethics, and the color. Composition. When you buy your fabric, just make sure you read
the small print because some fabrics look
like they unnatural. But then when you
read them made of polyester or a polyester blend, which personally, I
really don't like these. I think they feel squeaky
and plasticky and dry. So it's nice to use a cotton or linen or a viscose fabric. They are all natural
plant fibers and they will let
your skin breathe properly and feel
lovely to where you may also find a blend of
those are cotton linen blend, a linen viscous blend. And they will feel
lovely as well. Onto the width. Fabrics
come at different widths. And it's just good to
pay attention when you buy your fabric
what the width is. It might be good to research in general what the width
of the fabric car, where from the shops
that you're buying from to give you an idea
of the blue check fabric was 140 cm wide and the
red linen was 150 cm wide. When you buy fabric,
the wider the better, obviously because you have
more fabric to work with. Not always,
necessarily like that. It's just good to go
back to your measuring, go back to your
cutting plan when you decide on the width of the fabric that
you're going to buy. The next thing to consider is
the weight of your fabric. Do you want heavy trousers
like this red linen? Or would you prefer a
light and floaty fabric for your trousers like
these game trousers. To give you an idea,
the red linen trousers or 210 g/m squared, and the kingdom trousers
or 120 g/m squared. When you go to a fabric shop, you can feel the weights or contact the online shop and
ask them some more questions. Ethics is good to have
a moment to think about the ethics of the
fabric you're buying. How was it made? Who was it made by? Any implications
of those things? One simple way that I choose ethical fabric is to buy dead
stock or x designer fabric. It's like buying from, it's like buying
something second-hand because it's fabric that they've bought for a brand, for a High Street or
a designer brand. And then they've
overboard the fabric. So they pass it onto these dead stock
suppliers and you can buy fabric that would be
otherwise thrown away. So that's a really good
ethical decision to find dead stock or
x designer fabric. Just searched those
terms on Google. That's dark fabric. My case, England x designer fabric, UK, search that to
help find the fabric. If you can't find any dead
stock wax designer fabric, just take a bit more of a moment to research what you're buying. It can be really good
to look for E Kotex, which is a certification
to prove that the, the dyes that we use
for the fabric are not harmful to humans or
to the environment. So have a look for the
ICA texts stamp if you want to choose a more
ethically dyed fabric. And same with the how to
find your desktop fabric. If you just Google
ICA Tex fabric UK, you will be able to find some fabric that has been
produced in that way. And the last one we're going
to talk about is color. Choosing a color which you love. You might like to go on Pinterest or Google images to get inspired for the
color of your trousers. You might also like
to think about the other items
in your wardrobe. What color tops do you have? And what color top do you plan to wear
with your trousers? So you can make a
matching outfit. You might even like
to make a top in the same color as your trousers and also how the
color makes you feel. I'm wearing this lovely
orange and this orange, it makes me feel so
bright and radiant. So choose a color that makes you feel good and that you're
inspired to work with. Okay, so now we know
everything we need to consider when it comes
to buying or fabric. So it's time to go shopping. And then I'll see you in the
next lesson where we are going to prepare
and cut off fabric.
7. Prepare and Cut: Welcome back. In this lesson, we will prepare our
fabric to start cutting. It's a slightly different
technique we use for cutting, that we use for linen and
that we use for cotton. So I will show you
both examples. So depending on what
kind of fabric you have, you will know how to
prepare your fabric. The main thing we
need to pay attention here is that when
you buy fabric, often they will not
cut it straight. The piece of fabric
you have will have a slightly jagged edge
and you need to correct that first so that you have a straight line to
work from that's been cut and then the straight
line of the salvage so that you are able to
make perfect rectangles. By the end of the
session, you will have your fabric cut and ready to. So let's get stuck in. The first step is to wash and dry your
fabric as you would. If you're going to tumble dry it, you want
to tumble dryer. If you're not going to
tumble dry it, don't. And if you're going to hand
wash your hands, wash it, but just use the
washing technique that you're going to use
on the final garment. And then once we've washed it, we would like to
iron or fabric so it's smoother and
easier to work with. You'll see here
this scratchy edge that the seller has
left on the fabric. We don't want that because we need that nice straight edge to start off our
rectangles with the linen. What we do is called something, something called
drawing a thread, or sometimes called
pulling a thread as well. And what we do is we find the right length
that we want to cut. And then we pull a thread from
the fabric and use that to create a guideline for
cutting our fabric. So we get a really
nice straight line. I recommend doing this part and really good light because
it can be hard to see the thread that
you've pulled unless you're working in
really bright light. So we keep working the whole
way along until eventually we have a line running along the whole
width of the fabric. See me just pulling
it through here. So we get to see this nice line. Then if the, if the thread
snaps, we just start again. So I've found where
we want to carry on. I get my needle under there. I pull out another
thread and start again, pulling that all the way along. So eventually we reach the end. We have a line running, running along the whole
length of the fabric. Look like this. And then we follow that with our scissors and cut
all the way along. So we have unlovely
straight edge. To start cutting. This is very satisfying. You can keep those n bits
for stuffing for toys. Don't throw them away if you
have any plans to do that. Now onto a lighter fabric because we work with that
slightly differently. We don't need to draw a thread. We do something a
bit more radical. So first of all, just
getting that straight edge. So just take a tiny
bit of the end like this and then we rip it. Because when we rip it, it
just rips along the green. And then we get a lovely
straight edge to work with so that we have it. Now moving on to actually
cutting our pieces out. In this video, I am cutting out a belt on another garment, but you'll see me measuring
out the width of the belt. And then all I need to
do is a little snip which we'll start it off. And then I can rip along the fabric because this
fabric is light, easy to do. And then same, cutting
out my trouser pieces, I just measure the length
or the width that I need. And using the same technique, just cutting and ripping. For the linen. It's a bit different. So here's a close-up video of me preparing the belt on
the red linen trousers. So what I need to do is
once I've measured out, I draw a line on the fabric and then I just pull the thread like we did at the
beginning of this lesson to create a nice straight line for where that is going
to be cut out. And it can be a little bit
fiddly pulling the thread. And I also recommend doing
it in very good light. It can be hard to see
the thread that you've drawn on the thread you've
pulled the lights really good. And as you go the thread
will snap and you'll need to re-find it again
with your needle. This is a bit fiddly. It's also really
satisfying because you get really nice straight lines. No guesswork involved. There I am again
getting another little thread, pulling it along. Then you can see here
that straight line and it makes it very easy
to cut out the belt because I've got a
nice straight line to follow that I've made. As I said, good lights
so that you can see that little line
that you've created. Now to cutting out the blue indigo fabric
for this project. I'm actually using a dress that I didn't like so much
as the fabric for this. So that's why there's a strange off cuts on the side there. Just cutting out the rectangles with this fabric because
there's a pattern on it. I actually use the pattern
as a guideline to follow. By the end of it, I have my
two trouser pieces like so. And then when I turn them
over there like this, now it's time to mark out
which leg is going to be. So I'm going to have my
left and my right leg. You want to mark that on because you'll need
that for later. And the same. You want the front and the
back of your trousers. So I'm doing a B on
the left there and then an F for the front and then mirroring on the right leg. That's the front. And then that's the back FB. You should see that there. Then we take our front notch and put it on the
front notch side. Can all back notch on the back. And using our Taylor's chalk, we can mark around that
ready to cut it out. So this is the left leg, front and back and
then onto the right. So this will be the opposite. So you'll see my front
notch to the left, this side, and the back
notch to the right. If these two pieces
should be mirror images, when we've finished
drawing around that, then all that's left
to do is taking away our cardboard
templates and cutting those pieces out carefully
following the line. So by the end of this, it will look like this. Two mirror images, front, front facing each other, left and right and then
the backs on the outside. I'll see you in the
next lesson where we will start to so our
trials is together.
8. Sew Seams: Welcome back. In this lesson, we're finally
going to get to the sewing. This is where we are going to, so our side seams using the very beautiful and simple
running stitch. It's a good idea now to take a moment to think about
your intention again, your ankle word, elegance, so that when you are sewing, you can hold that in your
mind and in your body as you carry it forward
into your life. Even they're running
stitch is really simple. It can take a little bit of practice to get
the tension right. So be patient with yourself
and be willing to unpick. It doesn't go your way. Make sure you don't make your
running stitches too long. So you want really nice,
neat little stitches. I recommend one to 2
mm long each stitch. And just reminding you again
about cutting your thread that we pull one arm and a half. Don't be tempted to use
long length of thread, just one arm and a half, and that's the perfect
amount of thread you need to get working. Let's go. And so some scenes. We're starting here
with our left leg. So what we're going to
do is we're going to fold the piece of fabric with the right sides
on the inside. Then we're going to sew along this length and stop
1 cm from the end. So what I'm going to do
is just to make sure that I've got that one
sentiments 1 cm scene, I'm going to draw a
little dot there. That is gonna be the
point at which I stop. Now I'm cutting a piece
of thread to length. So I measure it
along the length. I'm going to sew and then a
little bit extra for knots. And that's how much we need. Thread my needle. And then time to get my thimble
and start sewing along. I always start
with a nice naught and usually 2 kt actually, because to make
it really secure. So we go in the fabric and
then we go around again. And when we go around this
time we tucked back in that loop that we've left and
it will form a little knot. Here, I'm pulling it. So that will be one naught. I will demonstrate
another not now. So we go in, we do
a little stitch, then we pull until we
see the little loop. We go through the loop pole, and that is 2 kt in a row. So our gamma will
be nice and secure. And now we are going along
with running stitch, going back and
forth and back and forth and then
pulling it through. It might take you a while
to get the tension right. If you pull it too tight and
bunched up, it's like this. You might just want to
smooth it out as you go. So we're going all the
way along this scene. This is where I'm up to now. Look at my lovely neat stitches. There are about a millimeter. Each stitch is about
a millimeter long. And we carry on down, up, down. With my size needle, I can get three or four stitches on before I pull through, which just makes it a
little bit quicker. Checking the tension,
smoothing it along. Now we're nearly at the stop point that we've
drawn that white dot. So catching up with that, it's time to finish off with
another couple of knots. So demonstrating
the knots again, we go in and through, pull it, go through the
loop and pull one naught. And now we'll do
the second one in pool through little tiny
loop left. Pull through. There we go. So that is in a scene complete. And now we repeat the same. Now repeating with
the right leg. So do is measured thread. Again, it's the right length. Cut it to length. Mark out that white dot again, 1 cm from the end. So it's 1 cm from both seems
to check in 1 cm each way. And then we're going to do
a 1 cm seen on this leg. If you're really new to following along
in a straight line, what you can actually
do is mark along a 1 cm dash along the, along the scene
doing the knots now, so that's not one. Then we're going to
do our second note. I've been sewing these 1
cm seems for a while now, so I can just do it by eye. If you'd like to
mark a little dash, few dashes as you go along. And that will just
make sure that you keep your themes street. So pulling it through. And again, always
checking the tension. I don't want it screwed up. And now we've gone
all the way along. White mark again. So as we get to that white mark, we are going to
check the tension, smooth it out, and
do two more knots, pulling through and
not in the loop. Then a second one. Same idea. There we go. So now we have our two pieces, like so sewn up on
the inside seen. And that completes this lesson. I'll see you in the next
lesson where we will construct the right
leg to the left leg.
9. Sew Crotch: Welcome back. In this video we are going to, so the right leg and left leg together to form the
crotch of our trousers. Here we are where
we left off with our two inside seams sewn up. Lovely. Now we are going to match up the front
and the front together. So first of all, I'm just going to measure a piece of thread, the length of the crotch, plus a little bit for tying off. Using my handy little
threads scissors. And we're going to start here. So what we do is we pull these two pieces and
stick them together. Now this can be a
bit fiddly when you first do it and you
really want to make sure that you don't get any other part of the trousers
that you are just getting. This front and this is front right and this
front left attached. And what we want to do this
is where our white dot is quite good because
that is where we're going to rejoin again now. So we're going to do,
I always like doing my 2 kt to make it extra secure, especially here at
the crotch where a garment gets a lot of
strain from movement. So doing my knot there and then making sure that these
two pieces are lined up. This is a point now where
you might like to pin I, as you know, don't
like using pins. You could also take it. And I'm going along now with the running stitch and I'm using my hands as the pin and
just holding it together, checking the tension
as I go. Nice. 1 cm stitches. Going around the
curve and then up the length of the front crotch. Now we're nearly at the end. So we're going to do a few more stitches to
get us to the front, to get us to the top
belt of the front. And then time for
our knots as always. So one not through
the loop palate. And to pull it through. And then we go so that
is your front part of your trousers attached. Lovely. So now it should look like
this when you open it. So you'll see the two sides
and then the front attached. And then we repeat
the same on the back. Again with this point
where they all match up, can get a little bit fiddly. And we want to make sure we get those two sides of fabric and don't accidentally
bunch anything else in. Again, that white dot that
we drew in the last class. It's quite useful because that is where we want to do or not. Where all the four corners
meet in this white dot here. So doing my knots in this point. Ready to, so the back together. Remembering to breathe,
relax, relax your shoulders. Sometimes after a
day of sewing I can get a bit tense
in the shoulders. We're concentrating
a bit too much and then adding more
strain than necessary. So make sure you're comfortable
the way you're sat. Jaw on clenched
shoulders, relaxed, repeating exactly the same
as we did on the front, making sure we're only
attaching these two pieces of fabric and we've
not accidentally got a leg bunched up in there. Doing our lovely neat little
1 mm running stitches all the way along with this one. I've already done the
not it's finished off. So this is what
you should have by the end of this lesson. Your front and your back
attached looking like this. Starting to look like
a pair of trousers. As you will see. There they are termed the right way round. So looking really nice. Now, in our next lesson, we are going to flat
fell or seems so, our garment looks as beautiful
inside as it does out. I'll see you in the next lesson.
10. Cut to Fell: In this lesson, we are going
to cut away excess fabric to prepare to flat fell or seems here is where we
were in the last video. So having our trousers
with the front facing us, we separate our scene. And then what we're going
to do is we're going to cut away nought 0.5 half a centimeter all the way along so that we can
fold our scene around. So we're left with 1 cm on one side and naught
0.5 on the other. This is what it looks
like as we go up. Then we will get to the crotch. When we get to the crotch, we just want to cut away
from that little notch. There we go. So that is ready to go. Then what we're going to do
is we're going to carry on now along the front
of the trousers. So we've done the inside leg and now we're doing the front. So what we do is we
get this fabric, again, cutting a little
notch out of it. And going along, going
to travel all the way up the front center of the
trousers so that we have a 1 cm piece of excess fabric on one side and naught 0.5 on the other side now is
ready to flat fell. And then we will
repeat the same on the other by just turning over the trousers and doing
the exact same thing. So we're now at the back. We open up this scene. And the piece of fabric
furthest from us, we're going to cut that
nought 0.5 cm away, half a centimeter away, so that we have the longer
piece to fold over. Once we get to the corner, going to come up
and come around. And then we're going
to travel upwards. So just making sure
that there's loads of bits of fabric sticking
out in the crotch. It should smooth
around. There we go. Inside leg Done. And now coming up the
back, the back middle. And taking that right
piece of fabric. There we go. Nought 0.5 cm, going all the way along. And there we have it at the end. So by the end of this
class, that is it, we will have both sides
don't exactly the same with 1 cm at the front and
naught 0.5 at the back, and then flipping
the trousers again. So nought 0.5 on one side
and 1 cm on the other side. So now we are fully prepared
to flat file or scenes. I'll see you in the next lesson.
11. Flat Fell Seams: Welcome back. In this lesson, we are going to use a finishing technique
which will make your garment look
as beautiful from the inside as from the outside. Modern garments use
an oval locker, which to me create such
an ugly inside seam. And it can also be
a bit itchy because it's, it's not smooth. So what we're going to do
with flat felled seam. So the scene as felled
found to the garment, which looks beautiful
and feels cozy. Let's go and fill some themes. As with the last
lesson, let's breathe, relax, and focus on
our intention as we. So this is where we left off with our seems all
cut and prepared, ready to flat file. What we're going
to do, we're going to start at the front, the trousers a
front-facing right now. What we're going to
do is we're going to fold this longer piece of fabric around to create this
almost invisible seem. That's why I like the
flat file seems it's almost like there's
no seam there at all. And it's so pretty neat
when you're finished. Before we fold it, Let's
first of all do a naught. So I like to do one
naught underneath, so tucking it under here. And I'm going to do
one secure or not. Using my thumb to hold
the tail of the thread so it doesn't go
running away with me. There's one naught and
then I'm going to fold that top piece of fabric around. And then I'm gonna do another note that this flat file seems starts with two lovely secure not so our garment
is held together. Nice and strong. Taking a moment to
check in again, have you tense to jaw? Have you tense to shoulders? Are you sitting comfortably? I've got that nice secure not I'm ready to travel
up the inside leg, folding as I go. So pinching the fabric around. And then I scoop up one or two threads and
then come in at an angle. We're going to demonstrate
this quite a few times because this is really
important, this stitch. So scooping up, taking two or three threads and
coming in at an angle. Again a bit closer, scooping into all
three threads where we went in and then coming up
and through at an angle. This, as you can see, really does look like there's no stitches there
and they're so tiny. It's taken me a while
to practice to get these stitches so
tiny and neat and also even so be patient with yourself as
you learn this stitch. And you get your
nice even stitches. Carrying on the same. So going in two or three
threads back out at an angle. And again in two or three
threads back out at an angle. Pinching with my left thumb, holding the fabric together. Like other parts of
this sewing project is all about how you
handle the fabric. And you might find
that you develop, strengthen your hands from
where you're pinching and holding parts of the
garment together. So now we're heading towards
the crotch where it gets a little bit fiddly because we want to flat fell
the crotch as well. So as we approach it, getting it as close as
we can before we start to turn and then travel up the front center
of the trials is what we're going to do
is we're going to fold it. It almost looks like a very wide V. You'll see as we approach the very center of the crotch that it looks like little wide V that I've tucked under my thumb. I'm holding it
under my thumb run out but there you can see it a little wide V. And because
as I said in previous video, this part of the Garmin at the crotch gets a lot of strain. I sometimes do more knots here. So at this point where all
the four corners meet, I am going to do
quite a few knots. So there is one not looped. So that's nice and secure. Can see that V shape
traveling around. Getting ready to go
up the front center. I think I'm gonna
do another not oh, no. Did another stitch. There will be more not so I'm sure I'm sure I
wouldn't just do one. Not they're coming round. Oh, I did just do one nor maybe there'll be
another note here. Oh, no. You might like
to do more than 1 kt. Or when you do the second layer, I think when I do the second leg there might be more knots. So coming up to the end
of the front center. Ready to do our 2
kt to secure off completing one half of
our flat felled seams. There we go with
our lovely to nuts. What we can do is we
can make the thread disappear by tucking it
back in where we came out, go along a bit, pop out. And then we trim it there. That makes our thread disappear. So there we have it there
is that one side looking really beautiful and
smart and finished. So now it's time to head
on over to the other side. Flipping the garment and
repeating exactly the same. So opening the bottom of the trousers,
flipping it around. And we'll do the same technique
where we do two naughts, one underneath, one over, and then inside the leg. And now we've jumped forward
to just do the crotch where This is the fiddly a bit. And we're going to do another V, folding that v around. So by the end of it, it will
look like two V's very wide. V is placed on top
of each other. And I'm pretty sure I'm
gonna do more knots this time because we
really want to make sure that that top V is
secured to the bottom V. So you'll see now I'm starting
my knots. Here is one. Lovely Not for that v. So can you see now it's starting to
look like two V's on top of each other,
folding it around. And I'm going to go around V, and then I'm going to flat
fell the back together. So let's do a few more stitches, hopefully a few more
knots as we move around this V and get it
nice and secure. Another not folding,
folding as we go. I've got a few excess
threads hanging around here. That's I wasn't really on it with cutting
my threads earlier. Don't do that. Cut the
threads as you go because then you're going to stop
yourself confusion later on. So now I'm coming
around the bend, ready to go up the center. And I'm gonna do one more
final note here just to get that secure before we travel up. So you can see there now one
v with another V on top. There's the North now. So say in total there
are three or 4 kt there just to really make sure that that part
was really secure. Coming up to the end, just like we did at the front. And we're going to fasten off. Repeating exactly
the same as we did on the front with
two lovely knots. And now that's secure. We're going to repeat as we did on the front and
make that thread disappear. So we tuck it in, pull through, and trim
that piece of thread. And now our trials is starting
to look really lovely. Look at those beautiful,
nearly invisible seems. So this is the inside
of your trousers. So you're really not
going to be aggravated by your seams here because
then nearly invisible, you can see the two V's on top of each other at
the crotch there. And lots of nots
where they meet. So it's really secure. To showing you the
crotch again from a few angles you can
see what we've done. Really beautiful. I do love a flat file seem I do. That's how they're looking now. In our next lesson,
we are going to add these pretty pleats. Or if you are not going to
add pleats to your trousers, skip ahead to the lesson after. I'll see you in the next lesson.
12. Pretty Pleats: In this lesson, we
are going to add some pretty pleased
to our trousers. Firstly, we need to decide
where our plates will be. You can try on what
you've done so far to see where you'd like
your pleats and imagine them. I'm actually going to use
the measurements I did on these Gangnam trousers because I think the measurements
here came out lovely. So here are the
measurements which we measure from the
center front scene. So we need to measure from
the center front seem to the start of the
first pleat, 8.5 cm. Then the first pleat
is 7.5 cm wide, and then a gap, three
centimeter gap between the two. And then the second
pleat is 7.5 cm. So here's a close-up of the trousers so you
can see what it means that you've got these
gaps in between the plates. So here we are on these rainbow trousers adding some pleats. So first of all, I'm
measuring out from the center front seam where
the first pleat we'll start. And then I will
measure the width. Once I untangle my tape, I will measure the width
of the first pleat. So with these rainbow trousers, because of the stripes, I slightly adjusted the
measurements because I wanted to follow the, the stripes. If you'd like. The exact measurements
are used for the rainbow trousers that is in the measurements and
calculations document. So I do the gap and then
I do the final pleat. Once that's marked out, you might like to
write underneath each section what it is, whether it's a pleat,
whether it's a gap. So when it comes to folding it, you'll know
what you're doing. So there's my first gap. And then I've written
a P there for pleat. So what I need to do
these two pleat lines, I match them up. So at the moment, the front, we've got the
trousers inside out. So the pleat is going
to go inside like this. So just make sure your
trousers or the right way. These trousers are inside out. So I'm doing a knot. To start with my plate. I like my pleats to be somewhere around
three to 4 cm long. Your own choice,
you can try it out. So these, these trousers, I'm going to do a four
centimeter long plate. You might even like
to try even longer. Statement pleat. And then I just sew along
running stitch all the way down to that four
centimeter mark. Once we get nearly to the mark, what we're going to do
is we're actually going to make these pleats
really secure. We're going to sew
back the other way. So we come out the end of the
pleat and then we head back up to the top of the trousers to make these
pleats really sick. Yeah. Here we are, finishing
off this pleat, so we'll come to the top and
tie it off or they're not. Then we just need to repeat the same for the other three pleats. Nice double, not secure. Now heading along to the
second plate on this side, you can see I've got
the two pleat Marx was doing exactly
the same thing. We're lining those two marks
up against each other. So that's our first
two pleats complete. Once we've got that secure
with another double naught, I actually like to try on my garment at this point once I've done
these knots so that I can see if I like where the plates are
because at this point you could just take them out and
move them if they don't. Look right to you. Here, I am just holding
them up against me and I'm actually very happy
with where these pleats are. I think they look really nice. Add some nice shape. So those are those two finished. Then I need to do this side. So then once that is done,
it will look like this. So I have two points
on this side. So the trousers it inside out. This is the inside of the
pleats, turning them around. They'll look like this. And again, I like to try them on and just see how it looks. These are kind of like a clown
style trousers or like how much it makes the trousers
kinda balloon out. Very, very happy with that. Then the last step to
get the pleats ready for the belt is to flatten them. You might like to
measure this out. I'm just doing it by eye. So they should be
exactly even this fold. Then all you need to
do is so that flat, so that when it comes
to doing your belt, you don't catch it funny. And all we're gonna do for that is a simple running stitch. And what you want to
make sure is that you're running stitch is
you leave a nought 0.5 cm scene because
you're going to so the belt over by 1 cm
because you want this, this little mini, mini line you're sewing here
to be hidden in the belt. If you do it at nought 0.5 cm, then when you so the belt
out one centimeters, this will disappear
into the belt. Again, this is a
point where you could use pins if you want
to hold it flat. But as a non fan of pins, I'm just using my hands
to hold it flat there and running all the way along
the width of the pleat. Then we need to do is
fastened off with an art. And that is done. So now we just need
to do the same with all the other pleats here. They are all done or float, and this is what it looks
like from the front. So that is your pleats
added to your trousers. I'll see you in the
next lesson where we will start to attach our belt.
13. Cut and Sew Belt: So here's the measurement we need to do with our belt width. We need to multiply it by two. So it's the front and the
back of the belt and then add 2 cm for seam allowance. So e.g. for the trousers
I made myself E was 3 cm. Multiply that by two, add 2 cm. So I need 8 cm in width. And then we need to
measure the length. About. The way I do this is once I've cut a
strip, the right width, I just hold it against the
trousers and measure like so, and leave at least
2 cm for the same, ideally a bit more just so that in case there's
a little bit of stretch that you've got
a long enough belt. So just showing you
again because you wanna make sure that you hold the fabric really taught
as you measure this, you could also use a tape
measure and double-check it, but just add at least 2 cm, maybe 34 seam allowance. Now you need to decide where the elastic is going to
start on your belt. So e.g. with these brown
trousers I'm wearing, you can see where
the elastic starts. It starts off just round
the back of the trousers. But you could do a smaller panel like this or
somewhere in-between. You needed to decide that. When you've decided where your
elastic is going to start, you need to measure from the scene of your
trousers all the way around to the point where you would like your
elastic to start. Once you've got that figure, then you need to go to your
trousers that you're making. Here are some trials that are
actually already completed, but you'll get the idea. So you go from the scene
around these ones with baby, baby Bobby's, they
start at 16 cm. So I want to draw
a dash at 16 cm coming from the
front in a scene. So right now the
trousers, a front-facing, then from the front in a scene, again, the other side, so matching, so 16 centimeter
dash on this side, that is where our
elastic or start. And we'll use that as a
guide for starting our belt. So we'll look a bit
like this will have two dashes at the back. But these trousers
are already finished, but we'll go back now to
the unfinished trousers. So here are my two
marks, the 16 cm. Now the trousers or
the back facing. The trousers are
facing the back. And we're just double-checking
that in the middle. Okay. So now you want your trousers inside out with the
back facing you. And we're going to start by leaving the 1 cm seam allowance. And then sowing. We live in 1 cm from the end of the belt and for the
length of it as well. So just in this corner here. So that's where we do are first starting
stitch for the belt. Just making a note of which way the fabric of the belt is facing and which way the
trousers are facing. So you can see right now that the belt is inside out as well. That's the wrong side of
the fabric facing us. So we're doing it like this. And then we do running stitch
going around from there. We started at the back of
the trousers and we're heading towards the front of the trousers and going
around sewing a 1 cm seen with our neat little
1 mm running stitch. You can do it either way. Hold it with the
belt facing you, or the inside of the trousers. You might like to switch between the two
so that you know, you're not going wonky. And as with other parts
of doing the seams, you can mark a 1 cm dash going along so that you know,
you're following straight. But because I've done a
lot of 1 cm seems I can naturally follow that straight
line and follow the green, the fabric traveling around. So now we've gone
around the front of the trousers and we're coming back towards the starting point. Carrying on with our
neat running stitch. You could pin this as you go. You know, I didn't
like pins, but you could have this pinned
as you travel around. So coming back to
the start point now, you'll see we have
these two parts that need to meet the
two ends of the belt. Want to go all the way
back to the start point. Now these two ends
will touch like so, and they meet together. And if you've measured
it perfectly there, this should be a 1
cm seem as well. I think I'm my one side is
little bit shorter than 1 cm. That's why I said it's good
to leave a little bit extra because if you pull too tight on the trousers
and it stretches a bit, then you might not have
enough length for the belt. So there we go,
tying and not there. So now we know the
belt is secure around. Cut off all the stray
threads as you go. Please don't do what I'm doing. It makes it very
confusing, doesn't it? With all these stray
threads hanging around. Now, we want to
close the belt here. So these two pieces, we're sticking them
together and we're going to do running stitch, making sure that we've just
got these two belt pieces. We don't want to
include the trousers and this is just
showing you I don't want the trousers
and I'm just doing these two belt pieces. Traveling up with
running stitch. You can see it's
supposed to be 1 cm, but mine looks a little
bit smaller because I didn't have enough fabric, silly sausage going all
the way up to the end. And then we do a fastening, not at the end. To fastening knots to be secure. Now if we turn this inside out, it should look like this. So this is the
trousers inside out. Then if I turn them
the right way, it should look like this. And then we're going
to fold that inside. And then flat fell. This part, which will we be
doing in the next lesson. I'll see you in the next
lesson where we will flat fell our belt closed.
14. Flat Fell belt: This is where we left
off with our trousers. This is the back facing
us and we're looking for that white mark on the
back to this side. Then what we're going to do
is we're going to flat fell the front of the belt shot before we add the
elastic to the back. So where that white mark is, we're going to first of all, do a starting knot. At the scene. You can see here I didn't
leave enough tail. I'm leaving this as an example. You can see how mistakes happen. You need to make sure you
leave enough tail at the end. And you can keep the
tail under your thumb. That will make sure that
you're not as nice and secure. So there we go. And
then we're going to leave the 1 cm same and
flip that round onto our belt. So this width that we
are flat filling up the front should look the
same width as our elastic. So Bobby's elastic,
I think it was 2 cm. So we're left with a two
centimeter belt at the front. And then the elastic
or tuck in the back. For the moment. Just lining this up, I've got this pattern
on my trousers, which gives me a bit more of a guideline of how
to keep it straight, but just make sure that you're following the grain
of the fabric, that you fold it round straight. I'm doing another
fastening not here. So we've done 1 kt underneath
and now one not around the flat filling just to make sure this is secure
before we start. And then folding that 1 cm
seem we are now going to do the same flat
fell stitch that we did on the inside
of the trousers. We will travel around
the front of the belt. This again adds a really
lovely, neat finish. As with other parts, you
might like to pin it. I personally don't want to. We're coming back
to the scene now, so we've gone all the way around the front and now
we're coming back to the scene where the two
ends of the belt met. And that is the point where
the elastic joins the back. We're coming to all white
mark on the other side. Can you see that
scene there if the elastic once we
get to that seem. So we've gone all the way from one white mark around the front back to the
other white mark. You'll see this now. So that's the front
looking very finished, but the back is still open. So that's where the elastic
joins on that side. And then it will join
on the other side here. So that is the front part
of our belt complete. I'll see you in the next
lesson where we will attach the elastic
and close our belt.
15. Sew Elastic : Now time to add our elastic. So starting where we left off, where the belt same is with
tucking in the elastic. We want it to be
tucked in by 1 cm. So it's nice and secure. It's hard to see
here that you see on my thumb is that's
where the elastic is. And then you can see
that white seam, so it's tucked under by 1 cm. We didn't cut my
thread off because we were already sewing along this way, so we're just
going to carry on. So we first of all do not to secure the first
bit of the *** to Qin. And then what we're going
to do is we're going to travel up that seam of the belt with a running stitch to fix the elastic in place. So I'm pinching the
elastic under my thumb. It's 1 cm buried in the scene. And then we're going up this scene to secure
the elastic in place. It's good to turn
your piece as you work because your needle might pop out at
different points. So just make sure you
turn it so that you follow along the
scene very neatly. Once we get to the top, we want to secure that
with a nice naught. Then, because this is going to get strain
because of the elastic. I like to then run
back the other way. So we've done running stitch up and now we're gonna do
running stitch back down, turning the fabric as we go. So heading down that seam. And then once you
get to the bottom, another knot to secure. So now we've got one side of
the elastic nicely attached. Then we can flat fell the back and tuck that
elastic to hide it away. What we want to make sure is
when we flat file this back, that we're not catching
the elastic in our stitches because we
want the elastic to be free to move because that's what gives
the garment stretch. So just make sure there's a
tiny gap between where you're felling and why your elastic is just tuck the elastic
out of the way. So I'm just slowly working
along and folding as I go, leaving that gap
so that I don't, so the elastic onto the
felled belt that it can just move freely, travelling around. Eventually, we'll get
back to the beginning. Where are we? We're going to
close our belt off. So you need to leave a
little gap like that. That's probably a three
or four centimeter gap, but the elastic poking out. Now you need to decide how much you want to
scrunch this in, like how tight you
want your belt to be. The way I normally do
this is by measuring on myself with my trousers
that aren't yet finished. I leave the elastic
hanging out and then I just pull it around my body. Like so until I feel like I've got a good fit
that it's tight enough. And then we're following
along that in a scene. We're gonna do one
mark where we're going to join the elastic
and then one mark 1 cm after which is
where we're going to cut because we want a
1 cm attachment point. Sorry, I've already
got these marks here on these trousers. So I'm going to cut
away from the scene. So we've we're
ready to attach it. And then what we need
to do is we need to hide that bit of elastic looking for that
white mark or trousers are. Then we're going
to tuck that in. And again, you can't see the
elastic under there now, but it's 1 cm in. And now we need to make a
nice straight line going up to fix the elastic. So we do the same as we
did on the other side. Apart from this
time, we don't have the pre-existing seam of
where the belt was joining. So we're making our
own straight line doing a couple of
knots to secure that. Then as before turning
the fabric backwards and forwards and following
the grain of the fabric. So we get a nice straight line. Going up. So here we are. Now we've gone all the way
up to the top, the belt. We do not. And as before, we are going
to travel back down to extra secure our elastic in place because of the strain
at this point. The garment. Now heading back down and you'll see now I've gone
up and back down. It makes a nice, neat line. And then we need to not
that at the bottom. So doing a nice
double knot there. So that's nice. Answer again. Then after that we'll
make this piece of thread disappear by tucking
the needle up into the elastic
and then trimming the thread so that piece of
thread is finished with. Now we'll return
back to the felling, where there's a tiny gap
now that we need to close, which is where we left off. We had a little break while we attached belt and
then we're coming back and we're going to close
that final bit of belt. Reattaching my thread. This is a little bit familiar because the elastic
is already there. So you have to Use your see how I'm using
my little finger to keep the fabric taut so we're able to so the osteon traveling up
with filling stitch again, I'm just making sure we don't catch any of the
elastic in our stitch. I'm just tucking away
some loose threads that I didn't cut off earlier. So there we go. It's
now closed shot. Now we just need to do a
few notes to secure it. Again, making the
thread disappear by tucking the needle
back through the elastic. Leave a nice, neat finished
no threads dangling. This is where we are now. Our trousers are starting
to look nearly finished. Very, very lovely. Here's the back with a
nice elastic aided back. In the next lesson, we are going to add our
turnip hymns to our trousers. I'll see you in the next lesson.
16. Turn Ups : So our trousers nearly finished. This is how they're looking.
We just need to do our him. What you can do is you
can just do a small him like this and just
flat fell it down. If you want to clear
instructions on this, go to the gathered skirt class where I do at him like this. But in this class I
thought it'd be fun to add a turnip to our trousers
as a nice style feature. What we do is we turn off
our trials is like this. You might like to do this
wearing your trousers just so you can
check that you're happy with the length
that you've got. You might want to do bigger
turnips or smaller turnips, depending on how
tall you are and how long you'd like to trousers
to look at the end. I've realized I like
an ankle swinger. It's actually more practical
because otherwise I end up getting all mud on
the end of my trousers. So deciding on your length. Once you've got them. Even so making sure your right leg and your
left leg even. We're going to just fix our
turnips with a few knots. So starting with the inside leg, we're just going to do knot. And then a few stitches
to hold this in place. A couple of knots and then let's see how many stitches I'm
going to do just one. Too. Relaxing your shoulders. Three. You could, if you like, travel all the way
around and flat fell the hem like so if you wanted. But I'm just going to
secure a few stitches here. So I've done three. That's it. Two units. So it was two nuts, three stitches, and
then one naught. Then we just hide it. We have before and trim it. Now we just need to
repeat that same process. On the outside leg, sit on the outside like
we won't have a seem to mark where we want to go, so we just need to use I, I've creased the trousers on the outer edge so we can
see where that line would be. So same idea, 2 kt, three stitches and then a knot. And that will
secure our turnips. Repeating the same
on the outside leg. Relaxing your jaw, relaxing
your shoulders, your eyes. Pull that through the
disappearing thread. Fantastic. And now all we do is
repeat exactly the same on the other leg. So by the end it
will look like this. You'll have a secure point here. Secure point here, point here, and a secure point here. They are almost finished. We're just gonna do a
few little final touches in our last video. So I'll see you in
the next lesson.
17. Finish and Well Done: Welcome to the final
lesson of this class. A big, well done to
finish off our trousers. There's a few simple
things we need to do. First of all, just
going through and checking if you've
got any loose threads on your garment that need
cutting off or removing. A way to make our
garment look really crisp and finished is to give our garment and nice ion that I know your
garment is finished. It's time to celebrate
and reflect. How will you celebrate? You might like to
wear your garment to a special event or ask a friend or a
family member to take some pictures so you
can share it with your friends is really useful to reflect on the process
and what you learned. It's particularly good to make a note of what you
would change next time. If you're going to make
the trousers again, would you make them wider? Would you make them longer? E.g. after I made these two pairs of
blue and red trousers, I decided I wanted to
make some really wide, almost clown style
trousers with pleats. And then I made these
gang and check one. These are the skills
I learned from the blue and the red
trousers and applied it to the kingdom and just
made them fit me even nicer. I also really
recommend making sure you've got all your
notes written down in a nice clear spot so that next time you make the
trousers, It's really easy. So you might like to
write that in a notebook, handwritten, or typed it up. The measurements
you calculate it. What size of the rectangles, what size of the belt, what size of the plates, so that when you want
to make another pair, it's a simple process, rather than having scraps or
notes all over the place. So now we've celebrated
and reflected on the process is time
to say goodbye. I'm really glad
that you've taken this class and there's lots
of ways we can stay in touch. So if you have any questions or problems as you go
through this class, please go to the
Discussions tab and asked me a question and I will go
ahead and answer you there. If you do go and make
a pair of trousers, I love to see what you make. Please share a photo in the project section
on Skillshare. And if you're going to upload
a photo to social media, please do tag me at
Lora Lamm with hashtag, folk sewing with Laura. It really helps me if
you write a review. So if you've enjoyed this class, please head to the review
section and just write a sentence or two about how
you enjoyed this class. You can also visit my
teacher page which shows the other sewing classes and other classes
that I have to offer. And there you will
also find links to my social media and my
email list where I send out an email about once
a month or a little more frequently with things
I'm making and learning. And you'll be updated when new classes get
uploaded to Skillshare. Made the magical art
of sewing add peace, intention, and
clarity to your life. Thanks so much for watching.
 Laura Lamn, I light the Creative Spark