Transcripts
1. Introduction: Making art can be a wonderful way to
cultivate mindfulness. When you immerse yourself
fully in the process and focus on every detail
and every mark you make, you can easily forget your
worries, at least for a while. Hi, everyone. My name is
Ewa Rosa and I'm an illustrator, embroidery artist, and Top
Teacher here on Skillshare. Today, I will show you three
drawing exercises based on mindfulness practices that
will help you to distress, slow down, and stay
present in the moment. As a bonus, you'll get to
create something really pretty. You don't need any
skills to participate, and I encourage you to let go of any pressure to perform
as an artist here. We will play with intricate
patterns and details, yet the whole process will
be very simple to grasp. I will show you step
by step how to draw every design, slowly
and mindfully. I specifically designed
these exercises around abstract fantasy
florals to reduce any self-criticism or
anxiety you might feel regarding your technical skills when it comes to
realistic drawing. We will be focusing on the process rather than
specific outcome, so just take a deep breath,
and enjoy the journey.
2. Materials & Class Project: Simplicity is the name
of the game here, so all you need to participate in the class is a pen and paper. Whether you use a
luxury sketchbook or a paper napkin on a plane, you will reap the benefits of this practice just the same. You can switch the black
pen for another color, (my current favorite is
blue), and experiment with different paper sizes from tiny backgrounds to big surfaces to work on for many days. I will be using a pencil and eraser in the
second exercise, especially, but don't worry. If you don't have them at hand and still want to
do this project, I will suggest some solutions. Your project for this class
will be to choose one of the exercises and try it out during your own little
mindfulness session. Of course, you don't have
to copy my designs to a T. Feel free to use any patterns
and details you like.
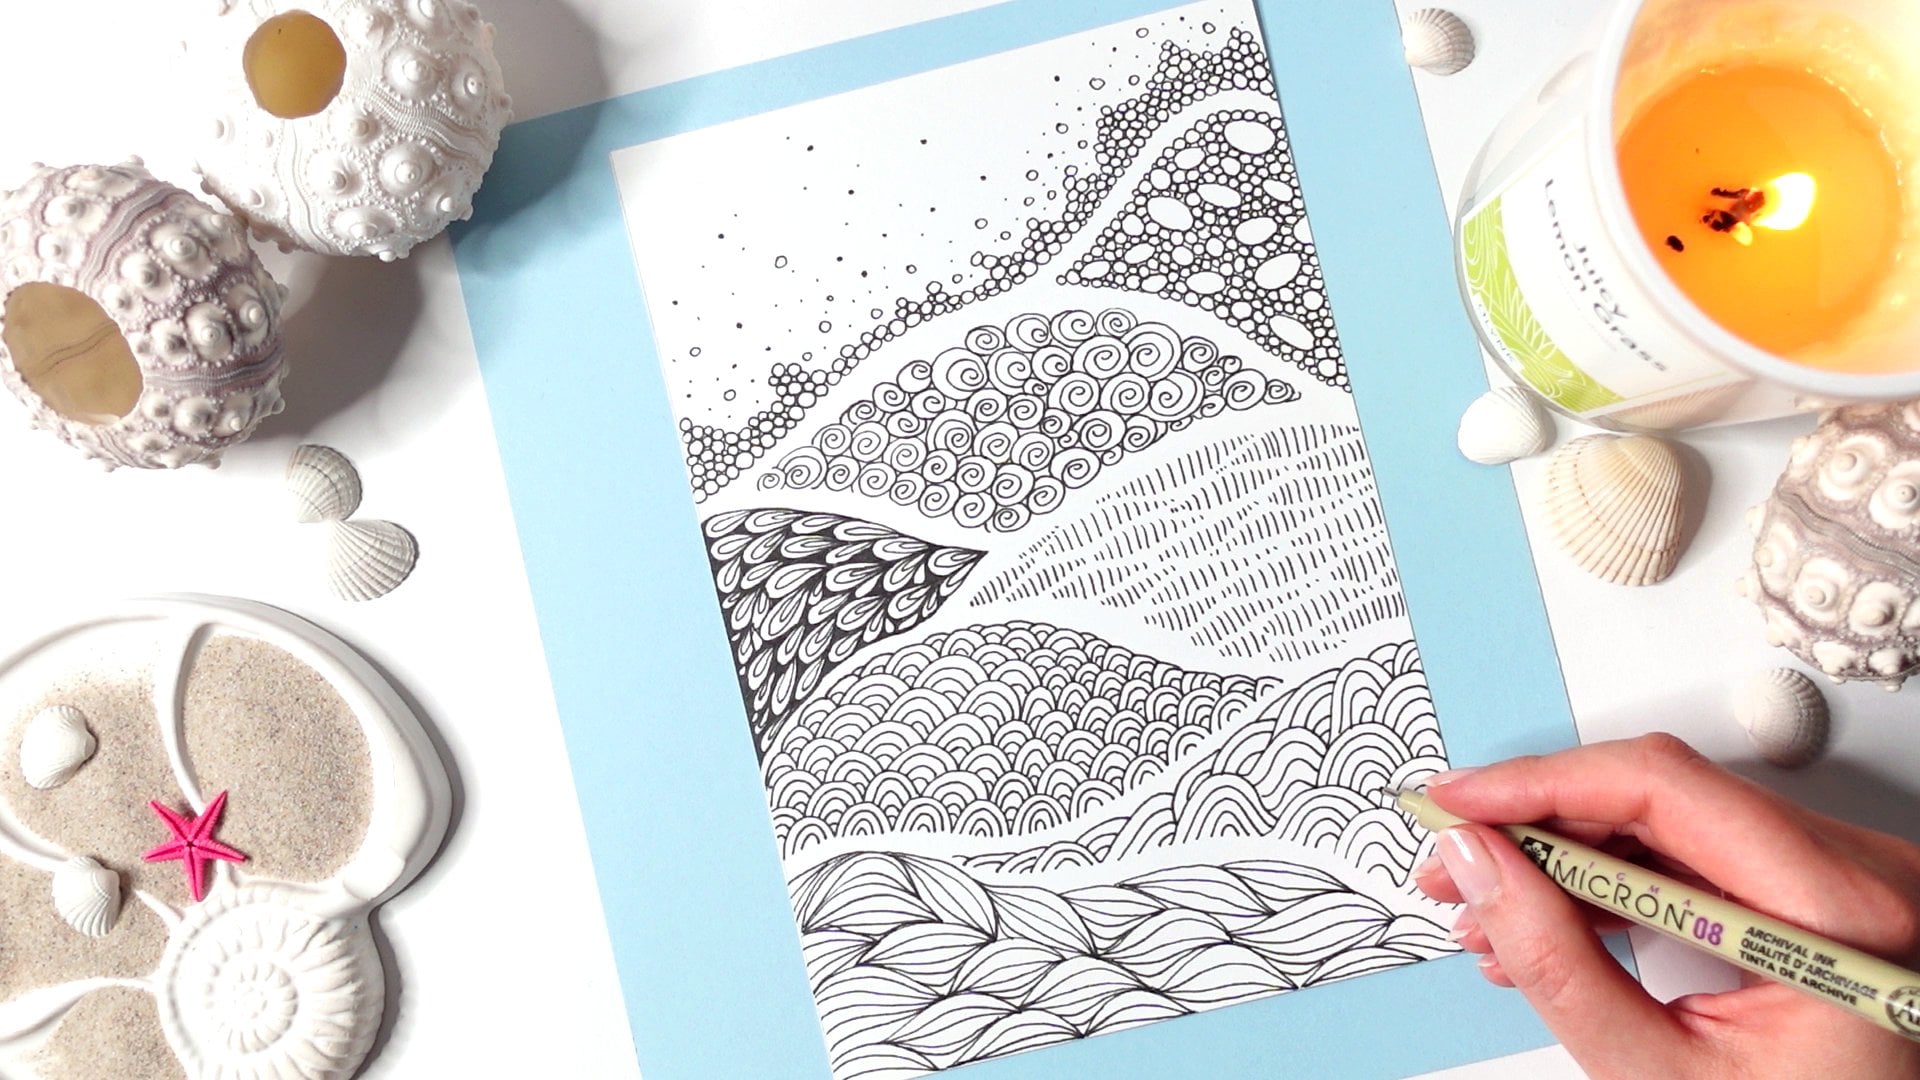
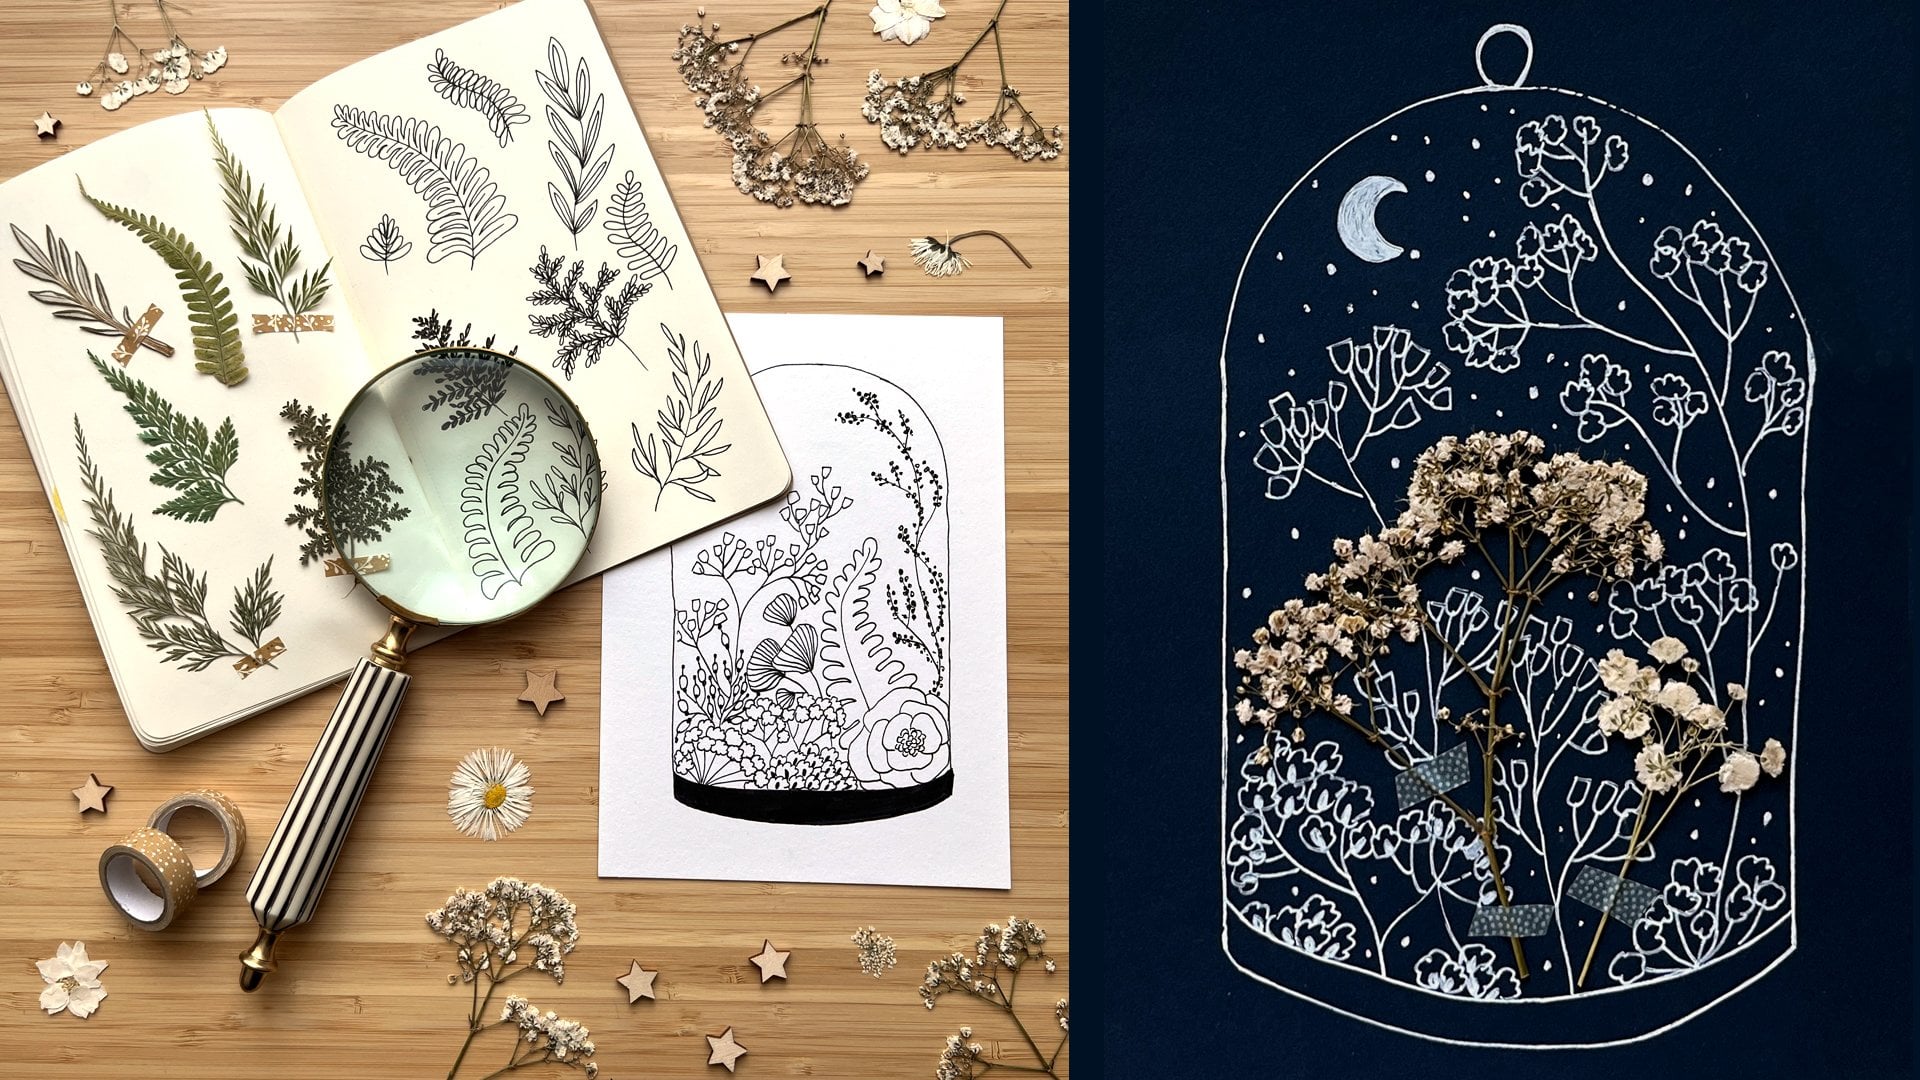
3. Floating Florals: For this first exercise, I will use a round
piece of paper because I want it to look cute and
pretty for your benefit, but feel free to use any scrap
of paper you have at hand. So take a few deep breaths to ground yourself in
the present moment, and let's start drawing. We will start with
something simple and create a floral
composition that will allow you to ease into
the mindfulness practice without feeling overwhelmed by the technical side of things. Our illustration will consist of floating floals
as I call them, meaning flowers that
are not touching each other and are kind
of swimming in space. As you can see, I'm covering the surface here with
irregular squiggly shapes. Join me and begin
to draw slowly, paying attention to each line. Notice that the spaces between the shapes I am making
are pretty thin. Focus on one element at a time, and as you draw it, try to follow along
all the nooks and crannies of the already
existing shapes, so there are no huge
gaps between them. Basically, your squiggly shapes should fit together
like puzzles. Just make sure they are
not touching each other. Try to place them evenly
on the page and keep them relatively big so you can easily fill them with
petals later on. Now that our squiggly
shapes are ready, let's draw our first
floating flower. Start by creating a center consisting of a bunch
of small circles. As you create this cluster, stay present with each detail. Focus on the movement of your hand and the flow
of pen on the paper. When you are ready, start adding petals around this
bubbly cluster. And again, make sure they
are not touching each other. Also notice that they
should not touch the center of your
flower or its perimeter. Just let them float inside a flower, just like the whole flower is
swimming on a page. As you approach the
perimeter of your floral, follow along its shape so
each petal fits snugly inside the flower outline
without touching it, of course. As you add more and more petals, try to match the rhythm of your breathing with the
movement of your pen. Inhale deeply through your nose as you start drawing the shape, and exhale slowly through
your mouth as you finish it. If during this process, your mind begins to wander, gently bring your focus back to the page and the
lines you are making. When you finish filling all the flowers, your illustration should
look more or less like this. You can play with
it further during your next mindfulness
drawing session by: filling the background of the whole composition
with black ink, filling the background of
each individual flower with black ink or filling all the petals and larger
flower centers with black ink. You can also repurpose
this illustration as a coloring page and go wild with colored
pencils or markers. Just have fun with it, and I'll see you in
the next lesson.
4. Overlapping Florals, Part I: For this next exercise, we will create a bit
more complex composition consisting of a bunch of overlapping circles
in different sizes. I will walk you through the
composition setup first, and then we will proceed to the mindfulness part
of the process. I am using this very
convenient contraption here, but you can employ
any round objects you have at hand to
draw these outlines. If you don't have
anything round at hand, you can just eyeball
the circles. Your composition
will simply look less geometric and more organic, which can actually
be quite nice. So I will draw these bigger circles in
the center of the page first and then add smaller overlapping circles
in different places. In the final illustration, some flowers will be placed on the top layer and some will be partly
hidden beneath them. I sketch the whole composition
with a pencil first, so I can calmly decide which
element will belong to which layer and erase unnecessary intersecting
lines later on. It's simply easier
to do it like that, but if you don't have a
pencil at hand, don't worry. Start with making a little thumbnail sketch of the composition somewhere on the side and mark the circles you
want to see on top. Then go back to your paper, draw these circles first, leaving the necessary
gaps between them, and then add the rest of the circles by filling the
spaces between the main ones. Okay, so let's get
back to our sketch and establish a middle
point of each circle. These points of reference
will become handy later on when we will be filling our flowers with
different patterns. Now it's time to decide which
circles will be on top of the composition and which will be partially
hidden underneath them. I want this one
to be on the top, so I will erase all these
unnecessary intersecting lines. I will go through all
the elements one by one, deciding how I want
them to overlap with the neighboring shapes and
remove any lines I don't need. So now that we have our
initial composition ready, we can start filling
the circles with different patterns to create
a bunch of abstract flowers.
5. Overlapping Florals, Part II: Pick your first circle
and start drawing small teardrop shapes
radiating from the middle. Go round and round, filling all the nooks and crannies with more
petals as tightly as possible to create a flower
similar to chrysanthemum. As before, take a few deep
breaths to center yourself. Let go of any distractions,
expectations or overthinking. The hard part of the
process is over, and you can focus now fully
on the joy of mark making. Stay present with
each stroke and notice the calming effect this
activity has on your mind. Finding the right place for the next petal is the only
thing that matters now. Get into the rhythm and enjoy the gradual
emergence of your flower. We will fill this next circle with similar teardrop petals. But this time, we
will color them in, and we won't allow them
to touch each other. Such a loose pattern
will contrast nicely with the tightly
packed chrysanthemum. So start drawing these teardrops around the center point of your flower and focus on slowly filling
each one with color. Don't rush through the process and carefully place each petal, considering its position, spacing and relation
to other elements. If your mind starts to wander, gently bring it back to
the emerging pattern. We will fill this
third flower with a simple cluster
of small circles. Breathe deeply and
observe the tip of your pen moving in
circular patterns. Now it's time for the
flower number four. We are going to fill it with concentric circles
made of small dashes, making sure there is a
gap between each circle. When you approach
the place where your flower is covered
by the neighboring one, imagine where the
circle would go and adjust the length of
your dashes accordingly. Focus on each dash and don't
rush through the finish. The beauty of this exercise lies in the slow and
deliberate creation. We will fill this next flower with a bunch of
elongated triangles. Pay attention to the sensation of the pen moving
across the paper, the pressure you apply, and how the ink is slowly
filling its shape. Now let's draw an abstract rose. Start by tracing the outline
of the circle with a pen. Then pick two points
on the perimeter, making sure they are
quite apart and connect them with a curvy line to
create your first petal shape. Fill this shape with more lines using the
same starting point, but choosing different
ending points on the perimeter, like that. Now, pick a new starting point in the middle of
the petal you just created and add
another ending point to the perimeter of your circle. Another circle covers
my ending point, so I have to imagine
where the line would go. After you create a
couple of first petals, their curves will become
your new perimeter. So mark your next ending
points on these inside lines. Use careful slow strokes and
pay attention to each line. Focus on the sensation
of drawing itself, how the pen feels on the paper, the way the lines interact, and how the circle
gradually fills up. Go round and round until you get to the very
center of your flower.
6. Overlapping Florals, Part III: So let's move to
the next flower. We will fill this
circle with a bunch of elongated ovals
indicating small petals. Start in the middle and
draw the first few shapes. Now go slowly and place new
ovals at different angles, ensuring they touch
the previous ones. Proceed like that until you reach a perimeter
of your circle. If you want to, you can
finish this flower by filling all the spaces between ovals with black ink for
a nice contrast. It will help you to
relax even more and appreciate all the shapes
you've just put on paper. For the next flower, start by drawing
a small circle in the center and then go with
your pen over the perimeter. Then draw a few curvy lines in different places to connect the middle of the flower
with its perimeter. This will help you create an
illusion of depth when you start filling the rest of the space with a
bunch of thin lines. Let your hand move freely and focus on the process
rather than the outcome. Some lines may be crooked
or uneven, and that's okay. There's beauty in imperfection and learning to accept things as they are is an important part of the
mindfulness practice. And now, let's fill this small circle with a bunch of black dots
in different sizes. This pattern will provide a nice contrast for all the
thin lines we just drew. For the next flower, divide the circle
with a bunch of straight lines and then fill each section
with more of them. Try to coordinate your
breathing with this process. As you inhale, draw one line, as you exhale, add another. Now, go over the perimeter
of your circle with a pen. As a finishing touch, adorn these lines with
dots in different sizes, placing them randomly
along each line. Work at a slow,
deliberate pace and feel the calming effect of
this repetitive motion. Now it's time to fill
the last circle. Start with going over the
perimeter with your pen. As before, divide the
circle with a bunch of straight lines, and then start filling all the segments
with more lines, but this time, make sure you are placing them really
close to each other. Drawing abstract
flowers like this allows you to enjoy the
creative process without worrying about achieving
a perfect likeness and to focus on the experience rather than the end result.
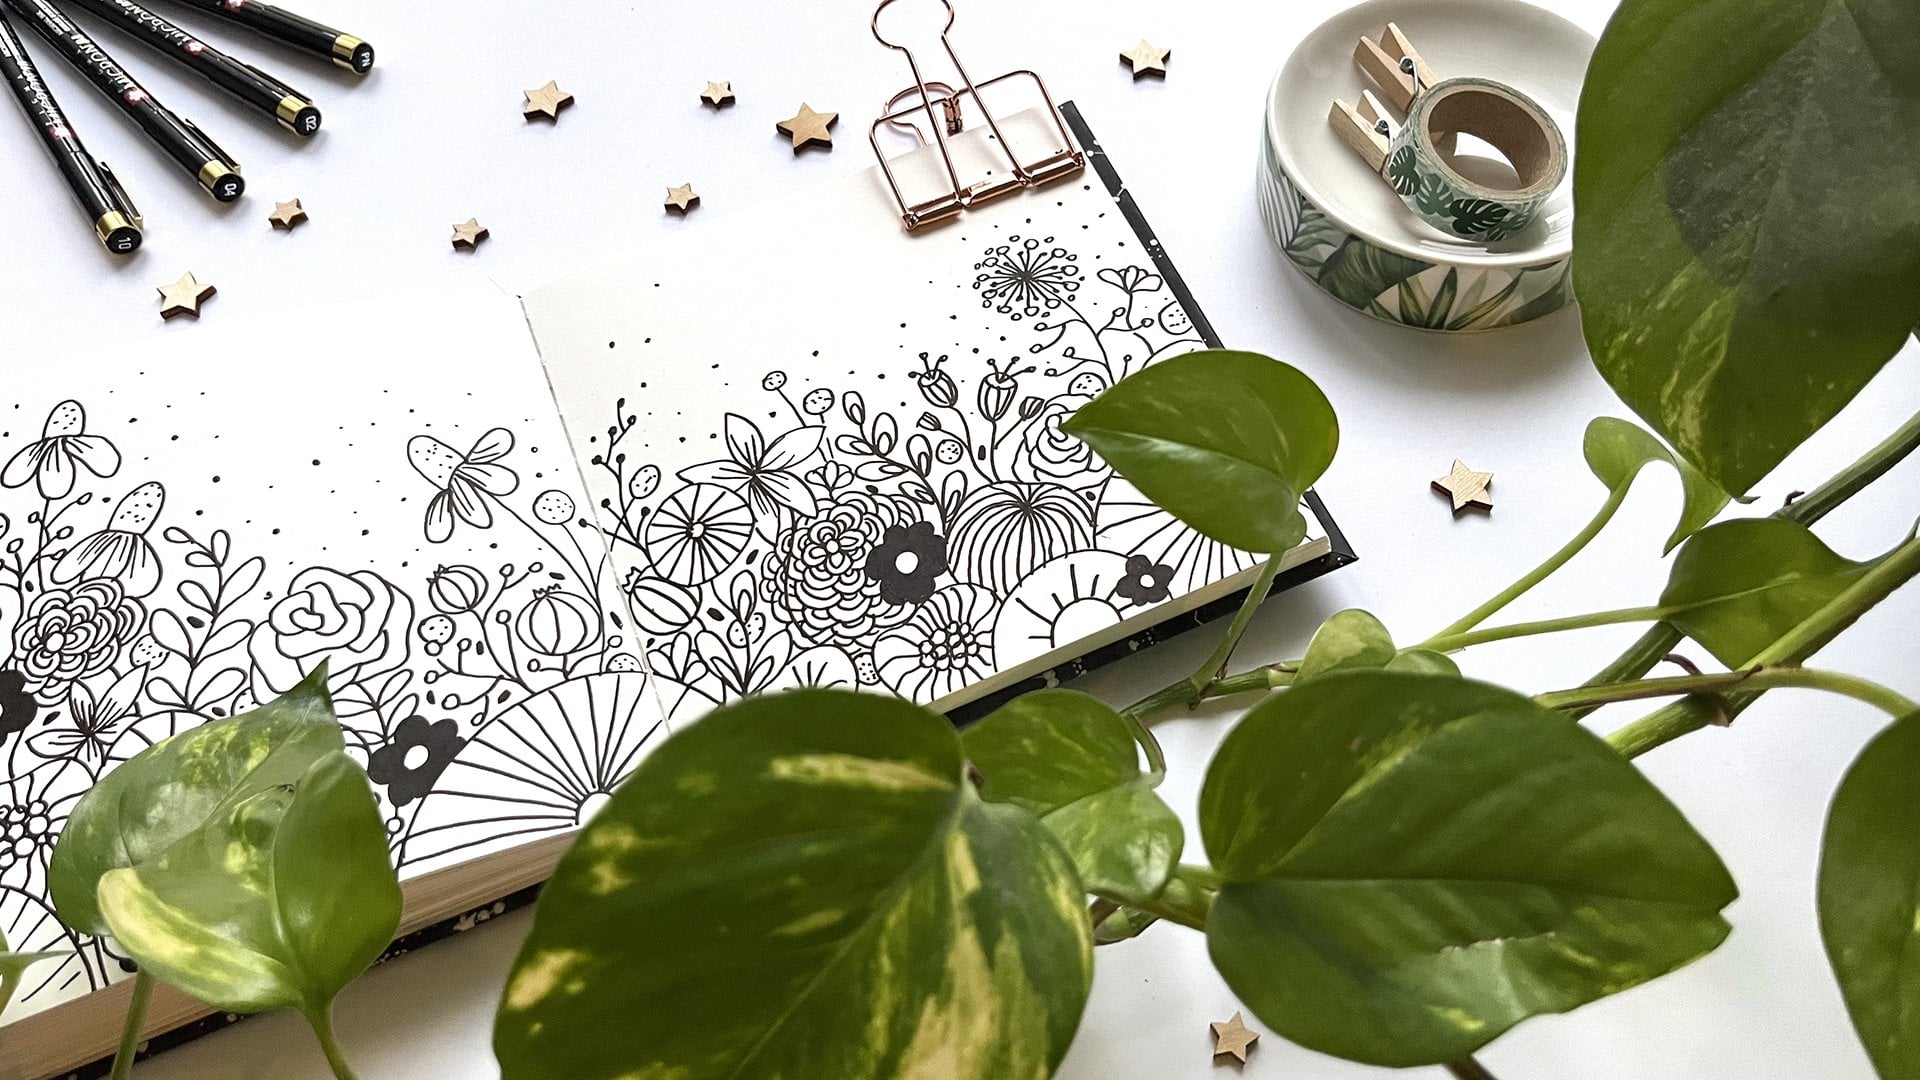
7. Tangled Florals, Part I: In this last exercise, we will draw a mess of
tangled florals and then fill the spaces between
them with black ink. Filling nooks and
crannies with color can be incredibly
soothing and satisfying. So the more complex
your composition is, the more fun you will have. We will start by drawing some simple big flowers at
the bottom of the page, ensuring they are
partially out of frame. You can copy what I do or use some of your
favorite floral designs. Now, we can add
the next layer of flowers partially hidden
behind the base layer. These ones will be
placed on stems, and you need to remember
that the stems have to be thick - consisting of two lines and a white space between them. This is because one
thin line would disappear after you fill the
background with black ink. I do the same thing for
the flower stamens. I basically draw an outline of each shape instead of a
thin line indicating it. Creating a floral
composition like this can be a powerful
exercise in slowing down, focusing, and finding
balance within yourself. As you draw, focus on the
smooth motion of your hand on the paper and let the lines
and curves flow naturally. So now we will add another
level of complexity to our composition by drawing some curvy elongated
leaves and stems of grass and other
imaginary plants. When adding new leaves, stay fully present
with each one. Notice the way the elements
overlap each other. This part of the exercise
is designed to slow your movements and bring your full attention to
each line you place. As the drawing gets
more complicated, you might want to use a pencil so you can think of
the best way to place the following elements and
erase any mistakes that may happen before you go over
the lines with an ink pen. Actually, you could sketch the whole composition
with a pencil first. However, I encourage you to go with the flow and not
overthink it too much. The goal of this exercise is not to create a
perfect illustration, but to have fun with
shapes and negative space. You will be able to
correct a lot of things by manipulating the black
background area later on, and the final composition
will be so crowded anyway that no one will notice
if you mess something up. I encourage you to let
go of any concerns about the final result, and just relax and engross yourself in
this beautiful tangle. However, if creating
such a jumble of lines really
stresses you out, remember, you don't have to make your drawing as complex as mine. You can use simpler shapes
for your leaves and flowers. The key here is to cover much of the page with some elements, so there are a lot of nooks and crannies to fill with
black in the end. For this fern, I'm drawing
the skeleton first, and then I add the rest
of the leaf around it. This nice trick can
help you navigate the maze of the
lines at this stage. I am erasing any straight
pencil lines that are still visible to get the drawing
ready for the next step. The last thing we need to do
here is to fill the top of the page with the
moon and a lot of stars in different
shapes and sizes, so you don't have to colour
the whole sky black, which would be boring
rather than relaxing.
8. Tangled Florals, Part II: Okay, so now that the final
composition is ready, we can proceed to the fun part, which is filling
the spaces between all the elements with black ink. I'm going to use a thicker
pen for this purpose, and you can also try using a brush pen like this
for larger surfaces. Begin to fill all the gaps with black ink slowly
and deliberately. Focus on every detail and
outline you are approaching. Observe how the black
areas contrast with white elements and how the
beautiful composition emerges. Coloring is very soothing
and mindful practice, especially with intricate
designs like this. It's a great way to relax, release tension, and
enter a meditative state. Coloring the edges of the illustration can
be quite tricky. Here, I switched to a brush
pen and put a piece of paper underneath my drawing to protect this desks surface
from getting dirty. And here is our illustration, all finished and magical.
9. Final Thoughts: Drawing abstract flowers
can be a great way to explore your creativity
and practice mindfulness. When you stop obsessing about how your
drawing "should" look and focus on the pure experience of putting pen to paper instead, incredible things happen not
only for your mind and soul, but also for your art. When you feel happy and relaxed, you get into the
flow of creation and invite inspiring
ideas more easily. So let go of any expectations. Don't try to achieve
a specific outcome and just surrender to
the mark-making process. This approach makes drawing and living much more enjoyable.
 Ewa Rosa, illustellar | Find Bliss in Making Art