Botanical Bliss: 6 Fun Ways to Fill Your Sketchbook with Floral Doodles | Ewa Rosa | Skillshare
Search

Playback Speed


1.0x


  • 0.5x
  • 0.75x
  • 1x (Normal)
  • 1.25x
  • 1.5x
  • 1.75x
  • 2x

Botanical Bliss: 6 Fun Ways to Fill Your Sketchbook with Floral Doodles

teacher avatar Ewa Rosa, illustellar | Find Bliss in Making Art

Watch this class and thousands more

Get unlimited access to every class
Taught by industry leaders & working professionals
Topics include illustration, design, photography, and more

Watch this class and thousands more

Get unlimited access to every class
Taught by industry leaders & working professionals
Topics include illustration, design, photography, and more

Lessons in This Class

    • 1.

      Introduction

      2:30

    • 2.

      Materials

      0:23

    • 3.

      Class Project

      0:28

    • 4.

      Bursting Blooms

      3:40

    • 5.

      Out of the Box

      2:40

    • 6.

      Masking Tape Trick

      2:54

    • 7.

      Faux Pattern

      4:06

    • 8.

      Filling Shapes

      4:31

    • 9.

      Full Spread Illustration

      7:51

    • 10.

      Final Thoughts

      1:07

  • --
  • Beginner level
  • Intermediate level
  • Advanced level
  • All levels

Community Generated

The level is determined by a majority opinion of students who have reviewed this class. The teacher's recommendation is shown until at least 5 student responses are collected.

1,705

Students

62

Projects

About This Class

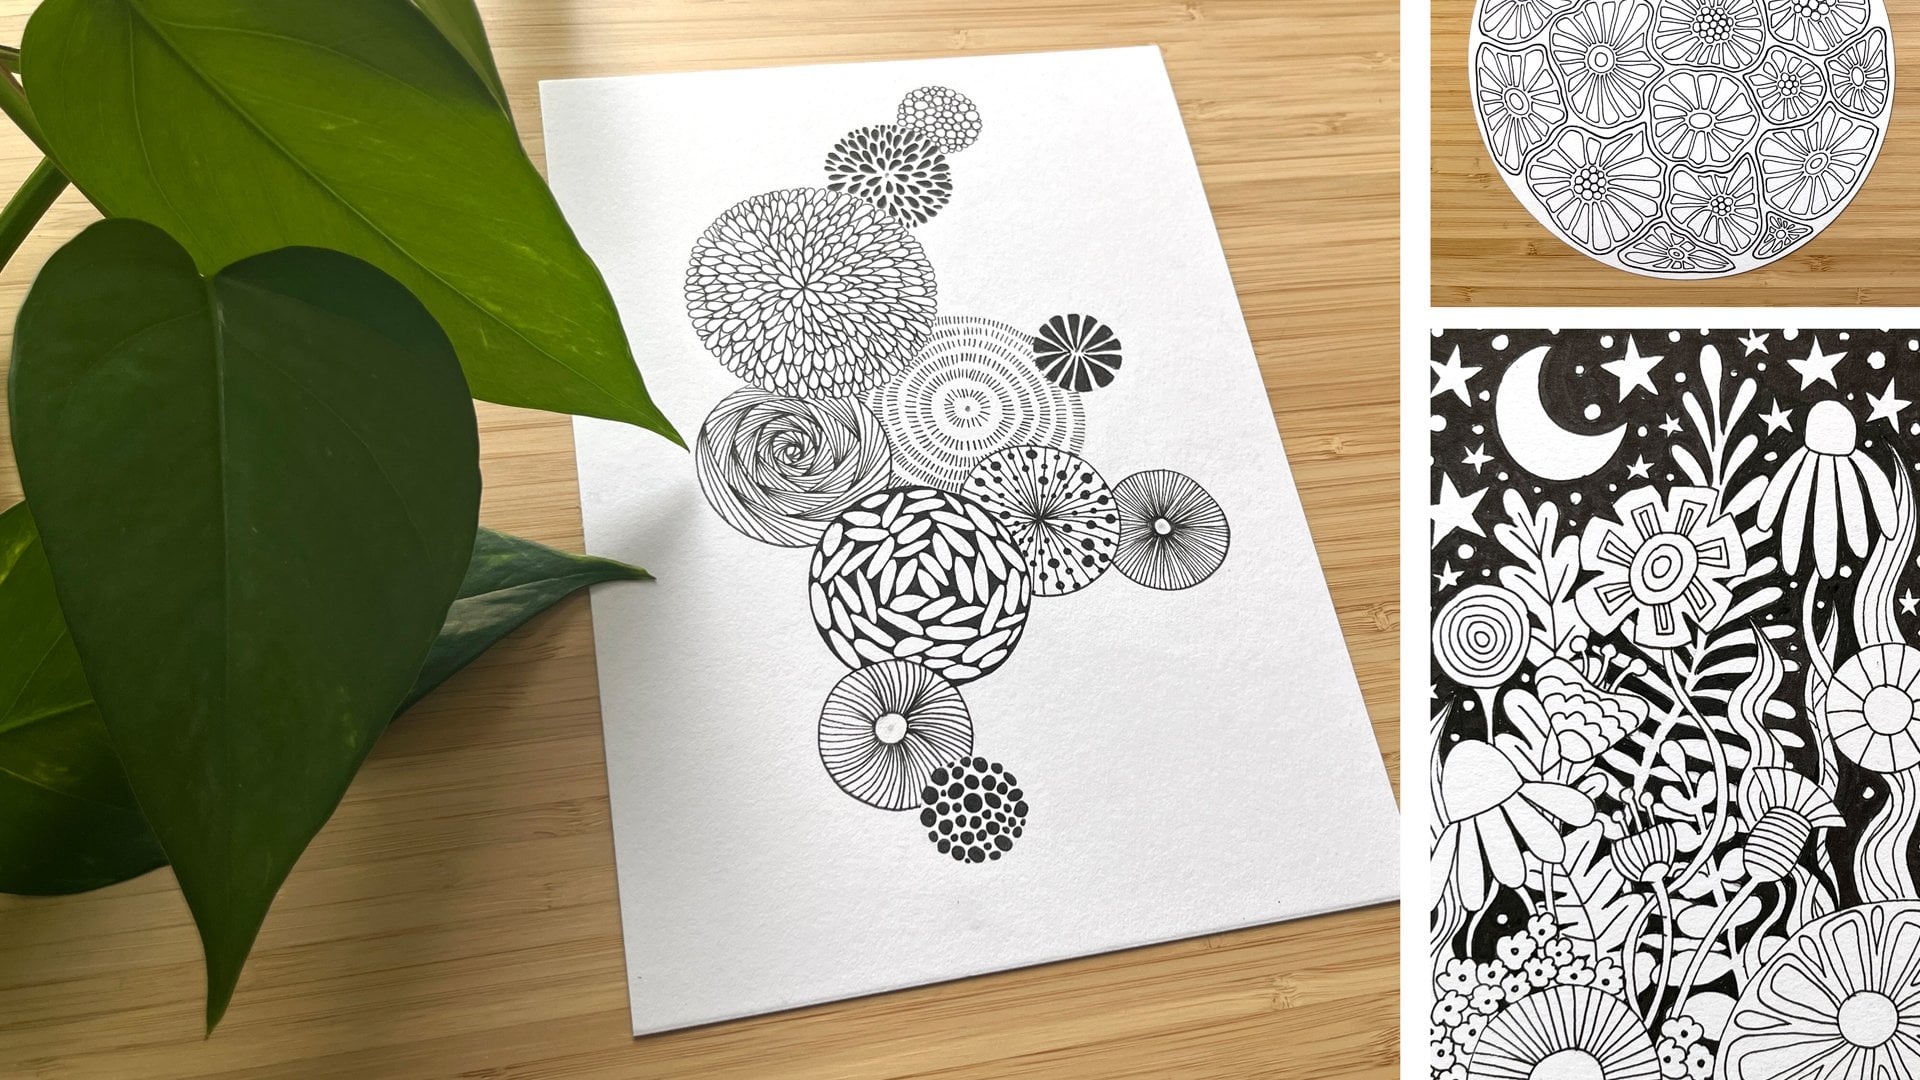
Overcome the fear of messing up your pretty sketchbook! In this class, I'll show you 6 fun ways to fill your sketchbook page with botanical elements. And I’ve designed these exercises, so you can actually start practicing your floral doodles without panicking that you will ruin your gorgeous sketchbook.

Keeping a sketchbook can be a vital part of your creative practice. It allows you to play, try different things, and experiment.

At least in theory, because if you are a recovering perfectionist like me, you probably shudder at the mere thought of making a mess in a pretty sketchbook you just bought. And as a result, you don’t use it at all.

The only way to loosen up and actually stop treating your sketchbook like a sacred object you're not allowed to touch is to get into a habit of drawing in it, like a lot. Sounds like a vicious circle, I know, but I found a way to break out of it by ignoring all the good advice out there and allowing myself to actually make my sketchbook drawings pretty, at least initially.

The exercises I've prepared for you are really simple, they allow you to actually make a lot of mistakes, and yet the end result can be quite stunning.

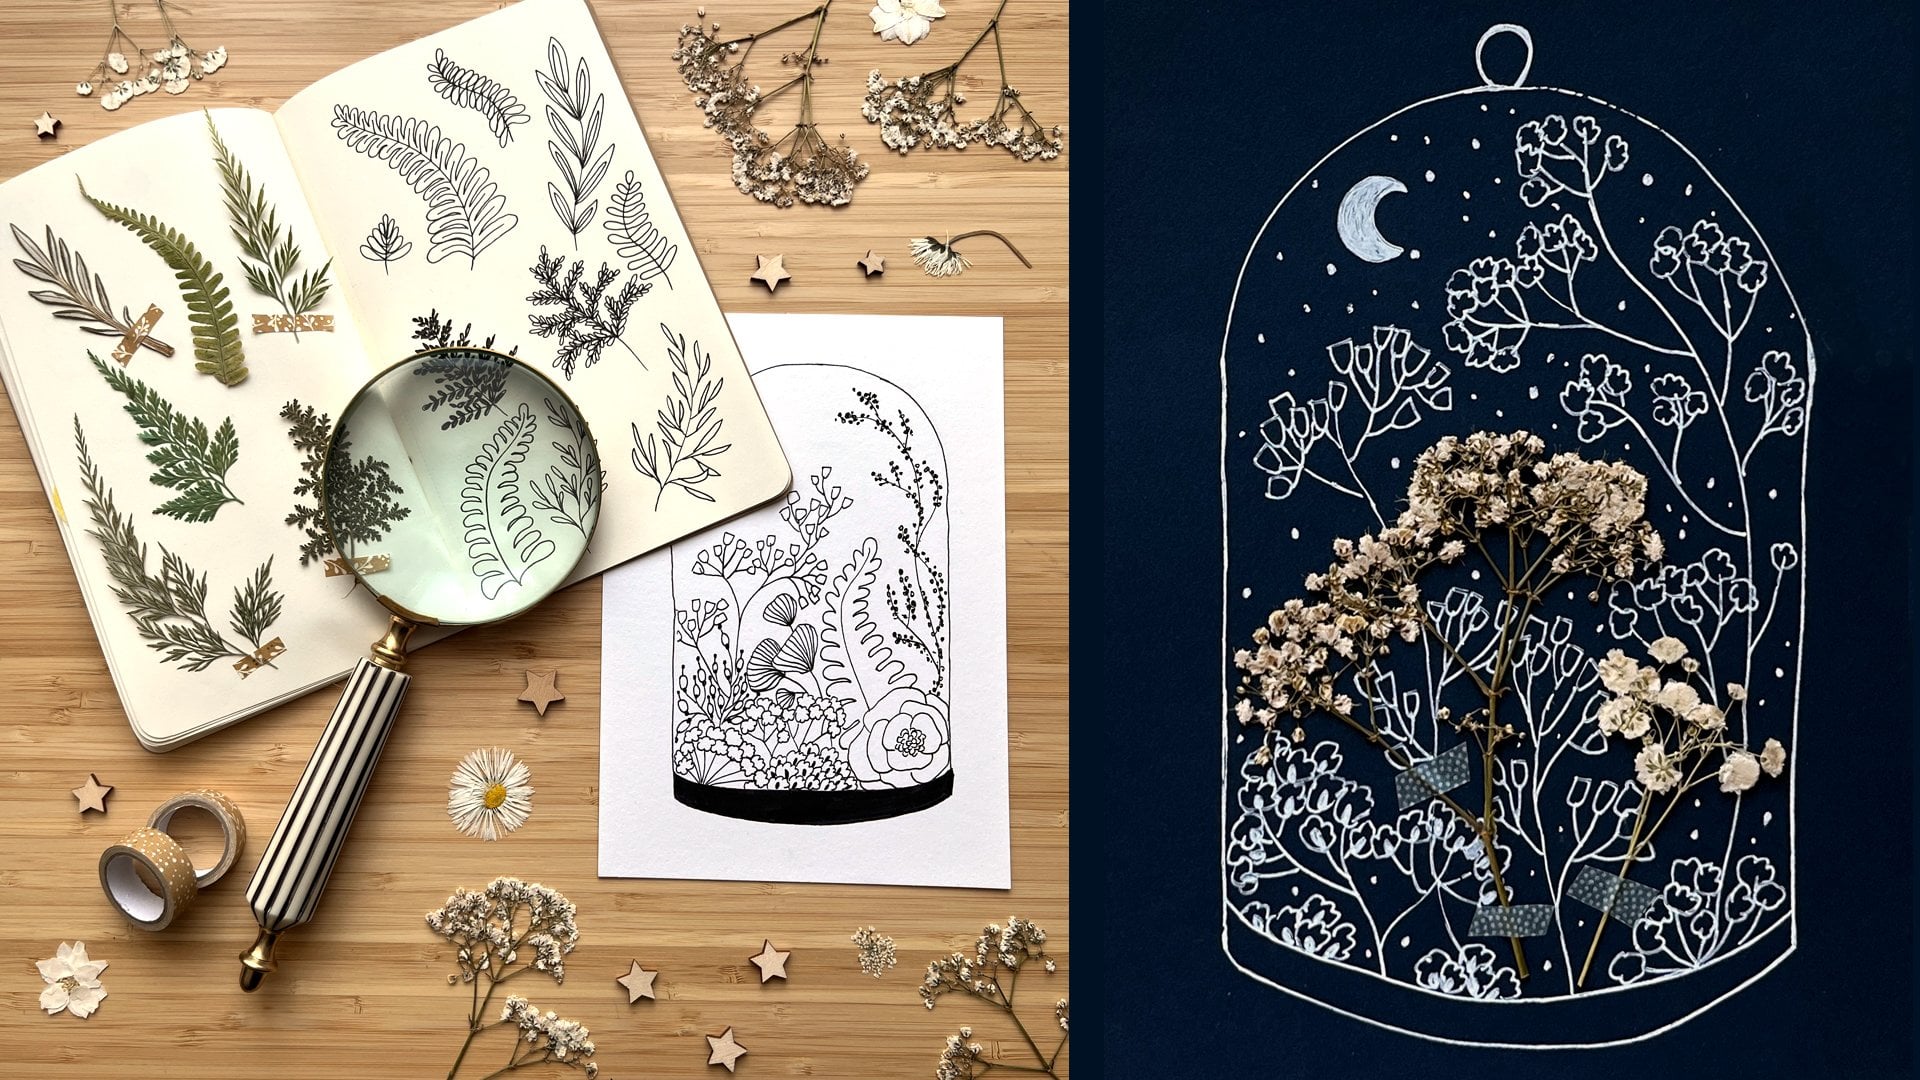
We’ll have fun with doodling simple botanical elements, like flowers, flower cups, leaves, and branches, and I’ll show you step-by-step how to combine them to create more complicated – and pretty – illustrations.

You will also learn how to modify these shapes to develop new, fresh designs and how to take advantage of mistakes and happy accidents.

We’ll finish by drawing a full-spread floral meadow illustration that will allow you to practice all the botanical elements once more. I’ll help you build it layer by layer, and by the end of this class, you will be able to create your own gorgeous, intricate composition.

Hopefully, these exercises will calm your inner perfectionist monster and lull it into a false sense of security. And when it finally goes to sleep, you'll be able to experiment more without feeling guilty that you are making a mess.

So be brave, grab this pretty sketchbook of yours and open it now!

MORE INSPIRATION

If you are looking for more ideas to fill your sketchbook pages, dive into my class: „Slow Drawing, Slow Living: Get in the Flow with Ocean Doodles”

Want to practice in your watercolor sketchbook? Watch: "Unwind with Abstract Forest Illustrations in Watercolor & Ink"

ABOUT YOUR TEACHER

Hi, my name is Ewa Rosa, and I’m an illustrator and embroidery artist based in Gdańsk, Poland.

Feel free to check my Profile here on Skillshare!

You can also visit my website here.

WANT TO SHARE YOUR WORK WITH ME?

Post it on Instagram and tag me @illustellar

Meet Your Teacher

Teacher Profile Image

Ewa Rosa

illustellar | Find Bliss in Making Art

Top Teacher

Hi there! My name is Ewa Rosa, and I'm an illustrator and embroidery artist in love with all things nature.

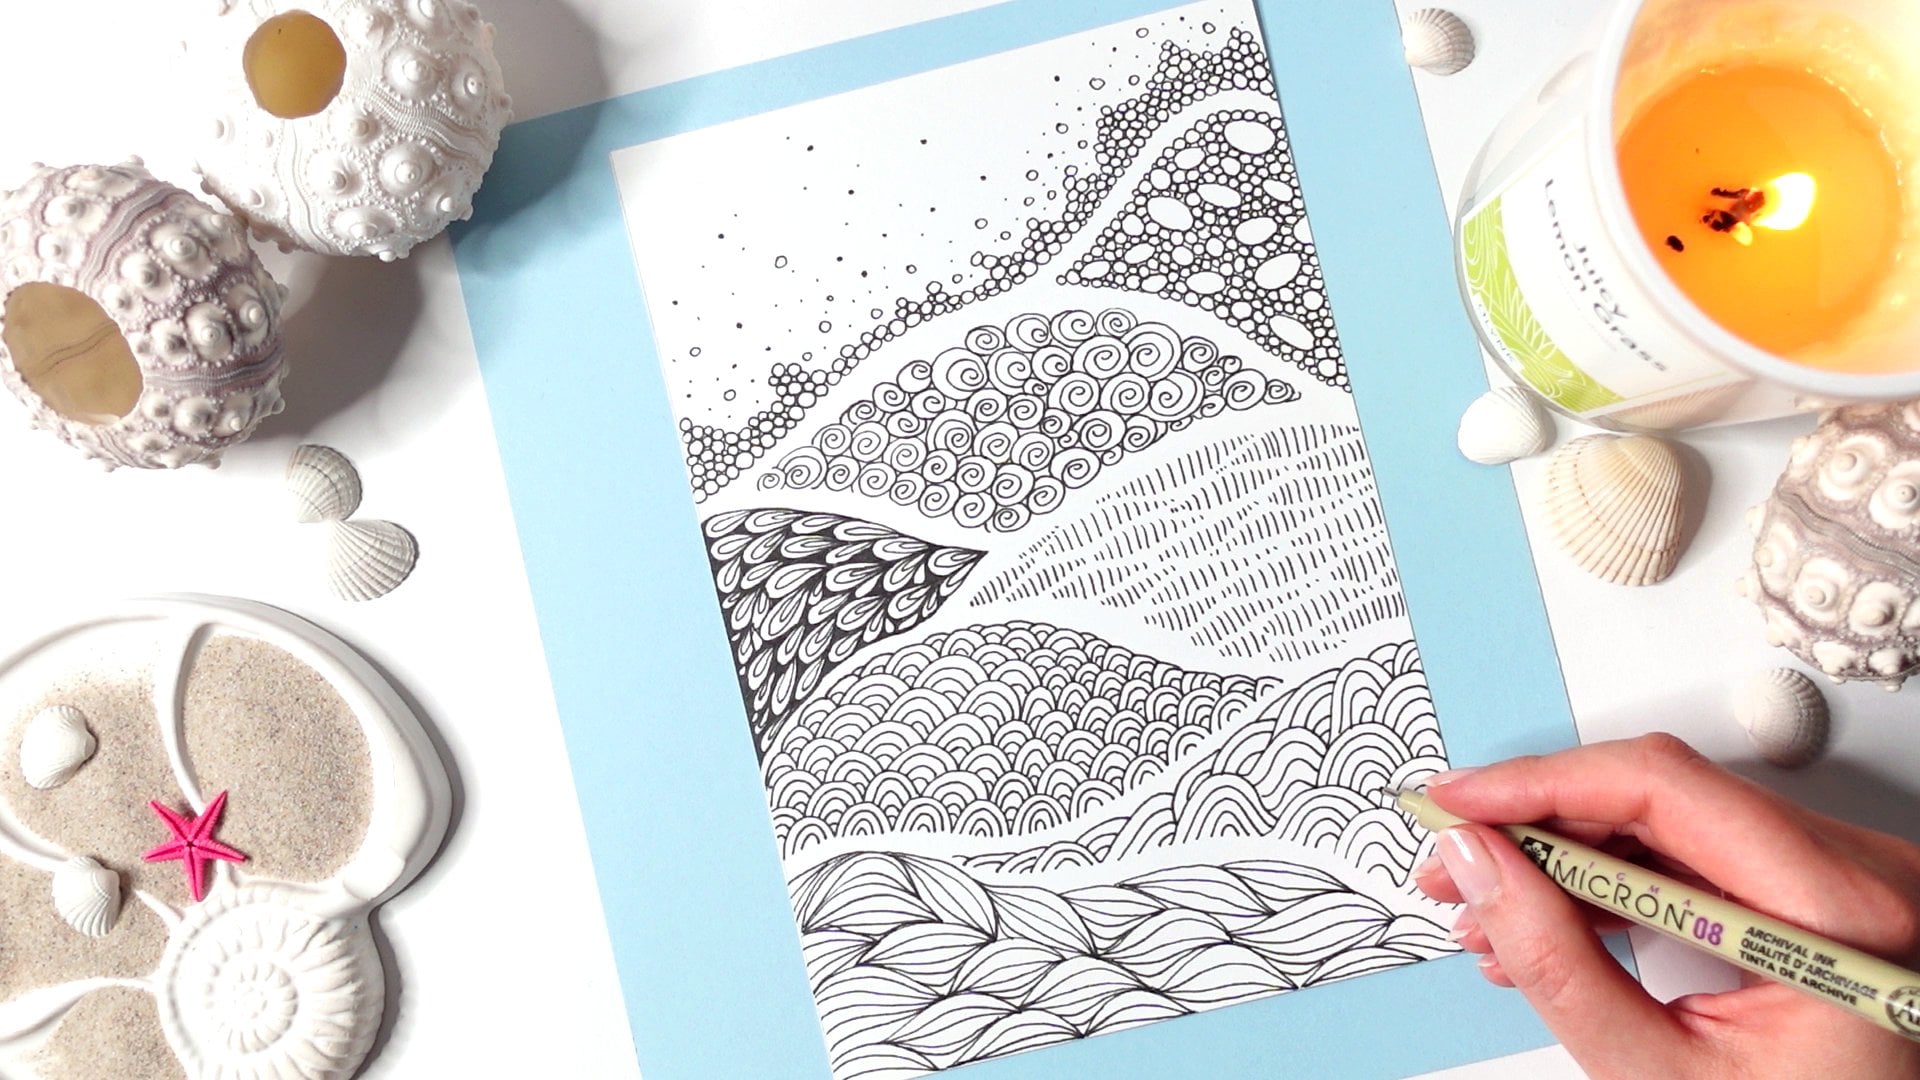
I love combining organic elements with geometry and I draw inspiration from the underwater world, plant life, cosmos, and Japanese patterns.

I've always been incorporating tons of details and intricate patterns into my drawings and lately, this practice translated to my embroidery, which consists of hundreds of french knots and other elaborate details.

This repetitive act of embellishing my art with copious dots, circles, lines, and dashes is something that helps me destress and curb my anxiety.

I adore watercolors, and I like to explore them in a fun, messy way, that probably would give tra... See full profile

Level: Beginner

Class Ratings

Expectations Met?
    Exceeded!
  • 0%
  • Yes
  • 0%
  • Somewhat
  • 0%
  • Not really
  • 0%

Why Join Skillshare?

Take award-winning Skillshare Original Classes

Each class has short lessons, hands-on projects

Your membership supports Skillshare teachers

Learn From Anywhere

Take classes on the go with the Skillshare app. Stream or download to watch on the plane, the subway, or wherever you learn best.

Transcripts

1. Introduction: [MUSIC] Keeping a sketchbook can be a vital part of your creative practice. It allows you to play, try different things, and experiment, at least in theory. Because if you are recovering perfectionist like me, you probably shudder at the mere thought of making a mess in a pretty sketchbook you just bought. As a result, you don't use it at all. The only way to loosen up and actually stop treating your sketchbook like a sacred object you're not supposed to touch is to get into a habit of drawing in it a lot. Sounds like a vicious circle, I know. But I found a way to break out of it by allowing myself to actually make my sketchbook drawings pretty, at least initially. Hi, my name is Ewa Rosa, and I'm an illustrator, embroidery artist, and top teacher here on Skillshare. In this class, I will show you six fun ways to fill your sketchbook page with botanical elements. I've designed these exercises so you can actually start practicing your floral doodles without panicking that you will ruin your gorgeous sketchbook. They are really simple. You can make many mistakes in the process, yet the end result can be quite stunning. If you usually give up after just one messy page, you feel all is lost and you just have to buy a new sketchbook right away, then keep on watching. We will have fun doodling simple botanical elements like flowers, flower caps, leaves, and branches. I will show you how to combine them to create more complicated and pretty illustrations. You will also learn how to modify these shapes to develop new, fresh designs and how to take advantage of mistakes and happy accidents. We will finish by drawing a full spread floral meadow illustration that will allow you to practice all the botanical elements once more. I will help you build it layer by layer. By the end of this class, you will be able to create your own gorgeous intricate composition. Hopefully, these exercises will calm your inner perfectionist monster and lull it into a false sense of security. When it finally goes to sleep, you will be able to experiment more without feeling guilty that you are making a mess. Sounds good? Be brave, grab this pretty sketchbook of yours, and open it now. [MUSIC] 2. Materials: [MUSIC] All you need today is a sketchbook and some kind of pen. I will be using Micron pens but any brand will do. We are focusing on a sketchbook practice here, however, you can participate in this class anyway you like. Just grab a piece of paper or your iPad and join us. 3. Class Project: [MUSIC] For this class project, I would love for you to fill at least one page in your sketchbook using tapes, composition hacks, and ideas I will share with you today. You can mix and match all the exercises, develop your own composition ideas, and use your favorite floral doodles instead of the ones I'll be showing you. Just have fun and make something. 4. Bursting Blooms: [MUSIC] In this first exercise, we will play with the drawing inside and outside the lines to create a botanical illustration that is bursting with flowers. Let's start with sketching a circle in the middle of a page. Use a compass if you like, but any round object will do. You can also choose a different shape. Just make sure you leave quite a big margin around it, and especially above it. I'm pressing my pencil quite hard to the page so we can see where I'm sketching. But you can just lightly mark the circle. Now we will partially fill this shape with simple round flowers and basic leaves. You can start somewhere in the middle or right at the bottom. Just avoid placing anything at the top for now. Round flowers are done with dashes, are really easy and fun to draw. You can create endless variations by playing with the size of the flower center, as well as the length, starting points, and density of the dashes. I often come up with a new idea by accident, after making a mistake. I try to fix it and it forces me to veer from the usual design and add something to it. Sometimes I love it, sometimes I don't. But it's always worth experimenting and trying new things. Here, I'm drawing a half flower to suggest it's partially hidden by the circular frame. I add another one behind it to create an illusion of depth in the illustration. We will continue adding more flowers and leaves until about three-quarters of a circle is filled. Now, let's erase the top edge of the circle to open it up. Imagine the flowers and leaves burst out of the circle, and start drawing some elements outside the original border you just erased. For our final touch, fill any gaps between the flowers inside the circle with black ink. This will add contrast and make the illustration pop even more. This composition trick will allow you to create eye-catching art that looks cool in your sketchbook, but at the same time, you will be able to experiment a lot with flowers inside the circle. Any mistakes you make won't be as visible in a large drawing like that. You won't feel compelled to tear the page out after making just one wonky line. 5. Out of the Box: [MUSIC] In this exercise, we will go outside the lines even more and practice blobby florals adorned with wavy lines. Let's start with drawing a square. It really doesn't have to be perfect. Make it more or less this big and it's essential to have broad margins around it. Draw a blobby shape and choose a center point. Then start filling the shape with curvy lines converging in the middle to achieve a three-dimensional effect. Now add another blobby flower partly hidden underneath the first one. Fill the center with some bubbles and then adorn the petals with wavy lines. You can also experiment with more traditional petals and fill them with converging lines coursing between two points like that. Continue adding more flowers and finally start drawing parts of them outside the square border. Don't worry about going over the pencil lines. You can erase them later on. When the whole square is more or less covered with florals, fill in the gaps between them with black ink. You want some of the square corners and parts of the border to be visible between the petals as well, so the flowers look like they pop out of it. If not enough of the background is visible underneath the composition, you can make the square a bit bigger like I did. 6. Masking Tape Trick: [MUSIC] In this exercise, we will use a masking tape trick to design a fun, unexpected floral composition. You can apply actual masking tape to create squares, triangles, or hexagons on the page. I wanted to play with circular shapes here, so I just sketched four concentric circles, and I will pretend these are ribbons of circular masking tape that I'm not allowed to draw on. The big floral elements that partly go underneath the mask areas will make this design look really cool. It's definitely easier to do it with a real masking tape as you can draw directly on it and remove it later. But if you want to try these circular lines or any wavy lines for that matter, just remember to carefully avoid crossing them over with your pen. We will focus on two floral designs here, a white one with black lines and the black one with a white center for more contrast. Make sure they partly overlap each other to create an illusion of depth and place them randomly on the page. Now that we have our main florals ready, it's time to make these concentric circles pop even more. We will do this by covering all these blank spaces between flowers and masking tape rebels with some bubbles or leaves or whatever you like really. Start carefully feeling all these tiny nooks and crannies with small elements of your choice. I treat this part of the process as a mindfulness exercise. It can be very relaxing if you don't rush it and just focus on each bubble at a time. I've decided to fill this middle area with leafy shapes to add some interest. I will repeat my favorite bubbles on the outside of the bigger circle to finish the composition. If you make any mistake, you can mask it with a big black flower or bubbles for example, and if you lose your focus and go over the masking tape line, treat it as a happy accident and make the most of it. Repeating the same mistake in several places will make it look like an intentional decision. There's really no need to tear out the page or did your sketchbook altogether. 7. Faux Pattern: [MUSIC] For this exercise, I've created a border with masking tape first and I will draw in this area in the middle. I want to practice sometime in botanical details like branches, floral cups, and single leaves. I will pretend I'm creating a repeat pattern to make these doodles look more cohesive on the page. Let's start with this cute little branch and redraw it several times in random places. Rotate the element each time so it faces a different direction. This will make the pattern look more organic. On the left side of the screen, you will see some ideas for branches, flowers, flower cups, and other small botanical elements you could use in this exercise. Of course, feel free to draw your favorite florals instead [MUSIC] The more elements there are on the page, the more I'm pondering about filling the remaining gaps. But to be honest, I just go with my gut here. It's only an exercise, so there's no point in overthinking it. The composition will look cool at first glance anyway, borders with white margins. Don't worry about potential mistakes and imbalances. Just focus on practicing botanical elements over and over again. 8. Filling Shapes: [MUSIC] It's time to practice more detailed, layered flowers with lots of petals. We will squeeze these elements into previously sketched shapes to make this exercise fun and avoid messing up the page. Here I'm drawing some circles, one big and a bunch of smaller ones. I place some circles on the edge of the page so they look like they're partially cut off. I'm choosing random spaces to create a pleasant composition. Basically, it should look like a bunch of bubbles floating on the page. You can always add more later so don't be too precious about it. Layered flowers look pretty complicated, but they are actually quite simple to draw. You just start with the center and add petals around it over and over again. Just follow my lead and also take a look at the examples on the left side of the screen. [MUSIC] When all the flowers in the first circle are ready, fill the remaining gaps with black ink. It will add contrast to the illustration, but what is more, it will give you the opportunity to correct or cover any wonky lines you don't like. You can practice drawing the same flowers in smaller circles or place other designs there. Even if you mess up something inside any given circle, the overall composition will look nice on the page. 9. Full Spread Illustration: In this last exercise, we will create a full-spread flower meadow illustration that will allow you to practice all the botanical elements once more. We will build it layer by layer, so don't feel overwhelmed at the thought of drawing something so complicated. You will see the process is actually quite easy. We will start at the very bottom and use flowers from the first exercise to create the foreground of our composition. Make these flowers quite big. Place some at the edge of the page and in the corners to nicely fill the spreads. Make sure some of them overlap and add simple stems and leaves to the ones floating in the air. [MUSIC] Now, let's add the second layer using the flowers from second exercise. Imagine all these flowers are a bit further away and some of them are partially hidden behind the first layer of shapes. [MUSIC] We will create the third layer by adding flowers from the third exercise. The ones filled with black will help you mask any mistakes in the illustration. Feel free to use them at any point of the process. Also in the foreground. Make sure you are positioning your flowers at many different heights. Otherwise, the model will look too flat and boring. I decided to add two dark flowers in the foreground here just to balance out the composition. It wasn't planned, but I felt it would look good so I gave it a shot. Don't be afraid to experiment and follow your gut in such situations. Now we will draw some gorgeous layered flowers in the background just focus on one flower at a time. Have fun with adding petals and slowly build the composition. Remember these flowers are even further away, so they should be partly hidden by everything that came before them. We will make our illustration truly lush and intricate by adding smaller flowers, flower cups, branches, and fillers from the pattern exercise. Remember to vary the height of the elements here to add more interest to the composition. [MUSIC] Here, I wanted to draw a simple branch, but I turned it into a dandelion on a whim, and I'm quite pleased with the results. Trust your intuition. If you see any gap you don't like fill it with something tiny. You can finish the illustration with dots indicating pollen. To make it look more magical. Also feel free to add any bees, butterflies, or birds, if you like. Remember, just have fun with it. 10. Final Thoughts: [MUSIC] I hope you're a perfectionist monster is snoring by now, and you feel empowered to use your sketchbook more and more and actually have fun with it. If you are looking for more ideas to fill your sketchbook pages, dive into my class, slow drawing, slow living. Get in the flow with ocean doodles, it will give you tons of inspiration and help you relax during your art practice. It's definitely a win-win. You can also check out my other class, unwind with abstract forest illustrations in watercolor and ink for fun exercises you could explore in your watercolor sketchbook. I would love to see your beautiful sketch book pages, so please don't forget to share them in the project gallery. If you've enjoyed this class, it would mean a lot to me if you'd leave me a review. If you want to see more classes like this in the future, follow me here on Skillshare. Happy creating, and see you next time [MUSIC].