Transcripts
1. 00 FL Beginners Course Overview: Hey everybody, welcome
to the course. I am John marathon
bone to produce. And you are going
to learn to make music and FL Studio by actually following along and making
a track yourself from nothing right through
to the final mix down. The whole course is over 5 h long and you can follow
along in any version of fL. So let's check it out. Before we look in
more detail or what you're going to get
out of this course. It's important to note that you're not
only going to learn how these FL Studio and its
instruments and plugins. And you're not only going to learn music production
techniques, you will also learn
the complete start to finish song making process
and how it all fits together. Now that's really
important because it means that when you start
to make your own music, you'll be able to apply
the knowledge you have learned in a
much more organized, constructive, and usable way. So let's take a look in greater detail at what you're gonna be doing in the course. Say straight away you will be bringing in your first sounds whilst learning how the
interface NFL works, how it operates with the channel Rack Patterns and the playlist. You'll also learn to
use the basic tools needed ten minute video
or sound editing sounds, how to make beats, and how to apply basic effects to
make it all sound good. Once you have a basic beat, you'll start making a baseline
and melody for your track. You don't need any music
theory knowledge for this, you'll learn how to
take a melody that's in your head and get
it into FL Studio. When you have that
basic structure, you will use this
musical foundation to build more musical
parts like leads, an arpeggiated FL comes with some really powerful
instruments and plugins. You will learn how to use the GMS synthesisers
to manipulate sounds, to make your own custom
white noise effects sounds and other lead and bass sounds, along with post-processing. To fasten them up. You will learn all
about how to correctly use EQ and compression
in your mixes, even going into side-chain
compression to give the low end of your mix
some super clarity. Now, before we get
a singer and you need to arrange your
track, say here, you will learn how to structure your songs so it takes the
listener on a journey, have ups and downs,
intense sections, relaxed sections, just
like a good story. This is achieved not only
through correct song structure, but also through the
use of special effects, sounds and automation
to give a real sense of tension and release and movement throughout
the arrangement. Now that we have the full track, we can get the
singer into record. You will learn exactly how
to record in FL Studio. Now this is actually really
simple and we will guide you through the whole process
from Mike positioning. So you setting up
FL for recording. You'll learn how to take multiple recordings and make one really great
performance out of it using timing and pitch
correction along the way to make sure it
is absolutely perfect, then you'll process the
vocals to give a nice, airy, bright and dynamically
consistent performance. Just a quick note, you don't
actually need to be able to sing in order to complete this tutorial or have
access to a singer, we provide all the
recorded audio so you can follow
along with what we do. Finally, you will learn how
to mix this all together. Now mixing is a vital skill, but it can take time to master. Here you will learn what mixing is and using the tools
available to you in FL, you balance the whole mix, add the final touches to make the track come alive and have crystal clear separation between the elements of your track. This is followed
up by final tweaks at the mastering stage. And lastly, you will render out your completed track so you
can share it with the world. Everything on this course is shown with
step-by-step guidance, so you can follow along. More importantly, this
means that you can easily repeated when you're
making your own music. And by making a track
from start to finish, you gain the knowledge in a much more usable
way than if you're just listening to
someone talk about it. That's it from me.
I'm going to play the final exported track that you can make if you
get the tutorial. Thanks very much for watching. I hope to see you
in the course 11. To be sad. I will barely. When I say, sadly.
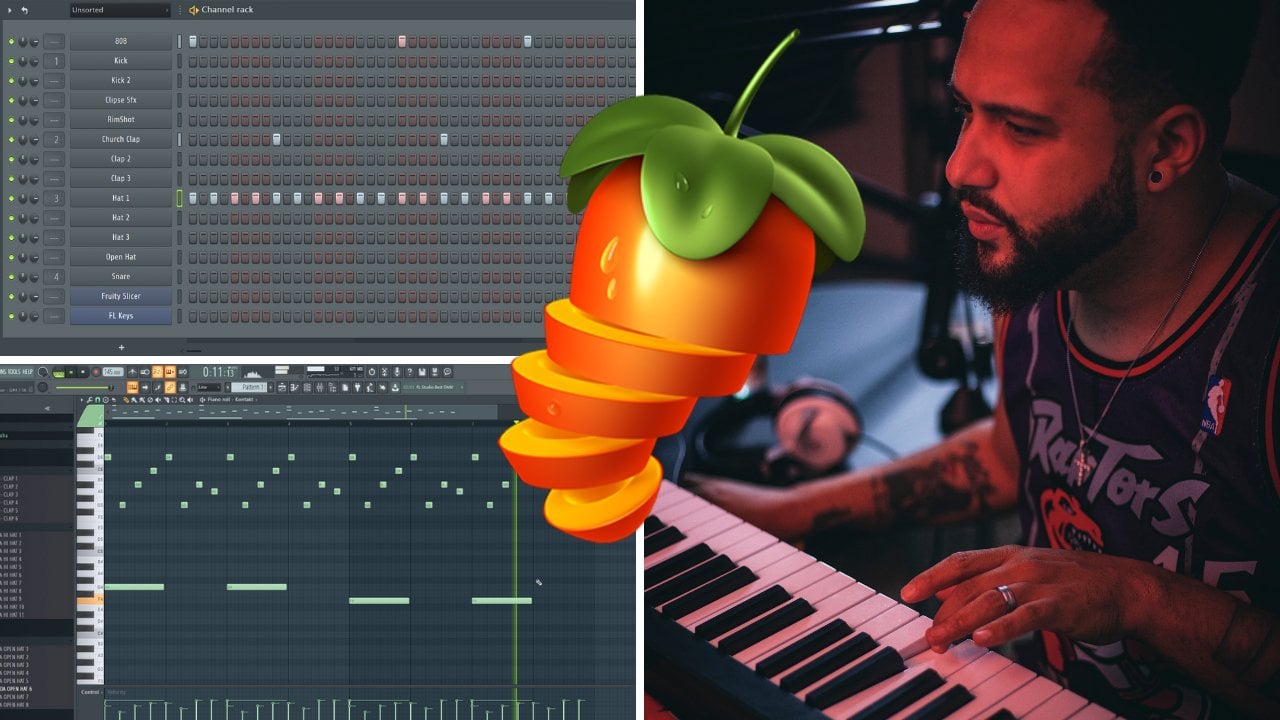
2. FL Beginners Lesson 01 Making A Beat: So this is what you see
when you first load up f l am very quickly. We're just going to go and
check the audio settings. So we're just gonna go
to options at the top, go to audio settings. And under device,
we can just pick what driver we want
to use for FL Studio. So your list probably
won't be as big as this if you have a different
sound card, but that's fine. We're only really interested in these ones down here
under audio devices. So if you haven't got a
dedicated sound card, then just select SEO for all V2. And if you do have a dedicated
sound card like I do, then I've got the
fire phase drivers. So just select that
as the best option. But if you don't have that
just selects as E0 for all. So that's it for the settings. Now I know this interface
at first glance can be a little bit overwhelming
when you first open it up, but rest assured, we
will be looking at an mastering all of it as we
go through this course. But we want to get making
music straight away. So let's look at the browser. On the left-hand side. If you can't see the
browser for some reason, you'll just have
to expand it out. So just bring it over and expand that and you'll
be able to see the browser. The browser has three
tabs at the top, you're only interested
in this one on the left. Don't worry about the other
two for now, that's fine. Browser is where you find all of the media like audio samples or plugins are instruments
that you can then bring into your projects, is not the only way to bring
things into our projects, but for audio specifically, it's the most commonly used. So what we want to do is navigate down to
where it says pax, click on it to expand it. Now, in the packs are
many different types of audio samples that
come with fl Studio. Now let's just click on drums
and then click on kicks. Now, all of the samples
in this particular pack, this drums pack, or what is
known as one-shot drums. So they just singular drum
hits as you can here. And you can just click
on them to audition. Or they sound like, say once you picked to
kick that you like now I'm going to
actually just expand this a bit so you can
see all of the writing. And I know which kick I want. I want the monster kick, o62. Nice fat basic thing. And all you gotta do is
bring it into the projects, is literally click it
and then drag it up. And I'm actually just
going to drop it on top of where it says Kick, just to replace the current
kick that's in the project. There are many other
types of samples. Of course you've got loops
and all sorts of things, but we're gonna get to
that later in the course. For now, we understand where we can actually find media in FL and we know how to bring
it into our projects. But first of all, I want
you to focus on two things. The first thing is the channel
rack, this thing here. The second thing is how
patterns work in f l. So let's start with
the channel rack, which you can actually
show or hide by clicking this button here or hitting
F6 on your keyboard. The channel rack shows
every single item, also known as elements, as they're basically
the building blocks of your track like the
kick the hat, the clap. Or it could be an
instrument playing a lead or whatever,
that all elements. So FL Studio always opens up with four different elements. Loaded the kick, which you've actually just replaced
with orange cake. We replaced with
this one, the clap, the hat, and a snare. And if you want to actually
hear what they sound like, you can just hold
Control or Command on your keyboard and then click it. And you can audition the sounds that are loaded into
your channel rack. So if you just
left-click without holding Control or command, it will actually bring up the channel properties and we'll be diving
into these later. But for now we can
actually just close it. And next to each element in our channel rack is this thing, and this is called
a step sequencer. So we really only use
the step sequencer for things like drums. So we can program in
beats as it's shown here. The step sequencer
represents 1 bar. And if I add a kick to
the start of each beat, them will have a
standard house beats, so it's 1 bar divided
into four beats. And it will just play
like one-two-three-four, one-two-three-four. Like so. You can play what patterns you're
working on by clicking this little speaker icon up
here next to channel track. Or as long as you've
got it in passive mode. So not song but pattern mode. You can hit the play
button or you can hit space on your keyboard to start and stop it
in the channel rack, I can just click with my left
mouse button to add a step. But if I put something
in, I don't like, I can just right-click
it to delete it. You can actually draw
in multiple just by clicking and holding and the
same with deleting as well. Apart from that, the controls, we have the volume
with this dial here. And if you change the volume and you don't like
what you've done, you can always just hold
Alt option on a Mac and then just click it and it will reset it back to
its original value. And then we've got panning, which means you can pan it to the left speaker or
the right speaker. And again, if you don't
like what you've done, you can just hold Alt or Option
and click it to reset it. But the controls as they are
absolutely fine for now, we've got our basic
kick pattern, but at the moment it's
just a little bit too far. So I'm going to change the
tempo of our projects. At the moment it's at 130. I can just click
there and drag down. And I'm just going
to set this at 124 years about the right speed. So let's add a clap in a
club in almost all genres, but especially in house music. Goes on the second
and the fourth beat, like sounding good, but the cup is just a
little bit too loud, so let's turn it down using
the volume control over here. So we don't want it too loud. So drowning out the kick
like it was originally, but we also don't
want it too quiet, so it's like hard to actually
hear it when it plays. Say somewhere about there is. Okay for now, we're going to be mixing this later
on in the course, so it doesn't to be completely perfect right from the start. Now, really important
point to remember here is as you bring new elements
into your projects, you always want to turn down the new element so it's
balanced with the kick. Don't do the opposite and turn the kick up to be as loud
as the new element or what's going to happen is the volume level of your
whole track is going to get louder and louder and
your projects will basically become
really hard to handle. Okay, So let's add r hat
now the hat in house music, or at least the main hats because you can have
multiple patterns, but the main house almost
always goes on the offbeat. So I'll just draw that
in and say That's basically halfway
in-between the kick. Okay. Sign, I'm pretty good. Maybe just turn that
down a little bit. And that's sounding
pretty decent so far, although we definitely
need to replace the hat. So let's just do that now. Let's go back over to
our browser window, just going to scroll
up, minimize the kicks. And instead of using
this drums pack, I'm going to go into
the drums mode, audio bank, go to hi-hats, and then I want a nice short
hats, something like that. Attack hat O2 sounds
pretty decent. So I'm just going to
click it and drag it and drop it on top of
my existing hat. Actually not too keen on that. So let's actually use this. Sounds a bit nicer. So let's just drag
that over the top. That sounds a bit
better. It's just turn it down again
a little bit more. Okay, that's cool,
but we now need to put a nice chunky
hats in there. So let's find one of those. So if we scroll down,
you'll find attack. Oh, hat's over open. Just means it's kinda like
a longer lasting hat. Quite like that one. So let's drag that and we'll
replace the snare. That's fine. And again, we just need to add in
a hat pattern for that. Way, way too loud. So let's just turn it down. Just balancing it roughly there. One thing I do want to do that because it's quite
boring at the moment, just being very,
very repetitive. So let's just mix up
our patterns a bit. So you've got attack A6, which is the short one. And if I want to listen
to this on its own, so solo it, I can right-click on the little
green dots and click solo. Now I can just listen to that on its own and then
I can right-click again and just tick solo
again to un-solo it. So what I wanna do
is let's just try deleting that one and adding
a hat there at the end. It sounds okay, but I'd say I don't want that
to be full volume. I would like that to be slightly quieter than the other hats. It's just a bit too
obvious at the moment. So what I'm gonna do
is just make sure that this is highlighted green, just the attack hat O6. And then click on the
little graph icon up there. And here we go, we
can see basically the volumes for each of
these individual hits. So this last one,
which is going to turn it down a
bit, just play it. I'll just play it
how it was as well. So it just kinda softens
up that last hit that. So nothing too crazy there. And then I can just
click the graph again so you get rid
of that. There we go. We've got a slightly
more interesting, slightly funkier how speed? So let's get this into our
arrangement and then in the next lesson we'll
actually get to making a really cool baseline It's
ago with our drumbeat. But first, you really need to understand how patterns work. So everything that
we've just done in the channel rack is gonna
be part of passing one. We know it's going to
be part of pattern one because that is
what's showing here. If I click the little plus
icon and just hit Enter, we can see that we're
now in pattern to, and we can see that our
channel rack is now blank. So e.g. if I go and just draw in another drum pattern, say e.g. just a constant load of hats. And if I play that, that's
what's in person to now, if I go back to pass in one, you can see we've
got our original beat that we just made. And again, if I go
back to the pan too. So these patterns, once I select it here in
the past and picker, I can then actually draw that
into our Arrange window, also known as the playlist. Say it's draw things
in either want the paintbrush tool
selected or the draw tool. Probably easier just to use
the paintbrush because you can draw multiple
items in one go. And then I can just draw him, say 4 bar e.g. of pattern one. And if I select pass into, I can draw in pattern
to note as well, just like in the channel rack, if I want to delete something in the arrangement day
or just right-click it, will do it multiple
times to remove it. And then I've got my
two different patterns loaded into the arrangement. Do now really important
if I just hit Spacebar at the moment
to play the track. It's still in passive
mode up here. So what I need to
do is either change this from passive
mode to song mode. And then when I play, you can see that it's actually playing in the Arrange window. Or I can play what's
in this window by clicking the little
speaker icon here as well. If I just want to go
back and listen to an individual person that's in the channel rack,
e.g. pattern one. Then I'll just change this again from song that's opossum. Say there are two
different areas which you can play in FL Studio. You've got the
episode of patterns that you make in
the channel rack, and then you've got whatever's
in your Arrange window. So let's just quickly
recap what we've learned. So we have our channel rack, where we have all the
individual elements that are going to
make up our track. Obviously there are only
four at the moment, but we'll be adding many
more as we progress. Then we have patterns
which can be made up of either single or multiple
elements from the channel rack. Then we have our playlist or Arrange window where
we draw in patterns. And this is where we
actually build the structure of our track and make it
into a complete song, I'm ready, That's
how FL Studio works. But don't worry if
this isn't sinking in right away as we progress
through the course, we're gonna be doing
this over and over. And you're gonna get a much
deeper understanding of how this all works as you
progress through the course. Okay, so that's it
for the first lesson. In the next lesson we'll
be adding the baseline. Thanks very much for watching. I'll see you in the next one.
3. FL Beginners Lesson 02 Making A Bassline: Hey everybody, welcome back. Alright, so in this
lesson we're going to get making the baseline. So they say far, we've
only used drum samples, but in order to make a baseline, we want to use an
instrument to create a musical pattern
for the baseline will use pattern to now
at the moment pass into, of course has r hat
pattern that we put in there more of an
example than anything else. So we can actually just go into pattern to make sure
you've got this selected. And then we can delete all of the notes just by
right-clicking and dragging. And you can see the pattern
over there is now empty. And we can also
just delete those as well by right-clicking
and dragging over it. So you can add an instrument into FL Studio in
a couple of ways. One is to go to the browser, remember to click
the left-hand tab and then just close
packs for now. And then we can go to plug-in database and then generators. And then you've got various
different options for sense. So it'd be under synth classic. You can see the instruments down here will actually be using GMS, but there's another way as
well, which is probably the slightly more common way of guessing instruments
into your track. And that's by clicking
the plus button and then just
scroll down to GMS. Click that. We can see the GMS
instrument that's loaded. So the GMS instrument, which comes with fl Studio, is what's called a synthesizer. And it's capable of
making all sorts of different sounds from leads
to bass sound effects sounds, and pretty much
everything in-between. So we're not going
to get too much into the actual synthesis side of things as this course
really is for beginners. But as with most instruments, the GMS comes with loads of readymade instrument
patches that we can load and then tweak if
we want to just say no, if you have this button
here highlighted, you can actually use the keys on your typing keyboard to audition
the sounds in the synth. So most of the keys on
your keyboard can be used, but bear in mind
this really isn't for playing melodies in, I mean, you can sort of the
basic melodies on it, but it's more as a way of just auditioning the sound
that's coming out of GMS. Know, if you have a
midi keyboard all Shea, very quickly how
to set that up and literally about
15 s. But just be aware that you don't actually
need a midi keyboard for this tutorial as we're going to program all of our
melodies in manually. But I know it'll be
important for many of you to know how to set up in fL. So I'll show it
very quickly here. So as long as it's a
USB midi keyboard, you can pretty much just plug it in and you're good to go. What you do need to
do in FL though, is go to Options, go to Midi settings. And what you wanna do is select your keyboard from the second
list here and our minds, the impact G X6 one. And normally this will
be unable to say, you just need to click
Enable and then that's it. You're good to go. Midi
keyboard is set up. Now you can just audition or play a melody on your keyboard. Just make sure that you do
have the instruments selected. If you have something else
selected like the hat e.g. then that's what you'll trigger. So just make sure that you've
got the instrument itself. And you'll be able to play
in whatever melody like this sound is a little bit nasty and not
at all what we want. So we want to pick a
different instrument patch. So just come down to where
it says bases at the moment. And this brings up our
preset library and has many, many different patches
like I've said. So these are all the base ones and you got leads and since pads and textures and loads of different
presets and each one. So for now we want a base
and we want to scroll down. And I want one called Scully t0. So when you click on it, it will load the
patch and you can see that the instrument behind us just updated slightly
different settings. And now when I
play it, so again, I can just use my keyboard to audition the sound
that's playing. And that's a nice plucky
sort of bass sound that's going to suit
our house track nicely. So what we need to
do now is actually make the melody for a base on, but we can't obviously use the step sequencer here for you. So programming notes,
it's just going to say, and a bit weird because
it's all monotone, it's just playing
one singular note. So what we want to do is just come over to
where it says GMS, we're going to right-click
and click on the piano roll. And you can see here it down
the side of this window. We've got all of the keys, just like on a piano
keyboard, e.g. and then in this
window we can actually start drawing in notes. So just click once
just to add a note. And again, you can
just right-click to delete those notes. And if I want to hear what
I'm actually making it, I'm just going to set my
playhead at the beginning there. For now, it will
just loop round. You can also change
the length of nights by clicking at the end of the midi notes and just dragging that to make
it longer or shorter. So this is gonna be a
simple house track, which is going to have a
basic musical structure. So it's not super
necessary to have any music theory knowledge in order to be able to do this. And you might be wondering, how should you come
up with a melody? And there are of course,
many different ways. Now the way I'm
going to do today, and this is actually the
way that I came up with this specific melody
when I wrote it. And that is, I just
had the beat made like we have an HMD, various different melodies until I had something that I liked, then I just transfer the notes, like hummed to the piano roll. And hey presto, you've got a melody is not
rocket science, but it is really
effective and actually do this process quite a lot. So I'll just close
this window for a second and I'll play the beat. Now just a quick tip, if I click in the timeline
in the Arrange window, it actually activates song mode. So it means that
this area will play. Okay, so I'm just
going to quickly Hm, and please excuse my humming, but I'm just going to
hover over the top of this or sort of show you the idea that I came up
with something like this, that they did it at that
did it did it, it read it. Then it's just sort of
repeats from there. Now, I've got to do, I've got my melody and I would just need to transfer it into f L. So I'm just going to
again go to the piano roll. So dentin, dentin
did it. It did. Select the first 2 bar. And if I just hit play by
hitting the little button here, it will just switch to passive mode so I can hear
what I'm doing. Now, one thing is here that
I really need a beat behind this so I can
actually program in the correct rhythm
of the melody. So he's not very much good if
I just have this Anita beat behind it to be able to sort of tell where I should
be putting notes. But of course, in passive mode, I can only hear
this pattern play or I can hear the drumbeat. I can't hear both
at the same time. So there's a couple
of different options. If you just want
a very quick fix, then just click on the
metronome button at the top. And now when I play it, I can start programming in my melody now because
I've got a bit of a beat. So I'm just going to
show you this way first, but really needs to
zoom in a little bit. So zooming in, in either the piano roll or in the Arrange window
is exactly the same. So this bar up the top here, this allows you
to scroll around. And also, if you click
on the end there, we get a slight
double ended arrow. You can actually use
it to zoom in as well to any points on the track. Or you can hold
Control or Command on your keyboard and just use the mouse wheel to
zoom in and out as well, which is probably the
easiest way of doing it. So we're going to
zoom in a little bit just so we've got
the first bar here. And I think my melody, which is the dentin, then it's gonna be
something like this. There we go, Perfect already. Just going to shorten those. It's really easy to edit
these notes and everything. So I wanna make this
longer than just 1 bar. It needs to be 4 bar long. So I'm actually going to close
the piano roll just for a second and then make sure
we got patency selective, which it should be already. And then I'm going to
draw in just 1 bar here, and then I'm going
to drag it out. So it covers a full 4 bar. And you can see there
we've got our pattern. And I can also click here to
switch this to song mode. Or of course you can just
do it up here if you want. And then when I play it, now we can hear it with the beat. Now I've got the beat
behind it so I don't need the metronome on anymore.
I can just turn that off. If I want see Edit pan, so I don't have to come over
to the GMS now and go to piano row because it's
already in our projects, I can just double-click it. And our melody or baseline
melody is already there. So let's carry on
and get this sorted. Then dependent and did it that night there and she
needs me out a bit longer. Not quite right. Perfect. Dan Dan the next night, Dan dan dentin that it
did dent that notes. So I know the next line
is going to be in G5, but I think he's got the
same pattern as what? I've gotten the first bar there. So I'm actually going to select multiple notes at once by holding my control key
or command key on a Mac. And then you can select
multiple events. And then if you hold Shift
and then click and drag them, it'll copy them over. Now I've got them over here. I can then drop them
down two semitones, so it's now on G. And one thing that
might actually be quite helpful for
you at the moment, you can see the keys over
here and just labeled C to C, which is one octave. And our melody starts in A5, but the keys over
here on labeled, so you can actually label these, just go to the drop-down
menu here, go to View, and then under key
labels, select all notes. And then all of them
are just labeled. It might make it a
little bit easier for you if you're not familiar
with the keyboard. So just copy what I'm doing at the moment,
that's fine now. So at the moment my
melody is starting in A5, which actually is a little
bit high for baseline rarely, we probably want this
to be down an octave, so I'll move it down to A4. Sounds a bit more sort of house, basically in that key. So I've got two different
ways of moving it down. So again, I want to hold Control or Command and
select all of the notes. Or if I want, I can actually just
hit Control or Command a to select all. And of course I can just
drag them all down, just down and not
save like that. But what I can do is I can move all of
these and Octavia at a time by holding
Control or Command on my keyboard plus
the down arrow key. And it just shifts it
down a whole OK, Save. Okay, That's fine. Good stuff. And I just want to
carry on making this. So let's just zoom
out a little bit there and just finish
off our melody. So got Dan, Dan,
Dan, dan did it, they did the dentin. And then Dan, Dan,
Dan, Dan, dan. Something like that. So let's just play that. There we go. We've got a
basic baseline melody, which I just hummed and then
literally just transferred. You got to figure out what
the notes are obviously. Then dent and copy the notes over from
what you've hummed. But this is probably
the most basic, but also one of the most used
ways of actually getting a melody into your track.
Okay, so that's good. We've got a baseline
melody and let's just close the piano roll window. And I can just for now
close my GMS as well. That can just be shut off. It's still there, of course. I'm just sort of
hiding it from view. And there's one more thing that I want to do and that is
in the channel, right? You can see these numbers 1234. Well, these tell us which
track in the mixer, this window here that we
haven't actually looked at yet, those numbers refer to
these channels here. So 1234, if I play it, you can see the levels moving
on tracks one through four. Now what I wanna
do is just go to the channel rack and then
we're going to change GMS. If you just click on
that and drag it up. And you can see there, you're basically choosing
the channel in the mixer. So I'm just going
to choose Channel five because it's
the next in line. So we've got all
of our elements on a different channel
in our mixer. Now, that's all I'm going to discuss about the mixer for now. We don't actually need
to talk about it until a couple of lessons time when we start getting
more into it. But just know that
as we're adding elements to our channel rack, we pretty much always send them through to a unique
channel on our mixer. For now, I can actually close the mixer if I want or I can use this button here to
hide or show the mixer. We don't actually need
it ready at the moment, so we can just leave it hidden. That's fine. Tidies up our environment
a little bit. We're almost at the end of
this particular lesson. Now, I'm just going
to show those of you who have a keyboard how to actually record in a
performance in FL Studio. So if you don't have a keyboard or you're just not interested, you can actually skip on to
the next lesson where we're going to make a lead
melody for our track. And don't worry, nothing
I show in the rest of this particular lesson
is actually going to be relevant to the rest
of the tutorial. So you're not going
to miss anything. It's just for those people
who are interested in recording their
keyboard into f L, and it's only going to
take a couple of minutes. So providing that
your midi keyboard is enabled like I showed
earlier in the video, then you can easily
record into f l. Just hit the record button. It's going to ask you
what you want to record. Say here. We're not looking
to record any audio. We just want to record notes. So just select notes
and automation there. Now with that done,
you can see that the record button is now
sort of highlighted. That means it's armed
and ready to record. Whenever you next hit play and start tapping keys
on your keyboard. So again, bear in mind, we're not actually going to
be using any of what we're doing right now in the
rest of the tutorial, I'm just doing this
for an example. So you know how to do this. A couple more things before
we actually try recording. Now is you can activate
a counting if you like, by selecting that button there. If you've got record enabled, I'll just play this for you. So what's going to happen is, again, you can see the
countdown timer there. I can also change that if
I want a longer counting, I can right-click on that
button and select 2 bar. Just gives you more of a chance to get ready for
your performance. Also, another important
button is this one here, which is blend recording. She can either have
it turned on or off. If I have it off, when I stopped playing
a midi Passing, I'm going to actually end up rewriting whatever I've
got in there, say e.g. if I play it now, when I stop, you
can see that all of the notes over here of being overwritten now I
don't want to do that. So I can undo by holding
Control or Command, Alt or Option plus z. You can also undo from the
Edit menu up here as well. If I blend selected, then of course what's
going to happen when I play and then record? It's just going to add the notes to that particular passage. When I stop it, it
doesn't delete any notes. You can just see
we've got both sets of notes there if you like. So again, Control
or Command plus Option or Alt and Z to undo, because we don't want
to have any of that. We just want to keep our
same original pattern. And then when you've
finished recording, you can then unarmed
the Record button. And then of course
when you play it, you won't have that
counts in again. Okay, so that's it
for this lesson. I'll see you in the next one.
4. FL Beginners Lesson 03 Making A Lead Melody: Hey everybody, welcome back. Alright, so in this lesson
we're going to make the lead melody for our track. But before we get going, There's just a couple of things that are really worth knowing before we actually get
into making a melody. Now one of them is that what we're doing
here is kinda what I loosely refer to as being
in content creation mode. And it's how most people
start and they make attract. So for instance, we mess around, we come up with a few ideas. We've got some drums,
we've got baseline, will have a lead, maybe a vocal, and maybe a few other elements. And then we'll take
all of that content and then we'll make
it into a tract. So we'll arrange it
into a structured song, like verse chorus, verse,
chorus, et cetera. The best way to think about it while you're in
content creation mode is to always work on the sort of main
structure of the song, or work on the part of the song which will become the chorus. So the main section and is also the most energetic
section of the track. And you're going to
see how all of this unfolds as we progress
through the course. So you know how to do
it in your own tracks, but it's important
that you understand the bigger picture
here so you know exactly where we are
in the process and how we're going to get it
to become a full track. So the second thing
that's important here before we get going with our lead melody is just that we want to do a bit
of housekeeping. Sounds boring, but believe me, when you have a
truck was say 37, 40 different elements in
there and they're all called pattern 12345, etc. And they're all the
same boring gray color. You can get lost really easily and it's just
going to slow you down. So we're going to quickly
organize this project. So let's start at the element
level in the channel rack. So it's very simple to
color and rename things. So just right-click on
my monster kick and I can just rename
color and icon, just going to call this kick. And I'm going to click on
this little colored tab at the end and select a
color, save my drums. I generally have a
sort of yellow color. So anywhere around
there is fine. And I do advise that you
copied the same coloring. So as you're going
through the tutorial, everything is the
same as my projects. There's going to be easier to follow along, just click Accept. And then very importantly, instead of just clicking off it, you do have to sort of confirm
this by hitting Enter. Then we can see our kick has been renamed and
it's being colored. So that is how you color in a singular element and
rename it at the same time, but you can also color multiple elements
at the same time. So if I just click drag
down to select multiple, then if we go to the
little drop-down arrow here, Go color selected. Now I need to select gradient, although actually want all of
these to be the same color. And with the first box ticked, just select our previous color. Now this little palette down here contains all of your
recently used colors. So it's got my weird
yellow, green color. And then I'm just
going to select the last box and select yellow. That means the
gradients basically the same color all the way through. And then I'll just click Accept. And you can see they've
all been colored in. So I'm just going to
quickly rename the hats. So the first one
is a closed hat. That's fine. Enter. And then I'll just quickly
rename this one as well. Open hat, hit enter. And then we just got
our baselines go, say let's right-click,
go rename and color. So I'll leave it as GMS, but we're going to
call it GMS base top. Because as you'll see in the
next lesson after this one, this is going to be the
top part of our baseline. And then I'm going
to color this in, and I'm going to select
a pinky red color scale for something like
that, pale violet. Whatever. No prompts, hits accept and
then hit Enter to confirm it. And we can see we've
got some color now in our channel wreck, as you can imagine,
when we've got more sort of bass
sounds and lead sounds, and they're all the
individual colors. They're going to
be much easier to identify when we're looking
through the channel. So now let's do the same
for our pattern section. So obviously we've
got pattern one here, which is just drums. So I want to color that the same and also label
it appropriately. So just right-click,
Rename and color, just going to call that drums. And I'm going to select our yellowy green color
from the color palette. Click Accept, and
then again hit Enter. And there we go, we can see our drum pattern is now
yellow and it's also no yellow in our Arrange window whenever we draw on
that path and n. Now let's get a pattern
to this is our baseline. So let's right-click
Rename and color. Call it base on top, make it red color except, and then hit Enter to
confirm. Okay, great stuff. Now, the next step
isn't 100% necessary, but it's just to make
it even tighter, you can actually do the same
for these tracks as well. Just for the sake of neatness,
I'm gonna do it anyway. And the same with
our baseline. Okay? Enter. And there we go. Everything is
nicely color coded. Okay, So sorry for the
delay in getting started, but now we're going
to finally get on to actually making our melody. So we won't see add another
GMS instruments say, I can either add it with the
Plus button or I can go to our GMS instrument here
and just click and drag it to the bottom
of the channel rack. And again, we're
just going to use a pre-made patch for this. At the moment, we
probably will be tweaking it later,
but that's fine. We'll get to that later. So we're going to click
on where it says bases. And then we're gonna go
to paths and textures. And it's actually
called ghost t0. So just click on it once. You can see the GMS
instrument is updated. Now we can close that window. And if I audition it, That's the sound that we've got. And again, I'm just
using my keyboard here with this button highlighted so I can actually play it on
my typing keyboard. Okay, so we've got
the sound selected. I can close GMS for now. I'm just going to quickly
color this is well a name it, so I'm going to right-click,
go to Rename and color. I'll call it GMS,
lead a one just in case we add another
layer to this later, just so we can differentiate,
but that's fine. Click on the color. Let's go for another
pinky color. Make it slightly brighter. Except, and then Enter. And now of course, we want to
program in our lead melody, but it's super important
before we start programming the lead melody that we want to make a new pattern. If I forget to make
a new pattern and I still have a base top
pattern selected. And I right-click,
go to piano row. You'll see here that we've got all these grayed out notes. I can't do anything
with these notes. They're just in the background. And anything that I add
while I'm in here will be added to the
base top pattern. You don't want this
as it's going to make life really confusing
and frustrating. So a helpful rules to
follow is you want to use individual patterns
for each element. Pretty simple, unless you
are working on drums, which will have
multiple drum elements to make it one
pattern that's fine. But if you've got a baseline,
a lead or whatever, always use a new pattern
for that new elements. So let's just close
this window and remember we got these
grayed out notes here. That's because we're in a pattern that's
already being used. Say if I create a new
pattern by going up to here where it says
Based top click Plus. I'm just going to label
this while we're here. Call it lead a one. And I'm going to color it the same pinky color
that we just made. Click Accept, and then Enter. And now my new
pattern is selected. When I go and right-click, go to piano row, you'll notice that there
are no grayed out note, so that's a good sign. It means that I'm
not in a pattern that's being used
by anything else. Now actually, before
I go any further in this window and start
programming in a melody, I want to actually work
out what the melody is. So again, like before
I just listened to what I've got and
I'm just going to hum along with it or whatever, just kinda play around with notes and my head come
up with a melody. And this is what I got so
far. I apologize again. Okay, so pretty simple, but it's a nice little melody. And while I'm here, I'm
just going to quickly change this color, pink. Just say we fully there,
we know where we are. Ready to go. I'm just saying
now you can actually put any pattern on any other track. It doesn't matter, it will
still play exactly the same. The only reason I'm coloring these n is just we're going to keep all of our drums, e.g. on one track, all of our
base top on one track. It just keeps the
whole project neat. A note as well that when you
click on a pattern here, it actually activates
that pattern. So if I went and started going back to the
piano roll again, you can see I've got all
these grayed out notes again, which I don't want. E.g. if I click on one of the drum patterns in
the Arrange window, it activates the drum
pattern, which I don't want. I want to make sure
I'm in lead one, right-click row, and then
let's get an R melody. So it's like Dan did it, did. It does have a play. Now I've got my
first note in there. I can go back and close this, go to my playlist and just draw that first
bar in and expand it. So it covers 4 bar
and then go back in. This just means that now
I'm going to be able to hear the beat over
the top of it. Scroll to the end. So it's a bit long. So it was a good day that it didn't get the
timing right here. Dentin. Alright. Well that sounds right,
Nazi bad at all. Quite like it. Very simple
but very effective. But it's going to get a
bit boring if it's just repeating over and over
and over, just the same. So we will actually expand
this and repeat it, but we're going to
make a variation to our second repetition. They worry, this will all
become clear in just a sec. First of all, what I
want to do is copy over our drums and bass top. So I want that to repeat. So I'm going to hold
Control or Command on my keyboard and
select all of those. Then hold Shift, and
then click it and drag it to the side. Now we've got a repeat,
and then I'm going to just extend my lead so it's
covering the full 8 bar. Now, double-click it to edit it. And I'm gonna do
the same in here. So I will hold Control or
Command, highlight everything. Or again, you can hit
Control or Command a to select all and
then hold shift. And I'm going to
copy that across. It's repeating from
the second repetition. Now we've got this
red line at the top. You want to get
rid of that, just double-click in the timeline, and let's just
play that through. And I can also select as
well where I want it to play from just by
clicking in the timeline. Now it doesn't actually show
you when you click on it, but you can see this little
thing move up here so you know that it has actually
moved. When you play. It will play from that
point is a shame. They haven't got like some sort of visual representation to tell you that you are actually
going to play from there. So let's play it from the
beginning because I want to again, I'm afraid. Just hum my last
little change here. Then did it it did. That's what I got in my head. I've got to get it out. So I'm gonna zoom in. I'm just using my mouse
wheel and holding control. So good. Okay. I think that's right. So just a couple
of different, sir. So right. Yeah. Right. So sorry for my having
a really do apologize. Okay. Super simple
but really effective. Thus fine with them with that. For now, let's just
close that window. So I'm very happy with
how this is progressing. We've got a decent drumbeat, got nice sort of baseline so far though we're going
to make that even fatter in the next lesson, I'll lead is sound nice. And although we've got a
long way to go before, it really sounds like a
proper track and it's pumping and got tension release and it sounds really amazing. We are definitely
on the right track. Okay, so that's it
for this lesson. In the next lesson we'll
be adding a sub base to our baseline, layering it up. And we'll be getting into some basic effects to make our track work
together and sound. Good. Thanks very much for watching. See you in the next one.
5. FL Beginners Lesson 04 Adding A Sub Bass Layer: Hey everybody, welcome back. In this lesson,
we're going to do what is called layering. Now, why would you want
to layer sounds together? And layering is where
you really make one sound outs of using
two different sounds. Now why would you
want to do that? Well, using this
baseline as an example, and let's just solo
that for a second. So siloing in the Arrange window is almost the same as soloing
things in the chat Iraq. If you remember, over here we right-click, then we go solo. In the Arrange window, you literally just right-click. And then you can see the
other tracks have been muted and just this
one's playing. So with this base, I mean, it sounds nice. It's got really nice attributes, but the actual bass part of it, this sort of very low
frequencies are really lacking. There's not much of them is
certainly not filling me with that nice warm base kind of feeling that you get when you
listen to a nice baseline. So what we're going to do
is use this as one layer, and then we're going to add
another layer to the bass, playing exactly
the same pattern, but that's going
to provide all of that nice warm sort of sub bass. You can do layering with
almost any sound like drums, leads, bases, as we're
going to do here. And it can help you make bigger, better, and more unique sounds. But just a quick caveat
before we get going. The more low frequencies I base, and especially sub bass
frequencies that are in a sound, the more you need to be careful when layering sounds together. I'm kinda throwing
you into the deep end here by layering to
bass sounds together. But by the end of this lesson, you'll understand the process
and you'll be able to layer any bass sounds
together that you like. The other sounds,
lame drum sounds, lead sounds actually
a lot easier to do. So I'm just going
to un-solo our top again by right-clicking
just so you know as well, I didn't mention it,
but you can just mute attract by left clicking. I want to, that's fine. So let's add our other layer. So I want to add another GMS since I'm just gonna come over here and I've still got my
synth classic folder open. So I'm just going to
drag in another GMS. I don't want another bass sound, so I'm going to click on bases, go to analog, one, TE, let's just play that nice sound that now one small
change I'm going to make in the GMS synth is on. The decay. If I play it. At the moment, is very plucky. Some just raising
up a little bit, just a bit higher than
what it was originally to give it a slightly longer, less punchy kind of filter
it by setting it to 0.39%. And then we can just close
the GMS instrument for now. And of course, before
we start programming in a bass melody again, what we need to do is
create a new pattern. So we come up here, click plus, and I'm going to rename
this bass sub n. I'll color it in all
same pinky color so we know it's part
of the baseline, sorry, the red color,
I beg your pardon. And click Accept,
and then Enter. And now we're in our
new base subpattern. I'll quickly just
rename this as well. Color it. Accepts Enter. And just so you know, if I
want to move this up or down, I can just hover over it, hold down the Shift key, and then use my mouse wheel
to move it up and down. Same applies in the
patterns tab as well. So I can hold my shift
key and then use my mouse wheel to move that up just so they're all
nice and organized. And just for the
sake of neatness, let's just do the same
in our Arrange window. Color it accepts. And then again
shift and then use my mouse wheel and
as neatly organized. So what I want to do, of course, is not programming that
whole base pattern again, I just want to copy
this one and then add it to my bass sub pattern. So I'm actually going
to go into an edit my bass top pattern scroll to the
left and then scroll down. And then I can
just go Control or Command a to select all. And then what I want
to do is copy it. So I hold Control
or Command plus c. I can close this window again. Make sure I go to my
bass sub pattern. And then right-click,
go to piano roll. And then just to
make sure that it pastes it at the right place,
I'm just going to click. At the one day he doesn't do anything when I click,
so I have clicked there. And then I'm just going
to go Control V or Command V to paste it in. And then I can close the piano roll editor
and I can just draw in my new base sub layer with its new base pattern or a new base pattern or
copied base pattern. And I can just hold shift as
well and copy that across. So let's just say they
are new bass sub. And in fact, I'll un-solo
that and I'm just going to mute the lead, meet the drum. So you've got a bass top and our bass sub playing
at the same time. The moment it
doesn't sound right? So because we've got
a new base sound and it's got this kind of growled
to it and all sorts say, obviously this isn't working, but the bass sub does have a
really nice low end to it, or listen to it on its own. And I just listened to the low frequencies
part of the sound. It sounds nice and big and
warm. Say that's good. It's going to unmute
or other sounds. Of course at the moment it's
just going to sound a bit messy because these two base sounds
aren't working together. So what we need to do is
we need to remove all of the high frequencies
from the base subset. All that growl and just
leave the sub bass. And from the top, I need to remove any of
the very low frequencies. And then they'll sort
of combined together. To do this, we need to jump
into the mixer section. So again, we can show our mixer by clicking on
that button there. We're gonna be looking
at the mixer in more depth later on at various
points in this tutorial. So don't worry if we're kinda glossing over
certain things here. What's important to know here is that these numbers in
the channel, right? We've got 1234. And then our other channels haven't
been assigned a number again, but as I've mentioned
in the previous lesson, we're just assigning these to a mixer channel and just know that wherever
the kicks on one. So if I, again solo channel
one, here is the kick. If I say the channel to just
hear the clap, et cetera. And of course, again, I
can meet these if I want. Now, the moment it all
looks a bit confusing as we just got grade tracks
and they're not named. So you can, if you
really want to select the channel first
and then right-click, go to Rename color icon and
you can do it all in there. So I could type the cake and
change the color to yellow. And I'll just right-click
to cancel that. But there's a much easier way. So if I go to the channel
rack and select all of these, then go to my mixer. And then from where I
want these tracks to go, say, I want this to be from channel one because
that's the kick. So I go right-click channel
routing and then I want to select route selected channels
starting from this track. There we go. We've
got our mixer, and it's got all of exactly
the same colors and names as what we've already
got in our channel rack. Just a nice, easy way of
transferring the colors over. And it means everything
now is completely color-coded throughout
our projects, right? So onto what we're doing, which is layering
two sounds together. So we've got our
base top Sounds. So I'm just going to
select this channel. And then over here on
the right-hand side, we've got our slots or inserts for this
particular channel. So I'll just make it a
bit smaller so we can see the menu and I click, and then I click on
slot one and select the fruity parametric EQ to. So all these Insert
slots can have different plugins on so it doesn't have to be an EQ light. What we're going to use,
it could be like delay or reverb or distortion or
something like that. And you can put them all in
the order that you want. And this will affect
just this one channel, just our base TOP channel. E.g. if I want to add an EQ, which we will eventually, but I'm not gonna do it
now, but just e.g. if I want to add an EQ to our bass sub channel
and I click on it, you'll notice that the
slots are empty again. And that's because we're
now on the base subchannel. And these slots pertain to just see whatever
channel is selected. So if I go back to the top, we can see our fruity
parametric EQ to. Okay, so let's just
make this a little bit bigger so you can
see what we're doing. And let's also just solo by right-clicking on GMS
based TOP channel. Say what you're seeing here with all these red lines
and everything and the purple lines is the frequency, or more specifically, the fundamental harmonics of the sound we're
not gonna go into. Harmonics are right now.
Don't worry about that, but just know wherever
you see lines, that's where you've got sound. So an EQ is really like
an advanced volume fader. So with a volume fader,
when you turn it up, you'll sort of turning all
the frequencies up or down. Equally with an EQ, you can actually choose which of those frequencies you
want to turn up or down. And this enables us
to do many things like make sounds brighter, e.g. or you can correct issues with a particular sound by
removing certain frequencies. And just say note. Once
you've moved the point, you can right-click
and just go reset. Put it back to its
original position. And in this particular case, we're actually going to remove the low frequencies
from this track. Now we don't want
to use it as it is. So this is what's
called a low shelf. So it's kinda like a
literally a shelf. It goes down to a flatline.
We didn't want that. We actually want to cut. So you want this
curve to continue on down and completely
remove the low-frequency. So to do that, which is
right-click the point, go to type, and then we're
going to go to high-pass. And you can see that we're
actually now cutting all of the low frequencies and
only let in the high-pass, or sorry, the higher
frequencies through. But it's not really
steep enough. So again, make sure we got 0.1 hair and just
right-click, go to order. And we're going to choose
steep eight sets like the steepest curve that
you can possibly have. So let's just play our sound and we're going to
cut any low frequencies out. Just bear in mind that when
it comes to low frequencies, you really want either a decent
pair of studio monitors, as in speakers, or you want
a decent pair of headphones. Most headphones will be able
to produce the low end. So you should be at a here. What I'm doing here,
as you can hear, the further I move
it up, the more low frequencies
we're removing from the sound now we don't
want to write you remove all of the
low frequencies. Some of it is quite
nice. So you want all the mid-range
body of the sound. We just want to
take out any sort of bass sub frequencies. Say somewhere about there
is, I think perfect. Don't want to go too far
and also don't really want this sort of slow dip here. I want to have that more of
a almost like a right angle. So I'm just going to
grab points to now. Don't worry if this isn't
making amazing sense right now, we'll eventually don't worry. But as you can see,
what I'm doing now is just making that
curve a bit neater. And while we're here, let's
just brighten up the sound. So I mentioned that
we could Bryson it. So we're going to use 0.7,
which is set as a high shelf. We're just going to give
it a bit of a boost. So let's just play it. So I'm just going
to bypass this. That's without any of our
processing, our width. I can here, we've basically
removed any of the sub bass, sort of muddy frequencies and just brighten
it up a bit more. Even brighten it up
a little bit more. Just copy what I've done there. And for base top,
That's absolutely fine. Now we need to go
to our other layer. So we're going to close that. Go. Select bass
sub in the mixer, and then again add another
fruity parametric EQ to. Again, Let's just make
this a little bit bigger. This time we're going
to do the opposite. So we're going to cut,
but we're going to cut from the high-end ON. Let's just close that for a sec. And I want to un-solo my GMS based up and solo
my bass sub sum, only listening to that, then I can just click on the F0 parametric
EQ to bring it up. So we can see most
of the frequencies are some concentrated
down the low end here, sort of more dense colors. So what we wanna do is
take 0.7, right-click, go to type, I'm
okay to low-pass. And then again, we want
to make this quite steep. So we're going to
right-click again, go to order, and
then steep eight. Hannah's just play. So you want all that nice base
and a sub bass frequency. But only that. They want any of this sort of more mid-range kind of sound. Save about those, perfect. Now let's, he's bands
here as well just to I think that all a
bit more consistent. Say somewhere about
there is perfect. So I hope you can
hear that properly, but you do need sort of half decent headphones or speakers. We had Herat say,
let's just close that and let's un-solo this. And let's just mute all other
sounds for now because I want to hear just all based top and our
bass sub together. So I'm going to start
with just the base top. So everything is now muted
apart from our base top. Then I'm going to add up a sub. And you can hear it just adds that warmth to our base top. So let's just now bring in
the rest of our sounds. Okay, so that is how you
lay it two sounds together, or specifically to bass sounds. Like I say, most other sounds
are a bit easier than that, but you can definitely give
yourselves a pat on the back if you manage to follow
that all through properly, because it's a fairly
advanced process. Layering two sounds
together like that. Now, again, don't worry too much if this isn't all sort
of sinking in straight away as you progress
through the course and as you work on your
own productions, all of this sort of thing will just start to slot into place. It's just one of
these things that can take a bit of time
for it all to work. But don't worry, it's all good. We're here to guide you and we're going to get
you through this. And you're gonna get
making amazing music. Okay, so that's it
for this lesson. Thank you very
much for watching. I'll see you in the next one.
6. FL Beginners Lesson 05 Layering The Lead: Hey everybody, welcome back. Alright, so in this lesson
and the next lesson, we're going to do two things. One is we're going to thicken up this lead a bit by adding
another layer to it. And secondly, we're
going to add a bit of variation to the lead melody, which will be kind
of like making a delayed up pattern type thing. Just unmute my lead. The nice lead sound that we got, we're going to just lay
that up in this lesson. And it's much easier to
do this rather than doing the baseline as
there's not really any base frequencies that
we need to worry about. And it's really just about
picking the right sound. Okay, so first off, as always, let's create a new pattern by coming up to the plus button. School is lead layer. And let's choose our lead color from the color palette except, and then remember to hit Enter. Instead of dragging in a new
GMS from the browser window, we can actually just clone the lead layer GMS instruments say if I just right-click
this and go to clone. Now this is basically like
duplicating the instruments. So you can see that you've got original GMS lead and now we've got another
one underneath, which is just labeled
with hashtag too. And it's basically
duplicated the instrument and it's kept all
the same settings, the same lead sound. And also it's kept the
color we've chosen. Now let's just
rename this quickly. So right-click Rename and color. Just call it GMS
lead layer answer. Now we want to copy
the lead melody, so we'll click on
the lead O1 pattern to select it and make sure it is highlighted over in
the pattern picker. Let's go into it by
double-clicking. Let's make it a bit bigger. Zoom out a bit, and then
I'm just going to go Control or Command
a to select all, and then Control or
Command plus C to copy it. You can also, by the way, I
didn't mention it before, but you can also come up to
the Edit menu and you've got your edit options here
so you can with it all selected up here and go copy. And then later we can
paste it as well. Say that's fine,
we've copied it. Now it needs to select
my lead Layer Pattern. Right-click on my
new instrument, the lead layer, the GMS, the layer, go to piano roll and then go
Control or Command plus V. Or again, you can just
go Edit and then Paste. So now that we've got our lead
Layer Pattern duplicated, we want to just make sure it's
selected again and then we can draw it in in
our main window. Let's just very quickly
rename the track and color it pink, except ends. None were all sorted. Now we can hear it, although obviously it's going to
sound the same because we've cloned the
instruments as playing the same patch as the lead. As you can hear, it just
sounds like it's louder. And if I solo that you'll
hear it again as well. It's just playing the
same thing at the moment. Now we want to change that
to a different sound. So let's just click on our
lead layer to bring this up. By the way, if you
want to stop this from disappearing every time you
click on a different window, you can actually click on
this little drop-down menu here and just tick detached. You'll see now
it's properly text not gray ticks are now when I click off it in
any other window, it just stays at the
forefront so it doesn't keep getting lost behind Windows
when you click off it. So now what we're gonna do is
basically pick a nice sound that suits the track and works with our
original lead sound. Now, bear in mind
when I say works with our original lead sound. I mean, it should
complement it and not detract or overpower
the existing lead. So it really should just work well with the
existing leaders, shouldn't be so different
that it just kinda clashes. So let's just mute everything
else at the moment, Apart from art to lead layers. So sorry, our lead O1
and our lead layer. And then we're gonna go through and select a different sounds again on the Presets Library,
I'm going to go into leads. And since now I already
know which sound I want to pick because I've
already done the experimenting. But just be aware
that it's not really like this in real life where you just sort of know exactly which lead is going to
work with another lead. You have to experiment and try different patches that are going through the process
of trial and error. And it's important to
know as we're obviously just kinda going through
and picking sounds. And it seems like they
will just work together. But that is only because
I've already gone through the process of triangle
the sounds out. So when it comes to making your own tracks,
they'd be put off. If it doesn't work
out right away, it does take a bit of time to find the right
sound for the job. Anyway, I know which one I want. I want super saw. Scroll down a bit. It's super small t0, so I'll just click on that and it loads the patch and answers. Just play it. As you can hear. It's
a lovely thick sound, but it is a little bit too loud and it needs probably
tweaking a little bit. So let's just close
the GMS instruments and let's just balance
out the volume a bit. So I'm just going to use
a volume control here. Just to turn it down a bit. And let's just play it
with the rest of the mix. So I'm going to unmute
the rest of the track. And I'm just going to mute
it a couple of times just to hear it with and without the new sort of elements
that we've just made. So it's a nice,
lovely, thick sound, but at the moment it really
is kinda making the mix sound a little bit
on the messy side. It's kind of like a bit
of mush that we're adding to the middle of the track or the mid-range frequencies
of the track. And it's somewhat masking the other elements that are already in this track
like the baseline, particularly the
pluck the baseline is making that will just
sound a little bit messy, which we definitely don't want. The simple fix in this case, is that I can just
raise the pitch of this up so it's higher
up a whole octave. So let's just go and try that. So I'm just going into the new lead layer and then Control or Command
a to select all. Then hold control or command and hit my up arrow to move
it all up and Octavian, and let's just play that. So now I've raised it up. It's lacking a bit in volume, so I'm just going to
turn it up again. And you can hear
that the baseline, everything in the mid-range of the tracks or stays
nice and clean, nice and crystal you can
hear it very clearly, which is exactly what we want. And the lead layer
is just adding a bit of thickness
to the other lead. Now I'm just going
to bypass it a couple of times so you can hear without so it's not like he's making a
massive difference, but it is just thickening up that lead layer and making
it sound just a bit nicer, a bit thicker, and
it fits really well with the rest of the
track is not masking anything. It's not taking anything away from anything
else in the track. That is what we want. Okay, So that's it
for this lesson, pretty easy one there. The next lesson we're going
to do a similar thing, but we're going to
create our own kind of like arpeggiator pattern to add a different texture
to the lead sound. Alright, thanks for
watching guys and girls see you in the next one.
7. FL Beginners Lesson 06 Making A Lead Arp: Hey everybody, welcome back. Alright, so in this lesson
we're going to make an arpeggiator kind of
pattern for this track. Just add a bit of variation. So we are still obviously in content creation
mode at the moment. But in just a couple of lessons, we'll be starting
to actually arrange our track into a proper song. Now very quickly, a bit of
an oversight on my part, but I haven't actually
mentioned saving your project. They probably figured
it out already. But obviously to save a
project, just go File, Save As pick
wherever you want to actually save the projects
on your computer. If you're just being
lazy about it, you can just save it
on your desktop, e.g. just go create new,
make a new folder. Fl beginners touch e.g. go into and then just call it whatever you want
really to be fair. And then click Save. And then from there
you can just go File Save whenever you
want to update it. You can also save a
new version which basically leave
your original save alone and create a new
version just in case something funky happens with a project like it
corrupts or something. And then you need to actually go back to a different save. But for now, just saving,
it is absolutely fine. Okay, right, let's
get on with it. So I'm going to try and
start to just speed up a little bit here just while we're going through
the same process. So again, we're creating
another bit of content. So you want to add a
new pattern lead up, and let's color it in a slightly
lighter pink this time, just to make it a bit
different. So there we go. Plum accepts and
then enter again. So again, Clone, the last since I made
the GMS lead layer. So right-click clone, rename it. Lead up, and I'm just going
to change the color so it's that new sort of
light pink color. Enter. And then also, I'll just quickly do this. Lead up same light pink color. Except Enter. Again to copy, we want the
same, almost the same pattern. We're going to modify it
a bit, but we want to select the lead layer or the lead one. Actually
it doesn't matter. Go into that midi and then Control a to select all command a
if you're on a Mac. And then Control or Command C to copy it, which I've just done. They're not going to
make sure that I've got my new pattern selected. Lead up, right-click on the GMS, lead up, good at piano, roll and Control or
Command V to paste that. And then I can
draw it in because I've got this selected,
draw that in. There we go. So what
I want to do is just change the sound
that's being played. So I'm going to click on GMS, lead up, go to the
GMS instruments, go to my patch bank or
my presets library, I should say good or leads and since and again, I
know what I want. I want to have one called
crunch, crunchy TE, sounds. Sounds like that. I'm going to close my instrument again because you've
got the patch selected. Now I'm going to go into this lead arcs at
the moment is just basically playing
the same pattern as everything else. So
I'll just play it quickly. Solo it. So let's go into this
and modify it a bit. So first of all, it's just a little bit
too high at the moment. So I'm actually going to just control a to select all and then hold Control or Command
and my down arrow on the key or you
can just drag it. I'm lowering it from A6, A5. Nice little plucky sound. Let's just zoom in a
bit because we're gonna be modifying this
now, just say no, you can actually zoom in
vertically as well if you want by clicking and dragging on this little control
point up here, that helps you sort of just
remain a bit more focused. It's a bit less confusing sometimes when you're
really zoomed in like that. So what I wanna do is
just modify this a bit. This have the, not just
the lead up playing, so I'll un-solo that. And then I'm just going to mute the leads and leave the rest. Say I can sort of make the pattern with the
rest of the beat. So let's double-click on
the lead-up to go into, again, scrolls at the beginning. Say I'm just going
to mess around and create what I think
it'd be a nice pattern. So again, shorten this one. So it's just a bit
of a variation. We're not really doing
anything groundbreaking here, just slightly changing the
rhythm of our lead melody. And it's obviously got that
plucky sound rather than aka constant note like
the other team leader. Say, let's just carry on. Do the same thing. And again, let's just copy the same sort of thing what we did in the
last repetition. Say, that's pretty good, we'll leave that like it is. So nothing too crazy. I just want to change
this last one I think. Did it ding, ding, ding. Let's try that. Okay, so we've got a nice sound, but we want to
thicken it up a bit and make the delay just a
little bit longer. On its own. Unmute everything. Actually keep the
leads off for now. Tidy up a little bit as
well. It sounds nice. It's not so bad, but it's a
little bit weak on its own. So we're going to thicken up. We're going to make that
delay that's on there. You can hear that
when I solo it. It's got this kind of
delay effects on there. I don't want to make that a bit longer and a bit more prominent. So the delay that you can hear
on there at the moment is coming from the actual
GMS instruments. So what we want to do is we're gonna turn that off
and we're going to use a dedicated delay plug-in, which comes in fL. So let's just turn off the
one in the GMS lead first. So let's click on
the GMS lead up. And you can see over here we've got these different effects. So one of which we want
to turn off is echo. So if we click on that, it
brings up the Echo parameters. And all we gotta do to turn
this off is unhighlight glue. And you can see the
little light underneath it is now turned off. So if I just play this so you can hear the
delay has gone, but there is a bit of
reverb on there as well. So let's click on reverb
and unglued that as well. Okay. You can hear it's
completely transformed. It's very, very
dry at the moment. Now, don't worry, we
are going to be sort of reapplying these effects by just needed to turn them off
first in the GMS instrument. And now we're going to add
them as separate plugins. So let's just click on our mixer to bring
it to the forefront, which is gonna make it
a little bit smaller. We can see here we got up to channel seven from
the channel racks. Say I'm just going to
select these last two. So my mixer and then
click on insert eight, right-click and then
go channel routing and then route selected channels starting from this track. Now we go, we've
got 78.9 and it's automatically change the
routing number as well. So whenever against
channels 8.9 in the mixer for our
new instruments. So we want our lead up. So click on that, then we come
over to our Insert slots. And of course there's
nothing there yet, so I'm just going to
make this a little less wide so we can see the menus. And I'm gonna go slot 1.2, the delay, I want
fruity delay two. And again, we can stop
this from hiding behind other windows by clicking the little drop-down arrow here and then selecting detached. Now it won't disappear. Let me just quickly play that. You can Harris adding
loads of delay. So we don't quite
want that much. Am you also want it to have
a sort of stereo effect. So one very quick
way of actually just getting this to work
is go to Presets, click on that, and then
just click stereo effect. And it just makes
it a lot more fun and nice to listen to. And it's been panned
left and right. Okay, that sounds cool. Let's just play it with
the rest of the mix. So let's just go to our
mixer window and unmute. I should just leave our leads mediated and just unmute
the drums and the bass. So that sounds pretty cool. We might want to change this
slightly so if you want to reduce the amounts
of delays, so again, I'll just mute the rest so you can concentrate
just on this, but we can change the
amount of the delay by changing the volume
in the feedback setting. So I'm going to just turn
this write down e.g. and you basically
only get one delay. As I turn this up, you get more and more delays. So be careful if you
go all the way up, it's going to keep delaying
for ever basically. And it will just create as
big fee Becky sort of mess. So we want somewhere
probably around about the 38 per cent level. You can actually see
the percent up here in the hints panel as well. Just say no and that's the
same with any setting NFL, whenever you're changing it, it will actually tell you over there what you're
changing it to. Alright, so let's go for
about 30, whatever, 36, 38, We'll try that for now. Let's just close that. And now I want to thicken
the sound of this up a bit. Now when we say thicken, we really mean we're
going to change the tone or the
Tambora of a sound. Now, you can only go
so far with this, but there is a great
plug-in in F L you can use to do this
called a destructor. So I'm just going to
load that into slot to say, let's click again. I'll just give myself
a bit of room. Click on slot to go to
distortion and go to destruct. Or again, we can stop that from being hidden by
going to detached. Say destructor is basically what's called a multi effects, meaning you can have
multiple different effects changing the signal
at any one time. So in this case, the initial presets
that loads up when you first load up the plugin is a distortion unit
followed by filter, followed by a chorus effect, followed by a speaker effects. So let's just play that. And you can sort of hear it
in modulating the sound. And if I just cycled
through the presets, you'll be at a sort
of see this update, two different variations
of different effects. All sorts of funky stuff there. And you can hear that it really changes the Tambora
or the tone of the sound by adding
this sort of level of distortion and other
effects mixed in. But one thing to note
here is that it's really badly affecting the delay. So we've added a delay and
that's before destructors. So basically what's
happening is we've got our original
signal from GMS, then it's going through
a delay plug-in. And then that
original signal with the delay is going
through destructor. And because the structure is kind of squishing
the sound loads, it's really affecting the
delay in a negative way. You can hear it afterwards
and stuff like that. So in fact, let's just click
on here and it selects agro. This is actually the
preset we're going to use. One thing that I
want to do though, is just turn down the outputs
of channel one a bit. Alright, so come down
here, turn this down. Turn down the output of the second distortion
unit as well. Now you can hear there.
Obviously. You can hit the delay clearly. And it sounds really weird. It's got that weird
sort of buzzy kind of thing going on now
that we don't want. So what we need to
do is we need to change the order
of these plugins. So we need the distortion, this destructor to come first, and then we delay that signal. Then we won't be negatively
affecting the delay. We can just change
the order very simply by hovering over it, holding Shift on your
keyboard and then using the mouse wheel and
just move it up one, and then it just
switches places. You can do it with the
fruity today if you want, you can just hover
over it, hold Shift, and then use your mouse
wheel to change the order. So now let's have a play. Just changing the premises
very slightly against say, sound in pretty decent. You can hear that delay now
sort of sounds much better. You've got that initial screech, but that's only part
of the initial sound. So that's fine. Let's just
go back to our playlist and let's unmute everything
and have a little listen to. Just meet leads though so we can really hear
what's going on. So one thing, that initial kind of scratchy sound that
we've got on here, just say that by
right-clicking it. I think we can probably get
rid of that by going to the GMS lead up. And then once we're in here, we will just turn down this releases, okay,
just a little bit. It's going to help, not completely get rid of
that scratchy sound, but it will help quite a bit. And then we'll also again
see change the decay amount. So just mirror this. You can really hear
that it's changed the tone of the sound. So let's just close
that for a sec and un-solo it meets our leads. Sounded much better.
Say that's fine. It's just turn it down a
bit so it's a bit loud now. Okay. So we've got our lead
up pretty much sorted. I would say I think that delay
amount sounds quite good. Possibly be a bit
longer, but that's fine. You can have it a bit longer if you want to in your track. No problem. But for now is
sounding pretty good. Alright, so that's
it for this lesson. We've got most of the content
of our tracks sorted. We've obviously got
quite a way to go. We got to record some
vocals to go in there, and we need to
arrange it and add loads of SFS sounds and all
sorts of stuff like that, which we're going to start
doing in the next lesson. Thanks very much
for watching guys and girls See you later.
8. FL Beginners Lesson 07 Bare Bones Arrangement: Hey everybody, welcome back. Alright, so in this lesson
we're gonna get the sort of bare bones arrangement dump
now very, very quickly. Before we get onto that, I just want to show
you something quickly. I probably should have
shown you at the end of the last lesson, but
completely forgot. See, so I'm going to
show it to you now. And that is when you're
in the mixer and you got your track
selected here, we just added a destructor plug-in and we've
added a fruity delay. So obviously at the moment, let me just say this as well. In the mixer with it selected, you can actually bypass these
effects if you want to, you to hear what it
sounds like without them, without the destructor plugin. And then with. So you can just hear the
difference between what it was, which is fairly weak sounding, and then with the distortion, which is obviously a lot
fuller sounding, of course, you can bypass any
plug-in that you want and have it
without any effects. And so just a quick one, you should know that because
it's important to check whether the effect you've added is actually doing
something positive to your mix rather than
something negative. And that's how you do it.
You just bypass the effects. Okay, moving on. Okay, so let's talk a bit about arrangement because it's
super, super important. And it's much more than just
putting things in a verse. Chorus. Verse structure is not enough. Keep the listener's attention. You need to create what I
call a dynamic arrangement. And by that, I mean, it has to have ups and downs and energetic bits,
relaxed bits. It has to have tension and then release from that tension. It needs a sense
of progression and always moving forward
is just not enough. If you just have a
verse and then you have a chorus and
then another verse, et cetera, although that is
an important part of it. And the first stage which
we'll do in this lesson, but it's much more about how you join those
sections together. What you do in each section
to make it stand out, how the energy changes and
moves throughout the song. And from section to section. If you break this
down, there are really three stages to making
a dynamic arrangement. The first is getting
the right structure, and that is the verse
chorus verse thing that we're gonna
do in this lesson. But that structure won't have
much movement or feel very alive until we have completed
the next two stages. The second stage is adding ES effect sounds
like cymbal crashes, rises, impacts,
scenarios, et cetera. Which will help us transition from section to
section and provide some tension and then release and also a
sense of progression. Then the third stage
is using automation to help the track evolve
and change over time. And it also plays a part in creating tension
and release as well. And that sense of
the tracks sort of building in energy and evolving. So let's start the bare
bones structure of our track and I'll
explain more as we go. So an important
thing to know when it comes to song
arrangement is that most things happen in sort of blocks of 8 bar or 16 bar e.g. are section that we've
been working on, which will end up
being our course, is 16 bar long. You just un-solo that. Zoom in a bit, just holding Control or Command and
use my mouse wheel. And we'll talk about
more about why that is important in a second. Just going to start
arranging the track though. Let's just give ourselves
a little bit more rooms in our playtest window. Let's just make that a bit bigger so we've got a bit
more space now I can still access my channel rack or the mixer if I want to just by clicking on them to bring
them to the forefront. And then I can just click with a right-click and
then empty space. Otherwise, I end up
drawing something in the playlist to bring
that to the forefront. So we don't want to start with the most energetic bits
of our track, the course. So let's move this
over and we'll add a verse and a
pre-chorus to it. Now I've only got this in my projects at the
moment is I could hit Control or Command
plus a to select all. But if I want to select
multiple events, I can actually hold the
Control or Command key and then click and drag. And that will also select whatever I draw the
selection box over. And I'm going to zoom out a bit. I got my 8 bar selected, and I want to move this along. So let's just kinda
move it full bars, sorry, 8 bar at a time. So that would be 16 bar in and it's just move
it another 4 bar. So it starting on bar 21, a KNN. As I mentioned, this
is the chorus section right here with
everything going on. And we want to start off the
track a bit more gently. So we'll start it off with a verse with just the
base top playing. So either click
on bass top here, the actual pattern in
the Arrange window, or you can click on base
Topsy select that person. And I'm just going to draw in four blocks of my
base top pattern. So that's kind of how
the song will start. Opposite needs effects
and it's going to have a vocal in
there and stuff later, so it will fill it out. As I said, we are
getting the bare bones of the arrangement, just sorting out where
everything's going to go. But as I said earlier,
we all just sorting out the bare bones and just figuring out where
everything's going to go. And let's just remove this red loop region by double-clicking in
the timeline up here, I'm going to have
this first 8 bar, say from bar five to 13 at
the moment as my first verse, and then 13-21, the next 8 bar is going
to be a pre-chorus. So diverse in a song is really used to sort of set the scene and provide the listener
with some kind of context about the
theme of the track. And it doesn't matter
whether it's wrapped trap, hip hop, EDM, it doesn't matter. It does not need
vocals to be averse. It could be purely
instrumental and still, it will sort of provide the context of how the
track is going to go. Now a pre-chorus,
as you'd imagine, a sort of lead into the chorus. Say, depending on the type
of track, this can differ. So if it's dance music, e.g. this would be where you have
the buildup section and pop. It's usually where
you have some sort of energy buildup kind of section and a variation or a
repetition of the vocals. And there's like 1,000,001
ways of doing this, but those are just
to sort of rough. Examples are chorus at
the moment is only 8 bar. So let's actually select all of that by holding
Control or Command. And then we're going
to hold, Shift, click it and drag it over. So now we've got a full 16 bar. And again in the playlist or arrangement window, to
de-select something, you just want to right-click anywhere in the blank space
rather than left-click in, because otherwise
you end up drawing in lots of stuff
that you don't want. Of course is 16 bar are
first verse is just 8 bar, and our pre-chorus
is 8 bar as well. Now as fine, you can mix
and match the two amounts, 8 bar and 16 bar. You could also have averse, which is 16 bar. A pre-chorus, which is
16 bar, is totally fine. You can do that. It's
just in this track. That's how it's going to be. We've got slightly shorter
versus than our course. Again, there are 1
million different ways of arranging your tracks to get maximum emotion or dance
for energy or both. Here we are covering the
basics and of course, enough to make this song. So as mentioned, the verse
is just going to have this sort of top
being played in it, like with the vocals and
some sounds and stuff. And in this pre-chorus
section, which is here, I won't see start
bringing in the drums, but I don't want
to actually have the full drums
coming in like so. I'm going to delete those,
but what I do want to do is just have the
kick coming in. So rather than making
a new pattern from scratch and then just
programming in the kick, what I can do is
actually duplicate the drums pattern or
cloner, I should say. So again, right-click
and then clone. And I'm just going
to rename this. Just kick, and I'll just color
it slightly differently. Let's go for a more
orangey color. Tan. There we go.
That'll do. Hit Enter. Now with this pattern selected, I'm gonna go to
the channel rack. And obviously it's
got the same pattern as our original drum loop. So if I draw that in right now, it just sounds like the normal
drums are playing is not, it's our new kick pattern, but we do need to modify it. So we're gonna go to
the channel rock again. We're just gonna get
rid of the claps, get rid of the hats, and just leave the
kick on its own. And I want that for 4 bar, okay, and then once we get to the halfway through the
pre-chorus section, I want to actually
change this up again and have my kick and the clap, possibly the small hat. So again, I'm going
to just select the drums pattern as this one with all of the drums,
I'm going to right-click. I'm going to clone it. Then I'm going to right-click
and change the name of it. Call it kick clap hat. And again, let's just
change the color again to something a bit different
so we can know what it is. Hit Enter, and then
with this selected, we can just draw it in here. And then we're gonna
go to our channel rack and modify it. So again, you got the
full drum pattern. I want to take out my open hat. And let's just play this,
see what it sounds like. Okay, so as you can see, we're sort of gradually building up the energy of
the track just with simple techniques like choosing
when to bring in drums. We start with just
the kick on its own. And then halfway through
the pre-chorus section, we bring in the cup
and the small hat. Then of course goes
into the full track. Which of course needs
balancing and stuff. But let's just zoom
out a bit actually. And I think we'll select both of our lead ups by holding Control and then
clicking and dragging. And I'm going to
move them over so they don't start straight away. So when we start here. We've got our full sub base coming in and we've got
our leads coming in. And then later on, we've then got our lead up coming in as well just to make
things more interesting. So let's have a look
at what's going on. I had to say every single 8 bar, we have a change. So we've got our
baseline or base top for the first 8 bar. Then we've got our
drums coming in. And then another 8 bar along. We've got the full
chorus coming in. And then 8 bar after that, we've got the lead up
coming in and then 8 bar after that we drop everything
out apart from the lead up. So you can see a
change every 8 bar. So basically the rule is this, you have some sort of
change every 8 bar, but every 16 bar, you have a pretty major change. So here you can see that reflected in for
the first 16 bar, we've got just the base top, we've got the drums coming in. But really the big change
happens when the chorus hits. So that's a big change. And then 16 bar after that, the course ends,
everything drops out. So you have a much
bigger change every 16 bar and a more sort of
minor change every 8 bar. Now one thing I'm
gonna do is I'm just going to duplicate this. Lots say I'm going to
select everything, but I will hold Control
and just select this lot, say minus the lead up. I'm gonna hold shift
on my keyboard and click and drag this over. So it starts are repeats again from this
point here, bar 45. And then I think we'll just make this last section a little bit longer by
selecting from bar 69. So that's just like
the last 8 bar of the cross-section hold Shift again and just
duplicate that over. So we've got a slightly longer
chorus section that time. Just for visual representations. So you know where we
are in the track. I'm going to add a marker track. And to do this, you
hold Control or Command plus t. Now you can see that this sort of extra spaces appeared underneath
the bar numbers. And I've got this
auto marker here, which I can move about by
clicking the left-hand edge. When you get a double arrow, click that and you
can move it around. And I can also right-click
it and rename it. I'm just going to call this
verse one and then move it to the very
start of our track. And I'm just going to
quickly add in these markers just so we know where we
are and what's going on. And to add a marker,
it's really simple. I just right-click up
here, good at marker, pre-chorus, hit Enter, and
then we've got another marker. Again, I can just
click the Add Marker. Course one should really
be pre-chorus one as well. And all I'm gonna do is
go through and label the sections so we know where
we are. Then there we go. I've just labeled everything so we know we're not
talking about verse one, we know we're talking
about this section. We're going to talk about
the pre-chorus one, we're talking about
this section and so on and so forth through
the rest of the track. Okay, so it's all neat and tidy. In the next couple of lessons, we'll start adding
some movement to this track by adding SFS sounds. Thanks very much for
watching guys and girls see in the next one.
9. FL Beginners Lesson 08 Adding SFX: Hey everybody, Welcome back. So in this lesson, Let's
add some more movement to our track and make it
a bit more exciting. So FL does actually come
with some okay SFS sounds, so I'll just show
you those quickly. So under Packs,
SF x. Here we go. We've got all of
these sounds here. And some of these
sounds are okay, but they're not also
completely Great. So what we're gonna do is
for a lot of the sounds, we're going to use samples from our very own house tools one and a club tools
one sample pack. Now, don't worry, you don't
actually need to buy them. All the samples we
use in this tutorial are included in the workforce that come with this tutorial. So to get to the work files now, I presume you've
actually already unzips or uncompressed
the files. Otherwise you wouldn't be
watching these videos. So when you go into that, you have the main BTP
FL beginners tutorial and you really want to
drag that entire layer on. But like I say, you've
probably already done this. And wherever is the IV
extracted your workforce to now I've just put mine on my desktop just because it's
easy as an example, what was the you can put them wherever you want, no problem. But once they are extracted
and onto your computer, then we can go to FL. What we need to do is actually specify where
they're going to be. So at the moment we can see that there's not really any way to find the files NFL. So what we need to
do is come up to this little drop-down arrow here and go to configure
extra folders. And this is gonna give us
the option to actually specify where our
audio samples are. So I'm going to click
on an empty box there. And I'm going to
go to the desktop. I'm just going to select a BTP FL Studio
beginners tutorial. That's fine. And just click, Okay, now you can see this is just
updated and we now have our BCP FL beginners tutorial folder there.
So I can close this. Now when I click on it and go to the workforce and
the audio folder, and we go all of the samples
that are in there now again, that'll be bigger in your version because I
haven't added all of the audio samples
to it as we're only halfway through the tutorial. But then worry, that's
fine. Just say, you know, you follow
the same process. So let's say you've got audio sample somewhere
else on your computer. You can just go and configure
the extra folders and just add as many folders
to fL as you want. And then it'll be listed
here in the browser. So we're going to start
with BCP H t1 crashed 15. Now it's really important
to note here you have two ways of playing
audio samples. Nfl. You can either
literally just drag a sample into the Arrange window or you can use patterns like we've
been doing for the drums. And it then becomes playable, which means that you can use
the step sequencer, e.g. to tell it when to play and you can play it
on your keyboard. So it's mapped to
the Musical keys on your keyboard as well,
like I showed earlier. But when you drag audio directly in to the
Arrange window, it's not playable, meaning it's just one hit and is not
playable on the keyboard. And you also don't trigger it using the step
sequencer that is kinda like the sample or whatever the audio sample is stuck
and it's natural pitch. You can't really
change it easily. Well you can, but that's
for another time. So why is that important? So some sounds like s effects sounds don't
need to be playable. You won't need to
change the pitch, and you don't need to
use a step sequencer to make a rhythmic
pattern out of them. So we can just make
things easier for ourselves by literally
just dragging them straight into our projects
and not have to bother actually setting
up a pattern and all the rest of the pillow
lava that goes with it. So note, when you do
drag something in, it actually creates
an AudioClip. You can see here, this is
the pattern pick and I normally you see this which
is all your patterns. And then if you click here, you see your audio clips. So these are separate from patterns because
they're not using a pattern to trigger it. And note that it works in the same way as in
the pattern section. So in the patent section, I select a pattern and then
I can draw that pass in n. Well, it works the same way in the audio picker or
the audio clip picker. You select it. And then I can draw in multiple versions of
that same audio sample. And of course I can
just copy it by holding shift if I want to, like you can with anything
else in the Arrange window. So one thing I'm gonna do first, because that's gonna
be really loud compared to the
rest of the track. So I'm just going to
turn that right down. Still a bit too loud. Say something like that
is kind of a k. Now, what I wanna do
is basically have a symbol pretty
much every 8 bar. So I'm just gonna
kinda draw them in. Probably don't want one there. We're gonna put a
different sound in there. Saying just drawing these
in pretty much every 8 bar apart from the
start and the end. And as I say, we're going to
have a different sound here, like an impact sound. So what a crash cymbal
really does is it just adds impacts to the
start of a section. Obviously you can do other
things with them as well, but that's sort of
like the main purpose, especially in sort of
like pop and dance music. And it just really helps
the section stand out, especially as you'll see
in the next lessons where we start adding movement and rises and what
sort of thing. Once you get to the end of that, you built up all of
this energy and then you need a nice big release. So that's what a symbol
really helps with, or cymbal crash,
or I should say. So you're going to have energy
building up and up and up. And then it's going to crash. Just really adds impacts
of that section. So it's one of the sort of read basic but really powerful tools that you've got
at your disposal, just literally using
crash symbols. Okay, So that's pretty
much where I want all of my symbols at the
moment. That's fine. So let's add in the next sound. Let's go for a riser. Now, I can just make this
a little bit bigger for a reader to read all the
text in the browser. So let's just add this one. This is the BCP H t1, which is that
finished FX riser 16. Okay, let's just drag that in. Stick on an empty track and we'll just stick
it near the beginning. Say let's just zoom right in. And that's about
perfect. I want it to basically finish there. So this is gonna be like an
intro to the actual track. And let's just
shorten this off by 1 bar of four beats as well. And again, let's
turn it right down. It's tending it down
a little bit more. Okay, So that's fine.
Now we will make that a bit smoother in the next
lesson where we add all summations this because
obviously it's sort of starts quite abruptly, but
didn't really want that. We want that to have a
more of a gentle fading. But that's fine for
now. No problem. Okay, so that's cool. Let's add in another crash. This crash has even more impact than the other one
is quite nice. I'm just dragging that in
again to an empty track. And just for the
sake of neatness, I'm very quickly
going to go through and color my SF6 sounds. I'm not going to
bother renaming them, so I'm just gonna go
and change color. I'm going to select a
sort of green color. I don't know why, but
I always use green for my special effects sounds do
the same for all of these. And then we could just change the color of these
as well as well. Make it all neat and tidy. Okay, good to go. So let's have the crush O9 at the beginning
again as turnip puppy down. It's gonna be really
it out otherwise. Still way too loud. Now let's have another
riser for long riser O3, just going to drag it in. Let's just quickly color
it as well, green, except I don't
want this sound cB the main. Sorry about that. I think a couple of the
other times that I might have done the change color, I think some of it was
off the screen there, so I apologize for that, but all I've been doing is selecting the color
and then hissing, except pretty basic stuff. So I want this long
riser O3 to basically be the leading for
the chorus sound. So again, let's just
turn this right down. So let's just zoom
in a bit and just get the placement
of this, right. So I want it to end actually two beats before
the very end there. So I'm just going to
put my play head to mark where I want it just
before chorus one starts, two beats before chorus one starts and I'm going
to drag my ending. Now at the moment,
it's keeping it relative to where it started from, which I
don't actually want. So if I hold Alt and then click, it just basically
turns off the snap. So I can do much finer increments and bring it right up
to where I want. That's perfect. That's gonna be like
this. But what I wanna do is have everything stopping two beats
before the end. So let's just make this particular base
top pattern smaller. And let's zoom in a bit as well. And I'm gonna make this smaller, but I want that last
kick to play there. Say I'm just leaving
that last one visible. We've got a nice little pause there before the track kicks in. And we'll put a nice little
snare fill in there as well. In fact, let's do that
little snare fill right now. Okay, so, so far
we've been putting in just straight audio into. Projects for our SFS
sounds now the snare row, we're actually going
to trigger it. So we're going to need
to make a pattern. I'm going to use
the channel rack step sequencer to
program that in. Up here under the menu, I'm just going to go to all. So it's showing every
single elements I have in the mix at the moment or in the
channel Act, I should say. And then I'm just going
to drag scenario three. Just drop it on there and I'm
going to create a new pan. Cool, It's snare fill. And let's just color it green or just a slightly
lighter as well, just so we kinda go some
sort of variation there. Hit Enter to confirm. And now I've got my
snare, fill patents. I'm just going to
draw that in quickly, change the color of this, actually rename it as
well, Snare Fill Color, it's our lighter green color, except enter that debt at it. That's kinda what
I want. So let's just figure out that and
how it's going to look. Just going to turn
this down a bit. I think probably that nice. Okay, there we go. That's right. Sounds okay, but it is a
bit robotic at the moment, so let's actually play
around with that a bit. Make it sound a bit
more natural sounding. Sounds way to just did, did it a robotic and
horrible, just quickly. I'll color that as well. Except the first
thing we're going to change is the velocity of
these particular hits. So make sure you've got just the snare highlighted
here in green. And then we're going
to click this little graph icon up here, and this shows us the
velocities of each hit. So I'm just going to
leave the sort of first and third elaine, I'm just going to change
the velocities of these two just to sort of give
it a bit of variation. So let's have a listen. So already sounds a
little bit better. A bit louder. Sounding a bit more natural, like it's actually being
played by someone. Not just programmed in, but it's still not
quite perfect. I want to add a little bit
of what's known as swing. So it's basically messing
with the timing of the snare. So it's pretty simple to do. Now. It just right-clicked off that to go back to
the Arrange window. Now I can double-click
on the snare fill. And if I scroll up to
find my snare hits, so these represent
my snare hits. And there's only
one I want to move, and it's this one here. Now I don't want to
just pull it like this. I want to hold Alt
again and then click it and just drag it a
little bit to the right. Always like one
is cost as swing, but it just adds a sort of
slightly funky field to it. Now we can mess with
the position of the other snares as well a bit. I'm just holding Alt again
or option on my keyboard. Just a mess it up
just to make it sound a little bit more natural. Now I don't want to
change the snare hits that are really
falling on the beat. Because it's quite
important that it keeps the specific timing
you can mess with it. But in this case, I
don't really want to. And it's better if you can leave the ones on the
offbeat alone as well. And I know I've changed
that one slightly, but it's the ones
that are on the 16th, so it's a little bit hard to
see, but you got your beats. So from here to
here is one beat. And then obviously that
is the offbeat and then a 16th of that is there. So the 16th are the ones
that you can really play with to bring out that
swinging, funky feel. Okay, that's fine. That's sounding okay,
Let's just close that. Turn up at such. So not too bad. It could do with a bit of
reverb and stuff like that, but we're gonna
get to that later. Now I've got that. Let's just copy over
what we've made here. So all of these elements hope
control on the keyboard or Command on a Mac to
highlight all four elements. And I'm just going to hold
Shift and copy them across. So they're basically repeated
in the second half there as well in our second verse
pre-chorus two and course two. The one thing that I need to
do though, is just change. We'll shorten the base SOP. And again, the drum pattern
just so it stops there. So again it's doing
the same dropout. And there we go. And this is a basic track, so I'm not going all out on making loads of different
riser sounds or anything. For a basic tutorial, we're just repeating
the sections, although we will add
some slight variations to them as we go. But I do want to
keep this relatively simple As far as sort
of arrangement goes. Now one of the sound I want
to put in there is an impact. That sound again,
just going to drag it straight in, turn it down. A little bit louder. And again, let's just
quickly cover this. So it's changed color green. And again do the track k
sorted. So that's that. And let's just put
that at the end of our track as well to
finish everything off. So I'm just going
to make sure it's selected and I can draw
it in the end as well. And let's make this
a little bit more interesting by having crashed 09 halfway through
the last course or a third of the way through, two-thirds of the way even. And let's take long rise. I'm going to shift to copy
that across, zoom in a bit. So here, of course it
hasn't got the last two beats him because we shortened
it on the other versions. Now, this one, I'm just going
to actually extend it out. So it goes the full length. And that's basically gonna
be the end of the track. In fact, let's just shorten
that because it's a bit of a long altro set gonna be
something more like that. Again, we're gonna be
adding automation and stuff to make that a
little bit smoother. Zoom out again, I think we're
pretty good for SFS sounds. Let's just play it
through now because we haven't really listened to
the truck in its entirety. That was still not really
anywhere near ready. Obviously, it needs
completely mixing. It also needs automation
and stuff like that. But I think it's good idea
just to have a listen three, so you can see really where
we are with the whole track. And then we're going to end
the lesson and we'll go on to making some automation
in the next lesson. Thanks for watching
guys and girls. I'll see you in the next one.
10. FL Beginners Lesson 09 Intro To Automation In FL: Hey everybody, welcome back. Alright, so in this
lesson we're going to basically have an
introduction to automation. Automation can be used to change the parameter of
a control over time. In the most basic example,
which we will do first, we can use basically
the automation to add smoother volume fades to some of the effects
sounds we've just added, but it's not just volume. We can automate. It can be the controls of a plug-in
or a synthesizer. And we will look at those
in the coming lessons. For now, we're just going to add some basic volume automation so we can get to grips with
how this process works in FL. Let's start at the beginning
with the first riser sound. So just zooming in a bit, holding Control or Command
and use my mouse wheel. And all I'm going to do is
click in the top left corner. So you see my cursor
turns to a hand tool. So just click there
and then go to automate and then select volume. So you can see we've
got this sort of gray overlay on top
of the audio sample. And it's got this
extra line here with some grabbed points
at either end. That bit that we've just
added is actually like a separate thing to the
actual audio itself. So this is called
an automation clip. Now you can just leave it so at rest over the top
of the audio sample. But I don't recommend it because it can get a bit confusing. So we'll actually drag
this onto an empty track. I'm just going to
actually zoom out a bit and make sure this
is an empty track. Yes, it is Good, good, good. Okay, say zoom back
in and let's just move this so it's
under our FX riser. So holding Shift and then using my mouse wheel
just to scroll up. Now our automation track for the FX riser is underneath it, makes it much easier. So we're going to make
it a bit more visible by changing the color first,
let's just do that quickly. So I'm going to change the
color escape for a sort of blue color for
automation. Why not? And I'm also going
to right-click and then go group with above track. So as you can see, it's basically added
it to the top track. And now we've got
this indentation and it just makes
it a bit easier. Now when I move this track, if I go to Move track
eight by holding Shift on my keyboard and
using the mouse wheel, then actually moves the
automation clip as well. Because it's been grouped, as you may have noticed
in the picker window, we're now in the automation
and clips part of the picker. We were in audio before and before that we
were in patterns. So automation has
its own clips picker to every time you add automation is going to appear
in this window here. And of course I can right-click, rename and color it with, I think I'll just
color it, that's fine. The same blue, don't
really need to label it. Enter. So just note that the sample and the automation clip for it are considered two
separate things by fL. So if you want to move them at the same
time or copy them, then you got to make
sure that you are both selected. So e.g. we go control, which is
going to zoom out to actually then hold shift and you can copy them
both at the same time. I'm just going to undo that
by going Control Alt plus z. Let's actually
also make this now say what we got is this. Just make this a
little bit bigger. You can see we've got
these control points. If I pull on this, you can see It's going to
change the volume fade. So obviously it's too
much, we don't want that. So if I want to add a point, I can just right-click
and add zero point, which I can then move around. Now be aware that it does
change the end position because it's sometimes whenever you
move a point left or right. So it's best to make sure you put the point in the
correct position. I'm actually going to delete that and put another
one in there. I want it to be full volume. Basically this is
the volume curves, so it's going to
go slowly up and then it's going to
be at full volume from this point onwards. I can make that smooth or by playing with this
control point as well. It can make it more
sudden towards the end or more sudden
at the beginning. That's just make it
a little bit more gentle at the start. Okay, So that's fine. That's all we're
gonna do for that. Just make that a bit smaller. And also what I'm
gonna do is we've got other instances of this sample where I also want automation. So I'm going to
select my automation. Then I'm going to hold Shift and I'm going to copy it across. I think that's the
only two instances. And now it's gonna
do the same for this audio sample
later on as well. Okay, so that's good.
Now, let's go and add some more automation to our long riser because I
want to make most Jen, so it kind of rises
up a bit too quickly. So I'm going to make
this a little more gentle in the same way. So he find where
your cursor turns to a hand tool on the top
left corner, click it. Automates volume. Again, we've got another
automation clips. I'm going to drag that down, stick on a separate channel, hold Shift, and use my
mouse wheel to drag it up. Again. I'm going to color this the same blue for automation, and let's do the track
as well, change color. So again as offscreen
a bit, sorry, I was just selected
blue and click accept. And then I'm going
to right-click and group with above track. Okay, now for this one, let's just have a gentle fade. So I'm going to grab the
left-hand control point and just move that down. See what that sounds like. Actually, I want to do something
a bit more funkier this because I kinda want
it to start early. But when it gets to this point, I want it to kind of balance out because it gains
too quickly in volume. So I'm going to add a control
points, Let's say there. And raise that up.
And then this one, I'm going to give it more of a linear curve to combat the sharpness of
the rise of the audio. Don't worry, just copy what
I've done. That's fine. I've only added
one control point. And then we just messed with the curvature of the automation. Okay, That sounded
pretty decent. And again, I've got two more instances
of this long risers. So I'm going to select
my automation clip, hold Shift, copy it across. And again for that
last one as well. Now G1 effects sound, which I had completely
forgotten to put in is our rise and fall O2. So let's actually grab
that and stick it in on a blank track. And I want it somewhere
around there. I'm just gonna make
this a bit smaller. I don't want it to
kind of lead in to be part of the
breakdown here. Turn it down. So clearly that's what a rise in full sample as it rises up
and then it falls back down. So it's kinda like a riser and a downfield are all
built into one sound. That sounds about
right where it is. Let's just quickly do the
honors by coloring it. As this is an SF Exxon
or color it green and also the track color
that green accepts. And again, we're going to
create an automation track. Drag it onto an empty track. Again, do the owners color it? The track and group
with above track. Now, this one's gonna
be a bit different. I want a control points or add a point in
the middle there. That's fine. And
then we're going to drag the two end points down. And we'll just give
it a bit of a face or I should make that
a bit bigger ready. So you can see a bit
clearer what's going on. So it's just a bit more gentle. She's not really needed
in the last half to be completely honest
because it's got a nice gentle fade anyway, but the first half definitely
starts a bit too suddenly. Okay, sign-in, pretty
good, right there we are. Very basic introduction
to automation in F L. Now we will be adding some more automation to
other parts of the track. So that's it for this lesson. In the next lesson,
we'll be making a white noise riser using
the GMS instrument. So we can sort of like Custom, have our own rises
and falls throughout. And you'll see why that is
important in the next lesson. And we'll also going to add
some automation as well, or some filter automation
specifically to our bass sound. Just to give the track
a little more movement. Alright, thanks for
watching guys and girls see in the next one.
11. FL Beginners Lesson 10 Making A White Noise Riser: Hey everybody, welcome back. Alright, so all of our
effects and stuff is great, but I really want something in the background to sort
of tie it all together. And for this, we're
going to make our own white noise sound that will act as both a riser
and a down filter. And it's a really useful tool to have in your music
production arsenal. Again, we're going to use a GMS, So let's just create one. So we'll come over to the
channel rack, select all. Then I'm just going to go to plug-in database
generators since the classic and just drag in GMS, just drop it in an empty space. Put that out of the way
for a second and I'm going to create a new pattern. Call it white noise
riser. Color it green. Hello again, Let's
change the color of it. Scope darker this time
for no particular reason. And of course hit
Enter to confirm it. And then in the patch
lists, the Presets Library, once again to use
special effects, and I want to select noise one. So this is what it sounds like. It doesn't matter which
key I'm pressing and I am pressing different
keys on the keyboard, but it makes no difference as the noise is basically
what we call atonal, meaning it doesn't
have a musical center, so it's not playable. Now a couple of things
before we go any further, I want to turn off the
echo or the delay. So I'm going to click on
the echo tab on glue. And this just sounds like also
wants to turn off reverb. This TR nc is actually
what's causing it to oscillate up and down
like as being side chain. And if you turn that off, you just get a constant noise. So we'll stick with a
constant noise for now. Maybe we'll come back
and turn that on later and just experiment a bit. But for now, that's fine. So what we want to do with
this is actually draw in basically one long note which goes through
the entire track. And then we're going to
use the cutoff filter. Actually let me demonstrate
what that sounds like. So when I play it, so if we
modulate the cutoff filter, we're basically going to be
doing that but bit slower just to add these build-up
sounds and breakdown sounds. So what we wanna do is
draw in one long note, which is this going to
mean that the synth is playing just one constant note of noise all the way through. And then we're just gonna
use the cutoff filter to modulate. When it comes in and
out very quickly. It just going to re-color this GMS noise that's
colored green as well, the dark green Accept. And then let's go
to the piano roll. Ftr, say, well, let's
first of all just note the end bar there. So we're actually going
to sort of bought 85. Say Yeah, go to my
piano, roll, zoom out, and then it's drawing a note. I beg your pardon, and zoom
in so you can actually make that bigger. Then we're
going to drag this out. So I guess the bar 85, take a little while, say borrow 85 and we'll extend
it to bars beyond that. Okay? So it's literally
a note going from the very start of the track at bar one all the
way to the end. Okay, let's close that. And I'll just sort
of draw that in. And I'll just color
this as well. Let's rename it. White noise riser, that's
fine colored, dark green. Excepts and enter again. So at the moment it's going
to sound pretty Genki. It's just a constant
note of white noise. So obviously, we want to
automate the castle filter. So let's just bring up our GMS
instrument by clicking on, by clicking on it in
the channel rack. And then all we gotta do to
automate a function is to right-click it and then go
creates all summation clip. And the same applies for
any the premises in here. You can do the same
with anything you want or any dial, at least. Now we've got our
automation clip. We can then stop playing
around with that. Say, first of all,
let's do the usual, which is just quickly
color this change color blue accepts,
change color. Blue. Except and then group
with track above. Say that's fine, right? Now, let's just have a
play around so we could do things like this sort of stuff, bring things in gently. I'm just going to
delete that and I'm going to zoom in a bit so you can see what's going on. So first of all, I definitely
want it to build up to this point here because that's
where our course starts. So I don't know how
high I want it yet, but it's gonna be
something like that. Now, I also want
to have a sort of mini build-up to the
pre-chorus, let's say. And then dipping down
quite suddenly afterwards. I'm just going in here and changing these control points to make things a bit steeper. Let's say something like that. Let's have a listen. One buildup and then build
up starts all over again. Obviously we need to
just play with it here. So actually when
a point in there, and then that point can
be lowered right down. And we'll just make sure this
is really nice and tight. So I'm going to
add another point. Pull that right down. Really
wanted to stop suddenly. When it gets to the two beats
before the course starts. Perfect. Then it's habit
building up a bit. So then basically let's
put in the points where we're going to want
it to be a riser. So obviously I want one at
the start, that chorus two. So it's going to want to have
built up again and again. I'm pre-chorus to sort of do a similar thing as
what we've done there. Just making sure it's all nice and smooth and
they're gonna wanna point. I don't want a point
right there as well. And let's see what's
going up a bit higher. But here I want it to kinda grade down a bit more gradually. So I'm going to add a point
roughly in the middle there and then add a bit more of a sort of gentle fade out because this is
like a downfield apart. Okay, so all sounding
pretty decent. It's just this last section
that needs sorts out. Say let's have like a
sort of mini buildup. Every 8 bar. I'm just adding in the points. And then we're going
to add in ones before that sees sort of
turn everything right down. So just bear with
me when I do this. Can be a little bit
confusing to follow, but all we're doing is drawing in points and just tweaking it so you can just copy
exactly what I've done. I've gone a bit too
extreme with those. So let's just bring
these back up a bit. And you need to end
that right there. So if you really need so
you can just copy that. If you need to delete a point, just right-click it, go delete, and try not to move these
sideways because when you do, you end up moving
everything in front of it, which is really frustrating and can get a bit
annoying and fL, so I'm just going to
scroll to the end now and just get this a little
bit sorted out here. So I'm just gonna
add a point there. Re, shape that this
point can go right down. We'll have it fading out
pretty quick, just like this. Say one thing about this though, is that it's when it goes low, when the filter
cutoff is going down, is a little bit deep and bases, so we're going to actually remove some of the base
or the low frequencies, I should say, from this
white noise riser. So let's find a white
noise, GMS noise there. Let's make sure in the channel
right, that it's selected. I'm gonna go to my mixer and
I'm just going to add it, say right-click channel routing, route channel to
selected channels. I'm not worried about routing. All of the other effects
sounds to the mixer. I don't really need to, to be honest, at least not yet. We might come to that in a
bit, but that's fine for now. We're just going to
effect the GMS noise. So we're going to add a fruity
parametric EQ to again. So I'm just going to
make it a bit smaller. Okay, It's just make
this a bit bigger. And again, we're gonna
be using band one, so we want to remove
any low frequencies. So we right-click, go to type, and we want a high pass, meaning only that's through high frequencies
above this point. And we want to change
the steepness. So it's the order
of eight steepness. And let's just see, Let's just have to
play around a bit. That's probably removed
a little bit too much. Okay, that sounded pretty
good, so absolutely fine. That's all we need
to do with that. Now one last thing
that I want to do is just awesome meets this baseline a little bit or the filter cutoff
for this baseline. So let's select in
the patterns picker. Let's go to our top. Sorry, in the channel
rack, bass top. So click on the GMS instruments. And let's just
quickly have a play. Just need to make this
so it's detached. We've got our cost off here. This is what we're going
to automate again. So let's leave it at its
final resting point. So that's where we
want it to end. We're just going to
gradually build up to that. So again, I'm going
to right-click, go to Create all summation clip. And just something
to note in F L is a couple of ways of
getting automation. And so when you right-click a parameter in a
synthesizer or in a plugin and you create automation
clip is going to create one that is the full
length of the track. Now, this might not
be what you want. You might actually
not want it to create something that's the full
length of the track. You might only want it to
create a small section of it. So in order to do that,
you can do what we gotta do is set a loop region. So I'm actually just going to, for the sake of Example, going to delete that automation
clip and I'm going to remove it from the
automation picker. I'm going to go delete. Yep. And then let's go back to our
GMS based top instruments. And instead of right-clicking and going all create
automation clip, we're going to set
the loop region over the area that we want and we only need automation
over the first section, diverse and the pre-chorus one. And then we can actually
just copy it over to verse two and pre-chorus to say, I'm going to click, double-click in the timeline
and then drag to the right. So it covers this red bar, sort of covers that section. Now when I go to the GMS and I right-click and go
create automation clip. You can see is only created an automation clip as
long as the loop region. Now I can just
double-click to get rid of that sort of
red area. That's fine. And also, I want to drag this down and find an
empty track for it. And I will move this up. So holding Shift and use my mouse wheel and stick that
under the bass top layer. And I can see I've got just
a nice automation clip over the section that I want much more handy than having
it over the whole track. So very quickly, let's color it and group with above track. And okay, so let's just have a look how we
want this to sound. So this is the resting pitch. So I want it to be like
that or like full power, I should say like that pretty much halfway through
the pre-course. And then we're going to
just drag this first point down a bit and I'm not sure
how much it needs yet. We're going to experiment
and we definitely want to much more gentle rise in
cutoff filter than that. So let's raise it
up a little bit. And you can hear it just makes it a bit more gentle sounding. We can have a little
bit more than that, I think should be about finds that it's just hold
shift and copy that across. So it's the same for our second verse and
pre-course as well. And it just starts everything
off a bit more gently. Again, it's all helping to just build up the
energy and create that movement within our track to keep things exciting
and interesting. Okay, so let's just make
that a bit smaller. And I think that's
it for this lesson. Well done for following
along because it's starting to get quite
advanced ready. This is much more than just beginner level stuff
that you're doing here. So definitely be happy with
how it is progressing. Alright, thanks for
watching guys and girls see you in the next one.
12. FL Beginners Lesson 11 Recording Vocals In FL: Hey everybody, welcome back. Alright, so in this lesson, we're going to look
at how to set up and record in FL Studio. Now you don't actually need to follow along in this lesson. So if you're not into recording, and even if you are in
the recording isn't actually necessary
to follow along as we supply the recorded
vocals in the work files, which will be impulsive
in the next lesson. In this lesson really is
just sort of information on how to record and
what the process is, and what sort of things you got to watch out for when you're recording vocals and
all that sort of stuff. So if you're not
into any of that, you can skip on to
the next lesson. Just be aware that
recording is not possible in the
basic version of fL, so you need the producer version at a minimum to be
able to record. So again, if you have
the basic version, you can either watch this
and see how it works anyway or you can skip
on to the next lesson. The second thing
to say quickly is that if you do want
to record, obviously, you'll need a microphone
to be able to record whatever it is
that you're recording. And if you have a microphone, you will need some way of
getting it into your computer, like an audio interface with XLR inputs or alternatively
a USB microphone. The microphone, if we're
using an XLR connection, will be plugged into usually the first inputs
on your audio interface, which is input channel one. But of course you can
use any input you like. Now yours is going
to probably look different to that interface, but the actual
connections are the same. So it's pretty straightforward. Plug it in. Annual
microphone is connected. Just note there are two
main types of microphone. If you're using a
condenser microphone, your sound card
will need to have the ability to provide
phantom power, which is a 48 volt power. So most sound cards or
audio interfaces that have XLR inputs will
have this built in. Some have a button on
the sound card itself, a physical button,
but some like mine. You actually have to
activate phantom power in the mixer software
that comes with it. If you're using a dynamic
microphone like e.g. an SM57, then you don't
need a phantom power, just plug it in and
you're ready to go. Okay, so that's the short
version of microphones. Obviously there are
many different types within dynamic and condenser, all sorts of like
cardioid patterns, which is the pickup patterns. So whether it's directional or omni-directional or
whatever, stuff like that. But we really don't need
to get into that now, if you've got a microphone, the chances are that
it's going to be a directional or
cardioid microphone just pointed at your face
and you'll be alright. So when it comes to actual
mic setup for a singer, it is really quite simple. You want to deaden the
sound as much as possible, that is the room sound. So you're minimizing
the amount of reverb from the sound bouncing
around your recording space. And then getting back
to the microphone, say acoustic absorbers,
like these are best. And if you want to know
how to make these on the cheap type in bone
to produce home studio. And just click on
the first video is an introduction to home
studio acoustics part one. Now that is the quick
and dirty guide to making acoustic
panels for your studio. They aren't particularly ugly, but they aren't
particularly pretty, but they are super
cheap and super easy and most importantly,
super effective. But even hanging up
blankets and DVs to make a little vocal booth would be
better than nothing at all. Secondly, you want the singer
to be positioned about ten to 15 cm away
from the microphone. Not really any further and
not really any closer. Or the best way to
ensure this is to use a pop shield and place it 10 cm away from the mic and just ask the singer to stay
as close to that as possible. So that is the very
quick studio setup for recording vocals. Now onto how to set
it up in FL Studio. So NFL, you can
record in two ways. You can record directly into
a plugin called Edison, or you can record directly
into the playlist. Now recording
directly into Edison is really only if you want
to record in a short clip and then be able to edit it
straight away when you're recording vocals or an instrument
like we're doing here, you will be doing multiple takes and the recordings
will be longer. So recording into the playlist is a much better
way of doing it. The first thing you want
to do is actually go to the mixer and pick a channel
for recording on Zoom. So I'm just going to pick 15. Really doesn't matter as long as it's like an empty channel. I will actually just
right-click and change the color of it to read. Indian red. There we go. Click Accept. Now just read. So I know that it's
a recording channel. Now if we go to what we've used as the Insert Panel before, up here is the input section, so we can just click on
that, select an input. Now as I mentioned, my mic is going into analog one
on my sound card. So that's what I
would want to select, but not from this top
menu because this is the stereo interface. So that's not just analog one, that's also analog to as well. Say if I had a two mike setup, then I might want to
record in stereo. Perhaps if I was recording and I can acoustic
guitar or something. But as I'm recording a
singular microphone, I want to record in mono. So I need to come down to
this second menu here. So you've got five
face USB mono, because it yields will say
something different depending on your audio interface. And I just want to click on Run. And you can see it seems
I have clicked that. We're actually getting
an input signal into f L. And you can also hear
that sloped sort of almost like a chorus effect on my
vocalists because we're actually hearing what I'm
saying through my headphones. So if I want to stop that, I can just mute that
channel just temporarily. But as you can see,
this is gonna be the channel that we're
gonna be recording through. The channel that we set up is automatically armed
for recording. That's this little
record button down here. So obviously if I turn it off, then the next time
I go to record, it's not actually going
to record anything, but if I have armed
the next time I go to record and then play, it will actually record audio. The next couple of
things, Our playlist, so we're almost ready to record. Now I just want to
turn on the metronome. So we've got more of an obvious beat when
the singer singing, I'm going to turn
off the countdown because I'm actually
going to have this playing and looped from 2 bar before the
actual track starts. So we're going to start
from this point here, and we'll get to that
in just a second. We can turn off blend
recording for now and we want to have it loop
recording enabled. So remember before
we set up a loop by double-clicking
in the timeline, but holding on the second click, like so and then
dragging to the right. And I want to loop up to the
end of the pre-chorus one, set up chorus one. And like I mentioned,
we're starting from 2 bar before the actual
track kicks them. This is just so when
it loops around, the singer always has
this initial 2 bar to prepare herself when
she starts singing. So just very quickly,
let's talk about loops, recording, and why
it's so important. It's important for two reasons. One is it, Let's see, really hone in on the performance of that
particular section, rather than getting
distracted by other sections if you're recording the whole
track in one go. So you can really
focus on getting the best possible performance from the singer for a
particular section. Secondly, it will give you more consistently sung
vocal performances. Now why is that important? Because later we will be
using multiple vocal takes and layering them
together to get one really fat sounding vocal. And the key to getting
that to work well is getting very consistently
sung vocal tracks. Now, we're going to see
more about that later. So I won't go on
about it anymore. But just know that
this is really the go-to way of recording. If you're doing
like a whole song, just hits it averse at a
time or a course at a time, whatever, get that
nailed and then move on. Now there's nothing to stop. You. Say maybe the singer
needs to warm up a bit. So the first set of
recordings isn't so great. You can obviously
always come back and do some more recordings for the first section that you record later on,
whatever, that's fine. But using loop two recordings
is really the way to go. So again, we can come up and hit Record and it's going to ask
us what we want to record. Now we don't want to record into Edison, as I've discussed, we want to record into the
playlist as an AudioClip. Say that's fine. Don't want to record
straight away, so I'm just going to hit stop. But now every time we hit Play, it's going to start recording as long as that button is enabled. So now what I wanna
do is make sure that FL Studio when I hit Record records onto a specific
track in the playlist. So how you do this is just
right-click an empty track. Let's just make sure yep, that's definitely not
got anything on it. Right-click, go to Track
mode, audio track. And then we want
to basically link this to channel 15 in our mixer, which is now labeled recording, because that's what
we're using as record. So you can see that it's got
a little microphone symbol. And if we go to our
mixer, That's awesome. Massively changed it to that. And it does that whenever
you hit the record button, as soon as you enable recording and you've
got this armed, it will automatically
change this, add that little Mike symbol, and cool the track in the
mixer or EC for recording. Okay, so now we've got that. I'm just going to very quickly show you what it looks like. So I'm just going
to loop, just say this 1 bar section
at the beginning. And I'm just going to hit play
and then record my vocal, which you can see that
it's coming through. So every time it loops around, it creates another
track and it just adds it or groups it to the first,
initial recording track. And now I've got all of
my recordings down there, so I'm just going to
quickly undo those. And now we know that is what
happens when we loop record. Okay, so let me just set
up my lip region again. So we're going from bar three, at least in this
arrangement to bar 21 at the start of course one. So we're all set up. The
singer is ready and we have acoustic baffles to deaden the room sound as
much as possible. Let's get recording now
I'm not going to show you the whole process as it
will be pretty boring. But we're basically going
to go through and record five to ten takes in
total for each section. Then we'll go through and get
some sort of ad lib takes, which is really where the
singer just freestyle some bits and pieces like oohs and ahs and sort of just free styles with the chorus vocal and
stuff like that. Just to see what we
can come up with, maybe we'll get something
really amazing. Sometimes it doesn't
work at all, but yeah, sometimes you can get vocal gold by just free styling
or getting the sanity, freestyle and decent
bits and pieces. So it's well worth doing.
So I'll just quickly show you one recording of the vocal. Say, we're ready to go, Let's just unmute our track. Say we're ready and now the
senior can do her thing. I'm just going to
play it and that Heracles, the first verse. And then we'll skip on
an end this lesson. Thanks very much for
watching guys and girls see you in the next 1212.
13. FL Beginners Lesson 12 Bringing In The Recorded Vocal: Hey everybody, welcome back. Alright, so in this
lesson we're going to carry on with our vocal. Say in the last lesson,
if you didn't watch that, we just set up FL for recording. So don't worry, you can
ignore this track here, but let's just delete that from the projects so you don't
have this track, that's fine. And I can just double-click
up here to get rid of my loop regions that
don't need that anymore. So when we recorded, we recorded all the
different sections, many different takes in one go ended up being a little
bit on the messy side. So there's about probably
12 different takes of just verse one
and the pre-chorus, and about the same again of the chorus and what
sort of stuff? So what I did, I've just taken the liberty of making it
a little bit simpler. So now when we
bring in the audio, it's a bit easier to
understand what's going on. So we're going to drop all of our new audio onto
these tracks here, so just make sure
that they are empty. Yep, So we're gonna go
from track 20 onwards. And if we go over
to our work files, so I've already set this up. We're going to go to
work files audio. And in here we've got BTP
FL beginner Vox recording. Oh one. So let's just click and drag that into our projects. And we want this
to be positioned 2 bar before the
start of verse one. So if you copied the same timings and
that'll be on bar three, then we're going to drag
BTP FL beginning of Vox recording O2 and
onto the track below it. And then again
with Vox recording O3 and onto the
track below that. Now let's just quickly set
these upset or works properly. So let's just right-click
Rename changing color. Just call it Vox O1
and its color it. And let's go for the red up here like
Indian red, whatever. It doesn't matter as
long as it's close. That's what we're going
for it and then hit Enter. And I'm just gonna do the
same for these as well. Cool that Vox O2. And again change
the color to red. Except I want to group these together just so they
are kinda like is if we recorded them
into f l. So I'm going to right-click that one and
go group with above track. And I'm just going to do the
same with this one as well. So that all grouped together. And what you can see
is if I zoom out, we've got basically verse one. We got V2, and then we've
got our course as well. Now as I said, we recorded
all of these separately, so we recorded the first verse separately from the second
verse and all that, but I've just
consolidated them to make this lesson just a little
bit more understandable, but this is what we record it. So let's just have a very quick listen to what we've recorded. So I'm just going to
mute the second to Vox tracks and just
play the first one. So what you might have
noticed straight away is that it actually
sounds hours of key. Well, what happened basically
in the recording process, and this is why recording
can be fairly fluid. Process is that when
the singer came in, we haven't done
any sort of tests, recordings or anything
like that beforehand. As soon as she started singing, it just sounded a
bit too low in pitch for her voice wasn't really getting the sound that I wanted. So what you actually did in the recording session was pitch everything up by three
semitones at all of the audio. So we're gonna go
through and do that. Now, this arrangement
hasn't yet been pitched up, so we are going to do it
and you can follow along. This is necessary for you
to complete the tutorial, so definitely do do it. So first of all, let's just
go to our first pattern, which is musical, which
is the base top pan, double-click it and whatever
we don't need to zoom out, we just need to go
Control or Command plus a to select all. Then hold Shift on your
keyboard and press the up arrow three times to move this base top
pattern up three semitones. So now the root is in C five. Okay, Now we're going to
come out of that and we're gonna do the same for
the other pattern. So let's go to our bass sub. Double-click it again, Control or Command a
to select all then hold Shift and press the up arrow three times,
also known as every. Of course you can just
drag it up to see, close that and onto
the next part. And this won't take
long, don't worry as any three more things to do. So we're going to lead
a one double-click Control or Command
a to select all, then shift and the up arrow three times to move it to see. Again, we're going to
just repeat that with lead layer Control or
Command plus Shift, plus three presses
of the up arrow. And again, the very
last one lead up, select 0, up three semitones. And then we've got
our entire track is three semitones higher. Now note, of course, that we didn't change
any of the other stuff. So we're not changing
the drums or anything. That wasn't unnecessary, just the musical
parts of this track. And of course you don't
need the metronome anymore, so let's just turn that off. 111, you'll be sad. Okay, So that's the first verse. Then we've got the second verse. I just played his
quickly, just say no what is going on with them? The way if you want to just move everything along
in the arrangement, you can actually press the
middle mouse button or your mouse wheel and you'll get this hand tool and then you can just sort of move
it wherever you want. I didn't cover that
earlier, which is a bit of an oversight
business easy way of just scrolling along just by using the center mouse wheel button. As you can hear,
it's all very raw. Vocal, just pure recording. I haven't done any
processing to ASL. It's just as it is
when we recorded it. And we're gonna go
through the whole process of making this better
pitch shifting, time stretching to get it to fit with the
absolutely perfectly, and just improve the performance
as much as possible. And here's the chorus vocal. I'll just play this
very quickly as well. Thanks very much for
watching guys and girls seeing the next one.
14. FL Beginners Lesson 13 Comping The Vocal: Alright, so in this lesson, we are going to look at comping. So comping is the
process of taking multiple different performances
of the same parts. So we're going to look
at the first verse here, and we're going to use these
three different versions that we've got to basically get one really
good performance out of it. If we like, say one phrase which has been sung very
well in box recording. Oh one, but we don't
like the second phrase. Then we'll look at books
recording O2 or O3. To sort of take a different
phrase from there, I will just patch it
together, but don't worry, I'll show you all about how
that looks and how it works. But comping is one of the most
powerful tools you have at your disposal when trying to get the best vocal
performance possible, or for that matter, any
kind of performance. So it could be piano
or guitar or whatever. Alright, so let's
just make these a little bit bigger so we can really focus
on this section. And let's zoom in.
Alright, so first off, let's select the slicer tool from the toolbar menu and
it's very easy to use. So if you want to
slice something, we're going to just cut off
this very start of the vocal. So I'm just going to
click and then drag up. And you can see that
we've got to cut. Then if I just hold Control
or Command and click to drag to select that
these first three bits, I can just delete them. And what we're gonna do is
basically go through and slice up all of these
different segments. And then we're
going to go through and select which ones we want. So we're going to start
in an easier way by just muting two of the tracks. I'm going to mute that track. That track can leave
just Vox O1 for now. Then let's grab our slice tool. And I'm just gonna go
through it and you can hold Alt or Option on your keyboard to not
cut on a grid line. So if you want to cut
halfway in-between, you can just hold out like so. And then just click and
cut wherever you want. I'm just going to
basically slice this up into sections like so. Let's just try and make
it even bigger so we can really sort of
see what's going on. And you can see where
we're just slicing it up. Let's do the same
for this as well. Basically what you're aiming
for here is just to cut it wherever there's
basically no audio signal. So you wouldn't want to cut it right in the
middle of a word, that'd be a really
bad place to cut it. Because when we switch between the different
performances, it will sound really, really bad to say the
best place to do is where there's very little audio. If anything, a tool say
someone like there's just about a K. Just
quickly do these. Okay, so let's just
start on that. I've just done basically
the first verse, but not the pre-chorus yet. And now we're gonna go back, grab our mute tool, the pink one up here with the x. And what it can do basically
is listened through. So if I start the
beginning here, I'm just going to listen to
each one basically in turn. So I'm going to mute and unmute that and then listen again. Which two do I prefer? Facts? I say what? Let's just
turn these upper bits so we can really hear them
over the rest of the track. So this is turn these
right up to full volume. That's the three vocal tracks. Let's have a quick
listen to make sure we're not going to
blow our eardrums. That's much better. And of course, if
you really want to, you can mute the
rest of the track. Or at least Let's just
mute these effects here. They bought one. And I can just go through and try all these
different bits out. So I'm going to basically mute, as you can see that too
muted on one playing. That's how it should
be for all of these. Say, let's just go through and you'll understand what
I'm doing as I go. They all sound pretty
similar to me. So let's try the next phrase, which at the moment is the
only active one is Vox O1. These two are muted to the ball. The ball. Okay. Let's go with that
for now to one. So it sounds pretty
alright as it is. But let's just try a different
vehicle for one's soul. To one quite like that soul, how that's sung, but I'm
not too sure about the one. Say let's try a different one. Now. Hopefully you
can understand what's going here and literally got three vocal tics
that we can choose from. We're muting two of them and
always leaving one unmuted. So we're basically picking and
selecting the best bits of each one to one. Too sure about steel. So we're going to
mute that and try the first one, Ball one. So you can see what
we've done there. Now let's just carry on. So I'm going to grab my split tool because I need to split up these segments a bit
more finer control. You can either zoom
in a bit where you get more grid lines. And just, oh,
that's already done at she better not do that. Just snipping up
there. Let's carry on. Always picking a place to
slice wherever there is, basically no audio signal. Here, I'd say there's
the best place. I'm going to be a little bit finer and hold Alt or Option, click and drag up, say let's just do the
whole first verse. I wouldn't bother
doing the pre-course is fairly obvious
what I'm doing. I believe so that's fine. Say again, select the move tool and I'm going to mute that one. Try that one bit
breathy for that one, but let's just try
Vox O3 as well. Yeah. I like that heart. Say it's probably going
to use that lumbar. I'm just going to check. Yeah. So for the first 1212. Yeah. So basically
what we've done is we've gone
through, obviously, we're selecting what we think is the best sort of phrase or
whatever from each one. But what we're
looking for really is a amalgamation of a
few different things. So the emotion behind the
performance is paramount. That should be the main focus
fuel decisions on whether you're keeping a bit of
the singer's voice or not. Secondly, obviously we're
looking at the quality of it. So if it's like really
badly out of qi, or there's way too much
warbling in there, or too much vibrato. And then lastly, timing. Performance is the
most important one. So that should be like say, 60 per cent of your
decision should be based on whether it's a
better performance or not. And then a very
small percentage, say 20% allotted to the pitch, whether it's in key or not. And then same again for timing. So what we'll see in the next couple of
lessons is that you can actually do
pitch correction. It doesn't mean it's perfect. You can't take
something that's really badly sung and then
make it sound amazing. It can't do miracles, but it can sort of
just, you know, something's just a bit flat
or a sharp or whatever, then you can put that back into pitch or the correct pitch. I should say, when we're
doing this comping process, we're not concerned too much by pitch a little bit
if it's really bad, but not too much. We're mainly focusing on the
most emotive performance. To say, I like the heart's not too
sure about the one though. So let's try a different 11. Very directs and let's just see what the
last one sounds like. One. I like. Actually, I'm not sure. Let's just keep this one. I definitely like the
more direct sound of the lower two takes. That's fine, but don't
like the word here. Not really got the
impact that I want. So let's try a different
one. Better, maybe a little bit over the top bar C. Nope. Okay, So definitely that
one is the best for that. Let's just move on. So I'm gonna go through
now and basically do this for the entire. Vocal. So this is the
entire vocal here. And I'm going to go
through and literally do that for every single one. Now, that might seem like
a crazy thing to do. It's quite time-consuming, sure, but if you want properly
professional sounding vocals, this is a technique that you're
going to need to employ, and it depends on
the type of track. Now obviously here,
you've got quite a, it's like one phrase sung
distinctly at a time. In some songs, it might be
much more consistent vocal. So you might just separate it into longer phrases
and then just pick the best overall phrase that each particular section,
that's absolutely fine. You might not separate as
much as what I'm doing here, but you might find
that you need to as well as there's no rule, one size fits all approach. You will have to treat it independently for each
vocal performance that you come across. Okay, say, I'm going to wave my little editing magical wand and we'll come back to
this when it's all done. Okay, so there we go. We are all clumped together. So what we need to do now
is actually select all of these individual little
snippets that we've decided that are going
to make up our main vocal take and
consolidate them into one audio file so
we can then further process it would pitch correction
and timing correction. So unfortunately, NFL is not the most easiest thing to do. So we're gonna go through
and select every single one. So you do this by holding
Shift plus Control or Command. If you're using a Mac
on your keyboard. And you can go through
and just select all of the bits of audio
that we've used. Decided to select, I should say, for our main, What's gonna
be our main vocal take? So I'm just going to go
through quickly and do this for the entire track. Make sure we get everything. All GO left behind. No non-mutated ODA left
behind, I should say. Now, once we got this selected, this is quite an important step because if we just
go Consolidate now, it will consolidate
what we've selected, but it will also mute
all of that audio. And actually we want to leave just the
muted audio behind. So we're just going to zoom out a little bit and
I'm going to drop our selected audio
onto the tracks below. So if you just look
what I'm doing, make sure it is lined up. So we want to make
sure that that is absolutely at
the start there. So it is, that's fine. So as you can see, what we've
done is we've basically separated all of
our chosen audio, which is gonna make up
our main vocal take. And we've separated that from the audio that
we had before. So all of the muted stuff
is what's leftover. Now, why is that important
and why we separated it. We could have just
consolidated it where it was, but we don't wanna do that
because we want to make extra takes out of
what's left over. So we're basically
going to repeat the process of
unmuting audio and getting another two vocal
takes out of what's left. Don't worry if it's not completely sinking in
right now, that's fine. What I do want to do is hold control and select
all of this audio. And we're going to go up to the drop-down menu
here, go to Tools, go to consolidate
playlist selection, and we'll just do
from selection start, that's fine. Just click that. And it's going to
give you a couple of options for rendering
this audio. It should already be set
up as web and 16 bits. They shouldn't actually
have to worry about as an image is going to hit Start. And then we got our
consolidated audio, which is all of this lot. Just consolidated down
to one audio track, which I can now actually delete
all of that. That's fine. So that's our first main vocal take that
we're gonna be using. And this will be the one
that takes center stage. So this will be panned
right down the middle. And then the remaining vocal takes that
we're going to make now are going to be panned
hard left and right. And there'll be
used to thicken up this main vocals so
there'll be complemented. So let's just very quickly
show you how to do that. Say, I'm going to meet
that vocal track. And then let's go
through and select our next load of vocal sound and a
slightly meet tool again. And to be fair, it doesn't really matter this
time which bits you pick, because these vocals
are always like backing vocals are going
to be a lot quieter. It doesn't matter if
they're so perfect. So really, we can
just go through and select any of the vocals. You can be a bit more precise
about this if you want, but I'm literally
just going to go through and select this lot. We don't actually
have to audition it. They're all half
decent vocal tics. So I'm just going to go
through and get it done. So in fact, what I
could have done is just selected that rather
than unmute it. But that's fine if
you want to have a quick listen through. One. Okay, so, so good. Now we're just going to go
through and select this again. So again, holding Shift
and Control or Command, just going to go through
select all of this stuff. Now I've got that,
I'm just going to drag just a little bit smaller, so it's a bit more workable. I'm just going to take
this selection and I'm going to drag it down, say actually I'll just select my normal selection
tool to draw. So I'm going to drag this down. Doesn't really matter where
it moment as long as it's on some empty vocal tracks. And with it all selected, I'm gonna go to my drop-down
menu, go to Tools, consolidate, play the selection
from selection starts. Again, you can just
click Okay or start. And then we've got
our second vocal. Take. Again. I can select
all of this lot, delete it, and then we're left
basically with just a load of muted audio, which will make up
the very last take. So you can just use my move tool and just literally unmute the lats and then select
them by holding Control. Don't need to move them because there's no other audio there. So I can just go and
consolidate them. Again. It starts. There we go. We've got our final
vocal tape now, I'm just going to grab my
normal selection tool and actually just move that
down, says underneath. So we know that this first one, this one here is our
main vocal take. And I can actually select
all of that and delete it. And for now let's actually
just delete track 20 because it's grouped
tracks here as well. We don't need that
also, we can just delete it yet. That's fine. And it's left us Volkswagen
Box2D Vox three. So I'm going to select
those and drop them on our three vocal
channels or tracks, I should say in the
playlist, that's fine. Now if I mute the second two, we've got our main vocal take. Ball, nice and consolidated. So that might seem like a
bit of a mission to be fair. I understand that, but
that is how you get the best possible vocal
performance and also getting the second and third takes
is really important because as you'll
see later when we start to use these in the track, it really helps thicken up the vocals are really
awesome technique, so it's definitely worth doing. Okay, so that's it
for comping vocals. In the next lesson,
we're going to be looking at vocal pitch. Gretchen, Thanks very much for watching guys and girls
seeing the next one.
15. FL Beginners Lesson 14 Vocal Pitch Correction: Hey everybody, welcome back. Alright, so in this lesson, we've got our consolidated
audio and we're going to now edit the pitch
of the performance. So before we get into that, I just want to tidy
this up a bit. So we've got these
three recordings now, which you can see are
these lower three here. Now we don't actually need
these for vocal clips in here. So I'm going to just select one hold Shift and then
click on the top one. So we've got all four selected. And then I'm going to
right-click and go deletes. Yep, That's fine. And we're just left with
our three vocal tics. So I'm just keeping
everything nice and tight. So we want to have a look
at pitch correction. So pitch correction is
only really properly possible if you have a
plugin called new tone, which comes with the
signature addition of FL Studio or above. Now you can actually
buy it separately. I believe if you really
want see by going to help and then purchase FL Studio
upgrades and plug-ins, that is completely up to you. Now, there are other
third-party plug-ins like Melodyne, e.g., which you can actually
use as a plug-in in FLT correct vocal pitch. But that also again costs money. You tone is fine for pretty much all pitch correction tasks. So don't worry, if you don't
have new tone provided in the workforce or the fully corrected
and processed vocals. So if you don't have the new term plugin that don't worry, you can either watch
this lesson and see how it works and see if you actually are interested
in guessing it. Or you can just skip on to the next lesson
where we'll bring in the processed pitch
corrected vocals, right? So for those of you who do
have new tone, let's carry on. So to load up new team first, let's just double-click on the audio that we want to pitch. Greg, say that's our
first vocal take and it brings up the
sample settings. And then we can just
right-click down here and click on Edit in
pitch corrector. So it's just going
to analyse that first and then it's loaded up so I can close that window
is a little bit bigger. And again, because
it's a new window, let's change this so it's detached and then
we can't lose it. So the controls work in here,
fairly straightforward. So again, if you want to
zoom out or you can use Control or Command plus
your middle mouse wheel, your scroll wheel,
you can scroll left to right by holding
Control or Command. And using your mouse wheel, you can scroll in and
out by holding Alt or option and using your
mouse weird as well, so you can zoom right in. We can get a good look
at what's going on here. So let's just go
to the beginning. And as I zoom in,
you'll see this like kinda squiggly line. And so as you can see, we've got our keyboard
down the side now you can't press it
is just a reference. And what you're seeing here
is a couple of things. So this actual line,
the squiggly line, is representing the actual pitch or the absolute
pitch, I should say. So the vocal is literally
doing this in pitch, up and down and all
over the place. It doesn't necessarily
mean it's bad or anything. It's just that, that
is what it's doing. And the sort of segments is
what FL sort of presumes are like single words or at
least a good chunk of a word. Hey, so people has been split into two and it's
got the first bit, P is a bit higher and then
it goes down in pitch pull. And as you'll see, we can change this later on if we want, we can split these up into
finer increments. No problem. Say very quickly, just make sure if you come up
to see where this is all art and click on the
little drop-down arrow. And we're just going
to have snap to grid, set that to one
for just so we got a nice amount of control or fine control in
the grid lines. So what you can do it,
it's very simple to change a note so you want to
come to the middle of the segment and
you'll see you get this double arrow when you get it in the
middle or thereabouts. And you can literally just
grab it and change the pitch. Now at the moment it's
not centered, right? So you can see that
it's slightly flat, slightly lower than the
center of the notes. Say, if I want to center it, I can literally
just right-click. It's when you got the double
arrow and it will just snap it exactly to the grid. Or you can hold Alt on
your keyboard and then you can freely move it around. So this is the more, slightly more the preferred
method if you're moving a whole segment because
you can be with it. But bear in mind that
these segments represent the median pitch of what is
happening in that segment. And the line represents
the absolute pitch. So sometimes not all the time, but we will see it as we
go through the vocals. Sometimes you'll see
that the segment or the medium pitch thinks
it should be somewhere. But actually if you
look at the pitch line, you will see that it needs
to be sort of slightly up to make it as medium
pitch as possible. But we'll get to that,
don't worry, that's fine. So in the new editor, you have these controls up here. So these are global controls. So if I turn sensor up, you'll notice that
everything snaps. To the center of the note. But I will tell you
straight away is not always a good idea to come
in and just go whack. It seems like a nice, easy way of sorting out
the pitch of a vocal. But from experience
I can tell you it's not always the best
thing to do. So e.g. let's look at this note here. And you can see as
we zoom in that it starts at one pitch and then it slides up
to another pitch. So it's actually
wants to really be, if I hold Alt and just move it up, really wants
to be about there. So it starts halfway
or in the middle of d, and then it slides up to
the middle of E flat. If I leave it how it
was and then go sensor, does it, drags it. So now it's actually
trying to start really off the key right
in-between two notes. So D and D flat or C-sharp,
whatever you wanna call it, and then slide up to right
in-between D and E-flat, which definitely is
not what you want. You want that to the
absolute pitch line to be as central to
the notes as possible. So this will be
much more accurate than having it snapped
to the center. So that's why it's not
a good idea to use the global center control.
Can experiment with that. Of course, it's very, very tempting because it just centers all the pitch and you
might think that's better, but it's not always the case. Now that might seem
a bit laborious, but it's the same as
with comping the vocal. It's much better to do
these things manually. You will end up with a much
more professional level vocal in the end. But anyway, I won't say
anymore about that. That's fine. Then you've got the variation global control. So let's just look
at this note again. So you'll see as I
reduce the variation, you're basically
strengthening the pitch. It's going to sound
a bit weird one. And it gives it that sort of nasty Over also tuned sound
to it as just not very good. And obviously if I increase
the variation than it just makes everything way more pronounced order
the pitch changes. So again, it's not really, it's not really actually useful controls to
be perfectly honest. So you can just reset
that by holding Alt Option and clicking it. So we won't be using
global variation. Then you've got the
transition dial, which basically will smooth
transitions between notes. Again, this is another one. It's not really super
useful, I wouldn't say, especially not when
you're editing a long vocal like this. You really want to approach
each word on its own merits. Now all of these
controls, center, variation and trans you have basically on the
micro level as well. So if you double-click
a segment, you will see that you
get these extra controls now around each one. This is for every
single segment. Again, I'll just zoom
in a little bit. So these extra controls
are divided into three sections and just
allow a much finer control, the opposite using
a global control. So the top section here is
really to do with volume. So if I grab the top line, you can actually change the
volume of the entire segment. If I grab the end parts, you can change the fading
of the audio sample or the fade outs
at the end there. Now if I grab it in
the middle section, this is going to
move it up or down, so that hasn't changed. If I grab the end, I can actually move the
audio in time back or forth. And if I grab it
right at the end, say where you got
the double arrow, you can actually shift this
in size and you can hold Alt as well to make it finer control so you can
make it longer if you want. Now, I don't want to
do that at the moment. But you can use
it for correcting small or minor timing issues, which will probably
look at in a bit. The same goes for
the end as well. So you can change the end, starts or length if
you want, that's fine. And then down the bottom
you got variation. So if I grab this, it's just exactly doing
what the variation does, the global variation dial. But on a micro level, say we can just do this one. Note. We can actually change
it later, it's reversed. So that's getting the opposite
of what it is doing is I go up in pitch now it's
going down in pitch. So you can do all sorts
of fun things with that. Said, let's just leave
that where it was at 100%. There we go. And then the n controls
here, you've got, say if I bring this in
and then change it, this is the sort of fade
in pitch if you'd like, or the ramp in is
it says so I can just have it starting
higher in pitch. And this controls
that are whereabouts. That happens if I set it right
over here and I change it, it's going to change, this amount of pitch will be up. So you can do all sorts
of crazy stuff like that. Or I can make that much shorter, even bringing it right to the front where it
doesn't do anything. And the same at the back here. So this is just the
sort of ramp out. So again, we can have that
gunned down in pitch. So all sorts of interesting things you can
do here with the pitch. And of course, the same applies
for any note that's here. You've also got split tool, which we'll be looking
at in more detail soon. So you can choose to split
up the audio like so. This is actually one
of the good techniques that you can use to
straighten up words. Now this particular word is not going to
work because we are where we want that glide to happen from one
note to the next. That's how it's
supposed to sound. But on other notes
you might want to straighten out the
pitch and actually cutting it into smaller segments and then flattening them out. A really good way I've
done it. But again, we're going to look at
that in just a sec. I'm just undoing one of
the control which is worth noting is
the formant shift. So just get rid of my
slice to go back here. And over here we've
got foreman shift. So if you click where
these blue and red arrows are in the center bits
on the right-hand side, you'll see that we got
as formant shift thing. So let me just very briefly
explain what format is. So you know, like
what it actually does, what it's important. So pitch and formant combine
naturally in sounds. So with voice, when you change the pitch of your voice
as you are singing, the formant also changes. The format is basically
the dominant frequencies, so they actually will change. They will get higher as
your voice raises in pitch, and the former lowers as
you go lower in pitch. But this change
between the pitch and foreman is not linear. So when you pitch something
up or down digitally, the pitch and forming
a kind of locked together so it can
sound a bit unnatural. So to fix this, we have a separate form and control
and what we can do with this. So if we are, say, e.g. changing the pitch
of this vocal chop, Bye a few semitones and
it really needs to be more than one or two
semitones for it to necessitate using
the format control. But if you're changing
this by quite a bit, then it was going to
sound a bit unnatural. So what you can do
is you can come in and change the formant and raise that up a bit,
a little bit more. So what we've done is making
it sound a bit more natural. So by being able to
change the format, you're kind of in a way, bringing back that kind of natural characteristic
of as the pitch rises, so does the format, but at a different rate. And of course it's the same
in the opposite direction. Say if we were going to
lower this in pitch, then it might sound
a bit unnatural. Therefore, we would also
lower the formant a bit to at least keep a bit of sort of
natural sound to the vocal. So I'm just going to undo that. There is another really cool,
useful format shifting. And that is just to
make it a bit more creative or you can
use it creatively, I should say, as a
vocal is playing, you can tweak the formant. Shifting a bit more. On the extreme side sees sort of make it sound like
it's been massive. So let's just move. We'll do this a
little bit higher. Get that kinda like
pitched up sound. Now that might not sound too particularly nice on its own. But if you use this
in the right way, it can actually be quite nice, which we might well
look at in this video. I'm not sure, but either way
that is formant shifting. So what we're gonna
do is we're going to start at the beginning. We're just going to listen
through and correct any errors in the vocal
performance pitch-wise. And we'll just see how you
use new tone as we go. So it kinda sounds right, but
it's a little bit wobbly. I'm not massively keen on
the last half of this vocal. Wobbles a bit too much. So I'm going to
grab my split tool. I'm just going to do this
to the last parts of it. I'll turn off my split
tool and I'm going to snap these by right-clicking
the center of the notes. Sounds better already. So that's fine. Just go on April. So again, just a little bit
too wobbly this last part. So I'm just going to split that. And I'm actually going to then
change the variation, say, make this less and
just see if we can get rid of that war
Bolinas by doing that. Sounds better, good. 11. So it's always there. It just wants to be
a bit more central, just getting them
as medium point for that central pitch line one. So again, as we want
it to be about there, so it starts off
in the middle of the night and ends in
the middle of the night. And this is why, again,
the global control is just not going to work. So that's fine. Scroll along again here we can see that we've got this looks like it's right in
the middle of those nights. But when you look at
the actual pitch line, you can see that really it's just a little
bit out perhaps. She sounds okay, so I want
to leave that as fine one. So again here we're
starting lower in pitch rights in the middle of two notes, which
is not what we want. So let's just raise it up a bit. One. Say that's much
better, It's fine. Let's carry on. One you one. You say, that's fine. Ready? One you. So I'm just going to tidy
this up a little bit. Just really be very precise
with what it wants. You. Want you to be. Be free. To be free beside me. So I'd want to see if it works. Be free beside me. Say that sounds a k. This words a bit all over
the place beside me. To be free, beside me. And centralized E, really I'm not having to
do much apart from just tighten everything to
be free beside me. And like a coat that sound
in nice and tight vocalize. So really that's
all I'm gonna do. Go through and do that, are going to carry
on and get on with the rest of the vocal. So you can either carry on and do it yourself
or a course. In the next lesson, we're going to load up
the pitch corrected vocals anyway that I've
created in this lesson. I'm just going to go through
and quickly do this. Okay, so that's pretty good. So what we can do now is
we can get this in C, the project, and a
couple of ways I'm just dragging this down a bit. So we still got
our controls here. So what we can do is
save the way fall. If we really want to, we
can drag the selection. So I'll just do this e.g. sake. You can
actually drag it into the project's window
wherever you want or if you want to, I'm
just going to undo that. Or if you want, see
what you can do is just replace the existing vocal. Say if you're super happy with the changes that you've made and you think it's
going to work, then you can actually
just delete that vocal and then go down here and
go send to play list. And you can see it's
just going to replace or add that new audio
to the playlist. So let's just play that. Now. It's timing is a bit off, so let's just get that correct. So then before HE closing new tone, I
don't want to close it. I just want to go
through and make sure that we're happy with
all of these changes. If not, we can bring up new
tone again and change it. So don't close the window yet. That's fine too. Hey ball 111b. Say, sadly, just listening to
these sections now to make sure that
100% happy with it. Then we're going to copy
the vocal from earlier, the pre-chorus because
it's exactly the same, so we'll just copy it
in a coming lesson into that slot there
and then just make sure the chorus vocals are okay. One of them, because
some sort of weird audio glitch going on here. What was
that all about?
16. FL Beginners Lesson 15 Vocal Timing Correction: Hey everybody, welcome back. Alright, so in this lesson
we're going to look at timing correction of the vocal. Now, if you didn't follow
along in the last lesson because you don't have
the new time plugin, but you want to follow
along in this lesson, you can drag in the pitch corrected vocal that we created. Now if you followed
along and did your own pitch correction
and did all of the vocals, then that's totally fine. You can obviously just
carry on using them. But if you're really unsure, then It's best to just use the audio provider
because I've already gone through and pitch
corrected at all. Just incase, just have
a little look under the audio clips
section of the picker. And just make sure
that we've got only this audio in
here at the moment. If we've got any extra
bits and pieces down here, like audio bits, then you can actually select whatever
is there and delete it. If you're bringing in the
new audio that's provided, say let's just bring that in. So we've got this one, BCP, obviously firstly,
navigate to where this is. So in the BTP
beginners work files, audio folder, and then we've got beginner Vox
pitch corrected O1. So I'm just going to drag this in and just get it lined up. So that's where the
first word should hit something like this one. Okay? And then we
bring in too as well, not O2 and O3. And then we've got all three
pitch corrected vocals in. Okay, So the timing
correction plugin is available in the
producer addition of f, l and above say if you're
using the basic version, you won't have it. So you'd have to do
your timing correction in what I call a manual way. Say let me just quickly show
you what I mean by that. So let's just zoom in a bit. Vox O1, say, let's
say that we want this to just mute the other
two vocals for now. That's a little bit too early. So what we could do is we
can grab our split so we could take out a little
bit of audio here. Then I can grab this and
then hold the Alt key and just move that to where I think the correct
sort of starting position is much more accurate. So if you don't have the
timing correction plug-in, It's called new time, then this is how you will
have to go about actually correcting the time of
an audio performance. I'm just going to
undo that because I'm going to go through
with new time. And really it's as
simple as that. You just go through and
make cuts and then just adjust the vocal however you
need to to get it in time. So obviously I'm gonna show
you in a different way. I'm going to show
you with new time, how to timing correct. This particular vocal. Okay. So let's just
double-click on it again like we did for
the Pitch editing, and it brings up the
sample settings window. Then we can right-click
where the waveform is and go edit in time warp, new time. This is the time shifting, more time warping plugin. And this really is the
superior method of time stretching or rejecting the time of a particular vocal. Or it can even be
used for beats to add swing to sort of like an audio
loop, all sorts of things. This is actually a
really powerful plugin, very worth having. But obviously we're
just going to look at this in a basic way, just using it to correct
the timing of the vocal or tighten up the
timing of the vocal. And again, before
we go any further, let's just make this
window detached. Just so we can't lose it
behind all the other windows. So f l will detect where it
thinks the starts of words. Or in this case, obviously if
you've got a beat in there, we'll try and define where it thinks the starts of like beats, like the kick the hats and all that sort of thing
starts from and it does a pretty reasonable job
of that owed say we can see that it's pretty much got the start of every single word. Sometimes it doesn't get
it absolutely perfectly. So you might need to readjust
some of these markers. So if you want to add a marker, literally just double-click
and you'll see you get a new marker point
or warp marker. I should call it
the warp marker. You'll see when you run
your cursor over it, you get this sort of
left and right arrow, which means you can just
drag it left or right. So you can obviously
see them changing the time of the vocal, making that too very
much more stretched out. I don't actually want
to do that, so I'm just going to undo it. And if I want to get
rid of that marker, I can just double-click it
again, which will remove it. Now, no, you see the
play head moved, but you can see the marker
is actually disappeared. Now that applies
for any of these. So if I want to change the
start of this one, e.g. so I'll just move my
cursor over until I get the double arrow and
then I can double-click. And it removes that
marker as you can see. And then if I want to, I can re, add one right at the very
start of that particular word. So it's just a bit more
accurate now it also, every single time you click, it moves the play head as well so it can look a
little bit confusing. So if I add a marker, it also moves the playhead, which kind of confuses
things a little bit, but don't worry, that's just sort of part
of how this works. I'm just going to double-click that marker to get rid of it. And then what we can do now, tighten up our vocal so I
can snap that to the grid, or I can hold the Alt
key and I can move that freely and much
finer increments. Okay, so one really important
thing to do when you are time correcting a vocal or
anything for that matter, is to actually play it with
the rest of your projects. Otherwise, how are you going
to tell whether it's like really in time or out of time. So what you need to do is
first select this button here, which is slave playback to host. Now unfortunately,
what you'll find at the moment if I
come out of here, we need to actually mute
the original audio. And then if I play it so you can hear that
something's not right there. Okay, so the vocal
is not playing in time with the actual projects. So what's gone on is in
new tone or new time. Whenever you load it up, it starts from the very
beginning of loads the audio in as if it's starting from the very start of the project. So you can see that
as like bar 1, bar two by three. Whereas in our
actual projects are tracked doesn't properly
start until bar five. So what we want to do is hit Control or Command
plus a to select every single slice the
vehicle has got in new time. And then we're
going to move this. So the first word two is starting on
bar five right there. Just to make sure we do
is accurately actually, I'm just going to add a point right on the first bar
where it should start. And for the ease of
everything else, I'm just gonna get rid of
that first marker just to make sure I'm definitely going to get this
in the right place. At the moment. That's where
it starts on the grid. Now I'm going to go Control a, makes sure every single
thing is selected. Yes, it is. That's great. Zoom in a bit. And then I'm just
going to move this. That marker is now
on bar five because that is where the start
of our projects is. That's where it
starts in verse one. Now I can just mute my other
audio and then when I play, hopefully one. Okay, Fantastic, So
it's playing okay, now it's a bit of a Genki way of doing things
because unfortunately, every time I want to play, what's in new time, do you need to actually click on the window here to hear it in
time with the actual beat. Okay, so that's fine. Let's go through now and timing, correct this a bit. So let's actually
I'm going to get rid of my point that I added in. I was literally just to
line this up correctly with the start of the song.
Just say no as well. We've got this thing,
this green market is a downbeat marker. We don't actually need
to worry about this. And you can make any marker you want into a downbeat marker. We're actually going to get
into this at the moment. We don't need to because it's actually unimportant
for correcting a vocal. But basically, we're just saying the starts of the
beat starts there. It's not to do with cracks in
vocalization, don't worry. You will just find that
sometimes that will appear when you
right-click a market, okay, so just don't worry
about it. That's all it is. Okay, so let's get rid
of that first marker and I'm going to add another
one in right there. So we can then snap
that to the grid. Maybe it's just
slightly too early. So I'm gonna hold Alt or option and just
move that slightly. Let's hear that with
the rest of the tracks, I'm just going to click
in the playlist C. Activate. Playing
in the playlist. That's kinda sounds all fine. I would say looking at it, it looks like it's
very slightly early. So he could be
super anal and just sort of hold 0 or Command
and just drag that in. The second word is falling
almost exactly on the offbeat. So that's fine. Let's
play that again. What are we trying to do is just really make this
nice and snappy. Some words might
need correcting, some might not see that
one's absolutely fine hair. Let's just have a little listen. Because it's got such
a gentle lead into it. The word soul, that's
absolutely fine. Not going to worry
too much about that. Again, it's just a
little bit early, so I'm going to just say no
as well if we don't want to elongate the previous word
when I'm correcting this. So say e.g. obviously
at the moment it's changing the word
before it as well. So if I don't want that, what
I can do is actually just add another warp marker in
by double-clicking there. And that means that anything before that warp marker
won't be affected. So I can just hold Alt and
move this wherever I want to. Actually sounds a little
bit late like that. So perhaps that was
actually correct how it was just going to change
that a bit again. That sounds fine. Okay. The soul starts just a little bit too early for
my particular tastes. So I'm just going to
move that a bit over. In fact, let's just
undo that and I'm just going to put in
a warp marker here, just so I don't affect
the other word. Let's just try that. Maybe just a little
bit too late. One. Perfect. Now of course you
can use warp markers here to actually
elongate the word. So if you are unhappy
with the length of this, if you wanted to
extend this word, you totally can see
what they sound like. So I could just grab this
warp marker here and just literally move
that all the way along. Or I could add one, get rid of that one here. Make this much longer. Not saying that's
what I want to do. I'm actually going to undo that, but just saying that's
what you can do with this new time correction
plug-ins. Pretty powerful. Okay, Let's move on. I'm just going to enable
this button here, which is follow or
scroll with cursor. Not bad, but I is just
a little bit off, so let's just find
where that was. I say, Okay, again, I'm going to drop mark
or even beforehand and just snap this right
onto the grid? To be sad me. Yes. All sounding pretty good. I'm just going through it and
this is what we're doing, just literally
tightening everything up as we go, saddening. So the truth is a
little bit off there, I think. Where are we? You self be true. Keeps jumping back to that
point. That's been annoying. So this new time plug-in isn't 100% perfect. It's
not bad though. So we're just going
to tighten up this last little phrases here. It's mostly okay. At
a point in there. Can I just snap
that to the grid? Just tightening everything
up as you can see. It's just play that back. Okay, so there we go. I'm gonna go through now
and do the rest of the vocal as I've done before
with all the other bits. So the second verse and
then the chorus vocal. But I just wanted to show you how to do it in the first verse, but literally has already doing going through tightening it up, making sure everything's like
really bang on the money. So I'll go through
and correct the rest. And I will also do the same with the backing vocals or two
extra takes, O2 and O3. So I'll go through and timing
correct those as well. And at the start of
the next lesson, we will then import the
consolidated and final corrected vocal where we can then start actually
mixing it into our truck. Alright, so thanks for
watching guys and girls. I hope that was helpful for you. I'll see you in the next one.
17. FL Beginners Lesson 16 Vocal Mixing: Hey everybody, welcome back. Alright, so in this
lesson we're going to get into actually
mixing the vocal. So we've done all of
the correction phase. We've corrected the pitch
roof, corrected the timing. And if you've followed along, then obviously
you're going to have already your own vocals in here, the final vocal, if you like. But if you skipped over the last lessons or you just
want to continue on from exactly where I am with the corrected vocals
that I've done. Then, follow along now and
load in the final vocal bits. So we're gonna go here to the work files against
the audio folder. And we want the beginner
Vox timing corrected O1. So just gonna click and
drag it into our projects. It should start from the
very beginning of this time. And we'll just do the same
with the last two as well. Fantastic. And one other
thing that we want to do is go to the mixer
and the channel that new times and
new towns have been loaded on C. And we're
just going to click these, sorry, click the little
drop downs and go delete. Yes, and then delete
new time as well. We didn't need them anymore. We're all done with
that. And there we go. We've got our final
vocal in the project. We gotta do now is
actually mix it in. So when I talk about mixing
the vocal at this point, I'm not really talking about finally mixing it into
the rest of the track, but I am talking
about guessing it ready so we can mix
it into the track. Now what we need to
do to get it ready is to apply any corrective EQ, like removing any unwanted
low-end frequencies. And we want to level
out the volume. So dynamically it's
much more consistent. So as you can see at the moment, if I just expand this and zoom in even just
to the first verse, you can see that a lot
of these words have quite differing volume levels. And the chorus where the singer
has sung more powerfully, it's quite a bit louder
sort of thing over there. So all of this needs
to be leveled out. Now the reason it's bad at the moment and the
reason you want to level it out is because when we mix it with all of the
other elements, the quieter bits of the
vocal can get lost, and the louder bits
can suddenly jump out. So getting a consistent
volume level is vital to getting a good and big sounding vocal as one of the keys to getting a decent
sounding vocal inner track. And this really does apply to pretty much any
recorded material, whether it's acoustic guitar, double bass, or whatever, all going to need
to be just tweaked slightly on the EQ to
make sure that there's no unwanted frequencies and
they're going to need to be leveled out so they will
sit in the mix much better. In this lesson, we're going to concentrate on the main vocal. In the next lesson, we
will actually look at mixing these doubled takes. What we're going to
concentrate first with the main vocal is the EQ. So very simple. We're going to go
to the channel rack as you bring it up
on Mixer quickly, just want to see where
we've got an empty track. So track 11, Let's go a little bit higher just in case there's anything else we want to
bring into our project. So I'm gonna go from
foreseen to 15. So again, all I need to do in my channel is select
those three channels. In fact, the table, sorry, let's quickly color these and we'll go with our red
that we've been using, except for all of these as well. Just so when we transfer
this to our mixer, it's going to be the
color and everything. So again, we'll select
those three vocal elements and then we'll go to our mixer right-click
channel foreseen. I'm going to channel routing, route selected channels
starting from this track. And there we go. We've got
our vocal in the mixer. And I'm only leaving a gap
between these and the rest just because it kinda helps me find my place when
I'm in the mixer. If I've got a little bit of gap between the main elements
and then the vocals. And then we might have
grouped channel tracks, laser, which will go further on. But that's fine. It's just
an organizational choice really more than anything else. So we are on channel foreseen, which is going to
be our main vocal. So in fact, we could just
change that very quickly. Just the name main Vox. Hit Enter. Just make this a bit smaller so we can see
what we're doing. So a fruity parametric EQ to, and again, this is
gonna be very simple. I'll just quickly detach the window so it
doesn't disappear. And we want to remove any
low-end, unwanted low-end. So let's play it. In fact, let's just say it as well. One. But if you look closely,
you can see where the main bulk of the
frequencies are. We've got the denser lines. But you can also see down here, this is kind of almost
looks like noise. There are unwanted
frequencies there. We definitely don't
want anything in that frequency range. So we're going to do the same again, right-click band one. Go to Type and we're going
to put this to high-pass. And then we're going to
change it again from the order too steep eight. And we're just going to move this up until we start
to hear that we're taking something away from the actual vocal and then we're just going to
back it off a bit. So let's just play that one. Say right about here we
can start to hear it starts to thin out the vocal a bit so we don't want to actually affect it in any negative way. We won't see, let all of the
good stuff through and just cross out any of that low-end rumble that's going on there. So I'm going to back
this off a bit. One. So one thing that
we can just use, band three, they're just grabbing that I'm not doing anything special, just grabbing him, bringing
it up just so we've got a nice smooth curve here. One. So that's the ROI on the
limit. I could choose to just back that off
slightly more. But that's absolutely fine. We're just removing anything
basically below 100 hz. So any sort of base or sub rumble that might have
been picked up perhaps from a computer fan that was in the room when
we were recording. Or it could be sort
of like rumble from distant traffic
or anything like that. That's sort of Rumble in the
low end we just want to get rid of because when we
compress this vocal, which we're going to do next, that compression is
going to bring up that noise floor or the quiet
stuff in the background. Compression is going
to bring that out. So we really want to EQ as
much out of it as possible. Okay, so that's it, fine done. And now we want to add
into slot to a compressor. So we'll just load up
the fruity compressor, Again, detach it, and
then it won't disappear. So before we go any further, let's just talk about
what compression is. A compression is the
process we use to level out the volume or to be technically succinct the amplitude
of the audio signal. So again, if we zoom in, we can really see the
variation in volume. So we've got some louder
bits and really quiet bits. And volume wise, it's kind
of all over the place. I mean, it sounds okay
when you play it, but when it comes to
actually mixing this and you really need that to be
much, much more level. So what compression will do? I will just give you a visual representation of
what it's gonna do. And what we do is we
set the threshold. So this function right here, if you can imagine it
as an actual line, as we bring the threshold
down, anything that goes, any part of the signal
which goes above that threshold line will
basically be turned down. So all it's doing is making the louder bits of
the signal quieter, which in turn basically means the volume is much more
level or consistent. And then all we do is we use the gain to turn
it back up again. There's a couple
of other settings that we're going
to go through now, but that's basically
how a compressor works. It just turns stuff down. Anything that goes over the threshold level is
gonna get turned down. Now the amount that
it gets turned down by is set by the ratio. So if I turn this up
to three to one, e.g. anything that goes over
that threshold level will be turned down
by a factor of three. So usually on vocals were
talking 3-4, a ratio of 3-4. I generally tend to go
a little bit harder, so the upper end of three, but really you can sort
of mess around with that. But we generally wouldn't
go any higher than 4.5, five to one, or any
lower than three, unless there's any sort
of special circumstance. But I'm just going to play this quickly so we can
hear because actually doing anything, he bought one. So you can hit, it's really
sort of squished the vocal. And I'm just gonna
use the gain to turn the signal backups.
That's a bit louder. Hey Paul. And all her breathe the sounds of really light coming out. That's what I was talking
about when it's making the quieter bits like any
noise or anything like that, it makes it appear much louder. So we don't need to have the
threshold at that level. We're just going to bring this down until we can hear it being affected one to one. So what I'm going to
do is I'm going to click this little cog icon so we can then
bypass the effects. This is without a ball. One. We can, if you listen carefully, you can really hear
the difference in volume between two people. And then 11 definitely
sounds quite bit louder than the
first two phrases. Let's just put that in. One. But with the
compressor on a ball one. So it sounds much
more consistent. It sounds like it's
the same volume level and that's exactly
what we're going for. The other settings
that we need to worry about when we are
looking at compresses, the attack and the release. Now as we are pretty much
just leveling the vocal out, I think we're going to
need to worry about the attack so you can
turn that to zero. And the release
probably say about 200. Hey Bob, 11. So actually just
experimenting a bit there. So it sounds better with a bit of attack, or the attack does, is kind of a bit of
the initial signal through before it gets turned
down by the compressor. And the release is
just how quickly it goes back to
its normal volume after the signal
has dropped back below the level of the
threshold. Now, ready? Don't worry about the
technical aspects of this. If you're doing vocal
compression in FL, you can use these
exact settings. The only thing that we need
to change is the threshold, because that's the bit that will depend on
the volume level of the original
volume level of your vocal or whether it's
guitar or whatever. But apart from that, you
can actually go ahead and pretty much use
these settings. I'm not saying you
should always do that and that's what you should do for the rest of your career. Obviously, if you're going
to learn about compression, you'll start to know when to
tweak these different dials. But as a very general
starting place, you can use these
settings. And that's it. We've leveled out the
volume of the vocal, so let's just give it a quick listen through and also listen to the chorus parts
of our track as well. Papal one. So you want to say it is getting a
little bit to breathe E. So I'm just going to back
the threshold off a bit, which means raising it up. Just checking it
with verse again. April 1. So still actually
quite breathing. One. But we're starting
to hear some sort of stronger volume
variation their site. I will actually leave
that down as fine. We can deal with the breathiness
if we really need to. But at the moment I think
that's absolutely fine. Okay, so that's
sounding pretty good. Now the next thing I want
to do is add a delay. So we're going to add the
fruity delay three this time. Let's add this
fungus is a bit more advanced than the other 111111. So again, we can
go to the presets. We can pick Ping-pong. It'll give us like
a stereo effects. First of all, what
you need to change the amount of the wet signal. So that's what we do here. Say this just basically
changes the mix. So if I turn it right down, one, pretty much all you
hear is the dry signal. So you can just raise this up and we'll hear
more of the delay. One. So now it's time to actually hear it with the rest of
the track, of course. So you need to make sure this
is working so un-solo it. And we'll just mute for
now, are backing vocals. Just going to go to our mixin, bring up the fruity delay
again and make it detached. And what I wanna do is dim those delays a little bit
because they're a little bit too bright. So what we wanna do is turn
down the cutoff of the delay. So again, I'm just going
to say do this quickly. Hey ball one. I think that sounds
like, Hey, let's just un-solo it and listen to
the rest of the track. But basically we're just
dimming or taking some of the high frequencies
off of the delays. To be sad. Okay, So that's fine.
I'm pretty decent. I'm happy with how
it is at the moment. Let's just check
it in the course. Okay, So sounding fine, maybe we'll tweak that a
bit in coming lessons, but that's pretty much in the ballpark of where I want it. So the last thing I want
to add is a reverb. So we're going to add a reverb specifically for the vocal. Now, in one or two lessons
time will actually be adding a reverb as a send. So that means that
we can just have one reverb unit or even
a reverb and delay unit. And then we can send
any elements in our projects to it to get
reverb or delay on it. But because the vocal is such an important
part of the track, we're going to have a
separate reverb unit on, say if we just click to bring up into the slot and we'll gates to the fruity reverb to say it when I place
is probably going to sound a bit crazy. I want us just to
touch that quickly. And solo vocal. Saying here it's got loads
of reverb suddenly added to it and it's controlled
by the wet and dry up. So if I turn it
down, will only hear the delay as I turn it up. Now, if I want see bypass
this and listen to, I'll just click on the
little cogwheel and then I can turn this on
and off or bypass it as I'm playing without width. So that sounds pretty
good summary about that. I'm not changing any
of this at the moment. A really nice, it sounds pretty decent and it's
sort of stock settings. We're just adding that extra
bit of space to the sound, making it a bit faster. So that's absolutely fine. And again, like I say in
the coming lesson or two, we will actually add reverb to the other elements
of the mix as well. Alright, so there we go.
Let's un-solo our vocal. And in the next lesson
we're gonna be working on the two backing or
doubled vocal tracks. Thanks for watching guys and
girls see in the next one.
18. FL Beginners Lesson 17 Mixing Vocal Double Takes: Hey everybody, welcome back. Alright, so in this
lesson we're going to see process the doubled takes here. So I'm just going to
mute the main vocal. So we've got these
two to process, just going to expand that a bit. And we're going to do
much the same thing. In fact, some of the
processing we can actually just steal from the main vocal, but we are going to do
relatively the same thing. So EQ first, then compress. Now before I go any further, we're gonna do the
most obvious thing with this vocal which is panned. Hard left and hard right. So over in our channel rack, these two are the sort
of backing or doubled, takes some just going to pan. The first one hard left and the second one hard rights
and then want to play it. Okay, so you can help
see they're just pan, but it gives a nice big
wide stereo effect. So what I wanna do is add the same processing,
see both tracks. Now, I could literally have them on separate channels like we have at the moment in the mixer. So one is going to channel 15, the other is going
to channel 16. So 15.16 and I could add the same
effects to both channels. Or I could potentially create another group
and actually route both of these tracks to
another channel in the mixer and just
add effects to that. But the sort of quick and
dirty way of doing it in f l is literally to route both of these
to the same track. So I'm just going to change
the third vocal takes. It's going to
channel 15 as well. It means this track here is now defunct so much I'm going to right-click and just go reset
selected tracks to default. Yes. So that's fine. So basically you got
to vocal tracks. I'm just going to rename this so it can stay the same color. And I'm just going to call
it doubled takes, hit Enter. And now we've got
both of these being routed through this channel. So if I say no, it's
one as you can hit, Okay, so that's fine. Now, any effects I add
to this will be applied. Obviously it's a both
tracks because as both signals running
through channel 15, say first off, I
want to get the EQ that I have on the main vocal. So I'm going to select
the main vocal track. Come over here, and that's just click on the
little drop-down arrow. And we're gonna go to Save Preset as all we do is
literally click and hold that. So left-click, click and
hold and then drag it. So it's now hovering over our other vocal tract double takes and let go.
And there we go. You can see that it's now
been added to that trap. So we now got EQ being removed and we're going to
also do the same thing. So we're gonna go back
to our mixer track. We're going to, for
the compressor, click the little
drop down arrow. And then where it
says Save Preset, going to left-click and drag it and drop it on our
doubled takes track. And again, we've
got the same thing. You can hear that obviously
it's being compressed now. Fantastic. So let's
do the same delay. We might want to change this
a little bit, but it's fine, is pretty much set
up how we want, so we're just going
to copy that as well. So let's click the
drop-down arrow. See priests as drag and drop. Okay. Now with the backing vocals or the double takes, I should say, we can actually add a bit more space to these, so we can actually turn
up the West amount. So increasing the
amount of delay just because they're going to sit a bit further back in the mix. Now, what this does is you've got obviously
the main vocal, which already has a little
bit of effects on it. So it's sort of sat a little
bit further back in the mix. But having even more depth on the double takes is going
to create a sort of nice, big, lush vocal sound. And you'll hear that as
soon as I bring in the main vocal again and
we tweak the volume. But just for now, let's
just add a bit more wet to that, so that's fine. Again, we're going to
get the reverb as well. So once again, go back to our main vocal, drop-down arrow, save preset as click
and drag and drop on double takes and reverb. So let's do the same thing here. So we're going to increase
the wet just a bit. Say that sounds
okay at the moment, I'm just going to
close these plugins. We didn't really need
them open anymore. And I got to turn the fader
down for the double tape. And I'm just going to go to our project window and
unmute main vocal tics. Now let's just play that and
see what it sounds like. The, you can hear that
nice thick vocal sound, but the double takes just
a little bit to doubt. A nice mixing technique feces when you're trying to get
the balance of something right is to turn
whatever it is you're mixing in right down
to start off with. And then just gently bring up the fader until it's getting the sort of effect or the balance that you want.
So let's just play it now. They can hear there, That's obviously the track
with just the double takes and you can
hear the sort of level of volume
that they are at. And then we bring
in the main focus as well. So I'll just play that. One. Can really hear. It just adds that extra dimension
to the vocals, making them a bit
more plush and nice. So that's fine, a pretty
good as they are now. And let's just test this in
the core section as well. So definitely add some,
just bypassing it there in the course section just to check it what it sounds like without them and
obviously with them. So that's just what
I'm doing there, but it actually
sounds pretty good. Just adds that extra thickness
to the vocal. Very nice. So we've got the option now
of just choosing where and when we want to add
those backing vocals. So do we want them all the
way through the track that literally right
from the beginning everything is just doubled
all the way through. Or do you want to use
them more as an effect? Perhaps we only use them
in the chorus. So e.g. if we just shorten these
and the main verse vocals, just a plain main
vocal on his own. Jordi sounds nice on its own, but then in the chorus, we got the doubled
vocal tics as well. So adds a bit more sort
of impact to the course. You've got many different
options that we can go with, that we're going to
be a little bit more intricate with our choice. So I'm going to have
the double takes playing just these longer
words in the verse, say like soul and
that sort of thing. Let's just play that quickly. And then this word here. So let's just do that quickly
as just shorten these. Get my arrow or you go to the beginning and
then just shorten that. Then get my split tool. Zoom in a bit as well. So it's just going to
split those two there. Get my normal selection. So making sure that I
grabbed the right bits. So that's all fine. Just want to make sure
you can see there's a little bit of audio. So I'm just going to choose
to not snip that in half. I'm just going to try and find a nice low volume patch at the point where I'm cutting
the audio off and again, grab my slice tool and it's
just slice down there. That's fine. Selection to say
you can see what I'm doing. It's quite sort of basic ready, so they just those two words. Now let's just, before
we go any further, let's just actually make
sure that actually works. One that can probably be turned up a bit
now we're just using them as one-off words. So I'm just turning
up the sorry. That was a bit quick but
I'm just turning up the doubled takes a
volume a bit there. That's nice. Just adding
a little bit more impact to those particular words. So that's a nice
trick to do and will do the same in this
second verse as well. We still got a bit
of editing to do because we are missing the pre-chorus vocal
in this section, but we'll get to that in
just a second is fine. Save, I'm just going to
do this here as well. Let's just check what we got. So it'd be this word. Say, let's just show
some these off. Ease my slice tool. Actually going to undo that. And I'll zoom in a bit so it
can be a bit more accurate. There we go. Yes, perfect. Selects my normal
selection tool and Just leave that last word there. Here we go. Let's
just play this. Then. I want you say Let's
just quickly do that as well. So let's get our split. So I'm going to split all
three audio takes right down the middle there and right
at the end of fantasy, zoom in a bit so you can
get as nice and close. Go back to the normal
selection tool and I can just delete these big gaps. And let's go and see the
beginning of our track. And here splits. So again, we're just
going to split this just a little bit before
it actually starts. And at the end there snippet as close to the end as
we can. So that's fine. And then what we're gonna do
is I'm going to select again our normal selection
tool, hold Shift. And just drag that
across and zoom in, just make sure that is
actually on the right point. So that should be fine.
So let's just play that. Sadly. Okay, say sounding pretty good. I think we could, if we wanted to sort of mess
around with this a bit more, we might even want
the doubled takes to only start sort of like say,
halfway through, perhaps. Just going to test this
out very, very briefly. We will actually do
something like that. I think that kind of works, but we're going to mix
this up a bit because our core sections or loss for
three repetitions of 8 bar. So what we're gonna
do is we'll select, sorry, I hold Control and
just select those two. And we're going to
move this to the end. And then we're actually
going to duplicate the first half of
the course vocal. Hope this isn't too confusing, but if you just follow
along, it'd be fine. So we're going to just have this first eight-bar
section up to here. So let's split it right there. Scale split to split
it, That's fine. Zoom out a bit and I
just want to shorten. So normal selection tool, I'm just going to shorten this up as much as
possible. That's fine. I just need to jig this
along so we're going to have that last part of the
course starting there. And this one's going
to be repeated. So we're going to hold
down Shift and just copy that across. I
think that's right. Just messed up and not put
those in the right place. So let's just select
them and move them up. Okay, so if you've
followed along, basically all we did was
just make the chorus vocal longer by chopping it in half and then repeating the
first part of that twice. Say from here to here is
the first repetition, then the second repetition, and then it goes into it. Second part, if you'd like. And we've also got
the doubled vocals. I'll just play the whole
thing just so you can actually get an idea of what
I just did before I play it. Just so you know, what
we're attempting to get here is just a
buildup in energy. So obviously we've
got the chorus vocal coming in for the first
time in the track, or at least in the
proper course section. And we've got 8 bar into that. We've got the lead up coming in. And then in 8 bar after that, we've got the doubled
vocals coming in as well. So it just sort of builds up and up and up throughout
the course section. It just keeps it a
bit more interesting. Let's just play
that last section so you get what
I'm talking about. Hello. Okay, So you can kinda
see the three stages throughout the three
different eight-bar section of the course, just booting up and up and up. So that's that one
last little thing. I was playing around
with the idea of putting the chorus vocal actually
in our breakdown here. So let's just try that. So let's first of all, we just need to cut snip
or slice this vocal here. So let's just cut up there, and let's cut it at
the end as well. Normal selection
tool, delete that, and then I'm going to copy over the first repetition
of our course. So again, I can just hold Shift. Copy that to the start
of the breakdown. Say they're just see
what this sounds like. Okay, So I think it actually
sounds half decent. I'm going to let the track plate through
from start to finish now just so we can
get an idea of where we are with the arrangement.
I think it's pretty good. In the next lesson, we'll start looking at either side
chaining the base, which is super important to
any track that you make. Okay, So I'm just going to play through now from start to
finish just so you can get an idea of where we are with the arrangement and how it
all sounds at the moment. So that's it for this lesson. But in the next lesson, we will be looking at
soil chaining the base. So the kicks and the base. So thanks very much
for watching guys and girls see in the next 11111. Right? But I want you to be sad.
19. FL Beginners Lesson 18 Side Chined Compression: Hey everybody, welcome back. Alright, so now we
are starting to get to the end of the course. And this is really where
we start to actually mix the track properly. So we've looked at a few effects already, like compression, EQ, and we'll be using
these a little bit more through outlaw
sort of mixing process. But the next thing I
want to look at is an incredibly important thing in guessing the low end of your
track to work properly. So we'll unpack this as we go. But basically, we're gonna be using side-chain compression to help the kick work
with the baseline. So when it comes
to side chaining, you can use so chaining sort
of in a creative manner, which we may do a bit towards
the end of this lesson. It is also one of the most
powerful mixing tools when it comes to the low-end
frequencies of your mix. This track we've
been listening to, and I haven't felt the need
to actually side chain it yet because it doesn't
sound too bad. Now sometimes when
you have the kick and the bass playing at the same
time like we do up secret. If I zoom right in, you can
see our kicks are playing on every beat actually.
So on these points. And also our baseline
is playing at some points at the
same time as the kick. Now that's where you get problems with
low-end frequencies. You didn't have to understand the science behind why that is. But basically, low frequencies
are harder to mix, or at least they require more attention and more
precision than mixing, say mid-range or high
range frequencies. But it's simply to get the kick and the bass
line to work together. You need to make sure
that there is no, or at least very little overlap
between the two elements. So very briefly to explain
why it's important, what happens when the kick, which obviously has
a lot of basins, sub-basins energy plays when that plays at the same
time as the baseline, which of course also has
lots of sub bass energy. When they play at the same time, the base from the baseline will interfere with the
base of the kick. And what happens is the kick kind of loses its definition. And this leads to an
inconsistent kick playing throughout your track
where you want it to be really nice and
tight and punchy. But it kind of having them play at the same
time has this kind of destabilizing effects on the mix between the kick and the bass, which ultimately
leads to a messy, muddy and, or boomy low end. So how do we get
the kick to have all nice bit of space around it and then still have
the baseline playing. To do this, we use a process called side-chain compression. Now we already know roughly
what compresses do. We looked at that and the
vocals mixing lesson, they basically just
turn the volume down when the signal goes over
the set threshold level. So all a side chain
compressor does is it allows you to use another source
to activate the compressor. So we'll put the compressor
on the bass line channel. And we'll use the kick as
the side chain inputs. And what it will do is
every time the kick plays, it will turn down the
volume of the baseline, thus creating space in your mix. Again, don't worry if you're
not following exactly. This is, I wouldn't say
an advanced process, but it's certainly not really
a beginner level process. However, it's so important
to every mix that you make, It's really worth covering from the very start of your
music production journey. The first thing I'm
gonna do just so we can really get to grips
with what's going on here is I'm going to mute all
the elements of our track, apart from the drums
and the bass sub k. So I'm going to mute the leads. The lead UP can stay. It's not really going to interfere where we
are at the moment. And the effects can
stay and that's fine. We're just really in
fact, so I'll just set a loop region as well. So just by double-clicking
in the timeline and then dragging to the right and
our mute, this one crashes. Well, let's go to our
channel rack and go to all. And I'll just mute the clap, the clays tap and the open hat. Okay, So obviously
we've just got the kicked playing now
and the bass sub, just so we can really
get to grips with what side-chain compression is doing when we add it to our track. Just going to make a
channel or a bit smaller. And let's go to our mixer. So you've already
got the bass sub coming out in this channel here. If you've copied me, then it will be channel six. And of course we've got a
kick as well at the start. In order to side chain the
kick to the base subunits. The first select
the kick channel and then on the
basis of channel. And with this little arrow, we're going to right-click
it and then go side chain. Track. Sorry, that's
a little bit cough, I apologize about that, but it says side chain
to this track and you can see this little
green wire has appeared. It just means that now
the side chain is linked. Thanks, turn this up. You don't need to,
that's absolutely fine. Just leave that
with no green bar, leave it at zero effectively. And then on our bass sub
channel when we select it. And just a quick note as well. Obviously, as I click
on a different channel, that green wire disappears. But when I click back
on the kick track, you can see that it appears
so it's just tidies up the mixer by not always
seeing these green lines. So just say no,
it's still there. When you click off it, go to the base subchannel. We're going to load
The fruity limiter. There is a quick, easy way of doing side chaining, especially when you're using a four-by-four beat like this. But honestly this is
the much better way to do it using the
fruity limiter. Okay, So just made it
a little bit bigger and let's also detach it. So the first thing
that we want to do is change this to comp mode. So at the moment
is unlimited mode and now it's in compressor mode. And we're going to come over to the side chain group
and click on that. So I right-click,
I beg your pardon, and just select the kick. Now, the side chain is
basically fully set up and it's just a case dialing
in the right settings. So I'll give you the basic
settings which can be used in almost all
kick and baseline. So chaining scenarios, just
remember the threshold. As we learned in
the last lesson. That is the one that will
always needs to be dialed in for each track that
you're working on. It will very rarely ever be
the same from track to track. The release which
we'll get to in a bit can be modified to change the response of the
side chain compressor. But let's go through
and we'll get to that. The settings that will
practically never change when your side chain is the attack wants to be as low as possible. So basically have that as zero. And the ratio, We, generally speaking, I
would have it again, 3-4. It really isn't going to make a huge amount
of difference. I usually go for
somewhere around 353621. So that's fine set
and forget that. That set, well, we
gotta do is dial in the threshold level
and the release time. So for now I'm just going to
set the release down a bit. So normally, when you talk in side-chain compression
and you'll talk in sub 100 milliseconds. Now remember that the
amount is actually displayed in the box
up here, Hint panel. So I'm gonna change
that you can see. So generally speaking, you're looking at less than
100 milliseconds, but with the fruity limiter, you want to be a little bit
careful if you go to shortly, actually add distortion
to the signal, which is a bit of
an odd behavior, but that's what it does. And in this case, we didn't want to add dissociates. That's fine. That's just play it
and see what happens. We're going to bring
down the threshold. You can see that when we start getting the light
blue, this blue line, we can actually start
to see that some level, some volume is being taken
out of the baseline. So if I bring it
all the way down, makes it much more obvious. And you can see that the
purple bits in here is actually what is being
removed from the baseline. So obviously it's
a bit too extreme. You don't want to
take out that much. We just want to be
dipping the volume. So let's just back off
the compressor a bit. We can see here
that purple is just where the volumes being dips
and that looks pretty good. So we're not completely
removing the sub bass line, but we are dipping
it quite a bit whenever the kick
hits this up here, That's the kick hitting. You can see now the release, as I've mentioned,
it's actually set about right as it is right now. So about 77 milliseconds. But I'll just show you
what it looks like when you raise this up a bit, you'll see the response
time gets longer. It will take more
out of the baseline, or at least it will take out more of the baseline for longer. I'll just show you what I mean. So you can see that before
our releases, nice and tight, just taking out the base until about halfway
through the beat. But with the release right up, you can see that it's got a
much gentler response to it. So it's taking out
more of the sub bass, so we don't want
that, that's fine. We want to leave that
sub 100 milliseconds. So put it back to where it
was, which is about 77. So what you'll find is some
tracks really benefit from, so chaining and some
might benefit less, but I guarantee that it's always worth doing
the site chaining. So it's just such
an important thing to do to make sure that the low end of your
track works together and as always sorted
through Psi chain. Okay, so that's it
for this lesson. Thank you very much for
watching guys and girls. I'll see you in the next one.
20. FL Beginners Lesson 19 Intro To Mixing: Hey everybody, welcome back. Alright, so in this lesson
we're going to look at mixing and we're going to look at the overall
approach to it. But first, I just want to
quickly unmute some of the bits and pieces that we've emitted in the last lesson. So we are then ready to
go in the next lessons, go to our channel rack and re unable the drums should
be everything, right? So in this lesson, we're going to talk about what mixing is and why
it matters so much. And I'll tell you how
you can line yourself up for an easy mixing experience. There's no practicality
to this lesson. We're not actually
going to do anything. I just want to give you the
overall sort of viewpoint of a mixing engineer and how you can apply that
in your own mixes. Mixing can be broken down
into a few main parts. Balance of the elements
in your track, separation between the
elements of your track and the clarity of
those elements. Say first and foremost, mixing is about balance. You can have the best clarity
and separation in your mix, but if the balance is off, then it will never sound right? This is why we generally
start with a volume mix. So when I say balance, I'm talking about the levels. So whether one things louder or quieter than another thing. So we start with a volume mix
of all the elements first. And the key to successfully doing this is understanding what the most important elements
are in your track and making sure that they take
center stage in this track. Clearly, the vocal
is the main element, closely followed by the leads, and then the base, and then
the drums sort of thing. So it's just a case
of selecting what is the main element and making sure that that always remains the focus of the attention
when you're mixing. The process of mixing,
believe it or not, actually starts at
the very beginning of the creation
process and involves picking the right elements
in the first place so that they all work together and
compliment each other. So you wouldn't want e.g. every element in
your tracks to be like short and
stubby and plucky. It's just not going to work. You need some elements to be
short and stubby and plucky, and then other elements
to be more drawn out. So in the case of this
track, we've got the lead, which has much more
longer drawn out notes. And then we've got the baseline, which is more sort
of like a consistent plucky rhythm behind it. So those two elements can
work together quite easily. Now that's just one example, just to illustrate my point. But it's not just about
picking elements with a strong rhythmic pattern and some without a
strong rhythmic pass. And we also need
elements that work together on a frequency level and also on a tumble level
as well, or textual level. Say frequency, it means
picking the right elements that are not too close
in the frequency ranges. E.g. if you have a singer with a really high
pitched voice, than you might want, a lead that is not too bright
and high-pitched. Otherwise the two
can be trying to like conflict at the
high frequencies. And you can lose that sort of definition of the vocal because some of the frequencies
are being masked or overridden by the lead sound. And in this example, you would just pick
Different lead sound, would change the existing
one so that it's not so high pitched or has less
frequencies, whatever. There's many different
ways of going about sourcing this thing out. Now I mentioned Tambora, which is also another
important factor in mixing and therefore important to consider when picking the
elements of your tracks. Say Tom Brett refers to the tone or the
texture of the sound. How some sounds have a
pretty hollow quality, or they might sound
really dense or airy. Well, that's the
Tambora of the sound. Now why it is important
is that you could have two sounds that sit together
in the same frequency range, but they may still
sound quite separate as they have very different
Tom braze or textures, if you prefer to call it that. So if you've got a
really light airy pad, but it's very high frequencies. You might also have
a very dense sound like a hat or something
that's very high frequencies. But because it's
hombres so different, they actually can work
together quite nicely. So all of this, I
just ways of helping you visualize how to
get a better mix. So if you choose the elements that generally have
different time, because if you can put
that together with the frequency range
and a balanced mix, then you're pretty much
going to have a nice, easy mix and it's
going to sound good. Then, as you'll see
in the next lesson, it's really all down to
the final volume tweaks, adding the final sparkle with some effects and making sure
that the mix is balanced. But really the most
important part is actually having the right
elements in the first place. Because if you've got elements that just don't work together, it doesn't matter
how much mixing, technical knowledge
you throw at it. It's always going to sound
like a bit of a mess. So that is the absolute
number on keys. Again, good mixes, picking the right elements
to start off with. Now I know this is a lot to take in if you're
new to making music. But in the next lesson, I'm going to show you
how to mix this track. So you'll get to see this
theory puts into practice. So that's it for the theory. Thank you very much for
watching guys and girls. I'll see you in the next one.
21. FL Beginners Lesson 20 Adding Reverb To Your Mix: Hey everybody, welcome back. Alright, so in this lesson
we're going to actually do the spatial part of
the mixing first. So we're going to add reverb. So when adding reverb or a spatial effect like
reverb or delay, you basically have two choices. You can either add
a reverb plug-in to each and every track
that you want to add. The effects too, like we
did with the vocal track. Or you can just set
up a channel in the mixer with one
reverb plugin on it, and then send the signal
of each track that you want to add
reverb to that track. So this has its benefits
as you only need one or perhaps two reverb plugins per projects as opposed to
potentially over like ten. If you've got ten trucks
that you want reverb on. So we're going to add
reverb to the clap sound. First of all, let's just bring
up our mixer. That sound. We're going to add
reverb to first. Now the best way to really
understand how ascend works is just for me to go and set one up and then show you
as I go through. So you can use
actually any channel in the mixer as a Send to Bus. So we're going to
use channel 17. It's just an empty channel not being used by anything else. So quickly I'll just
rename and color this. Cool it reverb send. Not that the name is important. And let's go and we want to select like an orange
color for this. At least that's what I normally
pick for an effects send, hit Enter. And there we go. That's our channel that
we're going to use now the next thing we want to
do is add reverb to say, we come over to
our Insert slots. We want the fruity reverb to
just going to detach this. And just for the
sake of quick setup, we're going to use a preset. So I'm just going to click
there and click on large who? Now we will modify
the settings of this in a bit when we've got
the snare coming through, but at the moment
there is no sound coming through to this, so
you won't hear anything. But one of the most
important things that you need to do when you're
using a spatial plug-in as a sender effects
on ascend bus is you need to turn the dry all the way down and you want to turn
the wet all the way up. This means that you
won't be hearing any of the original signal. What will come out of
this channel will only be the reverb signal. Okay, Don't worry, that'll
become more clear as we go. So that's fine for now.
We can close that. And now in order to send my clap through to
the reverb send, so I'll just un-solo
that for a second. I'm going to select
my clap channel. Then come over to my reverb send and just literally left-click that little drop-down
arrow at the bottom. And as you can see, it's just created now a link
between the two. And this here is now the
sort of level that I'm sending through to the
reverb. Send groups. Again, I'm going
to solo my claps. And as I bring this up, you'll start to hear reverb
being added to the clap. So having a send
like this doesn't affect the original signal. That's still, the clap
channels still there and it's still being
sort of directly rooted. The output channel,
all we're doing is basically taking a
copy of that signal, sending it over to
this channel here, which has obviously a reverb
plug-in on it with 100% wet. And we're just choosing
how much of the signal is being sent through
that reverb plugin. So let's just have it up
a bit more prominently. Now it's a bit chunky and big
the reverb at the moment. So let's go to our reverb send and actually
set up the reverb. So I'm just going to
click it to go into it. So the main controls
really are the decay. So I'll just let
this play around. You can hear what happens
when I change them. So the decay, the,
shortens, the reverb. Massive reverb if you want. Now, I'm going for
what is a typical sort of technique which is
having the reverb. You want it to be
long enough that it lasts until the next
hit of the snare. So you can sort of hear it just tailing out by the time
the next snare plays. Perhaps just a fraction
shorter. That's fine. Then you have damped, which basically just
removes some of the high frequencies
from the reverb signal, but it doesn't in
a linear fashion. So it will start with
more high frequencies, but lose those high
frequencies quicker overtime. Sort of has that kind
of deadening effect on the reverb. That's fine. Then we're ready, we need
to change that seem much. The high cut has a
similar sort of things. If I cut the high frequencies. It has a similar effects, but it takes all of the
high frequencies out of the reverb rather than with
the dampening that over time, the high culture
takes it all out. That's fine. We can just actually
leave that up. Now the low cut super-important for a general reverb like this, because we are gonna
be putting lots of different elements
through it and we don't want any extra low-end. If you notice here as
I change the low cut, you'll see up here the
frequency amount that we're taking out.
Anything really. So I usually set this
to about 250 odd hurts. And it just means any sort of sub frequencies that
might be there. In fact, let's just take out a little bit more than that as guts about 300 ish. Say when we add reverb to the kick is not
going to be adding reverb to those really
sub-e frequencies, which could end up making
the mix a bit muddy. So just a very small
amount of low cut, which is generally
what you want. The only time that you would want to actually have reverb on the low frequencies is
perhaps when you're adding a singular reverb to like a big drop kick or
something like that, something that has an effect. And you want to reverb
those sub frequencies. Brightening up a little
bit by adding a bit more of the damp. The higher that is, the less
dampening effect there is. So don't want it
to super bright, but something like that
sounds pretty decent. The size changes, but the perceived size of the reverb is now actually
think it's fine as it is, but I'll just show you
what that sounds like. It sounds more like a, in
a very small drum studio, something when the size is down. That's fine. No problem there. So
the main controls, the ones that you really
want to look out for, the ones that really
have the biggest effects on what the actual
reverb sounds like. You can add modulation to the reverb signal as
well if you really want. We're not going to add
any of this, that's fine. And I think we're
sounding pretty good. So one last control I'll
talk about is this is the early reflection level. So early reflections are supposed to represent
the first signal. So it has, a sound is being
produced, a shout in a room. The earlier fraction will be
when the sound has gone from your mouth to the wall and bounce straight
back to your air. That's the first reflection
called the early reflection. And then all the
other reflections are counted as just
the reverb tail. This slide, you can
choose whether you want early reflections or not. Not really making a massive
difference in this case. So that's fine. No problem. We'll just leave it where it was and I think we're
pretty much set up. So let's send some
other elements in our track through
this reverb group. So next one up or
just un-solo that. Let's add it to. Let's do the kick first actually
might as well. So I'm going to select
my kick channel, go to my reverb send group, and then left-click
again, set up. And it automatically sets
it at quite a high level. That'd be way, way too much. As you can hear
that slight really gasoline is just solo that. So we want a really small
amount on the kick, something like that,
really, really tiny. We want the kick to remain as upfront in the mix as possible. So that's fine. Let's move on. Let's do the closed hat. So close hat, on solo the kick. Make sure my clothes
hat is selected. Click on the reverb send, and I'm just going to solo this. So let's just listen
to this in the track actually so un-solo that I'm not going to play from
here because this is where the clothes
hat comes in. Saddening. Why may say something like That
sounds pretty nice. Just adding a bit
of reverb to it, giving it a bit of space. And let's do our open hat next. So I'll just forward
it onto there. So open hats selected, click on reverb,
send left-click. Let's just choose our mountain or let's just say
to that person, we don't want to add tons of reverb to that
just a little bit, just to give it enough
space, that's fine. Un-solo, just check in the mix. That sounds pretty
good as it is fine. Now I want to add a
bit to the base top. So let's select our base
TOP channel and left-click. So somewhere about
there actually sounds pretty decent at the moment. We may want to change
that in the next lesson, but where we get into sort of mixing and adding EQ in a bit, distortions are some
of these elements, but for now that's
absolutely fine. Don't want to add
any to the sub. Of course that's no point
adding any reverb to that. Say, let's just have a
quick look at the leads. So think the leads generally have that one's got quite a
bit of a delay on already. So I don't really need to
add any reverb to that. So does that one as well. So no need to add
anything to that. Let's have a listen
to our lead up. Just turn off my loop
by double-clicking in the timeline and
just solo this track. Definitely, it's got delay, but it definitely
needs some reverb. So let's just find that. So that's our lead up channel. Again, left-click. And let's just see
what it sounds like. It's just listened to
that in the mix as well. Okay, so just getting
a slight balance there between it being nice
and forward in the mix, but also having a bit of a
sense of space around it. So that seems about right to me. And let's just
listen to the vocal. I think I might want to just
change this a little bit. Yeah, It's got just a bit
too much reverb on it. So let's go to our mixer. And he got our main box.
Now this is different. This wasn't a send effect, so we're just going to go
into the main Vox channel, go to the fruity reverb to, and let's just turn
down our wet mix. So let's just play it first. So what I'm trying
to get here as we want it to have
a sense of space. And it has got that
with the delay and a little bit of reverb, but we really want to keep
the vocal nice and upfront in the mix and having
too much reverb on it or just experiment a bit. And I'll show you
what I mean because having too much reverb will sort of put it too far back in the mix and it just
won't sound right to me. It's just kinda loses a lot of its power
and its presence. So we're going to just have
that turn right. Much better. That's fine. While
I'm here, actually, I'm going to just
slightly turned down the doubled vocals. I think that just a little bit too loud when they come in here. Just a little tweak there to the doubled takes volume
level at one last thing I will do it in this lesson are they really should belong in the next lesson where
we're mixing all the bits, but I will just pan these leads where we
got our leads here. Rather than them being panned
both hard down the middle, I'm going to come in here
to the channel rack, and I'm just going to
pan the first one, just say like 20% to the left and then the
one underneath it, the layer 20% to the right,
or something like that. It doesn't have to be precisely
accurate as no problem. And they'll just give
them a little bit of Stereo Separation and just helps make the track
seem a little bit wider. Just a bit fuller,
which is nice. Sounding good. Got
the reverb on there. We may, again, like I say, tweak that in the next lesson, but I think we're pretty good. So we will get on
to the E queuing, tightening up things and
everything in the next lesson. So thanks very much
for watching guys and girls see you in the next one.
22. FL Beginners Lesson 21 Track Mixdown: Hey everybody, welcome back. Alright, so we're in
the final mixing lesson and we're going to get all of the bits and
pieces done that we need to make this track
sound nice and fat. So the volume mix
actually is not too bad. There's only a couple of things I really want to change on this. Some things like the kick and the sub bass might want
a bit of tweaking. But actually, as we've
been mixing this, as we've been going through and changing the volume levels, it's pretty close to
where we want it. So the first thing I wanna do is go and just tweak
the kick a bit. So her plate here, the tail of the kick is
just a bit too long. So I'm just going to go to the channel settings and I'm going to left-click on the kick. And we've got a
channel settings here. Now you can tighten up the
kicker bit by turning this up, but it's not really
the best way to do it. So what you wanna do is come to the envelope settings and
will activate the envelope. Now the first thing
you wanna do is just, in fact I'll just
solo the kick so you can hear what's
going on here. So at the moment the attacks up, we want to make sure
that's at zero. We can turn that sustain
all the way down. And all we're gonna
do here is play with the decay and the holder. So at the moment I'll
turn the decay down. We're going to just tighten the kick up a bit
so we're going to remove a little bit
of the tail end. So you can hear
that's way too much. It's just turning
it into a little tiny hits kind of thing. Maybe just a little
more tricky than that. So somewhere around 15 per cent. Just going to turn
the envelope officer can bypass in here
what it's doing. A little list to K. Problem is if you have
too little decay, you get that clicking sound. Which obviously is not how
it's supposed to sound. I'm just going to
attach this quickly. Will turn up until we stop
again, that nasty sound. That's fine. About 21% of
the decay and the hold. Just have that at 14. When I bypass. You just hear hopefully you got good enough
headphones to hear that, but it's just cutting off the last part of the
tail end of the kick. So just tightening it up. Very slightly, not massive, but just a bit. Okay.
So that's fine. We can come out of there
while we're on the kick. I think they're just
going to un-solo. It will go to our mixer so we can get to the mixer by pressing
that button there. And I think we're just
going to turn it up a bit. So this really is the onetime. Now we're right near the end of the mix that you can
actually turn up the kick without fear of the whole track
becoming too loud. That's fine. And it's just
a little tweak anyway, so no problem, That's great. And let's add an EQ to
this because I want to try and bring out the mid-range
punch a little bit. So with our kick
channel selected, we'll go to slot one. Just means a bit smaller. I mean, you want the
fruity parametric EQ to just make this a bit bigger. Say, I want to bring
out the mid-range punch of this kick. So we're going to
be looking to EQ somewhere around
the high hundreds, 23 or 400 hz perhaps let's just have
a little play with this. And I will actually just solo the kick as well in a mixer. Just right-click it. Somewhere about there
sounds pretty decent. But they won't sue really be
affecting the low-frequency. So I want to change the curve or the steepness of
the curve of this. And to do that, we come down to the band that we want to
affect this dial down here. Well, actually change
the steepness he kind of at a much finer. So we'll go for
something like that. Just going to use a
little balance between. So really just listening
to where I want it to be, just trying to get a bit more of a rounded mid-range
feel to the kick. So let's just play again. I'm going to bypass the EQ so we can hear what we've done. So without them with just gives us a bit more mid-range present.
So that's fine. But we will want to actually probably turn that
down just a little bit because you've actually
boosted the volume of it. Let's un-solo that and listen
to the rest of the track. Sadly, that sounds
pretty decent as it is. Great stuff. So that's
the kick sorted. Let's move on to the snare. So if we click on
the clap, again, the same thing here, we just got, this is a
little bit too long. Let's just say that again. We're going to go
to the envelope, activate its, turn the
attack right down. Again, sustain can be turned down the decay a bit and we're
going to tweak the hold. So again, it just makes
it a bit tighter, but we definitely
want to listen to this with the rest of the mix. We're also going to turn it up a bit. Just going to play
with the controls. So got the hole there. So it's making it quite
tight and snappy, but I'm just going to
bring in a bit of decay. So it allows a bit
of a tail out. So it's just
tightening up again. I hope you can hear
that properly, but let me just say let's just say you can definitely
hear what's going on with the
envelope and then without just tightening
up slightly, that's fine, but I do want
to EQ this a bit as well. So I'm just going
to on solo that. And let's go to our mixer again with the clap
channel selected. Let's go and add fruit eat
parametric EQ two again. And here I want to remove any sort of low
frequencies from this. So let's right-click type to high-pass and then steep eight, the order of steep eight. So just removing
any low frequencies from this, That's
absolutely fine. I don't need to do that anymore. And I want to add or disease band seven because it's already
be set up as high shelf. And I'm just going to boost the brightness of the scenarios. That sounds nice and crispy. Little bit too much. So with all that being boosted, I'm just going to turn
it down a little bit. That sounds pretty
decent. I think. Let's go to the closed hat. So the closed hat or wants to, I think brighten this up a bit. Let's have a listen to it. When it first comes in, in the pre-chorus 11. Yes, That could
do. Brightening it up a little bit, so that's fine. Let's add, make sure
it's selected in our mixer and add the fruit
eat parametric EQ to. And I'll just ease band six
here because this will be just a normal bell
curve type thing. And I'm going to also just
loop this little area here. And I'll detach this window so we don't have to
keep finding it. So observe just
brightened up a bit. I think you can hear that,
but I'm just going to bypass it as well so we can make sure that it's definitely
doing the right thing. Why? Do you say fine, just adding that bit of fizz, see the hat, That's fine. I like it. Is it too loud now let's just
double-check little bit. So it doesn't want to be too
super loud when it comes in. Why? That sounds absolutely fine. I don't need to change. That's just get rid of the leaf. That's fine. It kinda chugs
away in the background. There may be, may be
just an upper fraction, but really a tiny,
tiny bit there. Literally gone up to
101% instead of 100%. Massive, massive move. Okay, So that's fine. Let's just get the
vocal completely sorted now because obviously
if vocals like super, super important
parts of our mix, so let's just start from
verse one, that's fine. And gates on mixer, just scrolling across so
you get to the main vocal. I don't think I want to
make it any browser. I think Laura's voice is
actually naturally quite bright. Plus the microphone that we use, the Neumann TLM
one-two-three actually has a slight sort of
high-end bias as well. So I think it sounds alright. Okay, I lied, I'm giving it a little bit of
high-end shelf there. And let me just make that a bit bigger so you can
see what I've done. So just a little bit, nothing
too major, that's fine. I'm going to leave it at
that. But what I want to do is make the vocal sound
a bit more crunchy, which is a very modern
thing to do in production. I'm going to hold Control and
just use my mouse wheel to drag the reverb down and the delayed onset
open up slot three, I'm going to click this. And under distortion
we're gonna go to fruity blood overdrive. Let's just make that detached and let's just play
around with this a bit. So we're just going to use the
pre-empt to boost this up, but we'll probably need to turn it down when we
start doing that. One. Sadly, taken here. Hopefully that that's
just adding a bit of grit to the vocal would like
a little bit of distortion. This is Malika, what you'd
classes or saturation plug-in. So it's kind of adding musical harmonics to the signal
is not just crushing it, and it's more gentle
way of doing things, but it's a really
great way of sort of thickening up the sound. And it's, it really is used in almost every modern track
that you listen to. The vocal is being saturated. So let's just play this in the course as well so we can make sure we're
definitely happy with it. Almost sounds a bit dim without
sits and just very plain. But with it, it
just crunches that up just nicely, just enough. Probably go a bit more
extreme if you want to, that's fine. Up to you. Obviously this comes down
to personal taste as well. Some people like the
really over driven sound. I tend to not want
it to over driven, but like I said, this is
really a personal choice. You can have it
however you want. Just remember it's
always balanced by turning down or
up the post gain, just so it's not like much louder than the original signal. Okay, I think that's
sounding pretty decent. So let's just leave that
how it is done with that. So that's the vocal pretty
much sorted now in totality, I think now I do want to add some distortion to the white noise riser
that we've got there. So let's go to our mixer because we got there is the
GMS noise, I believe. Yep, so this channel here, let's just add
distortion to this. Distortion will use destructor and we'll use preset fuzzing. And I'm just going to bring
up the detailed settings. And I'm just going to
turn the mix of this down because we didn't
want it to have a really crazy effects. So just changing the
mixed level there, which just means that
we're having less of the distorted
signal coming through. But assigns a round about right, but it's just
thickens up slightly, so just bypass it so you
can hear what's going on. Let's just going to change it to about halfway
or 50 per cent ish. So it's not affecting
the signal as much. Now, you can hear that just adds a bit of extra
tonal quality to the sound. So that's absolutely fine. That's all we're
gonna do with that. It's just, just modifying
the noise sounds slightly, just to make it a bit more
interesting. So great stuff. One thing I want to do actually is go to the
very end of the track. And we've got impacts a four here which you've
kind of shortened. This is how the track ends. Then it's suddenly
cuts out at the end. So what we're gonna do,
we're gonna go to impact a4, click on the little
waveform, get to automate. And we'll go. Volume has given us this. I'm not actually going to create a separate automation lane. There's really no need.
I'm just dragging it down. So it's underneath. We'll just modify it slightly. So it all ends a
bit more gently. That's perfect. No problem. So we'll just leave
it like that. Okay, So let's go
on to the base. The base sounds nice,
the subs, okay, but it just is a
bit quiet, I think. So let's go to our mixer. Let's just turn up of sub. So somewhere around
there. So definitely turning up quite a bit there just to make that sub nice and warm in a
bit more prominent. And the base top, well there's a lovely sound. I think it could actually
be thickened up a bit. So let's just make sure
bass top is selected. And let's add
destructor to it again. And we'll see if we can't get some sort of nice
sound out of this. A good preset is stereo suffers
with a space in-between. Probably once you
turn this down a bit, that's a bit crazy. So we'll probably want to
change the mixed level as well. So let's bring up our settings. So that's it without
any of the effects of, so I'm just going to
mix the effective. Okay, that sounds good. It's much more impactful. Say without them with although I must admit I think the reverb amount is now
a little bit too much. So with GMS based top selected, scroll along and we're just
going to turn down The send, the signal that's being
sent to the reverb sensor, which is going to modify this. That sounds about right, I think anything
that's too much. So happy days, we've got our
base sounding much faster. It's just check it from the beginning of the song as well. Maybe even a little bit loud. Sad me. So I'm just going to go
into the parametric EQ to, and I'm actually going
to just remove a little more of the low end. Just sounds a little bit. In fact, much as he's
banned two there that we've used just to reduce
the low end a little bit. Why? It's like that
system this or muddy. Doesn't need much reduction.
Just a little bit. Yep. So it sounded much
better. Bit tighter. That's less muddy as good. So we're fine there. Because as you can see what we're doing
radius going through, just tightening up every
little aspects and whether any sort of conflicts or something's
making something a bit muddy, we're just dealing
with it then and there and making sure it's okay. So I think we're
pretty close now. So I just want to have a listen through from start to finish. Then we'll make any
final adjustments one to one. To be sad. I was barely see. Sadly. Hey, okay, So you're not sounding too bad. So just a couple
of minor tweaks. Oops. I want to make just turning this symbol
up a little bit. And the other cymbal crash 09 or just turn that
up a little bit as well. So I've listened. Still could do being just
a tad allowed to sign. Okay. But we are sounding
pretty decent, I think. One last little thing I
want to try is let's go to our mixer and on the base
top layer, scroll down, find that we've got destructor there and I
think it does sound good, but I want to tweak the EQ
after the structures beans. I'm actually going to add
another parametric EQ to, just to give this a little
more high-end presence. See, sadly. So actually sounds
much better already. So I'm going to leave
it exactly like that. Nothing else to do there, but I do want to
turn it down now because I've just given
it quite a good boost. So let's just play it and
get the balance right. To be sad. Okay, sounded pretty decent. Let's leave it at that. I think we're pretty
much done mixing. I think we're okay now. So what we're gonna do is we're
going to end this lesson. And in the last lesson,
the next lesson, we're going to just
give it a quick master. So it's just like a
quick limiting of the volume to make
sure we're getting a maximum loudness
out of our track. Maybe an EQ, we'll see. And then we're going to
render the final track. Thanks very much for
watching guys and girls see in the next one.
23. FL Beginners Lesson 22 Mastering: Hey everybody, welcome back
to the very last lesson. Okay, so in this
lesson we are going to look at just giving
the track a very, very basic master and then
we'll export our final work. So the first thing I
want to do is just try a bit of EQ on
the master out. Now you don't have to do this if you're really
happy with the mix, there's no sense in adding compression or EQ if you
don't think it needs it. I'm just a bit concerned. I think there's a
little bit of a lack of mid-range frequencies
in this mix. So we're going to try just
adding a bit of that. So what we wanna do come to
the mixer and you want to select the master channel,
which is this one. On the far left. It's already got a
limiter on there, which we'll be using in a bit. It comes pre-loaded, all
the channels and facts come preloaded with the fruity
limiter, so that's fine. But we're going to add
just a parametric EQ to, as per usual for our
E queuing tasks. Let's just make
this a bit bigger and let's just start off with, let's just detach it quickly. And then we'll
start from chorus. In fact, start from
course to wherever you've got all of the vocal
in there as well. So it's not too bad. So just kinda try given the midrange a
little bit of a boost. But we won't see,
have this much more gentle and it won't
be as high as this. I'm just doing this e.g. sake say on the band
that we want to change, that's come down
and just make this really as gentle as it can be. And we'll just be
looking at giving it a really tiny boost
in the mid-range. We'll see if this works or not. And of course, incredibly
important as always, to always check this bypassed. So we are talking
teeny-weeny increments here. And this is one of the things about mastering is
if you're going to be adding effects to
the entire track, you really want to be incredibly subtle with your movements, not like massive changes or big boosts or dips or
cuts here or there. I mean, they'd have to be
something really wrong with your mics if you had
to do that sort of thing, in which case, really
should sort out the mixed level like we
did in the last lesson, not at the mastering stage. So we're talking very, very subtle moves here, say a tiny, tiny boost to the mid-range
frequencies and a very, very tiny boost to the
high-end frequencies as well, using that high shelf there. And it's so subtle that you'd
be forgiven if you can't hear the difference between
when it's bypassed or not, as you get more experienced, you will be able to
hear those differences. Just gives up, midrange
a little bit of a boost and a teeny,
tiny high-end boost. Absolutely fine. Okay,
So that's no problem. Let's just go onto
the fruity limiter. So I'm just going to
click that to open it. Let's make this a
little bit bigger. And again, we'll go from the
same section because this is the section where the most stuff is happening is the chorus. So you've got everything going
on plus the vocal as well. So it's literally the loudest
point in the whole track, which is why we want to use
this when we're gauging how much we can push up
the volume of the mix. So it's very simple to use. All we're gonna do is hit Play and then we're going to turn up the gain until we start to see it actually
having an effect. And I'll explain this as we go. So as you can see, what's
happening here is this is basically that yellow
line is the volume line. And the signal, we're
basically boosting the gain of the signal until it starts
to reach this line here. Now, anything that goes over that line is gonna be
reduced in volume. So it doesn't go over
that line basically. And you'll see that
reduction sort of mirrored. So these dips here is where
it's being turned down. That's how much it's
been turned down by. And this is the level at which
it's gonna be turned down. So what you basically
don't want to do is really slam this
is going to sound awful and it will
start to distort the entire track of and
really mess up the dynamics. Like say it's just way,
way, way, way too much. So what we're looking for
is really about here. So most of the kicks
are at full volume. And only occasionally
they're sort of going over the threshold line and
needing to be turned down. The standard settings, the attack and the
release, actually fine. I wouldn't even mess
with them for this job. And basically that's it. We're basically there. You can choose to push. It may be a fraction more
if you really won't see, but you start to get into
the area of diminishing returns when you try and
boost the level up even more, but it just ends up
squishing the mix. So you've got to be careful with how far you go somewhere. Like what we got is perfect. So that's it. Fine. We're ready now to actually render
out our entire track. Say let's set our loop region. So I'm just going
to double-click and then drag to the side. And we're going to set this
over the entire track. Then all we gotta
do is go to File, Export, export, an MP3 file. So this will actually be
the MP3 that I use in the promo video
that you will hear and also the file that will
be in your projects file. So it won't have been
changed in any way. This is the final render, so I'll just stick it in
the Work folders directory. And let's just name it one soul because that's
the name of the track. And final Master, just
because that's what it is. Okay, Save, then we've
got the settings yet. Mp3, we want a
maximum bit depth, say 320 bps KPBS, I should say, that's fine. Let's go and start. There we go. It's going to render
out our final track. Okay, So that is
it for the course. I really hope that you've
learned a lot about FL Studio. You can always reach out to
me with questions or John at bone to produce.com and we'll try to help
you as best we can. So thanks so much
for sticking with me for that massive tutorial. There's going to
be loads more of these tutorials to come say
keep your eyes open for them. It's been a real
honor teaching you. Thank you very much
for watching guys and girls see in the next one.
24. Fruity Edition Users ADDITIONAL Lesson (coming from lesson 8): Hey everybody, Welcome to this extra lesson
for the course. So this is just for the
NFL, fruity addition users. So the most basic version of fL. So when I made this
course originally, I was actually not
aware that you can't just drag audio into
the Arrange window, which is a bit of a bummer. I thought that was just a given that you'd be
able to do that. So my apologies for the
oversight on my part. I do apologize about that. But don't worry, I'm going
to show you how you can still bring it in
these bits of all j, we just have to do it in
a slightly different way. What you can see
here is what happens after Lesson eight is completed, and we've looked
basically dragged it in all of these
audio samples. And all these are like
special effects sounds. I'll just quickly say we've got risers and crashes
and all that sort of thing. Now, you won't be able to follow along exactly with that lesson, because you can't just drag audio into the
project's window. So let's do it a different way. So I'm just going to zoom
in and I'll leave these in here just so we got a reference
of where they're going. We'll be seeing your
projects. This will be blank. There won't be any of these
green objects in there. So first things first,
let's create a new pattern. Cool, it rises 16, and let's go to the color options and we'll
just pick a green color, which you can get to by clicking over here and
just raising it up a bit. This is fine. So click Accept
and then Enter to confirm. Now we've got a
rise of 16 pattern. Great, That's fine. Rises 16 in the work files and the audio folder.
So there we go. Effects risers 16.
I'm just going to drag that in to
the channel rack. And let's just turn it down a bit because I'm sure
it's a bit too loud. And all we gotta do
is literally just click the first step in the step sequencer and then
we can just draw that in. So what's going to happen at
the moment if I play this, I'm just going to meet that one. Obviously, you don't have to, you won't have that
in your projects. But just drop into
the same position, which will be bar for, I'll just zoom in a bit so you
can hear what's happening. There is the riser is
playing, it's been triggered. If I double-click to
go into the middy, you can see that at
the beginning we've got that little mini block, doesn't matter what size it is. If it's bigger or
smaller, That's fine. And that's triggering
it to stop. But the problem is,
as you can hear, is that it carries on past where the actual
start of the track is, kind of ends there. So what we need to do
is just double-click to go into the settings
for this sound. And what we can do is change the start position
as this SMP start. If I raise this up, we're looking somewhere around there now this is a
bit trial and error. Unfortunately, you have to just make an adjustment
and then try it. Say I've just made that
adjustment, Let's play. Not quite there, just needs
to be a little bit shorter. So literally just changing the start position
of the sample. Let's try it again. Almost, not quite a
little bit shorter. And that's about perfect.
So you can hear there. Lovely, No problem at all, that's fine in the next
lesson or so will actually be adding automation
to this to give it an even smoother fade-in. Say, that's fine to
leave that as it is. Now, let's just go
on to the crash 09. So at the moment, obviously
we've got this crash playing. Now again, you in here that crushing your project is
not there at the moment. So I'll just mute that out. And then we're going to create
another pattern, crash 09. Let's give it the
same green color except then hit
Enter to confirm, and then it's fine, crushed 09 in the audio file. Drag it in to our channel rack. And again, we just click the first step in
the step sequencer. And then we've got our symbol. It should be as simple as that. Much, much too loud
though, of course. And of course we can change
the color of these as well. So it's all neat and tidy. So we've got the start of the
song is now sorted already. Just tweaking the volume of that riser just to turn
it down a little bit. Okay, so the next
one that we got to do is BCP crushed 15. So that is in a form there. I'll just play it quickly. So you know what
we're going towards. So just a nice
little crash cymbal. Let's meet that now. And again, create a new pattern. Crush 15, color it green
except then Enter, and then it's find it over here. So that's drag it into
the channel rack. Turn it down a bit. Again,
hit the first step, and then we can
simply draw that in. I mean, we can, if
you really want to, you can put these
on the same track, although I advise
keeping them separate because then we can kinda keep an eye on
where they all are. Let's just play. That's perfect. Okay, So the next
one, this long riser. So let's again make
another pass and cool it riser O3,
color it green. Excepts and then enter, find it in our audio files, drag it into the channel Rock, Turn it down quite a bit. And again, we're
gonna trigger it. We can draw it in so we
know the start position. Let's just meet that as well. Actually inherit building, they're just turning it down. So you can hear it goes on
for longer than we want. We want it to actually stop dead right on this point here. So this is where it
gets a little bit fiddly and it's a
bit time-consuming. Doing it this way when
you can't bring in audio into the projects,
but it's fine. We can still manage this
situation, no problem. So left-click to go into the riser settings
and then we can change the length, like so. And that's just going to have to be a bit of
trial and error here. So let's just play
it from this point. Probably that it's
actually perfect first-time crazy.
So there you go. You know, the length of it
is based to be 64% exactly. And that just fits nicely. So that was good. So we're going to
actually do is just drag out this bit of midi. So it covers the full length
of where the riser is, just so we can differentiate
between where it is. And it will say make
that crash a bit longer because it doesn't
actually matter. I'm just doing this for
pure visual reasons just to match the length of what they are in the
audio files as well. So you know, when they
start and where they end. Now one thing to note is that if I start
playing from say, halfway through the riser, we're not going to
hear it at all. Okay? It's just literally
not playing because you have to play it from the very
start of this segment. So unfortunately,
this is a bit of an annoying work around, let's say, for the
limitations in FL Studio. I'm really sorry about
that, but unfortunately, there's just no other
way of getting around it if you're using the
fruity addition, this is what you're
going to have to do because you can't have a
song without SFS sounds. I mean, it would just be awful. So this is what we gotta do. Okay, Let's just carry on and get the rest of
the sounds done. Say let's just do
impact quickly. So again, let's
create a new pattern, impacts though for
color it green. They need to do that.
Let's just select the green color and then Enter
to confirm, find it here, drag it in the first step, and then add that
into the projects. I'm going to meet
my audio version of it and turn it down. Maybe not quite
that much. Okay, So it sounded good and
simple as that, for that one, now we got the repetitions
of these samples. And just while I'm
here, I'll just very quickly color these as well. Sorry, I couldn't
see. The last one is off screen. I apologize. I just selected the
green color obviously, and I'll just move the audio version of the
impacts out of the way there. That's fine. So let's
just copy this over. So I'm gonna hold control and
select all of these events. And I'm going to
hold Shift and then I'm going to drag them across. Say they're in the
same position, say the second repetition of this level start from bar 44. So I know obviously you
won't have the audio in your project as a
reference. It's fine. Now they will be in
that with respect to the Snare Fill and changing the arrangement
slightly to accommodate that, you want to go to lesson eight. Go back and watch it. But you can start at 09:50, 9 min 50 into the video. And I will show you how to
do this quickly and add the snare fill obviously with
respect to the other bits, we've just covered those, so that will already
be done for you. And then at the end
of the project, there's just one last
thing to do and that is one of the impacts there. Sorry, I'll just drag
these out of the way. And our impact is there. So I'm just going
to copy that to the very end of the projects. Okay, so that's it for the
S effect sounds adding them in the sort of slightly
convoluted, an annoying way. But again, it's just a
limitation of FL Studio. What can you do?
So the last thing I wanted to discuss
is the vocals, which unfortunately is even
more annoying actually, because if you've only
got the fruity edition. Then dragging in audio
samples also isn't possible. So we've got to do it the same way that
we've been doing here. So what you wanna do is go to the audio files and we want to find the BTP FL beginner
Vox timing corrected final, say as long as it's got final in brackets after that, no probes. So I can just drag that into the channel rack and
make a new pattern. I'm just going to
call it Vox O1. And let's make this
like a sort of orangey red color for recording. Let's go Indian
red, that's fine. Except and then Enter. And again, we're
just going to tick the first step in
the step sequencer. And then let's just
make sure we've got a blank track here
and we're going to draw this in right
from the very first bar. And I'm going to expand that doesn't make a
lot of differences, purely only visual, so it
covers the whole track. So we know that the vocals effectively is supposed to
be over the whole track. Now, the problem
we've got with vocals is that every time
you start playing, if you don't start from the
very beginning of the track, you're not going to
hear any vocals. They're simply not
going to be there. You have to literally go
from bar one, hit play. And unfortunately because
there's a bit of a gap there. But you will hear
them eventually. Also bear in mind. One. Say if you
play it like that, then as you just
saw that once you press Stop to stop
the track playing, the vocal still
carries on playing. And to stop it from playing, you need to actually hit
the stop button again, not space, just hit
the stop button. Otherwise, every single time
you play from the beginning and you stop it halfway through the vocal is going
to carry on playing. It's gonna get very annoying. One thing to note
as well is don't actually add the vocals at
this point in the tutorial, when you continue
from less than eight, you need to wait
until you actually, you've gone through the
vocal recording lessons because we actually change
the pitch of the whole song. We raise all of
this up by a couple of semitones just to make
it a bit higher in pitch. So at the moment, if you add the vehicle, the vehicle won't fit with the rest of the track is
going to sound out of qi, which is at the moment until we change the arrangement
later on in the course, all of this would
have been fine if you could just drag audio
into the arrangement. Of course, alternatively, you can actually just completely ignore the vocals if it's
too much of a problem. But that's a bit of
a shame to waste it. Now, just in case
you're wondering. So if I double-click
into the vocal, zoom out, find where
it is. Say e.g. if I make this note much longer so it covers
the entire track, e.g. and then let's say I play from halfway
through the project, I'm just going to play it so
you can hear what happens. So what it means, I can go to press Stop
again to stop the vocal. So what happens there
is that if you've got one long notes
for the vocal, if I start playing the track at any point in the
middle of the track, e.g. then the vocal starts playing a fresh from
wherever you started. So don't do that. Just keep the notes short as it was originally after you've
added the first step. Just say you can only play the vocal from the very
beginning of the track. Otherwise, it'll just
get really annoying. But at least you know, there. It's going to work when you
do actually play the track. Now that is going to make working on it a bit more tricky. Later on. I'm really sorry
about that, guys and girls. It just is limitation of f l and there's no other
way of doing it. If there was OB shown
you how to do it, say you've effectively
got two choices. Either carry on as
I've shown you, and still have the
vocal in there and still sort of figure
out a way to work around the fruity addition of FL's limitations or for now, until you're happy to upgrade, you can of course, ignore
the vocals completely. Don't have to have
them in there. But the effects, of course, essential for any track. So you definitely
want to get those in. And now you can go back to
the time that I pointed out, which was 9 min 50 into less
than eight and carry on. They'll be where
I'll show you how to do the snare and everything. And then just follow the
tutorial on from there. Just remember, when you
get to the vocals lessons. Once you get to after the vocal who's been
timing corrected, you can then add it exactly the same way that I've
just shown you there. Alright, thanks
for watching guys and girls See you later.
 Jon Merritt, Born To Produce